1. Birch-Frame Starburst Around One Center Mirror
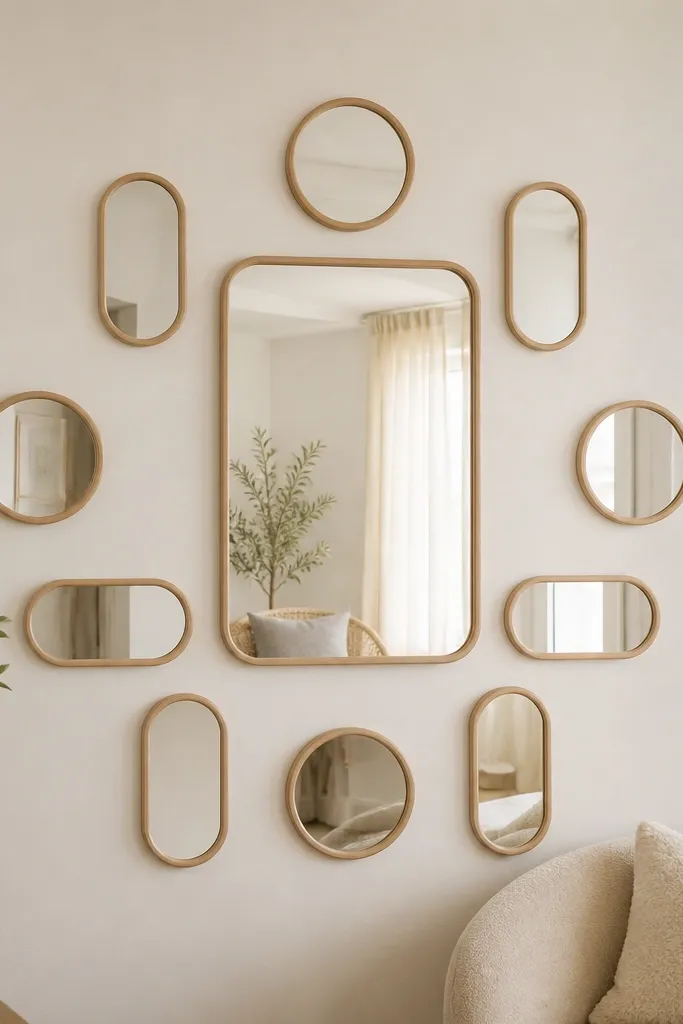
Start by choosing one IKEA rectangular mirror frame as your center piece. Place it at eye level, then lay out four smaller matching mirrors on the floor to find a comfortable “burst” radius. Measure and mark two horizontal guide lines on the wall with painter’s tape — one for the top edge of the center mirror, one for the top edges of the smaller ones. Hang the center first, then use a 2-3 inch gap between frames so the shadows look intentional. Finish by adding two slim wall sconces or a plug-in lamp aimed slightly upward so the mirror edges catch light.
This layout looks dreamy because the birch frames stay warm and the starburst pattern pulls your eyes toward the center without chaos. I used one larger rectangular mirror as the anchor, then placed smaller matching mirrors around it like rays. The light wood finish flatters warm undertones in skin and makes the room feel brighter even at night. It also works well if your furniture is mostly neutral — beige, cream, pale gray — because the mirror frames add texture without adding color.
One warningDon’t mix birch with black frames — the pattern looks “assembled” instead of designed.
Quick tipUse 2700K bulbs in any nearby lamp so the birch doesn’t look yellow-green in photos.
2. IKEA Mirror Gallery With Linen Ribbon Bow Spacing
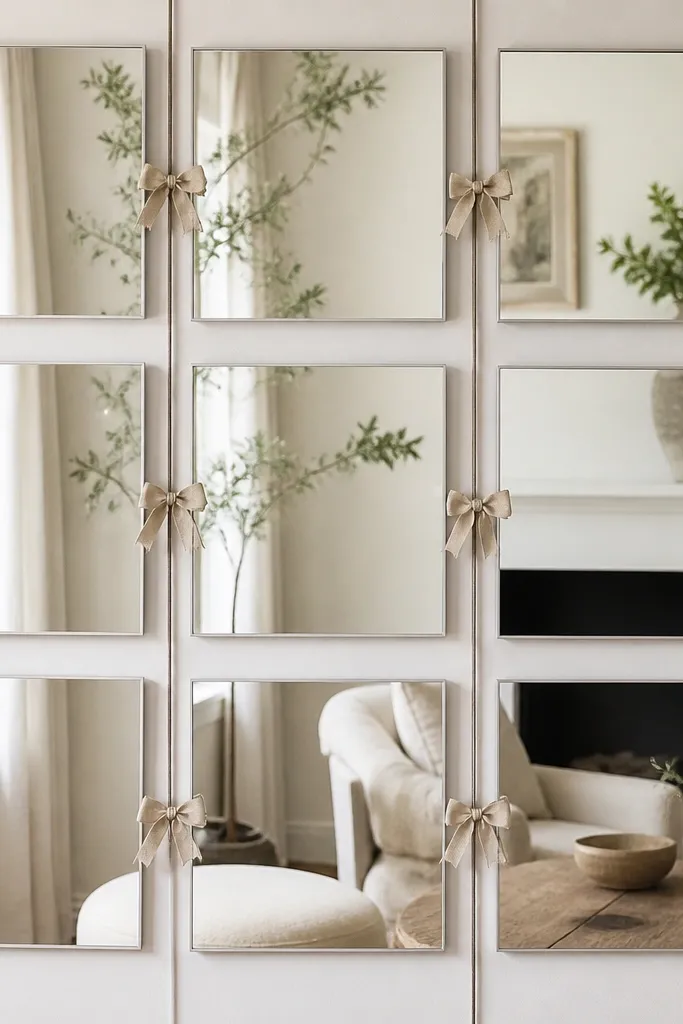
This is dreamy in a very specific way: the mirrors bounce light, and the linen bows add a gentle texture that doesn’t compete with the glass. I did this in a bedroom where the bedding was off-white and the curtains were a warm beige linen blend. The bows read romantic, but because the mirrors are identical, the whole wall stays neat. It also flatters people who like soft makeup looks and warm-toned outfits because the room lighting stays flattering instead of sharp.
Begin with identical IKEA mirrors (same size and frame finish) arranged in a neat grid. Keep the gap between mirrors about 2 inches so the bows don’t feel cramped. Tie a length of thin jute or cotton twine between two small wall hooks or picture nails placed behind where the ribbon will sit. Create a bow using 1.5-2 inch wide linen ribbon, then place it at the midpoint between two mirrors. Hang mirrors first, then tie ribbons last so you can adjust the bow positions without moving the frames.
Steam the linen ribbon for 20-30 seconds so it holds a clean shape and doesn’t look wrinkled.
Avoid shiny satin ribbon — it makes the mirror wall look like a party backdrop.
3. Black Slim Frames With Warm Gold Garland Line
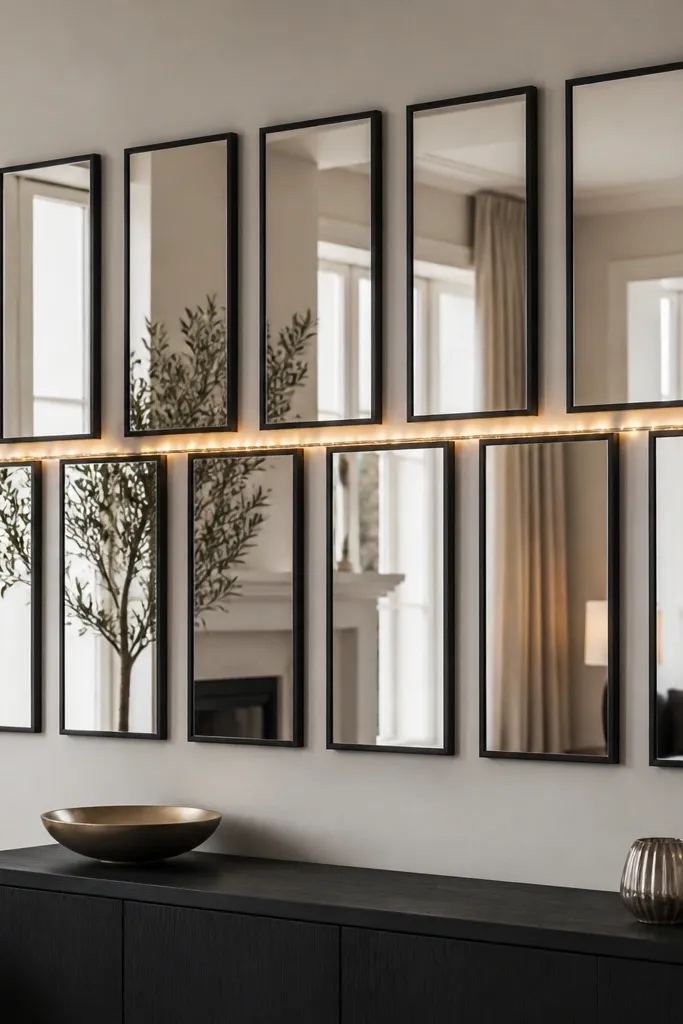
Start with IKEA mirrors that have slim, straight profiles in a black finish. Arrange them in two staggered rows so the top row sits slightly above the bottom row, keeping about 2-3 inches between frames. Run a thin warm gold garland (battery fairy lights or tinsel-lite without chunky spikes) along the horizontal line where the stagger creates a visual track. Use clear removable hooks so you can reposition the garland until it sits exactly level. Hang the garland first, then install mirrors so the garland peeks through the gaps.
Black slim frames make reflections feel crisp, and the warm gold garland gives that dreamy glow without turning the room into a holiday display. I built this one for a living room corner where I wanted a “night light” effect. The black frames look flattering on cooler skin tones because the room lighting stays clean, not muddy. This also works great if your furniture has black hardware or a black lamp base.
One warningDon’t overload the garland — if it fills the gaps, the mirror reflections look cluttered.
Quick tipUse warm white LED fairy lights (not multicolor) so the glow stays calm year-round.
4. Oval Mirror Loop With Woven Rattan Inserts
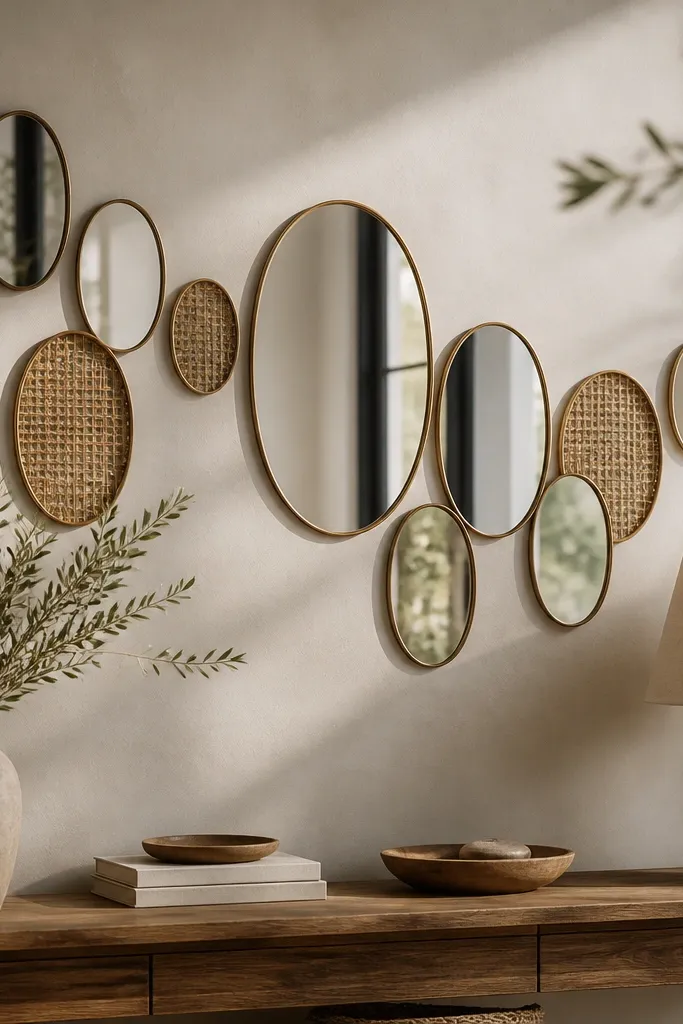
Oval mirrors feel dreamy because they soften straight-line rooms and make reflections look less harsh. When you add rattan inserts behind select mirrors, you get a warm texture that reads natural in daylight and cozy at night. I used this in a space with a light wood desk and a rattan chair, and it instantly made the area feel styled. This is flattering for rooms with lots of hard surfaces — it adds visual softness without needing more furniture.
Pick a set of oval mirrors from IKEA with similar frame thickness. Arrange them in a partial loop around a focal point, like above a console or dresser, leaving a small gap where you’ll anchor the rattan. Cut rattan panels or use small woven screens behind the lower half of a few mirrors so the texture shows through the negative space. Keep the top edges aligned to keep the pattern tidy. Mount mirrors with the same height, then adjust rattan inserts after installation by sliding them between the wall and the back of the mirror frame.
Choose rattan with a tight weave so it doesn’t look messy in close-up photos.
Avoid mixing oval sizes too wildly — it makes the loop look accidental.
5. IKEA Mirror Wall With Floating Ledge Shelf Styling
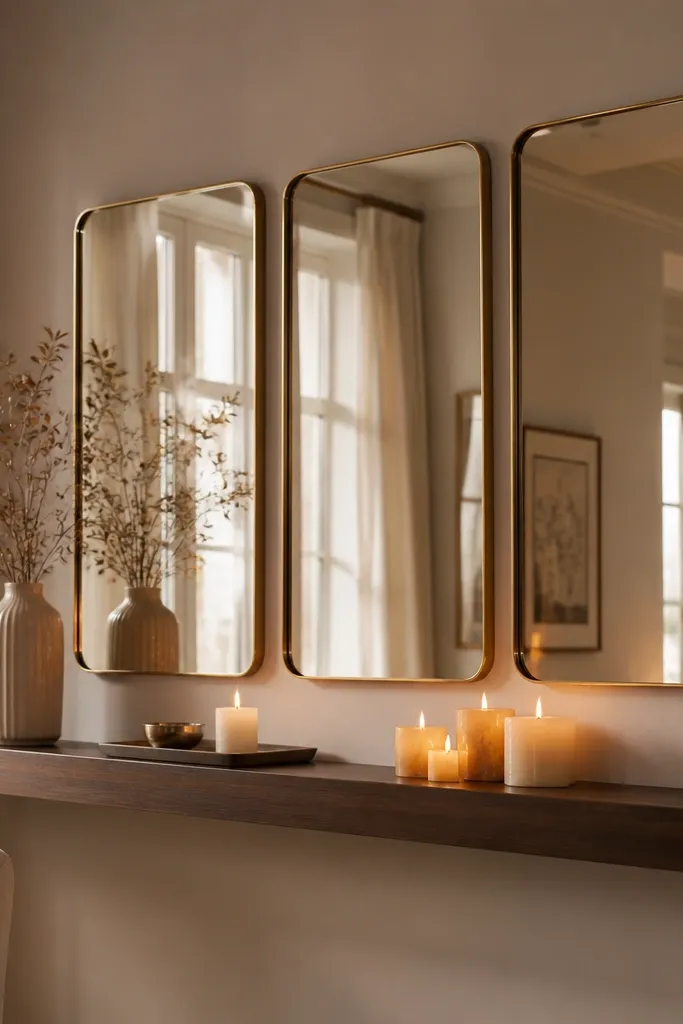
Install a narrow floating shelf (about 5-6 inches deep) centered under where you’ll mount the mirrors. Hang a single row of identical IKEA mirrors above the shelf with 2-3 inches spacing between frames. Style the shelf first with a long tray, then place two candle holders at the ends and one small vase in the middle. Use a warm-white LED candle if you want night glow without fire risk. Finally, step back and check the reflection — you want the candles reflected clearly, not hidden behind your mirror frames.
This one is dreamy because it turns the mirror wall into a light-and-scent moment, not just a decorative feature. The mirrors multiply the glow from candles and make the shelf items look more layered. I’ve used this setup in a hallway where it needed both storage and mood, and it looked finished even on days I didn’t change decor. It flatters small spaces because mirrors add depth while the shelf keeps your styling compact and controlled.
One warningDon’t place tall items directly under mirrors — they block the reflection and look top-heavy.
Quick tipUse a matte tray so the reflection doesn’t turn into a glare patch.
6. Two-Tone Mirror Wall With White Frames and Natural Wood Accents
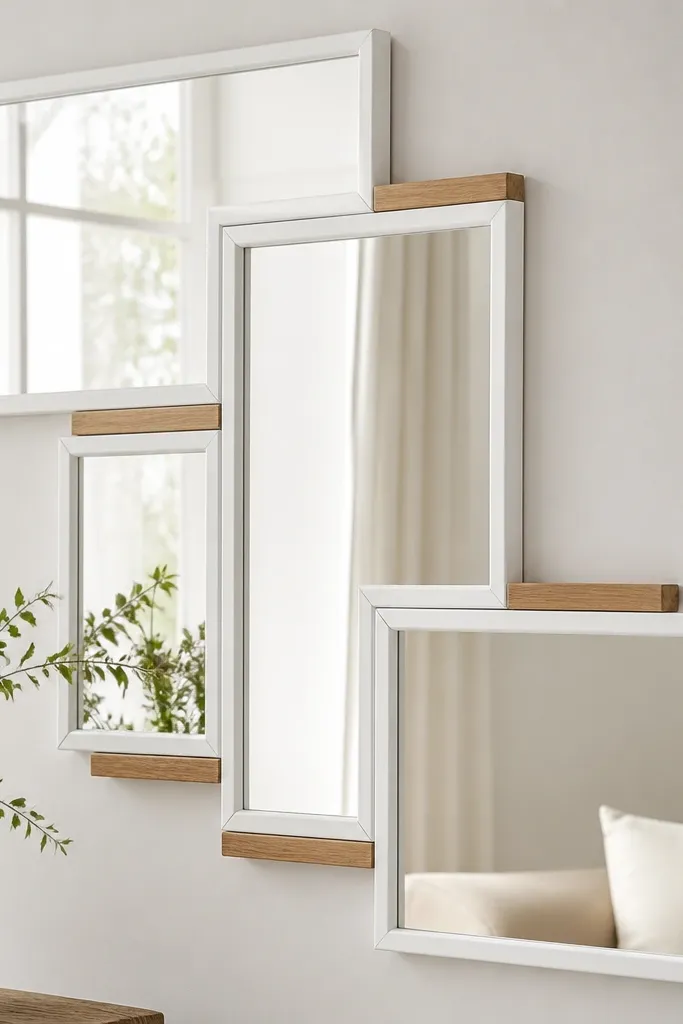
Choose white-framed IKEA mirrors in one consistent size family. Arrange them in staggered rows, leaving 2 inches between mirrors. Add natural wood accents by placing slim wood blocks or small shelf brackets between mirror sections at the same height each time. Hang mirrors first, then attach wood accents with removable adhesive pads if you’re renting. Keep wood accents limited to one per “gap” so the wall stays airy.
Two-tone walls look dreamy when the contrast is controlled. White frames keep everything bright and clean, while natural wood accents add warmth so the wall doesn’t feel sterile. I used it in a bedroom with white bedding and a reclaimed wood headboard, and the mirror wall tied the whole palette together. The white frames also flatter light hair and fair skin because the highlights stay soft rather than harsh.
One warningAvoid adding a third color like black or silver — the wall becomes busy fast.
Quick tipIf your wall paint is cool gray, warm it up by choosing a wood accent with honey or oak tones.
7. Holiday-Themed Mirror Wall With Removable Ornaments Strands
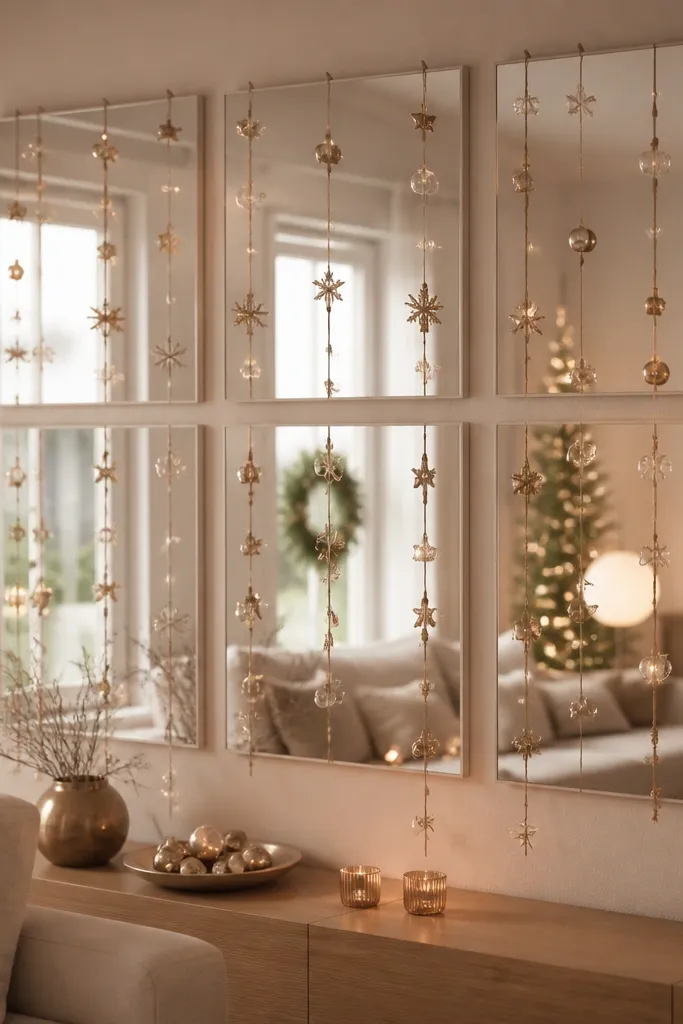
This is dreamy because the ornaments catch the mirror reflections and create a “floating decoration” look. I did this for winter without drilling extra holes by using removable hooks and lightweight strings. The mirror wall keeps the holiday vibe from feeling messy because the base is a clean grid of mirrors. It flatters rooms with neutral decor because the ornaments add color only where the light hits.
Start with a symmetrical grid of IKEA mirrors — identical size, identical spacing. Plan your ornament strands so each strand spans exactly one gap between mirrors. Use removable hooks or command-style strips rated for small weights, then tie thin fishing line to hang ornaments in clusters of 3-5. Keep ornaments small: 2-3 inch diameter baubles or mini pinecones painted matte white. Install the strands after mirrors so you can adjust height and keep everything level.
Use matte ornaments instead of glossy ones for a softer reflection glow.
Don’t hang heavy garlands from the mirror frame — it can stress the mounting points.
8. Soft-Glow Mirror Wall With Behind-Glass LED Strip Channel
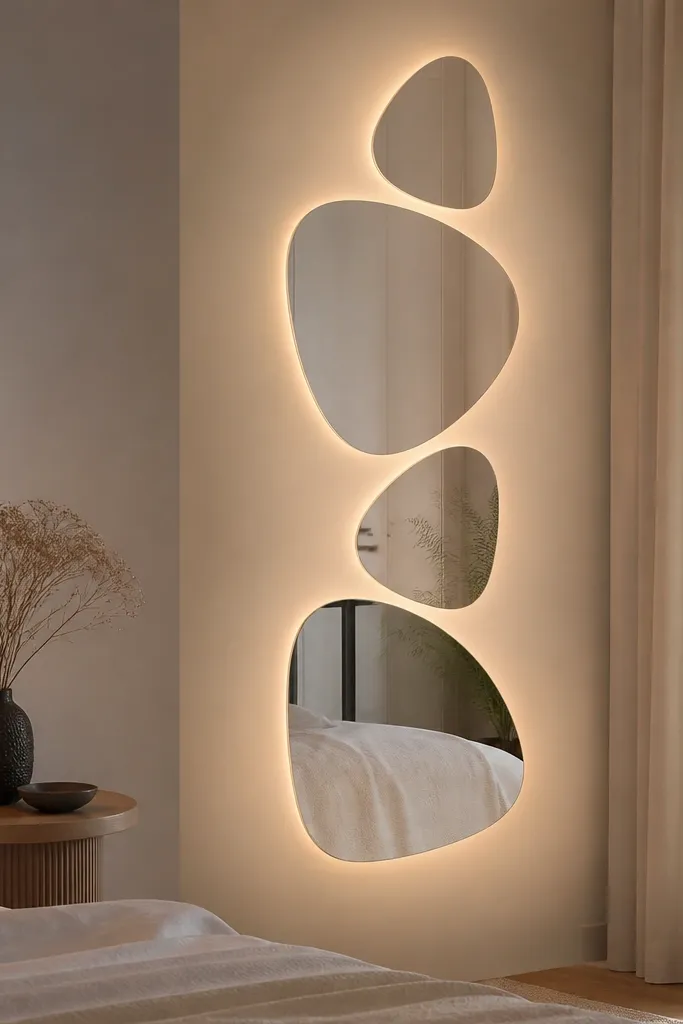
Choose IKEA mirrors that have enough depth behind the frame to hide a thin LED strip channel. Plan a vertical cluster of 3 mirrors with consistent spacing (about 2 inches). Install the LED strip on the wall first using adhesive channels, then test the glow before mounting mirrors. Mount mirrors over the strip so the light leaks around the frame edges, not straight out behind the glass. Use a warm dimmable driver and set it to a low level so the glow is gentle.
This is the most “dreamy room” one because the glow looks like it belongs to the architecture, not a lamp. I built it using a warm LED strip placed behind the mirror frames so the light wraps the wall, then the mirrors throw the glow back at you. The effect is flattering for night-time makeup and reading because it’s warm and even. It also works in small rooms where you want mood lighting without extra fixtures.
One warningAvoid cool white LEDs — they make the room look like a basement workshop.
Quick tipSet the dimmer so the glow is visible but doesn’t reflect as a bright line in the mirror center.
9. Mirror Wall With Curtain Panels as Side Frames
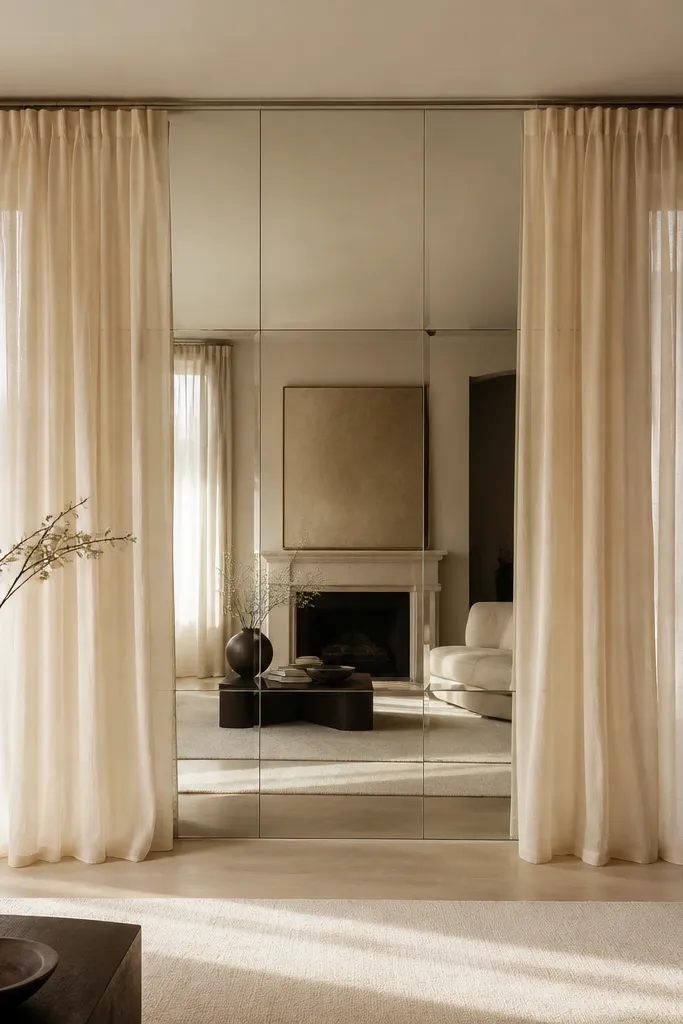
Mount a central cluster of identical IKEA mirrors, then install a curtain rod that’s wider than the mirror cluster. Choose sheer curtains in off-white or warm cream, and hang them so they touch the floor or stop just above it. Place the curtains so they overlap the outer mirror frames by about 1-2 inches. If you want a cleaner look, use curtain rings that slide smoothly so you can adjust the drape. Add a small blackout panel behind sheer only if your window is bright at night.
Dreamy doesn’t always mean more mirrors. This setup uses mirrors plus fabric movement, and the result looks soft and intentional. I’ve done it in rented spaces where permanent decor felt too permanent, and the sheer curtains made the mirror wall feel like a draped backdrop. The light through the sheer fabric makes reflections look layered instead of flat. It’s flattering for rooms with textured walls because fabric hides small imperfections visually.
One warningDon’t use thick velvet — it blocks light and makes the mirrors look dim.
Quick tipSteam the curtains hard before hanging so the folds stay crisp in photos.
10. Staggered Rectangle Mirrors With Macrame Net Backdrop
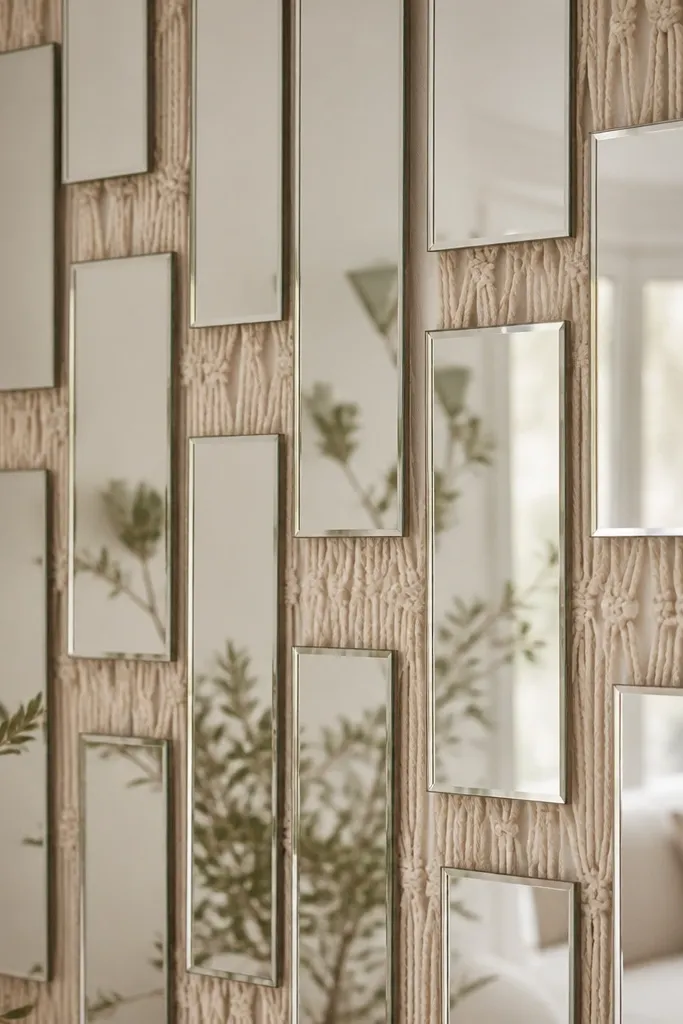
Choose IKEA rectangle mirrors with the same frame finish and mount them in two staggered vertical columns. Keep spacing around 2 inches between frames. Hang the macrame net behind the mirrors by attaching the top cord to removable wall hooks or a tension rod behind a nearby shelf. Adjust the net so it sits behind the center of the mirror wall, not sagging below the lowest mirrors. Mount mirrors last or first depending on your comfort, but test the net position before final mounting.
Macrame makes a mirror wall feel handmade, and the dreamy part is the texture catching light through the glass reflections. I used a light beige macrame net behind the mirror arrangement so it shows in the negative spaces without covering the mirrors. This works especially well if your room has a lot of straight lines like a modern dresser or metal shelving. It flatters warm skin tones because the neutral beige net doesn’t throw harsh color onto the wall.
One warningAvoid dark macrame against white walls — it looks heavy and kills the airy effect.
Quick tipUse a slightly smaller net width than the mirror wall so edges don’t fray into the room.
11. Mirror Wall With Color-Blocked Shelf Ledge (Pastel Season)
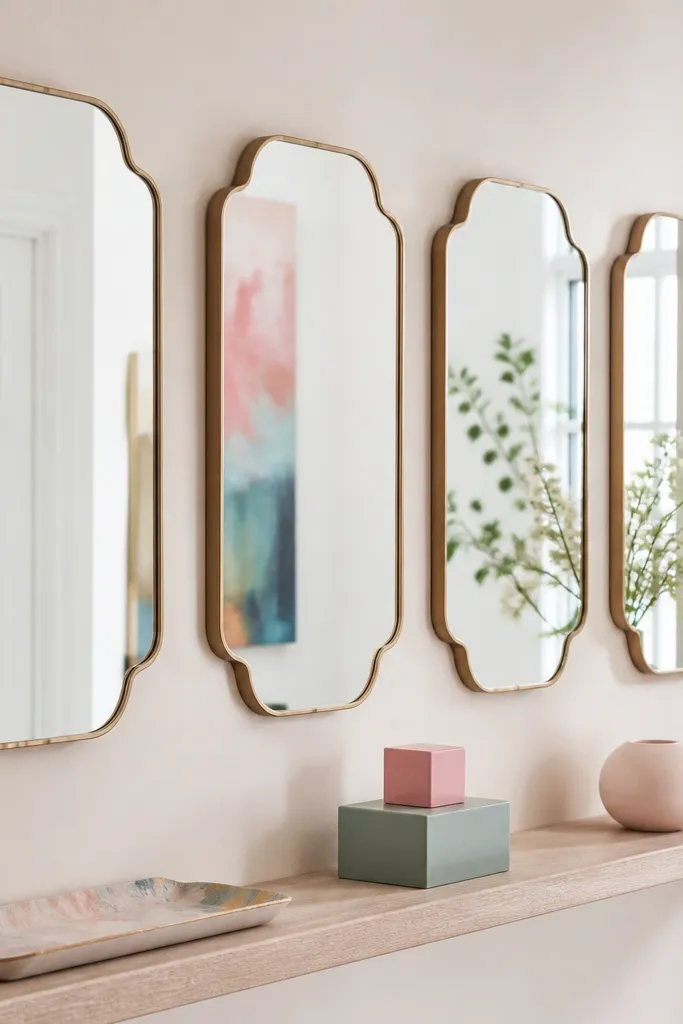
Mount a row of identical IKEA mirrors above a narrow shelf. Use three decor zones on the shelf: left in sage, center in dusty rose, right in powder blue. Paint a simple IKEA tray in a matte pastel (lightly sand and use primer first) or use pre-painted ceramic pieces. Space the decor so each piece sits under a mirror gap, letting reflections show each color block. Keep shelf items low so your mirror reflection stays clear.
This looks dreamy because the mirrors act like a soft color multiplier for small decor pieces. I built this for a seasonal switch where I wanted the wall to look different without changing the mirrors. When you use pastel tones like sage, dusty rose, and powder blue on a single ledge, the reflections make the wall feel coordinated. It’s flattering in bedrooms because it adds gentle color near your face without the harshness of bright neon.
One warningDon’t add more than three pastel families — the wall becomes a color collage.
Quick tipUse matte ceramics, not glossy — glossy turns into glare and looks cheap fast.
12. Corner Mirror Wall With 45-Degree Accent Panel
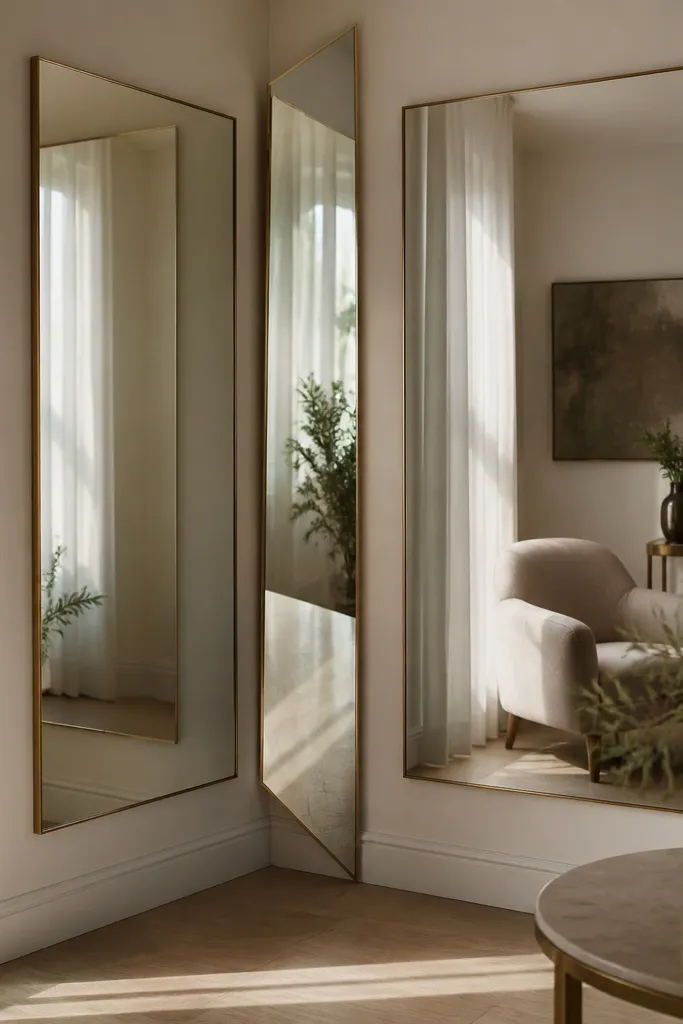
Corner mirror walls get dreamy fast because they multiply the space you already have. The 45-degree mirror panel is the secret — it catches light from two directions and creates a “depth” effect that feels like a bigger room. I used this in a corner of my living room where the floor lamp and window didn’t hit the same wall. The result looks flattering because it spreads light around your face when you stand near the corner, not just in one direction.
Pick mirrors that match in frame finish and thickness. Mount them on one wall at eye level first, then mirror the layout on the adjacent wall with the same spacing. Add one additional mirror panel at about a 45-degree angle so it faces into the room, not straight along the wall. Use a level and painter’s tape to set the angle guide line before drilling. Leave at least 3 inches of clearance from the corner so reflections aren’t cramped.
Aim a floor lamp so the light hits the angled mirror edge, not the center glass.
Don’t overlap mirrors too closely at the corner — it creates a confusing reflection tangle.
13. Round Mirror Cluster With Dried Pampas Feathers
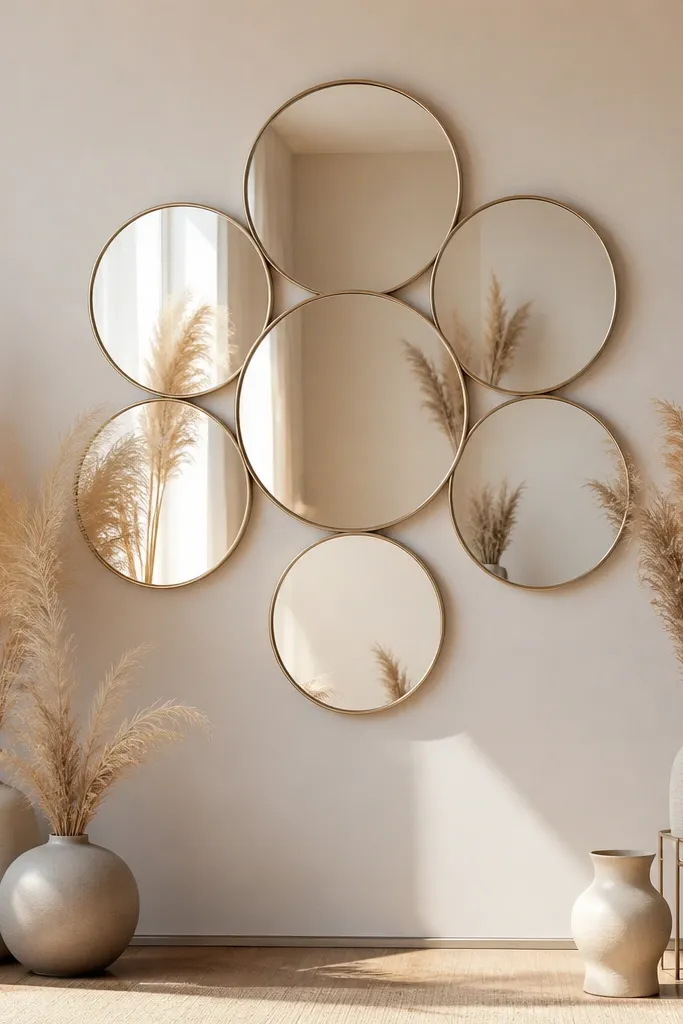
Round mirrors feel dreamy because their edges reflect without sharp corners. Add dried pampas grass and you get a soft, airy texture that moves visually when the air turns. I did this in a bedroom corner where the chair and lamp were beige and I wanted the wall to feel warm and lived-in. This setup flatters people who like neutral outfits because the room stays calm, and the pampas adds height without bright color.
Choose round IKEA mirrors with similar frame tone and mount them in a staggered cluster, not a perfect grid. Keep the gap between each round mirror about 2 inches so the frames don’t visually merge. Place a narrow console or stand below the cluster and set one tall vase at the center. Tuck pampas grass into the vase so it rises to just below the lowest mirror. Style the rest of the wall with a single slim tray or candle holders so the mirrors don’t compete with the plants.
Cut pampas stems to different heights before arranging so the cluster doesn’t look like a straight fence.
Avoid super dark pampas — it looks like a craft store bundle instead of airy decor.
14. Mirror Wall With DIY Faux Stained Glass Panels
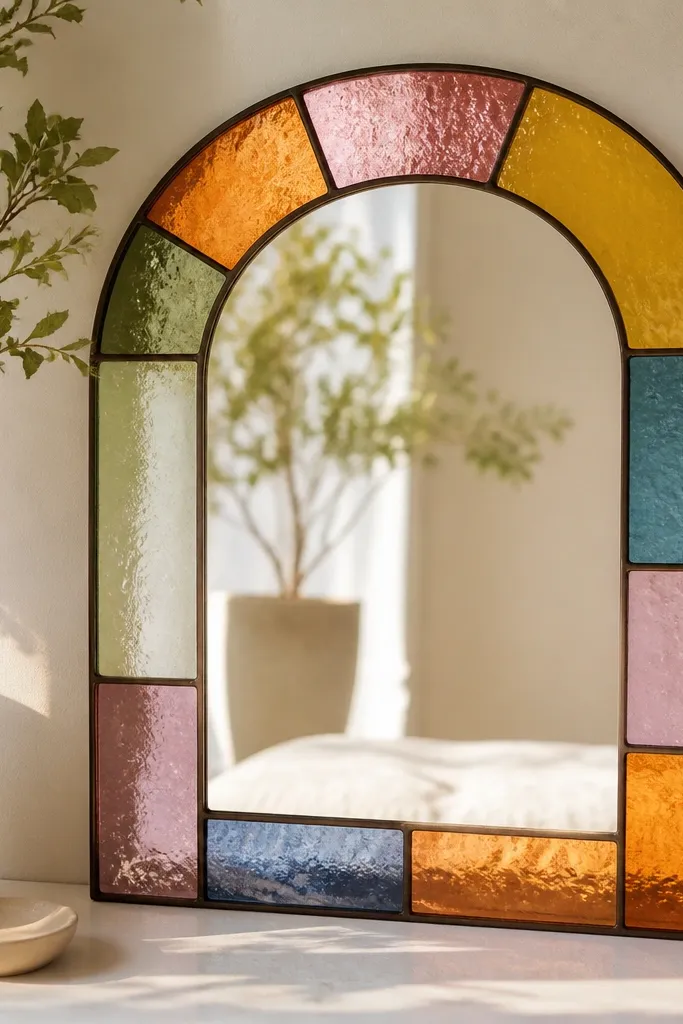
This is dreamy because it adds color glow without painting the whole wall. The faux stained glass effect makes the mirror reflections look like they’re lit from within, especially near a window. I built it for a holiday season that needed something prettier than plain ornaments, and it worked year-round because the colors are translucent and soft. It flatters rooms with neutral furniture since the glow becomes the color story.
Start with a set of IKEA mirrors that have open frame backs or enough space for thin film panels. Cut translucent stained-glass-style film pieces to fit behind the mirror openings or within the frame border area. Use tape or a thin mounting adhesive to hold the film in place on the back side. Arrange the mirrors in a consistent pattern, with 2-3 inches spacing between frames. When you mount, align the film colors so the strongest color sits near the center mirror for a clear focal point.
Use warm-toned translucent film (amber, peach, soft green) so the glow stays flattering, not neon.
Don’t use fully opaque sheets — you lose the dreamy light-through effect.
15. IKEA Mirror Wall With Layered Wallpaper Strips Behind Frames
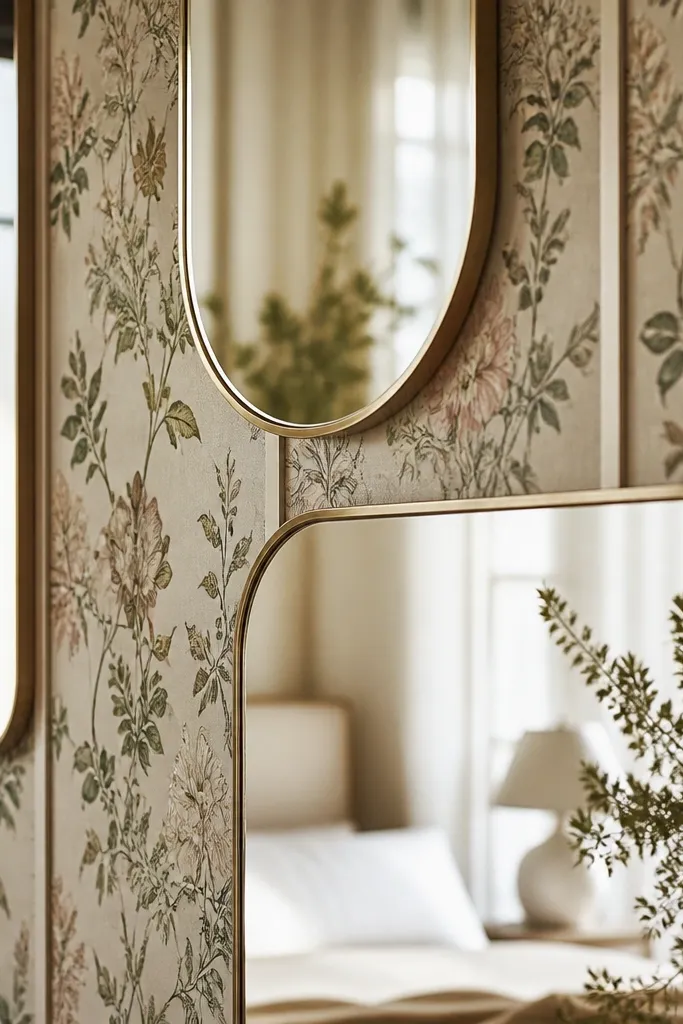
Pattern behind mirrors looks dreamy because the glass doubles the depth. I used thin strips of removable wallpaper and left intentional gaps so the wall pattern shows between frames. This gives the room a styled look even if you don’t add holiday decor later. It’s especially flattering for people who want a more personal look but don’t want to paint. The pattern also helps hide minor wall imperfections around the mirror mounting points.
Measure your mirror wall grid first and cut removable wallpaper strips that match the gaps between mirrors. Apply wallpaper to the wall with clean edges where frames will cover it. Mount mirrors over the strips so only the edges of wallpaper peek through between frames. Keep the wallpaper pattern consistent across the wall or you get busy results — I used one repeating motif and changed only the strip orientation. Use 2-inch gaps between mirrors so the pattern shows clearly without looking like a patchwork quilt.
Choose a wallpaper with a small repeat so the reflections don’t look scrambled.
Avoid large bold patterns — reflected pattern chaos looks cheap fast.
16. Mirror Wall With DIY Paper Fan Panels in Soft Pastels
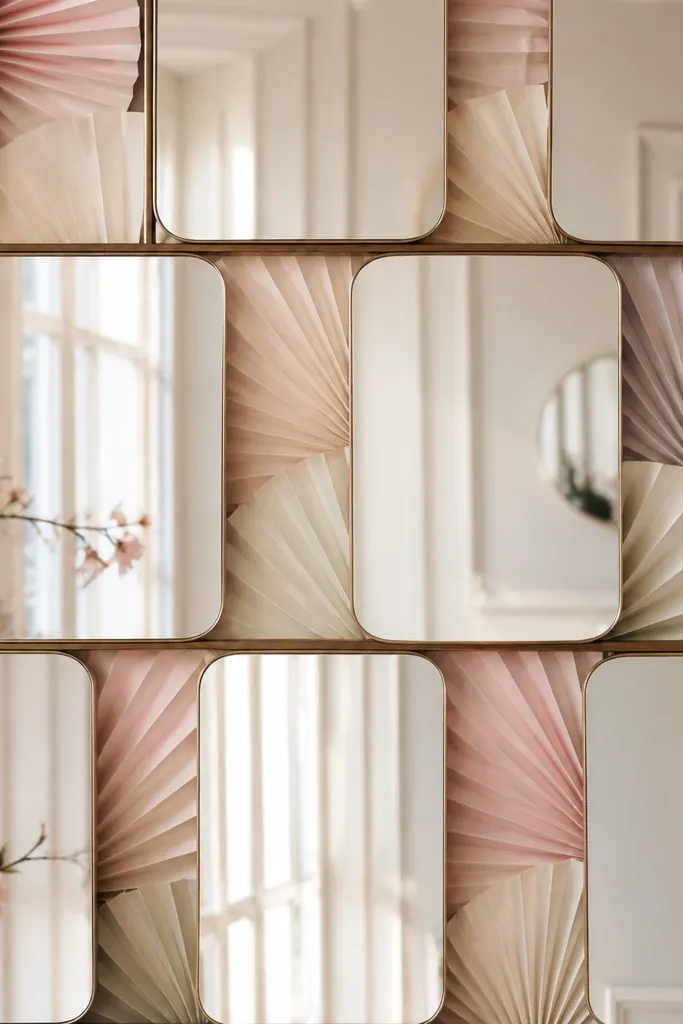
Start by arranging IKEA mirrors in a grid with 2-3 inches spacing. Cut paper fan panels from sturdy craft paper or use pre-folded fans in light colors like blush, pale mint, and soft lavender. Attach each fan panel behind one gap using removable adhesive strips so it doesn’t fall. Fold the fans so the outer edge sits closest to the mirrors and the inner edge sits slightly toward the wall. Mount mirrors last if you need access, or mount first and install fans through the gaps if your mirror frames allow it.
Paper fans create dreamy movement even when the room is still. The mirrors reflect the fan shapes, so you get a layered effect that looks more expensive than it is. I used this when I wanted a spring look without buying new furniture or changing bedding. Pastel fans look flattering near your face because the colors are light and do not overpower skin tones. This is also a great option for renters since you can use removable tape and keep everything lightweight.
One warningDon’t stack fans too thick — it blocks light and makes the wall look heavy.
Quick tipUse a matte finish paper — glossy paper creates harsh reflections that ruin the soft look.
17. IKEA Mirror Wall With Rope Twine Frame + Warm White Lights
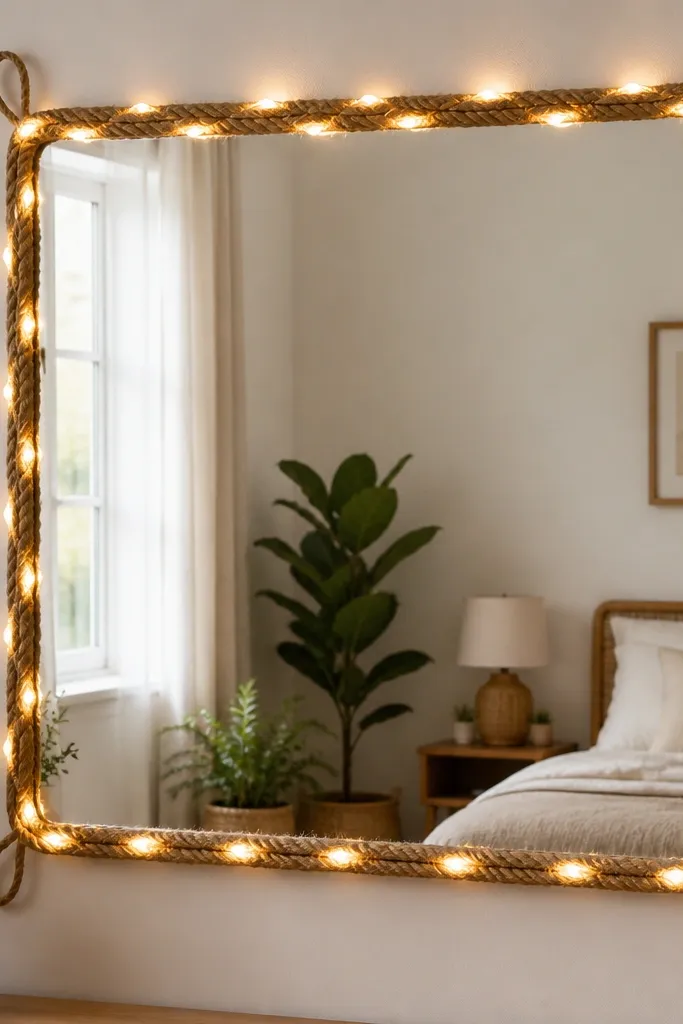
Rope twine adds a handmade, coastal-cosy feel that reads dreamy when paired with warm string lights. I installed this above a dresser where the room needed texture, not more color. The rope frames the mirrors visually, which makes the arrangement feel intentional even if your mirrors are different sizes. It flatters warm and neutral palettes because rope is natural and doesn’t throw color onto your face like bright decor can.
Choose IKEA mirrors and arrange them in a rectangle on the wall. Keep the mirrors evenly spaced with a 2-2.5 inch gap. Create a rope twine border using thick twine and hot glue on a temporary cardboard guide, then attach the border to the wall with small removable hooks or clear adhesive strips. Thread warm white string lights along the rope so the light sits inside the outline, not outside. Hang a small knot or loop detail at each corner to make the border look like it was planned, not wrapped.
Wrap the twine tight and keep the border thickness consistent so it looks clean in close-up.
Avoid bright cool LED strips — rope + cool light looks gray and dull.
18. Mirror Wall With Vertical Paper Lanterns Behind Lower Half
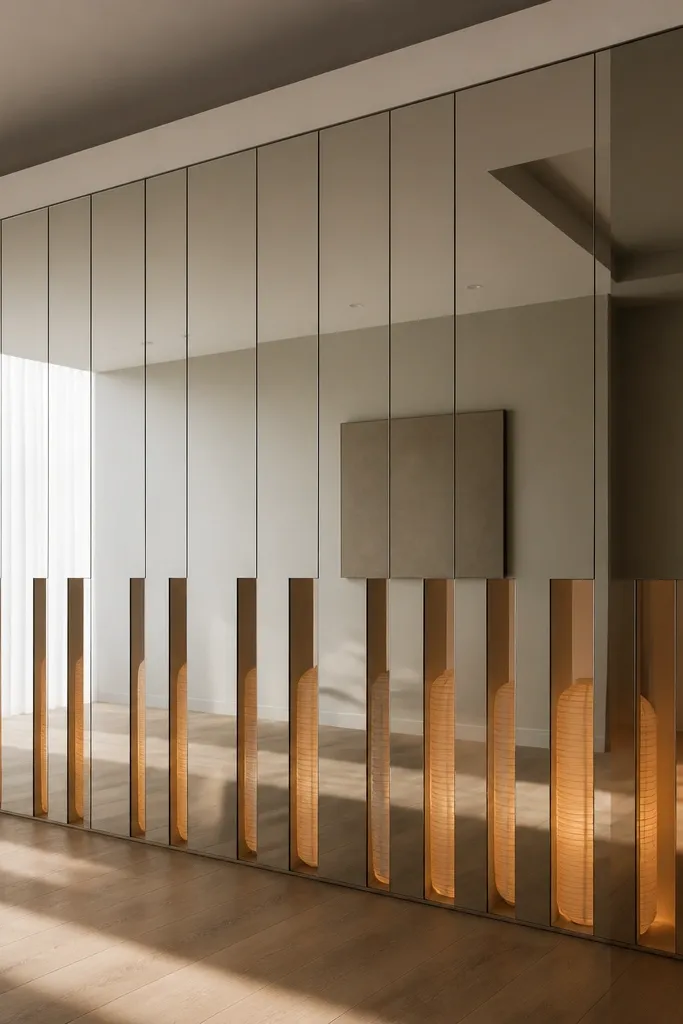
This one is dreamy because it adds soft, vertical glow without cluttering the mirror reflections. The lantern shapes show mainly in the lower half, so the wall feels airy up top and cozy down below. I used it in a reading nook where I wanted a gentle night light effect. Vertical lanterns flatter small rooms by drawing the eye upward, which makes ceilings feel higher. It also works well if you have dark furniture — the lantern glow lifts the mood.
Mount your mirrors in a clean row or grid, keeping 2-3 inches spacing between frames. Place the lantern panels behind the mirrors so they only appear through the lower portion of the wall gaps. Use lightweight battery lanterns or simple paper lantern sleeves tied to thin fishing line. Keep lantern heights consistent so the glow looks uniform, then test from across the room to ensure the reflections don’t glare. Use warm white lanterns and set them low so the effect is a glow, not a spotlight.
Use battery lanterns with a warm dim mode if you can — it keeps night-time glow gentle.
Don’t put lanterns directly behind the mirror center — it creates a bright blob in the reflection.
19. DIY Mirror Wall With IKEA Frame Backing Board and Fabric Swatches
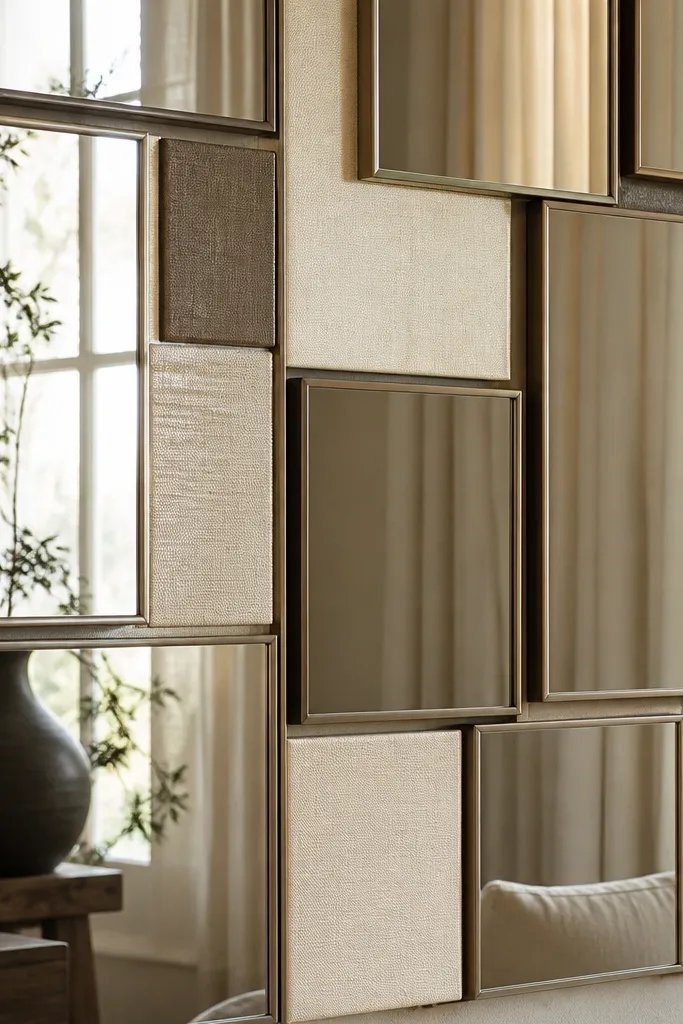
Buy or cut a backing board that fits behind the mirror frames where you can attach swatches. Arrange your IKEA mirrors first in your chosen grid with 2 inches spacing. Cut fabric swatches in widths that match the gap shapes between mirrors, then attach swatches to the backing board using fabric-safe adhesive or staples on the back side. Mount the backing board behind the mirrors so swatches peek through evenly. Choose one fabric family — linen, cotton gauze, or textured weave — and keep colors within a tight palette like cream, sand, and light taupe.
Fabric behind mirrors makes the wall feel like it has depth and soft layers, which is exactly what “dreamy room” means to me. I’ve done this with neutral linen and lightweight cotton so the glow stays soft and doesn’t look like a craft felt board. The mirrors reflect the fabric texture and create a calm, warm atmosphere. This flatters rooms with plain walls because the fabric adds visual interest without loud patterns. It also works beautifully in bedrooms and dressing areas.
One warningAvoid stretchy knit fabrics — they ripple and look sloppy through the glass.
Quick tipPress fabric swatches with a hot iron so seams don’t show through the mirror reflections.
20. IKEA Mirror Wall With Floating Garland of White Paper Stars
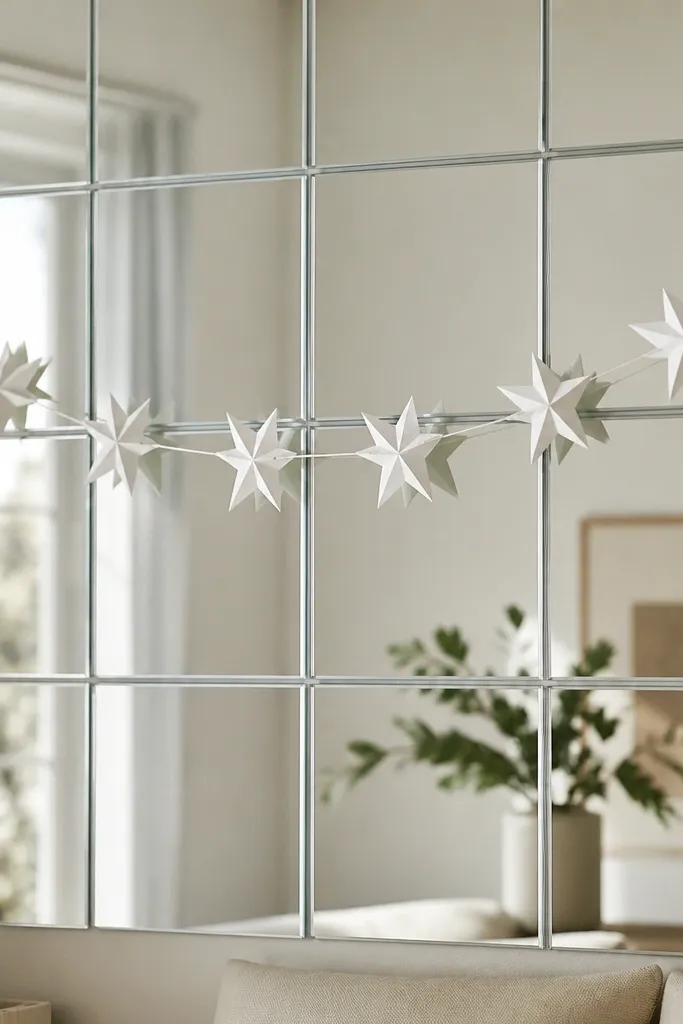
Paper stars look dreamy because they scatter light without looking shiny. I used this for a winter-to-spring transition where I didn’t want full-on Christmas decor. The mirrors keep the stars repeating, and the white color keeps everything calm. This is flattering for small rooms because it adds sparkle-like interest without adding heavy furniture. It also photographs well because the reflections spread the shapes across the wall.
Start with IKEA mirrors in a symmetrical arrangement — I like a 3x2 grid. Keep spacing about 2-3 inches between frames so the stars have room to hang. Fold paper stars (or buy premade matte paper stars) and tie them to thin twine at equal intervals. Hang the twine using removable hooks so the garland forms a shallow arc across the mirror wall. Place the garland height so stars sit around the middle of the mirrors, not at the top edge. Adjust after hanging by stepping back and checking the reflection from your main seating spot.
Use matte white paper or watercolor paper so the stars don’t glare under lamps.
Avoid metallic paper stars — they create harsh hotspots in the mirror.