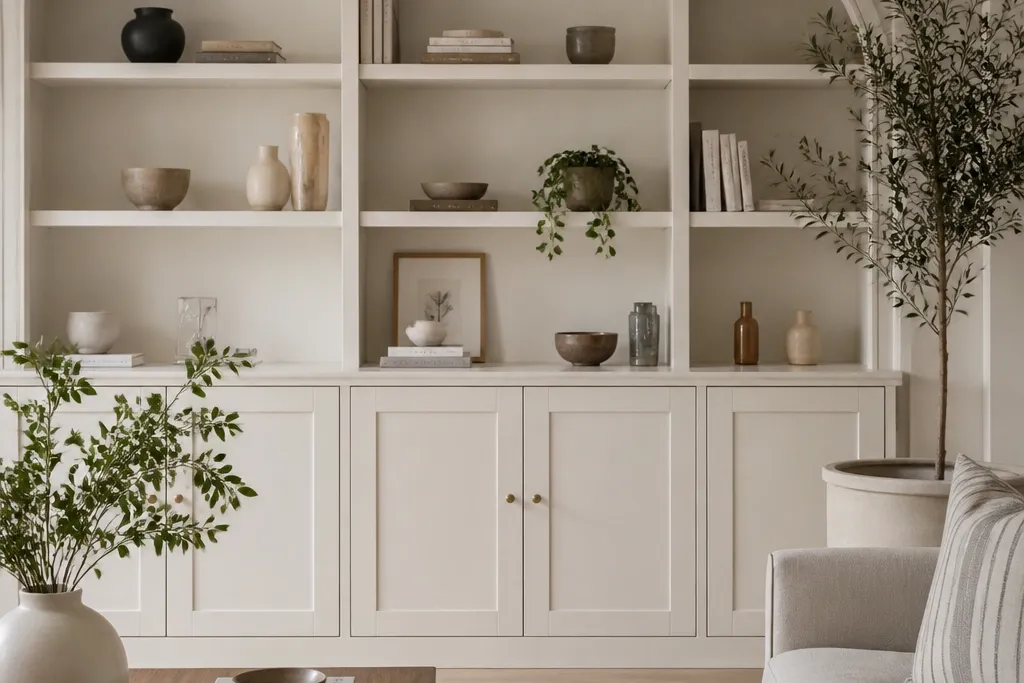
1. MDF face frame with 1/8-inch reveals in white-on-white
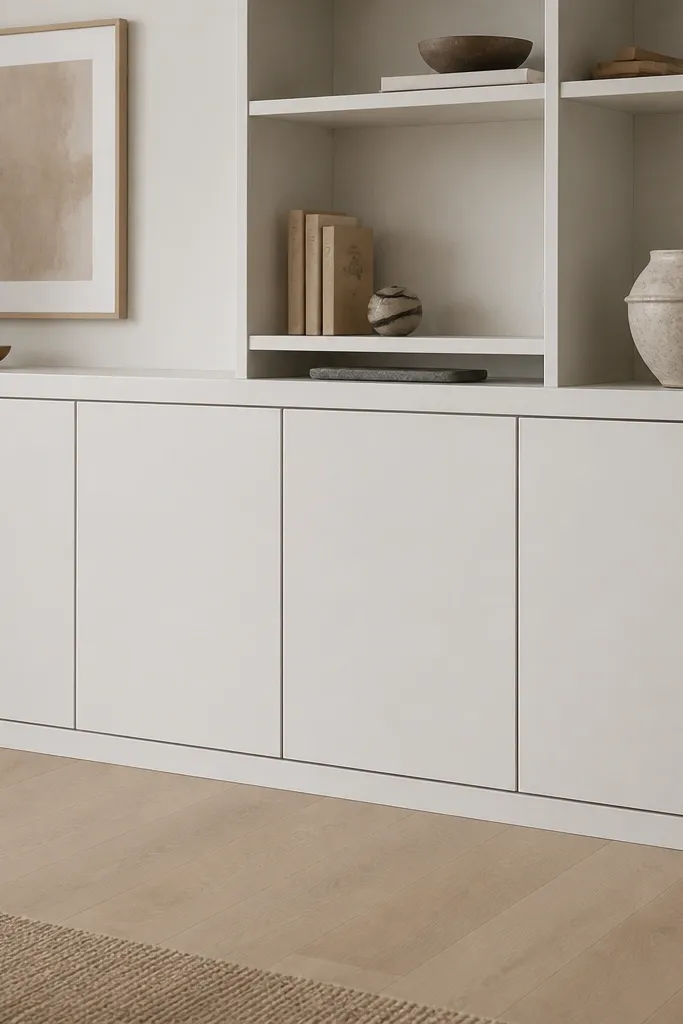
This is the built-in trick I reach for when I want the run to look like it came from a millwork shop. You wrap the Ikea carcasses with MDF strips and panels so every seam sits behind trim instead of showing raw edges. The tight 1/8-inch reveal makes the doors look engineered and keeps the line sharp in photos and real daylight.
Use 1/2-inch MDF for the vertical face pieces and 1x trim for the horizontal rails. Prime everything that will be painted with a bonding primer, then paint cabinet enamel in satin. For spacing, cut spacers so your reveal stays consistent at 1/8 inch from door to trim across the whole run.
Paint the trim and the cabinet box before assembly when you can — it hides brush marks at the edges.
Skipping a consistent reveal spacer makes the gaps wander and looks cheap fast.
2. Shiplap-backed open shelves with Ikea cabinets underneath
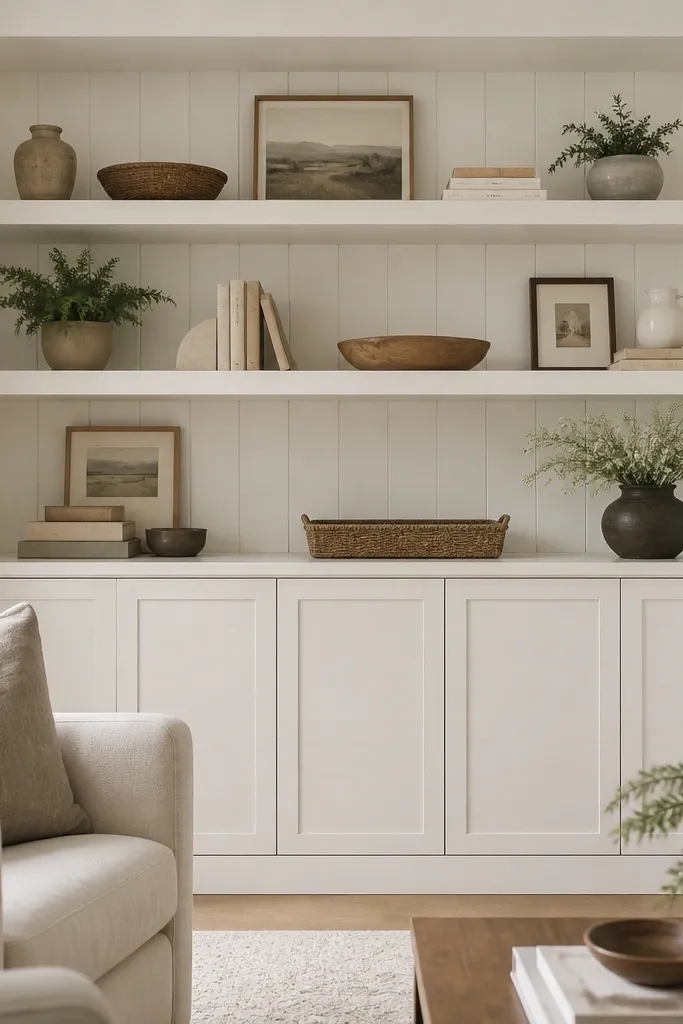
Open shelves look custom when the back isn’t blank. Shiplap gives texture and depth, and the painted finish keeps it cohesive with the cabinet doors. The thick shelf ledge (a trim lip) gives your eye a built-in edge instead of a flat shelf.
Build the shelf back with 1/4-inch shiplap (or thin veneer boards) and paint it before installing. Plan the shelf ledge lip using a 1x2 or wider trim board so it overhangs about 1 inch. Keep the open shelf section centered over the cabinet run so the proportions feel intentional.
Stagger the shiplap seams so they don’t line up with door seams — it hides the fact that parts are separate.
Leaving the shelf back raw particleboard makes open sections look unfinished.
3. Tall pantry-style built-in with a crown top and toe-kick
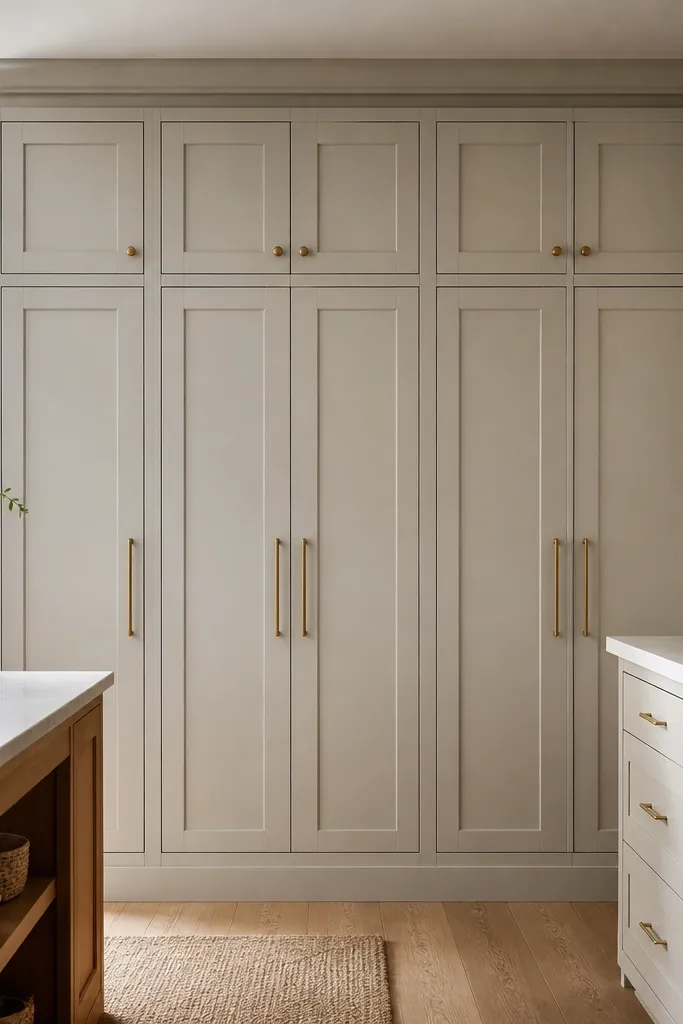
Crown + toe-kick is how you get the “built into the house” feel. Tall runs hide the cabinet’s boxed look because the top and bottom trim create a single continuous silhouette. When the toe-kick line matches the wall baseboard height, the whole thing reads like one structure.
Use a 3/4-inch toe-kick panel sized to match your wall baseboard height, then add a simple face frame around the carcasses. Pick a crown that fits your room scale — for small rooms, use a slimmer profile, for big rooms use a wider one. Install a backer board behind the crown so it screws solidly and doesn’t flex.
Quick tipPre-drill and countersink so your trim screws don’t telegraph through paint.
One warningTrying to “eyeball” crown angles without a test cut leads to visible gaps at corners.
4. Corner banquette-style built-in with angled trim return
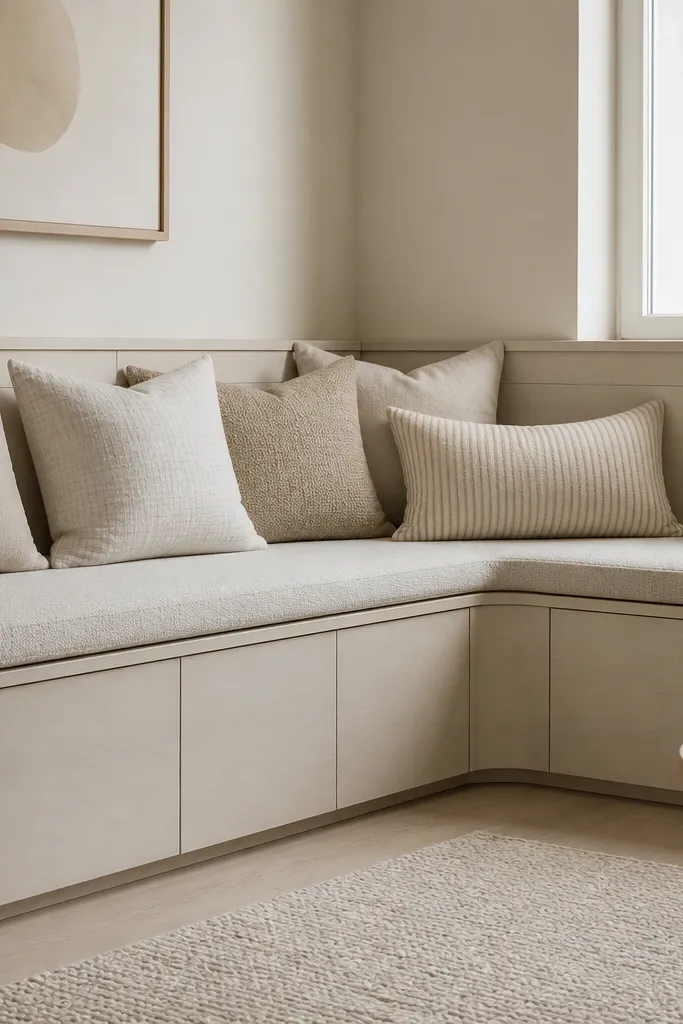
Corners are where built-ins either look custom or look patched. The angled trim return makes the corner read as one continuous piece, not two cabinets meeting. It’s also an easy place to hide small wall inconsistencies because your trim can cover the gap cleanly.
Use Ikea base cabinets and build a bench top from 3/4-inch plywood with a 1x trim edge. For the angled return, cut the trim at 45 degrees and test fit in place before final glue. Use concealed hinges so the door lines stay flush under the bench.
Quick tipAdd a removable access panel under the bench top edge so you can reach storage without lifting the entire top.
One warningUsing flat butt joints in the corner is the fastest way to make the piece look DIY in a bad way.
5. Laundry drop-zone with framed cubbies and a thick top rail
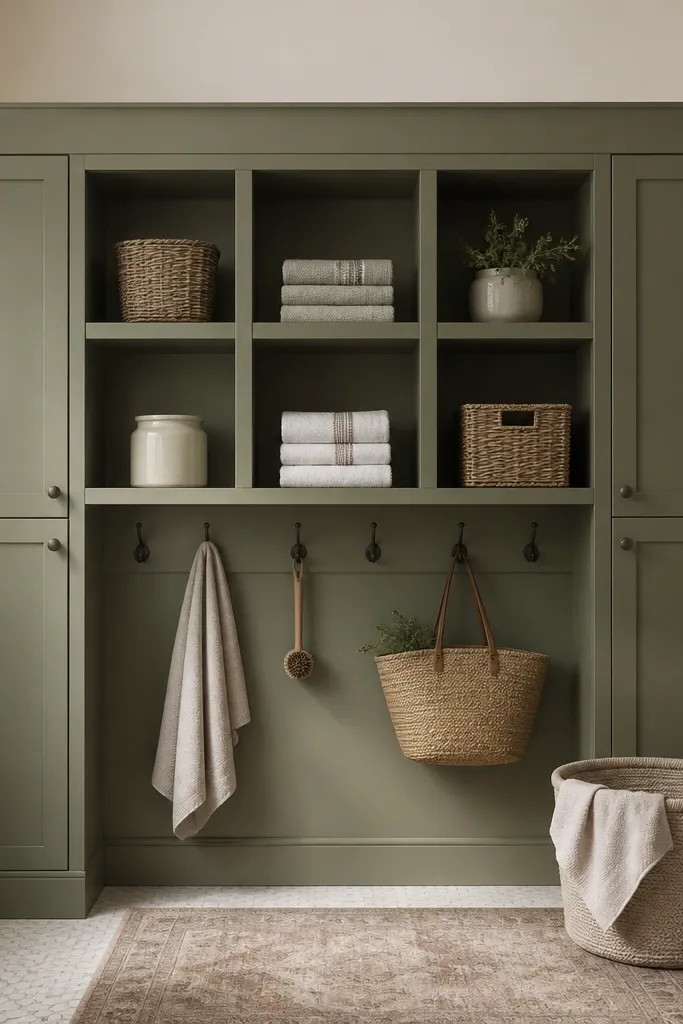
Drop zones look custom when the cubbies are framed like a built-in cabinet, not open bins. A thick top rail gives you a visual boundary and makes the hooks look like they belong there. The framed cubbies also hide the raw edges of shelf boards.
Frame the cubbies with 1/2-inch MDF strips and keep the reveal consistent at about 1/8 to 1/4 inch. Add a 1x4 top rail that overhangs 1/2 inch on both sides for a finished edge. Use a painted backing inside cubbies so the interior reads solid.
Quick tipMount hooks into a solid backing board behind the rail so they don’t loosen over time.
One warningLeaving cubby interiors unpainted makes them look like temporary storage.
6. Media wall with floating-look shelves and a recessed TV niche
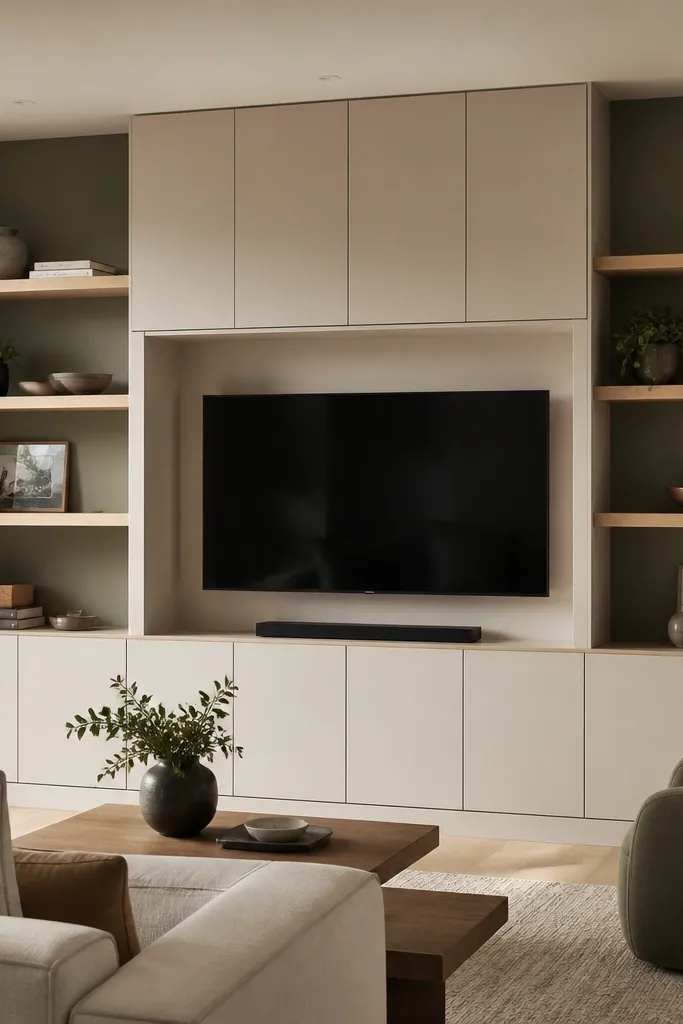
A recessed niche makes the TV look like part of the architecture. Floating shelves feel custom when the supports are hidden and the shelf thickness looks substantial. Recessing the TV also gives you room to add a back panel for cable routing.
Build the niche using Ikea cabinet boxes and add a plywood skin around the opening. For shelf thickness, use 3/4-inch plywood with a thin trim edge. Cut cable paths before you install the back panel so you don’t have to remove shelves later.
Quick tipPaint the entire niche interior a flat charcoal or deep gray so the TV area looks intentional even when it’s off.
One warningMounting shelves directly to the cabinet face without reinforcement makes them sag and look sloppy.
7. Glass-front upper cabinets with custom muntin grid
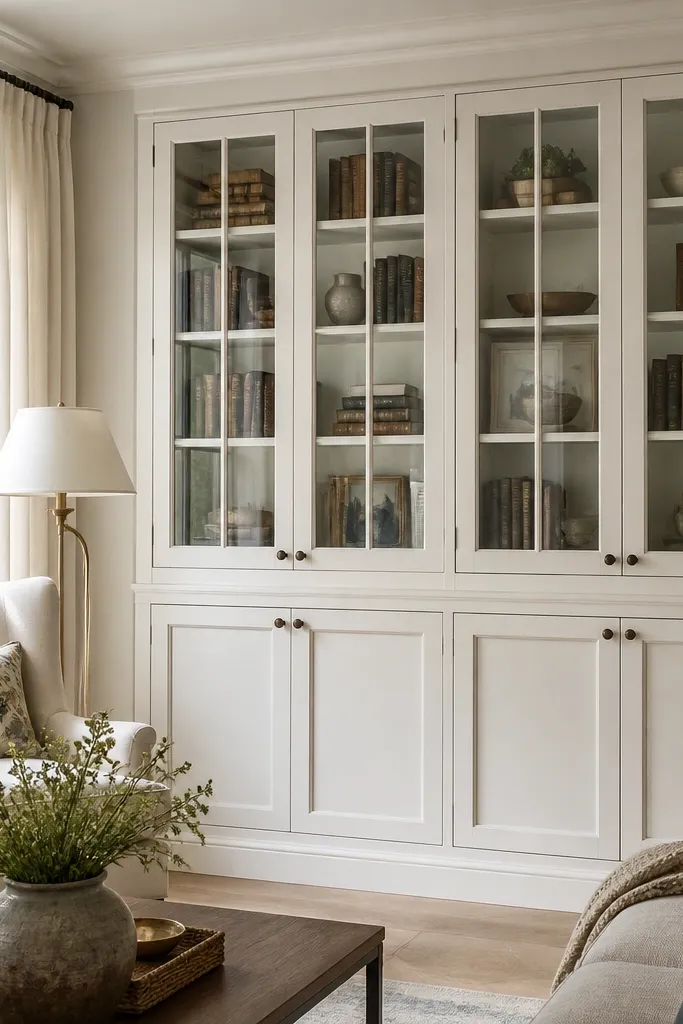
Glass fronts look like custom cabinetry when the glass is framed with a muntin pattern, not just a plain door. The grid gives structure and breaks up reflections, so it doesn’t look like a store display. Matching muntin color to the frame keeps it crisp.
Use Ikea glass doors or glass inserts, then add muntin strips from thin MDF or wood strips. Keep muntin spacing even — measure the opening height and divide by your desired grid size (I like 3 to 4 inches between bars for a balanced look). Prime and paint the muntins before installing so they look factory-made.
Quick tipUse clear silicone on the glass edge so you get a neat seal without squeeze-out.
One warningUsing mismatched muntin thicknesses makes the grid look homemade.
8. Oak veneer-look laminate built-ins with white trim separation
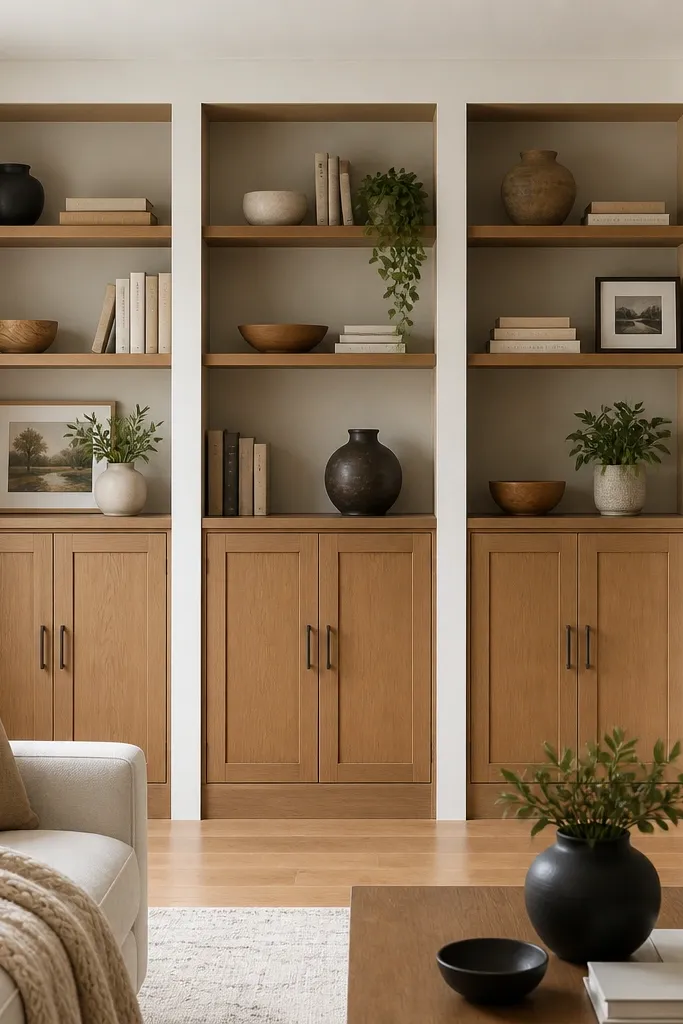
This combo reads custom because you’re creating two materials on purpose: warm wood-look for the doors and clean painted trim around them. The white trim creates a shadow line that makes the “frame” obvious. It also hides minor edge imperfections because painted trim covers gaps.
Choose a consistent oak-look finish for doors and shelf surfaces (laminate or veneer sheets). Use painted MDF trim around the edges in white to define the built-in silhouette. If you’re wrapping edges with laminate, use contact cement and roller pressure so seams don’t lift.
Quick tipAlign the wood grain direction on every visible panel so the run doesn’t look patchwork.
One warningMixing two different oak tones in the same run looks like a repair job.
9. Two-tone built-ins with painted uppers and stained base
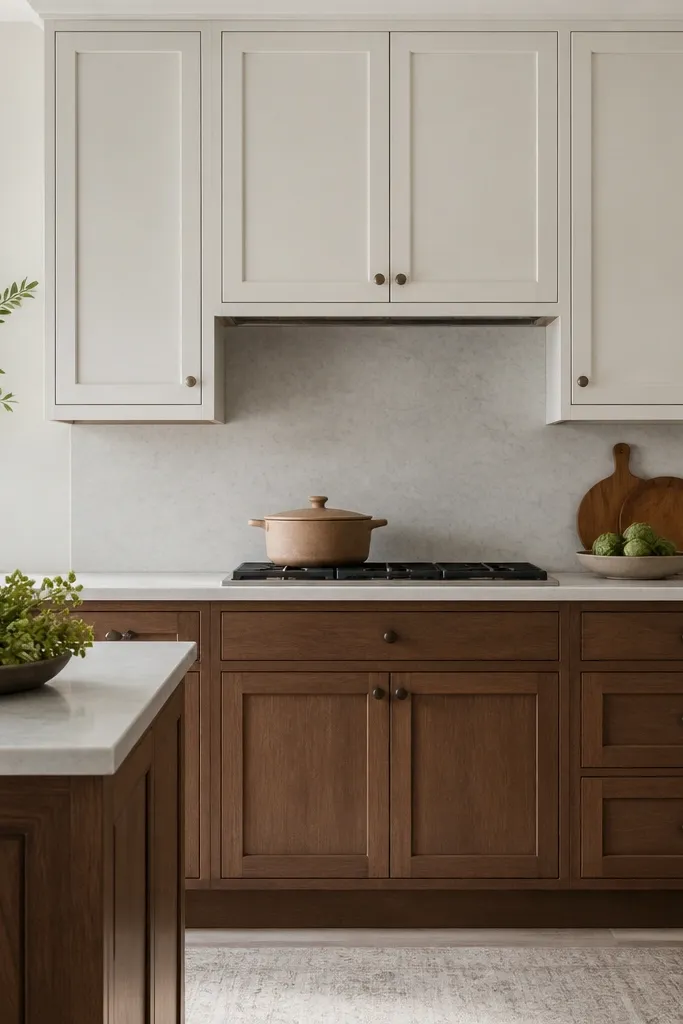
Two-tone built-ins look expensive when the transition line is straight and intentional. The mid-rail trim makes the change in finish feel designed instead of accidental. Stained bases add warmth and make the white upper section feel lighter.
Paint the upper face frame and doors with enamel; stain the lower door faces and toe-kick panels with a matching wipe-on or brush-on stain. Add a 1x trim rail at the boundary so you can hide any paint-to-stain edge. Use clear topcoat on stained parts so the sheen matches across the run.
Quick tipSand the lower panels to the same grit and keep the stain application consistent, or you’ll see blotchy patches.
One warningStaining over unsealed MDF can drink unevenly and look blotchy.
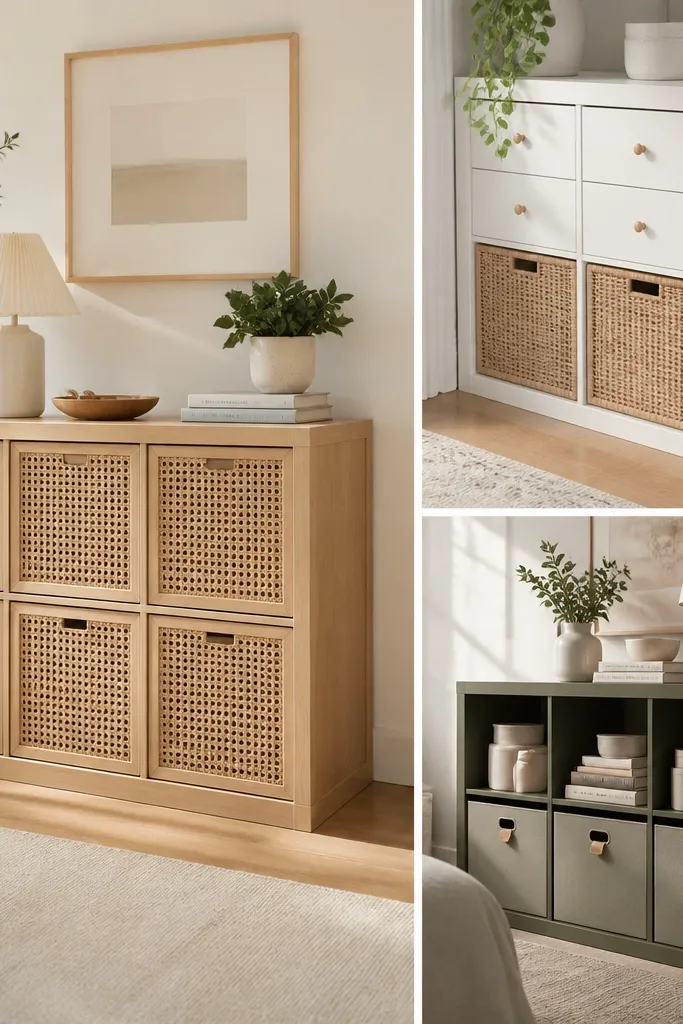
10. Open cubbies with rattan-wrapped back panels
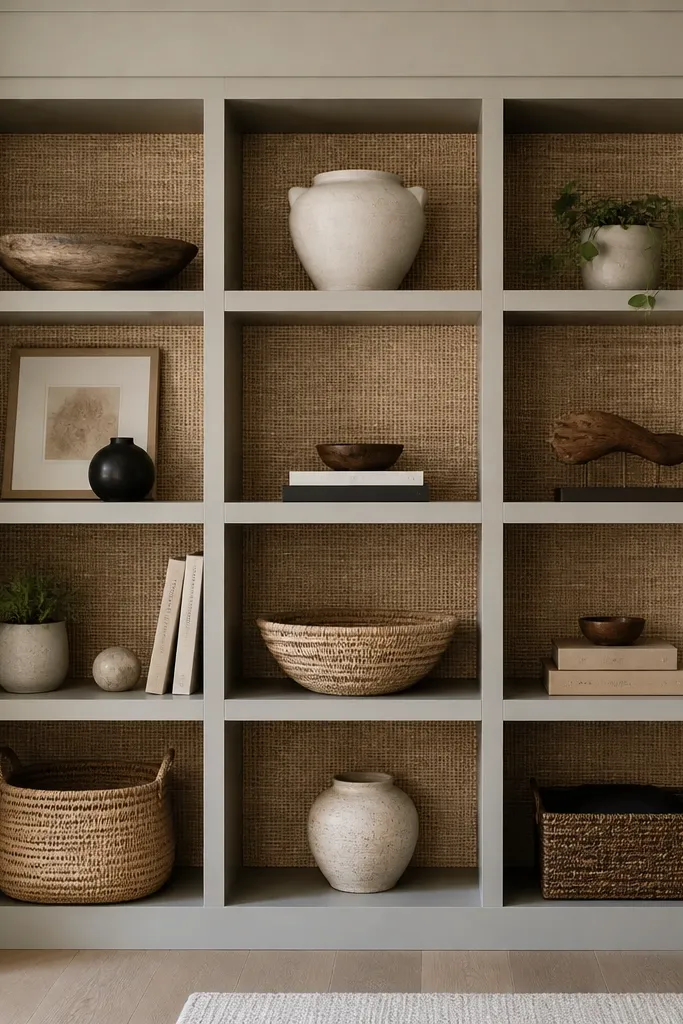
Textured backs make open cubbies feel like a designed feature wall. Rattan (or cane) creates a soft pattern that looks custom even with basic shelves. The key is keeping the trim clean so the texture stays the focus.
Cut a backing panel from thin plywood and wrap it with rattan sheet or cane mat, then staple on the back. Paint or stain the frame trim first so you don’t smear texture. Install the rattan backing after the cubby carcass is in place so you can fit around the revealed openings.
Seal the rattan with a light clear coat made for natural fibers so dust wipes off.
Skipping sealing makes rattan catch grime and look dingy fast.
11. Built-in desk with keyboard tray and side storage towers
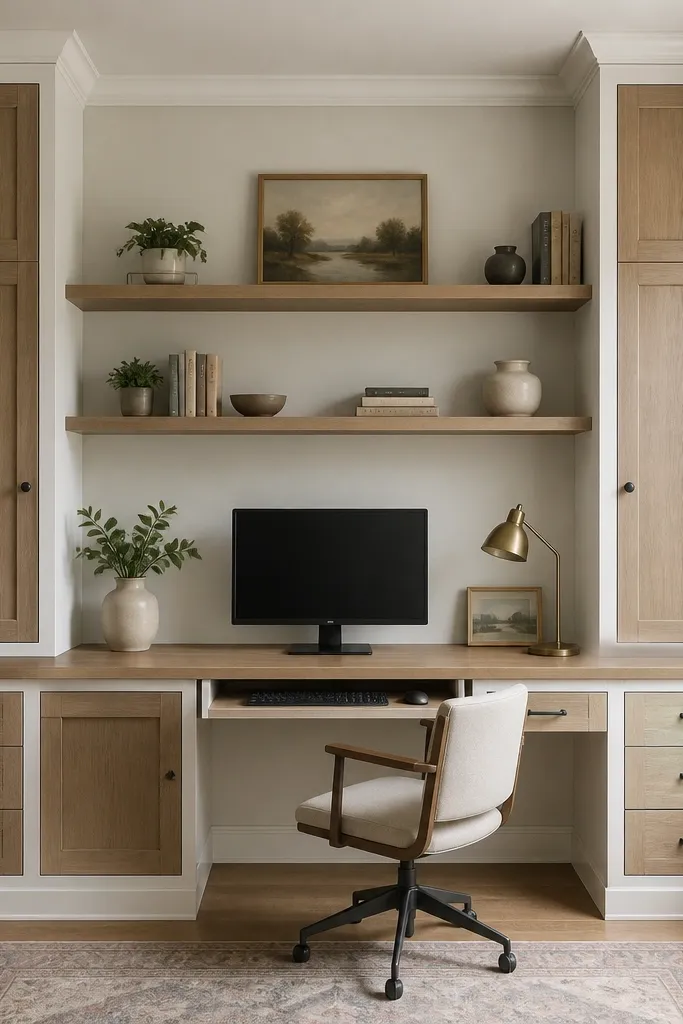
A built-in desk looks custom when the work area is functional, not just pretty. The keyboard tray gives you that real-office feel, and the side towers balance the countertop width. Once the desk is framed like cabinetry, it stops looking like furniture placed against a wall.
Use Ikea drawers or cabinets as the base, then build a countertop from 1-1/8-inch thick butcher block or plywood with a laminate top. Install a ready-made keyboard tray or build one with slides sized for your keyboard depth. Frame the desk perimeter with MDF strips and keep the top overhang consistent.
Quick tipRoute power before the countertop goes on; drill a 2-inch cable pass-through and add a grommet.
One warningMounting the desktop directly to uneven cabinet tops leads to a wavy surface.
12. Shallow entry wall with narrow cabinets and picture-frame trim
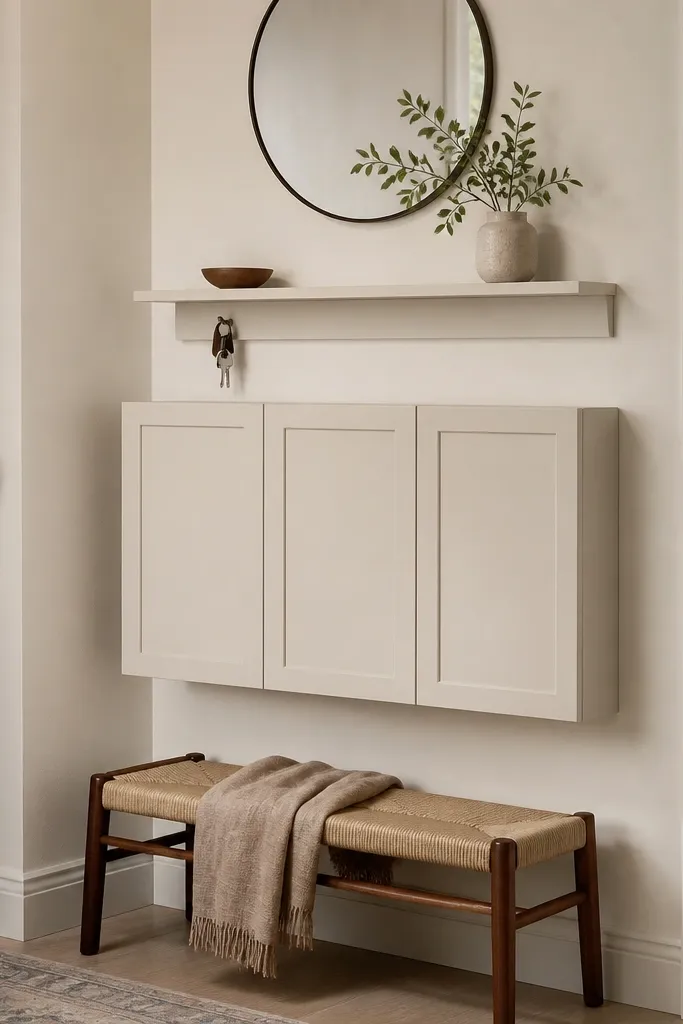
Slim built-ins can look custom if the trim proportions match the narrow width. Picture-frame trim creates a “panel” look that reads like cabinetry. This layout is perfect when you have a tight entry and you want storage without eating floor space.
Use narrow cabinet widths and add a frame border using 1/2-inch MDF with a 1/8 to 1/4 inch reveal. Keep the vertical rails consistent with the door width so the frame looks intentional. Add a top shelf with a flat board and a subtle back lip to stop mail from sliding.
Add a row of adhesive-backed felt on the inside key tray so keys don’t clink.
Using oversized trim on small cabinets makes the whole run look bulky and cheap.
13. Mudroom lockers with numbered plates and bench storage
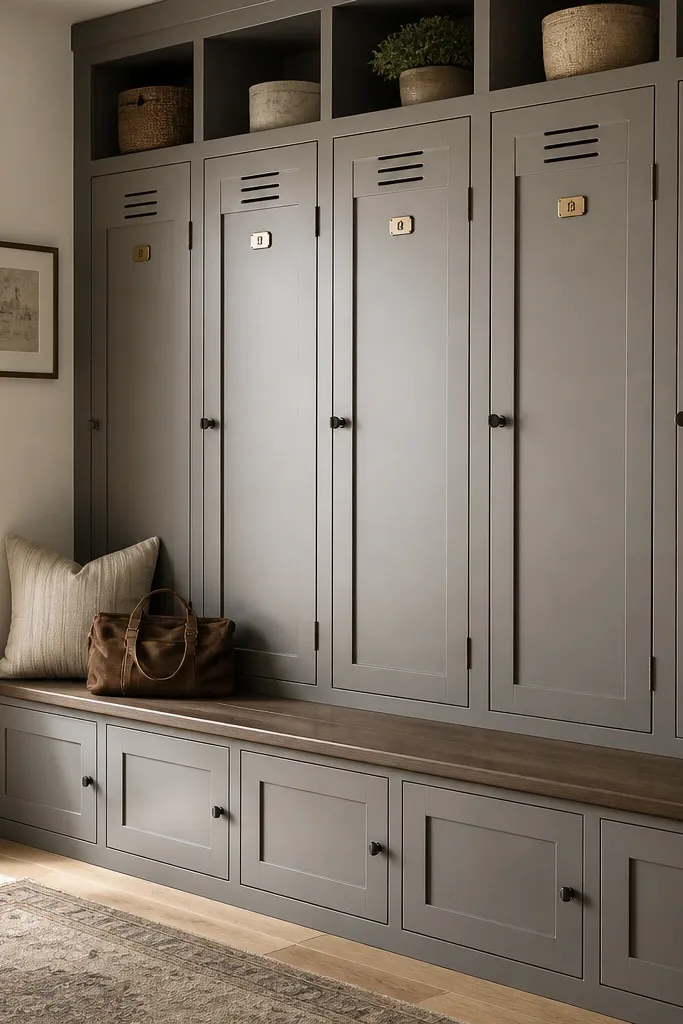
Locker-style built-ins look custom when you repeat the details: consistent door panels, matching hardware, and a clear labeling system. Numbered plates make it feel built-in for a family, and the bench storage keeps the floor area clean. The repetition hides the fact that Ikea parts are modular.
Use Ikea cabinet doors and add a simple panel trim around each door using thin MDF strips. Place numbers on metal plates mounted with small screws. For bench storage, use base cabinets and build a bench top from plywood with rounded edge trim.
Quick tipUse a template to drill all hardware holes so every handle lines up across the wall.
One warningMixing hardware finishes (brass next to chrome) makes the lockers look mismatched.
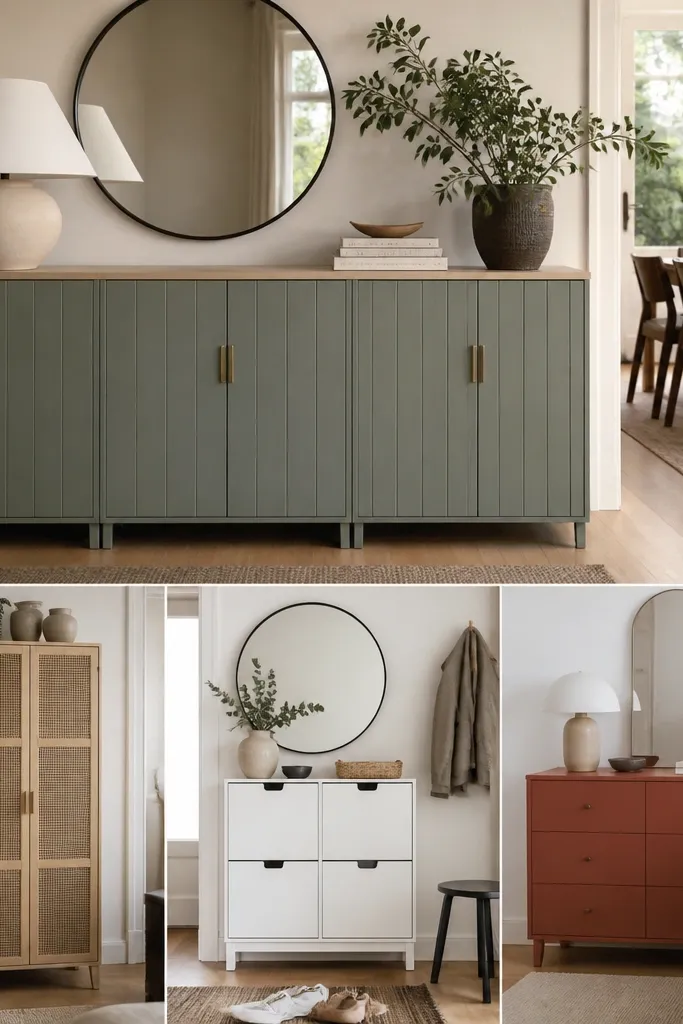
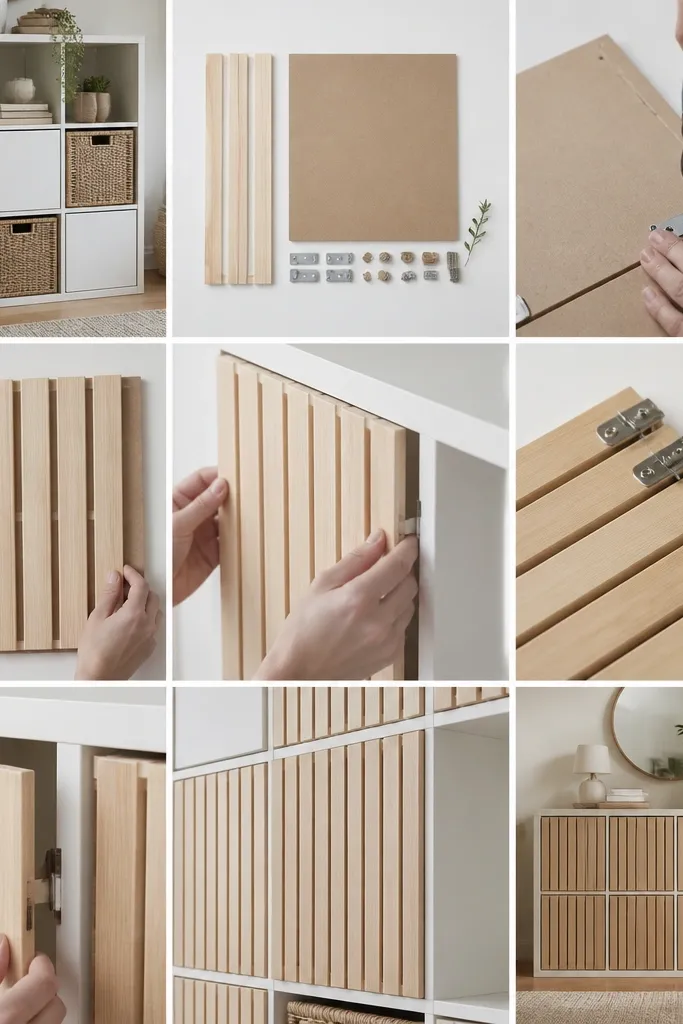
14. Painted fluted panel doors on Ikea cabinet fronts
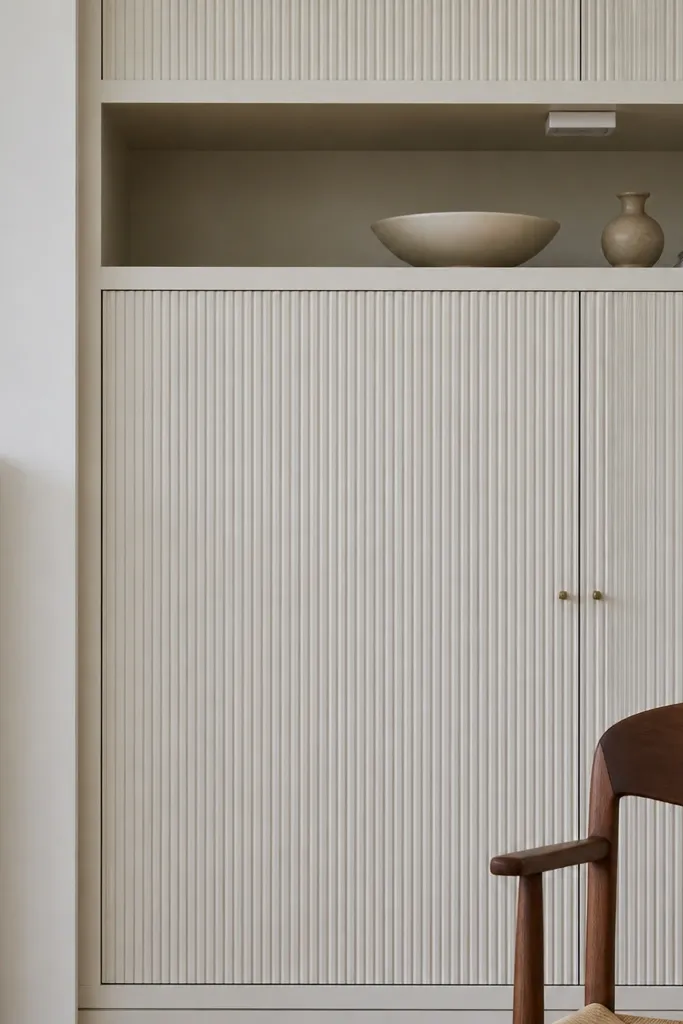
Fluting is the shortcut to a high-end look because it adds shadow lines without needing fancy moldings. When you apply fluted panel strips to Ikea door fronts, the doors start reading like custom cabinet panels. The light plays across the flutes and makes the piece look dimensional.
Add fluted strips made for door paneling or use thin MDF strips with a router or pre-made fluted inserts. Prime thoroughly and paint with a smooth cabinet enamel so the flutes don’t look grainy. Keep the flutes centered and evenly spaced across every door so it looks designed, not added later.
Sand between primer coats and use a foam roller — it keeps paint smooth over grooves.
Leaving flutes unpainted or uneven spacing makes the door texture look like a sticker job.
15. Built-in bookcase with adjustable shelves and picture-frame sides
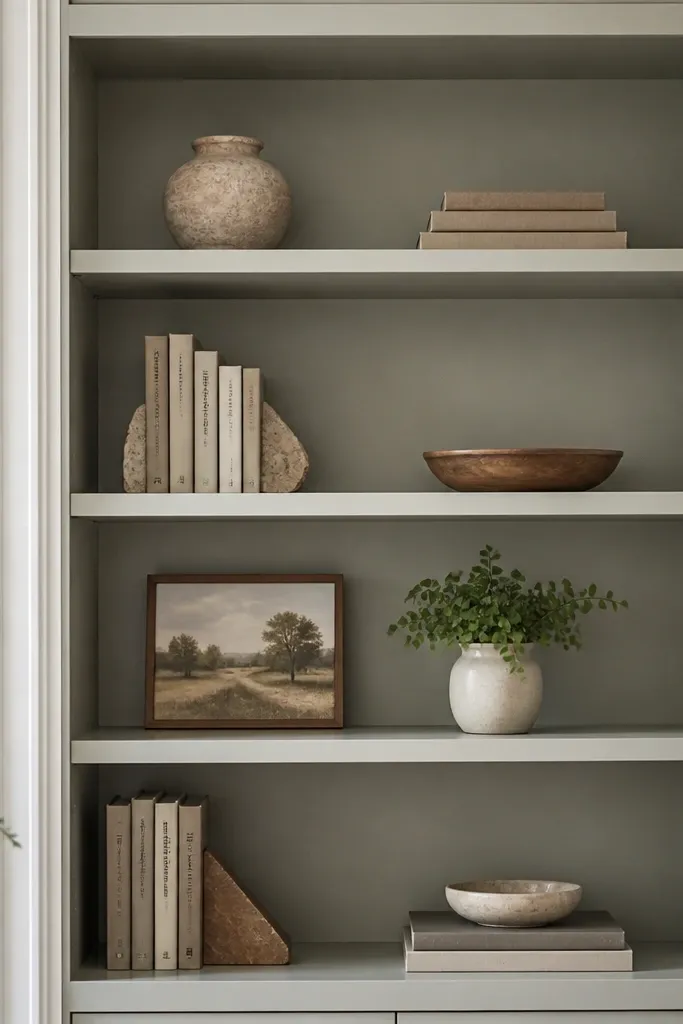
Bookcases look custom when you can adjust shelves and when the side reveals look like solid millwork. Picture-frame trim on the sides and a clean painted back makes the shelves look like they belong to a single unit. Adjustable shelves keep it usable as your collection changes.
Use Ikea cabinet frames and add a plywood skin for the sides with a 1/8-inch reveal around openings. Install shelf standards and adjustable shelves inside so you’re not stuck. Paint the inside back a satin finish so books don’t look washed out against raw material.
Quick tipMark shelf positions with painter’s tape on the inside so you can re-set levels later without measuring again.
One warningUsing fixed shelves that are all the same height makes the bookcase look like storage, not built-in furniture.
16. Tall display cabinet with LED strip lighting and fabric-wrapped back
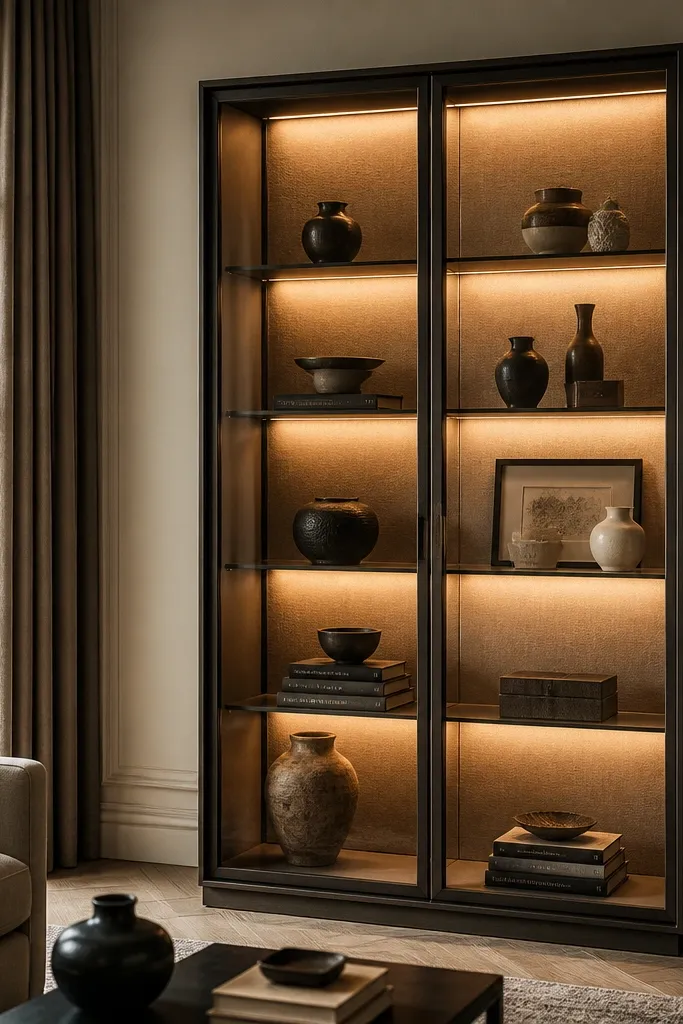
LED lighting turns a normal glass cabinet into a display piece. The glow looks custom when it hits a textured back, not bare wood or plain paint. Fabric-wrapped backs add depth and soften reflections on glass.
Install warm LED strips inside the cabinet with an aluminum channel so it doesn’t sag. Use a fabric panel cut to size and stretch tight over thin plywood. Keep the lighting wiring accessible through an access panel or the cabinet interior so you can swap the strip later.
Use a warm color temperature (around 2700K) so it doesn’t look like a fridge light.
Mounting LED strips directly on raw surfaces can create hotspots and uneven brightness.
17. Kitchen pantry built-in with matching shaker-style face panels
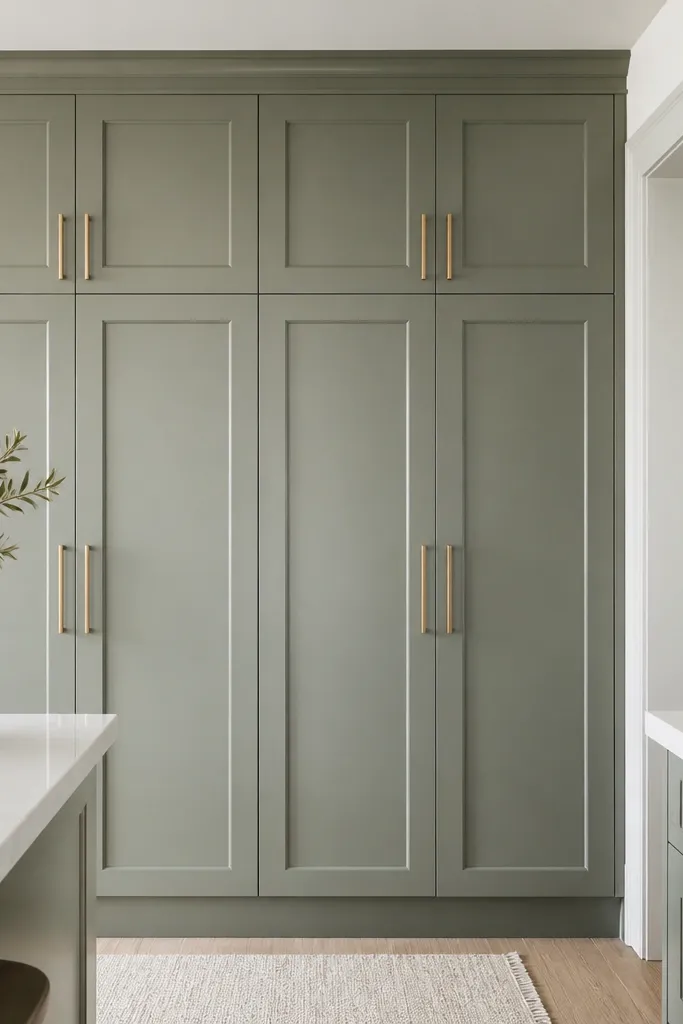
Shaker-style detailing makes Ikea built-ins look like real cabinetry because it creates panel depth. When the center panel is aligned and the rails are the same width across every door, the run looks built, not assembled. It also hides small door-to-trim gaps because the panel frame draws the eye.
Add shaker frames using 1/2-inch MDF for the outer frame and thinner strips for the inner panel border. Keep the center panel recessed by the thickness of your inner insert so the shadows look crisp. Paint everything with the same system so the sheen matches between doors and trim.
Quick tipDry-fit every door with painter’s tape spacers before you glue anything — hinge alignment is easier before the final trim locks it in.
One warningSkipping hinge adjustment after adding panels makes doors sit uneven and shows the DIY.
18. Bathroom vanity wall with moisture-resistant primer and shaker doors
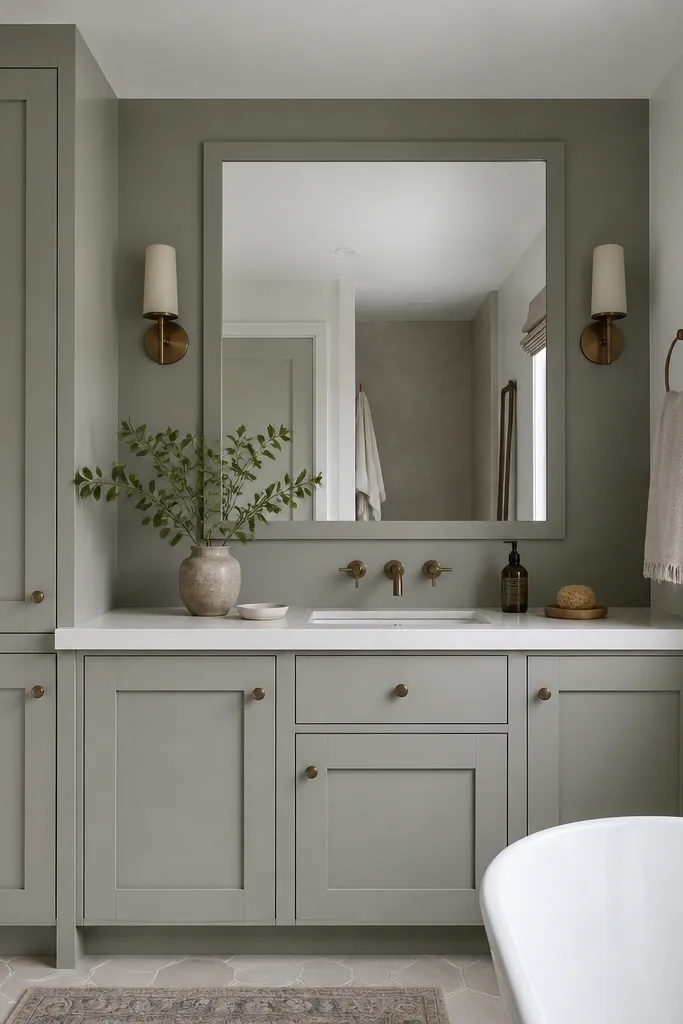
Bathrooms expose the weak spots in cheap built-ins: paint that peels and edges that swell. If you build the trim and doors with moisture-resistant primer and seal the cut edges, it stays looking fresh. The shaker door style also makes the vanity look like a custom bath vanity instead of a storage cabinet.
Use moisture-resistant primer and cabinet enamel, and seal any cut edges of MDF with a thin sealant before painting. Add a plywood or water-resistant panel behind the sink area if your wall gets damp. Keep the toe-kick line crisp so it matches the wall baseboard height.
Run a bead of silicone at the countertop contact points so water can’t creep into the seams.
Painting MDF without sealing edges is the fastest path to swelling and peeling.
19. Entry coat wall with slat panel backing and hidden hooks
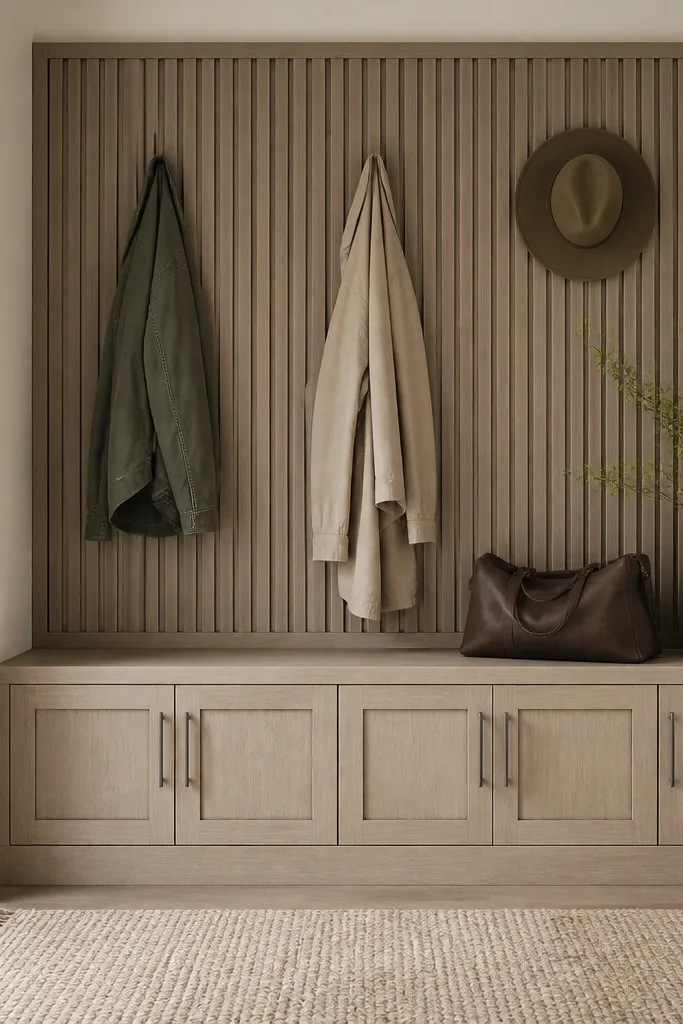
Slat panel backing makes a coat wall look intentional because it creates a grid the eye reads as design. Hidden hooks keep the wall clean when you don’t want hardware showing. Pairing slats with closed cabinets keeps clutter out of view but keeps the coat area functional.
Mount a slat panel backing inside the open section and attach hooks to a solid backing board behind it. Use 1x trim to frame the slat area so it looks like built-in cabinetry. Keep the cabinet face frame aligned with the slat frame so the whole wall feels one unit.
Label stud locations on your wall with painter’s tape before you start drilling — coat walls punish off-center mistakes.
Screwing hooks into drywall without backing makes them pull out after a few heavy coats.
20. Built-in bar wall with glass rack and open shelf lighting
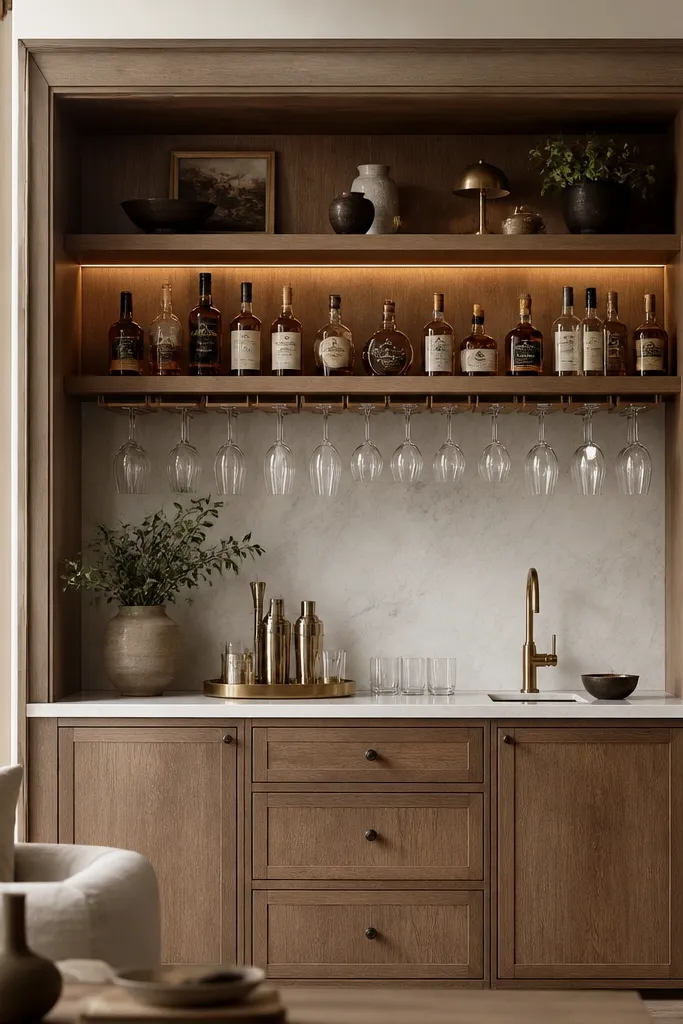
A bar built-in looks custom when the glass storage looks like a designed system, not a random rack. Lighting under shelves makes the bottles and glass silhouettes look intentional. The cabinet face frame ties the open and closed sections into one clean wall feature.
Install a glass rack sized to your glass stem length and mount it to a solid board behind the shelf. Add LED strips under the shelf lip and diffuse with a channel cover. Paint the face frame and shelf edges in the same finish so the lighting doesn’t reveal mismatched materials.
Quick tipUse a dimmer switch so the bar looks warm at night without blasting the room.
One warningMounting lighting too close to bare shelves makes it look like a temporary work light.
21. Low profile closet system with continuous baseboard trim
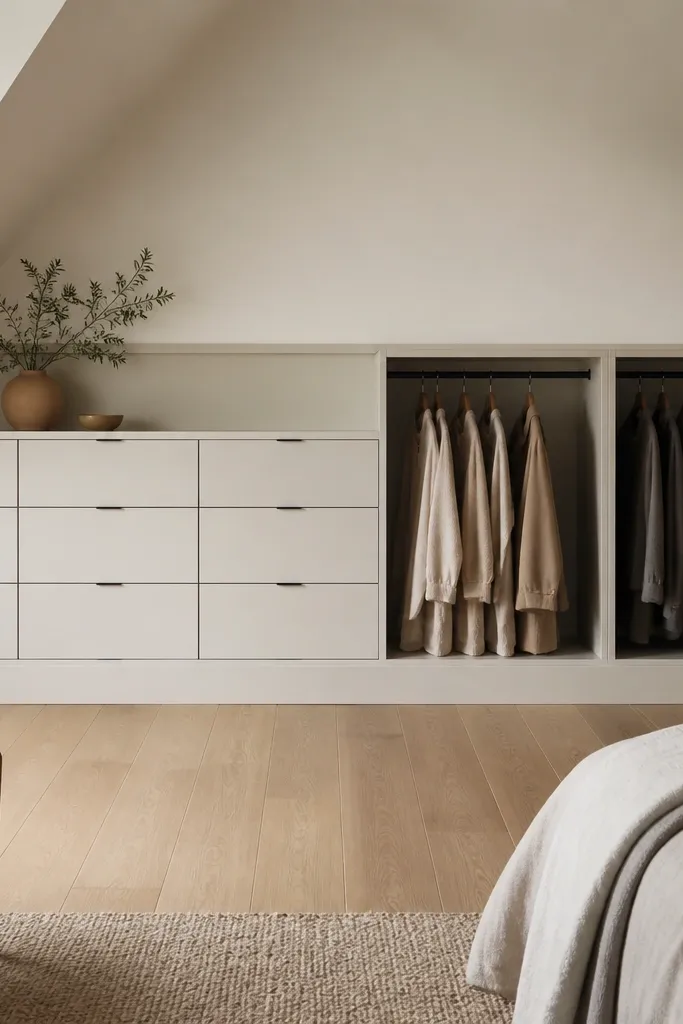
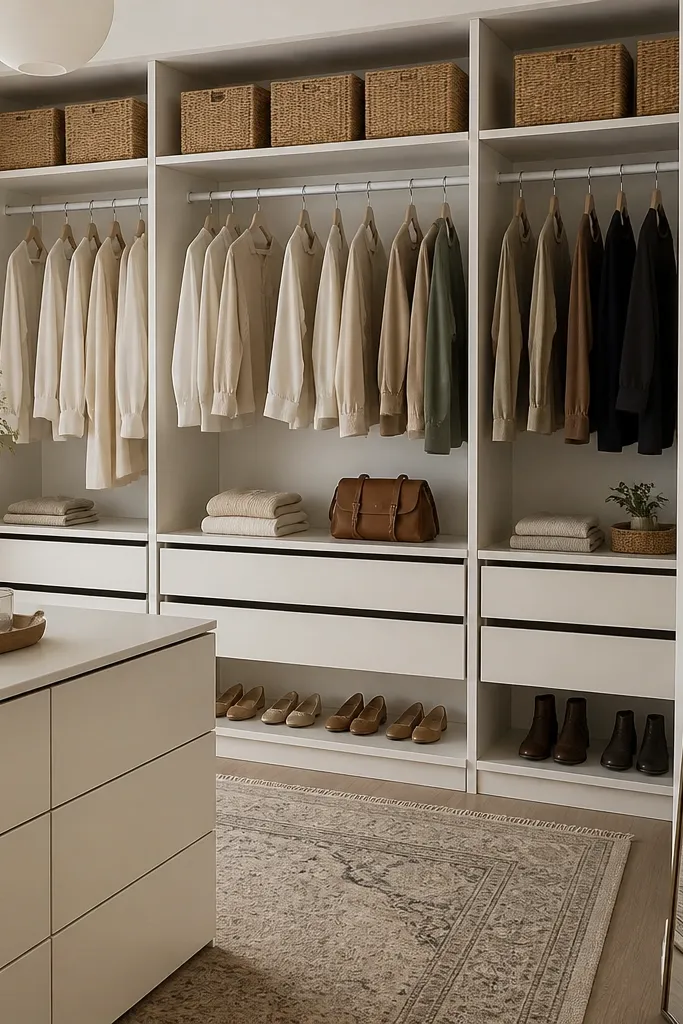
Closets look custom when the bottom line is continuous. Instead of stopping trim at cabinet edges, you run a single baseboard or toe-kick panel that visually stitches the unit to the room. That one line makes the whole built-in feel finished and architectural.
Install the Ikea carcasses, shim them for level, then mount a continuous toe-kick or baseboard panel across the entire run. Add a face frame around doors with matching trim width so the reveals stay even. Use a closet rod and shelf heights that match your storage needs before you close it in.
Quick tipCut the toe-kick panel to fit around outlet covers and add clean returns at corners.
One warningStopping toe-kick pieces at each cabinet seam makes the run look like separate furniture.
22. Powder room wall cabinet with wallpapered inside backs
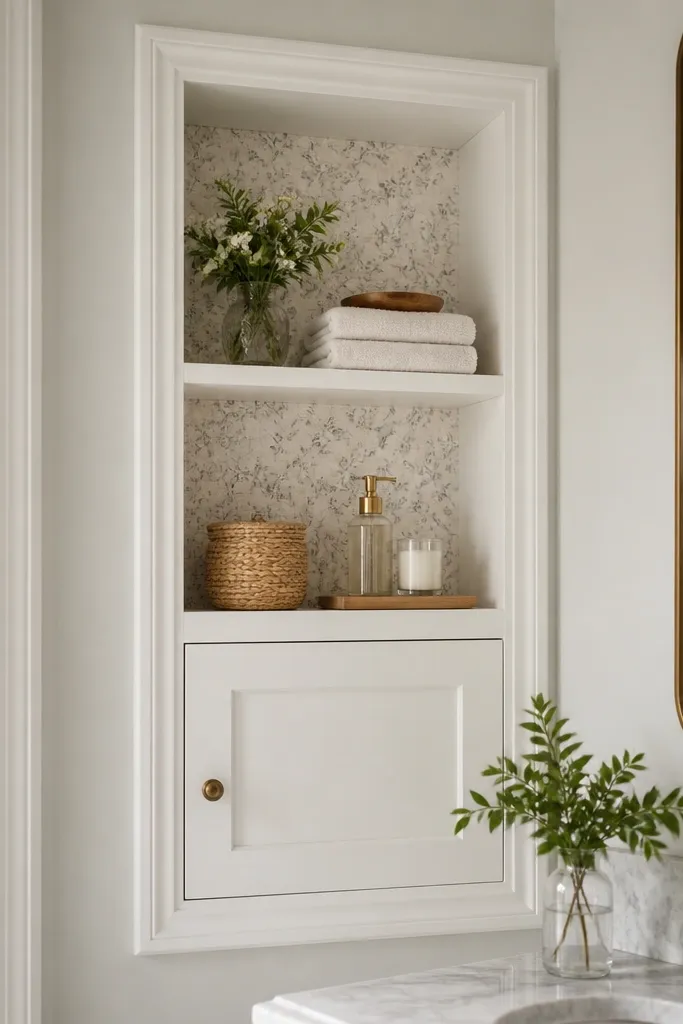
Wallpaper inside a built-in is a trick that reads custom because it’s a hidden detail. The outside stays clean and simple, while the inside pattern makes the niche feel like a designed feature. It also keeps the inside from looking like raw storage.
Cut wallpaper to fit the inside back panel and apply it to a flat backing board first. Seal the wallpaper with a clear coat made for paper so it survives bathroom humidity. Install the backing panel behind the shelves so edges are covered by trim.
Choose a pattern with small scale so it doesn’t overwhelm a small cabinet opening.
Applying wallpaper directly to uneven surfaces causes wrinkles and bubbles at corners.
23. Built-in utility closet with slanted top cap and screen panel doors
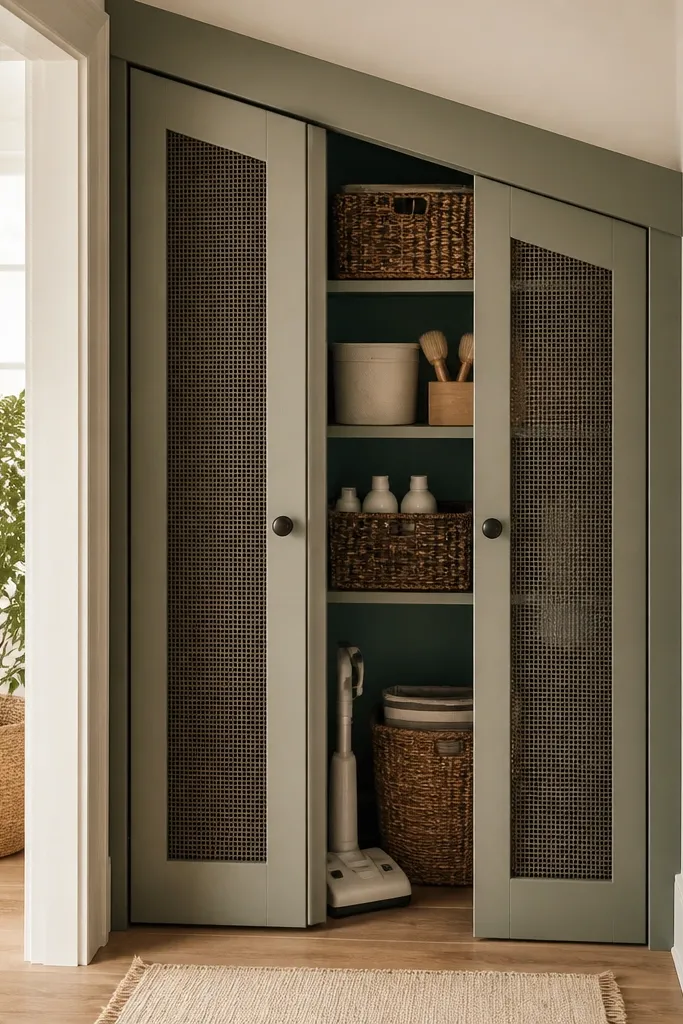
Mesh or screen-style doors look custom when the frame is clean and the top has a finished cap. The slanted top cap adds a designer touch and helps the unit visually separate from the wall. It also reduces the “boxy” Ikea vibe because the silhouette changes.
Build a top cap from plywood and cut the slope on a table saw so it’s consistent. Frame mesh panels using thin MDF strips and paint them the same color as the cabinet face frame. Install screen doors with the correct hinge spacing so they open without catching the trim.
Quick tipUse magnetic catches for the doors so they stay aligned when closed.
One warningSkipping a top cap makes it look like unfinished storage.
24. Stair landing built-in with angled shelves and matching trim returns
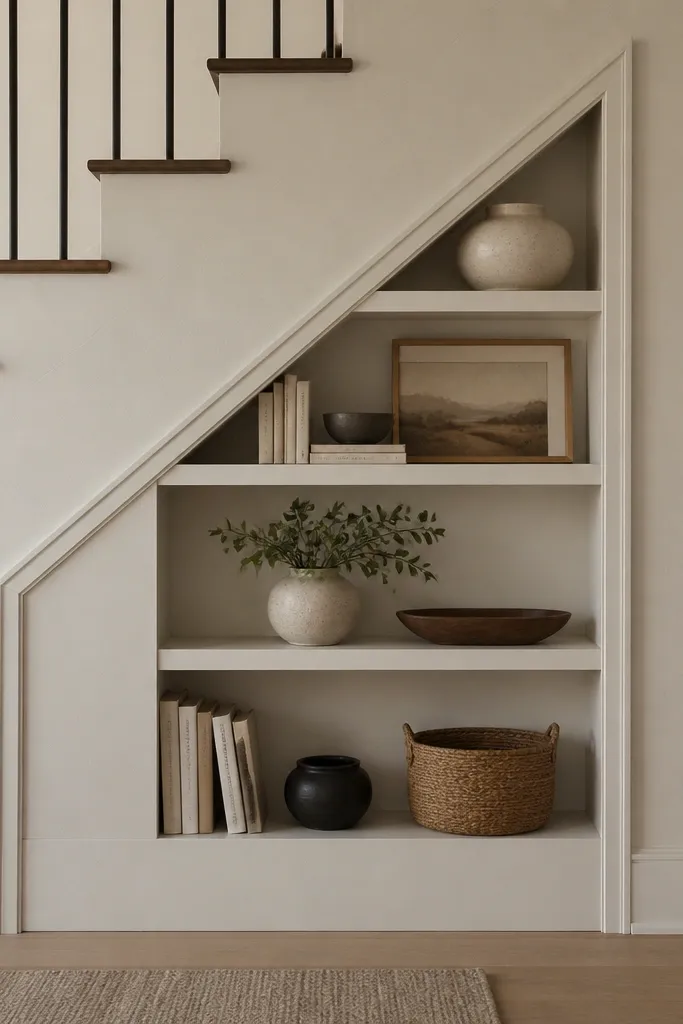
Angled shelves can look messy if you treat them like regular shelves. When you frame them with matching trim returns, they look intentional and architectural. Painting to blend with the wall makes the built-in disappear until you notice the details.
Use plywood templates to mark each shelf angle, then cut shelf boards to match. Frame the edges with trim strips cut to the same angles so seams stay hidden. Use a painted backing inside the angled section so the interior looks solid even at odd angles.
Make one perfect template, then trace it for every matching shelf — it saves hours and prevents one shelf from being off.
Cutting every shelf freehand makes the angles drift and the whole run looks crooked.
25. Built-in desk hutch with closed storage lower and open top cubbies
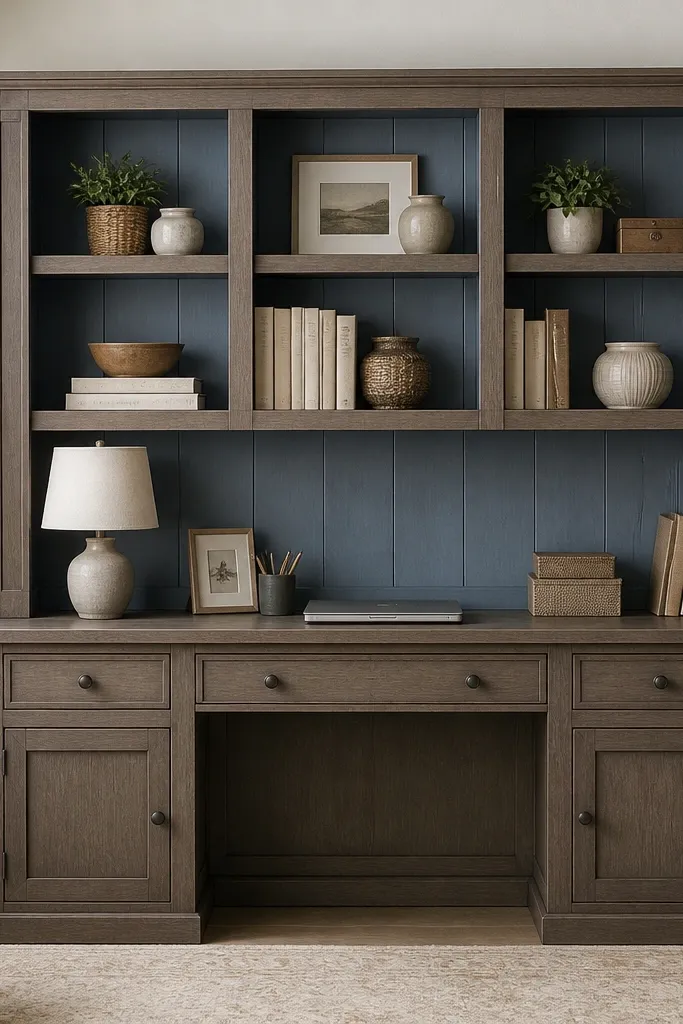
This layout looks custom because the eye gets both function and display. Closed storage hides supplies, while open cubbies show books and decor. The trick is consistent framing: same trim widths around the closed and open sections so the whole hutch reads like one piece.
Build the lower section with Ikea drawers/cabinets, then add an upper carcass for cubbies. Use 1/2-inch MDF trim frames around each opening and keep reveals consistent. Add a thick ledge shelf at the top so the hutch has a grounded, built-in presence.
Add a vertical divider in larger cubbies so books stop leaning and the compartments look even.
Using different trim widths between the top and bottom makes it look like two separate purchases.