1. Linen-Panel Winter Wall Grid from a Kvissle Frame Set
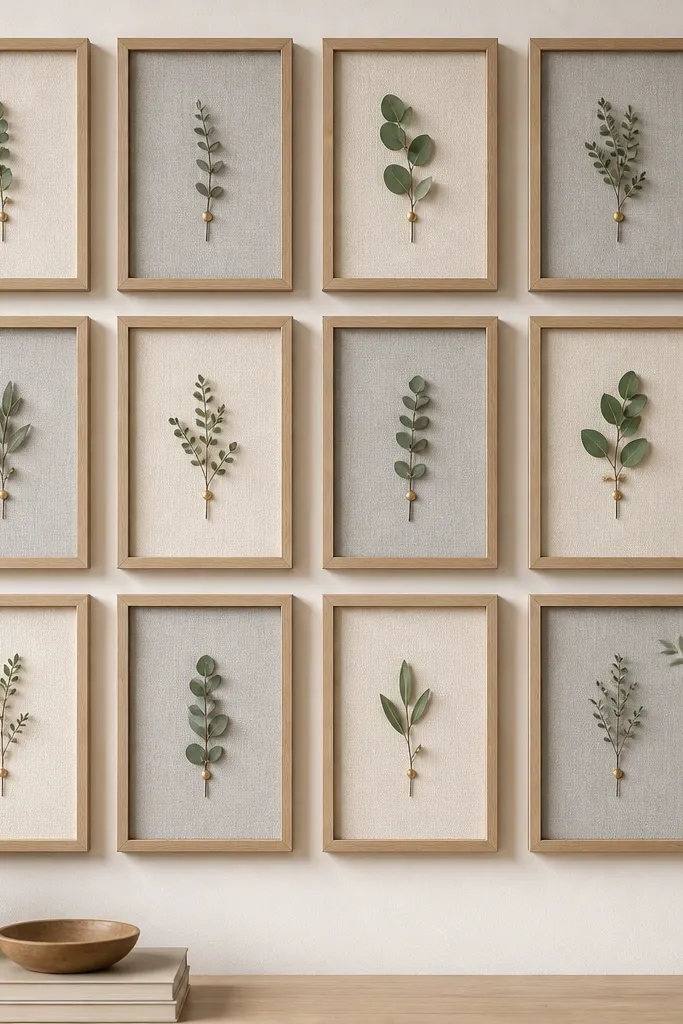
Ikea frames are the easiest way to make seasonal wall art that looks curated, not handmade. Swap out the insert with linen-look fabric so the whole piece reads soft and high-end. The gold accents come from pushpins or thin gold twine, and the eucalyptus adds a winter note without taking over the room. From across the room, the texture does the work.
Use a Kvissle-style frame set or any matching Ikea frames with the same outer dimensions. Cut fabric panels 1-2 cm larger than the inside opening, then fold the edges under the backing so nothing frays. Keep spacing consistent — I use 2 cm gaps between frames with a paper guide on the wall before mounting.
Paint a thin strip of matte gold or use gold washi tape along the inner edge of the frame backing so the color shows even when the fabric shifts slightly.
Avoid mixing frame sizes or letting fabric bunch — that’s what makes it look like a quick collage.
2. Birch Edge Garland using Ikea Lack Shelf Offcuts
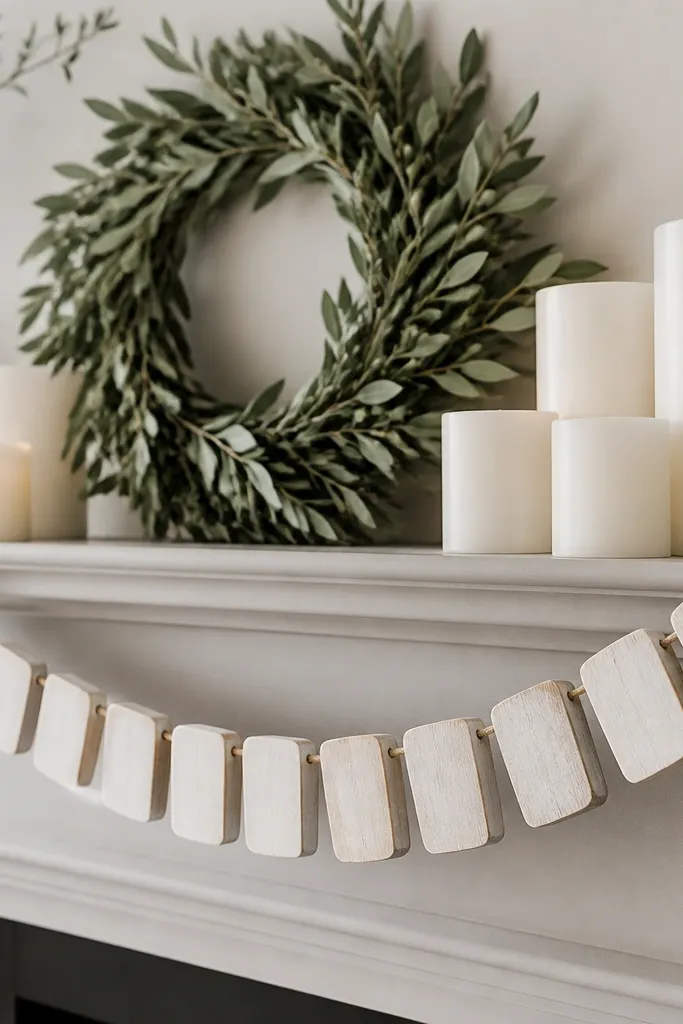
When you want holiday decor that looks intentional, texture matters more than theme. Ikea Lack boards are light, easy to cut, and take stain or paint evenly. I cut uniform rectangles, sand the edges, then tie them on twine so they drape without looking stiff. The birch tone reads warm, which keeps the whole setup from feeling icy.
Cut 20-30 pieces about 6 x 2.5 cm. Sand with 180 then 220 grit, then apply a light birch stain or a matte clear coat over a warm wood toner paint. Drill tiny holes (2 mm) near the top corners of each piece, then thread twine in a zigzag so the garland hangs evenly.
Pre-plan your twine length by draping it on the mantle first. Leave 8-10 cm extra at each end so you can tie it off without pulling the pieces tight.
Avoid rough edges or uneven sanding — chip marks show up immediately in candle light.
3. Magnetic Advent Calendar on an Ikea Raskog Tray
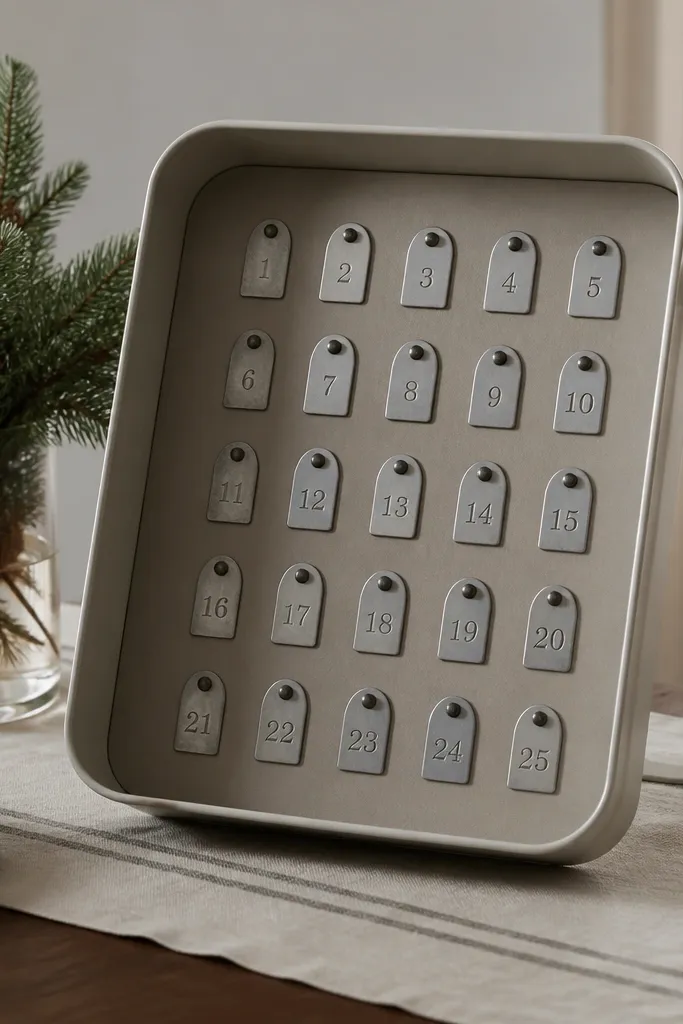
A cart tray is a genius base because it’s flat, sturdy, and easy to move around the house. The magnetic numbers let you open each day without fiddly pockets. I use a neutral runner and a simple evergreen so the numbers stay the only “busy” element. The steel backing makes the whole thing feel like a real product.
Quick tipUse removable painter’s tape to map the tag positions before you mount the steel — it saves you from crooked days 7-12.
Buy a thin magnetic steel sheet (or cut a sheet to fit the tray). Mount it to the inside of a backing board that sits on the tray. Make 24 tags from thin metal or magnetic sheets and add numbers with a paint pen or vinyl labels. Arrange tags in a grid with equal spacing so the layout looks clean.
One warningAvoid heavy magnets that look bulky — thin magnetic tags look flatter and more modern.
4. Snowy Lantern Centerpiece with Ikea Glass Jars and LED Candles
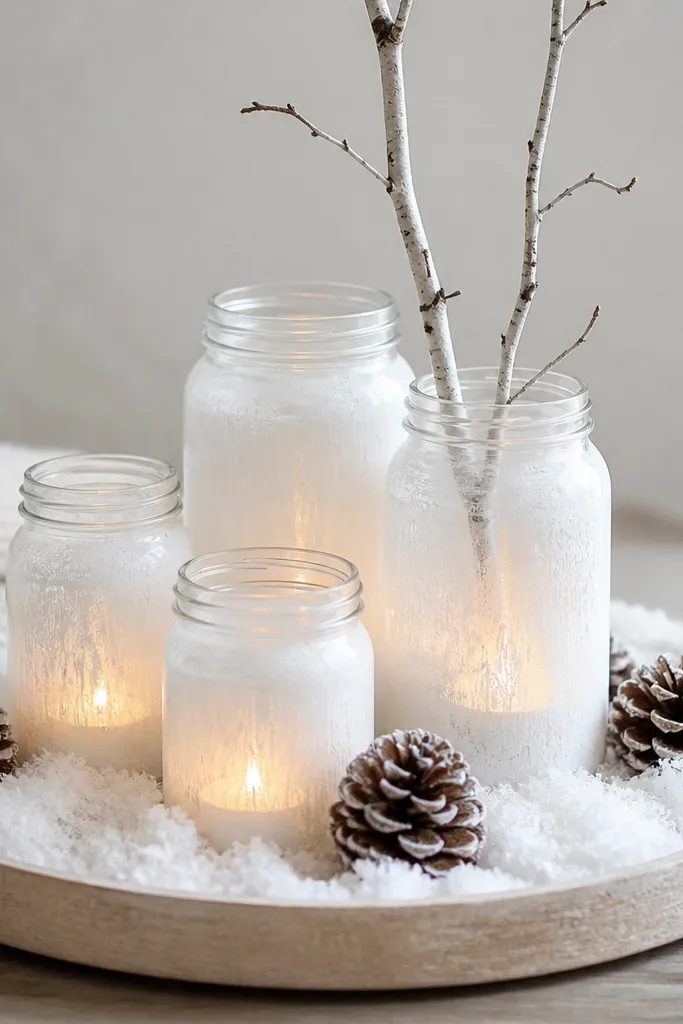
Glass jars look like lanterns with almost no build, and LED candles remove the fire problem. The “snowy” effect comes from painting the inside with matte white so it glows softly instead of looking like a messy coat. Pinecones and a single birch branch keep it from turning into a generic jar grouping. The result looks wintery without being themed to one holiday.
Use 3-5 clear jars of different heights so the stack has rhythm. Paint the inside bottom and up the lower third with matte acrylic using a foam brush. Let it fully cure, then add LED candles and a pinch of faux snow on the tray. One jar can hold a mini branch tied with twine for vertical interest.
Dust a tiny bit of faux snow on the outside only at the base edge — it makes the glow look grounded.
Avoid glossy paint on glass — it reflects harshly and kills the cozy look.
5. Tassel Tree Skirt from Ikea Tablecloth and a Cheap Curtain Rod
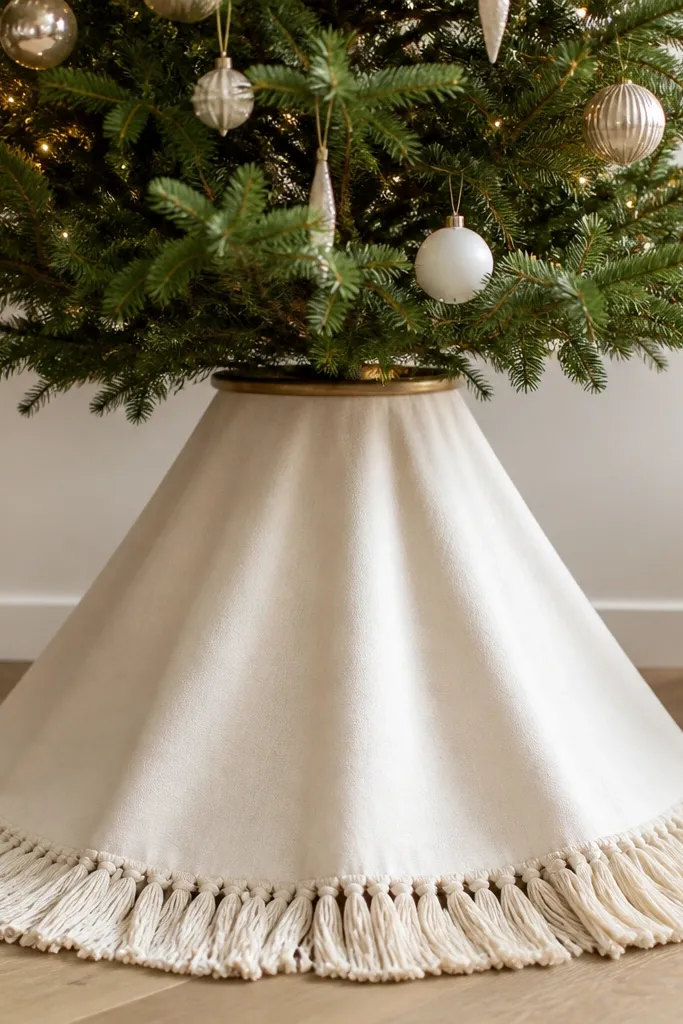
Most tree skirts look flat because people sew or tie the fabric directly to the tree stand area. I get a better silhouette by using a simple rod ring under the fabric so it hangs like a skirt, not a blanket. The tassels create movement when people walk by. A cream tablecloth hides minor unevenness and looks expensive when it catches light.
Quick tipUse a fabric glue stick or heat-bond hem tape along the top band before tying — it keeps the fabric from stretching out of shape.
Cut a circle from an Ikea tablecloth large enough to reach the floor with a 5-8 cm hem. Create a fringe by cutting strips about 2-3 cm long, leaving the top band intact. Attach the fabric to a cheap thin rod ring (or a spring wire ring) using small ties every 8-10 cm so the flare stays even.
One warningAvoid thin, slippery fabric without reinforcement — it twists and the tassels end up uneven.
6. Ikea SAMLA Bin Ornament Storage That Looks Like Decor
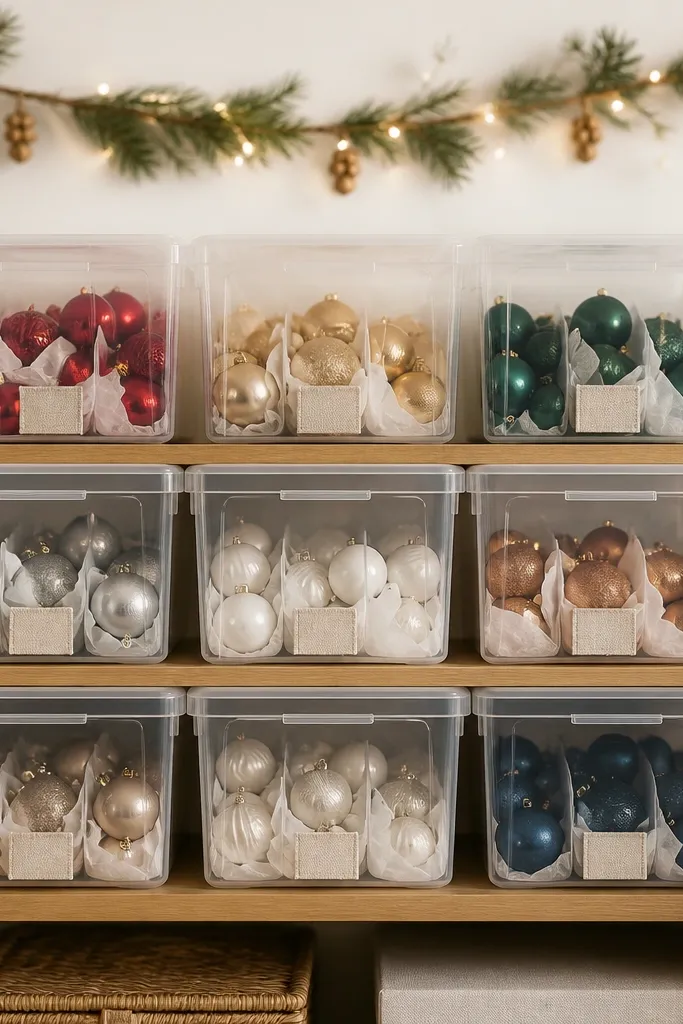
Ornament storage is where most holiday setups fall apart — you either hide it and lose the magic, or keep it visible and it looks messy. Clear bins let you see what’s inside, and fabric labels make it feel styled. Group ornaments by color family (silver/white, gold/amber, green) so the bins look intentional even before you open them. This turns “storage” into a holiday display.
Quick tipWrite the ornament group name on the label in pencil first, then seal with a matte clear spray for durability.
Use SAMLA bins with matching lids. Add a linen-look label tab by cutting a small rectangle, folding the ends, and using a glue dot or tie around the handle area. Add tissue dividers cut to fit the bin walls so ornaments don’t clink and chip. Keep each bin to one color family so the shelf reads clean.
One warningAvoid random mixing of colors inside the same bin — it makes the shelf look chaotic.
7. No-Sew Stocking Holders from Ikea Pegboard and Leather Straps
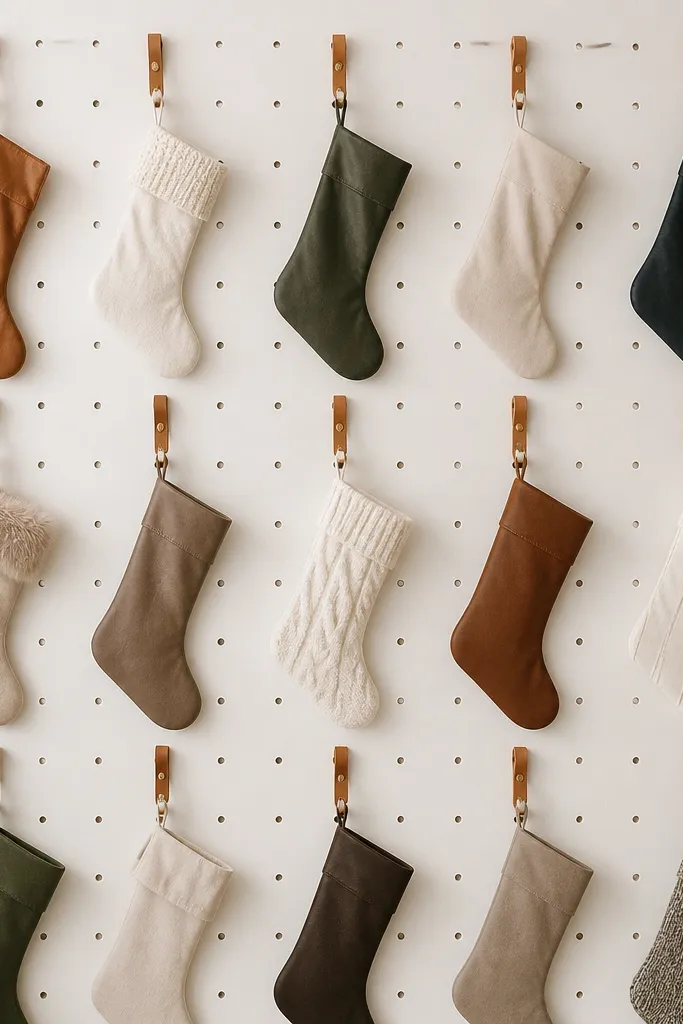
Stockings look best when they hang in a straight line and don’t twist around a hook. Pegboard gives you a grid you can measure, and leather straps let you adjust length. This setup looks more designed than standard stocking hooks because the straps create a soft, uniform line. It also makes swapping stockings easy year to year.
Mount an Ikea pegboard at eye level. Attach small hooks or screw-in eyelets into the board spacing 15-18 cm apart. Cut leather straps (2 cm wide) and punch holes at both ends. Hook the straps to the eyelets and hang stockings on the strap’s top hole.
Use painter’s tape to mark where each strap lands, then step back and check alignment before tightening everything.
Avoid uneven strap lengths — twisted stockings look sloppy fast.
8. Ikea Besta Backdrop Window for Fall Signs and Lights
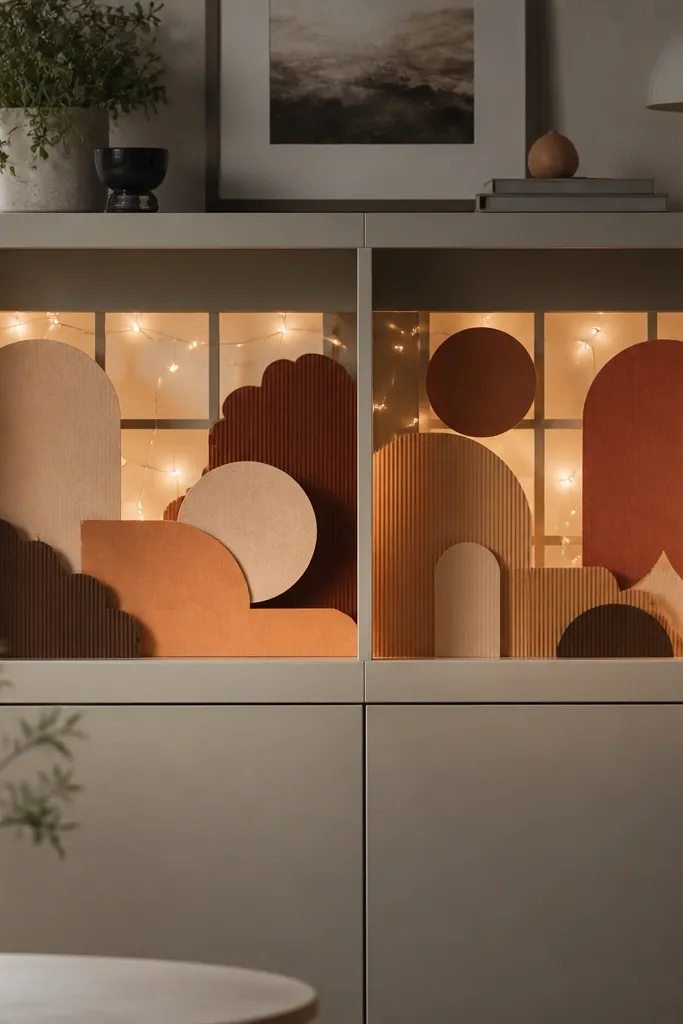
The reason a lot of DIY sign displays look flat is that the light is in front, not behind. I build a “back window” inside a Besta so the light glows through layered paper and gives depth. You get a gentle fall color without painting the whole cabinet. It also looks great from the couch because the glow fills the space behind the shelves.
Place warm white LED string lights behind the shelf area, then add a backer board of thin cardboard painted a dark warm gray. Cut sign shapes from textured cardstock (kraft brown, burnt orange) and layer them on thin foam sheet. Secure the layers with double-sided tape so they don’t sag.
Keep the paper sign edges slightly uneven by 2-3 mm on purpose. Perfect rectangles look too printed and less hand-made.
Avoid cool white LEDs — they make orange paper look sickly.
9. Candle-Safe Ikea Ribbed Tray with Faux Moss and Pinecones
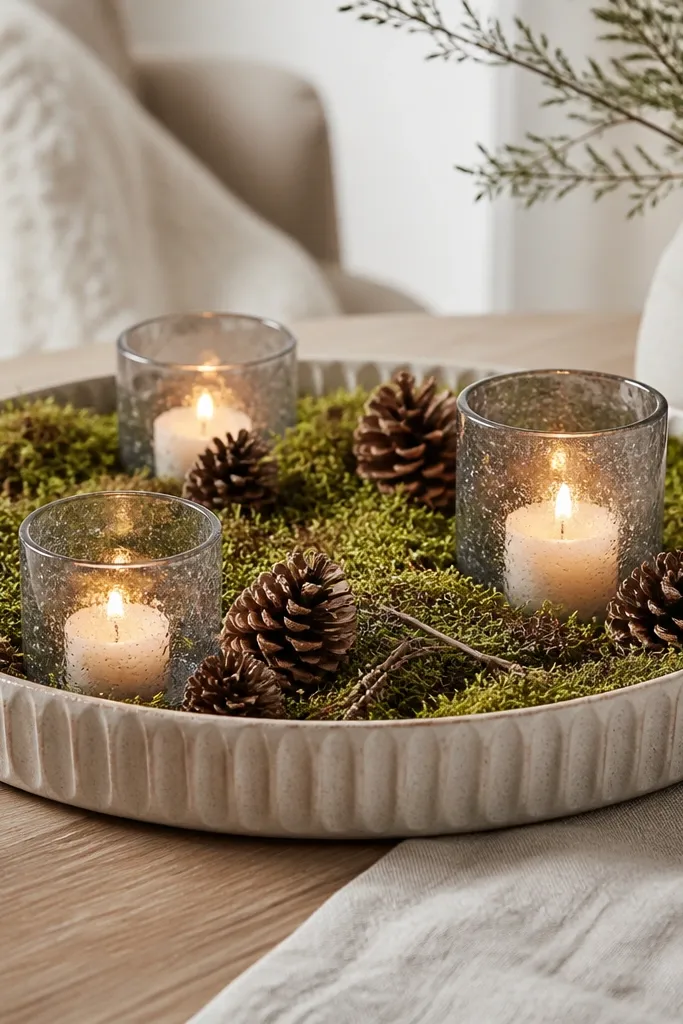
Trays are the fastest way to make a seasonal table look styled. A ribbed tray adds texture so you don’t need ten decorative items. Moss and pinecones give you fall depth, while candle holders create the height variation. The trick is spacing — each element gets breathing room so it reads like a design, not a craft pile.
Use a shallow ribbed tray from Ikea and line it with a thin sheet of felt or plastic liner to keep moss from getting everywhere. Place candle holders first, then nest pinecones around them. Add moss to cover the empty space, but keep 1-2 cm gaps around glass so it doesn’t look smothered.
Spray faux moss lightly with repositionable adhesive so pinecones stay put when you move the tray.
Avoid overfilling the tray — if everything touches, it looks messy in photos.
10. Peel-and-Stick Tile Snowflakes on Ikea Mirror Frames
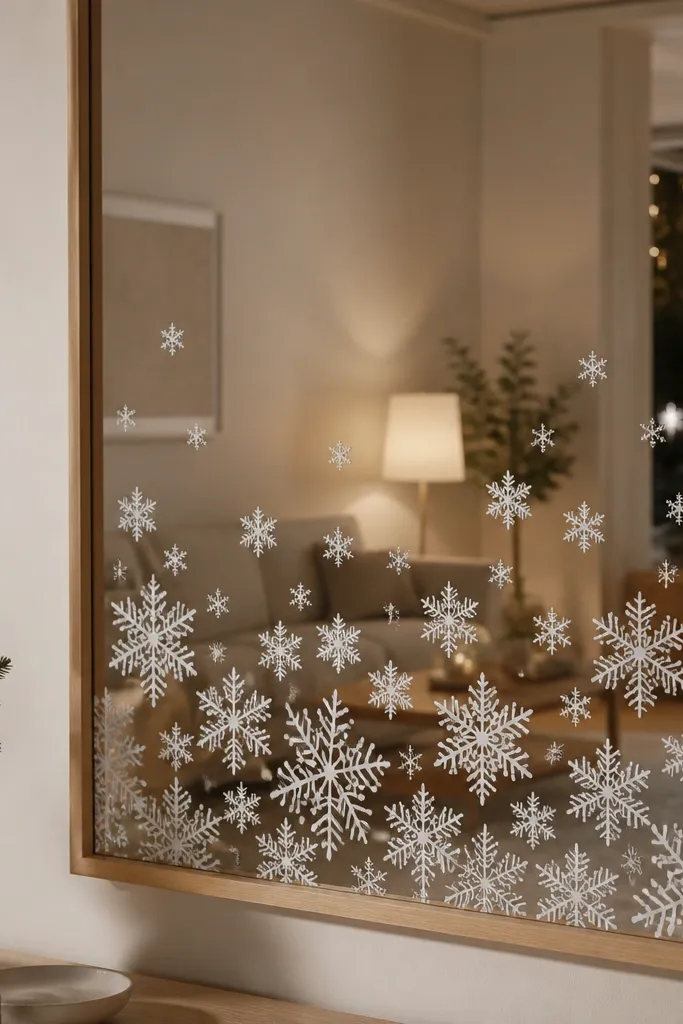
If you want a winter look that doesn’t require paint, peel-and-stick tile accents work shockingly well. Put the snowflakes on the mirror frame, not the glass, so you keep the reflection clean and bright. White-on-wood or white-on-matte black looks crisp and modern. It’s also reversible, which matters if you hate winter decor by mid-January.
Pick an Ikea mirror with a frame you can decorate — wood or matte black. Clean the frame with rubbing alcohol and let it dry. Apply peel-and-stick snowflake tiles in a gradient: bigger shapes lower, smaller shapes higher. Finish by trimming edges with a sharp craft knife.
Press each piece with a hard plastic scraper for 20 seconds so corners don’t lift.
Avoid placing stickers over glossy varnish without cleaning — they pop off in a week.
11. Rattan-Style Wreath Using Ikea Curtain Rings and Twine
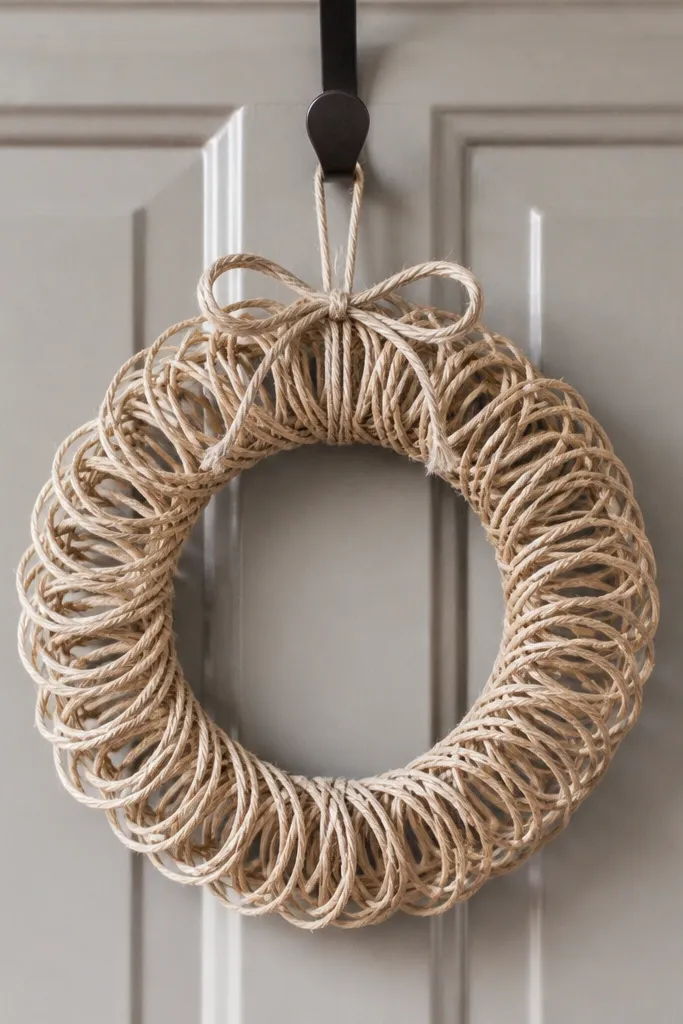
This wreath looks like rattan but costs way less. The base made of connected rings holds shape so the twine can wrap tight without collapsing. I keep it neutral so it works for spring, fall, and winter with a single swap of greenery. The woven texture catches light and looks good even when it’s bare.
Connect 10-14 curtain rings into a circle and tie them with twine at 3-4 points. Wrap twine tightly, crossing over itself in small bands. Glue the last wrap with hot glue at one hidden spot. Add a small bow or a dried eucalyptus bunch tied at the top.
Wrap in two directions: first vertical bands, then horizontal bands. It makes the woven pattern look intentional instead of random.
Avoid loose wrapping — it looks like a half-finished craft.
12. Ikea SKUBB Shelf Divider Turned into a Gift Wrap Station
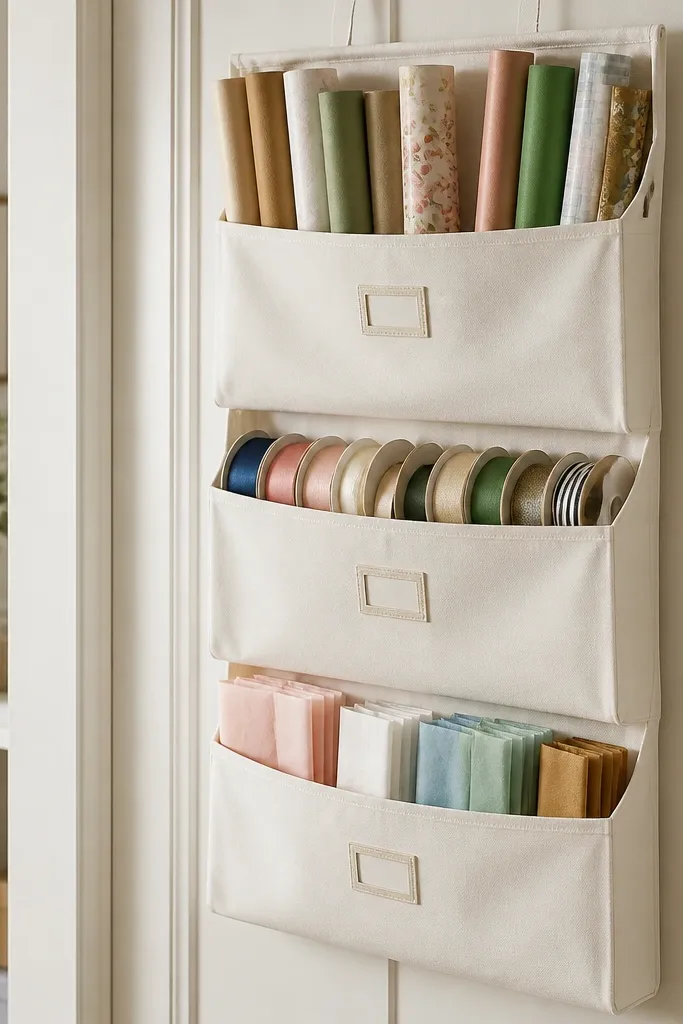
Gift wrap chaos is real. A door-mounted SKUBB divider keeps rolls upright and visible, so you stop digging for tape. The pockets also hold ribbon spools neatly, which makes wrapping faster. This setup looks clean because fabric pockets are soft and uniform — it’s practical and pretty at the same time.
Mount SKUBB to the inside of a closet door using the included hooks or small screws at the top rail. Roll wrap paper tightly and store each roll in one pocket. Ribbon spools go in long pockets; tissue paper folds into a square and sits at the top. Add a small piece of cardstock behind the pocket opening in a coordinating color for a cleaner look.
Use one color for labels (like black on kraft) so the whole organizer looks styled instead of annotated.
Avoid overstuffing — when pockets bulge, the door looks messy.
13. Holiday Serving Tray with Ikea Frame and Removable Chalk Labels
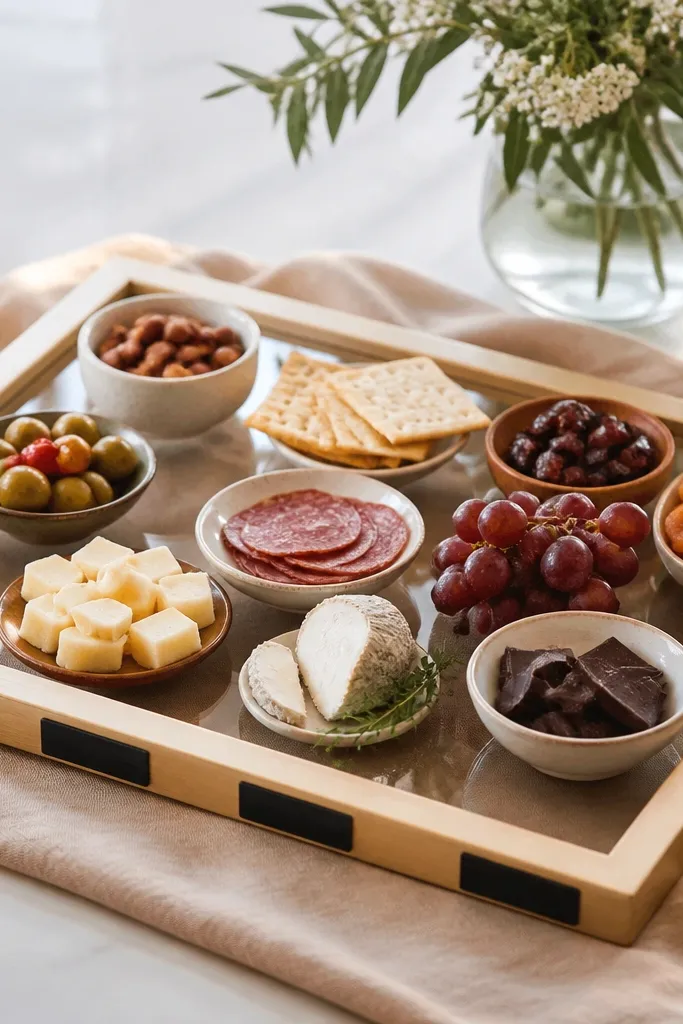
Serving setups look better when names and portions are easy to read. A frame gives you a rigid base, and a clear acrylic top keeps food prep clean. Removable chalk labels let you change the menu for every holiday without making new art. This is the kind of detail that makes a table feel put-together.
Use a flat Ikea frame and replace or cover the insert with a clear acrylic sheet cut to size. Attach small chalkboard label cards with removable tape or tiny magnets at the edges. Arrange dishes in a tight grid with consistent spacing so the labels sit over blank space, not on top of food.
Write labels in white chalk on matte black card stock. It reads well under warm string lights.
Avoid glossy labels — they reflect and look hard to read.
14. Ikea Mop Bucket to Mini Tree Watering Station
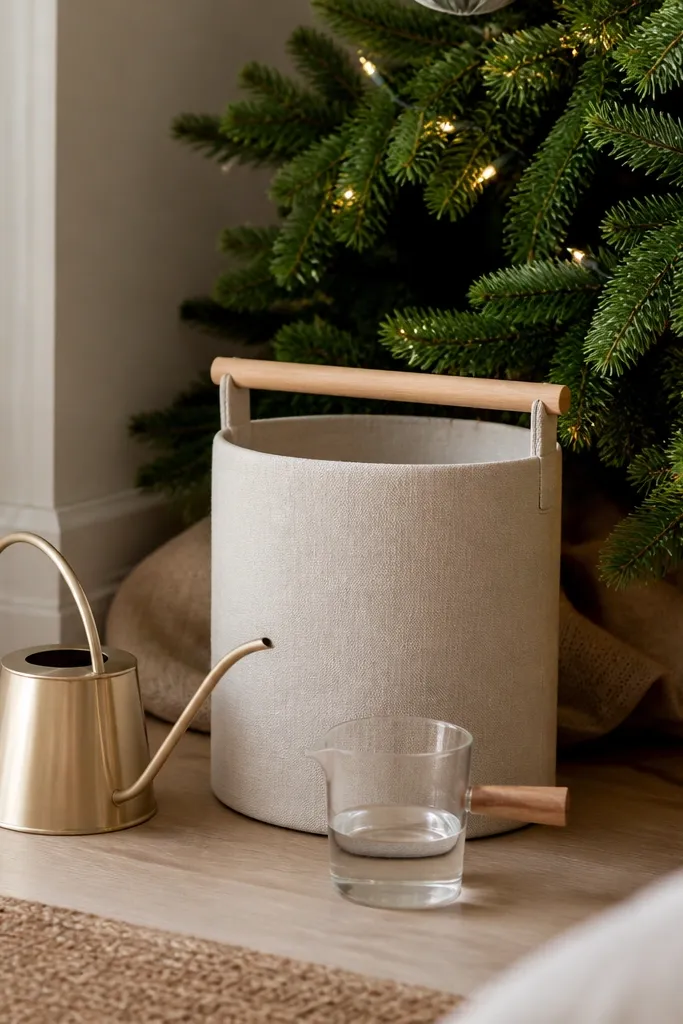
Real-life holiday decor includes the boring parts, and that’s why this looks smart. A bucket next to the tree is practical, but it usually looks ugly. Covering it with neutral fabric and adding a simple wooden handle makes it blend into the decor. It also keeps your watering routine tidy and easy.
Use a small Ikea bucket or similar container and wrap it with a tight fabric sleeve (linen-look or burlap blend). Tie the fabric with twine around the top edge so it can be removed to refill. Add a wood dowel handle across the top tied with jute. Keep a measuring cup and a slim watering can in a tray nearby.
Line the bucket bottom with a plastic bag so you can lift the liner out after the season and keep it clean.
Avoid floppy fabric that sags — it looks like a cover instead of an intentional part of the setup.
15. Wire Basket Ornament Ladder from Ikea VARIERA Inserts
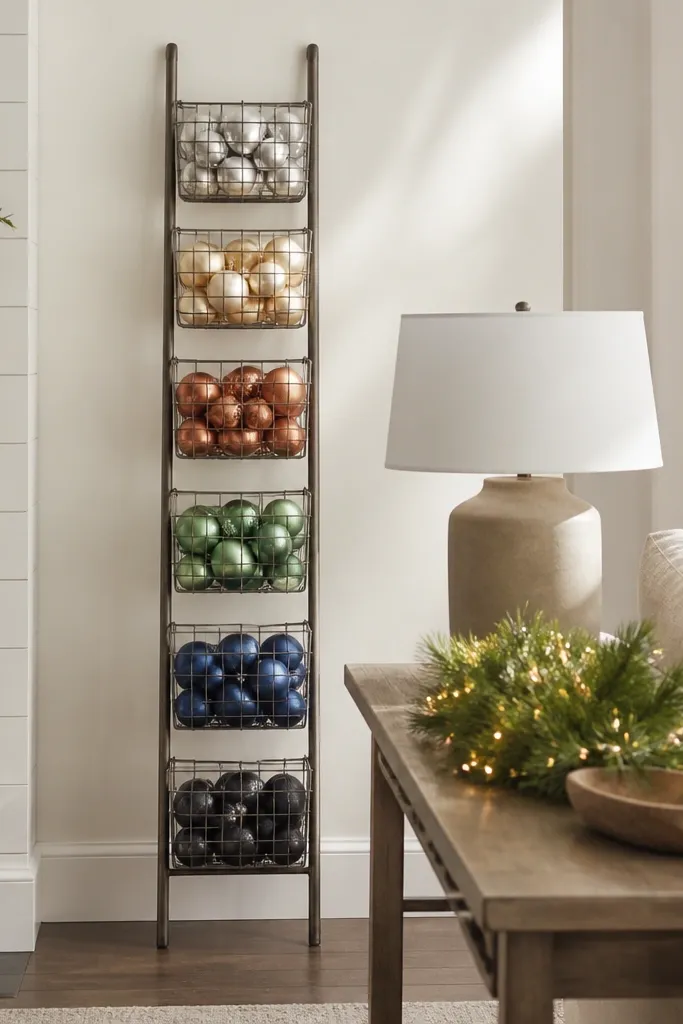
Ornaments on hooks look fine, but a vertical ladder makes the display feel like decor instead of storage. Wire baskets are great because they let light pass through, and ornaments don’t get trapped in shadows. The VARIERA-style inserts or shelf supports help you mount baskets at consistent angles. I like this for small spaces because it takes up vertical room.
Quick tipSort ornaments by shape first, then place by size — round ornaments in the middle baskets look balanced.
Build a simple base with two vertical supports and mount basket hangers at 20-25 cm intervals. Use four to six wire baskets, each holding 6-10 ornaments. Keep ornament colors limited to two families so each basket looks intentional. Add a small LED light strip behind the top baskets for a soft glow.
One warningAvoid overcrowding each basket — the display should breathe.
16. Ikea Brimnes Drawer Front to Sliding Holiday Photo Banner
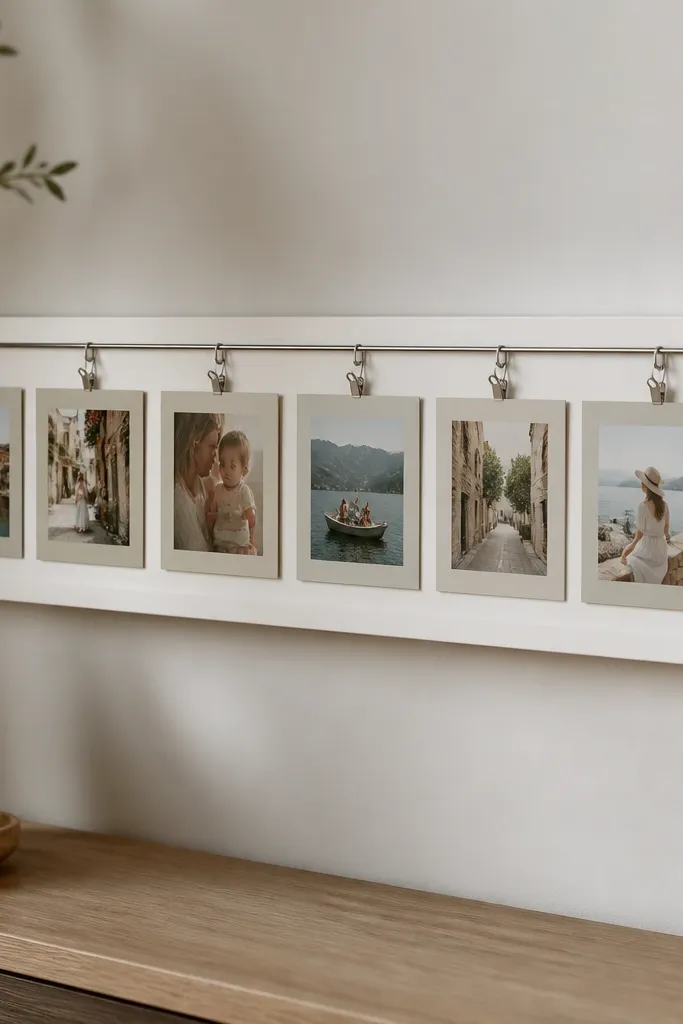
This is how you get a holiday “memory wall” without printing a ton of new frames. Drawer fronts already have clean lines, and the hardware gives you a built-in sense of structure. Add a sliding track with clips so you can swap photos or swap in seasonal cards. It looks personal without turning into a cluttered gallery.
Quick tipPrint photos with a matte finish and add thin black tape borders so the edges look clean under warm light.
Use a Brimnes drawer front or similar flat front. Install a small rail (like picture hanging track) on the back edge so clips slide smoothly. Attach photos with mini clothespins or binder clips designed for lightweight paper. Keep photos the same width and use one background color for mats so the banner looks cohesive.
One warningAvoid mixing glossy and matte prints — the reflections make it look uneven.
17. Ikea Curtain Panel to Oversized Door Bow with Hidden Tie
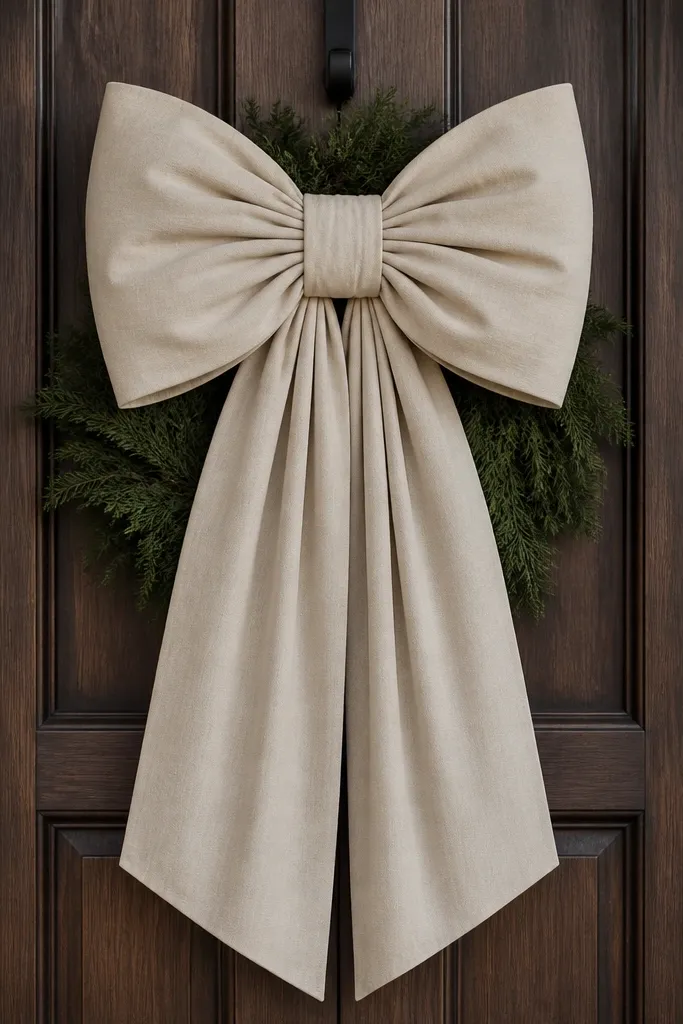
Big bows look expensive when the fabric has weight. Ikea curtain panels give you that drape right away, and you can cut one piece to create both loops and tails. The hidden tie keeps the bow centered so it doesn’t slide down the door hook. This works for winter, spring, and even graduation with a simple color change.
Cut one long strip for the center and two wider strips for the loops. Fold each loop and pinch the center, then tie with a small fabric strap underneath. Use a wreath hook or Command hook at the top and hang the bow by the center strap. Trim the tails so they land around 20-30 cm below the loop line.
Steam the fabric before cutting folds. Crisp creases make the bow look designed, not wrinkled.
Avoid lightweight sheers — they collapse and the bow looks like tissue.
18. Ikea Kallax Shelf Winter Layering with Felt Skirt Panels
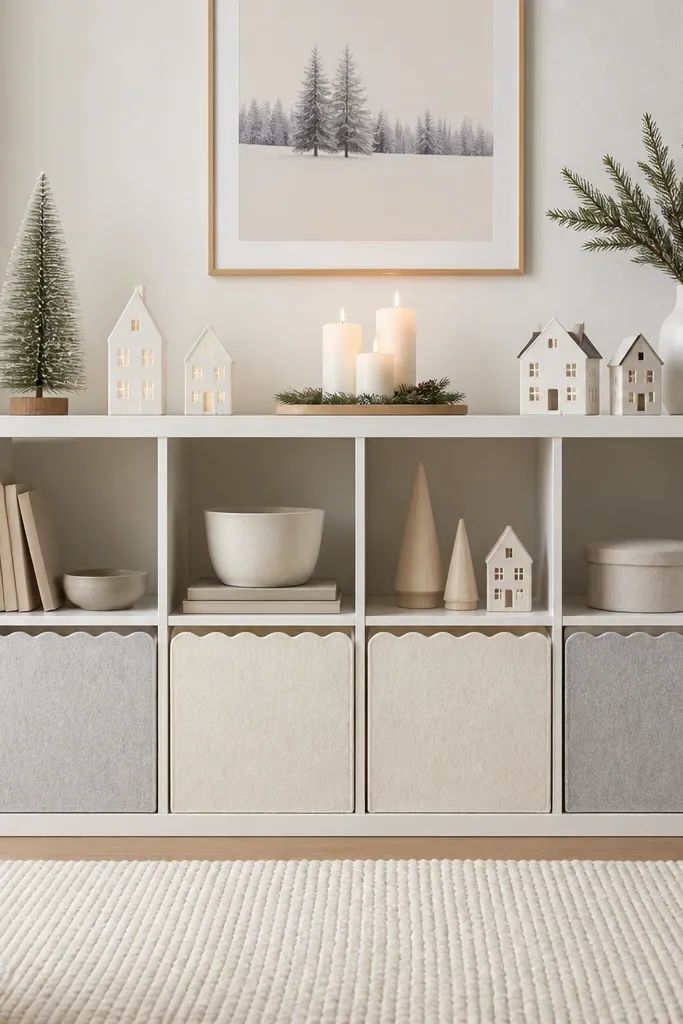
Kallax looks great but can look “empty” during off-season. Felt skirt panels create a soft base so the bottom row disappears into a clean background. The result feels like a styled shelf because everything sits on one neutral layer. Felt also hides small clutter like extra batteries or wrapping tissue.
Quick tipUse one felt color per season and store the rest flat. Switching the base is faster than replacing everything.
Cut felt to fit each Kallax cube opening. Use stiffened felt or layer two thinner pieces for structure. Attach with Velcro dots on the back walls so you can remove it for cleaning. Keep the top objects larger — one candle cluster per row — and leave at least one empty cube for breathing room.
One warningAvoid mismatched felt thickness across cubes — the seams show and the shelf looks uneven.
19. Ikea Lack Floating Shelf Turned into a Gingerbread Display Platform
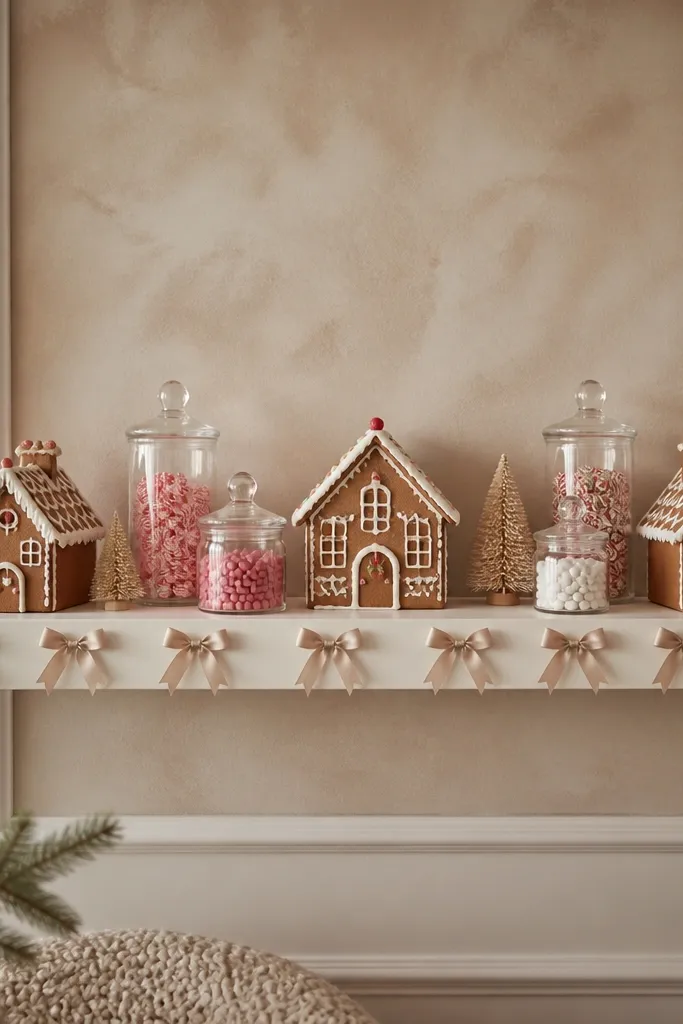
A floating shelf is perfect for seasonal because it puts the display at eye level where people actually look. I make it feel like a gingerbread scene by painting a matte backdrop and adding a small ribbon “front trim.” Mini houses and candy jars give height and sparkle without needing a big tree. The shelf stays light and easy to refresh every year.
Quick tipUse a small craft brush to paint a thin brown border at the backdrop edge — it makes the display look framed.
Attach a Lack shelf to studs if possible. Cut a piece of matte foam board to fit the back and paint it a warm cream, then wash the edges with light brown diluted paint. Tie ribbon around small hooks along the shelf front so it drapes straight. Place houses in a staggered line and add candy jars toward the ends.
One warningAvoid glossy paint on the backdrop — it reflects room lights and makes the scene look flat.
20. Ikea Plywood Photo Clips Holiday Card Wall with Numbered Slots
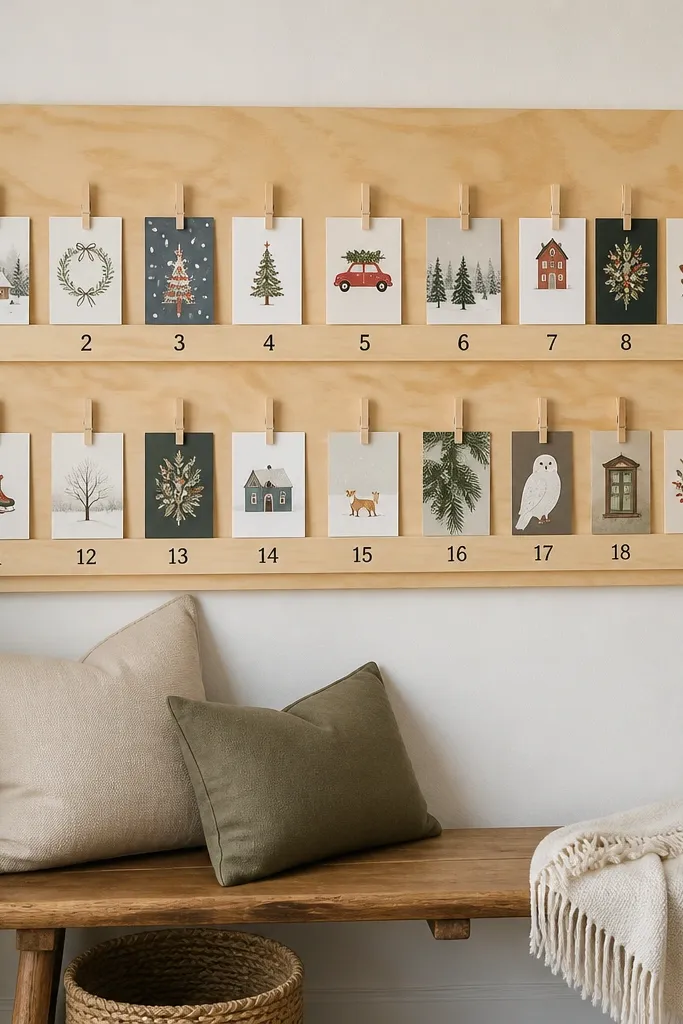
Holiday cards look better when they have a consistent system. A plywood panel with numbered slots keeps your cards from turning into a pile and makes it feel like an activity, not clutter. Clothespins add a casual texture that still looks organized. Numbering makes it easy to rotate cards out without losing the order.
Quick tipUse a matte clear coat over the numbers so the ink doesn’t smear from handling.
Cut a plywood panel to your preferred width and sand edges smooth. Add thin strips of wood spaced 6-8 cm apart to create card slots. Stain or clear-coat the panel so it matches natural wood decor. Add clothespins and small number stickers to each slot so you can clip cards neatly.
One warningAvoid uneven spacing — cards end up looking random and the panel loses its clean look.