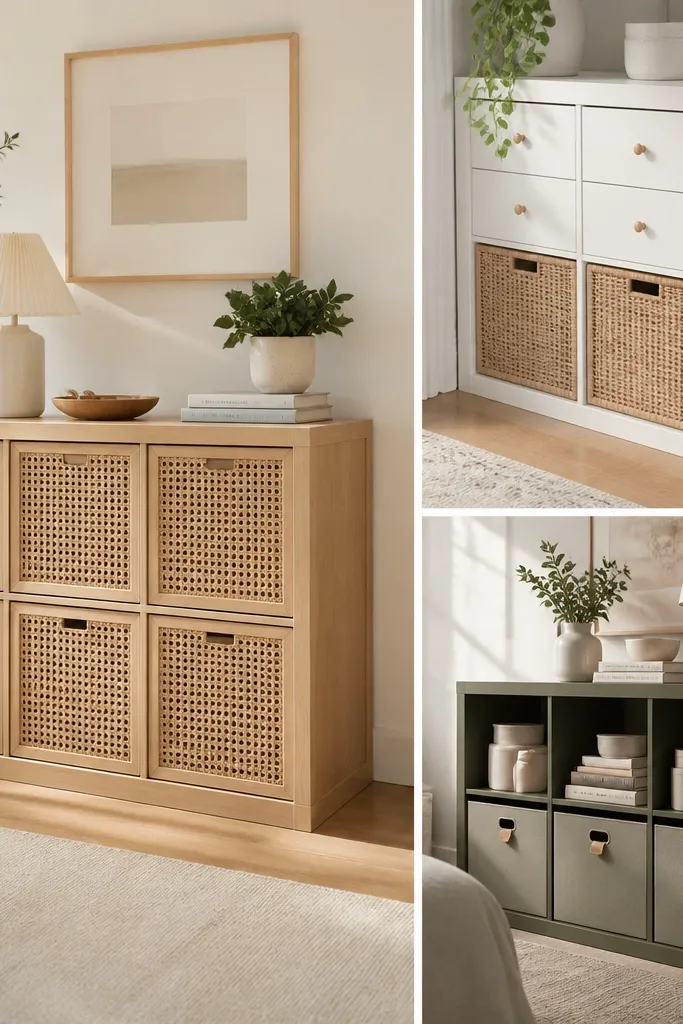
1. Felt-lined ornament cubby with pull tab
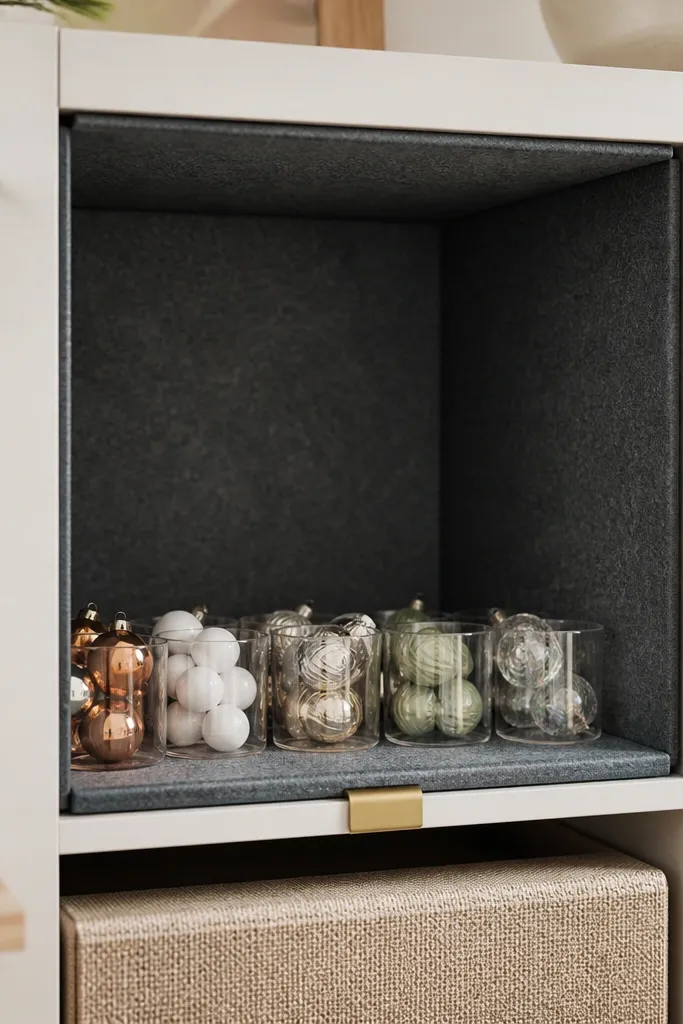
This hack makes a “grab-ready” cubby for ornaments that are easy to drop when you’re rushing. The felt lining grips the cups so they don’t slide, and it also muffles the sound when you set pieces down. I use small clear cups so you can see what’s inside without digging. The pull tab gives you a handle even if the cubby is behind a wreath or garland.
Cut felt to the inside back and sides first, then trim a front panel that wraps over the cubby lip by about 1 cm. Use hot glue or contact adhesive on the felt to keep it flat. Place 2-3 clear cups (same height) so they sit tight; add a thin EVA foam pad under them if the cups rattle.
Write the ornament type on a tiny label on the pull tab, like “Tree balls” or “Snowflakes,” so you don’t open the wrong cup mid-season.
Avoid lining only the back — the sides need coverage or cups still drift forward.
2. Clear front ribbon drawers made from shallow boxes
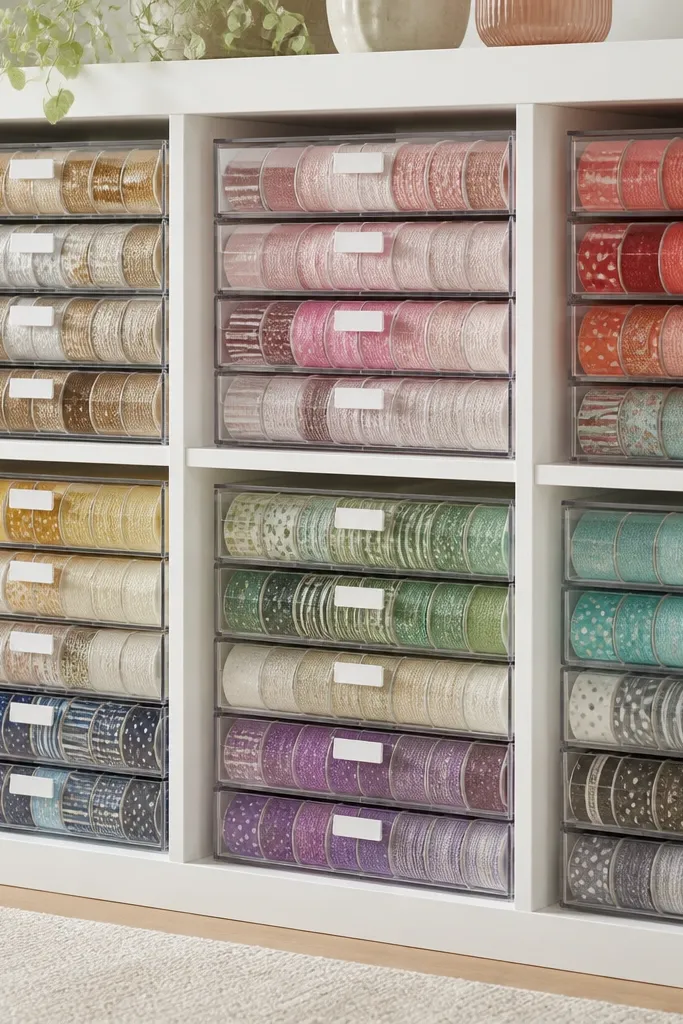
Ribbon turns into a tangled mess unless it has a controlled home. Shallow boxes with clear fronts let you see ribbon colors instantly, and the drawer format stops spools from tipping over. I like using boxes with straight sides because they slide smoothly and look uniform across multiple cubbies. The clear front also keeps the shelf bright rather than heavy with fabric.
Use shallow plastic or acrylic organizer boxes that fit the cubby depth, then add a strip of thin foam tape to the sides so the drawer glides without scraping. Label each drawer with a color name and width, like “Red 10mm.” Keep spools vertical by using a small insert strip so they don’t roll.
Quick tipStore ribbon by width, not by theme. A 6mm ribbon and a 25mm ribbon fight for space if you mix them.
One warningSkip oversized drawers — if there’s extra play, spools migrate to the front and snag when you pull.
3. 2-minute winter blanket fold with a tension-rod cover rail
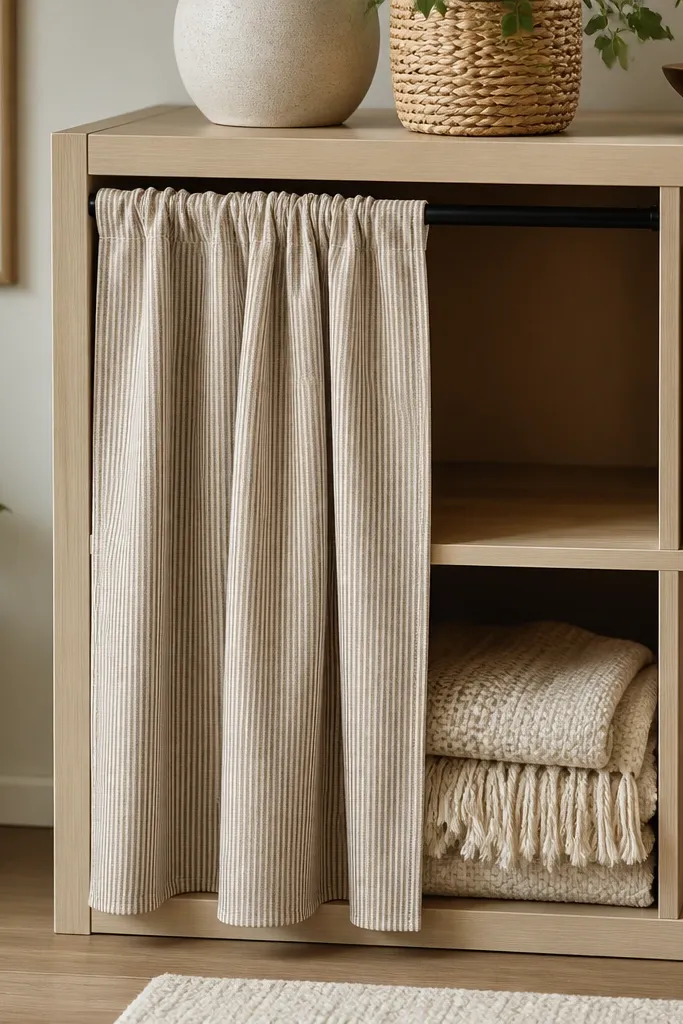
Blankets look messy when they’re stuffed loosely. This setup keeps them folded and hides the fold lines behind a fabric panel, so the shelf stays calm even when you’re not using it. A tension rod works without drilling and lets you swap the fabric for different seasons. I pair this with a cotton panel in a winter neutral so it blends with the room.
Fold the blanket into a rectangle that matches the cubby height and width, then add a strip of non-slip shelf liner under it. Mount a tension rod across the cubby opening using the rod length that fits snugly. Hang a fabric panel with a simple pocket at the top so it slides on and off.
Use a fabric that doesn’t shed — I ruined one panel by using a fuzzy knit that left lint on the blanket.
Don’t use a slippery curtain fabric — it slides open and defeats the “hidden storage” look.
4. Bamboo drawer rails with wire baskets for wrapping paper
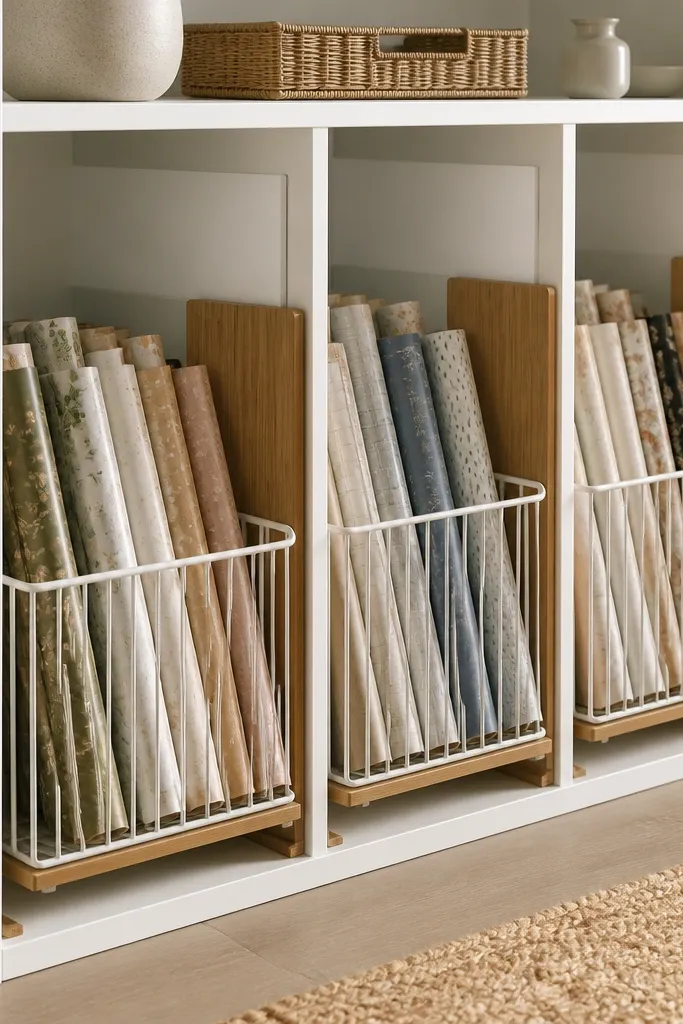
Wrapping paper rolls are heavy and they crush corners if they lie flat. Wire baskets on rails hold rolls upright and keep them from collapsing, and bamboo-toned dividers make the row look intentional. The wire also lets you slide rolls out without fighting a lid. I like this for families because you can hand a kid the exact roll without digging.
Use long wire baskets sized for the cubby width, then attach two small wooden rails (thin bamboo or plywood strips) to the inside edges using screws or strong brackets. Add a divider strip every 2-3 rolls so they don’t lean. Keep rolls capped with elastic bands so they don’t unroll when you pull one.
Label the end of each roll with a strip of masking tape where you can see it through the wire.
Avoid storing rolls loose — they roll together and you end up tearing paper hunting for the right design.
5. Painted-to-match plywood cubby dividers for themed decor
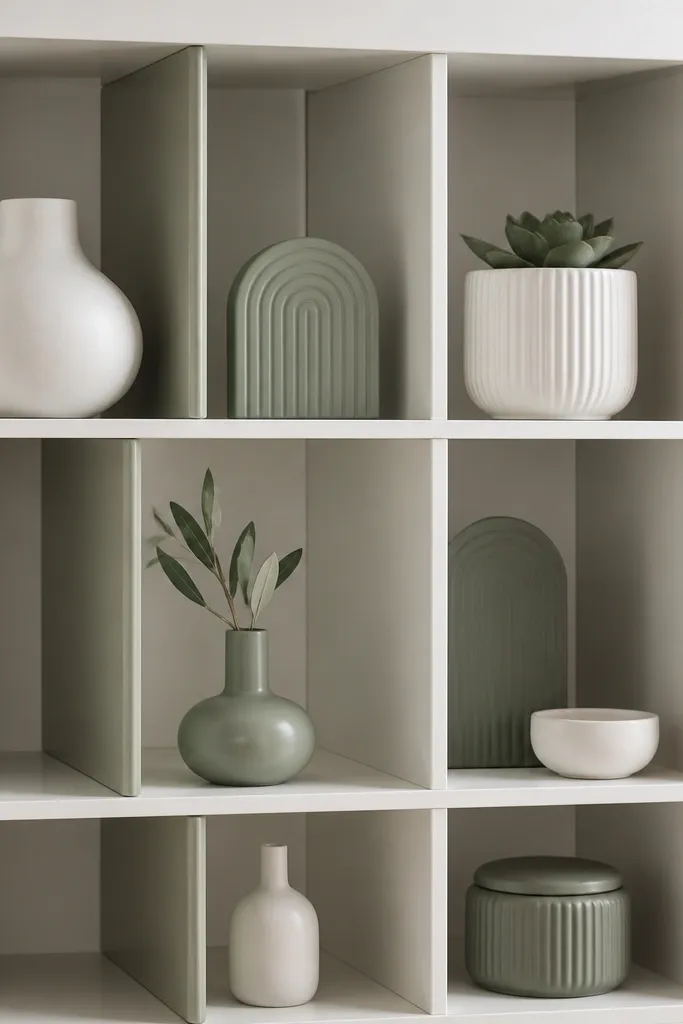
When you store decor in bags, everything looks the same later. Dividers turn one cubby into a mini display grid so you can keep sets together — like sage winter, red ornaments, or neutral farmhouse. Paint the dividers to match your room so the structure disappears behind the decor. It also stops small items from migrating into the spaces you didn’t plan for.
Cut plywood strips to cubby depth, then cut dividers to create compartments around 8-10 cm wide. Paint two coats, then lightly sand between coats so the finish isn’t rough. Secure dividers with small L-brackets at the back so they don’t tip when you lift items out.
Quick tipUse a flat interior paint sheen (eggshell) so it doesn’t glare under daylight.
One warningDon’t skip sanding — rough paint chips when you slide baskets in and out.
6. Magnetic spice-style label strips for holiday bins
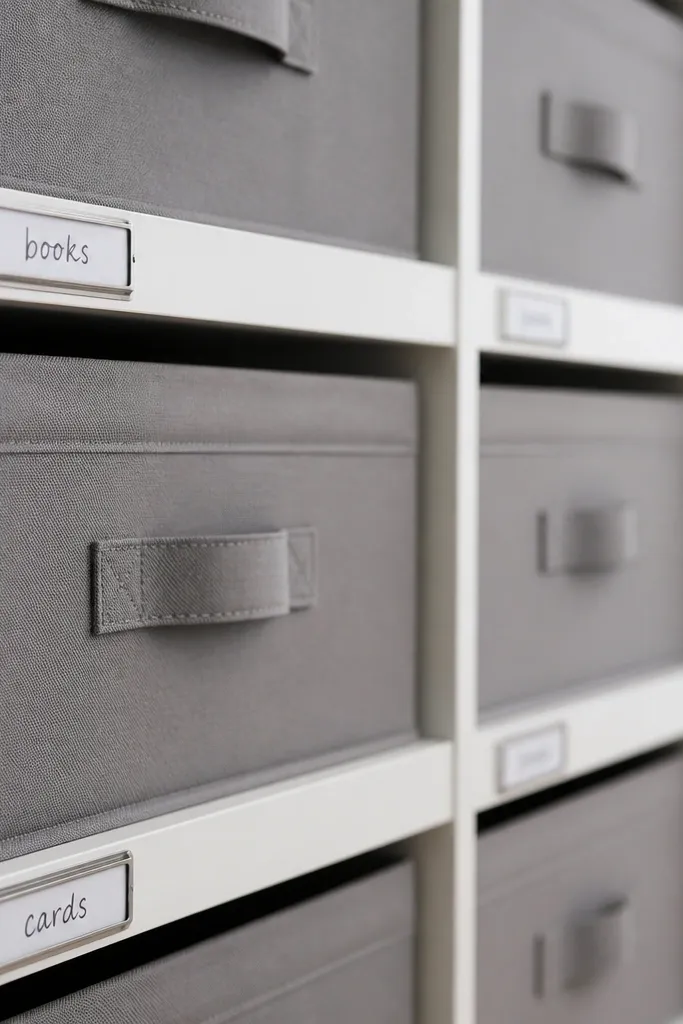
Paper labels fade and get peeled off when you handle bins every weekend. Magnetic label strips let you swap labels fast when you change themes. I used a spice-label style format so the text stays straight even when bins shift. The shelf looks organized because every cubby uses the same label height.
Stick thin metal strips or use small magnetic label cards on the inside face of each cubby. Add a clear tape cover over handwritten labels if you store near kitchens or garages. Keep label size consistent — I use about 3 cm tall text blocks so they look tidy across the whole unit.
Write the month on the label too, like “Dec — ornaments” so you know what to pull first next season.
Avoid thick label holders — they catch on bin edges and make drawers stop moving.
7. Woven basket fronts with hidden handles
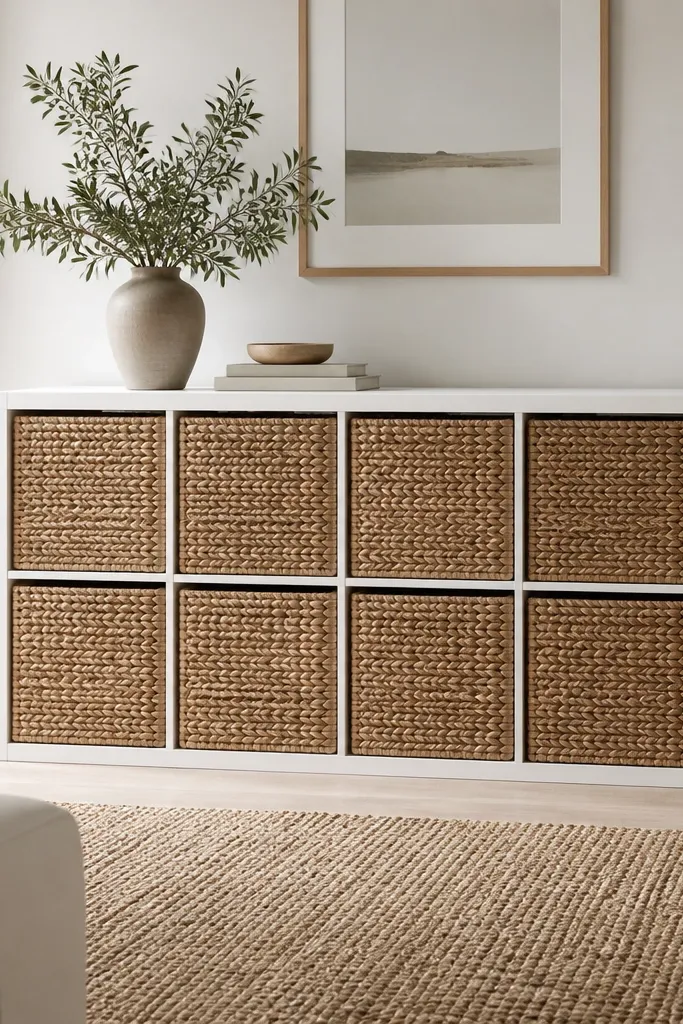
This is the “soft storage” look that still works for real life. Woven baskets hide clutter, but handles are what make them usable. I stitch a small fabric handle on the inside so you can grab the basket without the handle ruining the front texture. The baskets also breathe, which helps when you store items that might have slight humidity from basements.
Choose baskets that fit the cubby opening with about 5 mm clearance on each side. Add felt pads to the bottom corners so they don’t scrape and wobble. Sew a handle loop with heavy-duty thread and attach it to the top inner rim of the basket.
Quick tipMatch basket color to your room trim, not to the decor theme. The storage should look right even when the bins are empty.
One warningAvoid baskets that are too tall — if the rim hits the shelf frame, they catch when you pull them.
8. Reversible holiday fabric covers for each cubby
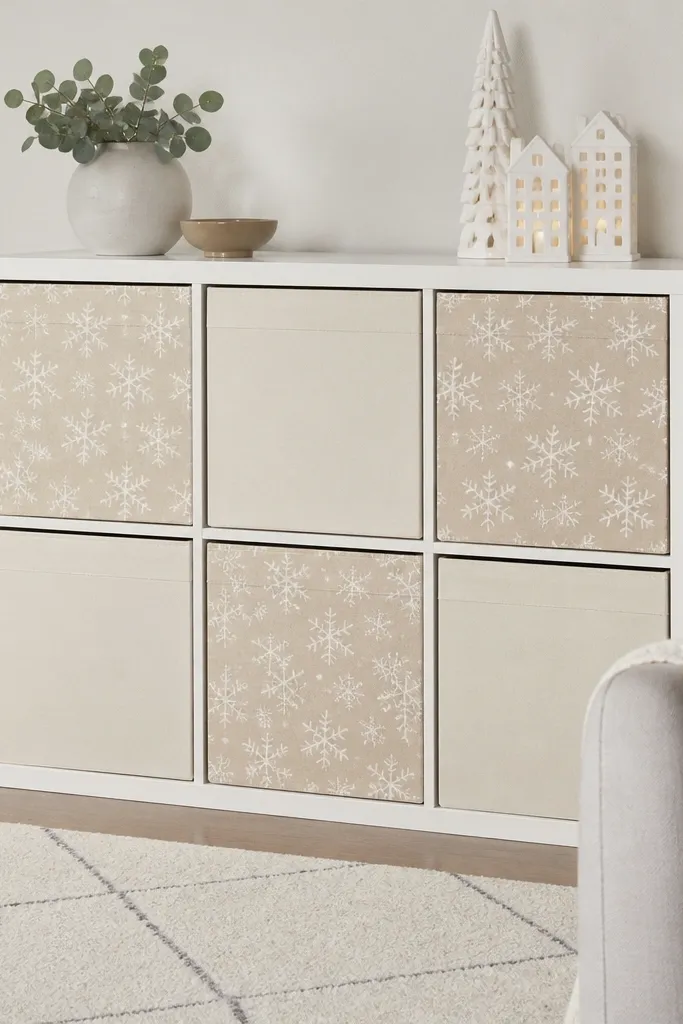
Seasonal storage looks better when the cubby face changes with the season. Reversible fabric covers let you keep one storage system and swap the look in minutes. Velcro tabs keep the cover aligned even when you open the cubby. I like this when you store holiday linens, table runners, and wrapping accessories.
Measure the cubby front panel area and sew a simple envelope cover that folds over the edges by 1 cm. Add Velcro hook strips to the inside lip and soft loop strips to the back of the fabric. Use cotton or canvas so it stays structured and doesn’t sag over time.
Add a tiny label on the inside back seam like “Front A / Front B” so you don’t guess which side is which after washing.
Skip thin polyester — it wrinkles fast and looks messy after a few swaps.
9. Drawer-style cubby inserts with soft-close foam stops
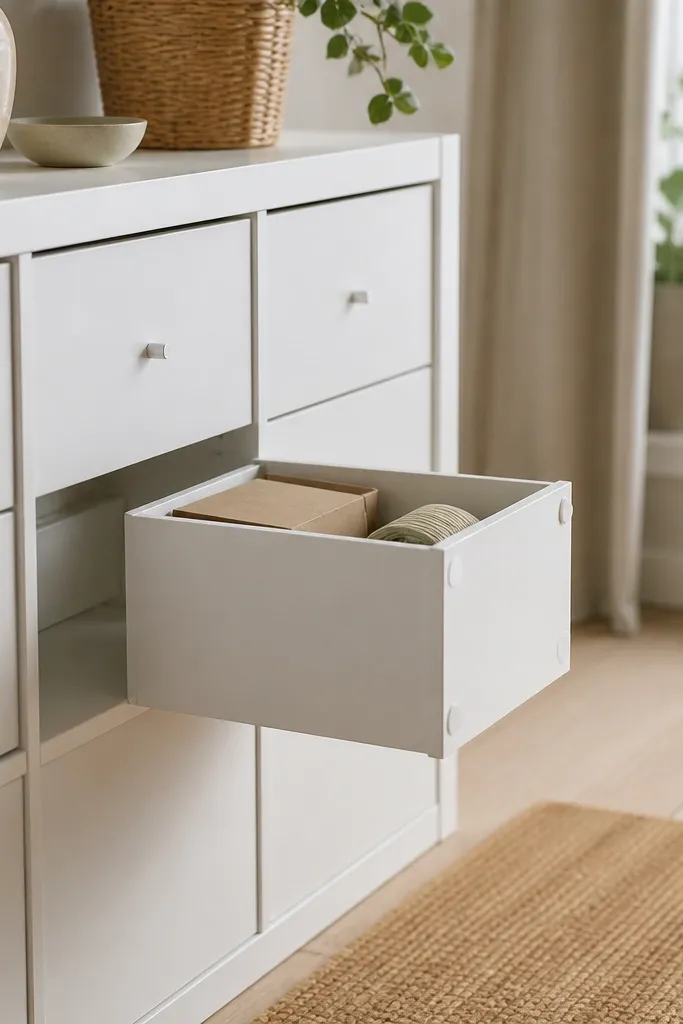
If your Kallax drawers slam, the whole shelf starts to feel chaotic. Foam stops create a soft landing so drawers slide in quietly and stop at the same spot every time. This matters for fragile holiday items like glass bulbs or ceramic houses. The drawer format also keeps small pieces from falling into the back.
Use shallow drawer boxes sized for each cubby and attach stick-on foam bumpers to the inner front edges. If you want more glide, add thin felt tape on the box sides where they contact the cubby frame. Keep the drawer face consistent across all cubbies so the motion looks uniform.
Quick tipTest the stop height with one drawer before doing the rest — tiny differences make the drawer sit crooked.
One warningAvoid bare plastic-to-wood contact — it scratches and makes the drawer feel rough.
10. Pegboard-backed cubbies for wreath hooks and cords
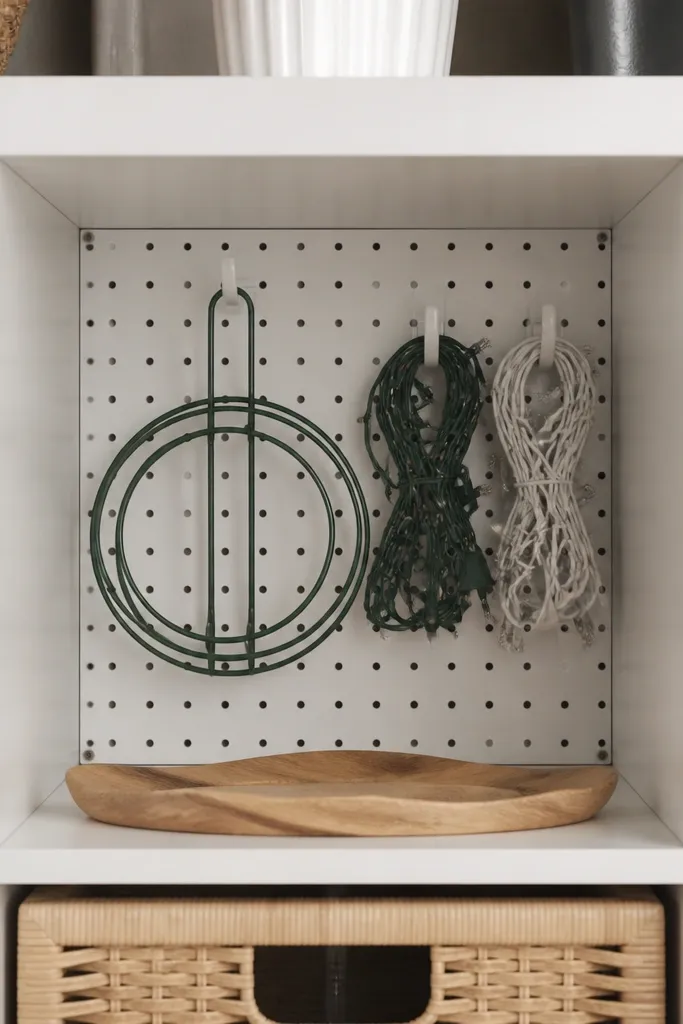
Wreath hooks and light cords are the kind of “small but annoying” items that get loose in holiday bins. A pegboard back gives you a place for hooks and a place for coiled cords, so nothing turns into a tangled ball. The pegboard also makes it easy to rearrange as your collection grows. When you open the cubby, you see the hooks instantly.
Cut pegboard to the cubby back size, then screw it into the back frame using short screws. Add hooks sized for wreath hangers and small S-hooks for cord ties. Coil cords with a paper band so the shape stays consistent and slides into a hook.
Use color-coded zip ties for cord length — one color per string size.
Don’t use hooks that are too large — they chew up ribbon when you pull it out.
11. Seasonal table runner storage with vertical file folders
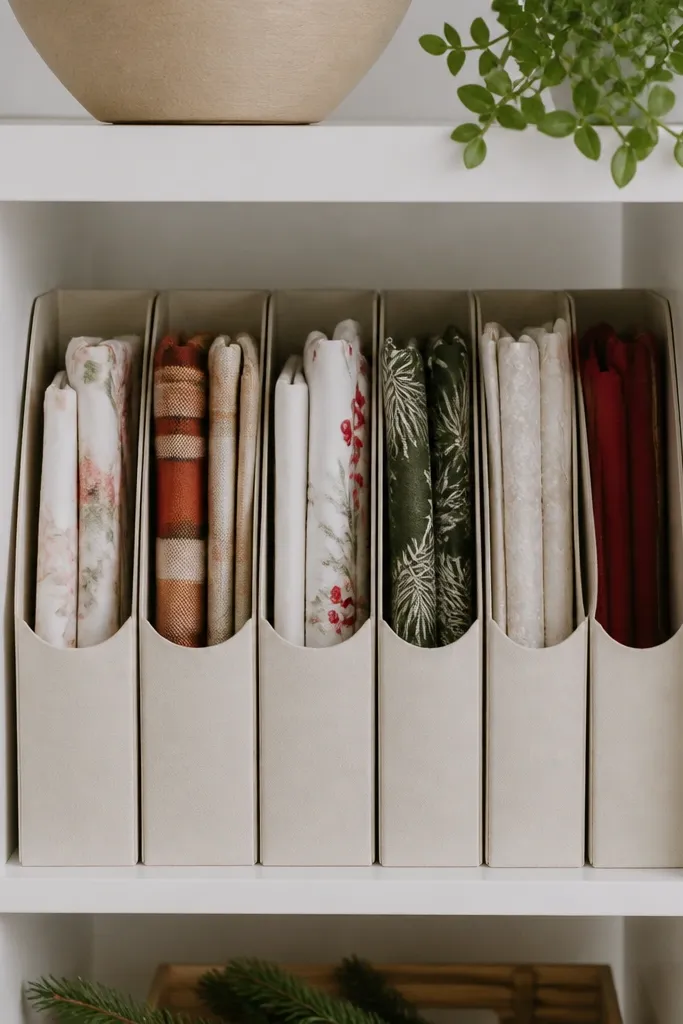
Table runners fold into awkward stacks and end up wrinkled if they’re stuffed. Vertical “file” storage keeps them flat and easy to pull out without disturbing other pieces. I use stiff cardstock or fabric folders that stand up like a book shelf, which keeps the runner edges from getting bent. This looks clean because the folders form straight lines.
Measure the cubby height and cut folders so they fit with 1-2 cm clearance at the top. Use heavyweight cardstock backed with cotton fabric so the folder stays upright. Label each folder on the front with a simple holiday tag.
Fold runners the same way every time — I use a tri-fold that matches the folder width so they slide in without forcing.
Avoid flimsy folders — they collapse and runners start to crease from the bottom.
12. Color-blocked bin system using IKEA paper wrap shelves
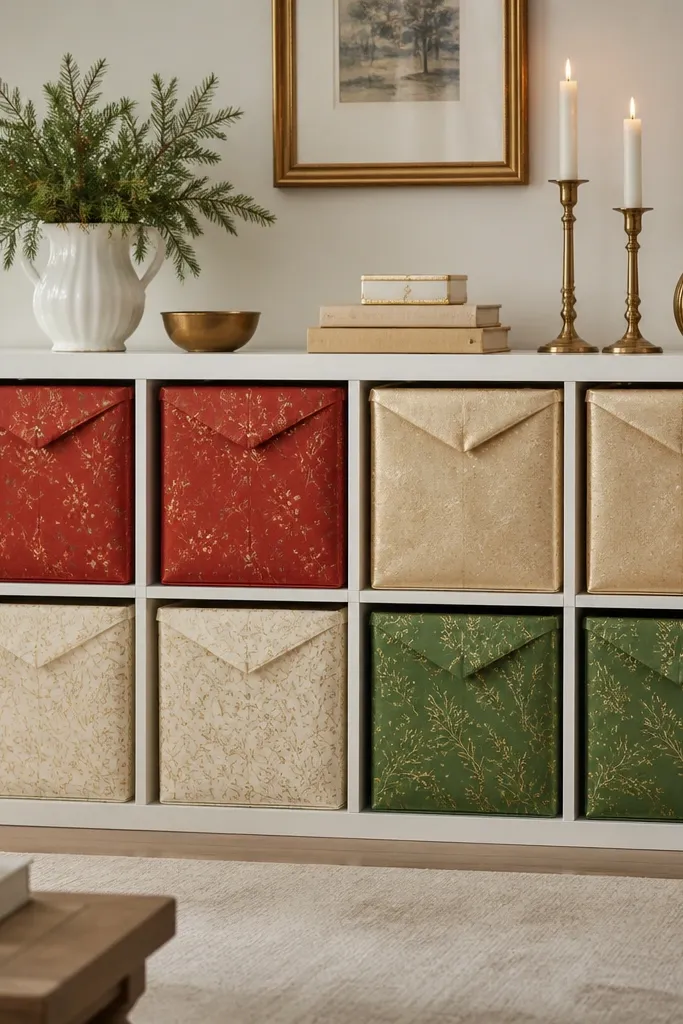
This is a simple aesthetic trick that makes storage look intentional. When bins share a color family, the shelf reads as a design piece even if contents change. I wrap the bin exteriors with paper or patterned craft wrap so every cubby face looks coordinated. It also hides labels and keeps the shelf from looking “office-like.”
Choose bins that are the same shape across your cubbies. Wrap with thick craft paper and seal edges with clear tape or decoupage medium. Leave the lid or top edge uncovered so you can lift easily. Group bins by theme, not by bin size.
Pick one accent color and repeat it across at least 4 cubbies so the shelf feels planned.
Skip thin wrapping paper — it wrinkles and shows seams when you slide bins in and out.
13. Stackable box tower using drawer organizers inside cubby
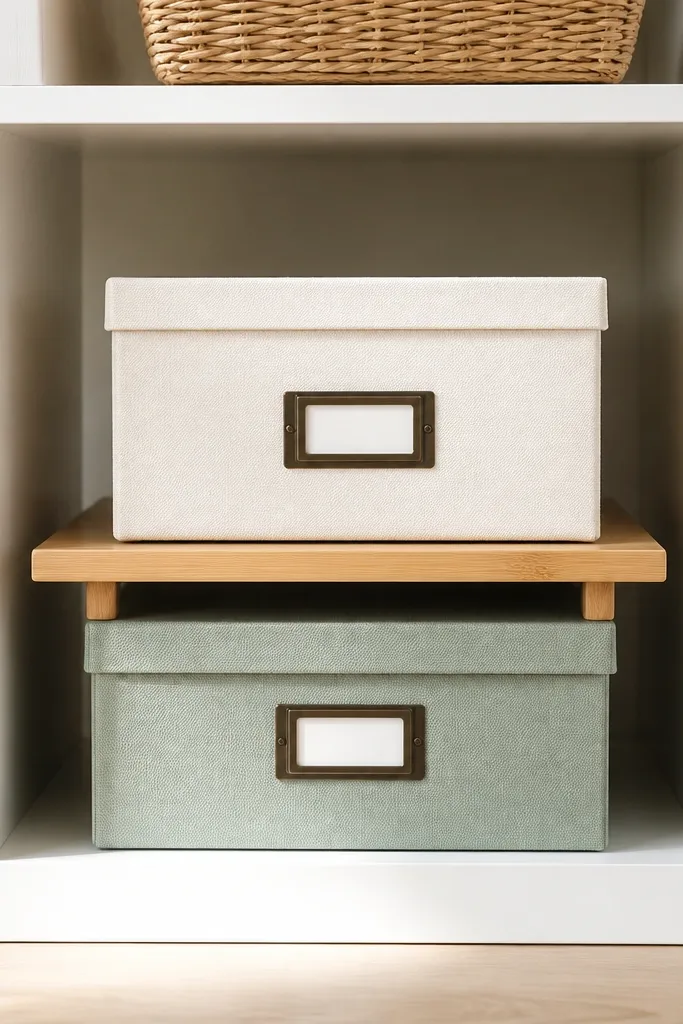
Stacking works when you build a stable “tower” so nothing tips. I use a platform layer with small drawer organizers on top, so you can store tags, glue sticks, and small holiday craft pieces without digging. The outward-facing labels make it fast to grab supplies for last-minute crafts. This is ideal for kids' ornaments and craft nights.
Place a thin plywood or plastic platform in the cubby, then stack two shallow organizers with exact alignment. Use non-slip shelf liner between layers. Keep the top layer light — heavy items go on the bottom cubby so the stack stays steady.
Use binder clips on the outside of small bags so they don’t spill when you lift the organizer.
Avoid free-stacking without a platform — the top box shifts and you end up dumping contents.
14. Curtain-rod hanging system for stocking pairs
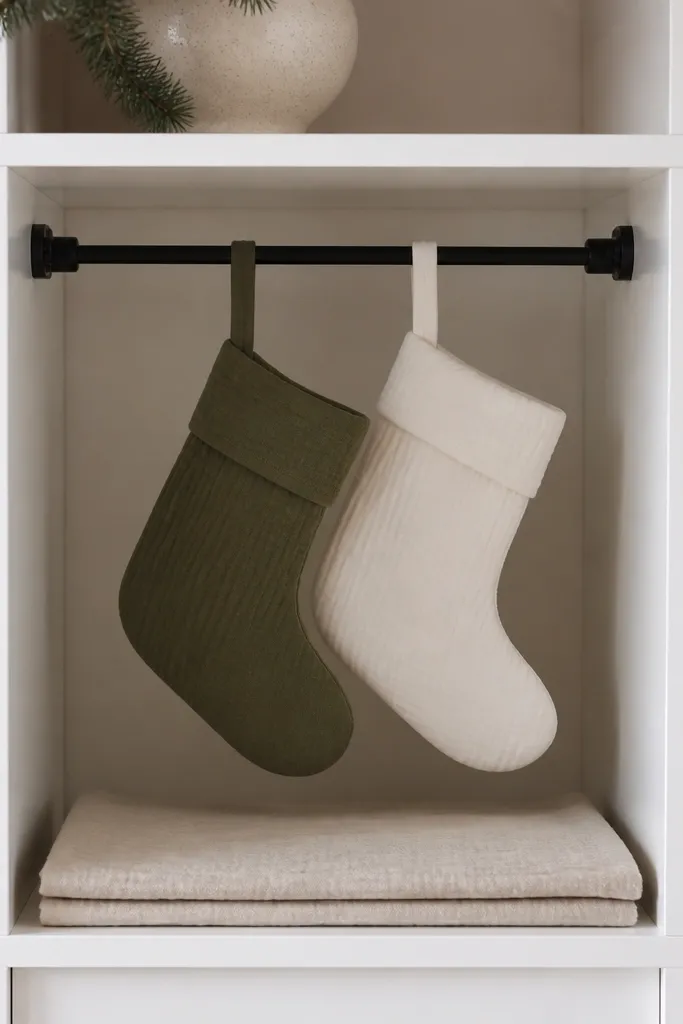
Stockings look better when they hang flat, not stuffed into a bin. A small rod inside the cubby keeps them paired and easy to grab when you decorate. I use a fabric liner at the bottom to catch any loose glitter or tiny ornaments from inside the stocking. This hack also prevents snagging between stocking fabrics.
Install a mini rod or tension rod inside the cubby opening, then hang stockings by their loop. Add a slim fabric liner panel on the bottom with a few hidden stitches or Velcro so it stays put. Keep stockings facing forward so you see the pair alignment.
Quick tipTie a thin ribbon around each stocking cuff so you can grab the pair quickly without mixing them up.
One warningDon’t hang heavy stockings without a snug rod — loose rods swing and scrape the Kallax frame.
15. Under-cubby cable channel for string lights

String lights become a tangled mess when they’re stored loose in a bag. Routing them through a cable channel keeps the loops orderly and makes untangling take seconds. The channel also prevents the lights from snagging on drawer edges. I store the battery pack and spare bulbs in a small zip pouch clipped to the front label area.
Attach a shallow plastic cable channel or a low-profile organizer track under the cubby opening. Coil lights into gentle loops and route each loop into the channel. Use a small zip pouch for accessories and attach it with Velcro so it doesn’t fall out when you tip the bag.
Wrap the coiled lights with painter’s tape so the loops keep their shape for next year.
Skip stuffing lights in a tight bag — you’ll fight tangles every time.
16. Chalkboard label strip on birch plywood for easy swaps
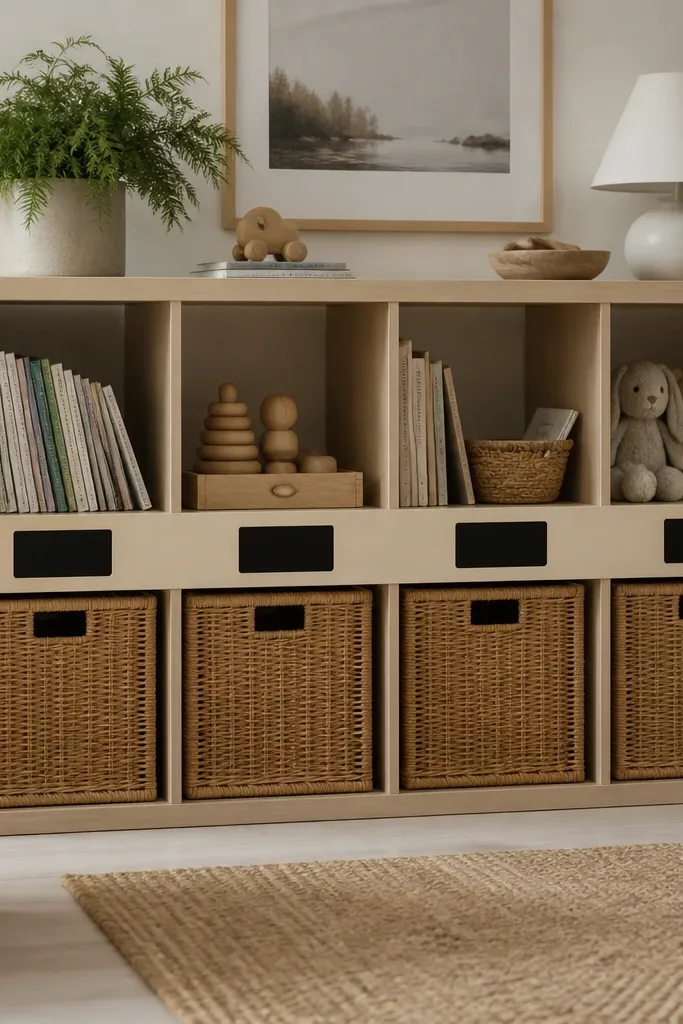
Paper labels get messy fast when you erase and rewrite. A chalkboard strip on birch plywood lets you update labels as your holiday inventory changes. It also looks clean and warm, especially if your room has wood tones. I use chalk for categories like “December” and “Ornaments — red” because it stays readable and easy to change.
Cut a birch plywood strip to fit across the front edge of a row. Paint small rectangles with chalkboard paint and let it cure fully. Use a short ledge or small screws to mount the strip without blocking cubby access. Label each rectangle with neat, consistent handwriting.
Use a white paint marker for the category outline, then chalk the specific item names inside.
Avoid cheap chalkboard paint that rubs off — it smears when you handle the shelf.
17. Holiday-specific spice jar organizer inside Kallax
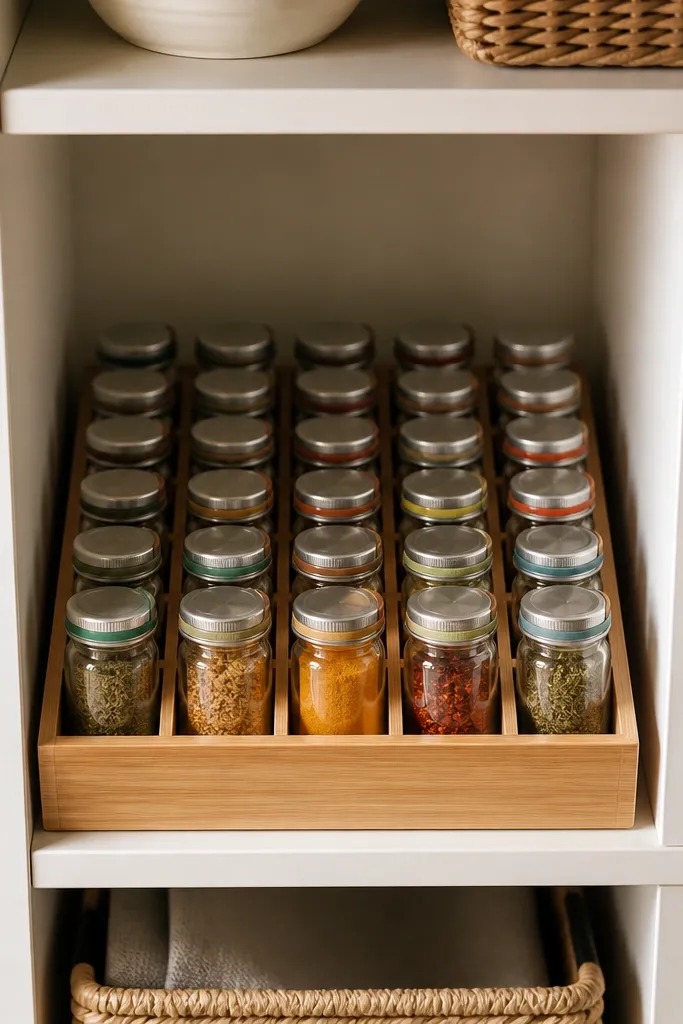
Tiny holiday items disappear in bigger bins — glitter, tiny bells, star picks, glue, and even candy sprinkles. Spice jars give you portioned storage and a clear view of what’s left. The metallic lids look good even when the shelf is uncovered. This hack is great for DIY ornaments and for keeping craft supplies from mixing into one sticky pile.
Use a grid tray made for small jars or build one from thin wood strips so jar bottoms sit flat. Choose jars that match in height so the lids line up visually. Add color tape rings on the jar lids for quick sorting by craft type.
Quick tipWrite the jar contents on masking tape wrapped around the lid rim so it stays readable without opening.
One warningSkip mixed jar heights — the tray looks uneven and jars tip when you pull one.
18. Lidded fabric bin with matching front tab for wrapping accessories
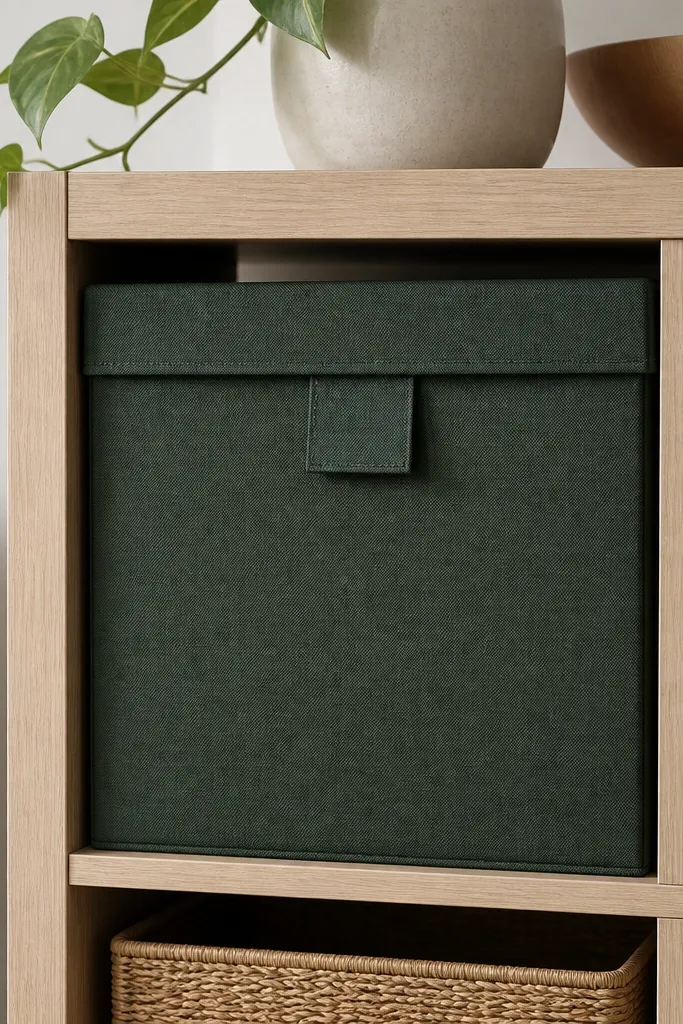
Wrapping accessories are the worst because they’re small and they spread. A lidded fabric bin keeps tape, scissors, gift tags, and ribbon ends in one place, and the front tab makes it easy to pull without wrestling the lid. I like deep green or charcoal fabric because it hides dust and looks expensive next to the wood frame. The tab also lets you label without sticking paper directly onto fabric.
Choose a fabric storage bin with a lid that fits the cubby width and height. Stitch or hot-glue a fabric tab to the inside of the front rim so it pulls forward. Add a rigid label backing under the label so it doesn’t sag. Keep scissors in a small separate pouch inside the bin to avoid scratching.
Use a small carabiner clip inside the bin for scissors — they stop sliding to the bottom.
Avoid bins that are too soft — if the sides collapse, the lid doesn’t sit right and the front looks wrinkled.
19. Sliding tray for holiday cards and photo inserts
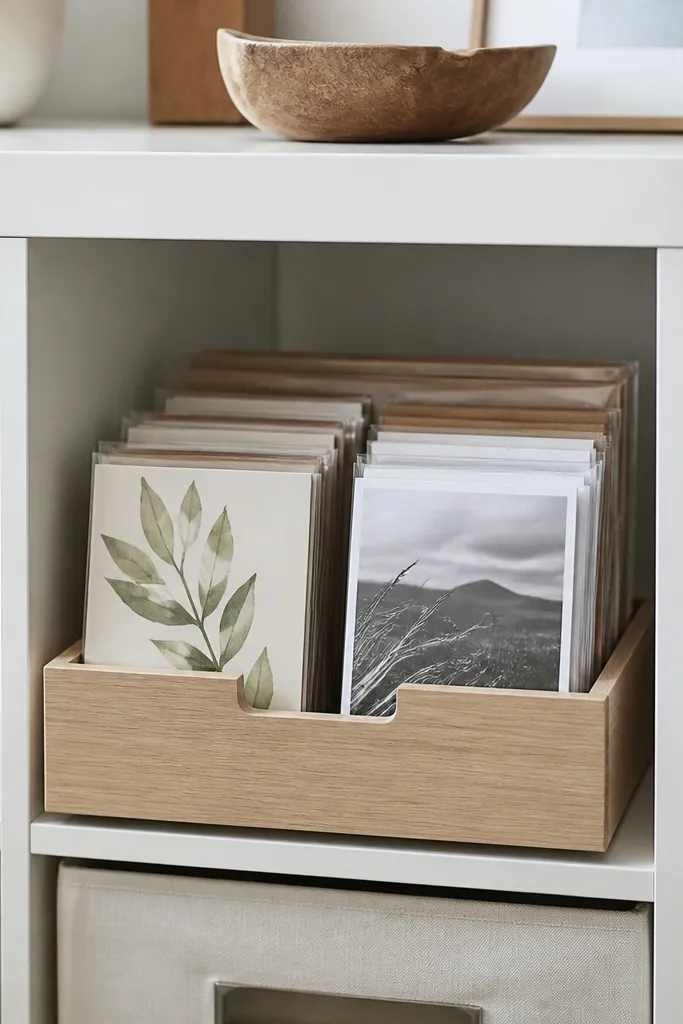
Greeting cards stack messy unless you keep them flat and separated. A sliding tray lets you pull the whole stack out, grab what you need, and slide it back without bending corners. I built mine from thin plywood with a simple pull handle so it feels like a drawer. The tray also keeps the bottom cubby looking tidy while cards disappear.
Cut a tray to the cubby width minus about 5 mm on each side for smooth movement. Add two small stops at the back so the tray doesn’t fall out when you pull. Use felt pads under the tray so it glides quietly. Store cards upright with a divider strip so they don’t fan.
Put a thin layer of wax paper between card layers if your cards have glitter — it prevents smudging.
Avoid trays that bind — if it sticks, you’ll stop using it and the cards go back to piles.
20. Back-to-front roll holder for tablecloths with elastic bands
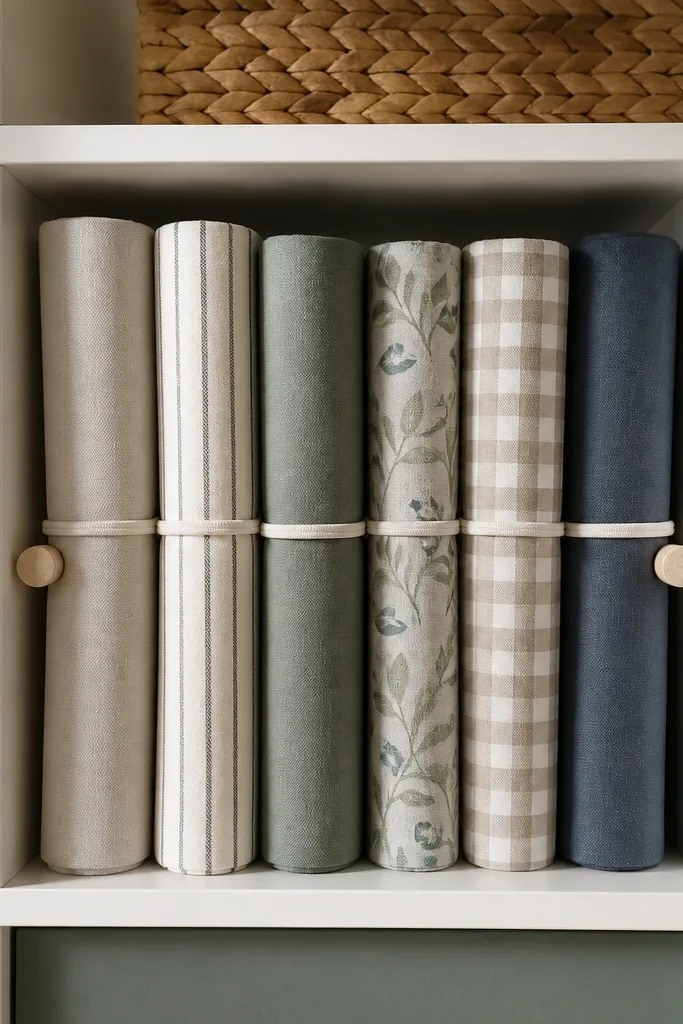
Rolls are the cleanest way to store tablecloths if you control the roll diameter. Side pegs plus elastic bands keep the rolls from unspooling and prevent creases from forming at random spots. This looks tidy because every roll stands at the same angle, and the shelf face stays uniform. It also keeps tablecloths from getting crushed under lighter bins.
Install two short wooden pegs or dowels on the side walls at the back of the cubby. Roll the tablecloths with a consistent wrap and secure each with an elastic band around the roll center. Add a small non-slip mat under the rolls so they don’t slide forward.
Use two elastic bands for long tablecloths — one at the center and one near the ends so the roll stays round.
Don’t store tablecloths flat under bins — they crease and you’ll regret it next holiday.