1. RÅSKOG Holiday Tray Cart with Vinyl Labels and Mini Garland
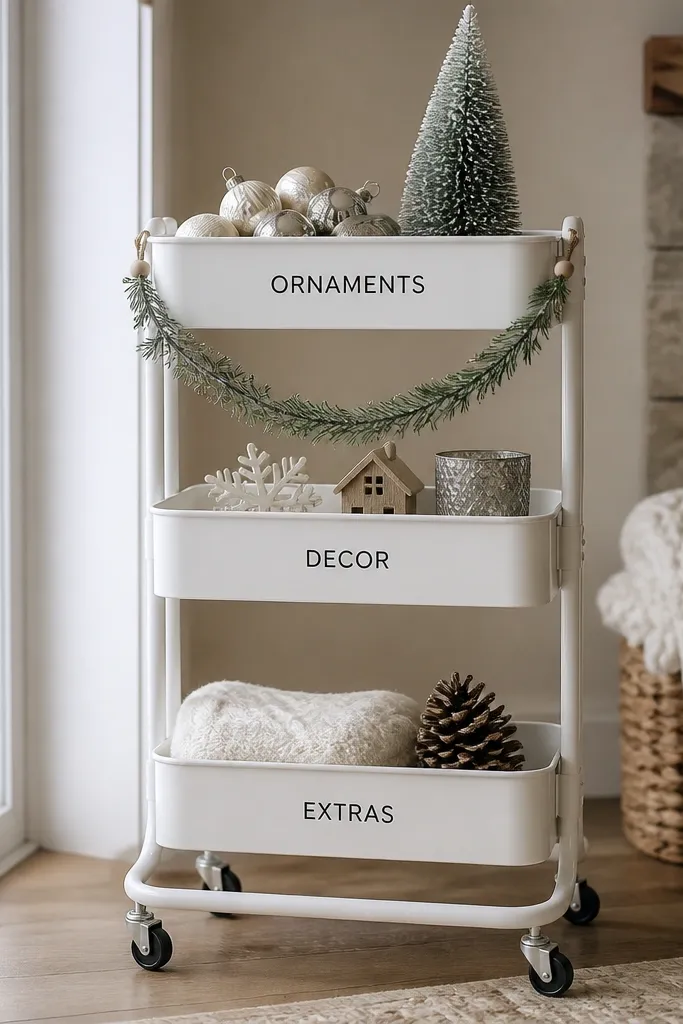
This turns a utilitarian cart into a moving holiday display. The cart’s metal grid makes it easy to hook garland and hang small items, while vinyl labels keep it looking crisp instead of cluttered. I use black vinyl on white labels so the cart reads like a curated set, not a craft pile. The garland loop sits low so it doesn’t block the top items.
Use a RÅSKOG cart with three shelves. Add two small hooks on the top shelf lip and drape a 60-90 cm garland in a shallow U shape. Cut vinyl labels to match the drawer face width, and apply with a squeegee so the edges stay sharp.
Label one drawer for “wrap supplies” and one for “holiday batteries” — it keeps the look tidy even when you’re using it.
Avoid fuzzy marker labels or uneven vinyl — that’s what makes IKEA DIY look homemade.
2. KALLAX Winter Display with Fabric-Wrapped Inserts and Picture Frame Backing
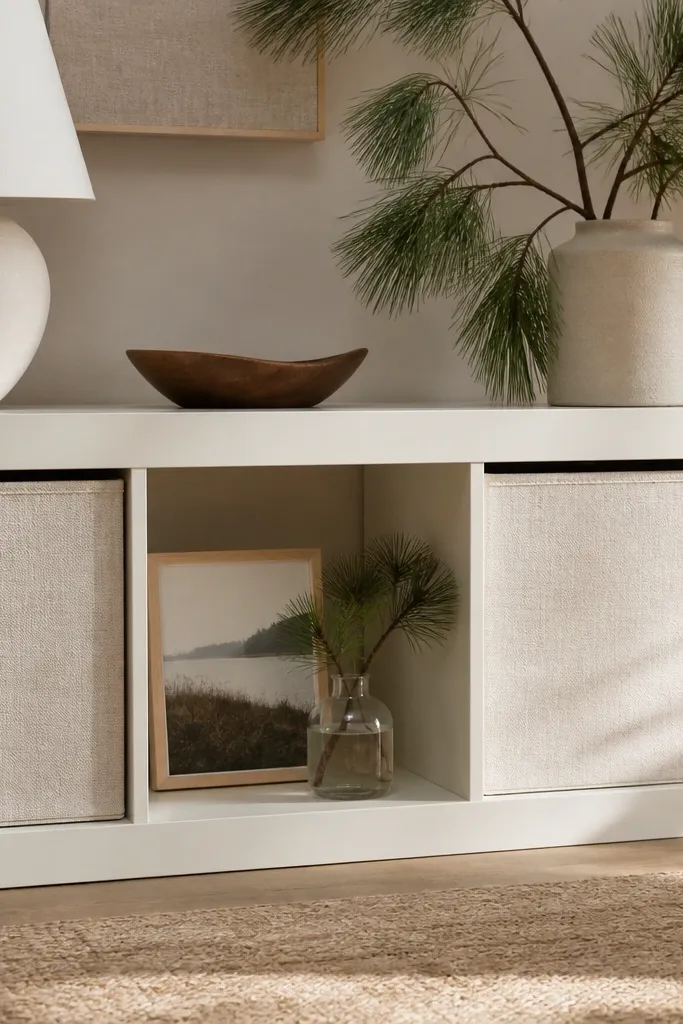
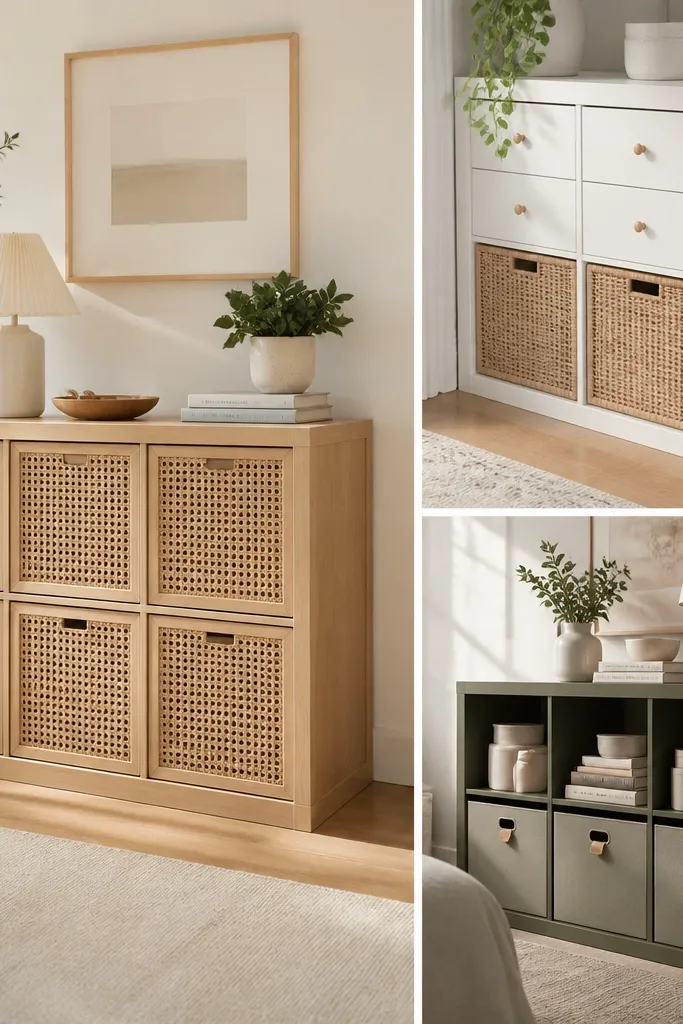
KALLAX looks best when the cubbies read like a set. Fabric-wrapped inserts hide the empty box vibe and give you a soft winter palette. A picture frame backing adds structure behind ornaments, so the decor looks placed rather than dropped in. Stick to two neutrals plus one holiday color — I like cream + charcoal + deep green.
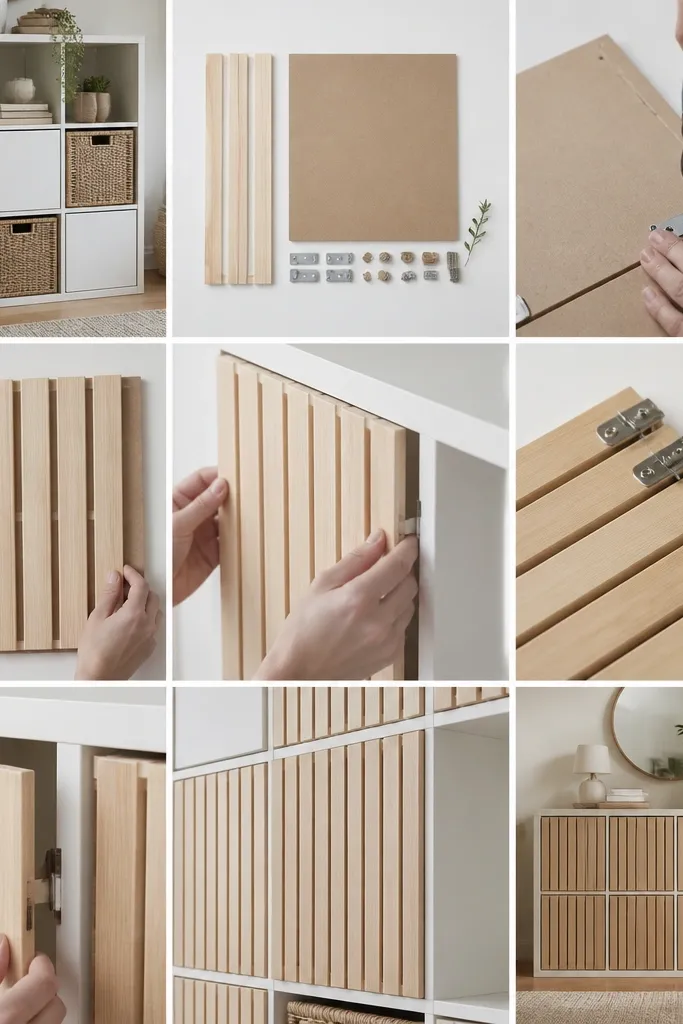
Cut fabric slightly larger than each cubby insert panel. Wrap tight around the edges and staple on the back side that won’t show. Place jars or ornaments on a small framed backing panel so the background stays consistent.
Use a spray adhesive made for fabric or paper so the fabric stays flat and doesn’t ripple when you set items in.
Don’t use thin fabric that shows the box seams — it makes the cubby look patchy.
3. FRÄNKA-Style Wooden Frame Wreath Holder with Command Hooks
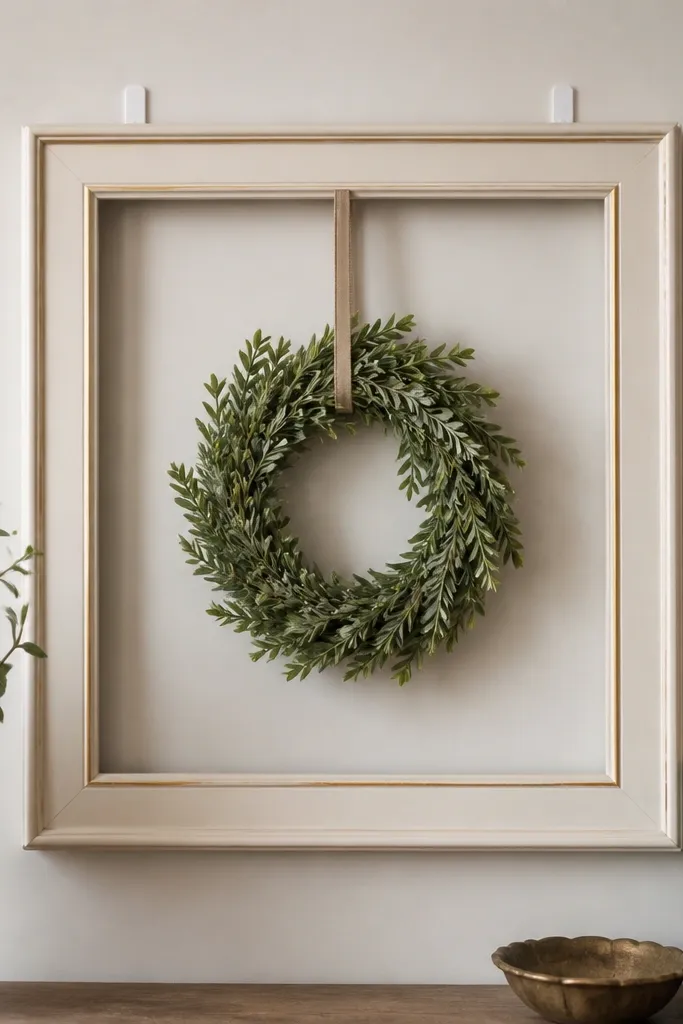
This is a wreath display that looks intentional even when the wreath is off-season. The frame creates a clean rectangle, and the wreath sits centered without crushing the wall with a heavy hook. A thin gold line on the frame makes it feel finished without going full glitter. I like cream paint because it holds light nicely in dim entryways.
Paint the frame cream and let it dry fully. Mark a center point and mount two Command hooks at the top so the wreath hangs level. Add a gold line using painter’s tape and a small craft brush for a straight edge.
Quick tipUse a level and tape the hook locations first — wreaths look crooked even when you think they’re “close enough.”
One warningSkip heavy nails on this one. If you mount wrong, it looks messy fast.
4. HEMNES-Drawer-Front Stocking Display from Two IKEA Frame Pieces
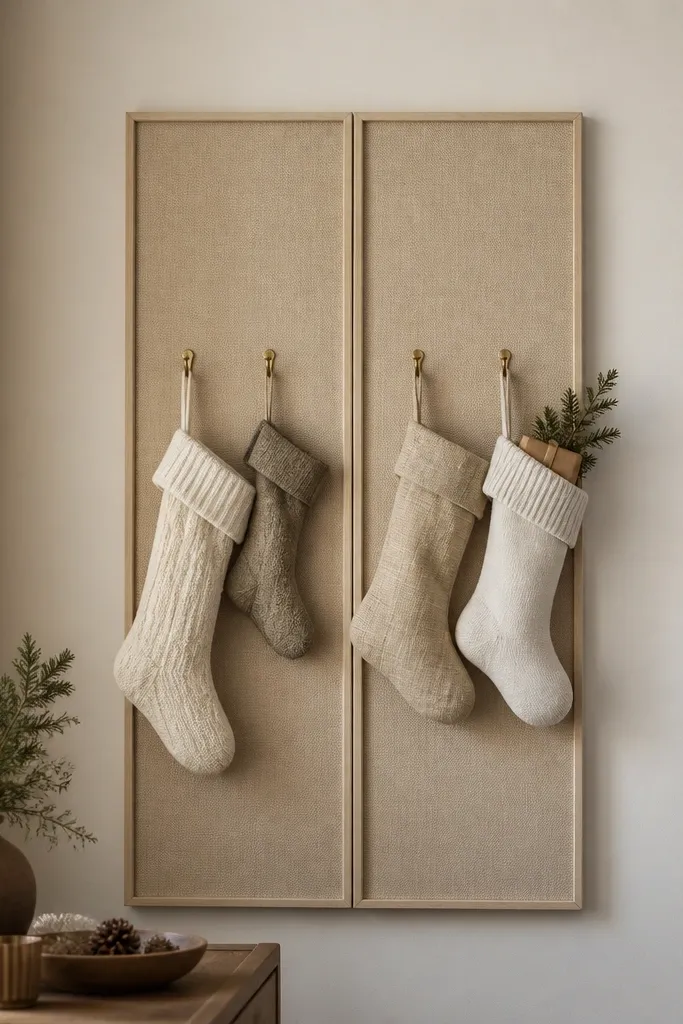
Stockings often look random when they hang from random hooks. This method gives them a uniform line and a tidy background. The beige fabric behind the stockings hides wall texture and makes the red and green stand out. I use brass hooks because the warm metal looks good with most holiday palettes.
Use two matching IKEA frames and back them with fabric cut to fit the inside opening. Mount small brass hooks along the top rail evenly spaced for your stocking widths. Keep stocking gaps consistent so the line looks symmetrical.
Pre-measure your stocking cuff width and space hooks so each stocking has 1-2 cm breathing room.
Avoid mixing hook colors (chrome + brass) — it reads cheap in photos.
5. IKEA Picture Frame Ornament Gallery with Removable String Clips
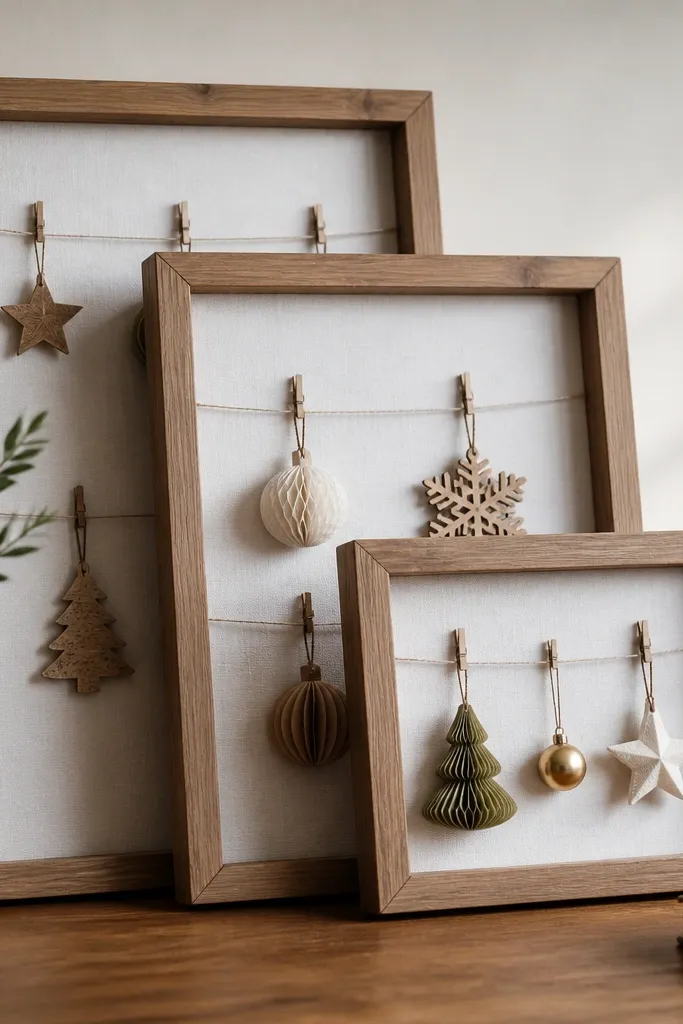
Ornaments look better when they’re displayed like a gallery, not stuffed into a bowl. Picture frames give you a clean border, and fabric backing makes the ornaments pop. String clips let you rearrange without re-gluing anything. The layered heights create depth without needing a big tree.
Use three frames and add fabric inside the back. Attach small binder clips or mini clothespins to a thin string stretched across the frame interior. Hang ornaments using lightweight twine and keep the heaviest ornaments centered.
Use clear fishing line for the ornament strings — it disappears and keeps the frame looking crisp.
Don’t glue ornaments directly to fabric. It tears when you change the layout.
6. IKEA BENNO Bookcase Candle Shelf with Frosted Window Film Glow
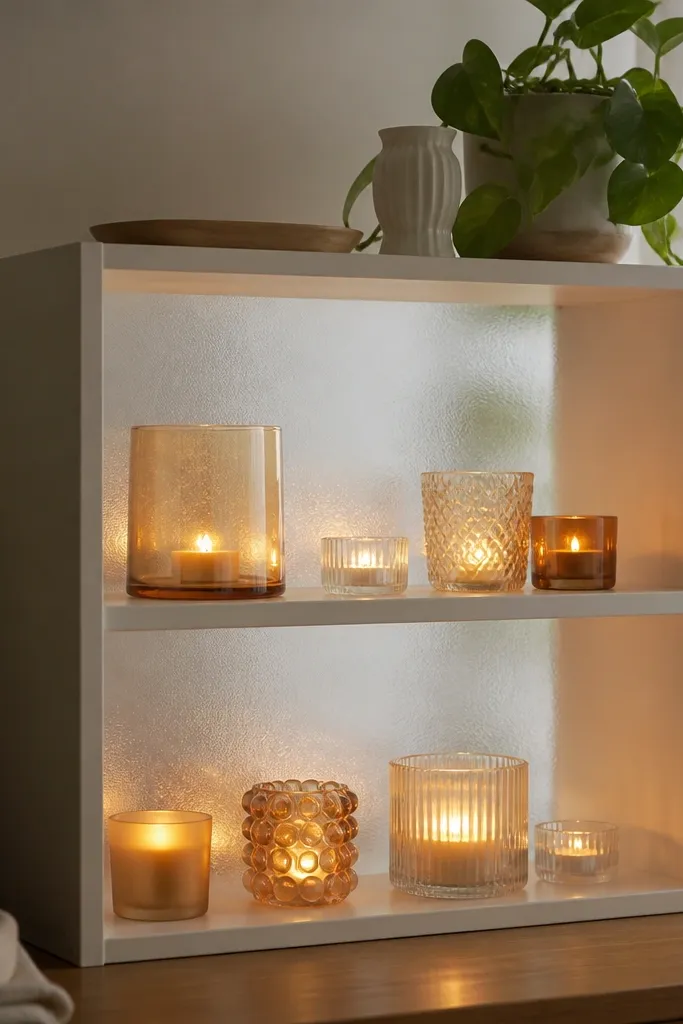
Window film makes the back wall look like textured glass, which is the difference between “candles on a shelf” and “designed decor.” It also hides dust and smudges on the shelf back. Frosted film diffuses warm candle light so you get a soft glow even with small candles. I keep the front open so the candles look like they’re floating.
Cover the shelf back panel with frosted window film cut to fit. Use a smoothing tool to press out bubbles. Place LED candles first to check spacing, then swap to real candles only if you have stable, heat-safe holders.
If you use real candles, keep them at least 5 cm away from the film edges to avoid peeling.
Avoid glossy film — it reflects overhead lights and flattens the glow.
7. KALLAX Gift Wrap Station with Fabric Curtain and Brass Tension Rod
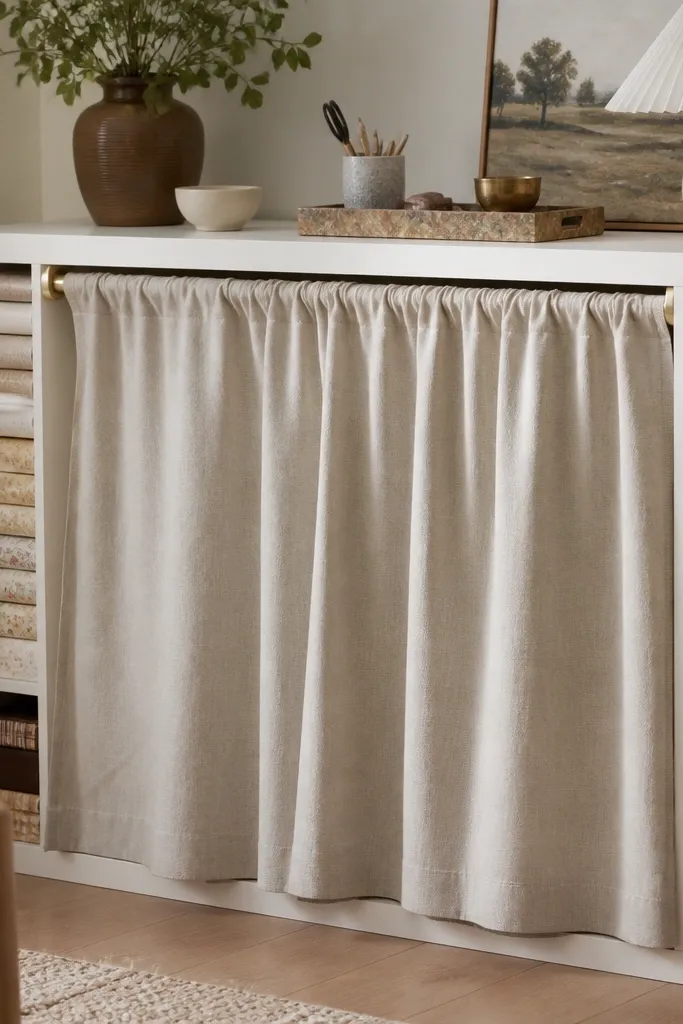
Gift wrap always looks messy. A fabric curtain hides the chaos while keeping everything reachable. A tension rod makes it removable, so you can wash or swap the curtain for each holiday. Brass warms up the typical IKEA look and pairs well with kraft paper and cream ribbons.
Measure the front width of the KALLAX opening and choose a curtain panel with a little extra width for fullness. Install a brass tension rod across the inner sides. Arrange wrapped paper upright so the curtain stays smooth and doesn’t snag on corners.
Quick tipUse a curtain fabric with a tight weave like cotton-linen blend so it hangs without fraying edges.
One warningSkip thin polyester — it clings and wrinkles, and the curtain looks saggy fast.
8. IKEA Lack Floating Shelf Snowline Using Painter's Tape and Dry Brushing
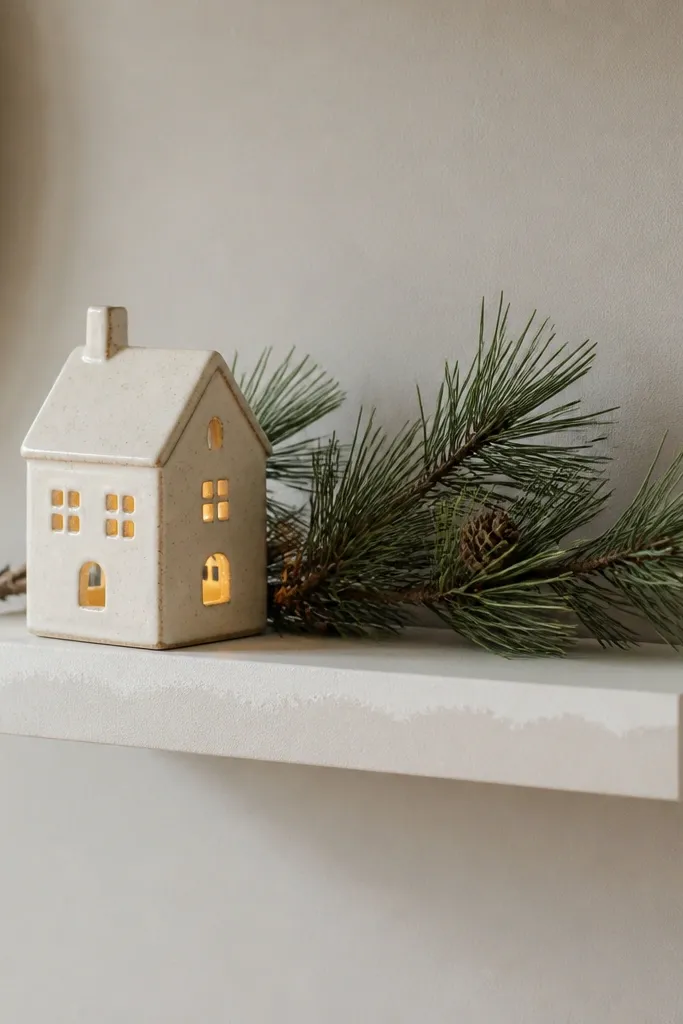
Dry brushing creates a believable snow edge without needing texture paste. The snowline works best on the shelf lip and a couple of decor pieces, so your eye reads a consistent winter theme. I like off-white base paint because it makes the snow look bright but not harsh. This is one of the easiest ways to add seasonality without covering everything.
Paint the shelf off-white and let it cure. Tape a straight line along the front edge, then dry brush white paint lightly over the tape edge and pull the tape immediately. Place one ceramic house centered and add pine stems in two small heights.
Quick tipUse a nearly dry brush and do two light passes instead of one heavy layer for a softer snow effect.
One warningDon’t use thick snow texture on a shelf lip — it chips and looks rough.
9. IKEA Tote Bag Shelf Hack with Hanging Organizer and Color-Matched Ribbon
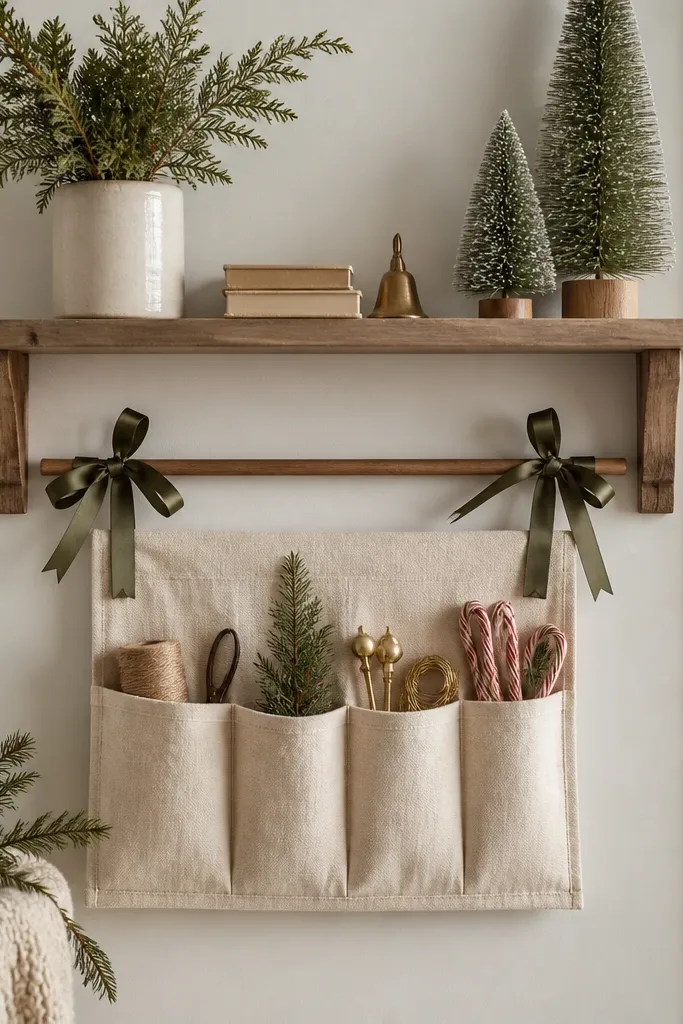
This is a practical holiday storage idea that still looks styled. The hanging organizer keeps small items from spilling into drawers, and the ribbon makes the top bar look decorative. I use matching ribbon in a single color so the whole setup reads intentional. It also works for spring and summer when you swap ribbon and labels.
Hang an organizer with pockets on the shelf wall using the manufacturer brackets. Tie a 1 cm wide ribbon around the top bar in two neat loops. Add one small tag label on the pocket front for “ornament hooks” or “tape.”
Use a ribbon color that repeats in your decor — like deep green for pine, or black for monochrome.
Avoid random multicolor ribbons. Mixed colors make it look like leftover wrapping.
10. IKEA Mirror Turned Holiday Table Center with Wrapped Frame Edge
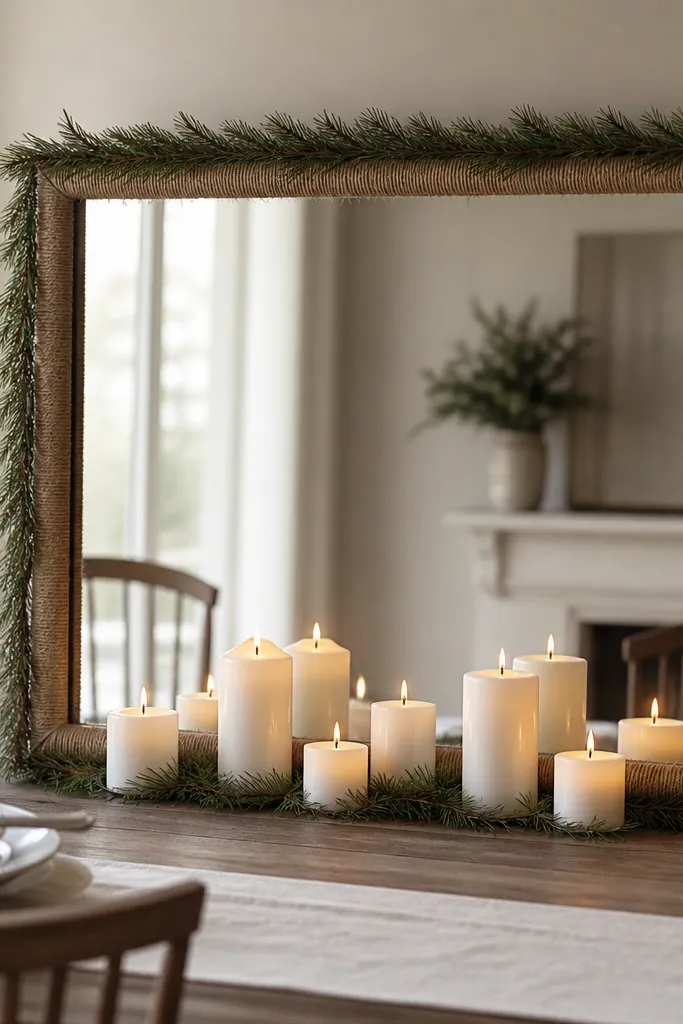
A mirror center reflects candlelight, so your table looks brighter without adding more items. Wrapping the frame edge adds texture and makes the mirror feel festive. Twine looks rustic, pine looks seasonal, and the candle line keeps the styling clean. I’ve done this with both LED and real candles, and the reflection always makes it feel fuller.
Use a rectangular mirror and wrap the frame edge with twine in tight coils. Add a thin strip of faux pine along one side only, not around the whole frame, so it doesn’t look crowded. Place three candle holders centered along the bottom edge with equal spacing.
Wipe the mirror glass with glass cleaner before styling so the reflection stays sharp in photos.
Don’t cover the entire mirror frame with bulky decorations. It blocks the reflection and flattens the look.
11. IKEA Storage Box Snow Globe Effect with Glitter-Free Faux Frost
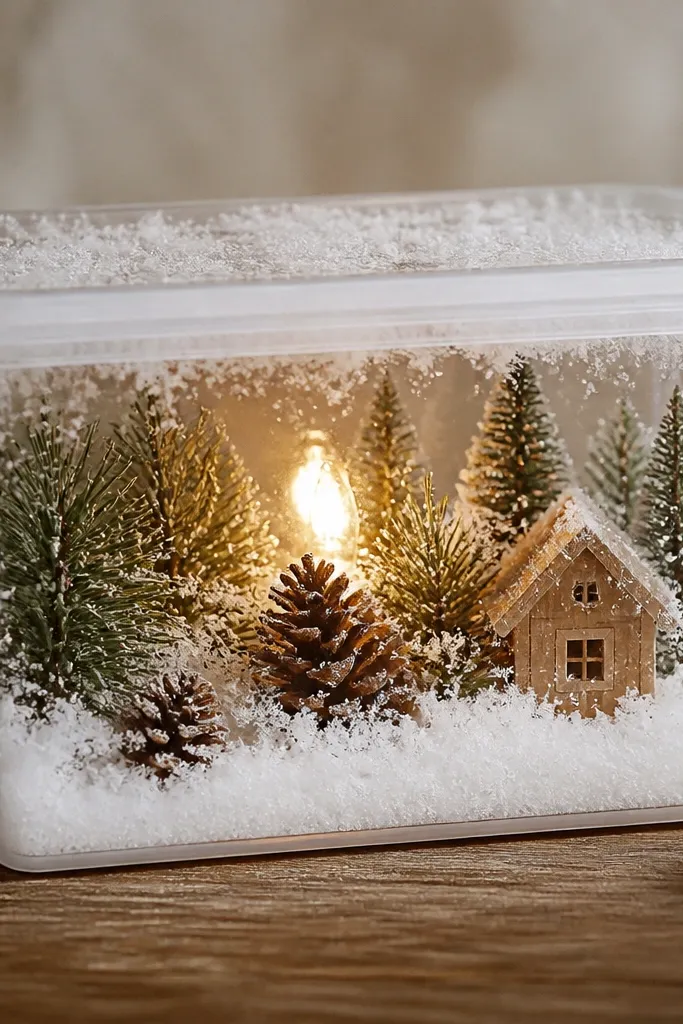
You get the snow-globe vibe without messy glitter. Flocking or fine foam snow gives you a soft, matte look that reads like snow under warm light. The clear lid lets the shape look intentional, and the LED light makes the inside glow. I prefer glitter-free because it doesn’t shed onto your tablecloth after a week.
Use a clear-lidded IKEA storage box big enough for your decor. Add flocking to the base and sides lightly, then arrange pine sprigs and tiny ornament shapes. Place an LED tea light or small strip light under the decor so it glows through the frosted surface.
Quick tipTest the light placement with the lid closed before you glue anything down.
One warningSkip chunky fake snow paste. It looks like craft foam, not snow.
12. IKEA Shelf Bracket Mini Stocking Holders with Painted Pegs
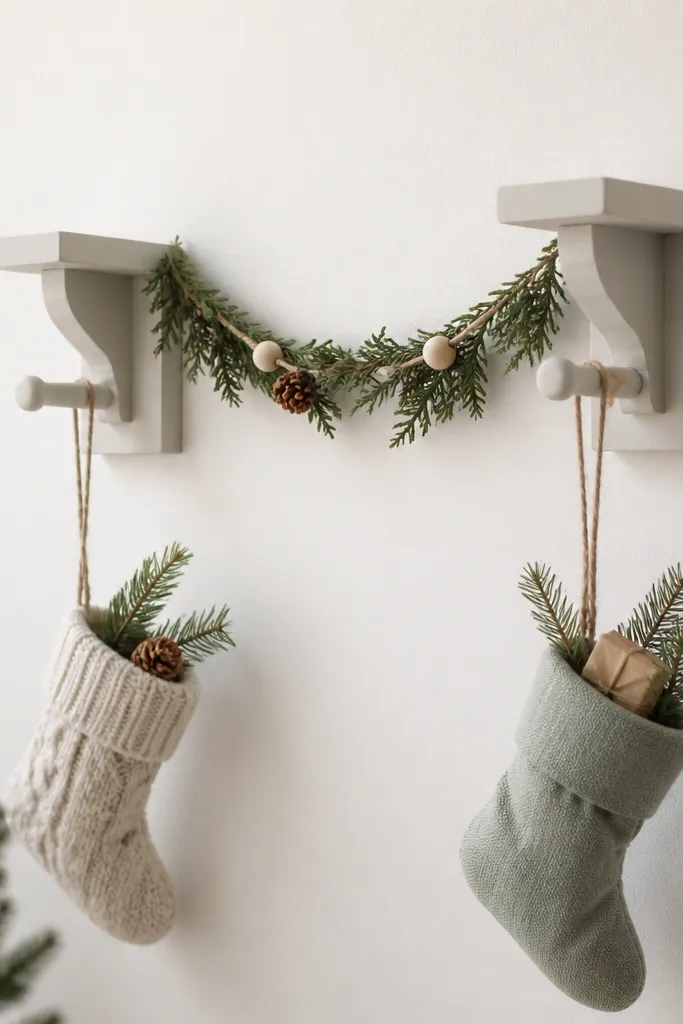
This creates a small, wall-friendly stocking setup without drilling heavy hooks. The peg ends act like a simple hanger bar, and painting the pegs in the same color as the brackets makes it look finished. A tiny garland strip across the top ties it together. This works great in apartments where you don’t have space for a mantel.
Mount two shelf brackets level. Add short wooden peg pieces (cut to about 6-8 cm) and paint them to match the bracket color. Tie mini stockings with twine loops so they hang from the peg ends evenly.
Use a scrap of cardboard as a stencil for stocking hook spacing so both sides match.
Avoid leaving peg edges unpainted. Bare wood makes the DIY look unfinished.
13. IKEA Frame Candle Holder Wall with Removable Hooks and Fabric Backing
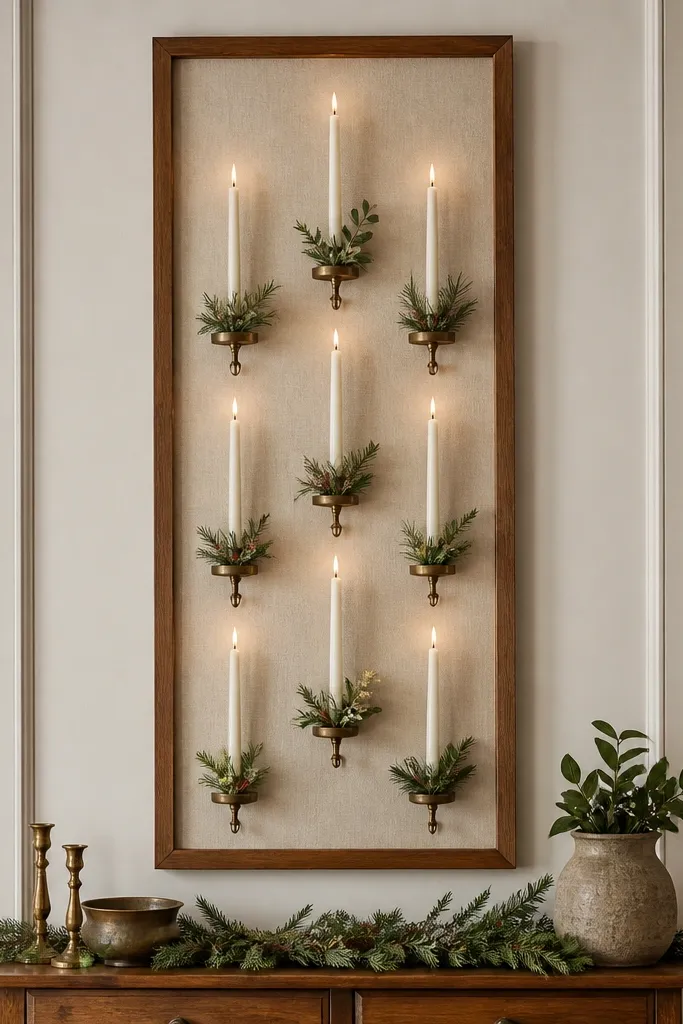
A vertical candle display looks stylish when the background is consistent. Fabric backing hides the wall and makes the candle holders stand out. Removable hooks let you change candle sizes without re-drilling. I use cream fabric so the warm candle color looks richer.
Mount a large IKEA frame and attach fabric to the back using staples or a frame backing sheet. Add removable hooks inside the frame so candles sit upright. Keep candle holders centered and spaced so you get a gentle vertical line.
Use LED candles first for placement. Once you like the spacing, replace with real candles if your holders are stable.
Don’t use thin backing fabric that sags. It makes the whole frame look droopy.
14. IKEA Photo Tray to Advent Calendar with Numbered Tags and Hidden Drawers
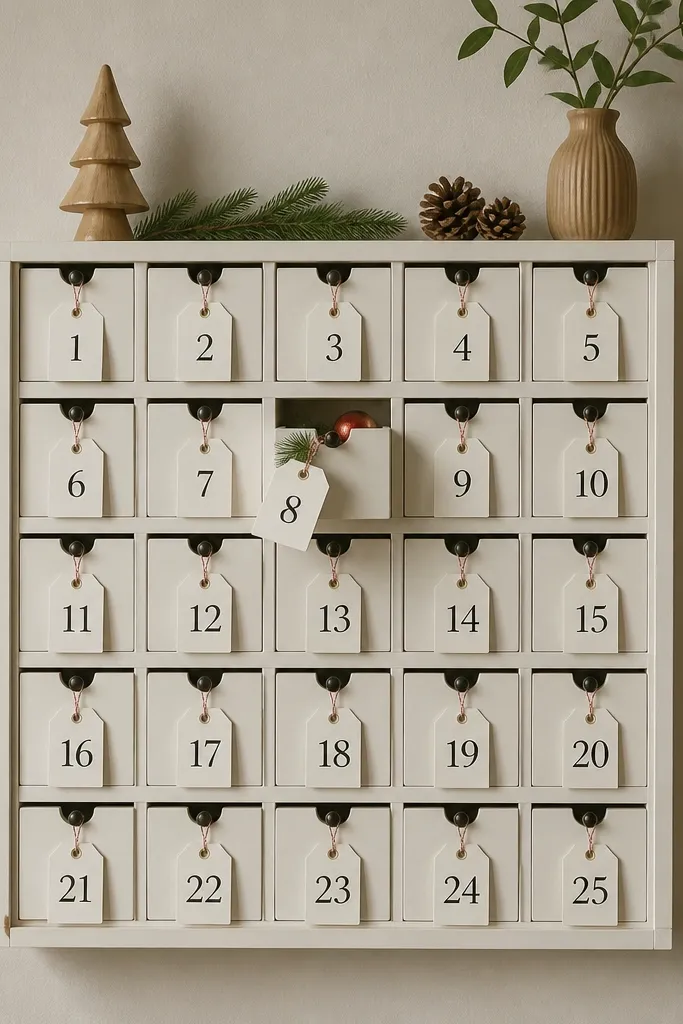
Advent calendars look best when opening day doesn’t create chaos. This design keeps each “gift” in a small hidden slot behind a tag, so you’re not hunting through piles. Numbered tags make it feel like a real calendar, not random pockets. The photo tray’s grid layout helps you align everything in straight rows.
Use a photo tray or small wall organizer panel. Attach mini hooks or fasteners under each grid point and hang numbered cardstock tags. Behind each tag, insert a small drawer pull insert or a folded paper pocket that you can slide out.
Quick tipWrite numbers with a paint pen and seal with clear matte so the ink doesn’t smear from handling.
One warningAvoid handwriting in pencil. It looks temporary and messy after day 3.
15. IKEA Lack Side Table Santa Tray with Stencil Letters and Candy Stripe Edge
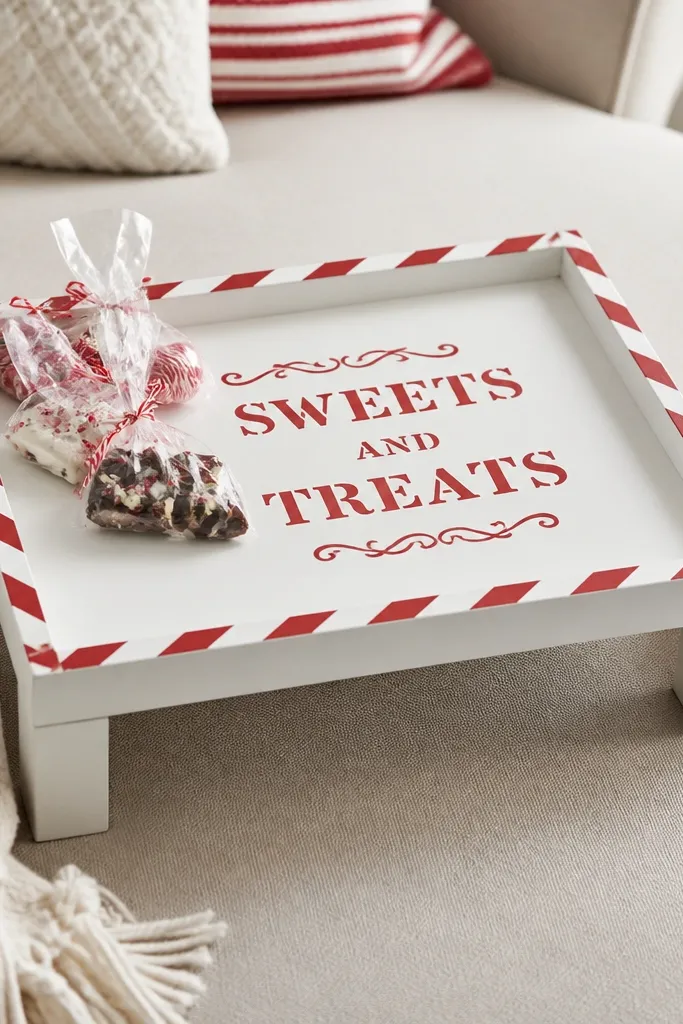
A candy stripe border makes any plain tabletop feel holiday-ready. Stenciled letters keep the design clean even if you’re not good at freehand. This is a great “use what you already have” project because Lack tables are flat and easy to work with. I’ve used this as a snack station for parties and it always gets compliments.
Sand the top lightly, then prime. Paint the base color, then tape a thin border and use alternating red and white stripes. Finish with a clear matte topcoat so it wipes clean when people spill.
Do the border stripes with painter’s tape strips 6-8 mm wide for a tight candy stripe look.
Skip glossy clear coat. It turns white paint slightly yellow under warm lights.