1. Kallax "Holiday Library" Cube Inserts
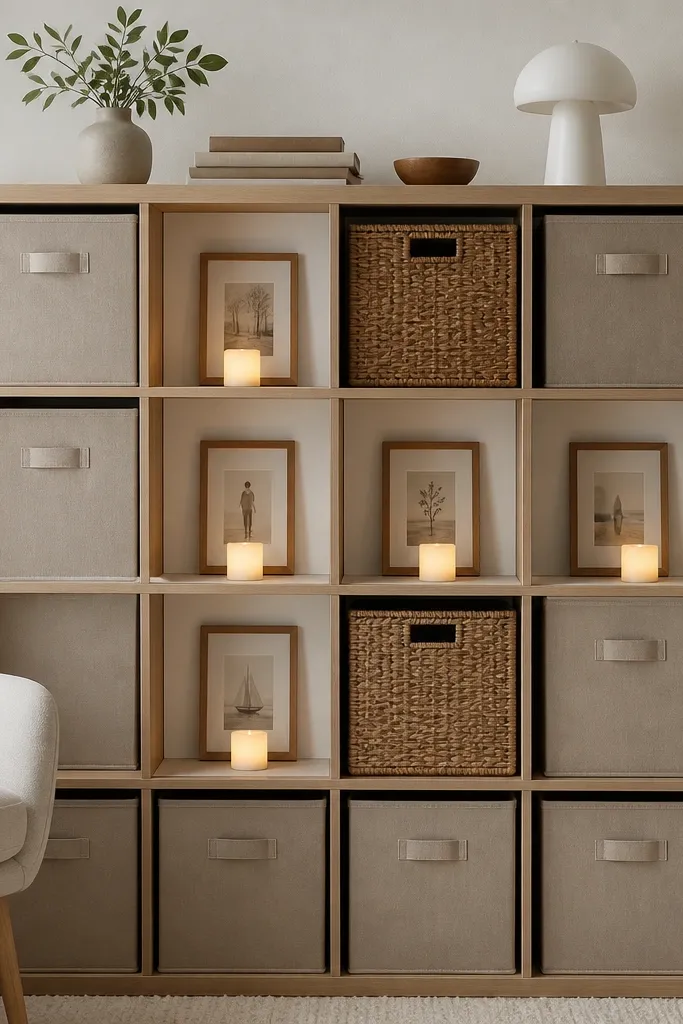
This turns blank cube space into a curated holiday scene without changing the shelf. I use foam board painted to match my color theme, then add printed holiday paper or thrifted postcards behind simple frames. The LED candle sits low so it glows through the open front, giving warmth instead of harsh overhead light. It looks styled because the backs are consistent, not because the items are expensive.
Quick tipChoose one print style (all typography, or all vintage snow scenes) and keep the frames the same color finish.
Paint 3mm foam board with matte acrylic (I like off-white or warm cream) and let it dry fully. Cut inserts so they slide into the cube with a 2-3 mm gap for snug fit. Use frames sized to the cube opening (or cut foam board to act as a backdrop behind smaller frames). Place LED candles on a small riser like a trimmed cardboard rectangle.
One warningAvoid leaving raw, unpainted foam board edges — they catch light and look DIY in a bad way.
2. Lack Frame Garland With No-Sew Fabric Bows
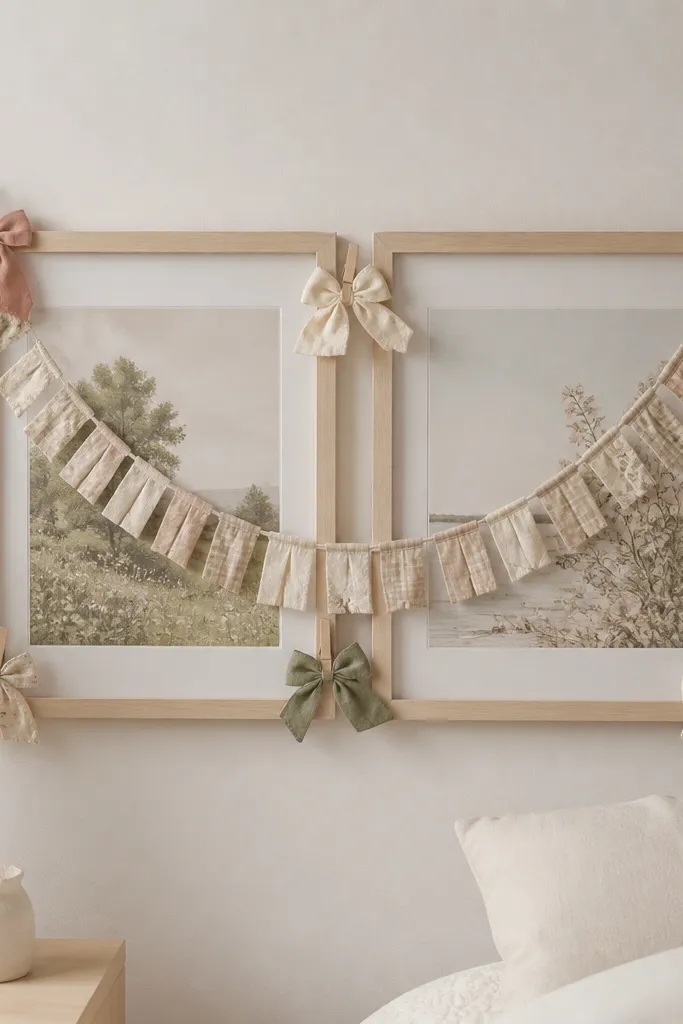
Frames make garlands look intentional because the garland has a boundary. I cut fabric strips from an old curtain or linen remnant and tie simple bows, then anchor them using fabric glue dots on the back of each Lack frame. The result looks like a store-bought seasonal banner, but it’s lightweight and easy to store. The fabric texture matters — linen and cotton look softer than shiny polyester.
Quick tipMist the fabric lightly with water before tying so it holds the folds tighter as it dries.
Use Lack frames with the glass removed. Cut fabric strips about 60 cm long and 6-7 cm wide, fold and knot for a bow, then glue the knot base to the inside frame lip. Space bows 12-15 cm apart and add one longer fabric tail between frames to create movement.
One warningDon’t use stiff craft felt — it makes the bows look flat and toy-like.
3. Ikea Tray Centerpiece With Faux Moss and Ornaments
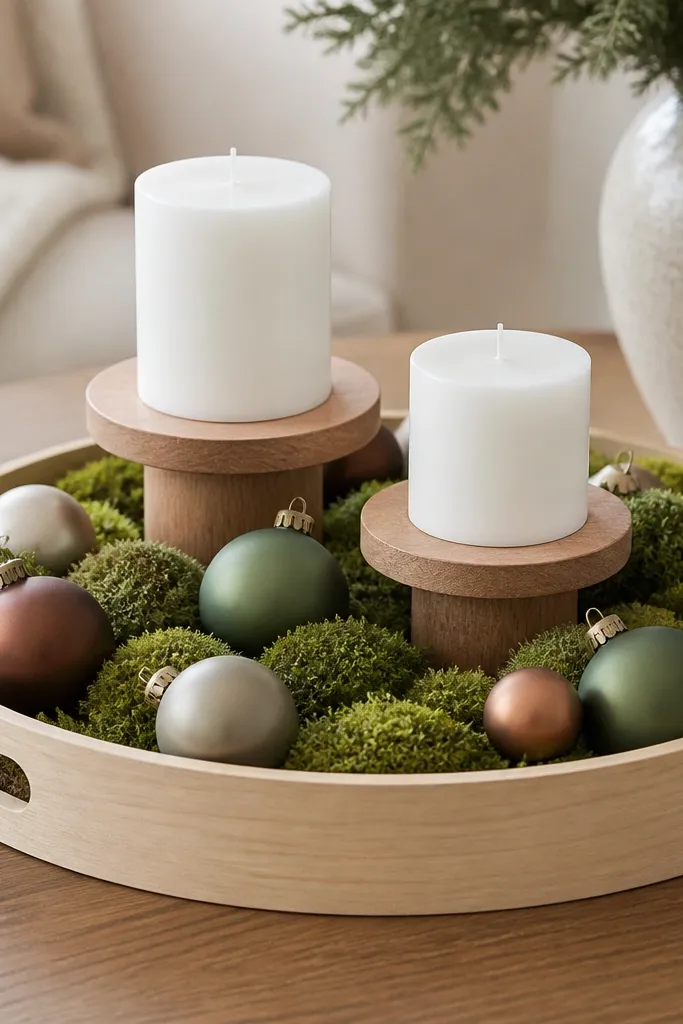
A tray is the cheat code for instant polish. You get a contained shape, and you can stack height with risers so the ornaments don’t sit at one boring level. Faux moss looks expensive when you fluff it and keep the color controlled (I use deep green with a few white picks). The candles tie everything together and make it feel warm even in daylight.
Hot glue or tack down a thin layer of florist foam inside the tray to keep moss from shifting. Fluff faux moss by pulling strands apart with your fingers, then press it into the foam. Add ornaments on small wooden blocks (about 2-3 cm tall) so the cluster rises.
Spray your ornaments with a matte clear coat if they’re too glossy; it reads more natural.
Avoid overfilling — if moss reaches the tray rim everywhere, it looks like a spill instead of a centerpiece.
4. Curtain Rod "Snow Branch" for Doorway Decor
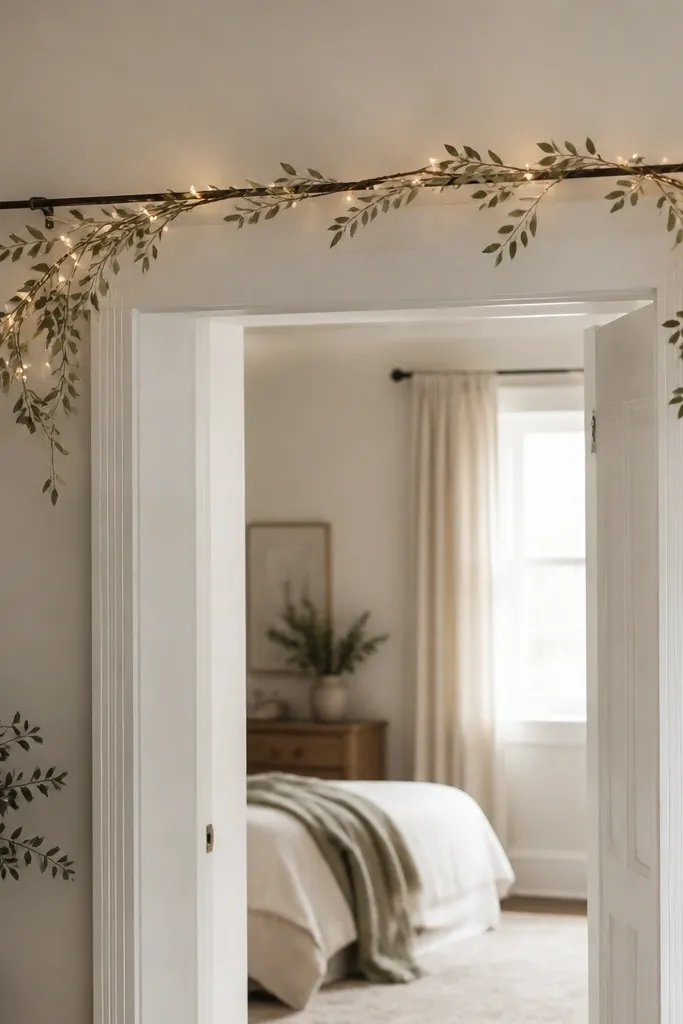
This is a doorway upgrade that looks architectural. The rod acts like a clean line for the garland, and the lights run along it without tangling. I use a branch garland tucked under the rod, then wrap a few strands of white fairy lights so the bulbs sit behind the leaves for softer glow. It’s budget-friendly because you’re reusing a basic hardware piece as the frame.
Quick tipUse warm white lights (2700K) so the green looks less neon.
Mount the curtain rod with simple brackets and keep it centered above the door trim. Tuck a faux branch garland so the thick part sits in the middle and thinner tips move outward. Weave lights between branches, then plug in through a hidden extension cord taped to the inner edge.
One warningDon’t mount the rod too high — if it’s above eye level, the garland looks like it’s floating.
5. Ikea Photo Frame Shadow Box for Fall Leaves
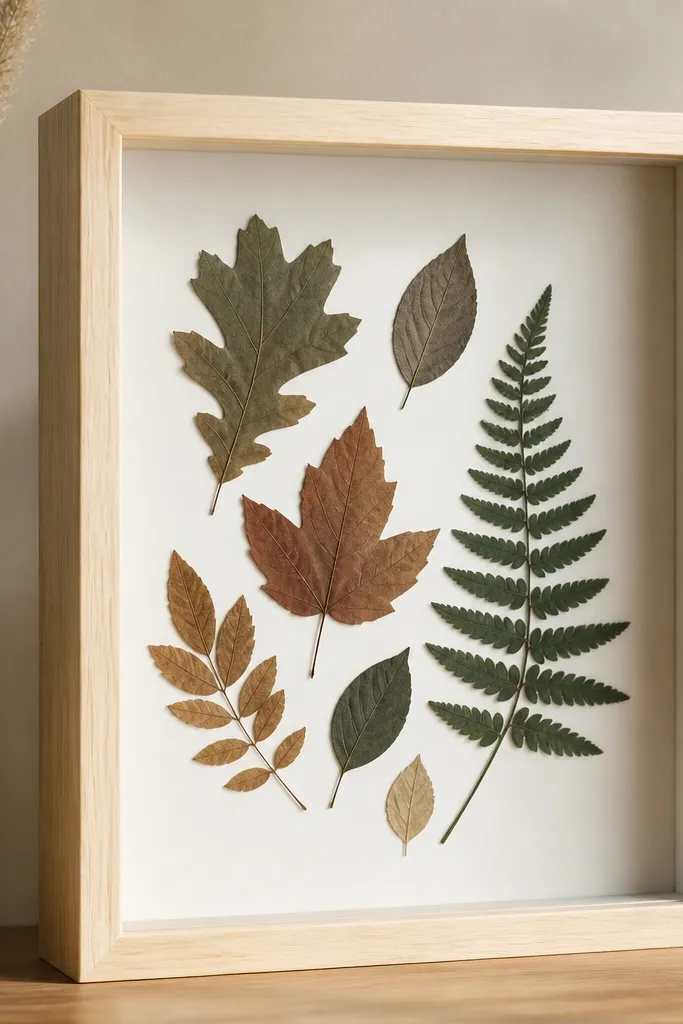
Shadow boxes make cheap leaf decor look collected. I print a simple kraft-paper background, then arrange pressed leaves in size order and secure them with tiny dots of glue. A clear top layer keeps everything flat and prevents leaves from curling. It’s perfect for fall because leaves naturally create depth without needing bulky materials.
Remove the glass and replace it with thin clear acrylic sheet if you have it, or keep glass if you’re careful. Cut kraft paper to frame size and add a border using brown washi tape 1 cm wide. Arrange leaves with the stems angled differently, then seal the back with tape so nothing shifts.
Mist-press leaves under a heavy book for 5 days before using so they stay flat.
Avoid glossy backgrounds — they reflect overhead light and make the leaves look messy.
6. BILLY Bookcase Shelf Winter Scene With Paper Snow Cutouts
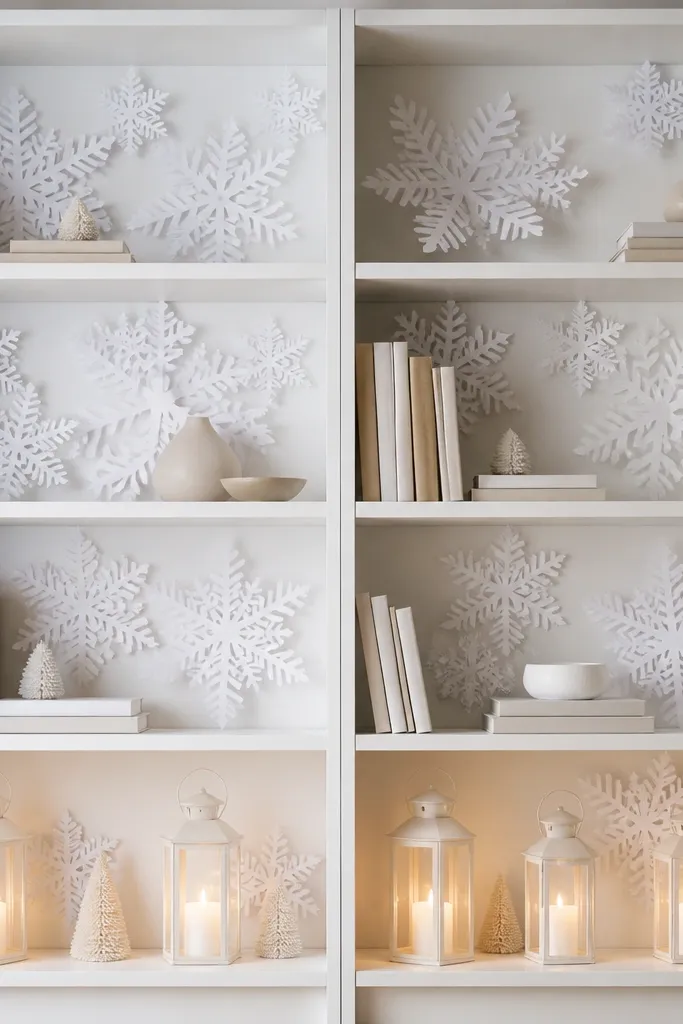
This turns unused shelf space into a scene you can change every year. The trick is layering paper snow at three depths: one layer flat on the back, one layer on thin foam squares, and one layer closer to the front. Lanterns add height and help the cutouts cast tiny shadows. It looks designed because the snow has dimension, not because you used fancy materials.
Quick tipUse a craft knife and a metal ruler so snowflake edges stay sharp.
Paint shelf backing panels matte white or light gray. Cut snowflake shapes from white cardstock and attach the first layer directly to the back. For the second layer, mount snowflakes on foam squares about 5-8 mm thick; add the third layer by placing a few cutouts on small risers on the shelf bottom.
One warningDon’t cram all cutouts together — you need breathing room for shadow effects.
7. Ikea Shoe Cabinet Top Garland With Candle-Height Stacking
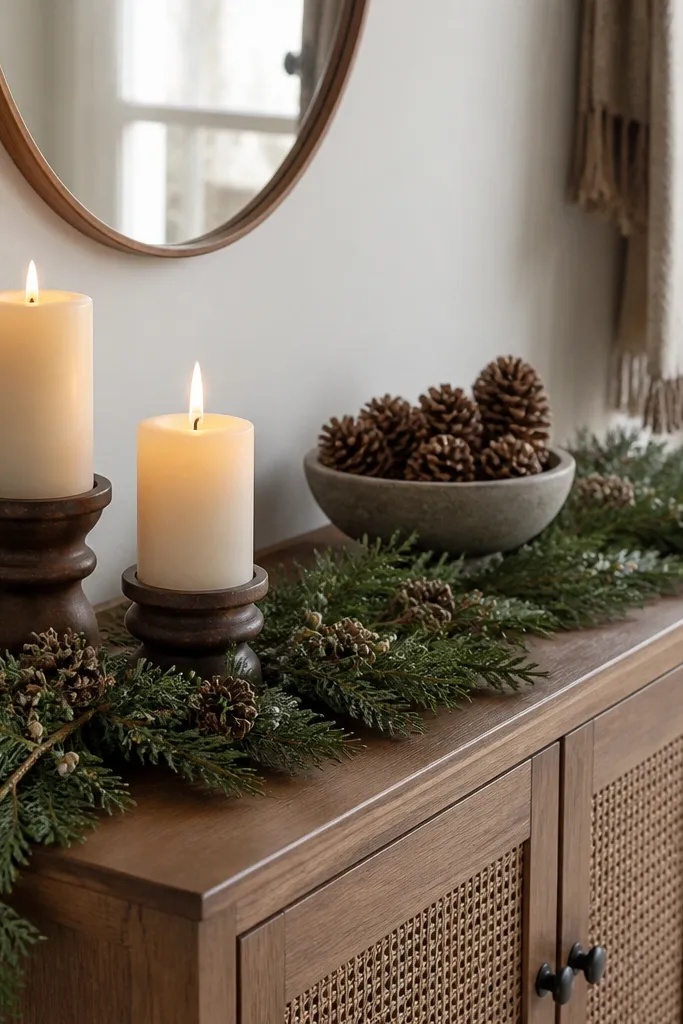
Cabinet tops are perfect because they’re like a built-in mantel. I stack candles at two heights and anchor a garland runner so it doesn’t slide. The candle glow makes pinecones and greenery look richer, even if they’re faux. You get a holiday vibe without covering the whole room with bulky decor.
Use a garland runner about 30-40 cm shorter than the cabinet width so it doesn’t hang over the edges. Place two candle holders: one low (about 5 cm tall) and one medium (about 12-15 cm). Add a small bowl of pinecones in the center and tuck the garland ends behind the bowl for a clean finish.
Secure the runner with two pieces of clear tape under the garland near the back edge.
Avoid one single candle height — it makes the styling look flat.
8. KROKFJORD LED Lantern Hack on a Wall Shelf
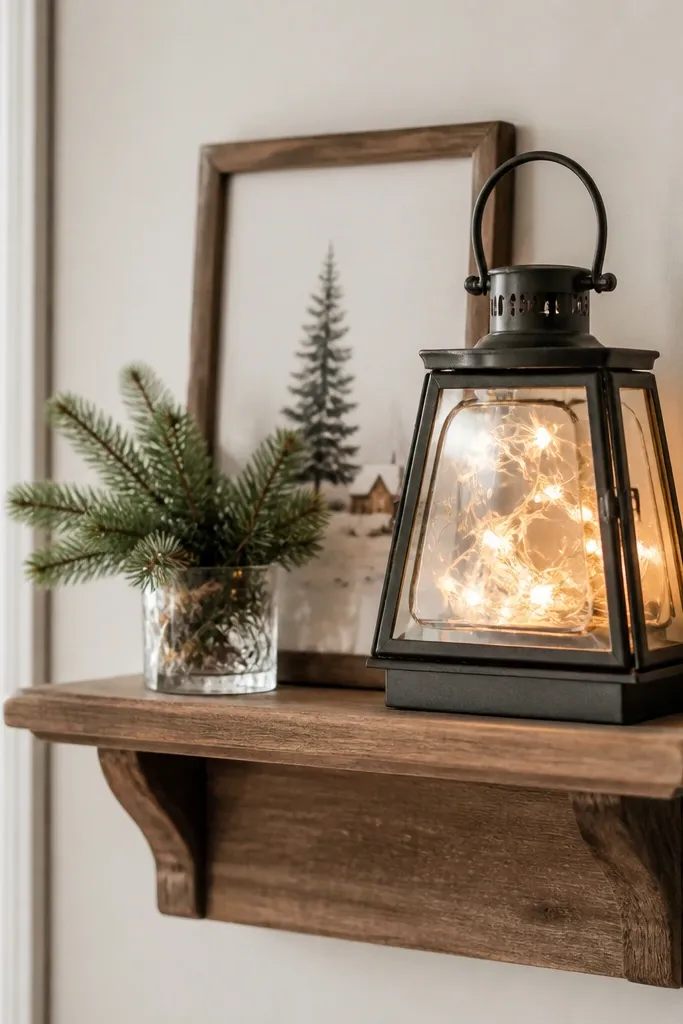
Lanterns look expensive because they create a focused light pool. I mount a small wall shelf, then place the lantern centered and add one glass cup with evergreen clippings. The framed card behind the lantern gives a backdrop so the light hits something textured. This works in hallways where you need light without clutter.
Mount shelf 150-160 cm from the floor so it sits at eye level. Use a lantern with removable battery pack so you can access it. Add a small framed card or painted paper behind the lantern, taped to the shelf back.
Swap in a paper doily behind the lantern for extra diffusion — it softens the light without extra cost.
Don’t place the lantern too close to the shelf edge; it makes the glow look like it’s falling off.
9. Ikea Rolling Cart Candy-Cane Display
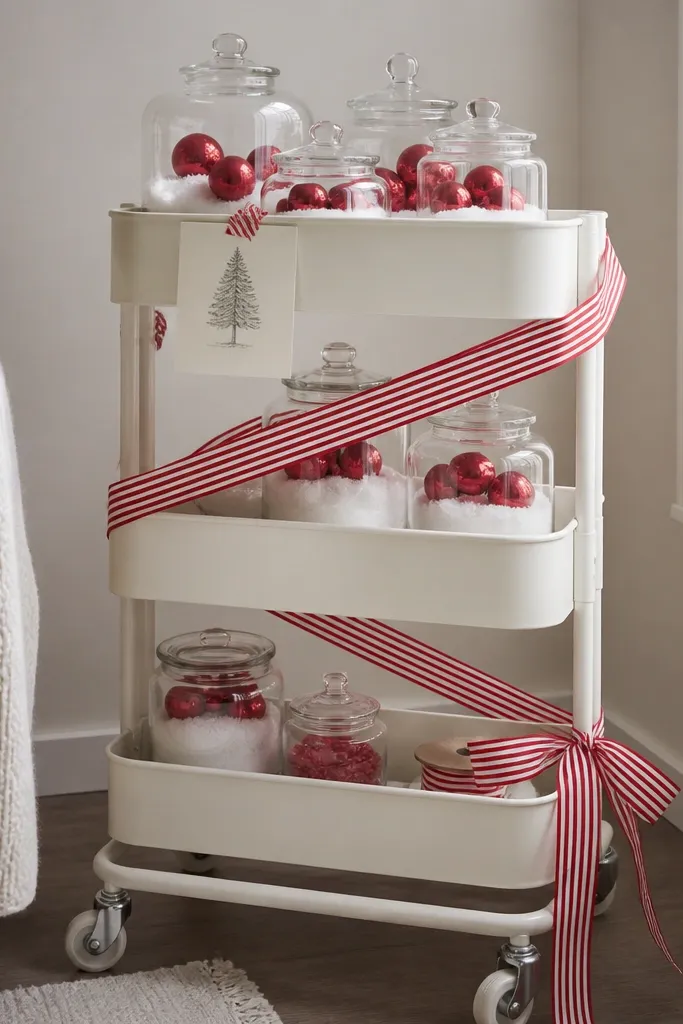
A rolling cart is a portable party prop. You style it once, then move it for parties, movie nights, or holiday dinner. The candy-cane effect comes from repeating red and white across jars, ribbon, and small decor. Glass jars make it feel grown-up because you can see the layers inside. It’s one of the easiest ways to get a “holiday corner” without building anything.
Wrap the cart front with wired ribbon so it holds shape; use 2-3 loops across the width. Fill two jars: one with white faux snow, one with red ornaments or wrapped candies. Add a small sign on the top shelf using painter’s tape so you can remove it cleanly.
Use jar labels from an old spice rack — they look vintage and cost nothing.
Avoid mixing too many reds (pink, burgundy, tomato) — it looks chaotic.
10. RÅGRUND Salt Box Ornaments in a Mini Grid
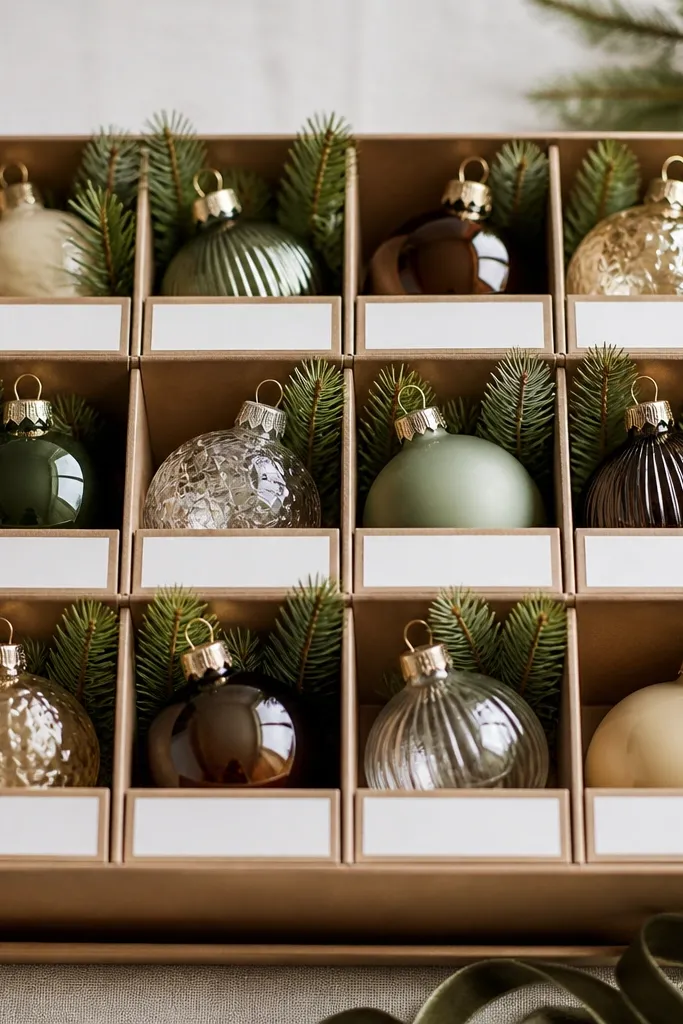
This hack turns individual ornaments into a display you can reuse. The boxes keep ornaments from rolling and make each one look intentional. I paint the box lids the same color as the theme and add a tiny sprig for texture. The grid pattern makes it look like a planned set, not a random stash.
Quick tipCut labels with a paper punch so every label is the same width.
Arrange boxes in a 3x3 or 2x3 grid on a tray. Paint lids with matte spray in one color; let dry 24 hours. Add a small strip of patterned paper inside each box beneath the ornament so the background is consistent.
One warningDon’t skip consistent spacing — uneven gaps make the grid look cheap.
11. Ikea Mirror Frame Winter Wreath Illusion
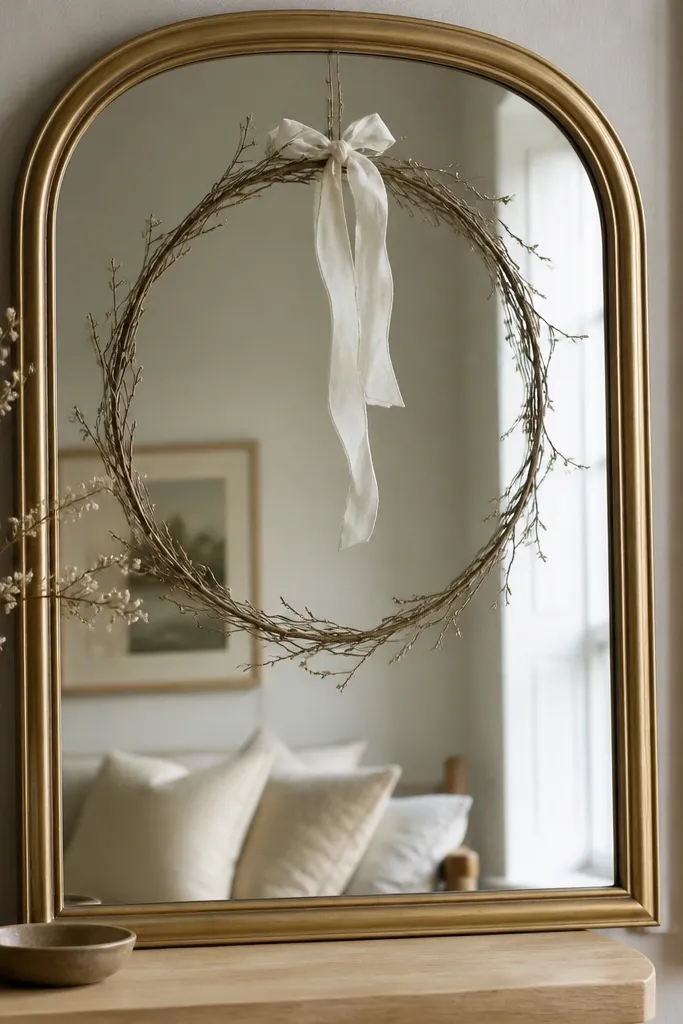
You get a wreath look without a bulky front door wreath. The mirror reflects light and makes the branches look denser, especially at night with warm bulbs. I use thin branches and wrap them with white ribbon, then tuck them behind a mirror’s frame using zip ties or small hooks. It’s a clean, high-impact look for small spaces.
Quick tipUse warm LED string lights behind the mirror for a glow that outlines the wreath.
Choose a mirror with a wide frame lip so you can secure items behind it. Build a wreath ring from thin branches and tie the ends with twine. Wrap with ribbon in 2-3 passes, then attach to the back frame using zip ties at 4 points.
One warningAvoid thick faux greenery — it blocks reflection and makes the wreath look flat.
12. Ikea Wall Shelf Mini Stockings With Fabric Pockets
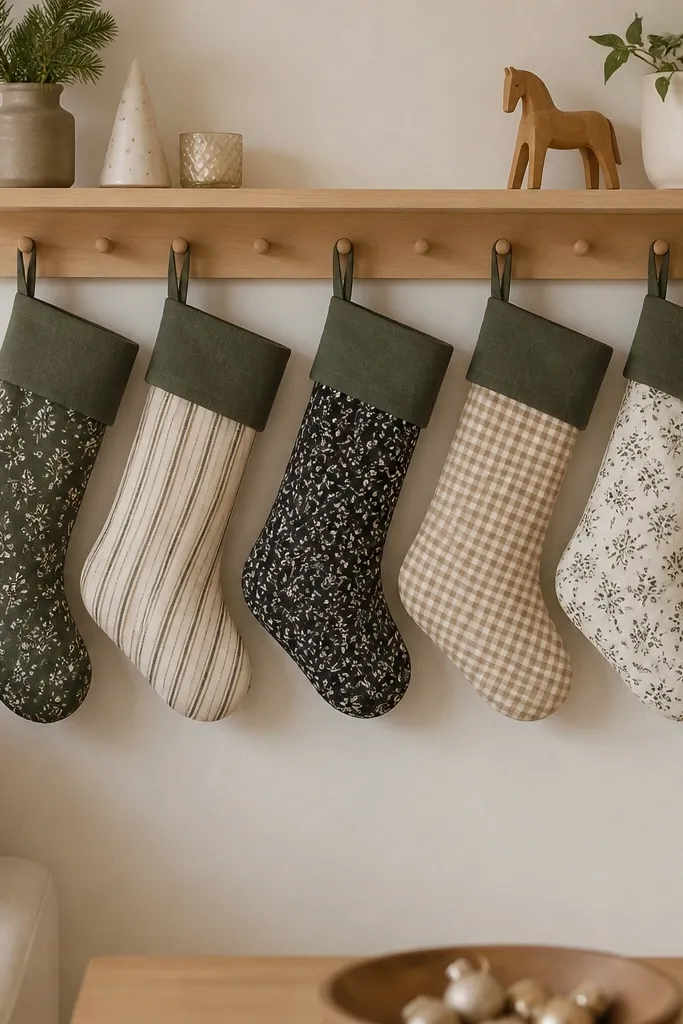
Mini stockings look adorable and they’re easy to refresh each year. I sew or glue simple fabric pockets, then attach them to a row of hooks under a shelf. Matching trim keeps the set cohesive even if the main fabric patterns differ. The shelf hides the hook hardware and makes everything look tidy from across the room.
Quick tipUse fabric stiffener spray on the cuff so it stands up like a real stocking.
Cut fabric rectangles about 18 cm tall by 14 cm wide, fold into a stocking shape, and glue or sew sides. Add a 3 cm cuff in one matching fabric (red felt or green cotton). Install 4-5 small hooks under the shelf, spaced about 10-12 cm apart, then hang the stockings by a small loop inside the cuff.
One warningDon’t choose trim that’s too shiny — it reads like costume material.
13. Ikea Curtain Panel Snow Drift Backdrop
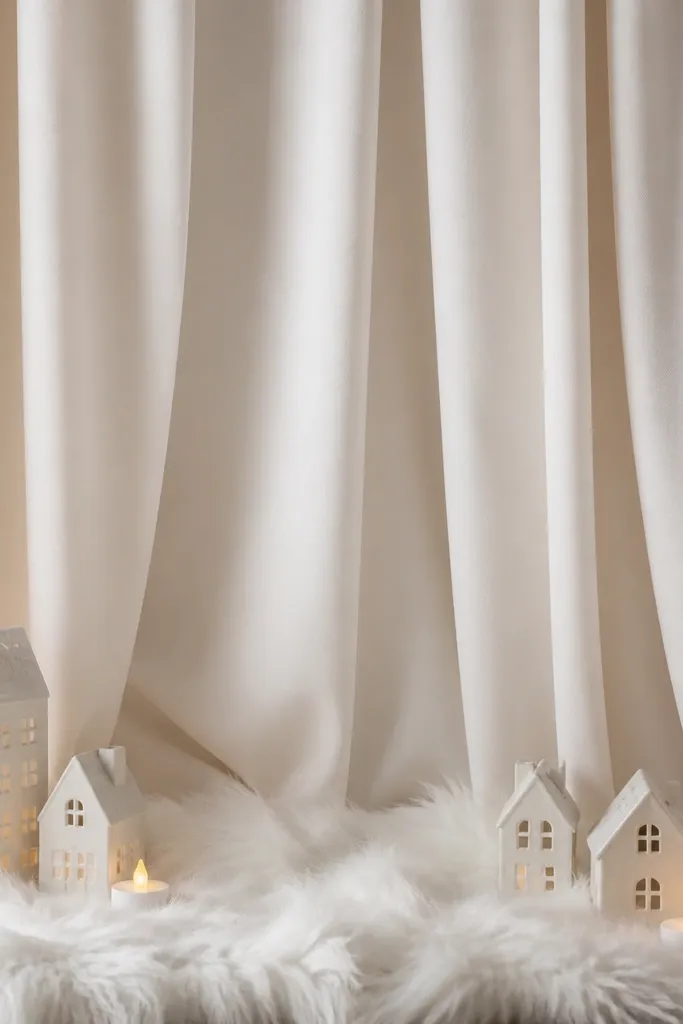
A backdrop makes holiday decor look like a photo set. I use a white curtain panel as the main background, then add a faux fur “snow drift” along the bottom edge. Place small houses or mini trees in front so the fur gives texture behind them. This hack is great for shelves, entry tables, and even a dining buffet.
Hang the curtain panel using tension rods or hooks so it forms a flat sheet. Cut faux fur into a strip 25-35 cm deep and tack it to the bottom edge with hot glue or fabric glue. Arrange decor pieces in a shallow arc so the tallest item stays near the center.
Lightly brush faux fur with a pet slicker brush so it looks fluffy instead of matted.
Avoid using a curtain with heavy sheen — it makes the whole scene look like stage props.
14. Ikea Wood Cutting Board Seasonal Risers
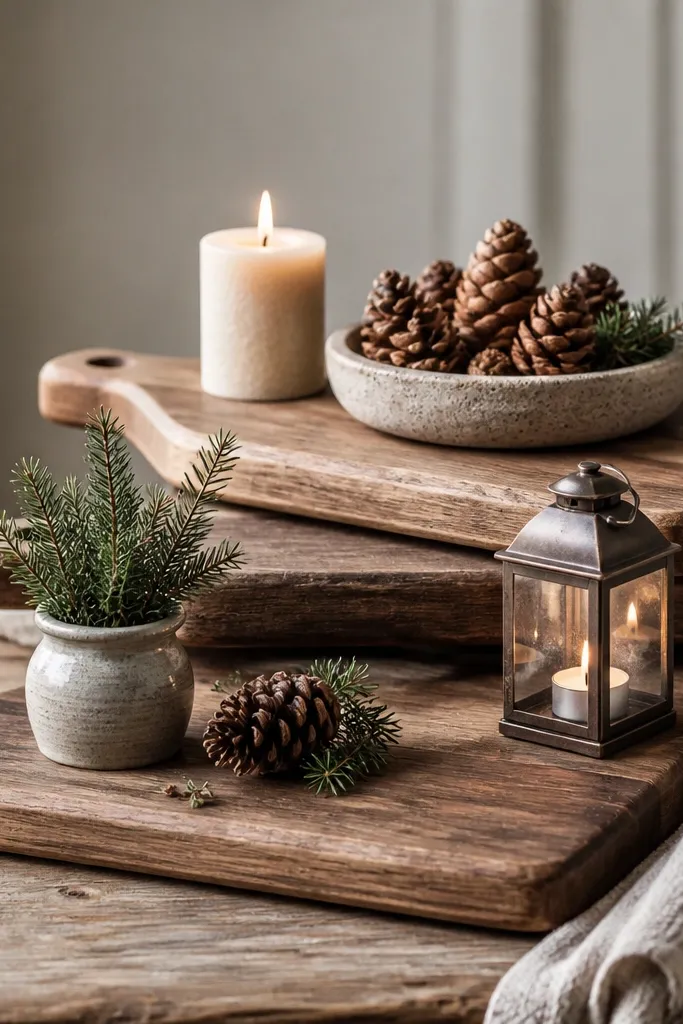
Risers fix the biggest holiday styling problem — everything ends up the same height. I stack small wooden cutting boards and treat them like steps, then place one feature item on each level. The wood tone ties together the scene and keeps it warm. It costs less than buying dedicated pedestal stands, and you can re-style the boards for spring later.
Quick tipWipe boards with a damp cloth and let dry fully before styling so they don’t look dusty under lights.
Stack boards so the smallest sits on top; aim for a total height of 12-20 cm. Add felt pads between boards so they don’t slide. On the top board, place a candle or ornament cluster; on the middle board, place a bowl or lantern; keep the bottom board for a grounding tray.
One warningDon’t stack without pads — wood-on-wood looks scuffed and unstable.
15. Ikea Basket Ghosts for Halloween Mantels
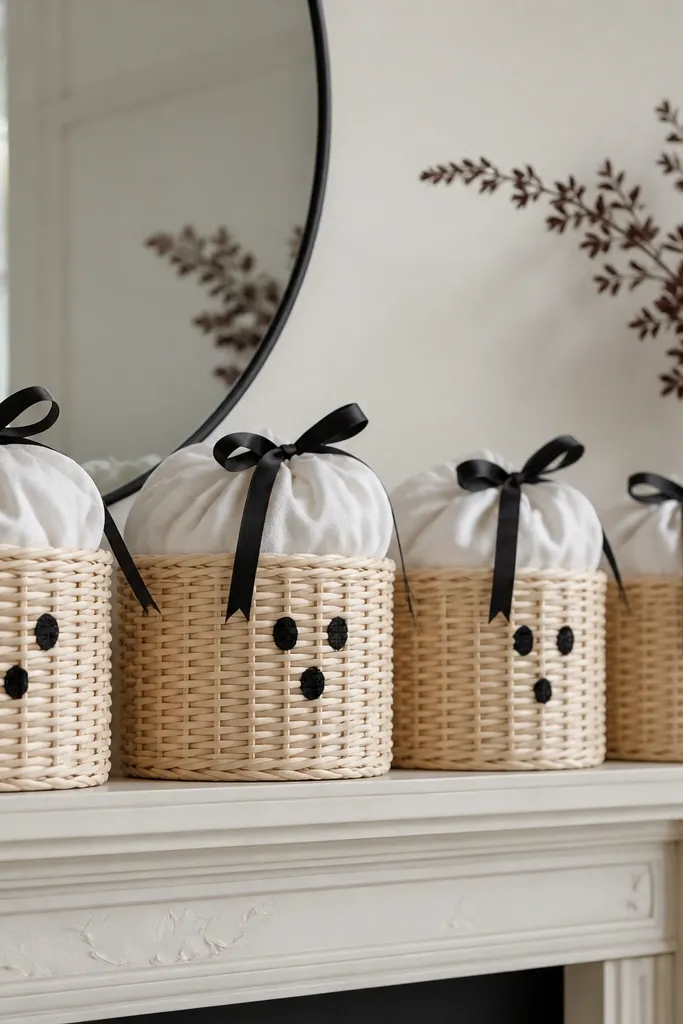
Baskets become spooky ghosts with almost no crafting. I stuff each basket with white tulle or muslin, then tie a bow at the top and add simple face marks with a fine-tip black marker. The basket texture shows through the fabric folds, which makes each ghost unique. It’s a cheap way to fill mantel space fast.
Choose small baskets with an open weave. Stuff with white tulle until it looks rounded at the top, then tie a ribbon around the rim. Draw eyes and a small mouth with a marker that won’t smear, and add a tiny black bow made from ribbon scraps.
Use fabric stiffener on the tulle for a dome shape that holds through the season.
Avoid using thick felt for the face features — it looks like store-bought plastic when close up.
16. Ikea Jar Lids as Ornament Holders on a Pegboard
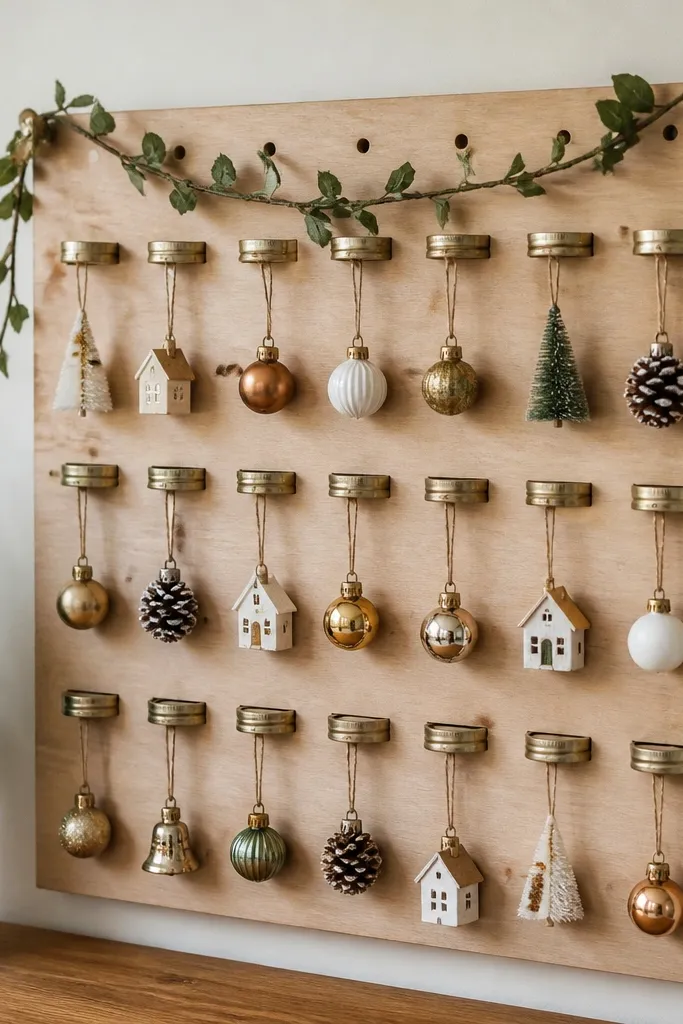
This turns ornaments into an organized wall display. Jar lids are flat and easy to mount, and you can hang ornaments by string so they don’t get lost in boxes. I paint the lids one finish (matte black or antique gold) so the wall looks cohesive. The pegboard grid makes spacing fast and neat.
Quick tipUse a single knot style for every ornament string so hang lengths match.
Mount a pegboard panel and mark holes for lids. Screw lids into place, then tie ornament strings to slip over small hooks or to the lid handle area. Run a thin garland wire across the top and tuck it behind ornaments so it disappears into the grid.
One warningDon’t mix lid finishes — chrome with matte black looks mismatched.
17. Ikea Shelf Liner Wreath in a Cube Wall
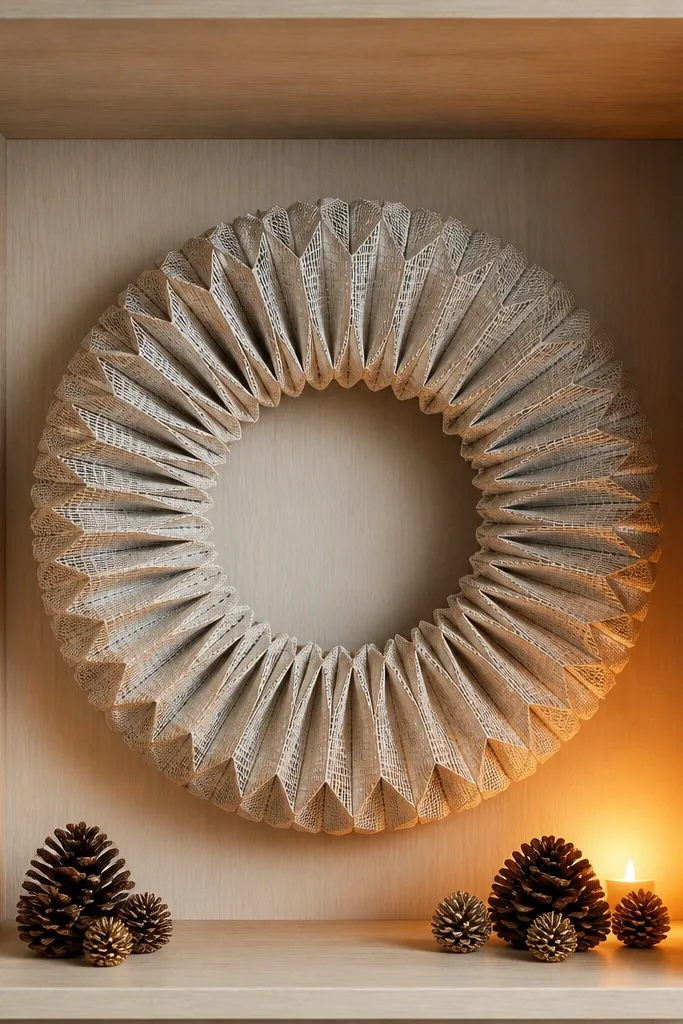
Shelf liner makes a wreath that holds shape without expensive foam. I fold and twist the liner into petal-like loops, then stack them around a simple ring. The material is thin enough to create texture but sturdy enough to keep its form. When placed in a cube opening with a warm light, it reads as a clean, modern winter wreath.
Cut shelf liner into strips about 2.5 cm wide and 30-40 cm long. Twist each strip into a loop and glue to a ring base made from cardboard. Build a full circle with tight spacing, then place in a cube on a small light source like a battery tea light in a cup.
Add one ribbon bow in the same color family as your liner so it looks intentional.
Avoid loose loops — big gaps make the wreath look unfinished.
18. Ikea Frame + Fabric Scrap Banner for Spring to Winter
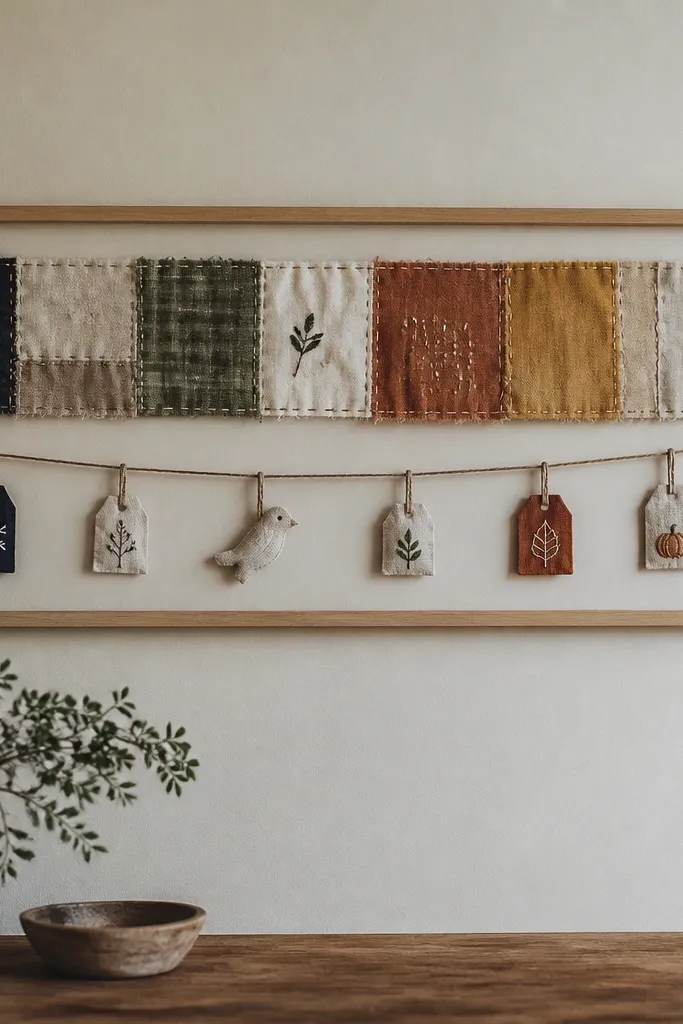
This is how I reuse fabric scraps every season. The frame creates a straight top and bottom edge, and the scraps add color without needing new materials. I hang tiny tags (paper rectangles) to switch themes: snowflakes for winter, leaf shapes for fall. It looks handmade but tidy because everything is inside the frame boundaries.
Quick tipPress each fabric scrap flat under a book for 10 minutes before gluing so it doesn’t pucker.
Mount a long Ikea frame and use the backing board as your base. Glue fabric scraps in a staggered line, leaving 1-2 cm between pieces so the pattern breathes. Add twine across the top and attach tags with mini clothespins.
One warningDon’t cover the entire backing solid — negative space keeps it from looking messy.
19. Ikea Rattan Basket Candle Cups for Cozy Corners
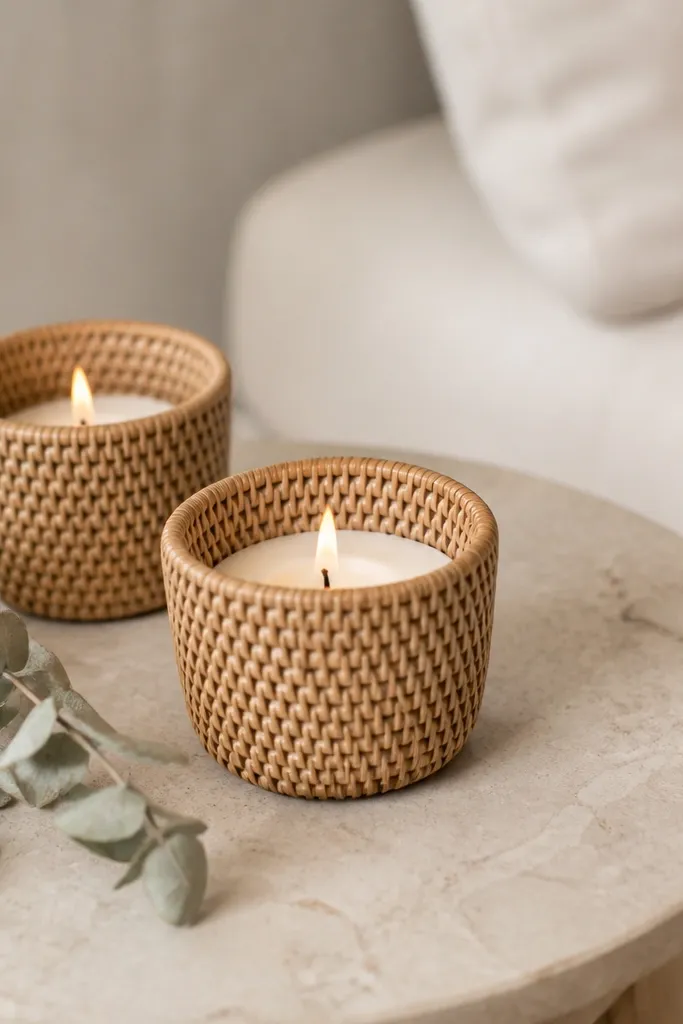
Basket texture makes candlelight look softer. I place white candles inside small rattan baskets and add a few sprigs of dried eucalyptus or faux greenery tucked around the rim. The woven surface diffuses the light so it doesn’t look harsh. It’s a small change that makes a corner feel finished without a full holiday theme.
Quick tipDust rattan lightly with a dry brush before styling so it looks clean under light.
Choose baskets that fit the candle diameter with 1-2 cm clearance. Use flameless LED candles if you’re placing them near fabric or paper. Tuck greenery around the basket edge and secure with a dot of hot glue on the back side where it won’t show.
One warningAvoid using a candle that’s too tall — it can make the basket look like a holder instead of decor.
20. Ikea Lack Shelf "Countdown" Door With Number Tiles
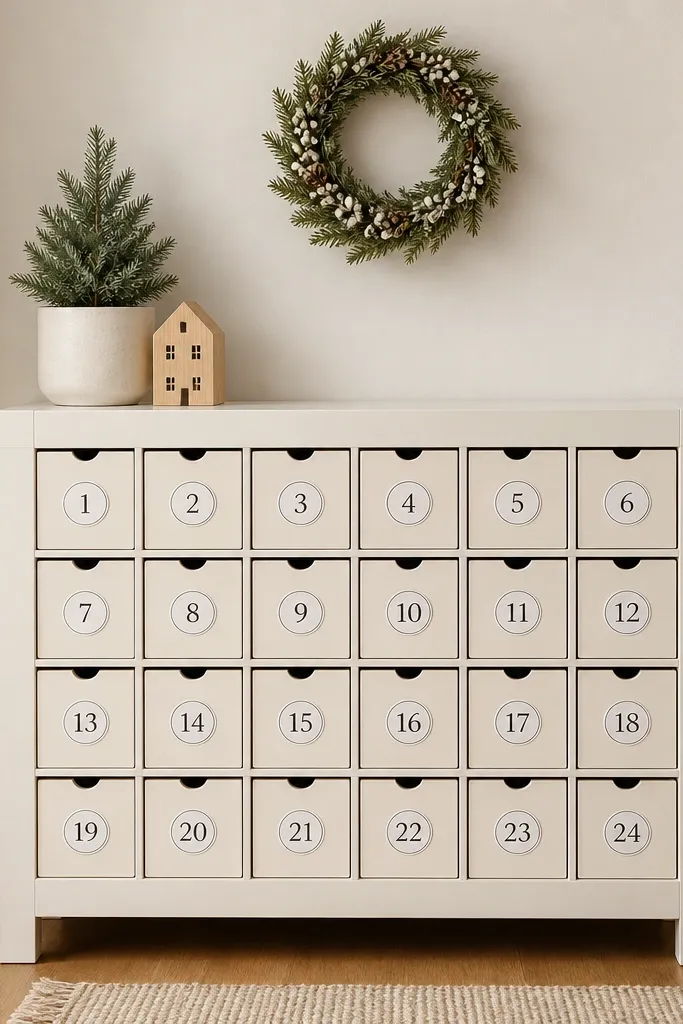
You get an advent calendar look without buying a dedicated calendar. The key is making compartments that open cleanly and labeling them so you don’t have to remember where things go. I use foam board divider walls and printed number tiles in one consistent font. When hung in a visible spot, it becomes decor even when it’s not advent season.
Quick tipUse paper clips as mini handles for each compartment so opening is smooth for kids.
Build a small box on the shelf using foam board walls about 8 cm tall. Create compartments by adding dividers spaced 6-7 cm apart. Print number tiles and stick them centered on each compartment front. Add a small magnetic strip behind each divider if you want doors that lift easily.
One warningAvoid handwriting numbers — uneven spacing makes it look rushed.
21. Ikea Cabinet Knob Snowflake Ornaments
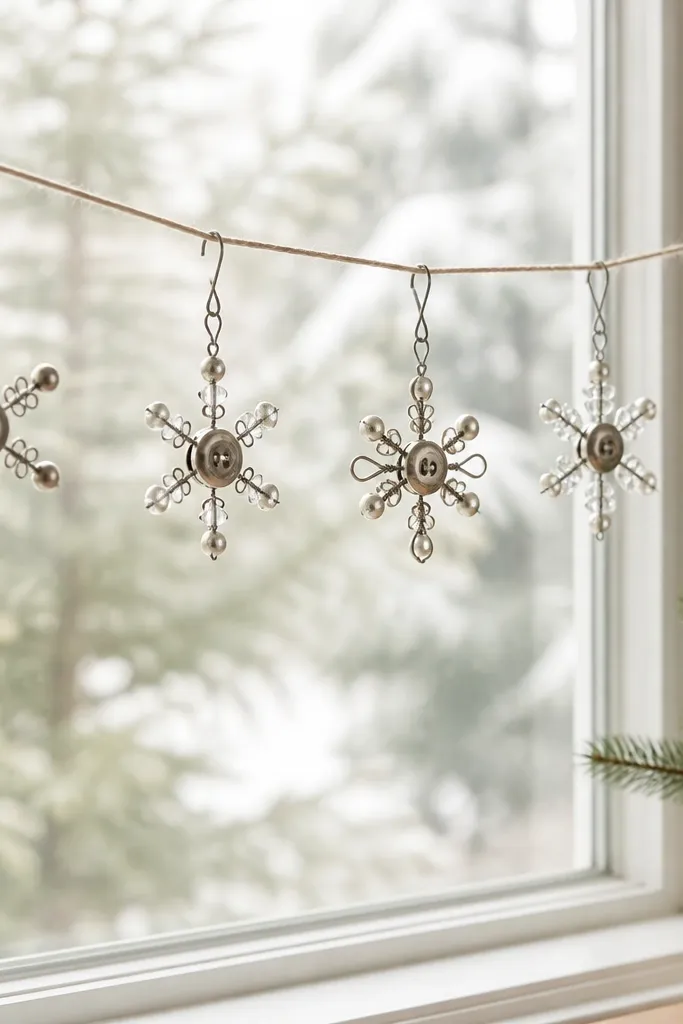
This is the craft I reach for when I want something that looks “metal” but costs almost nothing. Cabinet knobs give you a solid center, and wire turns them into snowflake shapes. I spray the finished ornaments in one metallic finish, then hang them on thin string at slightly different heights. They catch light and make a window look decorated without heavy bulky garlands.
Quick tipAdd one matte snowflake per cluster to keep the metallic from overpowering the window.
Use wire cutters to shape snowflake arms, then twist wire around the knob shank. Spray with metallic paint and let cure fully before hanging. Hang ornaments on a string with small loops so they swing just enough to catch light.
One warningAvoid thick wire — it makes snowflakes look chunky and less delicate.
22. Ikea Table Runner to Wall Hanging for Holiday Color Blocking
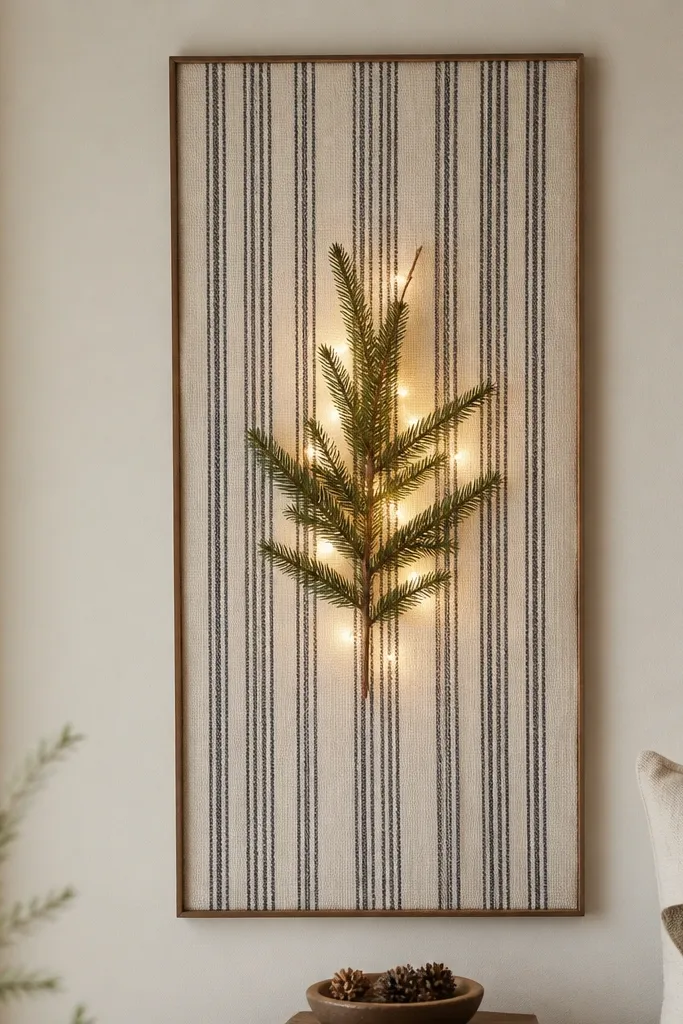
Color blocking is the fastest way to make a cheap holiday set look designed. I use a table runner as the main fabric layer and stretch it across a simple frame or backing board. Then I pin a few evergreen sprigs behind it and add a warm light string so the fabric glows slightly. It looks like a modern wall piece, not a craft project.
Quick tipIron the runner on low heat with a pressing cloth before you mount it.
Trim the table runner to fit the frame backing, leaving 1-2 cm on each side for tucking. Pin or glue the runner to the back so the front stays wrinkle-free. Tuck greenery behind the runner near the bottom corners and hide the light string within the folds.
One warningAvoid stretchy runners — they sag over time and ruin the crisp look.
23. Ikea Paper Lanterns in a Kallax Corner With Backdrop Paper
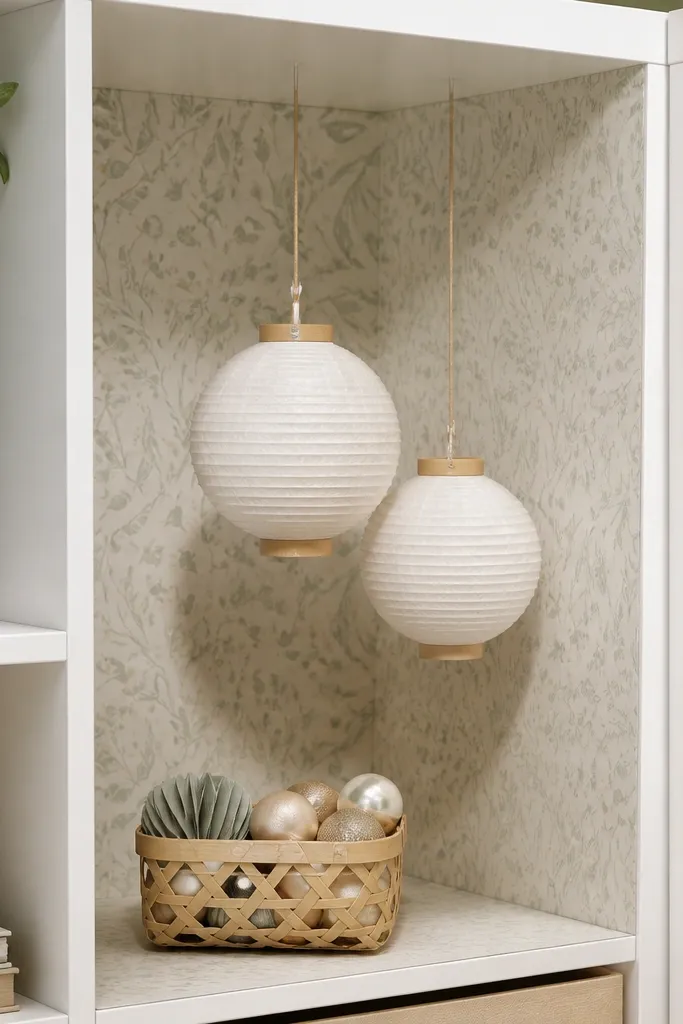
Paper lanterns look best when they have a backdrop. I line the back of a Kallax section with patterned paper (muted, not neon), then hang lanterns so their light spreads across the paper texture. The contrast makes the lanterns look fuller. This works for both winter and spring because you can swap the paper pattern.
Cut patterned paper to the back panel size and tape it flat. Hang lanterns from small hooks installed on the inside top edge of the cube. Place a basket of ornaments or faux greenery at the bottom to ground the scene.
Use lanterns with warm bulbs or warm LEDs so the paper pattern doesn’t look gray.
Avoid bare back panels — plain wood behind lanterns makes the light look uneven.
24. Ikea Curtain Tie-Up Bow Wreath on a Door Handle
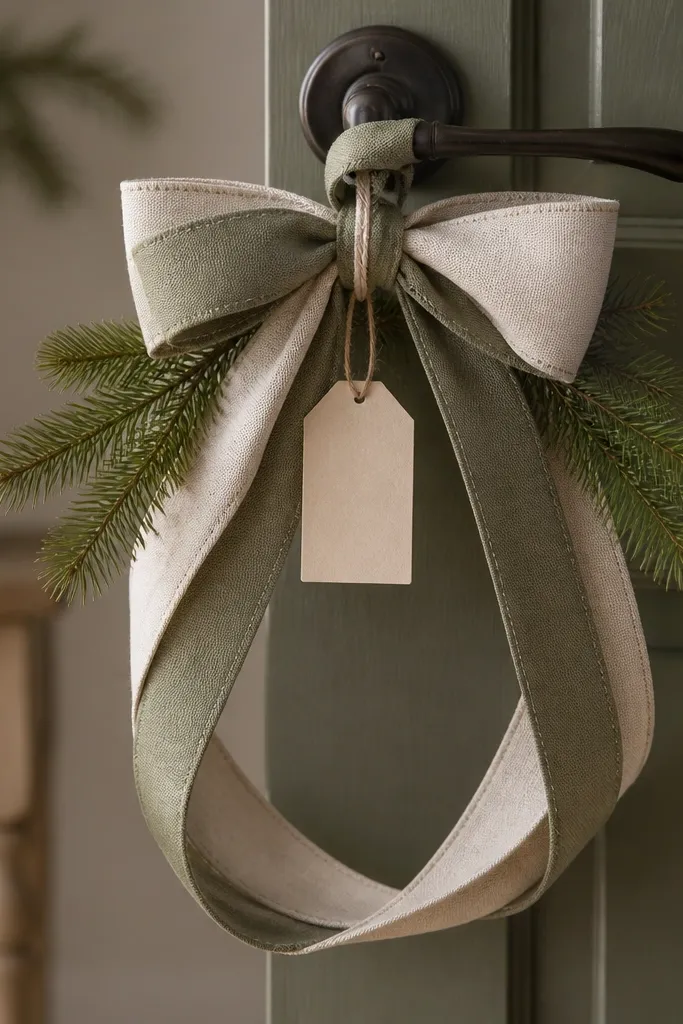
This is a quick, high-visibility holiday look. You build a looped wreath shape from ribbons, then tuck small sprigs around the loops so it looks natural rather than flat. The bow ties hold shape better than loose ribbon because they’re designed for fabric grip. It’s perfect for rentals where you can’t mount a wreath.
Quick tipUse two ribbon widths: one 2.5 cm and one 5 cm for better shape.
Tie ribbon loops around the door handle in a circular pattern and secure with a hidden knot behind the loops. Add 4-6 small sprigs by tucking and tying them with thin floral wire. Finish with a simple tag centered on top using twine.
One warningAvoid slippery satin — it slides and the wreath collapses by day two.
25. Ikea Railing Planter With Mini Ornaments for a Front Porch
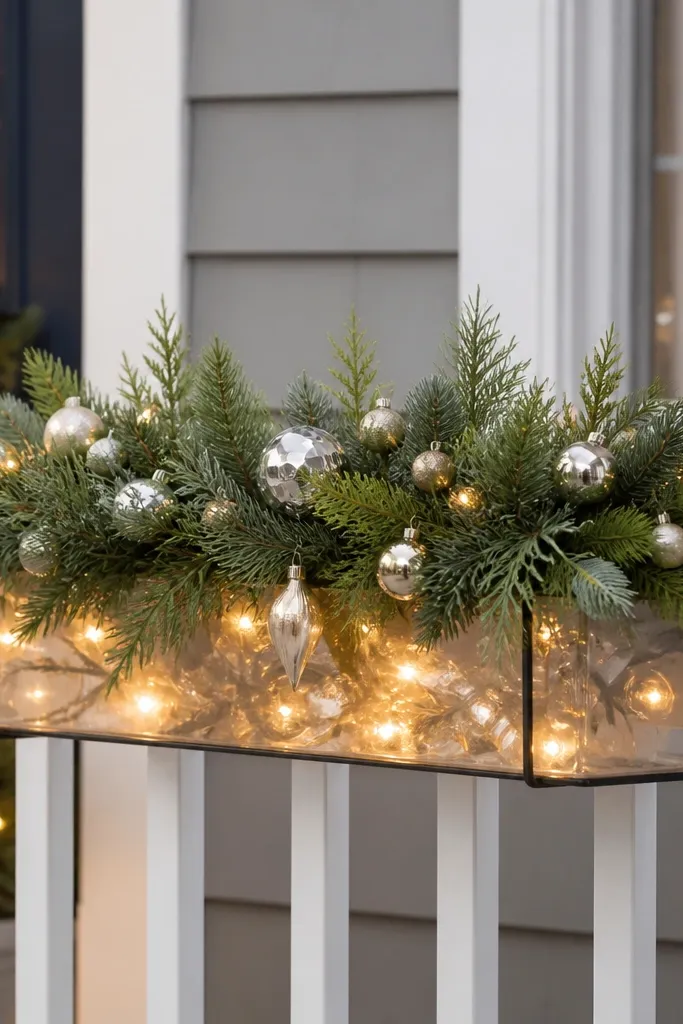
Planters look like real landscaping when you keep the structure simple. I pack faux evergreen into a planter insert, then tuck mini ornaments at different depths so you see them from walking height. A small warm light inside a clear container makes the ornaments glow without needing a big outdoor light setup. It reads festive and tidy from the street.
Use a railing planter and fill with a foam base or a tight bundle of faux greenery. Tuck ornaments into greenery so hooks disappear. Place a clear container with battery LED lights near the center, then cover it with a few branches so the glow is indirect.
Add one consistent ornament shape (all stars, for example) so the cluster feels designed.
Avoid leaving foam visible — it turns the planter into a craft project instantly.