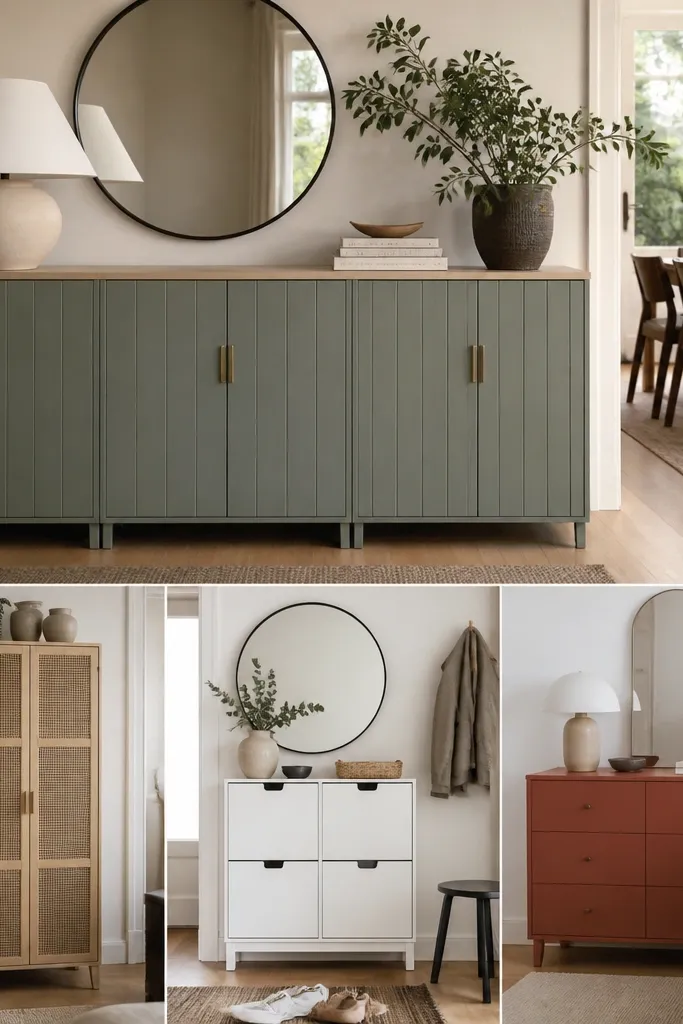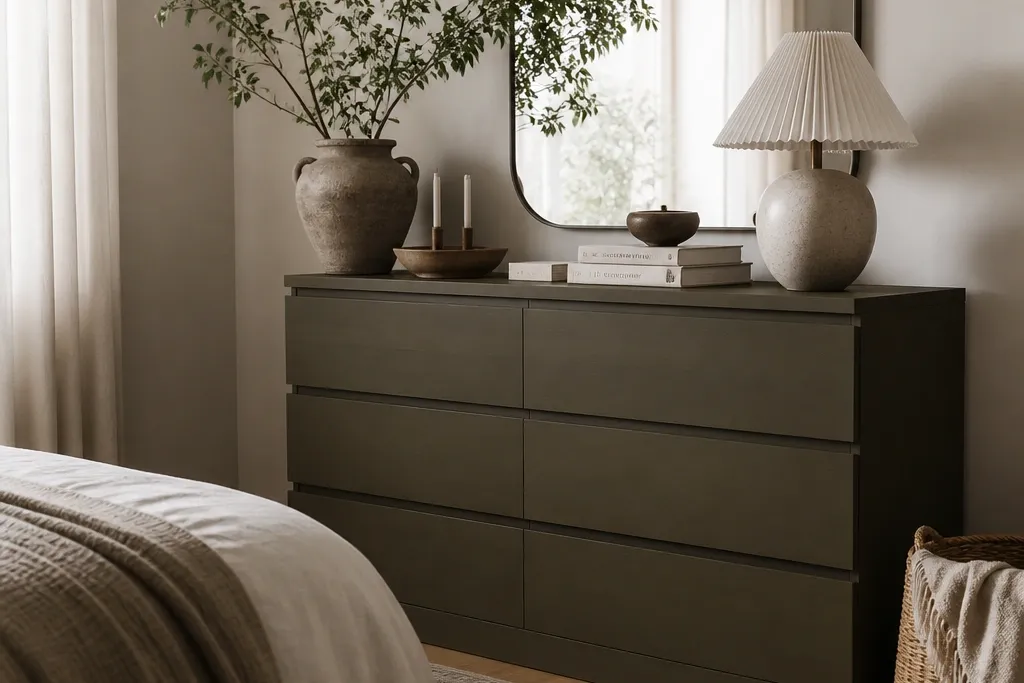
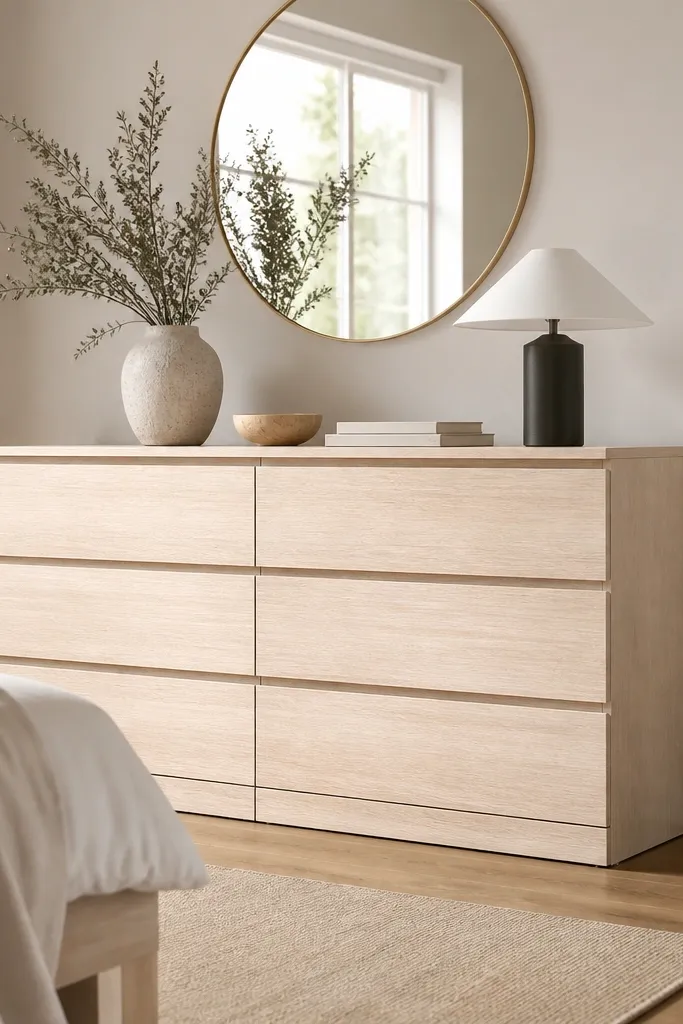
1. Brass bar pulls on Malm drawers with satin edge spacing
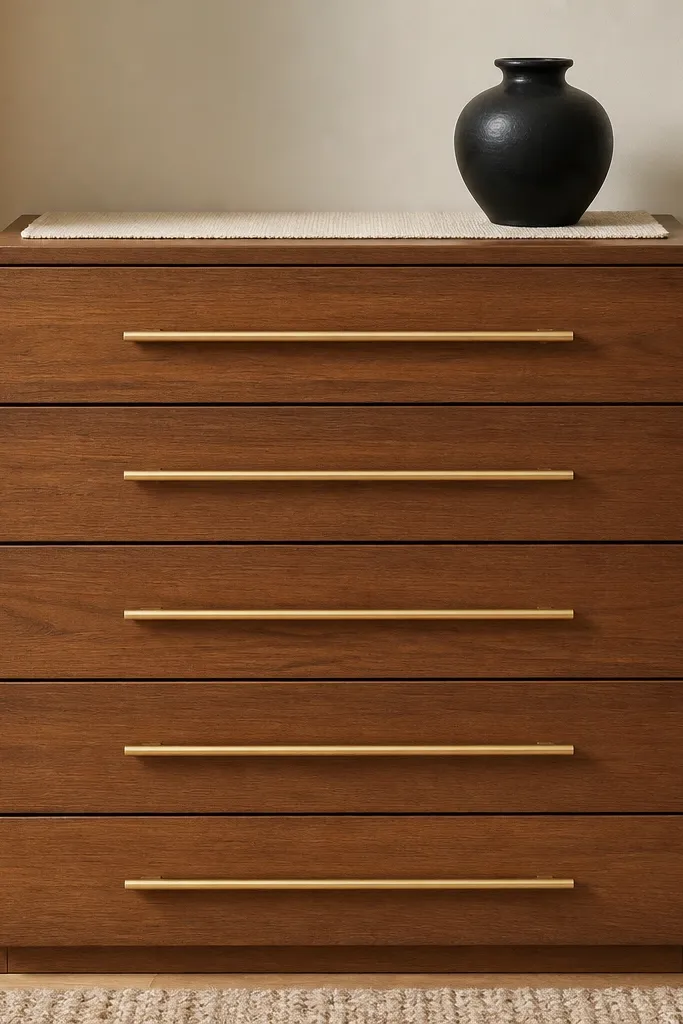
This is the quickest “luxury shift” because bar pulls change the proportions of the whole front. Use satin brass, not polished gold — satin reads softer and hides fingerprints. I’ve matched this look with warm cream textiles and a dark charcoal accent so the metal doesn’t look loud. It flatters rooms with light floors and neutral walls because the hardware adds contrast without looking harsh. If your skin tone leans warm, the brass looks especially flattering near your hands when you grab the drawers.
Start by removing one drawer front and measuring the pull center-to-center spacing on the existing holes. Fill the old holes with wood filler, let it cure, then sand flush so the new hardware sits tight. Mark new pull positions with painter’s tape on the drawer face — I measure from the left edge and then double-check with a ruler so the pulls line up across all drawers. Install the brass bar pulls using the included screws and tighten firmly but don’t strip the holes. Finally, style the top with a cream runner and one dark ceramic piece to lock in the luxe palette.
Use a small piece of masking tape as a “level” guide so the pull sits perfectly straight before you drill. Satin finishes look better under warm bulbs, so aim for 2700K lighting.
Avoid mixing polished gold pulls with matte black decor — the shine mismatch reads cheap.
2. Hidden magnetic drawer liners in holiday tartan
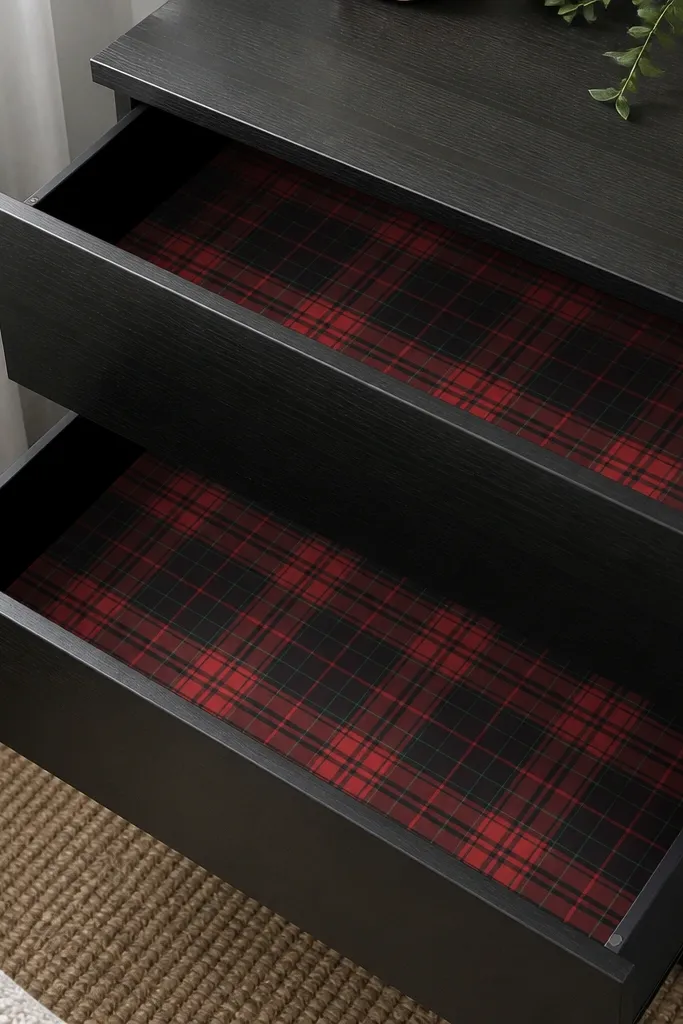
Drawer liners aren’t just “cute” — they change how the piece feels when you open it, and that’s where luxury lives. Tartan in red-black-green looks holiday-ready but still classic when you keep the rest of the room neutral. I use fabric that has a bit of weight (cotton twill or wool-blend) so it doesn’t crinkle. This setup flatters small spaces because the pattern fills the drawer opening without cluttering the room. It also works for people who hate visible clutter because you can keep items tidy and still feel festive.
Start by cutting liner pieces to the drawer dimensions minus 1 cm of clearance on each side so the fabric slides in smoothly. Glue thin foam or stiff interfacing to the back so the liner holds shape. Then add magnetic snaps or small rare-earth magnets to the underside corners and matching spots on the drawer base so the fabric stays flat. Fold the corners neatly and glue the flaps down with fabric glue — press for 30 seconds per seam. Place your folded holiday items inside and test the drawer opening before you finish styling the top.
Quick tipChoose tartan with a dark base if your dresser is light — it hides minor stains and looks intentional.
One warningAvoid thin quilting cotton liners that bunch at the corners — they look like store-bought craft fabric.
3. Faux leather top tray runner for instant grown-up holiday styling
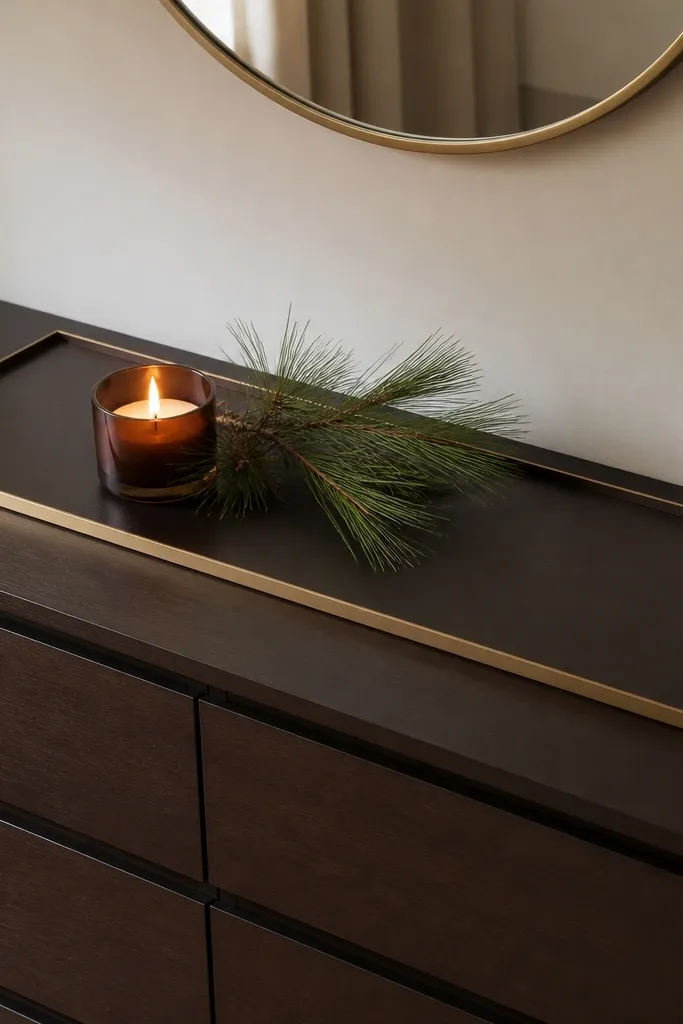
A top tray changes the whole “surface story.” Faux leather in espresso brown looks expensive because it has a subtle grain and absorbs light, which makes candles and greenery pop. This works great for holiday because you can swap objects without moving your base. It flatters rooms with warm neutrals and wood tones, and it keeps the dresser from looking bare when the season changes. If you like a clean look but still want holiday vibes, this is the compromise that always looks intentional.
Start by measuring your Malm top surface length and width, then add 2-3 cm on each side for a slight overhang. Use a heavy faux leather sheet or vegan leather with backing so it doesn’t curl; trace the shape and cut with a sharp utility knife. Glue thin felt to the underside so it doesn’t scratch and so it lies flat. Edge-finish with a simple blind stitch or use leather edge paint if you have it. Center the tray, then layer one candle holder, a small brass tray, and pine sprigs around it.
Quick tipUse warm white candles (not blue-white) — the leather makes them look richer.
One warningAvoid glossy patent leather; it reflects too much and reads costume.
4. Clip-on holiday garland along the top rail with removable hooks
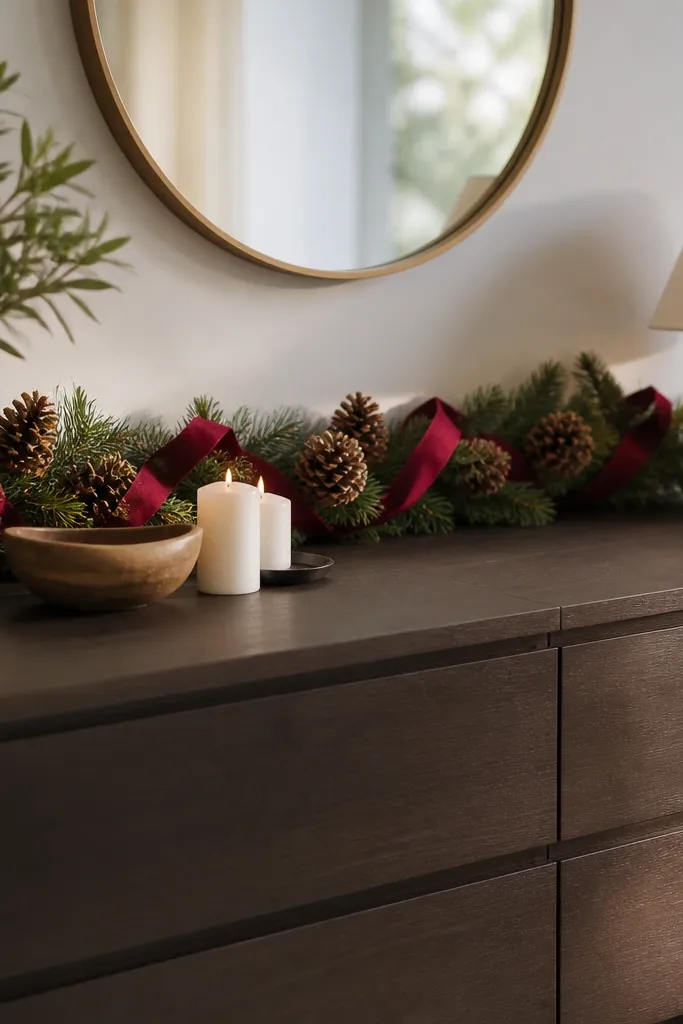
This gives you holiday framing without gluing anything to your furniture. The luxury look is in the line — a garland that sits evenly across the top edge makes the dresser look designed. I’ve used matte faux pine and real pinecones for a layered texture that doesn’t look flat. It suits people who host because you can take it down quickly and switch themes. In rooms with neutral walls, the garland adds depth without turning the whole space into a themed set.
Start by cleaning the top edge where the hooks will sit so adhesive sticks (if you use adhesive hooks) or position the hooks if you’re using non-damaging clips. Lay the garland across the top and mark where each clip should go so it drapes with gentle curves. Add small clear command-style hooks or low-profile clips every 10-15 cm along the edge. Fluff the garland after clipping so the needles spread and the pinecones sit at different heights. Finish with a thin ribbon loop at the center and two small candle holders at the sides.
Quick tipUse a ribbon that’s wired — it holds shape and looks cleaner than floppy fabric.
One warningAvoid chunky ornaments all in one line; it makes the garland look like a craft project.
5. Charcoal painted drawer fronts with brass hardware and a cream runner
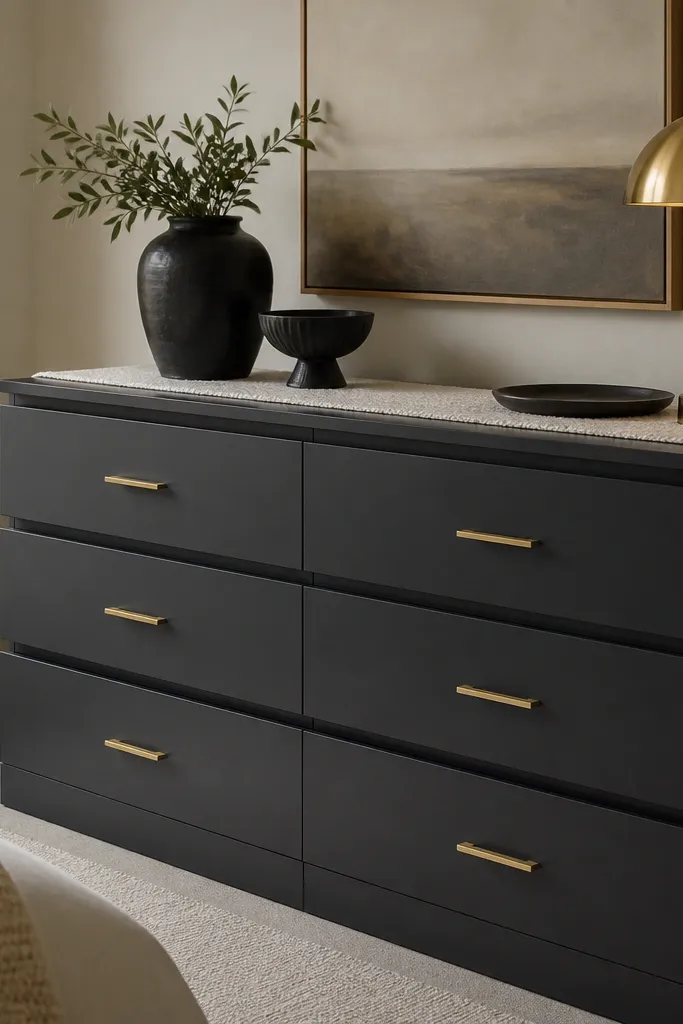
Painting the drawer fronts is the biggest visual change, and charcoal makes it feel modern-luxe instead of “DIY painted.” Charcoal hides small scuffs and looks refined next to brass. I’ve done this with warm cream walls and it always reads upscale because the contrast is controlled. It flatters cool-toned rooms and creates a strong backdrop for holiday styling. If you’re fair-skinned with cool undertones, charcoal and silver/brass accents look sharp without being harsh.
Start by removing all drawer fronts and sanding lightly with 180-grit so the paint grips. Clean with a degreaser wipe and let dry fully. Prime with a bonding primer, then spray or roll a chalk-matte paint in charcoal; I like a matte finish because it looks like furniture, not lacquer. Let each coat dry, then sand very lightly between coats with 220-grit for a smooth feel. Reinstall hardware using the filled and sanded holes method from the first idea, then style the top with a cream runner and one black ceramic piece.
Quick tipKeep the top neutral when you paint the drawers — a cream runner prevents the whole piece from looking heavy.
One warningAvoid glossy black paint; it shows brush marks and fingerprints like crazy.
6. Malm bed frame with faux sheepskin throw drape and matte black side tables
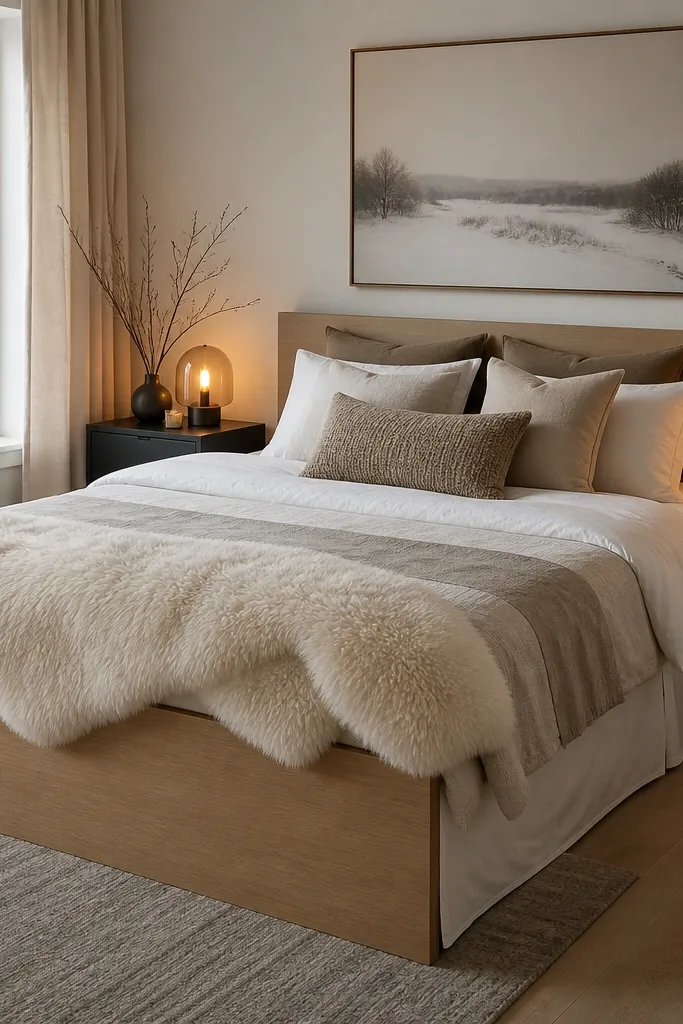
The luxe look here is texture and contrast at the bed’s “front view.” A cream faux sheepskin throw reads cozy and high-end, especially when it drapes naturally rather than being folded into corners. Pair it with matte black accents so the throw doesn’t blend into light bedding. This setup flatters bedrooms with light floors and makes the bed look taller. It also works for anyone who wants a holiday vibe without hanging ornaments — the fabric does the work.
Start by selecting a sheepskin throw with short pile so it doesn’t look shaggy. Drape it from the bed’s foot so it spills evenly about 25-30 cm down the side, then smooth the pile with your palm. Add a bed skirt or keep the existing skirt crisp and ironed so the bottom line looks straight. Place a matte black side table on each side if you can, then style lamps with warm bulbs (2700K). Finally, add one small black tray on the table with a single candle and a pine sprig.
Shake the throw outdoors or in a closet to fluff the pile before you drape it.
Avoid long-pile shag throws; they look messy on a clean Malm bed frame.
7. Removable fabric bed skirt panels in deep green velvet
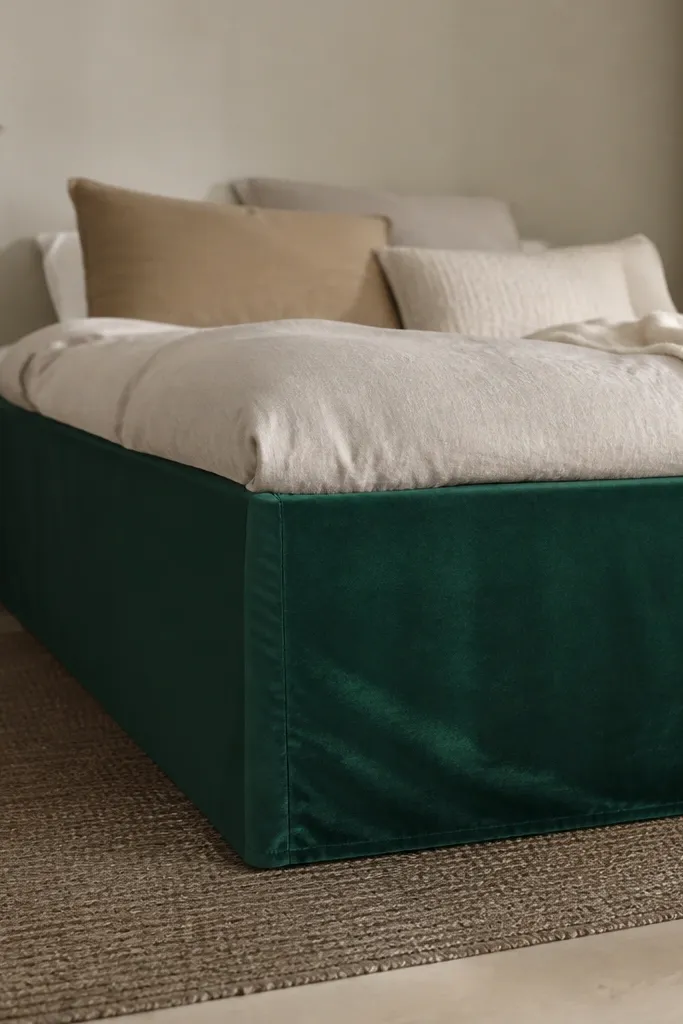
Velvet reads luxury under warm light because it changes shade as you move. Deep green is holiday-ready without looking like a party theme, and it pairs well with cream bedding and brass accents. I love removable skirt panels because you can swap seasons — green for winter, ivory for fall, black for holidays. This works especially well if your room feels plain or the bed frame looks too “flat.” It flatters most skin tones because it adds depth without pulling attention away from people.
Start by measuring the bed skirt length from the mattress edge down to where you want the hem to land. Cut velvet panels with 1-2 cm seam allowance and add stiff interfacing or thin foam to the top edge so it hangs straight. Sew or glue a narrow hem at the bottom edge and tuck the top edge behind the mattress platform or attach with hidden snaps. Fit each panel so seams meet neatly at corners, then press lightly with a steamer on low so it doesn’t crush. Finish with a cream throw at the foot so the velvet reads rich, not heavy.
Use a fabric brush to lift velvet nap before you hang it — it looks smoother in photos.
Avoid attaching velvet directly with visible tape; it droops and looks temporary.
8. Malm dresser mirror wrap with thin gold frame trim
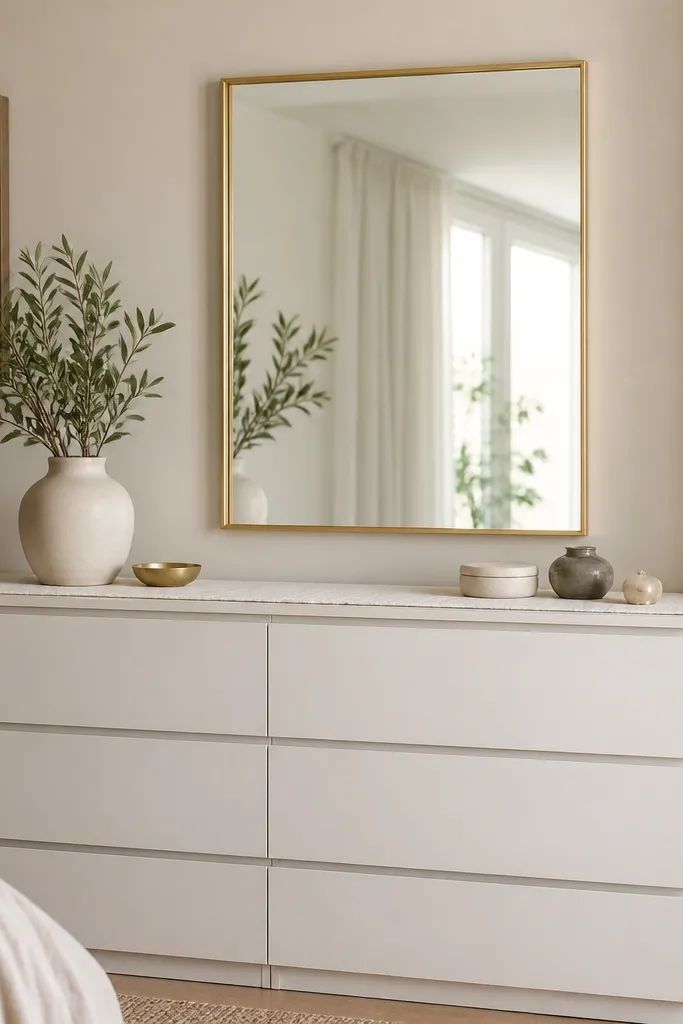
When you style a Malm dresser, the mirror often becomes the luxury focal point. A thin gold frame trim looks custom because it adds a crisp border without building a bulky look. I like satin gold trim because it matches satin brass hardware and avoids that overly bright “craft gold” vibe. This flatters small apartments because the frame adds polish without taking up extra space. In winter, you can add a simple garland behind the mirror and it still looks cohesive.
Start by measuring the mirror outer edge and choose picture-frame trim with a width around 1-2 cm. Clean the mirror frame surface so adhesive grabs. Cut the trim at 45-degree angles for corners and dry-fit before gluing. Apply a thin bead of strong adhesive and clamp or tape until set. Once installed, style the dresser: cream runner, one black candle holder, and two small matte ornaments spaced evenly on the sides.
Paint the trim edges with a matching satin gold touch-up pen so the miter seams don’t show white glue lines.
Avoid thick decorative trim; it makes the mirror look like a cheap resale frame.
9. Drawer face shadow-gap trick with vinyl edge tape in smoke gray
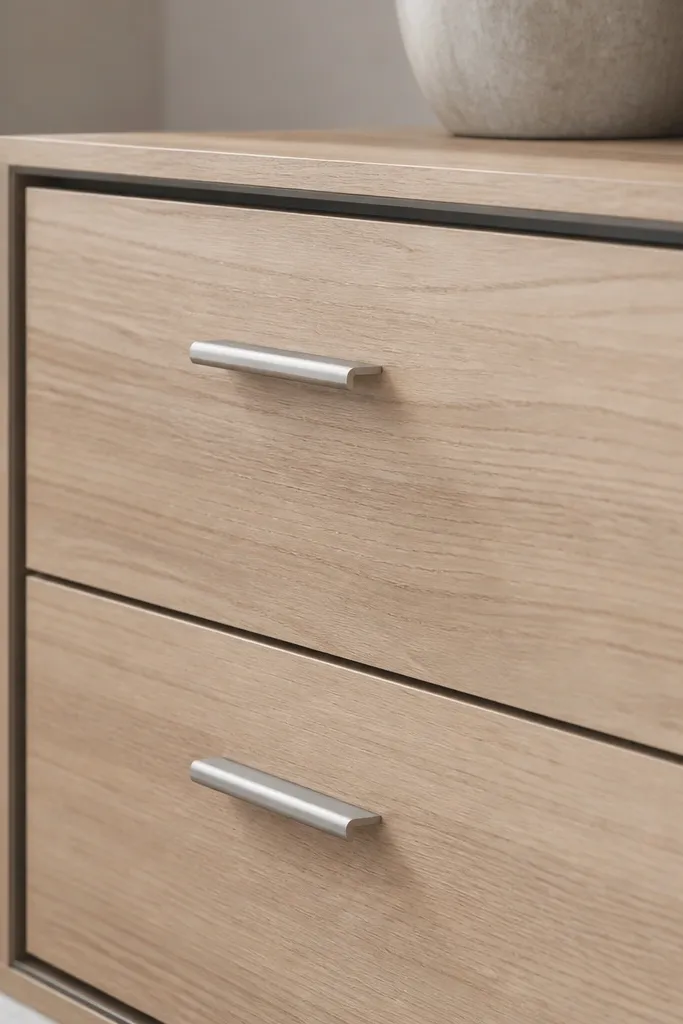
This is a subtle trick that looks expensive because it creates a “custom built-in” edge. A thin smoke-gray vinyl edge tape creates a shadow-gap effect that makes the drawer faces look more architectural. It’s especially good if you want to keep the wood tone but want the luxury finish. This flatters modern rooms because it adds a clean line without heavy color changes. It also makes holiday styling look sharper because your decor sits on a more finished base.
Start by cleaning the drawer face edges so the tape sticks — wipe with alcohol and let dry. Cut the vinyl edge tape to length and miter the corners with a sharp blade. Apply tape along the drawer perimeter, pressing hard with a plastic squeegee so it sticks without bubbles. Then install hardware, using careful alignment so the pulls sit centered in the new border. Style with a runner and keep one accent color — smoke gray pairs well with burgundy or pine green.
Use a hairdryer on low to soften the tape at corners so it lays flat.
Avoid thick tape; it ruins the shadow-gap illusion and looks like a label.
10. Seasonal runner swap system with non-slip gripper shelf liner
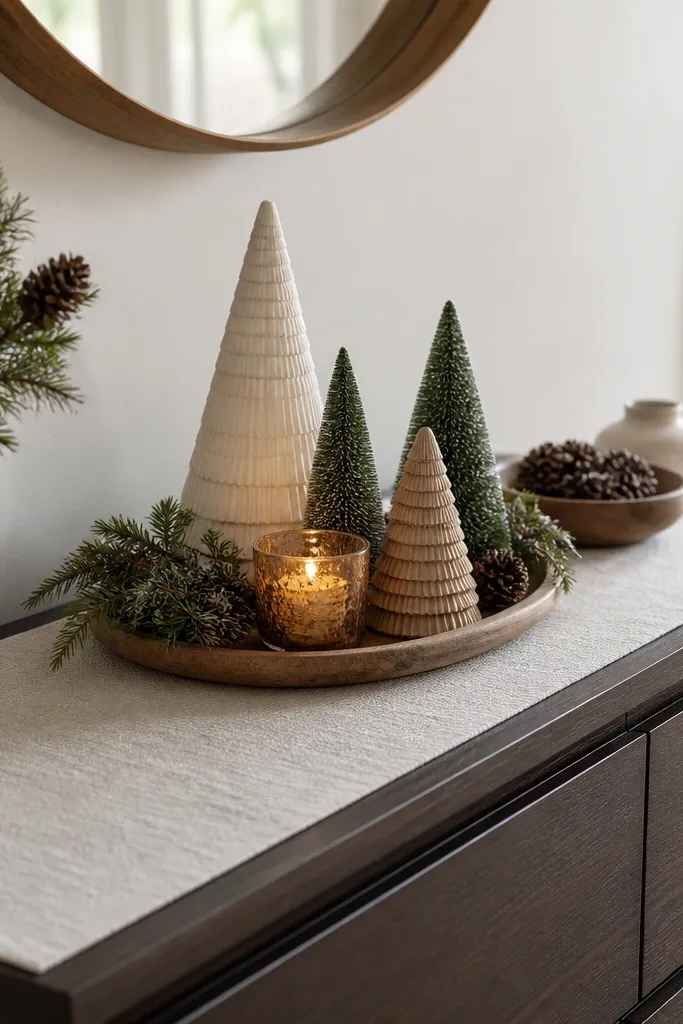
Luxury looks come from clean surfaces and controlled styling. A runner that doesn’t slide keeps your holiday objects aligned, and that alignment reads “designed.” I use linen or heavy cotton runners because they drape softly and look expensive when they fold. Gripper liner keeps everything from creeping when you move dishes, candles, or ornaments. This works for busy households because you can swap runners by season without redoing the whole setup. It also flatters small spaces because runners add softness without cluttering.
Start by measuring the dresser top and cutting a rectangle of shelf gripper liner slightly smaller than the surface. Lay the gripper liner down first, then place your runner centered with equal overhang on both sides. If your runner curls at the corners, iron it with steam on low and weight it for 10 minutes. Build holiday styling on top: a candle cluster at one end and a small seasonal arrangement at the center. When you switch seasons, remove the runner only — the liner stays put.
Choose runners with fringe only on the ends, not all around; it looks more tailored on a dresser.
Avoid slippery satin runners — they shift and make the decor look messy.
11. Malm dresser with faux marble contact paper panels behind decor
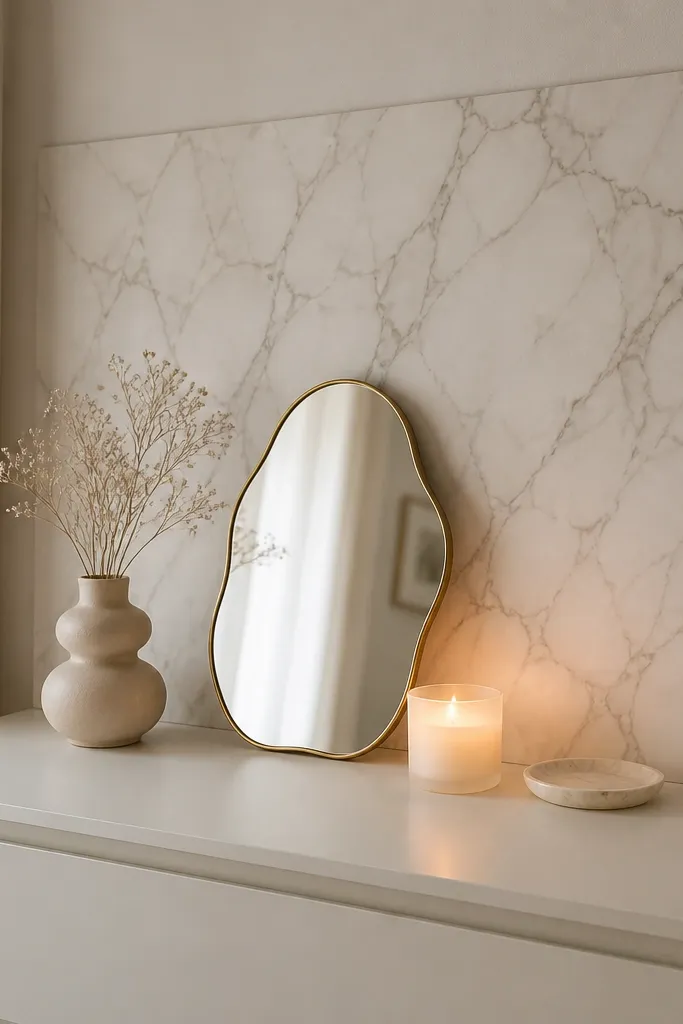
A marble-look backdrop makes small holiday items look like they’re staged for a magazine shoot. The key is matte contact paper with subtle veining, not glossy. I’ve used this behind a candle and a small decorative tray so the objects look “floating” on a luxe surface. It flatters neutral rooms because the gray-white marble adds brightness without adding color chaos. This is a smart choice if you rent or don’t want to paint your Malm.
Start by cutting contact paper to the size you want for a standing panel or a flat backdrop. Clean the surface you’ll adhere to (or cut a separate board if you’re not sticking to the dresser). Smooth the contact paper slowly with a plastic card to prevent bubbles — work from the center outward. Trim the edges cleanly with a sharp knife. Place the panel behind your decor on the dresser top and style with one metal element (brass candle holder) and one organic element (pine sprig).
Use a small foam board backing so the panel stands up straight and doesn’t flop.
Avoid high-gloss marble contact paper; it looks like a sticker.
12. Satin nickel hardware + black drawer liners for a winter goth-luxe vibe
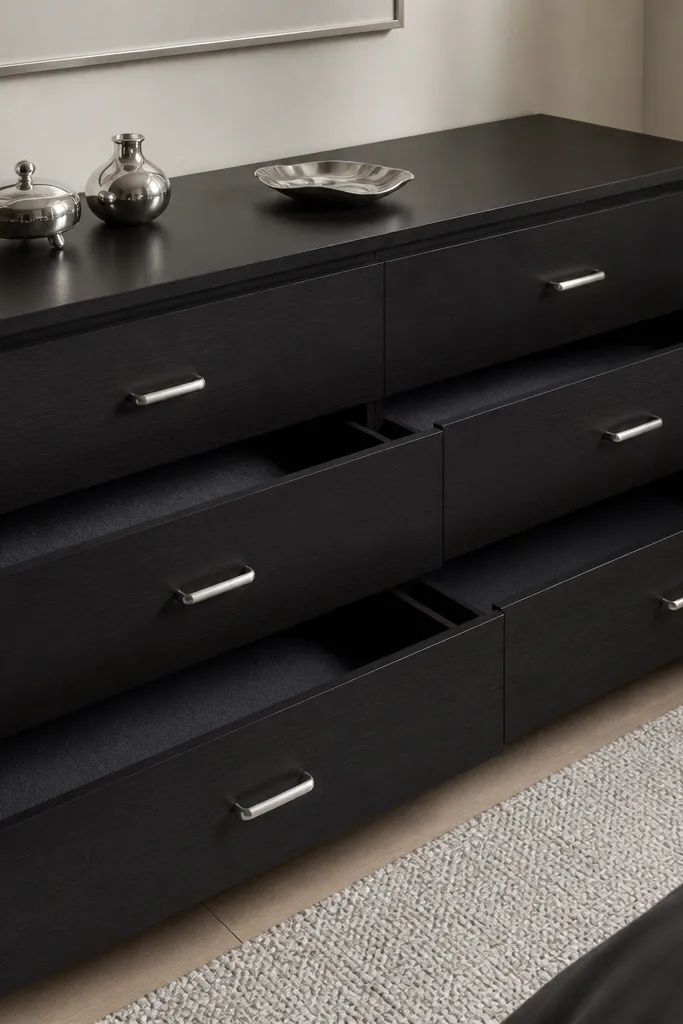
If you want holiday style that looks sharp instead of cute, go black liners and satin nickel hardware. Matte black hides everyday mess and makes metallic ornaments look colder and more sophisticated. Satin nickel reads less harsh than chrome, which keeps the look grown-up. This works beautifully in rooms with gray walls or dark wood floors because it creates a consistent tone. It’s also flattering if you wear darker clothing — the hardware and liners match and your room feels cohesive.
Start by swapping hardware to satin nickel and filling old holes like you would for brass pulls. Cut drawer liner fabric in black with a medium weight and add thin foam so it hangs flat. Use magnets or hook-and-loop so the liners stay in place when you open drawers. Style the top with a matte black tray and silver ornaments spaced apart, not piled. Add one warm light candle so the black doesn’t feel sterile in the evening.
Quick tipUse silver ornaments with a matte finish, not shiny — they look more expensive next to satin nickel.
One warningAvoid mixing chrome hardware with black liners; it reads harsh and temporary.
13. Malm dresser skirt made from pleated blackout curtain fabric
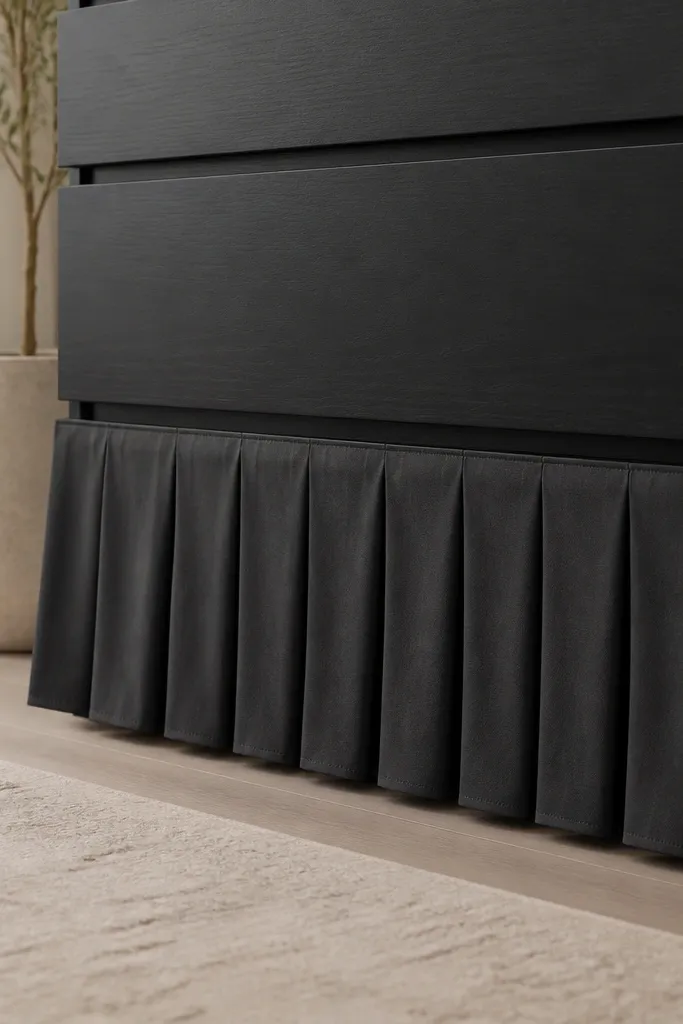
A dresser skirt changes the entire silhouette, especially in living rooms where the bottom line shows. Pleated blackout curtain fabric looks luxe because it has weight and drape, and it holds shape better than lightweight craft fabric. Charcoal makes it feel winter-ready and pairs with both brass and silver hardware. This flatters low-visibility corners because it hides clutter and visual mess underneath. It also makes the dresser look like custom built furniture instead of a standalone box.
Start by measuring the dresser height from the floor to the underside edge where you want the skirt to hang. Cut a strip of blackout curtain fabric with enough width for pleats (aim for 1.5 to 2x the needed width). Create even pleats using hand basting or clips, then sew the top pleat line into a channel. Attach the skirt channel with Velcro strips to the underside so it’s removable for cleaning. Hem the bottom with a clean fold and press with steam.
Keep the skirt hem 1-2 cm above the floor so it doesn’t collect dust and looks crisp.
Avoid thin lace skirt fabric; it turns see-through and looks like costume decoration.
14. Warm white LED strip under-top glow with hidden channel
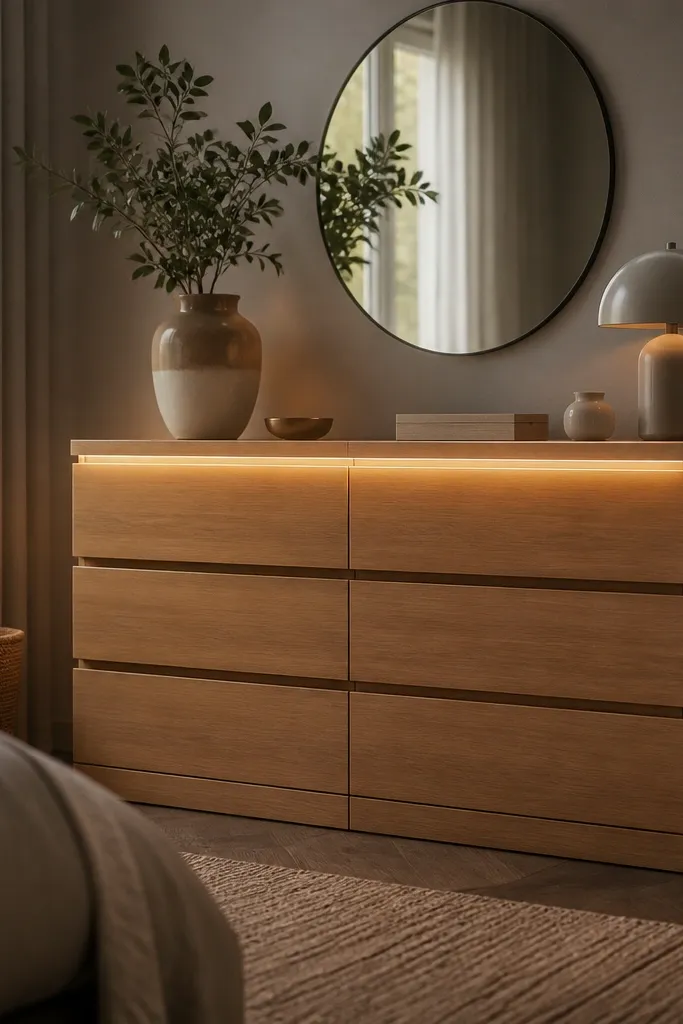
Lighting is the fastest way to make wood and metal look expensive. A warm white LED strip under the top edge creates a halo that makes your holiday candles and greenery look staged. I always use warm 2700K so it doesn’t look like a store aisle. This works for any season because you’re changing the mood, not the theme. It’s also flattering in bedrooms because it reduces harsh shadows when you get ready in the evening.
Start by choosing a warm white LED strip and a low-profile channel so the light doesn’t show as a bright line. Measure the underside perimeter and cut the strip only at marked points. Attach the channel with double-sided tape rated for LED strips, then route the wire to a hidden power point or battery pack. Test the lighting before fully securing the channel so you can adjust placement. Style the top with a runner and objects that reflect softly — brass, ceramic, matte glass.
Quick tipUse a dimmer if you can; controlling brightness makes the whole dresser look more expensive instantly.
One warningAvoid cool white LEDs; they make brass look dull and skin tones look gray.
15. Malm mirror-ledge tray with walnut veneer and mini wreath
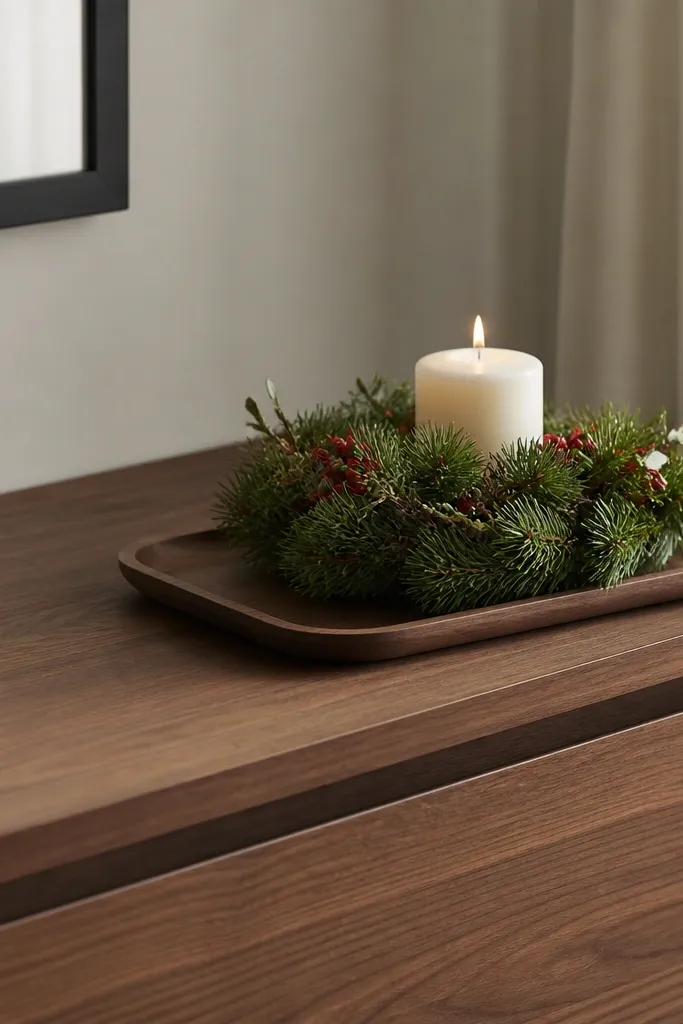
Walnut veneer looks premium because it has real-looking grain and warmth. On a Malm dresser, a tray creates an instant “decor zone” so your holiday items don’t spread out and look random. A mini wreath adds seasonal texture without overwhelming the surface. This is perfect if you like minimal decor but want the room to feel holiday-ready. It flatters warm and neutral interiors because the walnut tone bridges between wood furniture and holiday greens.
Start by buying a small walnut veneer sheet or using a pre-made tray base if you have one. Sand lightly and wipe clean, then apply veneer adhesive if you’re veneering — smooth with a roller to avoid bubbles. Seal with a matte or satin clear coat so it doesn’t look plasticky. Place the tray centered on the dresser top on top of a linen runner. Build the mini wreath and berries around the candle, keeping the wreath diameter small enough to leave space for the tray edges.
Choose a wreath with berries that are matte or lightly frosted — glossy berries look cheap on camera.
Avoid oversized wreaths on small dressers; it makes the whole piece look crowded.
16. Stacked books + brass risers for a holiday mantel-style dresser top
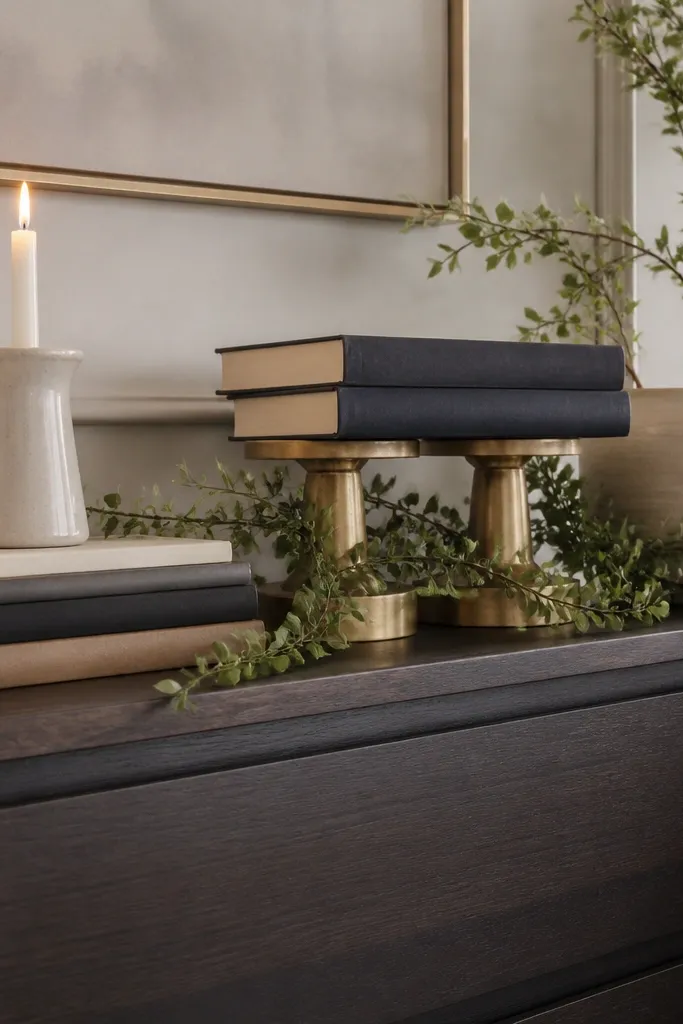
When you style a dresser top like a mantel, it instantly looks intentional. Brass risers add height without clutter, and stacked books give you a stable base to place holiday decor. I like using neutral book covers (cream, gray, black) so the season comes from greenery and candles. This flatters taller people and low lighting rooms because the vertical elements guide the eye upward. It also works for holiday parties because the decor looks “set” even when guests move around.
Start by picking three books with similar thickness and neutral covers. Stack them so the top book sits slightly off-center, then place a brass riser or two on the stack. Lay a thin garland strand along the back edge of the dresser top, then tuck it behind the risers. Add a ceramic candle holder on the riser and a small ornament cluster on the side. Finish by adjusting heights until you have one clear tallest point in the center.
Use museum putty to keep garland and candle bases from sliding on smooth surfaces.
Avoid mixing too many bright colors in the books; it makes the setup look like a photo prop.
17. Malm drawer fronts with linen "panel pulls" using ribbon ties
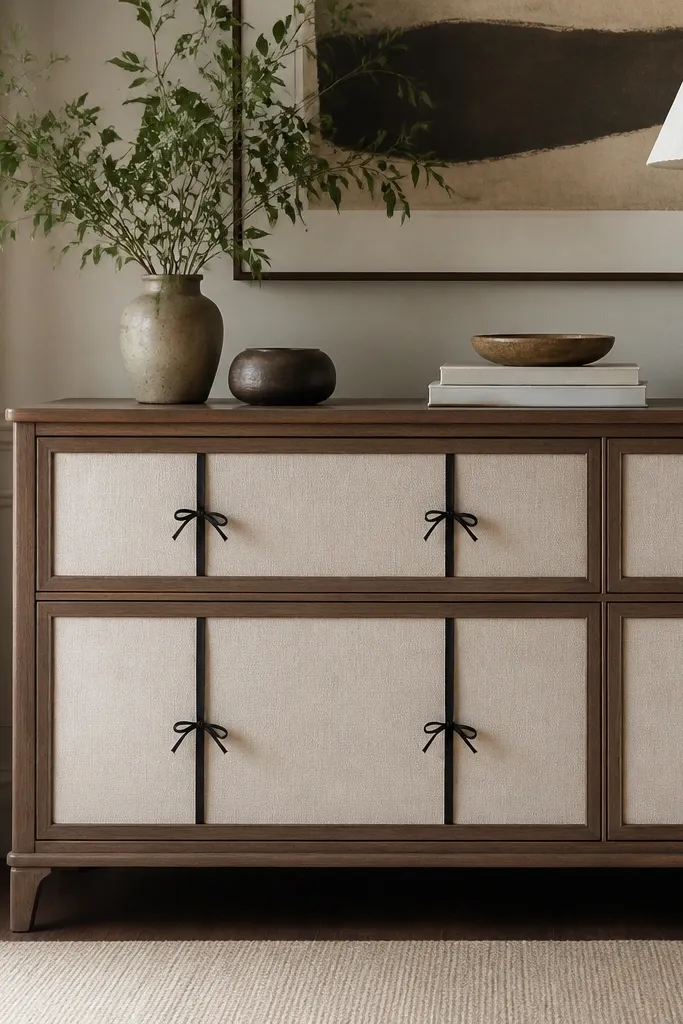
This idea creates a soft, tailored look without painting. Linen panels tied with ribbon make the Malm front feel like it’s dressed for the season, and it reads upscale because linen has texture and depth. I’ve used off-white linen for fall and deep green linen for winter so you can swap color with the holidays. This flatters rooms with light walls and makes the furniture look less boxy. It also works for people who don’t want to drill new hardware.
Start by cutting linen panels sized to each drawer front, leaving a 1-2 cm gap around the edges. Add iron-on interfacing to the back so the panels hang flat and don’t curl. Attach panels using small ribbon ties that loop behind the drawer front or use fabric-safe adhesive dots on the back edge. Center each panel and tie in a consistent knot style so they look uniform. Style the top with a neutral runner and one seasonal accent color — like burgundy or pine green.
Quick tipUse narrow cotton ribbon in matte black or dark brown for a cleaner knot than shiny ribbon.
One warningAvoid bulky knots; they make the front look like a gift wrap.
18. Holiday ribbon border on the dresser top with matching bows
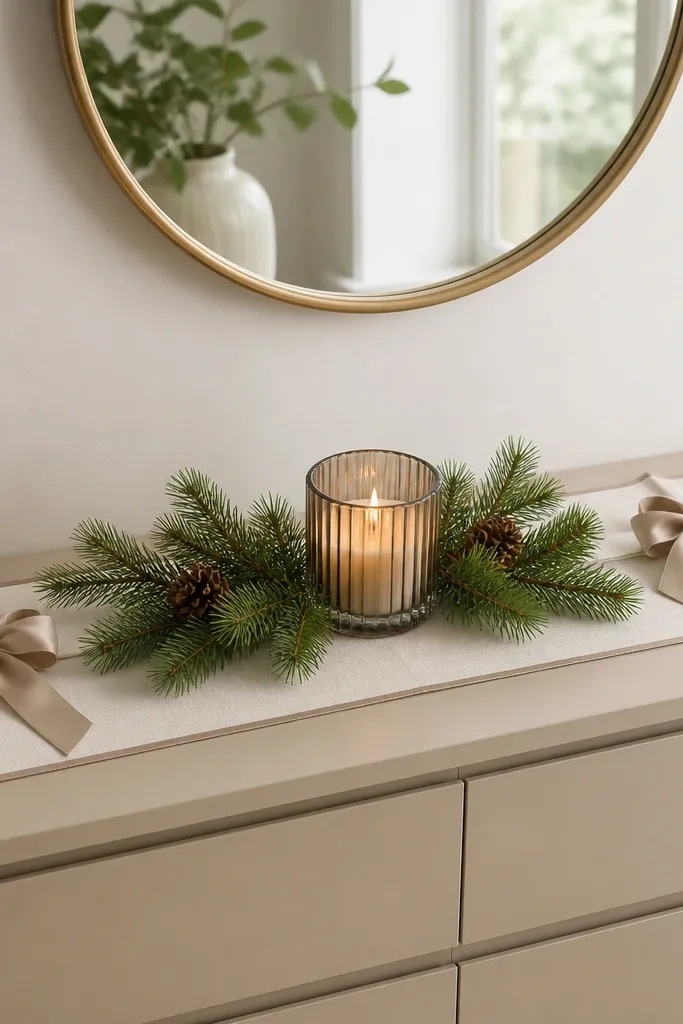
Ribbon borders look expensive when they’re thin and consistent. The trick is treating the runner like a framed surface: ribbon outlines the perimeter, and matching bows anchor the corners. I use wired ribbon in a matte finish because it stays crisp and doesn’t sag. This works for holiday because it frames your decor without adding clutter. It flatters small rooms because it creates structure and makes the dresser feel styled rather than decorated.
Start by placing a cream runner on the dresser top. Cut wired ribbon to match the runner perimeter and pin it in place temporarily so you can adjust corners. Sew a simple channel on the ribbon back if you want it permanent, or use double-sided fabric tape sparingly under the ribbon edge. Make two bows and secure them with hidden thread so the tails hang evenly. Add pine sprigs and a candle in the center, keeping items below the ribbon line so the border stays the focal point.
Keep bow size small — about 12-15 cm wide — for a luxe look on a dresser.
Avoid thick ribbon; it overwhelms the surface and looks like party wrapping.
19. Frosted glass jar candle cluster with painted wood coasters
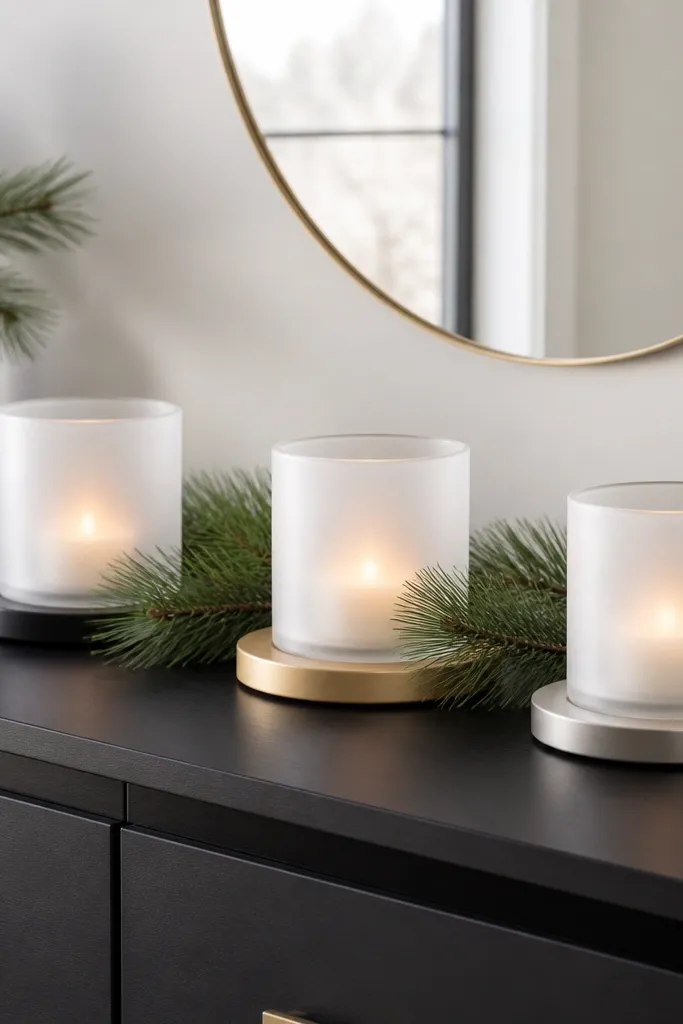
Candle clusters look luxe when you control spacing and use repeat materials. Frosted glass jars soften flame light and look elegant in winter photos. Painted wood coasters add a “set” feeling, especially when they match your hardware finish — brass or nickel. This flatters people who like candlelight but hate messy decor because everything sits on a defined base. It also keeps holiday styling from looking random since the jars create a grid-like structure.
Start by placing three coasters in a triangle on the runner. Paint or finish the coasters to match your hardware: satin brass spray on wood, or satin nickel paint if you want the cooler look. When dry, set frosted jars on top of the coasters and add candles inside. Add pine sprigs around the jars, then tuck berries or small ornaments only if they don’t crowd the jar glass. Step back and adjust spacing so the jars have equal gaps.
Quick tipUse LED candles during the day — the jars still look good without worrying about wax drips.
One warningAvoid random candle heights; clusters look cheap when one jar is dramatically taller than the others.
20. Matte white paint + thin black trim line for modern holiday minimalism
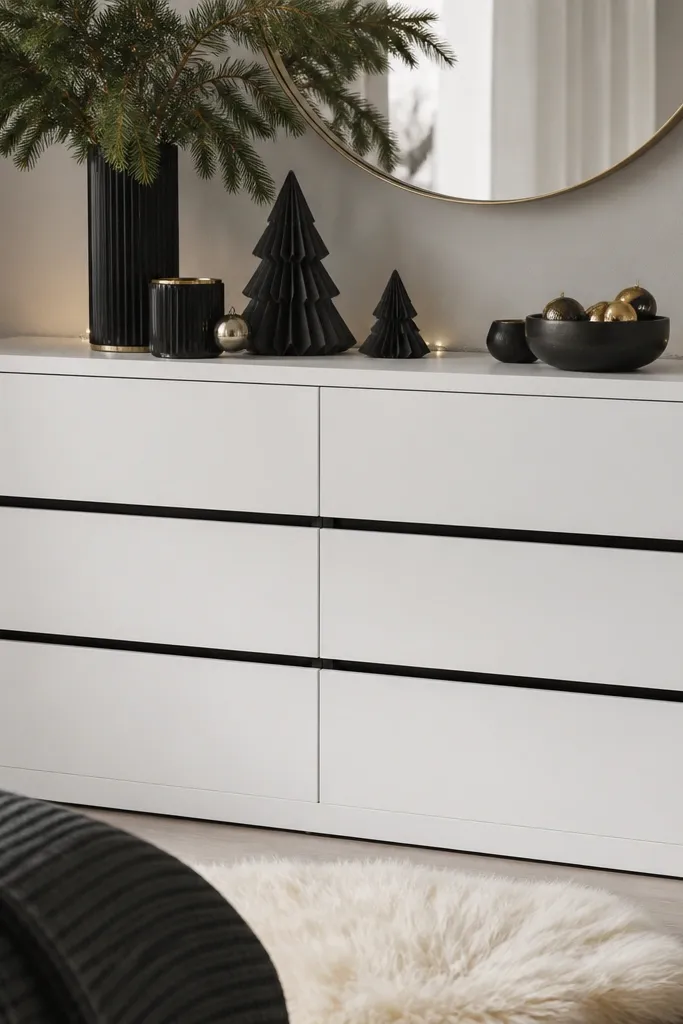
Matte white makes a Malm look crisp, and a thin black trim line makes it look designed. This combination reads modern-luxe without needing heavy ornament. I’ve used it for Christmas and also for winter-to-spring transitions because the base stays clean. It flatters darker rooms because white brightens, and black trim keeps it from looking sterile. If your room has lots of light wood, this look balances warmth with a cool line.
Start by sanding and priming the dresser, then paint with matte white in two coats. Let it cure long enough to be sandable if needed. Add a thin black trim line using flexible picture-frame trim or vinyl line tape at a consistent height on all drawers. Measure the line placement using painter’s tape and a level before you commit. Reinstall hardware and style the top with black candles and one gold accent — keep ornaments minimal and spaced.
Quick tipAfter painting, wait 48 hours before trimming so edges don’t chip under tape pressure.
One warningAvoid thick black stripes; they turn it into a DIY stencil look.
21. Malm bed side drape with linen panels and hidden snap tape
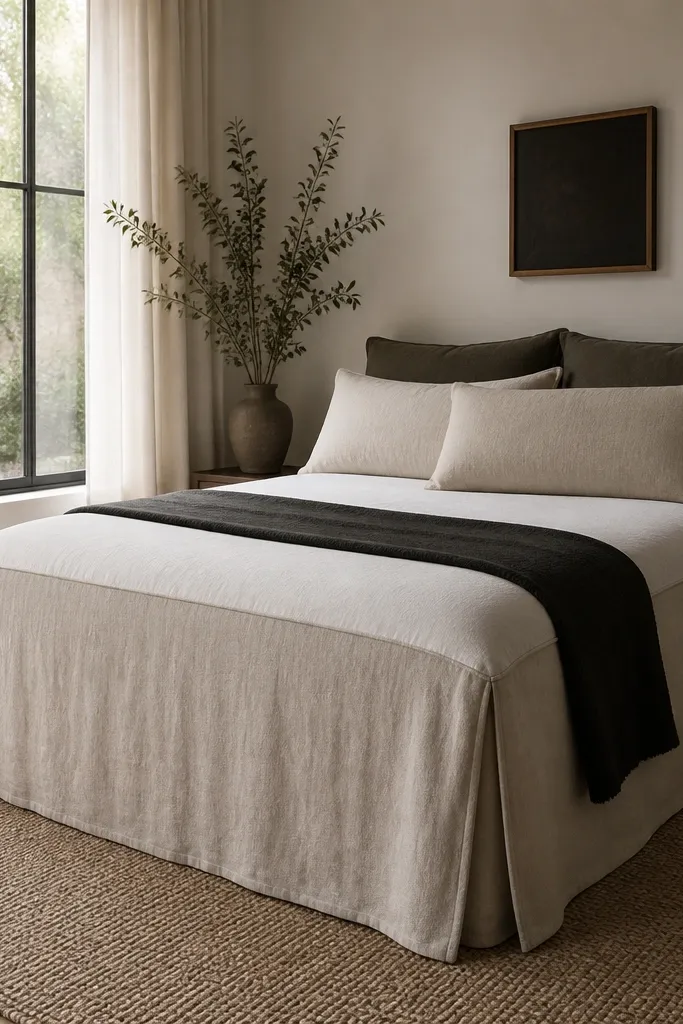
Draping side panels makes a Malm bed look taller and more expensive, especially when you use linen that has weight. Hidden snaps keep the panels from flapping, so the drape looks intentional instead of thrown on. I like warm ivory linen for fall and winter because it looks soft under warm lamps and pairs with green and red accents. This flatters people who want a calmer, less busy bedroom. It also makes holiday styling easier because you can tuck garlands behind the panels.
Start by measuring the bed side length and the height you want the panel to cover. Cut two linen panels with seam allowances and add interfacing to the top edge so it hangs with a clean fold. Sew or glue small snap tabs along the inner top edge, then attach matching snap tape to the bed frame. Hang panels, then adjust so the folds sit evenly. Press with a steamer on low and style the bed with a neutral duvet and one patterned throw at the foot.
Use a spray starch mist on linen before pressing for crisp drape that lasts through the season.
Avoid lightweight voile panels; they cling and wrinkle and look like curtains from a dollar store.
22. Holiday drawer pull garland using real twine and tiny bells
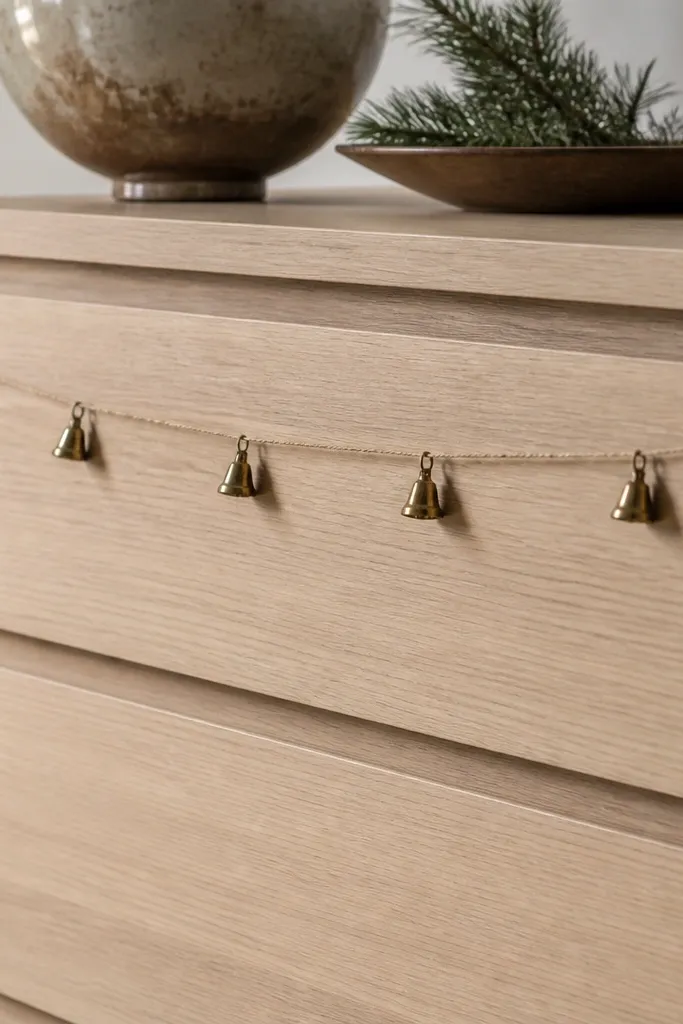
This is the smallest upgrade with the biggest charm. Tiny bells on twine look handcrafted, and when they’re evenly spaced they read intentional rather than cluttered. I like this for rustic-luxe holiday styling when you already have warm wood and neutral decor. It flatters people who like gentle, subtle holiday touches instead of big ornaments. It also works in apartments because it doesn’t require wall mounting or heavy changes to furniture.
Start by tying a piece of twine around two end pulls or around the handle area where you want the garland to sit. Measure spacing with a ruler so bells hang evenly across the front, then tie each bell with a short knot so it doesn’t swing too much. Keep the garland loose enough to remove easily — I use knots you can untie in under a minute. If your Malm has bar pulls, wrap twine around the bar ends only so it doesn’t snag fabric. Add a small pine sprig or berry pick on the top to connect the theme.
Use bell sizes that step down toward the edges for a more expensive look.
Avoid long strings of bells; they tangle and make the front look messy.
23. Seasonal scent tray on Malm with ceramic dish + dried citrus
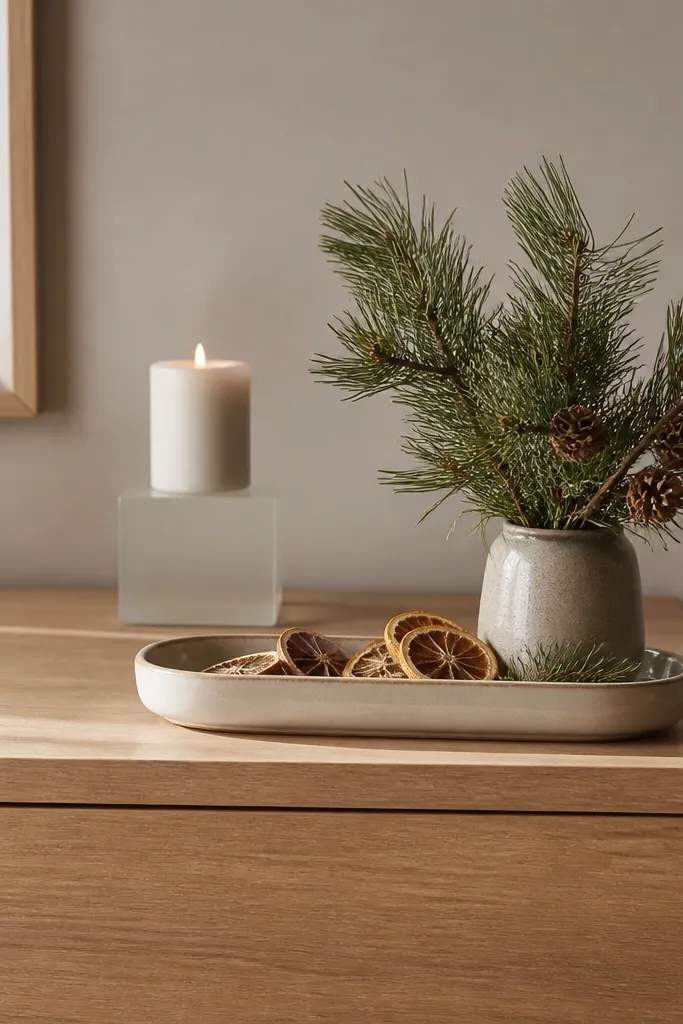
Luxury isn’t always visual. When you add a scent tray, the room feels finished during holiday visits because people notice when they walk in. Dried citrus and pine smell clean and warm, and they look good next to neutral holiday decor. I use a ceramic dish in off-white or warm gray so it doesn’t fight your hardware finish. This flatters homes where you want holiday mood without loud colors. It also keeps your decor from looking like it’s only “for show” since it has an everyday purpose.
Start by choosing a ceramic tray that fits the runner area without touching the edges — leave 2-3 cm breathing room. Add dried orange slices and a few cinnamon sticks, then tuck pine sprigs between them. Place a small candle or oil diffuser nearby but not directly under the citrus so it doesn’t overheat. Add a thin layer of pinecones at the back so the tray has depth. Refresh the citrus every 2-3 weeks during peak season so it still smells strong.
Quick tipIf you use real citrus, bake slices at 200°F for 2-3 hours until dry so they last longer.
One warningAvoid placing wet citrus; it sweats and leaves sticky spots on furniture.
24. Matte gold stencil monogram on the top edge of Malm dresser
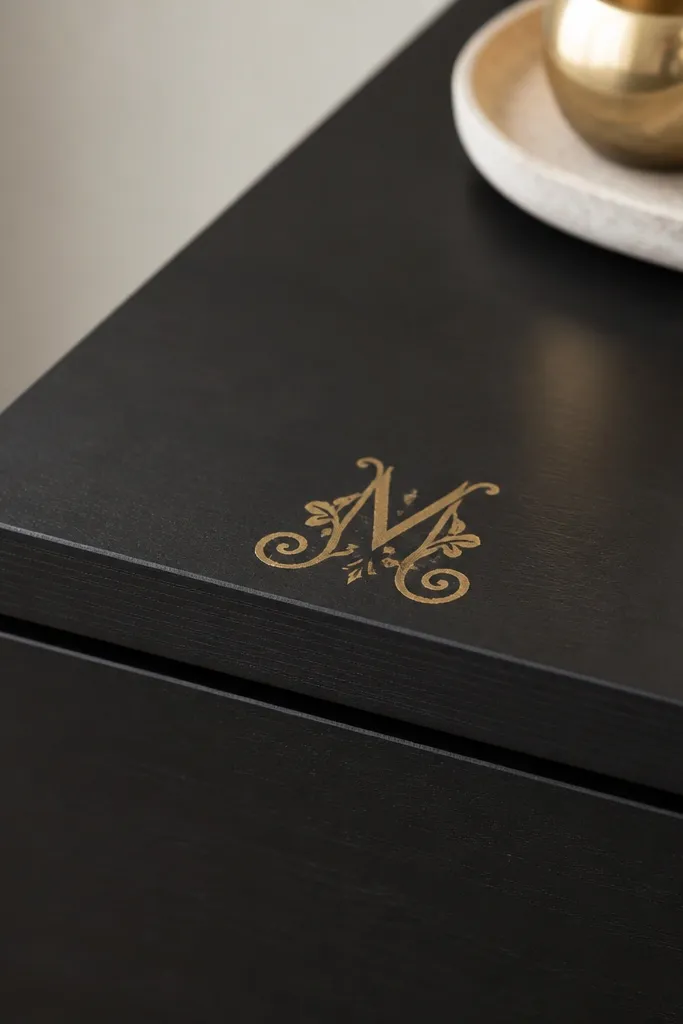
A monogram can look tacky fast, but done small and placed on the top edge, it reads like custom furniture. Matte gold keeps it sophisticated and avoids the shiny “craft” look. I’ve used this for Christmas and New Year because it pairs well with black, cream, and evergreen. This flatters anyone who wants their space to feel personal without adding a lot of objects. It also looks good in photos because the gold catches warm light without screaming.
Start by cleaning and lightly sanding the top edge so stencil paint grips. Tape a stencil in place with painter’s tape and press the edges firmly so paint doesn’t bleed. Use metallic acrylic or stencil paint in matte finish and apply with a foam brush, dabbing rather than brushing. Let it dry fully, then remove the stencil slowly at an angle. Seal with a clear matte or satin topcoat if your top gets frequent contact, then style the dresser with a neutral runner and one evergreen stem.
Keep the monogram height under 4 cm on a dresser top edge so it stays subtle.
Avoid big centered monograms; they look like decals.