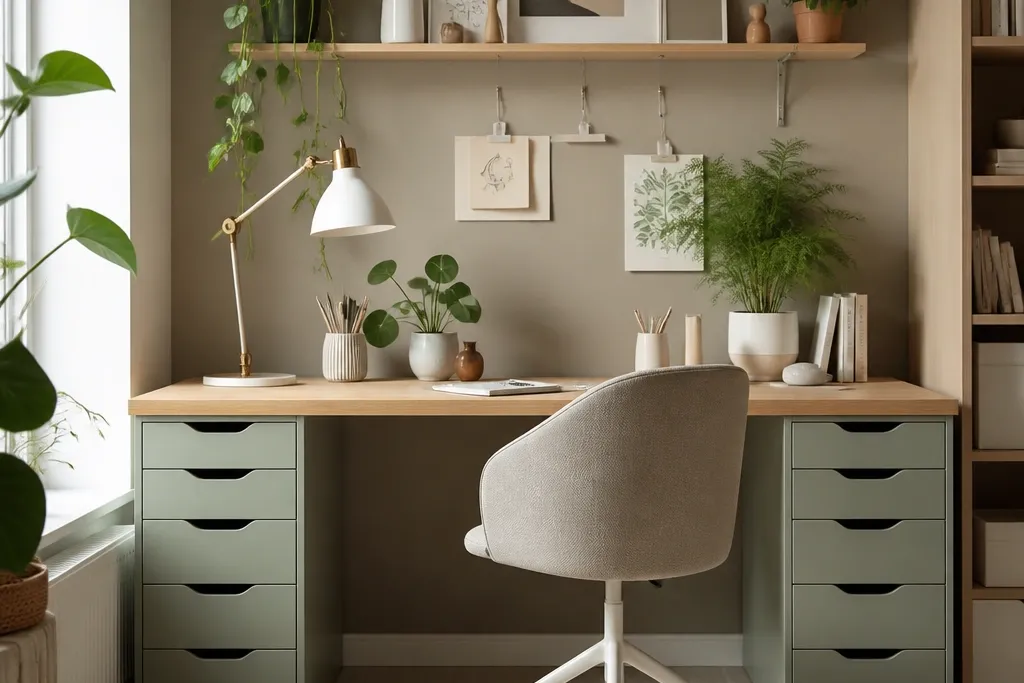
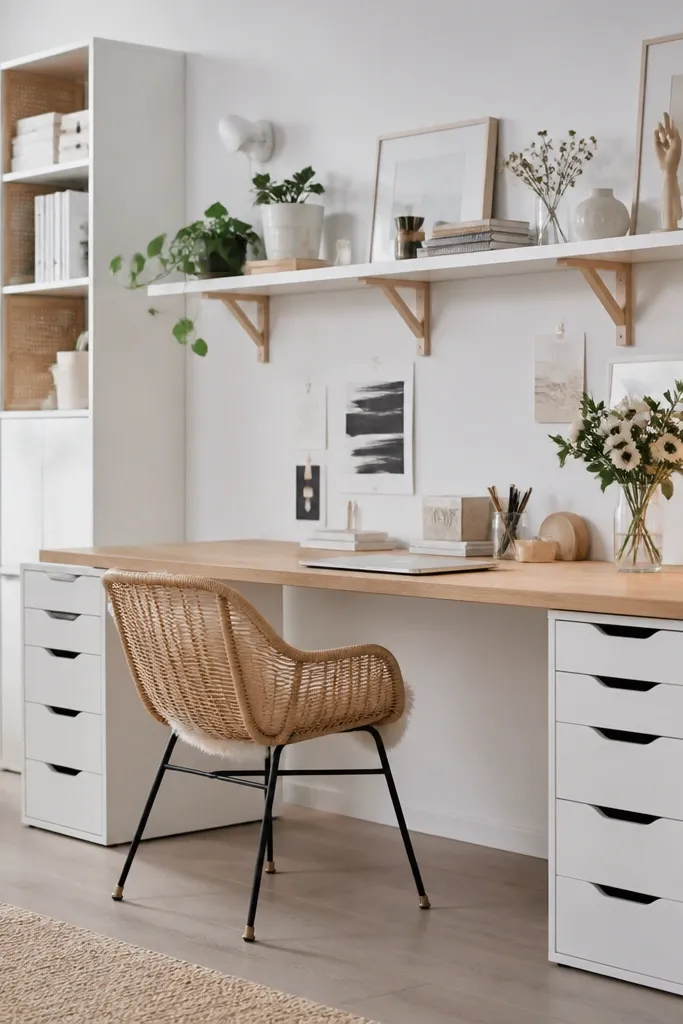
1. BESTÅ media console desk with hidden cable channel
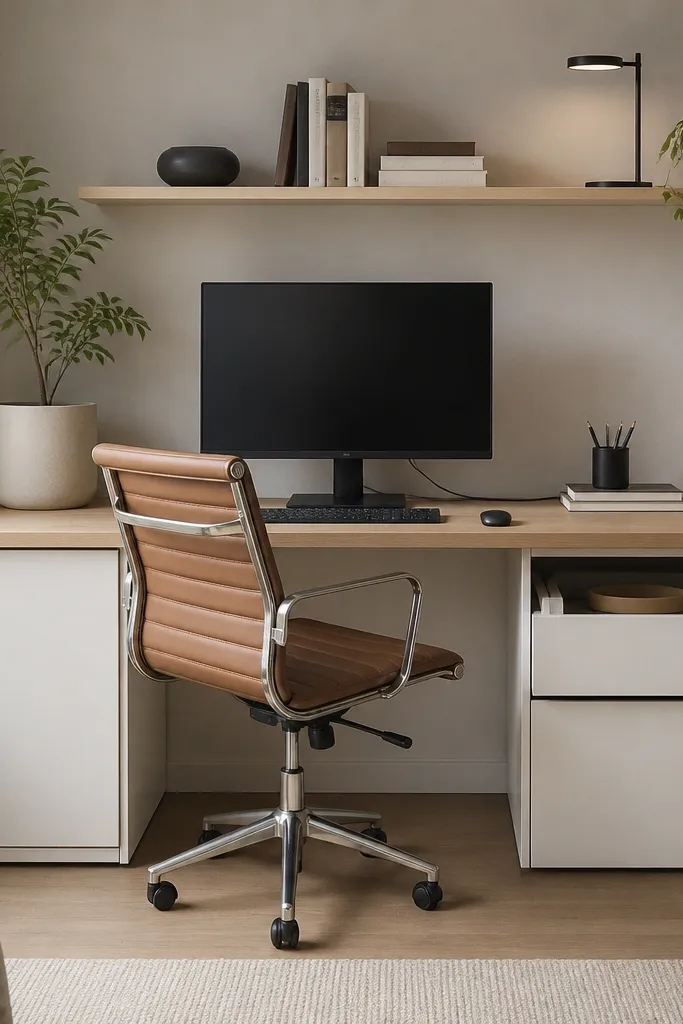
This build looks intentional because the BESTÅ cabinet gives you straight, vertical lines and the countertop adds a warm horizontal surface. I used a white cabinet body with a light oak-effect top so the desk reads bright without looking sterile. The grommet strip at the back edge is the difference between “DIY” and “finished,” because you don’t see cords hanging over the side. It flatters most setups because the drawers keep small items out of sight, and the open cubbies can take a printer or a notebook stack. If you have a smaller room, the clean front face makes the desk feel narrower than it is.
Start by picking a countertop size that matches your cabinet width and leaves a 1-2 inch overhang on each side. Screw the countertop down to the BESTÅ top rails using the manufacturer’s recommended bracket points, then install a back-edge cable grommet strip with a hole saw or step bit. Place a power strip inside the cabinet on a small adhesive cable tray so the cord has slack and doesn’t tug the grommet. Finally, add a wall shelf above the desk and use two bookends so your items look styled instead of piled.
Quick tipBuy a pack of black grommets even if your desk is light. They make the cable area look like a designed feature instead of a DIY afterthought.
One warningAvoid leaving the back edge bare — visible cords instantly cheapen the look.
2. LINNMON tabletop desk with butcher-block edge band and slim metal legs
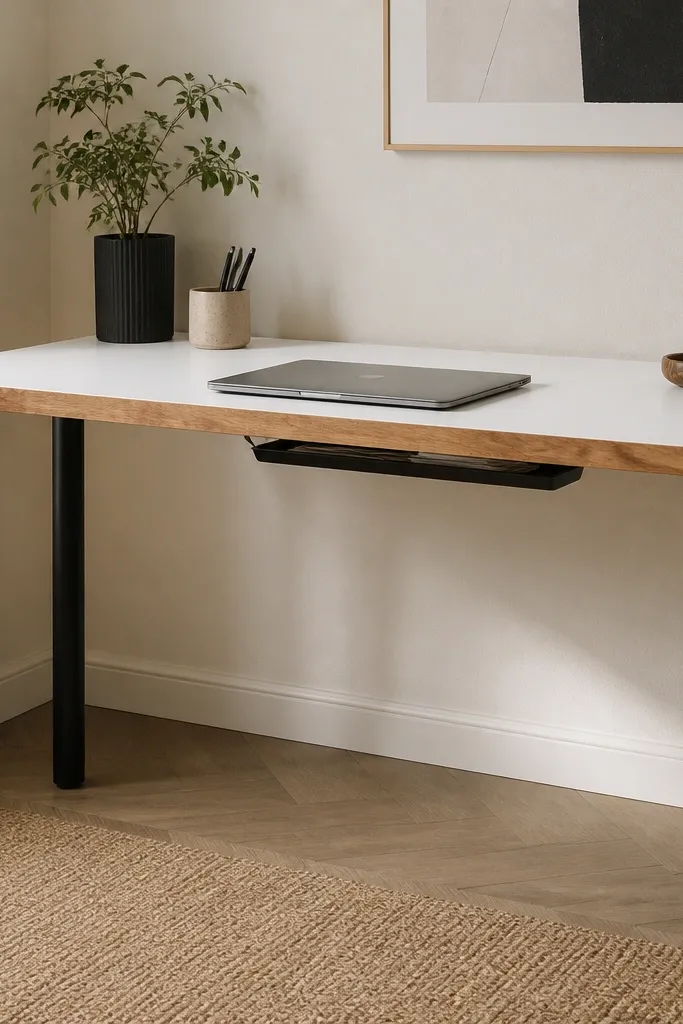
This is the desk I recommend when you want a clean Scandinavian look but hate the “big flat sheet” feel. The white tabletop keeps the desk bright, and the butcher-block edge band adds warmth where your hands actually touch. I used a 1.5-2 inch wide strip so it reads like a deliberate front trim rather than a thin sticker. The slim metal legs make it feel lighter visually and works well if your chair has a compact footprint. It’s especially flattering for people who like minimal decor because the desk doesn’t compete with wall art or shelves.
Start by sanding the tabletop edge lightly and applying edge banding or a real wood strip with wood glue and clamps along the front edge only. Cut your butcher-block strip so it’s flush with the tabletop corners, then sand the joint smooth. Install slim black legs at the corners, keeping them square by measuring diagonals. Under the top, screw a low-profile metal cable tray so cords run straight down instead of looping.
Quick tipSeal the wood strip with a matte clear coat so it doesn’t look glossy compared to the tabletop.
One warningDon’t wrap the wood trim around all edges. A front-only band looks designed; full wrapping often looks clumsy on IKEA tops.
3. FJÄLLBO shelf desk with drop-front keyboard tray
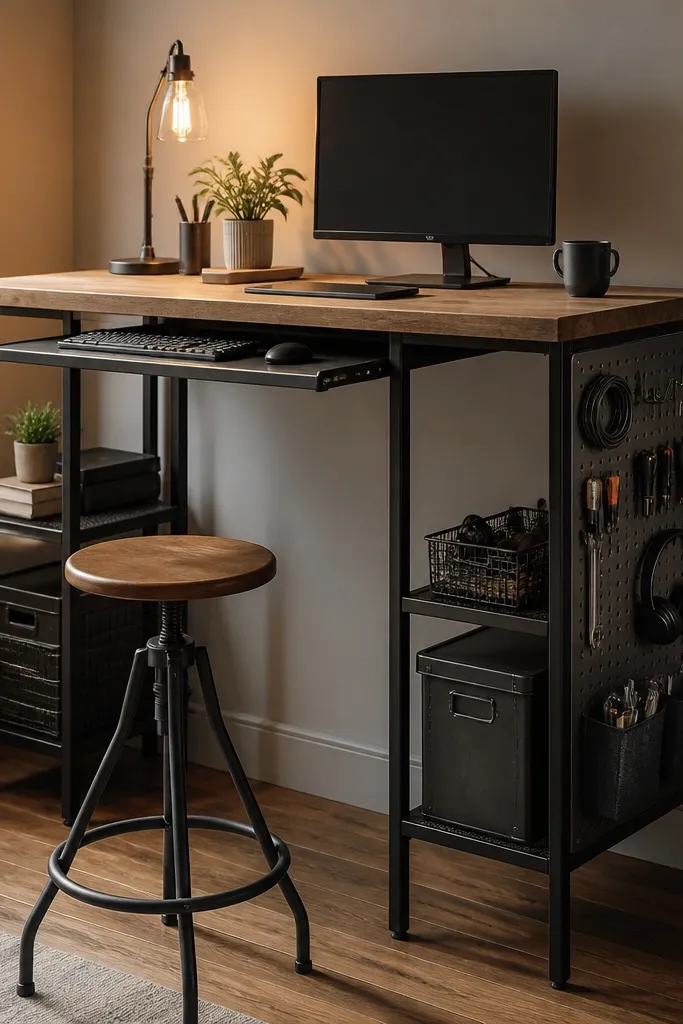
This setup is for people who want a desk that feels like a workshop but looks tidy. The shelving frame gives you open storage for bins, and the drop-front keyboard tray makes typing feel centered and ergonomic. I built it with a pegboard side panel so small tools and desk accessories hang at arm height. The warm lighting makes the metal look less harsh, which matters if your room has cool gray walls. It flatters tall people because the shelf height lets you keep the monitor at eye level without stacking books under it.
Start by attaching a tabletop to the top shelf rails using brackets that keep the surface level. Measure your keyboard area and install the tray slides so the tray sits 1-2 inches below the tabletop when closed. Mount a pegboard panel to the side frame with standoffs so it doesn’t touch the metal directly. Then add a cable loop organizer behind the keyboard tray so charging bricks and cables hang vertically instead of spilling across the floor.
Use two small felt pads on the tray lip. It stops rattling when you slide it in and out.
Avoid mounting the keyboard tray too low — you’ll end up hunching your shoulders after a week.
4. KALLAX cubby desk with glass-front drawer front and desktop organizer rail
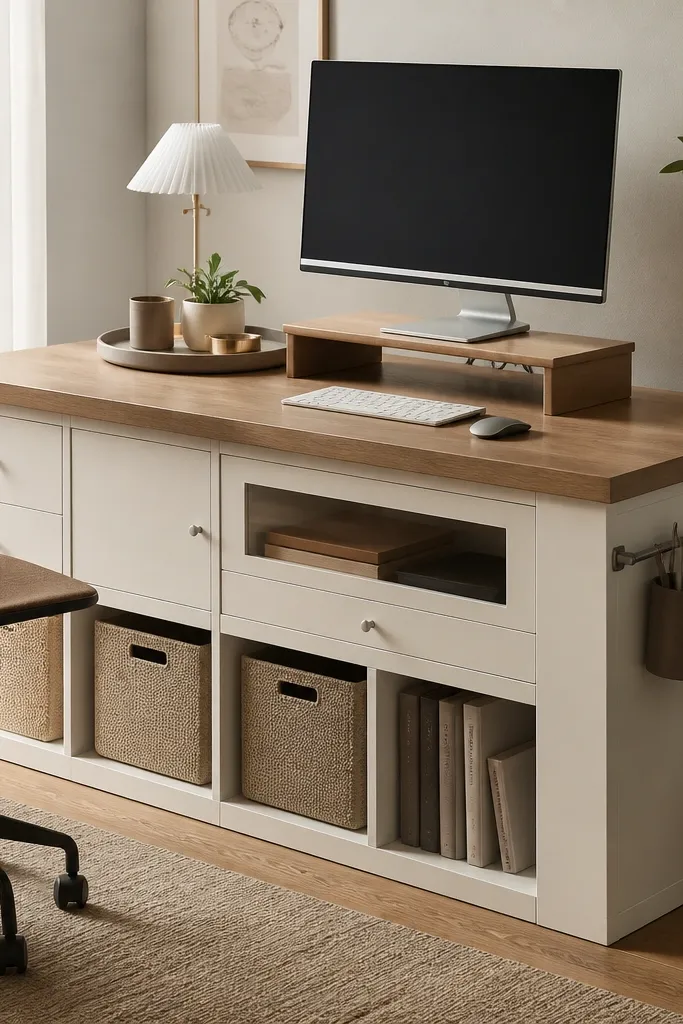
This is a “pretty but practical” desk for anyone who likes seeing a few things on display. The KALLAX structure creates a grid that looks intentional, and the glass-front drawer gives you a peek at what you store without turning the whole desk into clutter. I used a clear glass insert with a dark frame so the drawer reads modern. The organizer rail on the side keeps pens, scissors, and a small notebook within reach. It flatters people who work with physical materials like journals or paper plans because you can keep your current stack visible.
Start by selecting a KALLAX size and placing the unit so the open cubbies line up with your chair. Add a tabletop cut to cover the top surface with a 0.5-1 inch overhang so it frames the cubbies. Install a drawer front with a glass insert on the lower section — measure the opening carefully and pre-drill for the handle hardware. Finally, mount a slim rail along the side and attach magnetic or clip-on organizers, then run a single cable line from the monitor through a corner gap.
Quick tipChoose a desk lamp with a black cord and keep it clipped to the organizer rail so it looks planned.
One warningDon’t use frosted glass if you plan to store dark items. It makes the drawer look dusty and gray.
5. MICKE desk build with acoustic cork pinboard backsplash
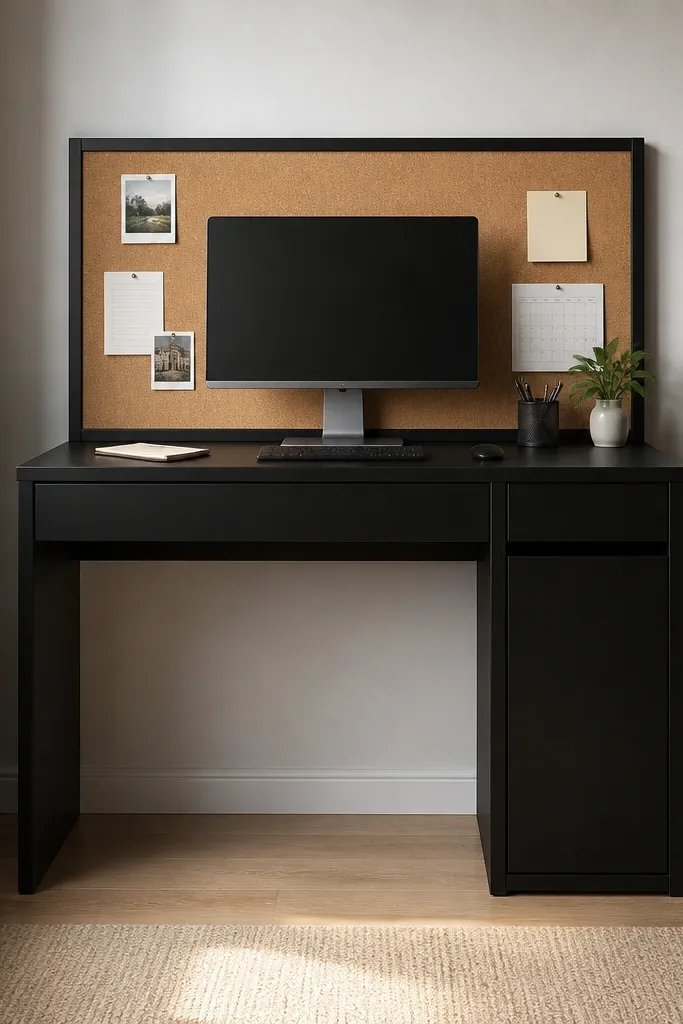
This idea upgrades the “plain front panel” problem that MICKE desks have. The acoustic cork adds texture and makes the whole desk feel like a studio wall behind your screen. I framed the cork with thin black trim so it doesn’t look like a random sheet from a craft store. The pinned notes stay visible without cluttering the desktop, and cork is forgiving — it doesn’t snag like cheap foam boards. It flatters desk workers who rely on paper reminders, because your eyes catch the notes while you work.
Start by removing the existing back panel or measuring the gap behind the desk where you can mount the cork. Cut cork to fit, leaving a 1/8 inch gap for alignment so it doesn’t bow. Attach thin black picture frame strips around the cork using screws and corner brackets, then mount the frame to the desk back with L-brackets. Add a cord clip under the monitor so cables sit flat against the cork frame edge.
Use straight pushpins for a clean look, not colorful thumbtacks. Black pins match the frame and read more “designed.”
Avoid mounting cork directly with thick glue dots. It can peel and pull unevenly after heat from a lamp.
6. IDÅSEN-style drawer desk with painted front panel and brass knobs
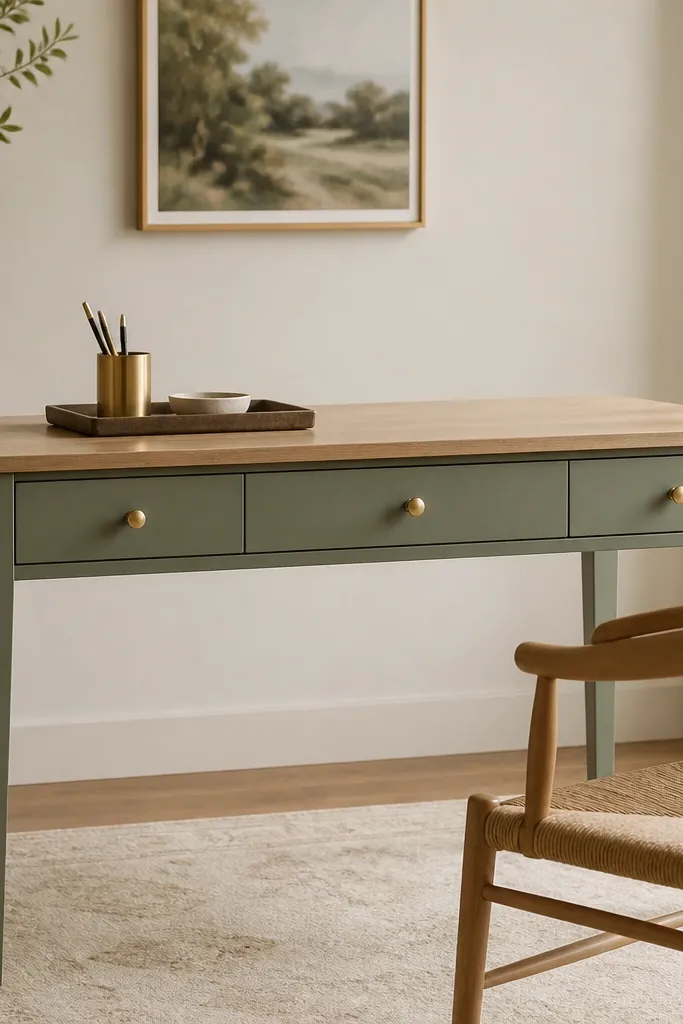
If you want your desk to look like it came from a boutique office, paint the front panel and keep everything else calm. I used a muted sage green on the drawer front because it flatters warm skin tones and makes wood look richer. Brass knobs pick up the warm tone and add a small “glint” when the lamp hits them. This works well if you use lots of neutrals — cream walls, oak floors, gray textiles — because the desk becomes the only color anchor. It’s also forgiving for beginners because even small paint mistakes are less noticeable on matte surfaces.
Start by sanding the drawer front lightly and cleaning with degreaser so paint sticks. Tape off edges and paint with a matte enamel in two thin coats, then let it cure overnight before handling. Swap the IKEA knobs for brass knobs that match the drawer spacing; measure center-to-center spacing so the pulls line up. Finish by adding a matching brass tray on the desktop and a lamp with a brass base so the desk hardware feels intentional.
Quick tipUse a foam mini roller for drawer fronts. It avoids brush streaks that show up under overhead lights.
One warningAvoid gloss paint — it shows every scratch and looks cheap on flat cabinet doors.
7. ADILS legs with reclaimed-wood look laminate top and under-shelf task lighting
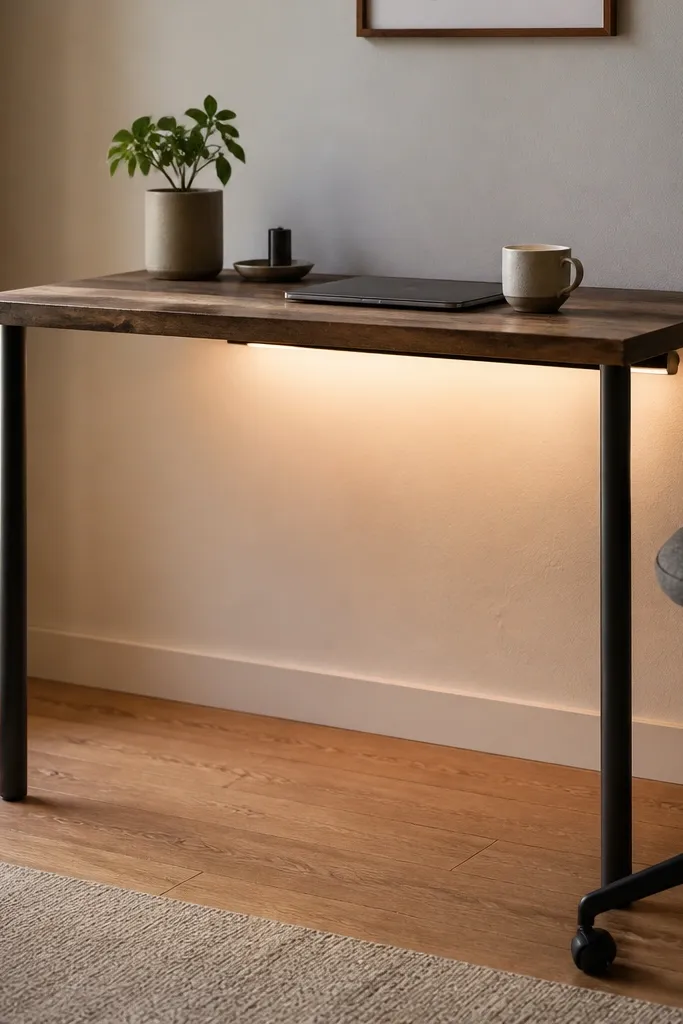
This is the desk that looks expensive because of the lighting, not the wood. ADILS legs keep the silhouette minimal, and a reclaimed-wood look laminate top adds visual depth without the hassle of real boards. Under-shelf task lighting makes your workspace feel cozy and helps you see notes and tools clearly. I like warm white LEDs at around 2700K because they don’t turn paper yellow. This works great for night workers and people who get headaches from harsh overhead lighting.
Start by mounting a slim shelf or bracket just under the tabletop edge where you want the LED strip to attach. Cut the laminate top to size or use a pre-cut board that fits the leg spacing, then pre-drill mounting holes for the legs. Attach the LED strip to the underside bracket with aluminum channel or a simple adhesive mount, then route the cable to a hidden side outlet. Place a matte desk mat on top and keep the LED switch within reach but off the desktop.
Set the LED brightness so it’s dimmer than your overhead lights. Your eyes will thank you after an hour.
Avoid cool white LEDs. They make the desk look clinical and make warm wood tones look muddy.
8. RÅSKOG cart desk with folding monitor stand and rolling stationery trays
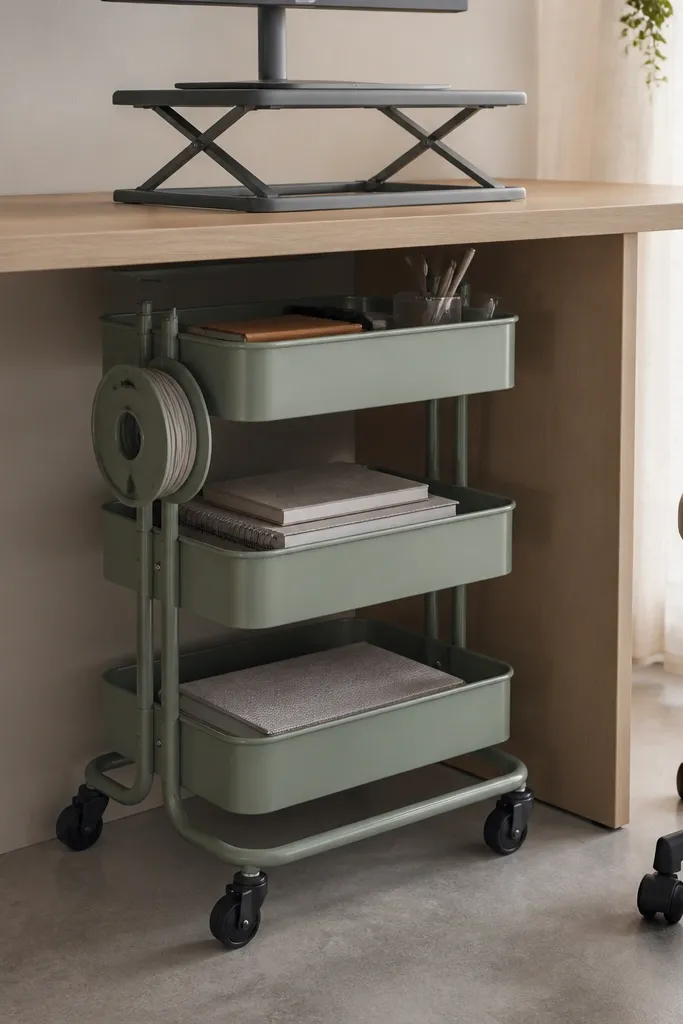
This one is for small spaces where you need flexibility. The RÅSKOG cart gives you storage on wheels, and a folding monitor stand keeps your laptop or monitor height adjustable. I built this for a spare room corner and it instantly cleaned up the “stuff everywhere” problem because everything has a home that rolls away. The black wheels and metal frame look modern, and the desk top surface can match your room finishes. It flatters people who work from different spots because you can move the whole setup in under a minute.
Start by choosing a cart height that matches your chair — I used a work surface around 29-30 inches tall for a standard dining-chair height. Place a thin tabletop on top of the cart frame with screws or strong brackets so it doesn’t slide. Add a folding monitor stand and set it so the screen sits 4-6 inches above the keyboard. Route the charger cable down the cart side and clip it to a small cable spool so it doesn’t snag on the wheels.
Quick tipUse two stackable desk trays on the cart top instead of one big organizer. You’ll keep papers in neat layers.
One warningAvoid letting the cart wobble. If it rocks, tighten the frame and add non-slip pads between the tabletop and cart.
9. BEKVÄM spice-rack style wall rail desk for vertical storage and cable-free desk top
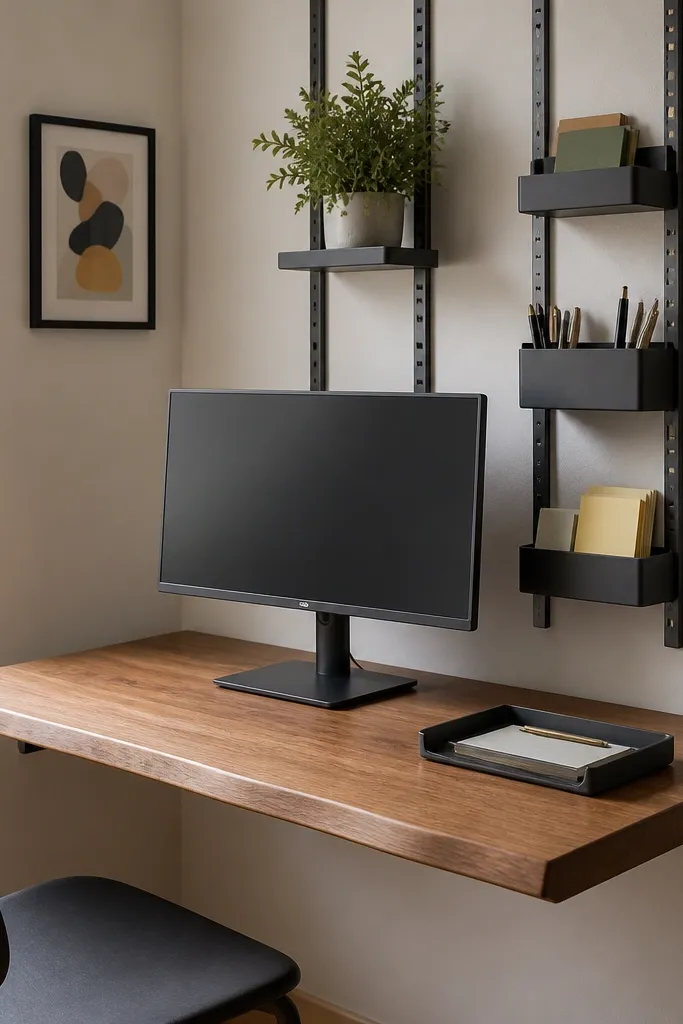
This build is for people who hate desktop clutter and want a desk that looks airy. The wall rail system moves storage up and out, so your desktop stays open for writing and laptop use. I mounted small BEKVÄM-style racks on a vertical rail, then placed the monitor centered under the rail so the whole setup looks symmetrical. The benefit is visual: you see fewer objects at eye level, so the room feels calmer even when you’re working. It flatters small studios because it doesn’t eat floor space.
Start by mounting a wall bracket system or a sturdy floating shelf for the desk top — use proper wall anchors based on your wall type. Install the vertical rail above the desk top and space the mini racks so you can reach them without leaning. Put your chargers and power strip behind the shelf line in a small wall-mounted box so nothing sits on the desk. Finish by placing a single low tray on the desk for daily items and keep all other tools in the wall racks.
Quick tipMark your wall bracket holes with painter’s tape first. It saves you from drilling twice when studs don’t line up.
One warningDon’t mount the desk top too high. If your keyboard is above your elbows, you’ll feel it after one session.
10. BILLY bookcase desk with laminate worktop and fabric drawer panels
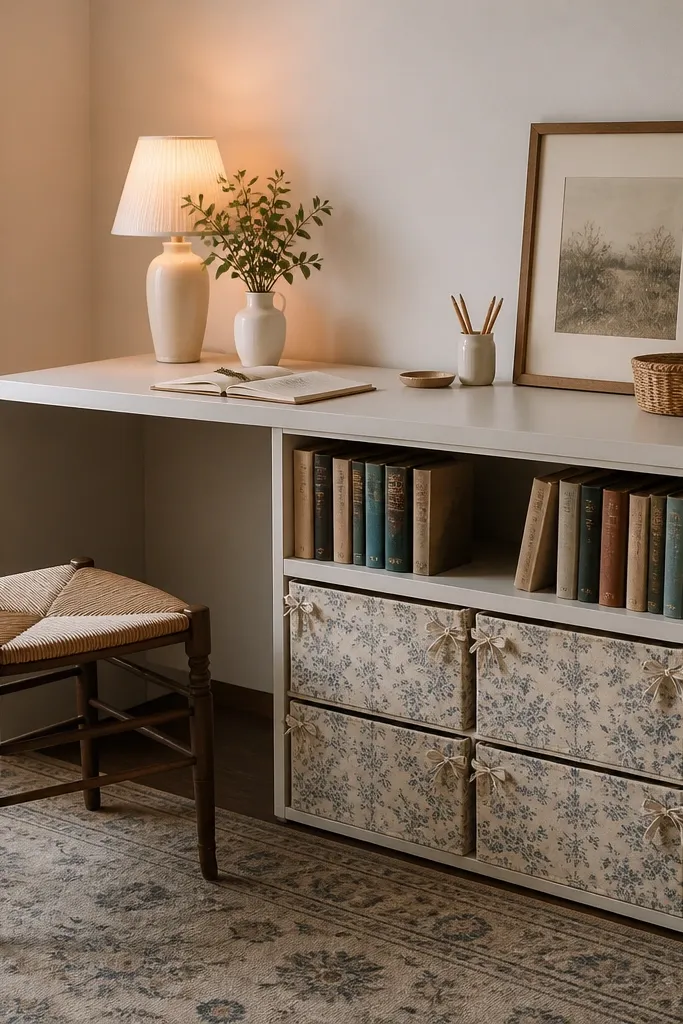
This is the desk I’d pick when you want soft texture in a home office. The BILLY bookcase gives you tall storage that looks tidy, and adding fabric-covered drawer panels makes it feel less like office furniture. I used a medium-weight cotton in a muted geometric print so it reads intentional, not random. The fabric also hides the mess of charging cables, extra chargers, and small supplies that you don’t want on display. It flatters people who like cozy interiors — it warms up white walls and keeps the desk from feeling too hard.
Start by converting the bookcase orientation so the shelves face up and the drawer area lines up with your chair position. Install a laminate worktop cut to span the bookcase width and screw it into place. Make fabric drawer panels by measuring each drawer front, adding 1 inch hem allowance, and stretching fabric over a thin backing board or frame. Attach panels with Velcro strips so you can swap prints seasonally, then route cables through a cutout in the back shelf area.
Quick tipUse spray adhesive on the fabric backing before you attach it to the drawer frame. It prevents wrinkles that show up in photos.
One warningAvoid thin cheap fabric that sags. If it droops, the desk looks unfinished.
11. MICKE desk with ribbed acrylic desk divider and pen station
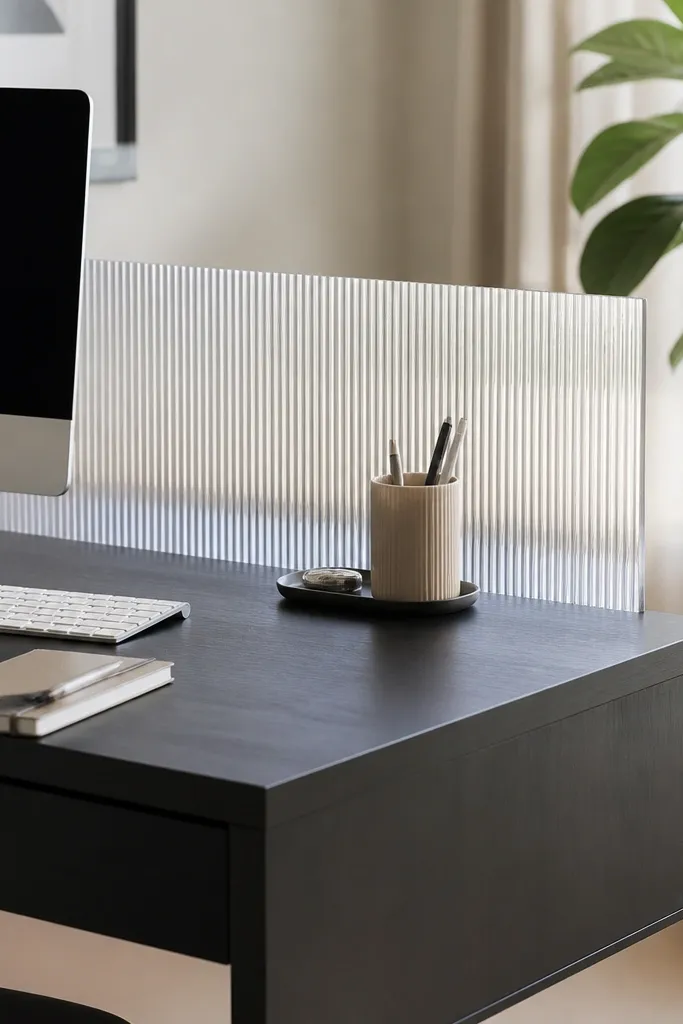
This is a styling-forward build that still solves function. The ribbed acrylic divider creates a clean visual boundary between your keyboard and the rest of the desk, so your space looks organized even when you’re mid-project. I used ribbed acrylic in a frosted clear tone because it doesn’t block light but adds structure. It flatters people who hate the “everything in one plane” look — the divider gives your eye a resting point. It also helps you keep papers from sliding toward the keyboard.
Start by measuring the space behind your keyboard and cut or purchase an acrylic sheet sized so it sits 1-2 inches above the desk surface. Use small standoffs or acrylic corner brackets to mount it so there’s airflow and it doesn’t touch the desk directly. Place a pen station on the left side of the keyboard area and keep sticky notes on a small tray directly under your monitor. Run your cable line along the desk back edge and secure it with two adhesive cable clips so the divider stays visually clean.
Quick tipWipe acrylic with microfiber and a drop of dish soap solution. Dry wiping scratches it fast and makes it look cloudy.
One warningAvoid placing the divider too high. If it’s above eye level, it becomes distracting.
12. IDAÅSEN table frame with butcher-block top and cork cable cover strip
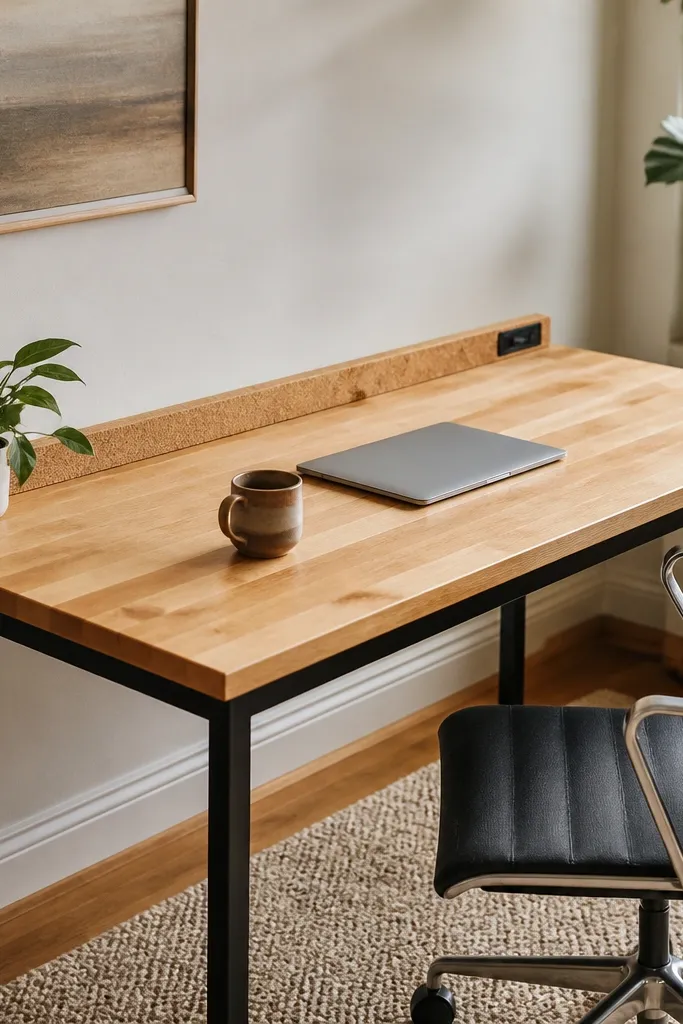
This desk feels warm because the top is real-looking wood and the cable area is soft and hidden. I used a butcher-block style top with a matte finish, then added a cork strip along the back edge to cover the cable route. Cork looks good because it matches natural textures like wood and woven baskets, and it hides the “ugly middle” where cords gather. It flatters anyone who works at a standing desk occasionally because the warm top tone makes the whole station feel calmer. The cork strip also gives you a place to stick labels for chargers.
Start by assembling the metal frame and setting the top in place to check level. Install the butcher-block top using pre-drilled holes and wood screws so it sits flush without wobble. Cut cork strip pieces to match the back edge length and thickness, then attach them with strong double-sided tape or small screws hidden under a lip. Route cables into a cable tray behind the cork strip, leave slack for monitor adjustments, then label each charger with a small kraft label.
Quick tipLabel power bricks before you tuck them away. Future-you will thank you when you swap devices.
One warningAvoid tight cable bundles under the top. Leave slack so you don’t strain ports when you move the monitor.
13. EKBY shelf desk with ladder-style side supports and hanging task lights
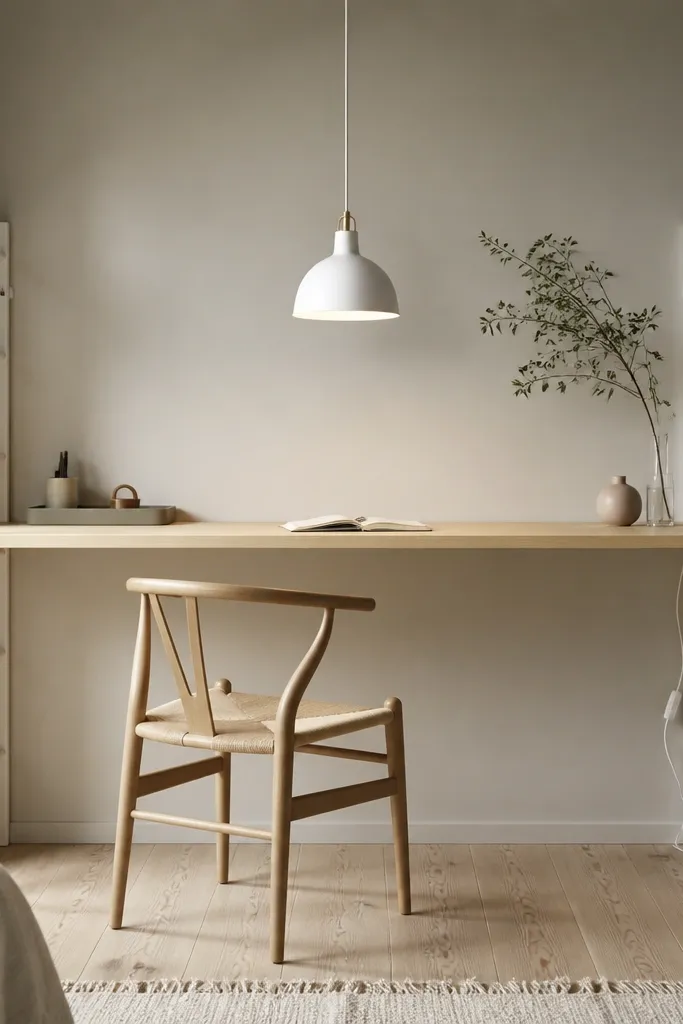
This is a dramatic look without complicated joinery. The long shelf top gives you a wide work surface, and the ladder-style supports create a visual frame that makes the desk feel custom-built. I paired it with a hanging task light so the light hits the desk surface directly instead of bouncing off the wall. The ladder sides also let you run cables down one line so the front stays clean. It flatters people who like to spread out — sketching, writing, or using multiple monitors — because the surface feels generous.
Start by mounting EKBY shelf supports into studs at equal height so the top stays level. Build or buy ladder-style side supports and bolt them to the shelf brackets for stability. Cut a small cable channel or use cord clips along the ladder side, then route the cable down behind a removable panel or inside the side frame. Hang a task light centered above the work area and add a single desk tray to keep small items in one zone.
Quick tipUse a dimmable bulb and set it slightly warmer than your room lights for a more focused workspace.
One warningAvoid mounting supports at uneven heights. A slanted shelf makes everything look off, even if it’s subtle.
14. STENSTORP trolley desk with pegboard back and under-desk bin storage
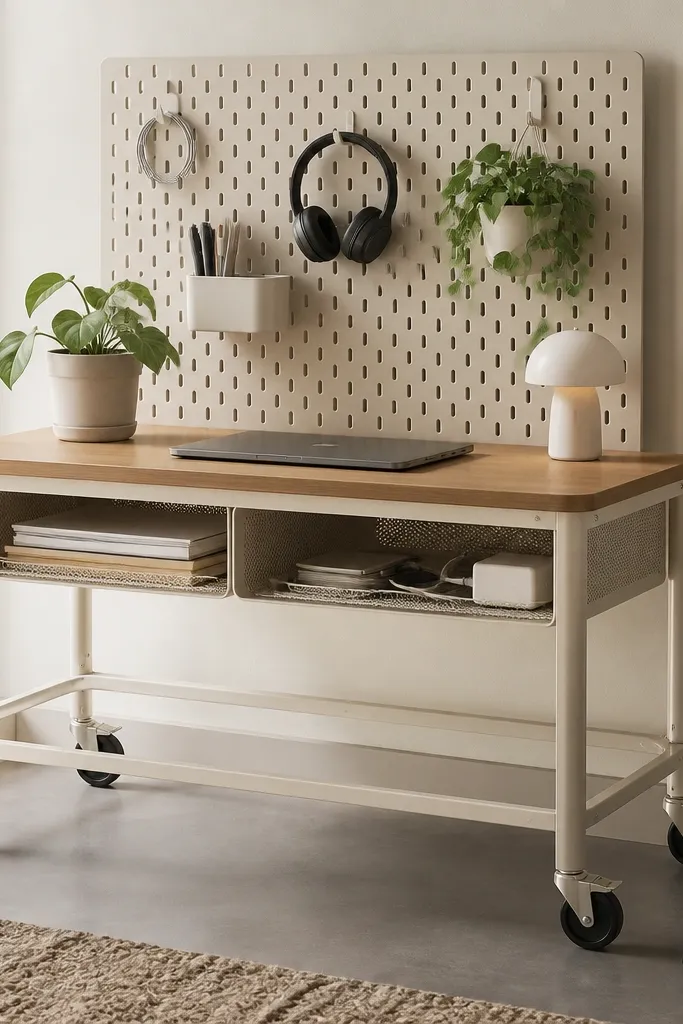
If you want an office that feels like a calm command center, STENSTORP does it. The trolley frame keeps the desk airy, and the pegboard back turns your most-used tools into wall-accessible items. I mounted hooks for headphones and a small plant so your eyes catch something comforting when you look up. Under-desk bins hide paper chaos without needing drawers. This flattered my own setup because I’m constantly switching between laptop work and paper tasks, and the tool access saves time.
Start by placing the trolley and attaching a wood top with brackets that keep the surface from shifting. Mount a pegboard panel behind the trolley using standoffs so it sits a few inches off the frame and doesn’t scrape. Add hooks and a small shelf for a daily notebook, then place under-desk bins on simple slides or directly on the frame rails. Route charging cords through a small hole in the back panel line so the desk front stays clean.
Hang your headphones on a hook even when you’re not using them. It keeps the desk looking “done.”
Avoid adding too many hooks. Three to five items visible looks intentional; ten looks messy.
15. SKÅDIS board desk workstation with floating monitor shelf and removable organizer trays
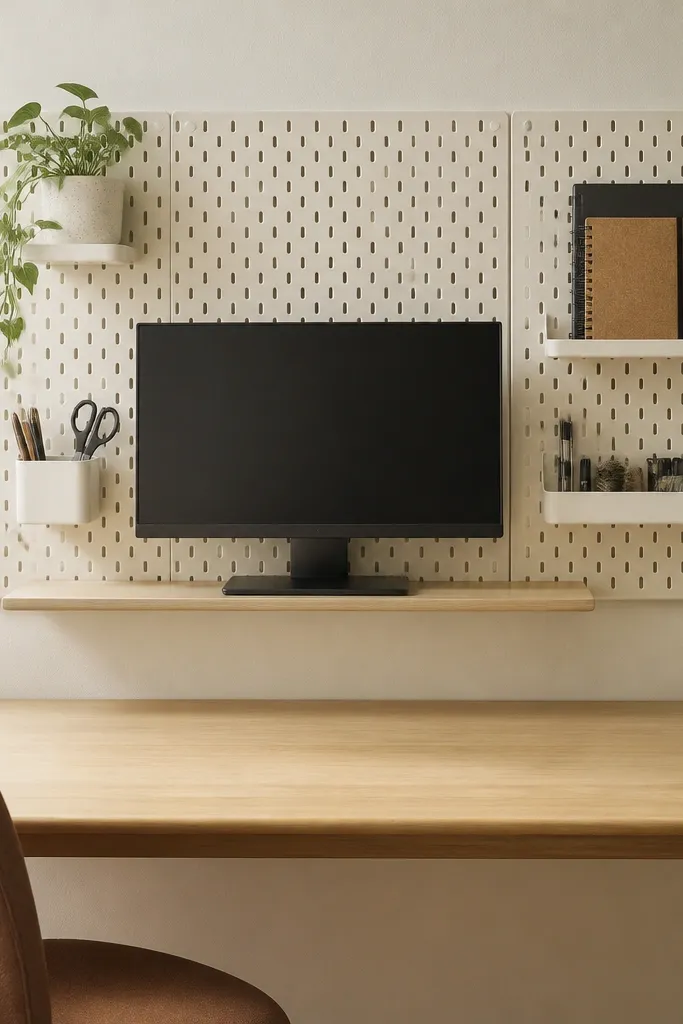
SKÅDIS is the easiest way I’ve found to make an IKEA desk look like a real workstation. The grid organizes your accessories visually, and the removable trays let you rearrange as your work changes. I mounted a floating monitor shelf so the monitor sits higher without stacking books, and the space under it stays clean. This works especially well for people who switch between planning and typing because notes and tools land where you expect them. It flatters compact rooms because it moves storage to the wall and keeps the desktop open.
Start by installing the SKÅDIS board at eye level behind where your keyboard sits, then mount the floating monitor shelf above it. Use the SKÅDIS hooks and trays to build a left-right layout: pens and sticky notes on the left, small tools on the right. Add a removable tray on the desk surface for daily items so you can clear it in two minutes. Route cables behind the monitor shelf and secure them with two adhesive clips so they disappear into the wall line.
Quick tipPut a small tray on the board for receipts or quick notes. It stops paper from migrating onto the keyboard.
One warningAvoid placing the SKÅDIS board too high. If you can’t reach it comfortably, you’ll stop using it.
16. RIBBA picture ledge desk with fold-out side shelf for laptop and documents
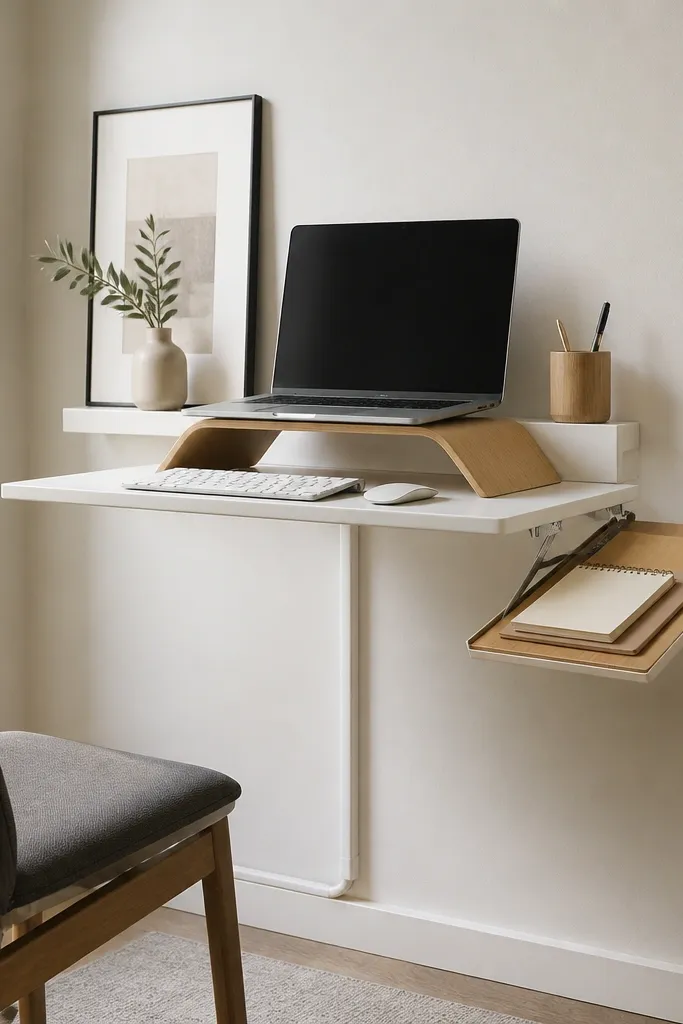
This build is for tiny spaces and for people who want a desk that doesn’t feel like furniture. A picture ledge top looks light, and the fold-out side shelf gives you a second surface only when you need it. I used a warm wood tone ledge so it doesn’t look cold against white walls, and I added a laptop stand to bring the screen up. The fold-out shelf is great for printing days or when you’re working with paper — it keeps documents from spilling onto the floor. It flatters renters because it’s straightforward to mount and remove.
Start by finding a stud and mounting the RIBBA ledge with the included brackets so it can handle daily weight. Add a fold-out side shelf with a hinge and two screws into the stud or a strong anchor. Place your laptop on a riser so the top of the screen hits your eye line, then run the charger cable through a small corner cutout or cable clip. Finally, mount a small cable organizer under the ledge so the cord doesn’t hang.
Quick tipUse a desk mat in a single color. It grounds the ledge desk and makes it feel like a real workspace.
One warningAvoid mounting without checking the stud locations first. A ledge anchored only to drywall looks shaky and feels unsafe.
17. MALM dresser top desk with removable tray insert and brass corner guards
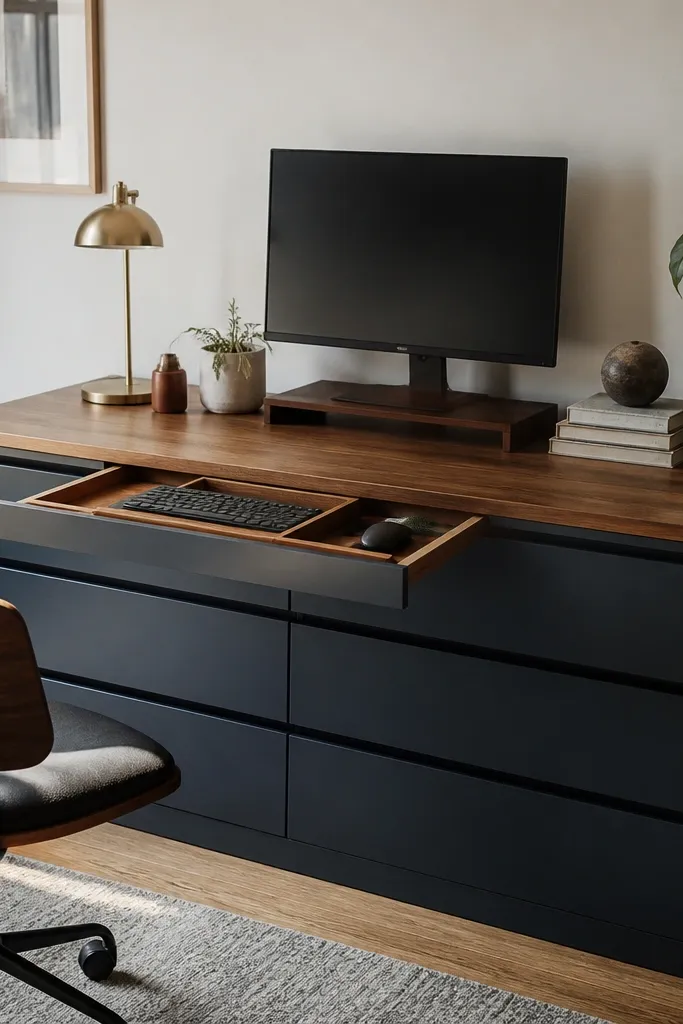
This is a grown-up desk look that still feels practical. A MALM dresser base gives you deep drawers that hide your office life, and the wood top makes the whole thing feel like furniture instead of a craft project. The removable tray insert is key for keeping your keyboard and mouse zone clean; I used a slightly raised tray so crumbs and tiny paper shreds stay contained. Brass corner guards protect the edges and also make the desk look deliberate. It flatters people who like a heavier, stable feel and those who sit for long stretches because the drawer height keeps your legs comfortable.
Start by placing the dresser where your chair fits and test for clearance under the top. Add a wood top that covers the dresser fully, leaving no big gaps where hands could hit. Install a removable tray near the keyboard so it sits flush with the top surface and doesn’t wobble. Add brass corner guards on the front corners using screws or strong adhesive pads, then fit a small cable channel behind the tray area.
Quick tipUse felt pads on the underside of the removable tray. It glides without scratching the wood top.
One warningAvoid leaving sharp raw edges on the top. Sand and seal the edges or it looks unfinished fast.
18. RASKOG + wall shelf combo desk with vertical file holder and holiday-friendly decor swaps
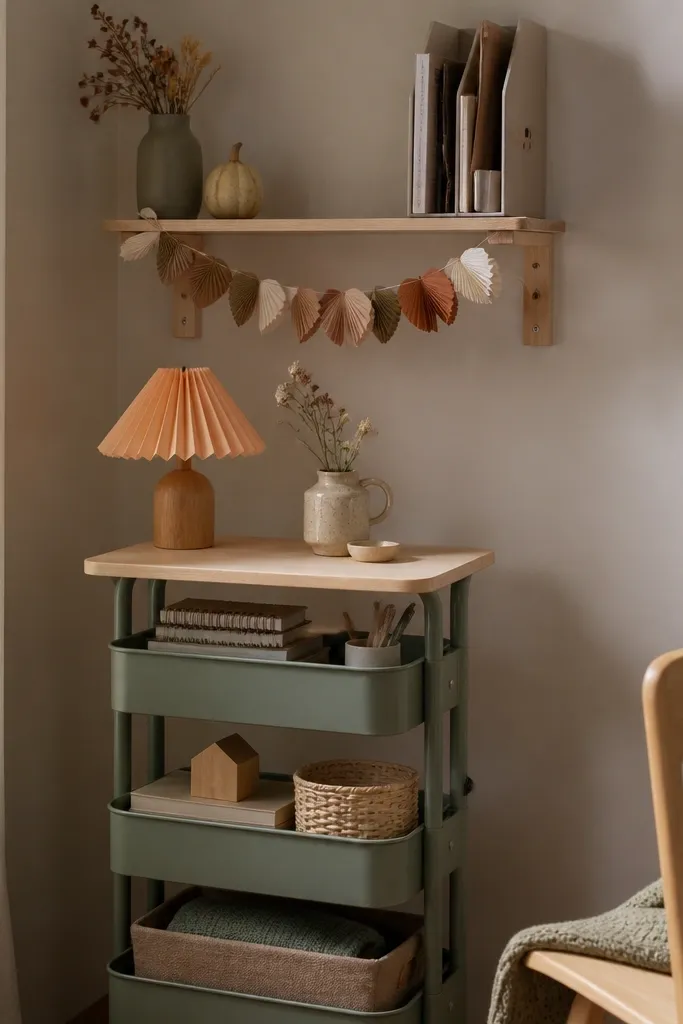
This is the desk I built when I wanted a workspace that changes with the season without a full rebuild. The RASKOG cart keeps storage mobile, and the wall shelf above lets you swap decor or seasonal organizers in minutes. A vertical file holder on the shelf stops papers from turning into a pile, and it looks neat even when you’re mid-bill or mid-project. I chose neutral materials so the seasonal items stand out: white shelf, light wood surface, and black storage bins. It flatters anyone who gets bored easily because you can refresh the look with small swaps.
Start by setting the cart under a wall shelf so your chair clears the shelf supports. Attach a small work surface on the cart and place a vertical file holder on the wall shelf directly above the desk area. Route the cable through one corner clip and keep the power strip inside the cart’s lower shelf. Add a seasonal lamp shade and one small decor piece that matches the file holder color, then keep the rest of the desktop in one tray so the desk doesn’t look crowded.
Use Velcro removable hooks for holiday lights or mini garlands. They let you change the decor without leaving holes.
Avoid seasonal clutter on the desk surface. Keep decor on the shelf or in one tray.
19. IKEA cabinet door desk with hinged writing panel and hidden storage behind
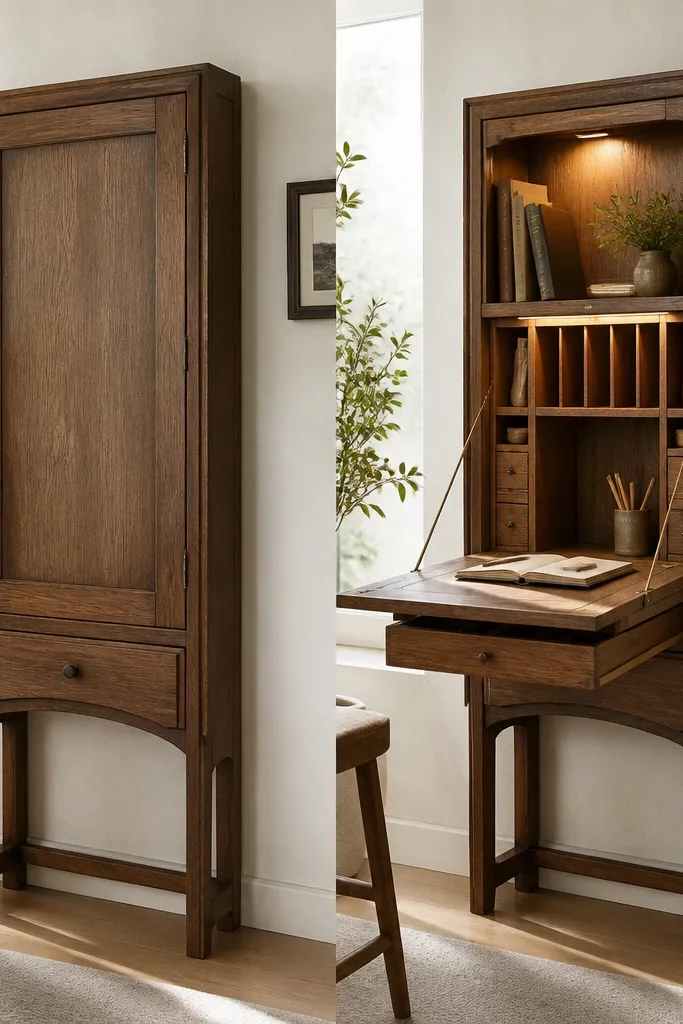
This build looks like furniture because it hides the workspace when you’re done. A hinged writing panel makes the desk feel compact and keeps the room from looking like an office all day. I used a cabinet frame with a smooth door front, then added a writing panel in a matching wood tone so the open look is cohesive. The hidden storage behind the panel keeps papers, chargers, and notebooks out of sight, which is a lifesaver if your home office shares space with living areas. It flatters anyone who works in short bursts and wants the desk to disappear after use.
Start by assembling the cabinet frame and attaching the door/hinge hardware so the panel opens smoothly. Measure the writing panel area and mount it so it sits level when down, using hinge stops to control angle. Add a small drawer inside the panel cavity for stationery and mount a puck light on the underside with a switch you can reach. When the panel closes, keep cables routed into the cabinet interior and use a velcro strap to keep cords from catching on the hinge.
Quick tipUse a soft-close hinge if you can. The desk feels calmer when you open and close it through the day.
One warningAvoid hinges without a stop. Without a controlled angle, the writing panel will sag and look off.