1. Monogrammed Cozy Tea Kit in a Reusable Linen Pouch
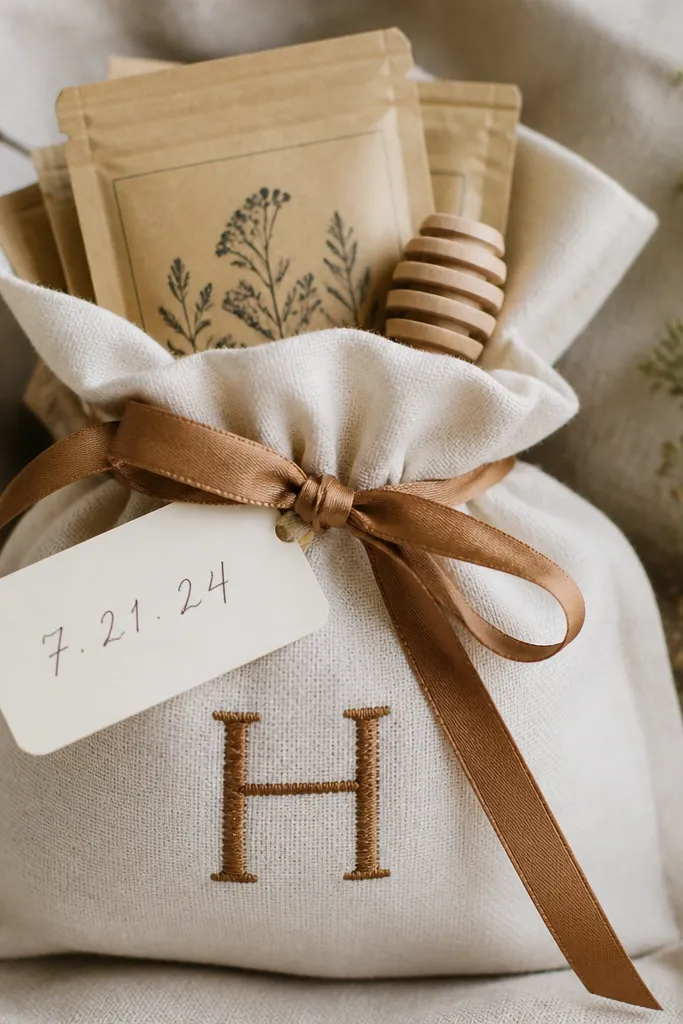
This gift feels personal because the pouch looks like it belongs to them, not a store label. I use cream linen because it absorbs ink and thread nicely and looks warm even in daylight. The monogram should be stitched, not printed — it reads handmade and survives handling. Add tea sachets in matching colors to the couple’s palette so it looks like a set, not random items.
Buy a pre-cut linen pouch blank or sew one from 1 yard of 100% linen. Stitch initials about 2.5 inches tall using backstitch or running stitch with embroidery floss. Fill with 8-12 tea sachets (choose flavors that sound cozy: chai, vanilla rooibos, chamomile) and add one small honey dipper. Tie the ribbon once, then add the tag with string so it hangs straight.
Use a simple waxed-paper label under clear tape so the tag stays readable if the tea steams up.
Avoid glossy vinyl labels — they peel fast and make the pouch look store-bought.
2. Map Coordinate Candle Jar with Faux Wax Seal Label
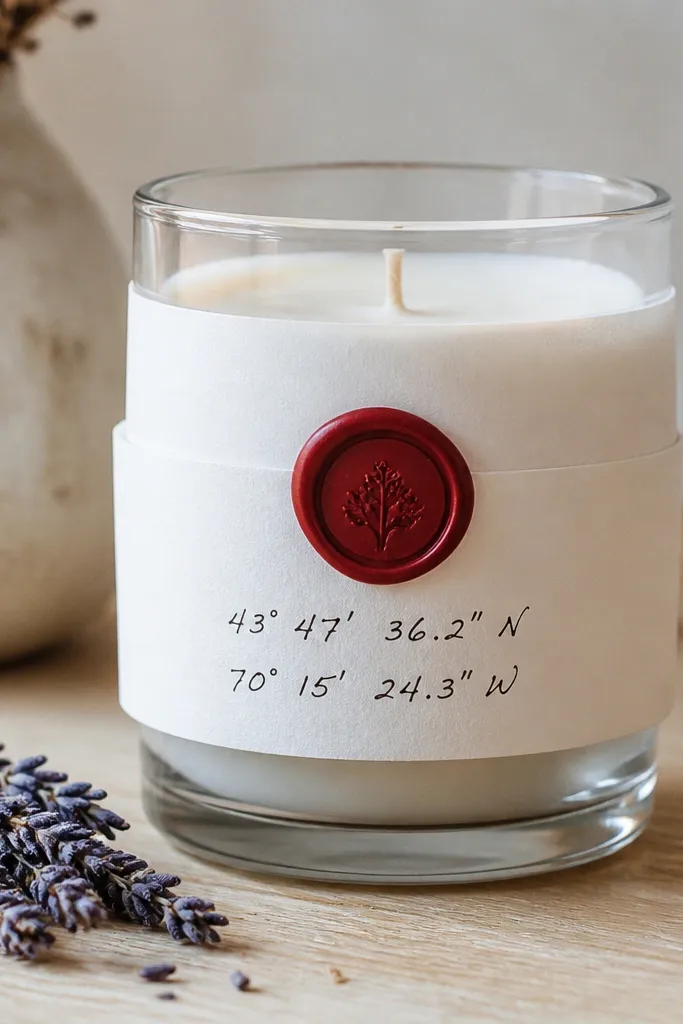
Candle gifts work because they’re cozy on day one — you don’t have to wait to “get around to it.” The map coordinate feels personal without needing a photo montage. I like clear jars because the warm candle glow makes the label look alive. The faux wax seal gives the jar a wedding-level finish even if the rest stays simple.
Choose a candle in a warm scent like vanilla, cedar, or amber. Wrap the jar with kraft paper cut to fit — measure height and leave a 1/2 inch overlap. Press a faux wax seal onto the label (or glue a seal sticker) and write the coordinates with a fine-tip paint pen. Add dried lavender or a thin ribbon around the neck only if it matches their palette.
Write the coordinates with a paint pen, let it dry 10 minutes, then seal the label edge with a tiny strip of matte Mod Podge.
Avoid glitter pens — they smear when the jar warms.
3. Fabric Scrap Photo Frame with a Single Statement Ribbon Loop
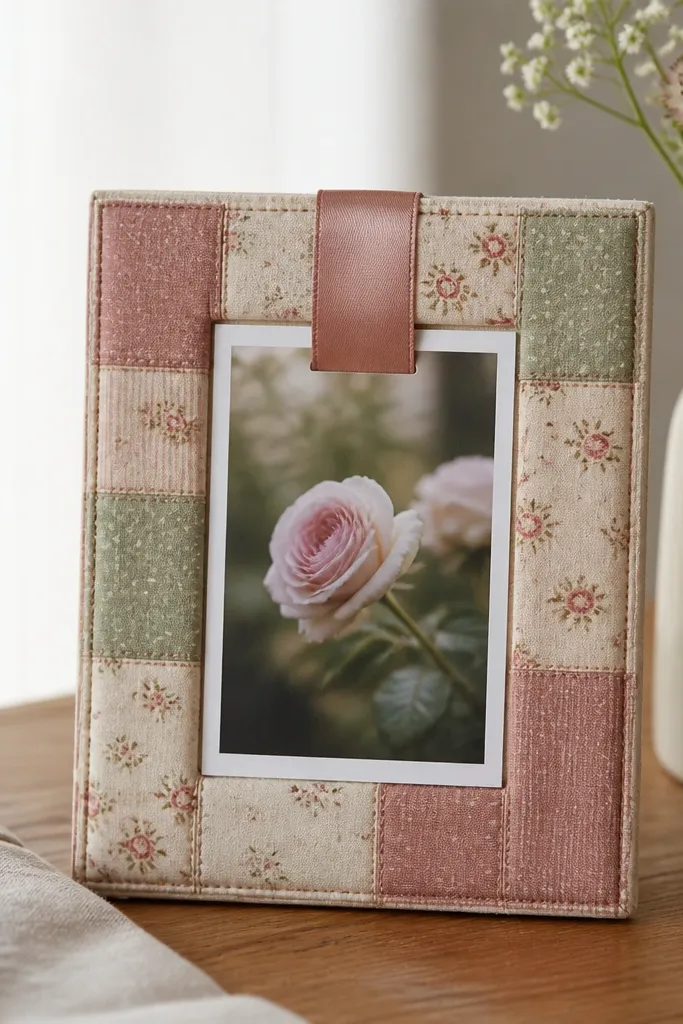
Use a 5x7 frame with a flat front. Cut fabric scraps into 1 inch squares and rectangles, then arrange with a 1/8-inch gap. Glue with fabric glue or a thin layer of Mod Podge, working in small sections. Finish the back with felt so the fabric edges don’t fray. Insert a print photo sized to the frame opening and tie the ribbon loop through the top screw or a small hole you punch.
This looks personal fast because fabric scraps mimic the couple’s colors in a way that feels handmade. The ribbon loop makes it feel gift-ready without covering the whole frame. I use a patchwork layout with 1-inch pieces so the texture shows but stays controlled. A single ribbon element keeps it from turning into a messy quilt.
One warningAvoid hot glue on fabric edges — it can leave strings and uneven bumps under photos.
Quick tipPress the fabric down with a scrap of parchment and a warm iron on low for 5 seconds per section.
4. Personalized Seed Packet Set for Their First Spring Garden
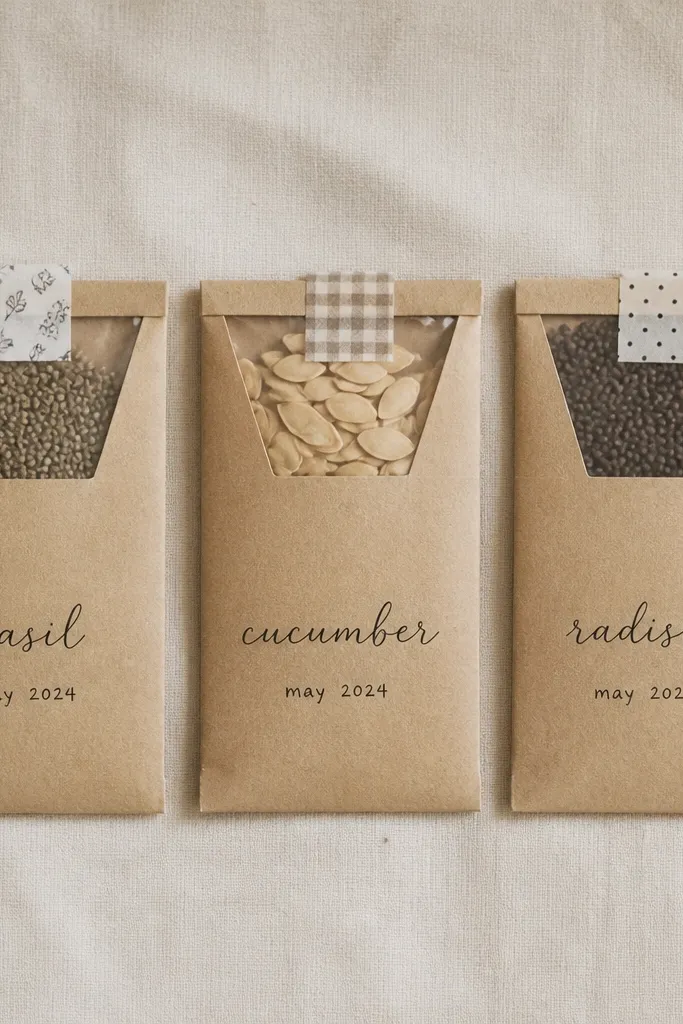
Use pre-cut seed packet paper or make your own by folding 4x6 kraft paper and sealing sides with double-sided tape. Add a small clear window from acetate so the couple can see the seeds. Write plant names and a planting date on each packet, then seal with narrow washi tape. Tie packets together with jute string and add a small card with spacing instructions.
Seed packets feel personal because they connect to a future moment, not just the wedding day. I pick seeds that look good and are easy for new gardeners: basil, wildflowers, and marigolds. The cozy part comes from the kraft paper, warm ink, and small waxy details like tape seals. You can make it look thoughtful even with simple seed choices.
One warningAvoid generic fonts printed from a template — hand-lettering is the whole point here.
Quick tipInclude a tiny “how to plant” card with exact depth: basil needs about 1/4 inch depth, marigolds about 1/2 inch.
5. Embroidered Ring Dish in Felt with a Tiny Heart Pocket
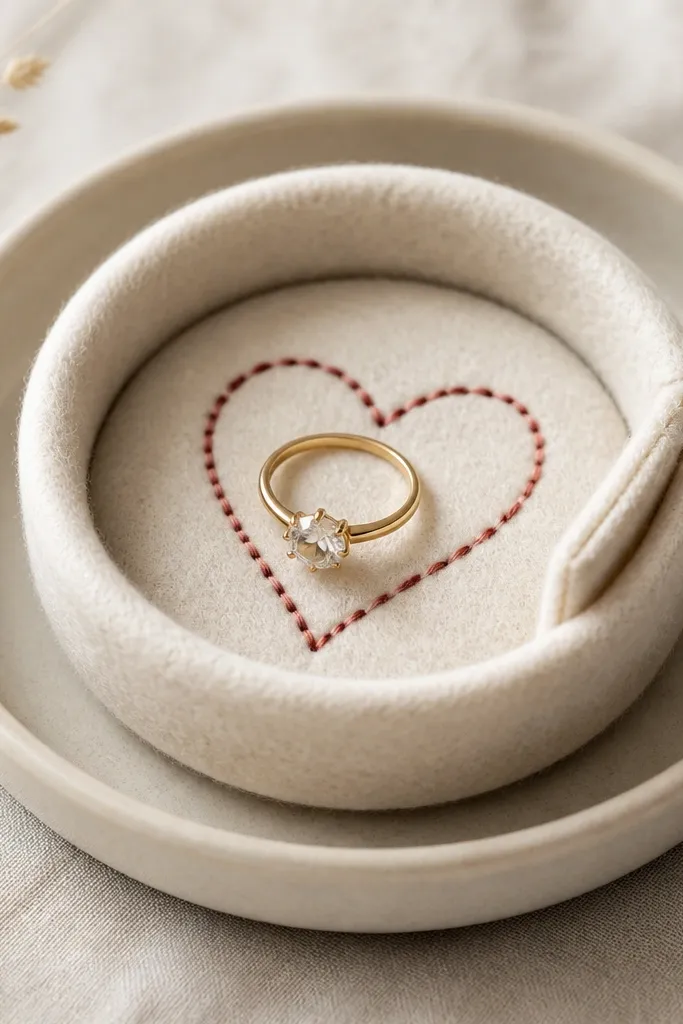
Cut two 4-inch circles of felt for the top and base. Stitch a simple heart outline on the top circle using backstitch with 6-strand embroidery floss. Add a small side pocket by sewing a 2x2 inch felt square folded into a pouch. Layer the top and base and sew around the edge with a whipstitch using matching thread. Stuff lightly with fiberfill or keep it flat for a firmer dish.
Ring dishes get used constantly. I like felt because it holds shape, looks cozy, and hides uneven edges better than fabric that frays easily. The heart pocket is a cute little detail for earrings, hair ties, or a wedding day note. Embroidery makes it look intentional instead of craft-store plain.
One warningAvoid super-thin felt — it collapses and makes the dish look cheap.
Quick tipUse a fabric marking pen for the heart sketch, then iron it away if your felt allows it.
6. Cozy Cork Coaster Set with Initials Burned into the Center
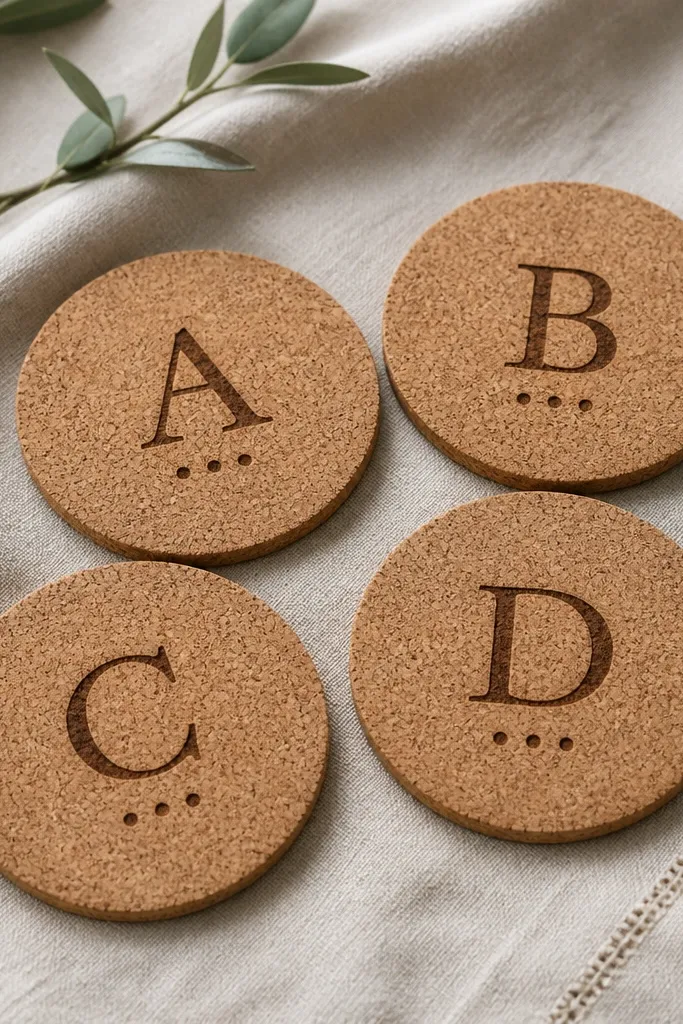
Buy cork sheets and cut into 4-inch circles. Sand the top lightly with 220 grit so the burn is even. Use a wood-burning tool on a low setting to mark initials — press slowly to avoid gouging. Seal with a matte clear sealant spray so drinks don’t stain the cork. Pair with a simple storage tray or a ribbon wrap.
Coasters are one of the few wedding gifts that get immediate daily use. Cork looks warm and forgiving, and it takes a burned mark well. I keep the design minimal: one initial, one small design element. That makes the set look cohesive and not like a bunch of separate crafts.
One warningAvoid glossy sealant — it reflects light and makes the initials look smeared.
Quick tipTest your burn depth on a scrap first — cork burns fast once it heats up.
7. Wedding Date Embossed Wax Paper Place Card Holder
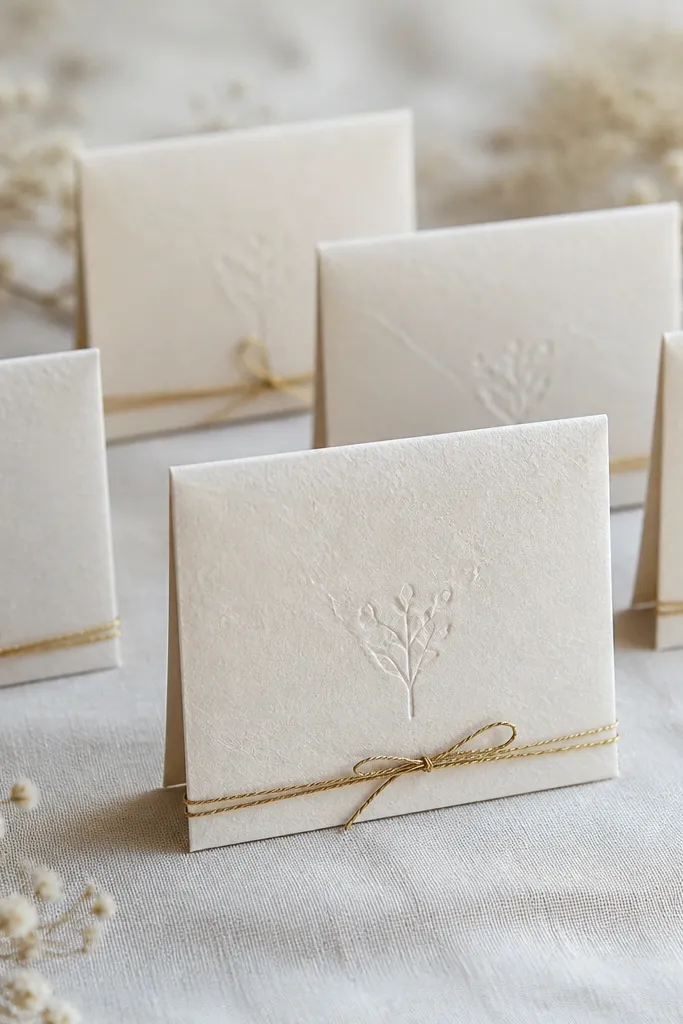
This is a cozy gift because it doubles as decor for the couple’s first dinner party in their new place. Embossed date details look classy without needing foil stamping. Waxed paper gives a soft sheen that photographs well. It also feels personal because the date is the anchor.
Cut cardstock into 3x6 inch strips and fold into a tent holder. Wrap each with waxed paper so the edges meet neatly at the back. Create a date emboss using a metal embossing stylus and a firm backing board, then add the date with a fine gold paint pen. Tie a thin gold string around the base where the fold meets. Use 6 holders so they match a small table setting.
Ink the emboss lightly with a tiny brush, then wipe the surface with a dry cloth so only the grooves hold color.
Avoid thin paper — it caves when you stand the holder up.
8. Handmade Linen Napkin Rings with Pressed Dried Flowers
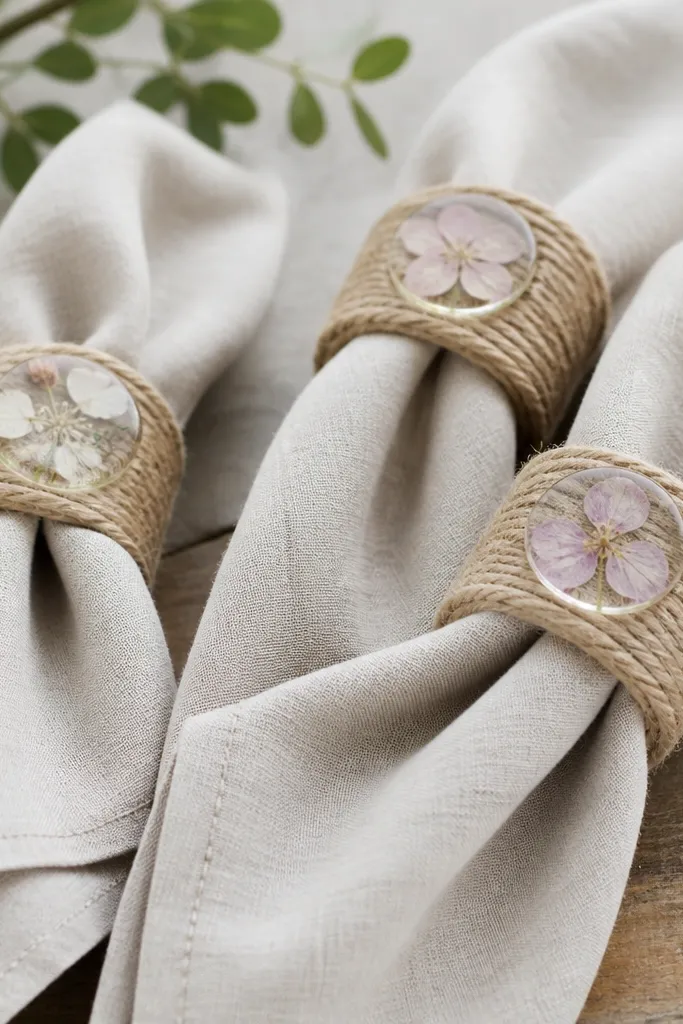
Use cardboard ring bases (about 2 inches wide) or buy cork rings. Glue pressed flowers onto the top center, then cover with a thin layer of clear resin or clear craft gel. Let it cure fully, then wrap the ring with jute or linen strip. Add a tiny tag with the date using a hole punch and string.
Napkin rings are small but memorable. Pressed flowers under a clear dome look gentle and cozy instead of flashy. I use pale flowers because they don’t clash with most wedding palettes and they photograph softly. The rings also make the couple’s first hosted dinner feel special.
One warningAvoid dark, thick flowers — they show bumps and look heavy on a small ring.
Quick tipPress flowers for 7-10 days between book pages so they stay flat under the resin.
9. Knitted Look Crochet Mug Cozy with Initial Charm
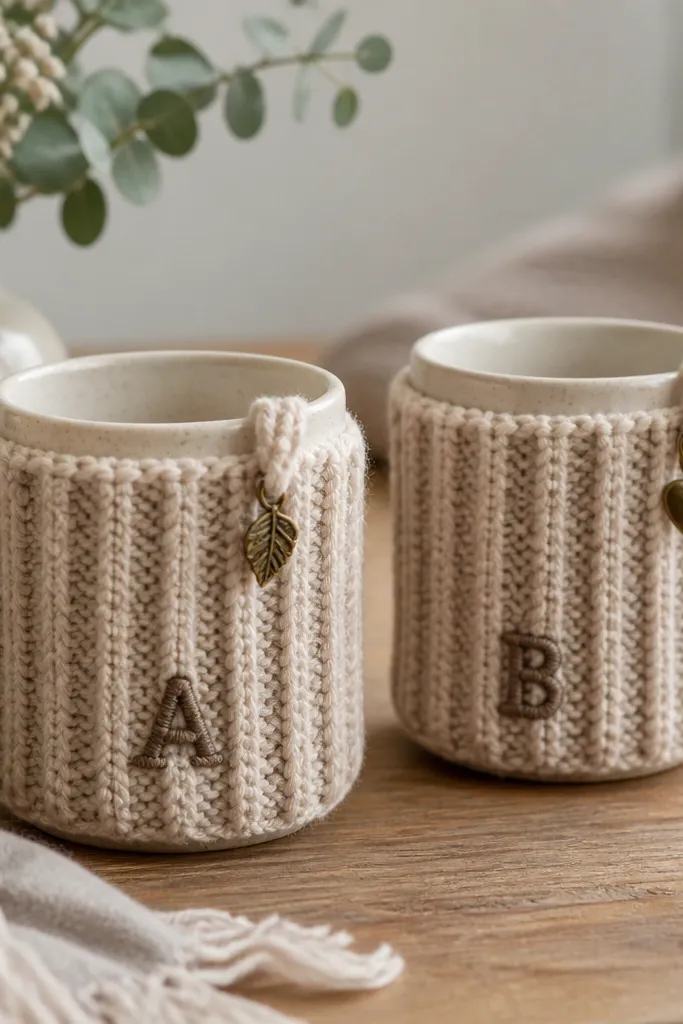
Use super bulky or chunky yarn in oatmeal, cream, or warm gray. Crochet a tube that fits snug around a 3.5 inch mug circumference and about 4 inches tall. Sew or stitch an initial patch on the front using felt or embroidery thread. Attach a small metal keychain charm with a jump ring. Include one extra cozy if they’ll host friends soon.
Mug cozies make tea and coffee feel cozy every morning. The ribbed texture is what sells it — it looks like knitting even if you’re crocheting. Add one initial to each cozy so it feels like theirs. I keep the yarn neutral and the charm in a warm metal tone so it matches most wedding decor.
One warningAvoid acrylic yarn that pills fast — it looks worn even after a few washes.
Quick tipMeasure your mug twice and stretch the yarn slightly — a cozy that’s too loose feels sloppy.
10. Personalized Wooden Spoon Cooking Card Holder
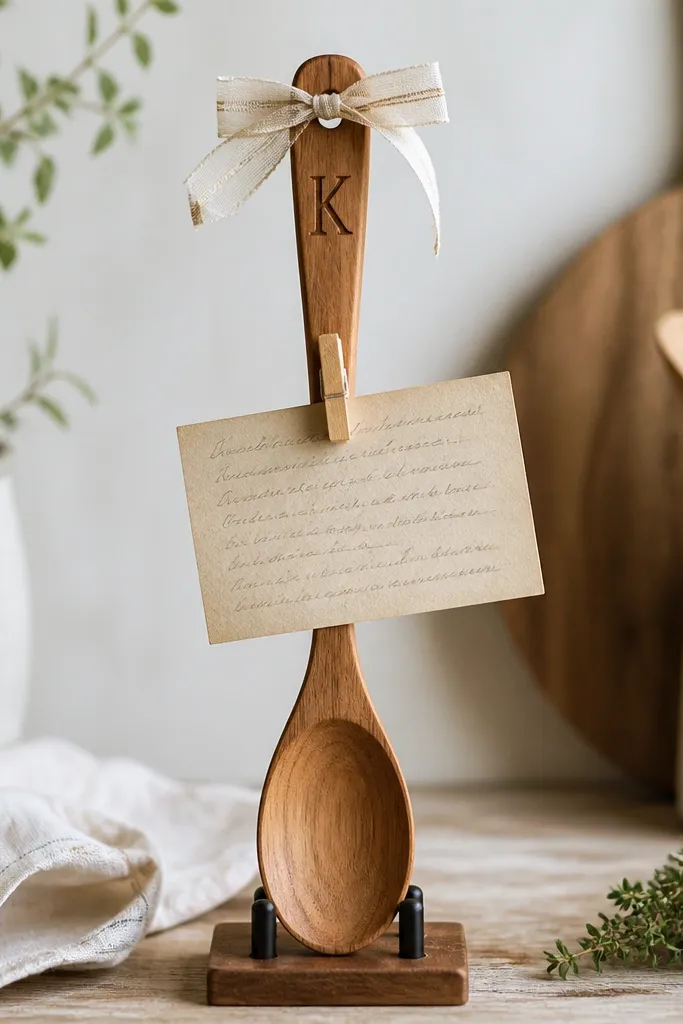
Buy a plain wooden spoon with a flat handle. Sand lightly, then burn an initial and date stamp near the top of the handle. Make a recipe card holder by adding a small binder clip or clothespin to a simple stand, or clip the card directly to a ribbon loop tied around the handle. Use thick cardstock cards so the edges don’t curl. Tie a satin ribbon in their accent color around the handle.
This gift is personal because it points to how they’ll cook together. A wooden spoon feels warm and kitchen-friendly, and it makes a recipe card look intentional instead of loose paper in a drawer. I like using one spoon per couple because it looks styled on a counter. The initial burn keeps it clean and not overly decorated.
One warningAvoid painting the whole spoon — chipped paint looks messy fast.
Quick tipWrite the recipe card in permanent marker on the front and add cooking notes on the back in pencil.
11. Bottle-Brush Wreath Keychain with Date Tag
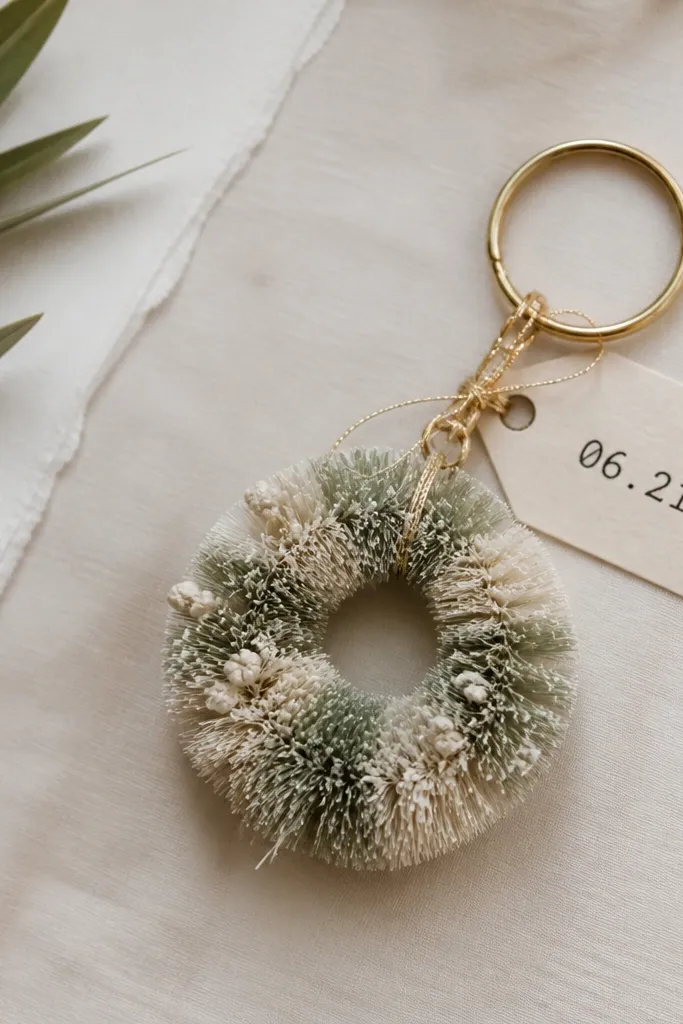
Use mini bottle-brush wreath forms or make a ring with craft wire and wrap bottle-brush stems around it. Hot glue the ends sparingly so the wreath doesn’t look lumpy. Tie a gold string loop through the top and add a cardstock date tag sized about 1.25x2.5 inches. Attach to a metal keychain ring with a split ring.
This is a cozy, tiny gift that feels personal because it attaches to their daily life. Bottle-brush texture looks wintery and soft, even if the wedding is in summer. I keep colors muted: sage, cream, and a hint of blush. The date tag is the personal detail, and it doesn’t require fancy tools.
One warningAvoid oversized wreaths — they snag on bags and look awkward in photos.
Quick tipSeal the date ink with clear matte spray so it doesn’t smudge from keys.
12. Cozy Welcome Bag for Their New Home with Vinyl-Free Labels
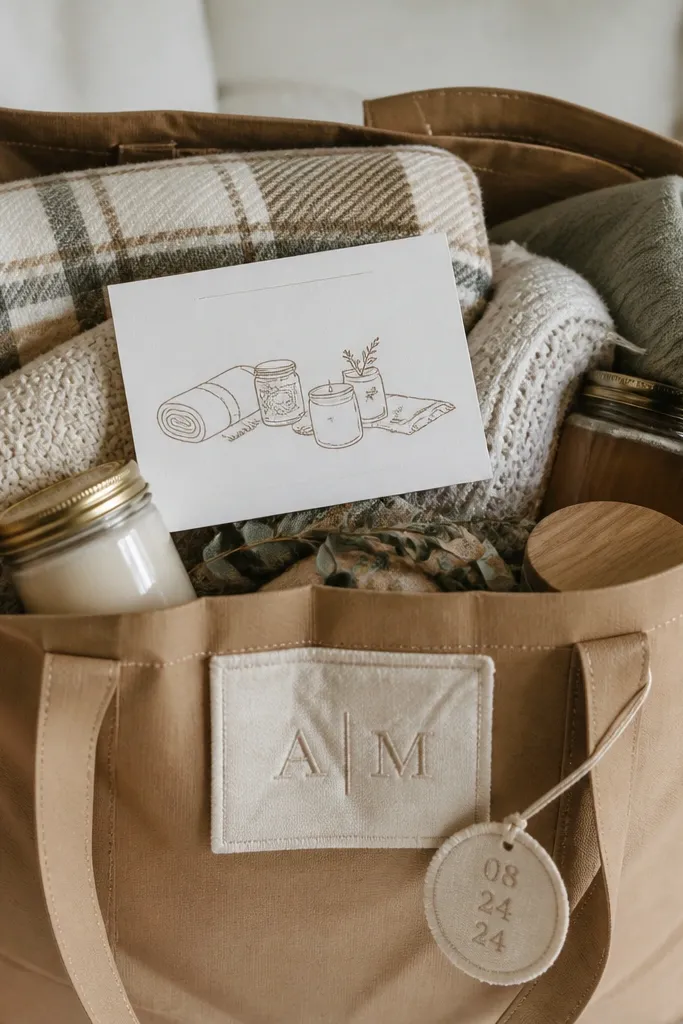
Use a medium kraft tote or a canvas bag. Sew a fabric label on the front: 2x4 inch strip with their initials and wedding date in embroidery thread. Fill with a small candle in a glass jar, 2-3 tea sachets, matches in a wrapped box, and a mini packet of hot cocoa. Add a card with a simple “first night” checklist like light candle, brew tea, set out blankets.
A welcome bag feels personal because it’s timed for the first days in a new place. I like keeping labels fabric-stitched so they look soft and not like store packaging. Cozy items inside make the couple feel cared for immediately: tea, a small candle, matchbox, and a throw-scarf. When you use a tote that can be reused, the gift stays useful.
One warningAvoid vinyl heat-transfer labels — they peel when the tote is handled a lot.
Quick tipWrap fragile items in tissue and tape the tissue to itself so it doesn’t stick to the glass.
13. Hand-Painted Family Recipe Booklet with Brushed-Edge Covers
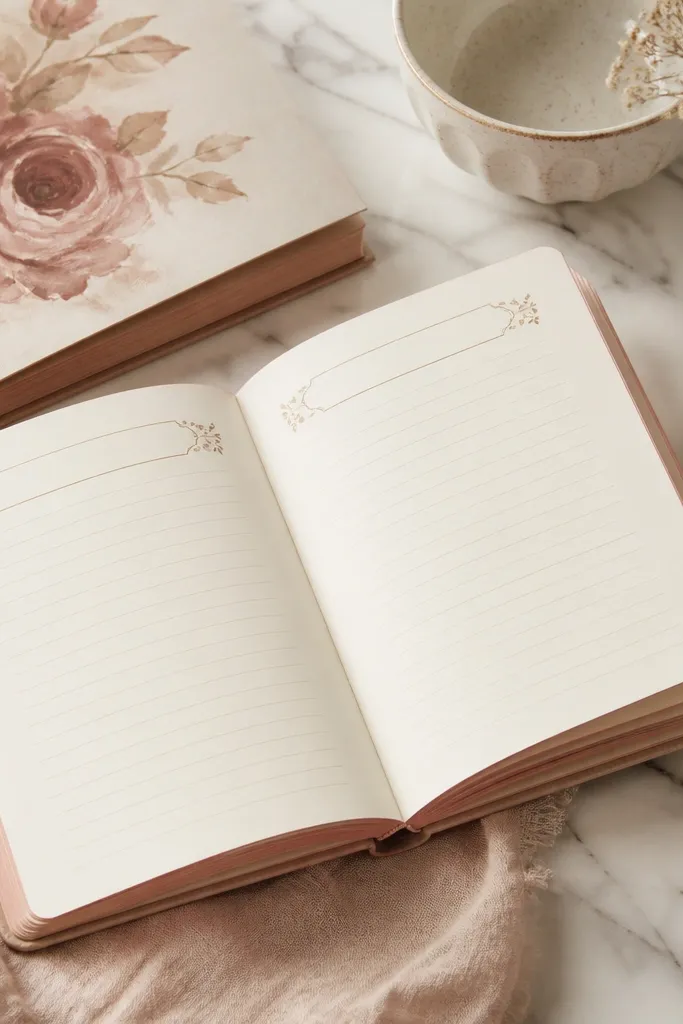
Use 8.5x11 paper cut down to A5 or create a half-fold booklet. Paint the cover with acrylic in one main color and add a dry-brush edge in an accent color. Clip the booklet with binder clips and punch holes along the spine, then stitch with waxed thread. Add tab dividers for categories like “Breakfast,” “Dinner,” and “Treats.”
A recipe booklet feels personal because it invites their handwriting and future memories. I like blank pages with a consistent layout so they can add recipes over time without making the whole thing look messy. Brushed-edge covers keep it cozy and handmade without needing full illustration skills. This is a gift they’ll keep reaching for when friends ask for the “good stuff.”
One warningAvoid messy page spacing — uneven lines make the booklet look unfinished.
Quick tipUse a fine liner to draw ingredient lines so their later writing stays aligned.
14. Custom "Our First Year" Ornament with Handwritten Month Tags
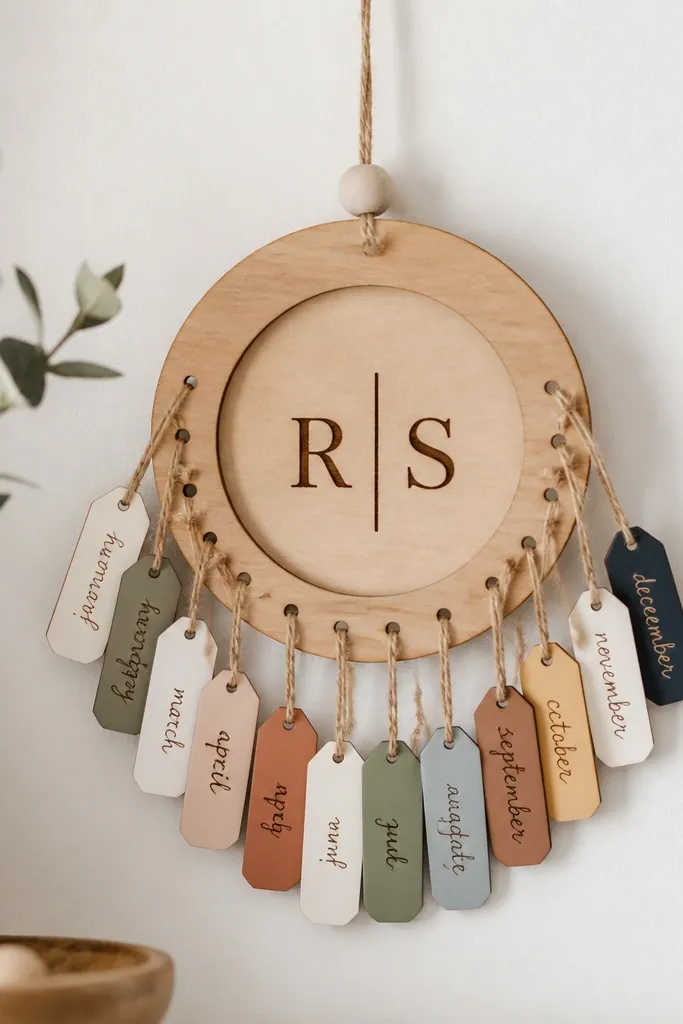
Use a 4-5 inch wooden ring or cut one from craft wood. Burn initials in the center. Punch holes in 12 cardstock tags and thread them through twine tied to the ring at equal spacing. Write each month and a tiny prompt on the back like “a meal we loved” or “a place we visited.” Seal the tags with matte spray after ink dries.
This is cozy because it turns the first year after the wedding into something they’ll open and hang up repeatedly. The month tags make it interactive without needing electronics or complicated assembly. Wood looks warm, and handwritten tags feel like you sat down and did the work. Burned initials keep it clean and long-lasting.
One warningAvoid mixing too many fonts — it reads cluttered.
Quick tipStick to one handwriting style and one ink color so the whole ornament looks intentional.