1. Mirror Tile Mandap Swag on Foam Back
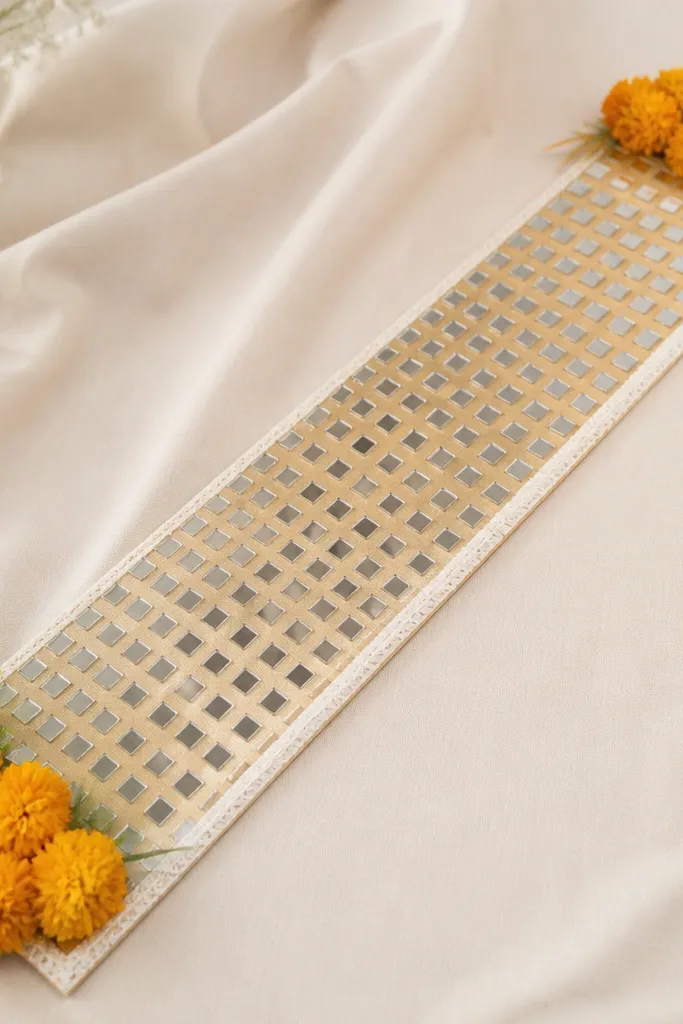
This looks stunning because mirror tiles catch light in tiny flashes, the same way expensive mandap decor does. The foam back keeps the shape firm so the swag doesn’t droop, and the fabric border hides any uneven cutting. I like pairing antique gold mirror tiles with marigold-yellow flowers and a thin ribbon trim so it reads bridal and festive, not disco.
Quick tipBefore sticking tiles, lay them on the board dry and mark a faint grid with a pencil so every tile lands aligned.
Cut foam board to the swag size you need (I usually do 24x36 inches for a side panel). Attach mirror tiles with a strong clear craft adhesive, starting from the center line and working outward so spacing stays even. Finish the borders with a 2-inch strip of satin or dupion silk in off-white or pale champagne.
One warningDon’t use hot glue for mirror — it can show bumps and cause tiles to shift as the glue cools.
2. Organza Ruffle Backdrop Strips with Threaded Beads
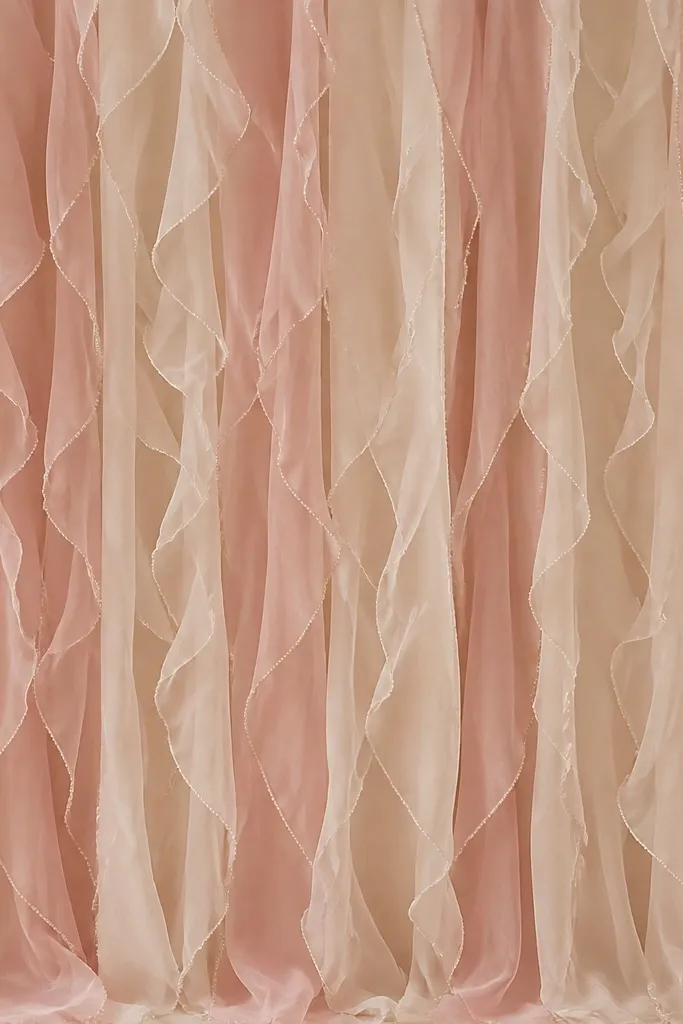
Organza ruffles look expensive when the ruffle spacing is consistent and the beads are threaded in straight lines. I’ve seen this work on sangeet stages because the fabric moves with light and camera motion. Blush organza plus champagne beads gives a bridal glow without looking harsh.
Cut organza into 8-inch wide strips and sew a long gathering stitch at the top edge, then pull to form a 3.5-4 inch ruffle width. Thread 4mm pearl beads onto a thin clear nylon thread and stitch them along the ruffle edge. Hang strips from a rod using small safety pins hidden behind the gathering top.
Use one bead spacing rule for all strips — I measure 1 inch between bead clusters so it looks designed, not random.
Don’t mix ruffle widths across strips; uneven widths make the whole backdrop look handmade.
3. Tassel Garland with Fabric Binding and Color Blocking
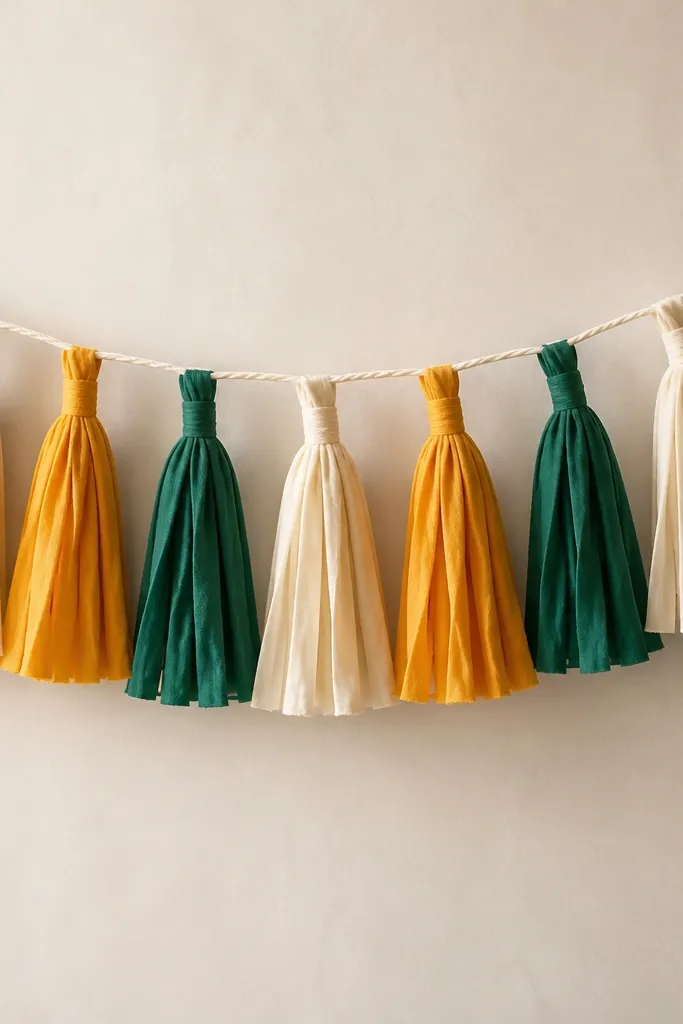
Tassels look high-end when the tops are wrapped cleanly and the colors repeat in a strict rhythm. I use fabric binding because it hides thread mess and gives a uniform “bundle” look. Color blocking (emerald + marigold + ivory) makes a sangeet mandap feel bright and modern on camera.
Quick tipSteam the tassels before hanging so the fringe falls in the same direction.
Make tassels from 4-inch wide strips of silk or cotton-silk blend, cut 10-12 inches long. Bundle 6-8 strips per tassel and tie tightly with matching thread, then wrap the top with a 1-inch strip of satin to cover the tie. Space tassels 3 inches apart on a cream jute or satin cord, alternating colors in a set order.
One warningSkip thin polyester fringe; it tangles and looks dull under stage lights.
4. Pearl and Crystal Table Runner Clips (No Sewing)
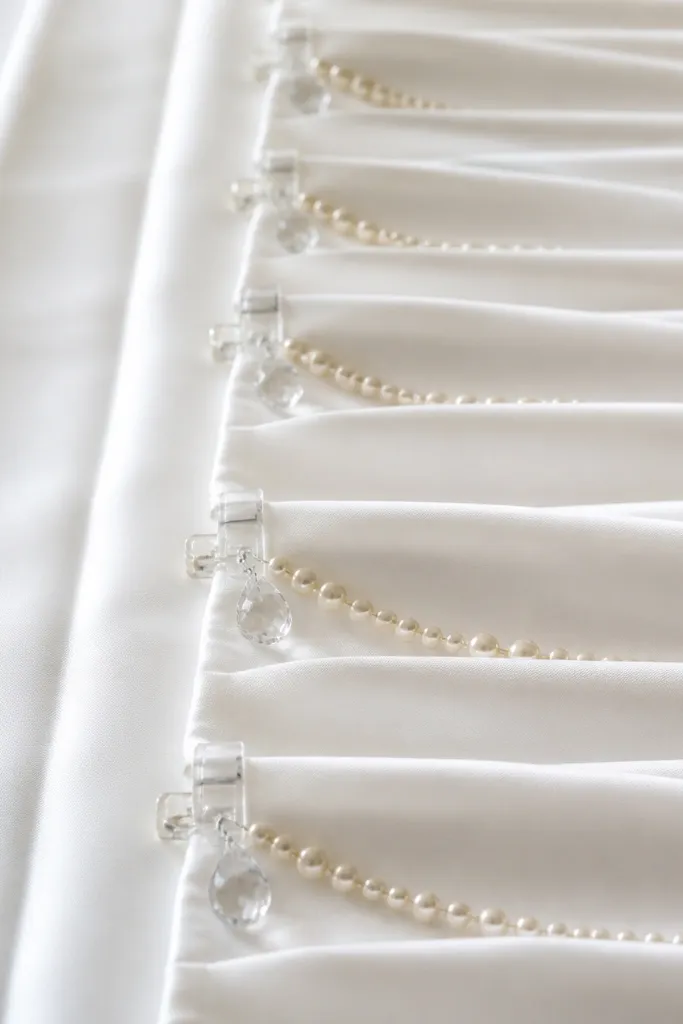
Table runners look “styled” when the decorations are placed with ruler-level spacing. These clips let you attach pearl strands without sewing into your expensive fabric. The clear clips also disappear, so the runner looks like one planned piece.
Quick tipMark your runner with a washable fabric marker at 8-inch intervals before clipping so you don’t have to eyeball symmetry.
Buy small alligator clips (or binder clips with a smooth coating) and attach 3mm pearls onto a 2.5-3 foot length of elastic thread. Add 6-8 tiny crystal drops (about 8mm) between pearl clusters. Clip the strand onto the runner, placing clusters every 8 inches across the length.
One warningDon’t hot-glue crystals directly onto satin; the glue can leave a shiny patch that catches light weirdly.
5. Floral-Print Paper Lanterns with Real Glass Bulb Covers
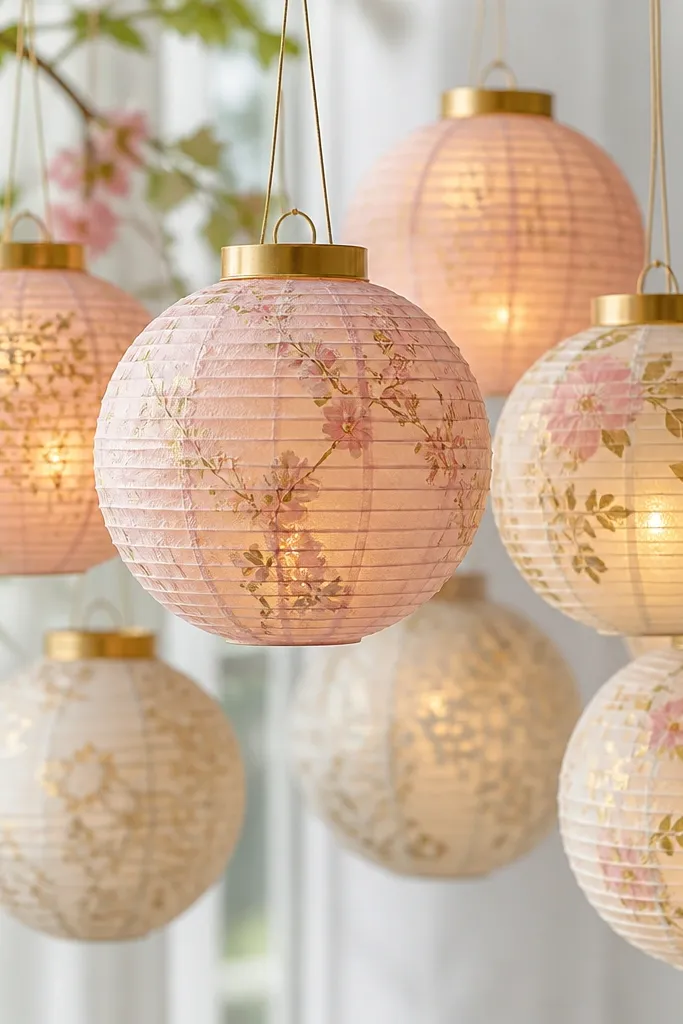
Paper lanterns look stunning when the print is crisp and the light is warm. I’ve used floral-print paper because it reads like designer stationery, and warm LED bulbs keep it cozy for mehendi. The trick is adding a protective bulb cover so the lantern looks clean and safe.
Quick tipChoose paper with a matte finish; glossy paper shows glare and looks cheap fast on camera.
Use lantern kits or build from cardstock: cut 6-inch wide panels and roll into a cylinder, then glue seams. Add a top ring made from 1/2-inch cardboard circle and punch holes for suspension thread. Place a warm white LED candle inside with a small clear glass bulb cover or heat-safe diffuser.
One warningSkip super-thin tissue paper — it wrinkles and sags when light heat hits.
6. Embroidery Hoop Monogram for Couple Seating Area
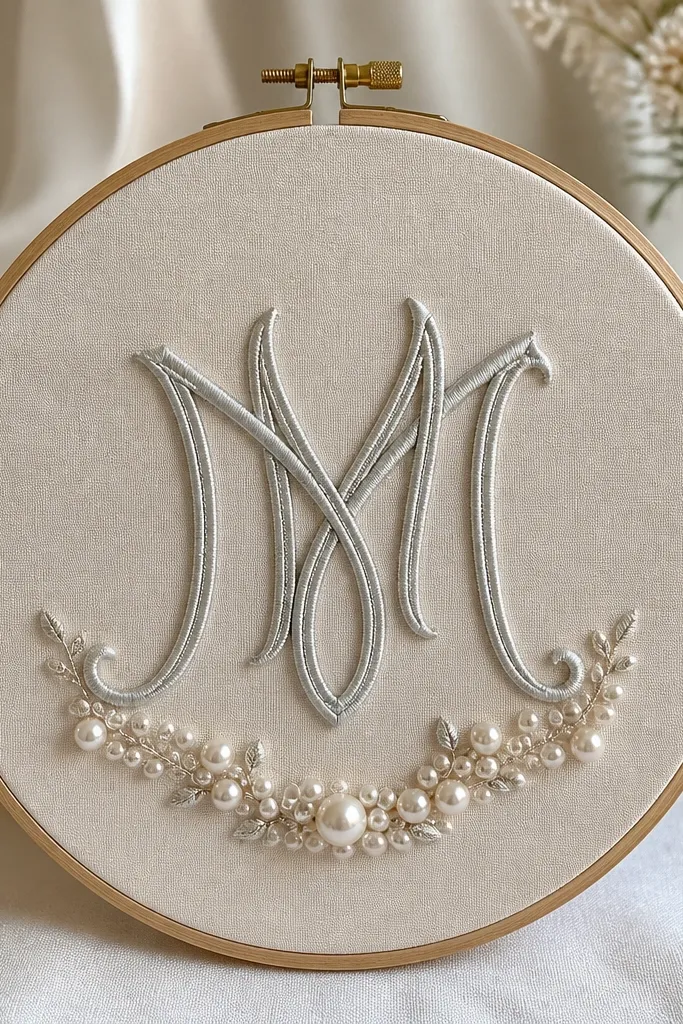
Monograms look personal and polished when the lettering is stitched tight and centered. I like embroidery hoops because they create a perfect circle frame without complicated carpentry. Pairing silver thread with champagne backing makes it look wedding-ready, not craft-store.
Quick tipPractice the curve of your letter on scrap fabric; uneven curves show immediately in photos.
Stretch champagne satin or dupion silk over a 7-8 inch embroidery hoop and tighten the screw evenly. Use a simple satin stitch for the initials with metallic silver thread, then add 3 small pearl clusters at the bottom using needle and strong thread. Seal the back with a thin layer of fabric glue around the hoop edge.
One warningDon’t use chunky novelty yarn for letters; it looks bulky next to satin.
7. Mehendi Welcome Sign with Foil Lettering on Black Acrylic
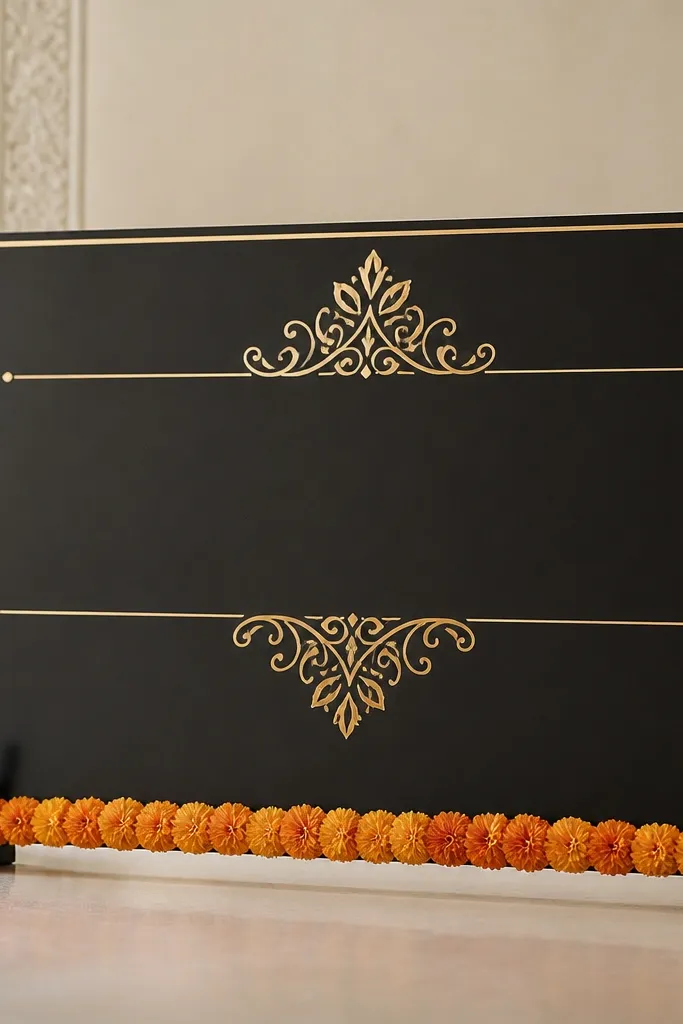
Black acrylic plus gold foil reads high-end instantly because the foil looks like real signage. I’ve done this for mehendi entrances and it photographed better than painted wood. Keep the design minimal and let the foil do the work.
Quick tipUse painter’s tape to mask the edges before foil so you don’t get accidental smudges.
Use a vinyl stencil for the text on black acrylic, then apply gold foil transfer sheets with a foil pen or transfer adhesive method. Peel carefully to keep edges crisp. Mount the acrylic on two acrylic stands or a foam board base wrapped in black satin, then attach a 1-inch marigold garland at the bottom.
One warningDon’t hand-paint gold on acrylic; it chips and looks uneven under flash.
8. Satin Ribbon Rose Mandap Corner Clusters
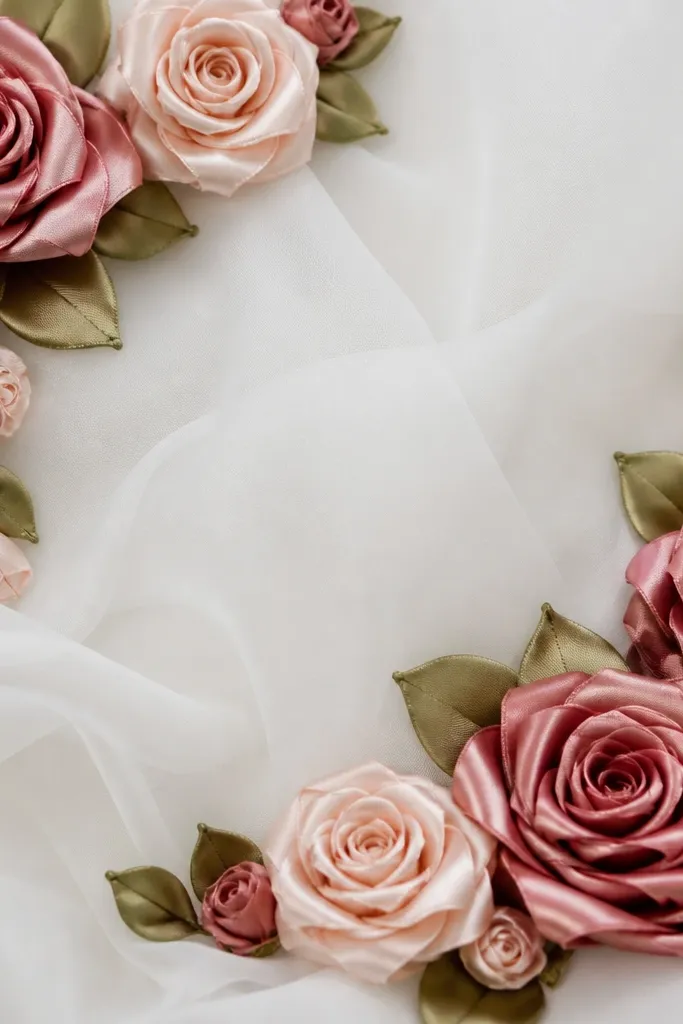
Ribbon roses look stunning when the petals overlap like real flower layers, not like rolled craft strips. I attach the clusters to a sheer base so they sit lightly against the mandap. Dusty rose plus a hint of sage-green ribbon leaves makes the whole corner feel soft and romantic.
Quick tipUse a hot glue gun on the ribbon only at the very base — too much glue makes the petals look stiff.
Cut 1-inch wide satin ribbon strips, fold into a spiral center, and glue each wrap with a tiny dot at the base. Make 12-15 roses per corner, each about 2.5-3 inches wide. Attach roses to a 12x18 inch sheer fabric panel, then add mini ribbon leaves using green felt cut into leaf shapes.
One warningSkip shiny craft ribbon; it reflects light harshly and flattens the rose shape.
9. Marigold and Teal Fringe Backdrop Panel
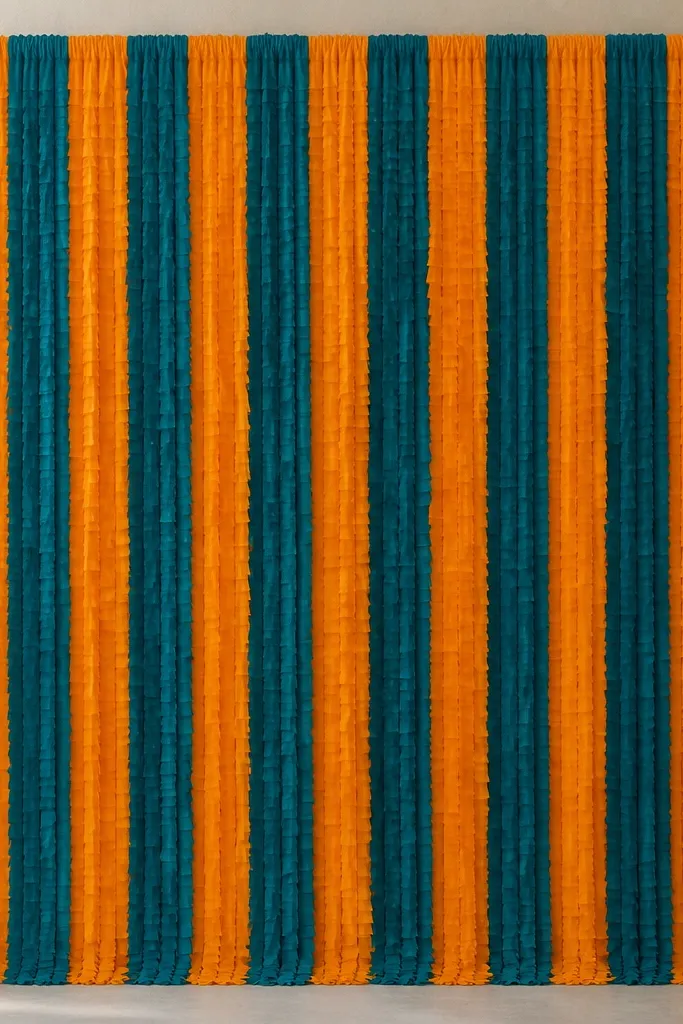
Fringe panels look bold and camera-friendly because the strands create texture even from far away. The marigold and teal combo pops in daylight and looks festive at night with warm lighting. This is one of my go-to DIYs for sangeet stage sides.
Cut 2.5-inch wide strips of chiffon or satin blend in marigold and teal, each 18 inches long. Tie strips in bundles of 10-12 per knot onto a top rod pocket made from folded fabric. Keep bundles 1.5-2 inches apart for consistent density. Finish side edges by sewing or gluing a 1-inch border strip.
Hang the panel and adjust fringe length after tying — trim only after it’s on the rod so it hangs evenly.
Don’t make knots too loose; fringe will separate and look messy mid-event.
10. Crystal Tealight Holders in Gold Leaf Paper Cups
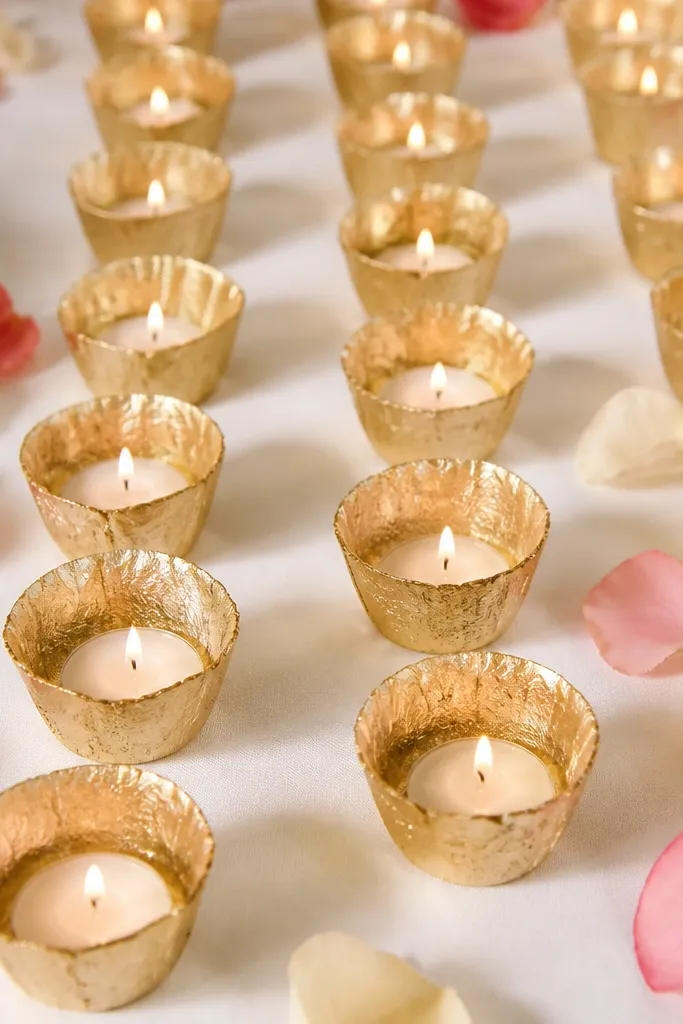
This looks luxe because gold leaf reflects light in tiny highlights, and the clear tealight glass keeps it clean. I’ve used these on cocktail tables where guests walk past — the glow looks intentional, not random. Teal crystals inside make the light feel jewel-toned.
Quick tipLine the inside with a thin circle of heat-safe paper so wax doesn’t soak the gold leaf.
Use 2.5-3 inch diameter paper cups (or wrap cardstock into cups). Apply gold leaf sheets with leaf adhesive, then add a clear acrylic tealight holder insert or place tealight directly inside if the cup is lined. Drop 1-2 teal glass gems or small crystal pieces at the base before inserting the tealight.
One warningSkip scented candles with thick wicks; the flame shape looks different and can look uneven in photos.
11. Geometric Foil Confetti Frame for Photo Table
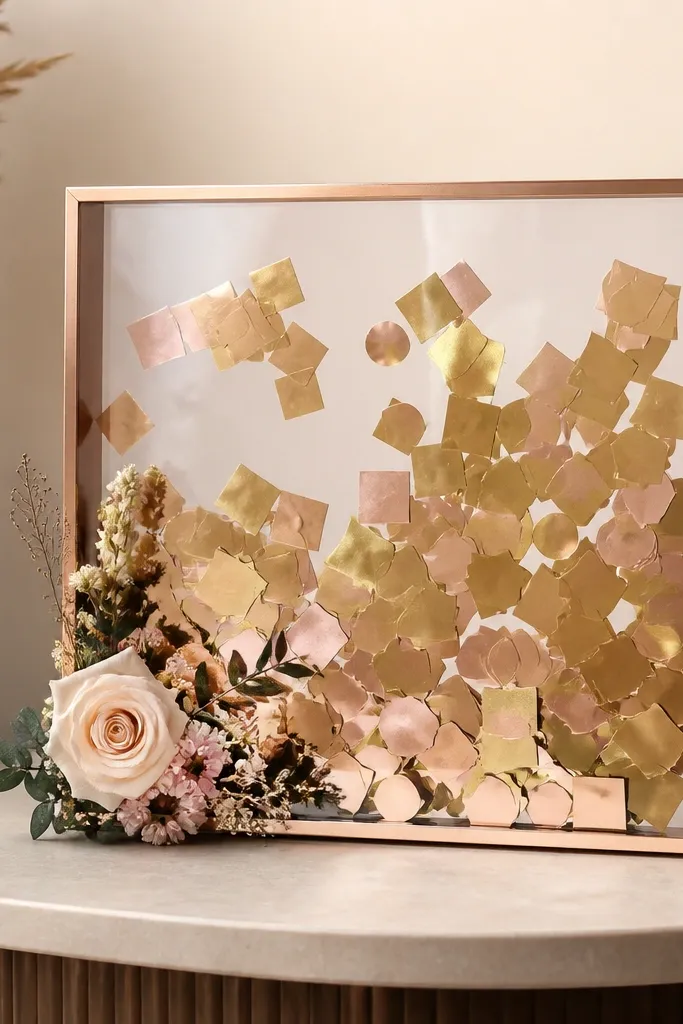
Confetti frames look like high-end party props because they’re controlled — you’re not tossing loose confetti everywhere. Foil pieces inside a fixed frame catch light from angles and give a “designed scatter” effect. Add a clear acrylic front to keep it tidy for guest photos.
Quick tipUse a mix of sizes: 1/4-inch triangles plus a few 1/2-inch pieces so it doesn’t look flat.
Make a square frame from foam core (12x12 inches) and cut a window opening in the center. Layer a clear acrylic sheet over the window with thin double-sided tape. Fill with small triangular foil pieces (gold and rose gold mix) and place a small compartment of faux flowers at one corner using a glued foam pad.
One warningDon’t overfill; if the confetti touches the acrylic too densely, it turns into a dull glitter sheet.
12. Cardstock Wedding Stage Clouds with Backlighting
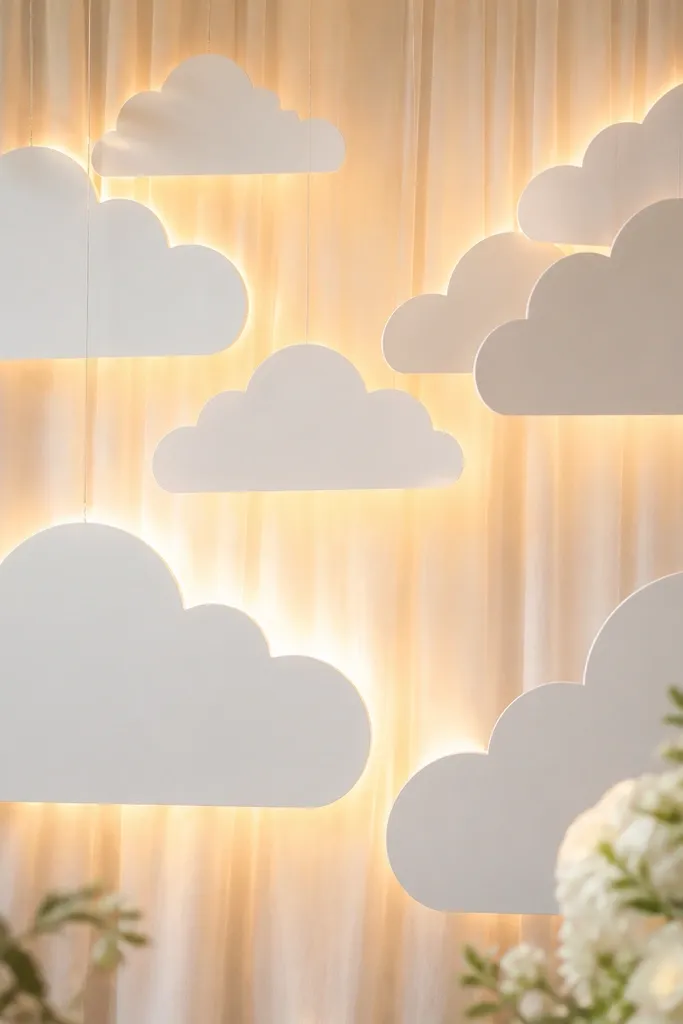
Cloud cutouts look dreamy when they’re backlit and layered at different depths. I made these for an evening wedding and the glow made the stage feel like it had depth without heavy decor. White cardstock with a matte finish avoids glare and looks like fabric in photos.
Quick tipDust the edges lightly with white chalk powder so cuts look soft instead of sharp.
Cut cloud shapes from 2mm foam sheets or thick cardstock using a template (make 3 sizes: 10, 14, 18 inches wide). Layer them by attaching smaller ones in front with 1-inch foam spacers. Hang behind a sheer or directly in front of warm LED strip lights, keeping at least 2 inches distance so heat doesn’t warp paper.
One warningDon’t use thin printer paper; it curls and shows cut lines.
13. Kundan-Style Bead Fringe on Organza Dupatta Panel
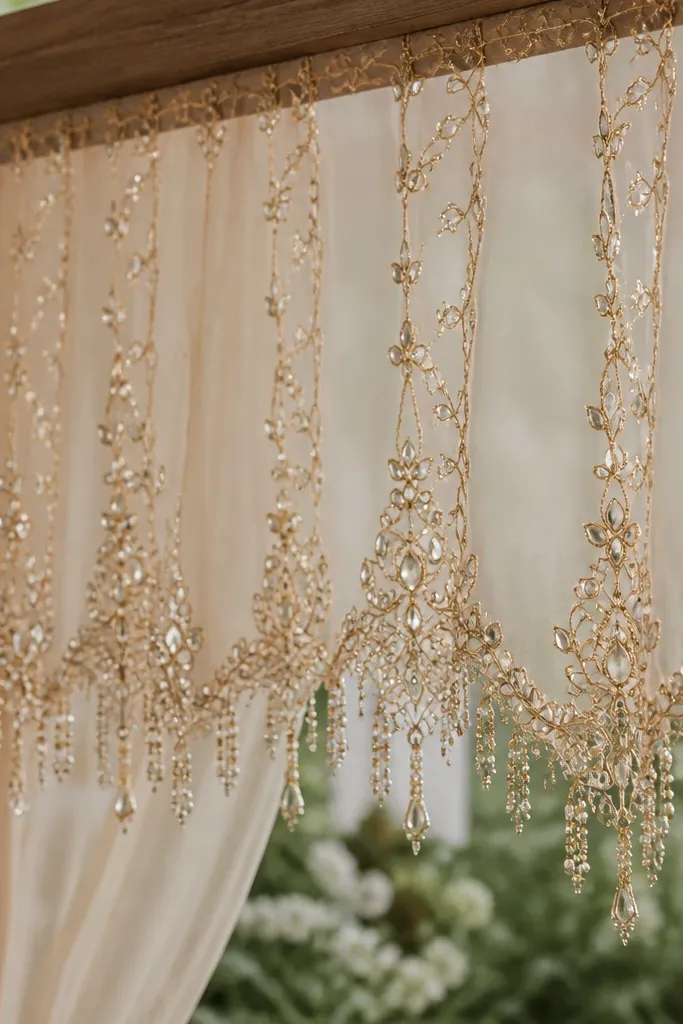
Bead fringe looks like kundan jewelry when you keep the pattern tight and the bead sizes consistent. I like using organza for the base because it floats and lets the beads shimmer without getting too heavy. This works beautifully for mandap sides or for covering a plain wooden stand.
Cut organza into a 18x36 inch panel and glue it to a thin wooden strip at the top. Create fringe rows by stitching 8mm kundan-style stones or acrylic kundan beads along a 2-inch strip, then add smaller 4mm pearls beneath in repeating groups of 3. Finish with a 1-inch border strip of satin so the top edge looks intentional.
Lay out your bead pattern on paper first and count bead groups so spacing stays identical across the panel.
Don’t mix huge beads with tiny ones in the same row; it looks random instead of jewelry-like.
14. Haldi Photo Booth Floor Washi Tape Borders
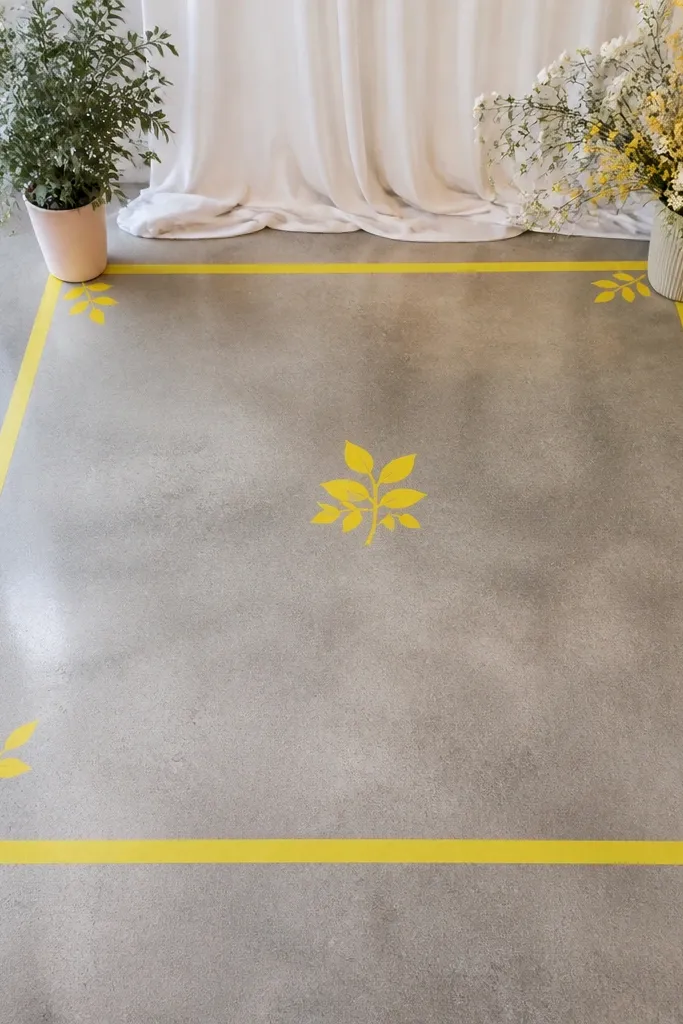
This is one of those DIYs that looks fun and clean because it’s graphic. Washi tape borders are sharp, removable, and perfect for haldi photo corners where you don’t want to damage the floor. The bright yellow border guides the eye and makes the background look styled even if the venue is plain.
Quick tipPress tape edges firmly with a plastic card so it doesn’t lift during foot traffic.
Tape a rectangle 5x7 feet on the floor using 2-inch wide yellow washi tape. Add corner triangles in teal tape and paint small leaf motifs with a thin brush using acrylic paint. Put down a protective clear sheet or use tape only on clean, flat surfaces so it lifts without residue.
One warningDon’t use thick duct tape; it wrinkles and looks industrial.
15. Sangeet Entry Side Lights with Foil Balloon Frames
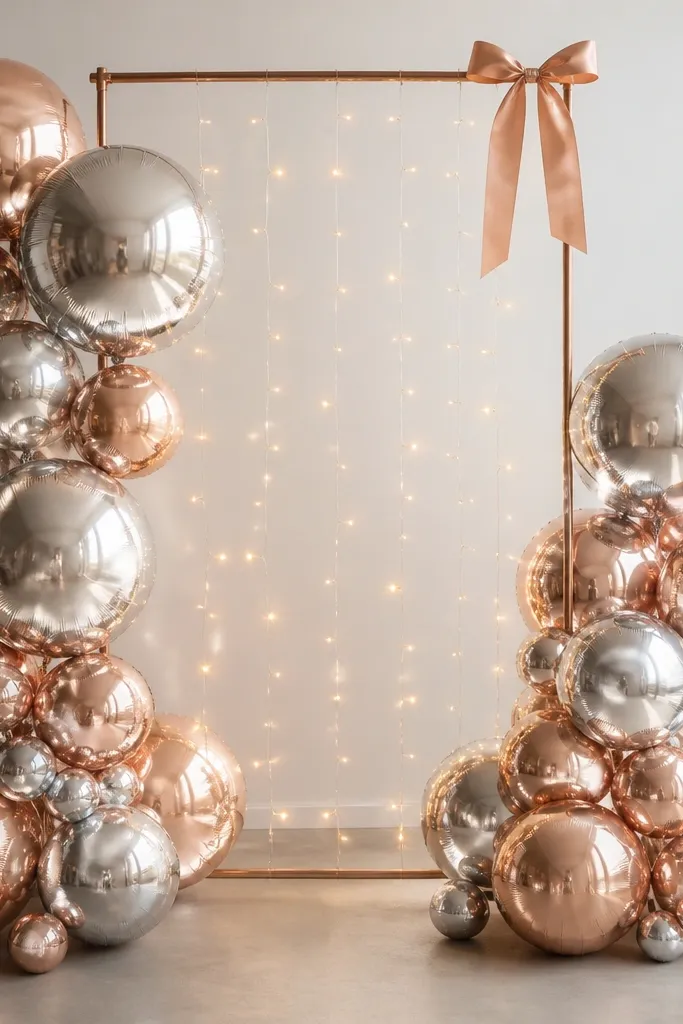
Foil balloon frames look like an event designer did it because the shapes are controlled and symmetrical. Add warm string lights inside and the balloons glow at night. Silver and rose gold with a few pearl accents reads elegant even with balloons.
Quick tipUse one ribbon tone for tying — I use satin blush ribbon and tie it in a single bow at the top center.
Build a rectangular frame from 1/2-inch PVC or cardboard covered with silver foil contact paper. Secure balloon clusters with zip ties through the frame holes, using 9-12 balloons total for a 3-foot tall frame. Insert warm fairy lights behind the cluster so the light is not blocked.
One warningSkip random balloon strings; they sag and make the frame look lopsided.
16. Pearl String Curtain for Mandap Side Entrance
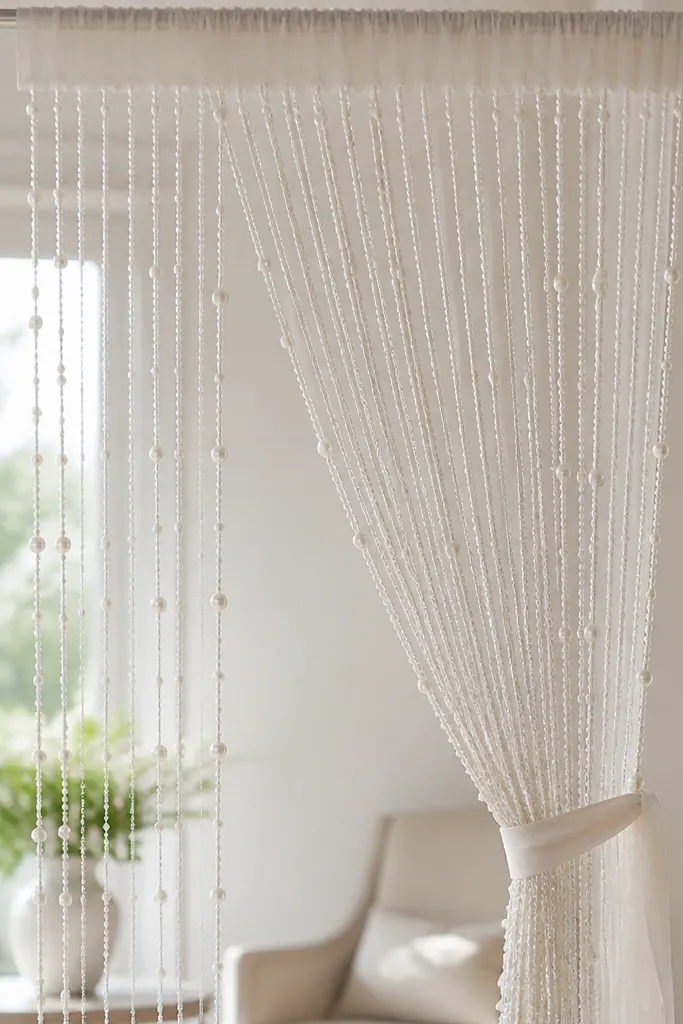
A pearl string curtain looks like jewelry draped in the air. The key is spacing: equal gaps make it look like a planned installation. I’ve used this for mandap entry because it creates a photo moment without taking floor space.
Quick tipCount strands and mark the rod at equal intervals before tying — don’t eyeball spacing.
Hang from a rod using a sheer top pocket made from 1.5-inch wide fabric strip. For each strand, use 22-24 inches of clear monofilament with 6mm pearls spaced about 1 inch apart. Make 18-24 strands depending on width, and tie ends to a bottom support bar or a thick thread line.
One warningDon’t mix pearl sizes wildly on one curtain; it looks like leftover beads.
17. Hand-Painted Clay Diyas with Gold Edge Lining
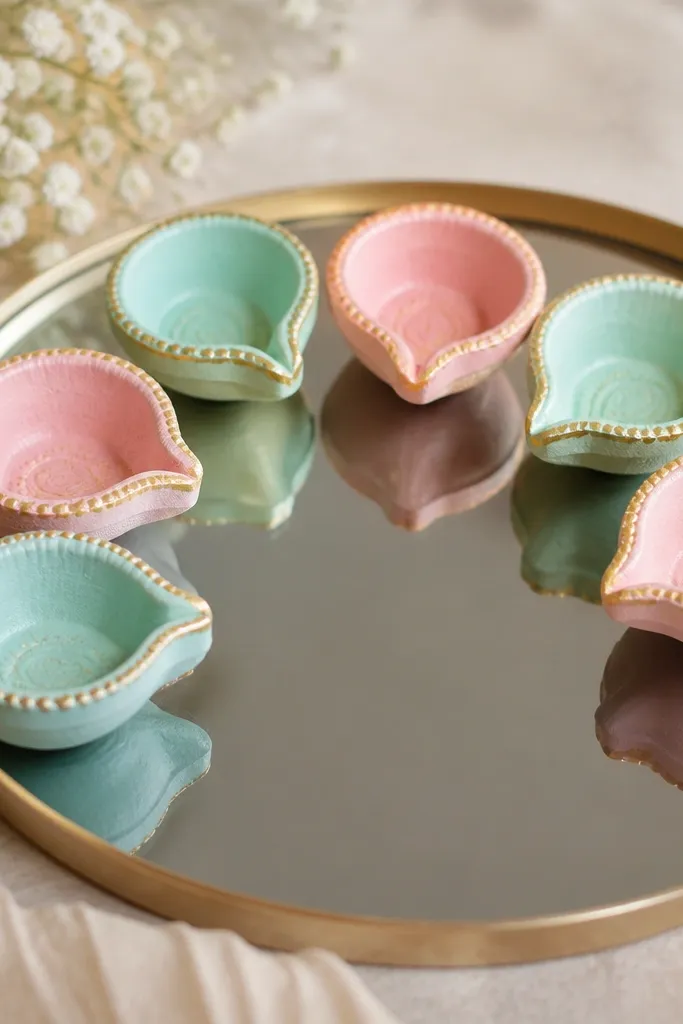
These diyas look high-end because the gold edge lining gives a jewelry border effect. I paint simple leaf and dot patterns and then outline the rim with gold paint pen. On a mirror tray, the warm flame reflects and makes the gold feel brighter.
Quick tipSeal with a matte varnish if you expect handling; glossy varnish shows fingerprints.
Use terracotta diyas, clean and dry fully. Paint the body with acrylic in teal and blush, then let dry 20-30 minutes. Outline edges with a gold paint pen and add tiny dot accents near the base. Place on a mirror tray and use LED tealights if the event is outdoors with wind.
One warningSkip heavy brush strokes — thick paint chips and looks uneven around the flame.
18. Rose Gold Foil Name Cards in Acrylic Holders
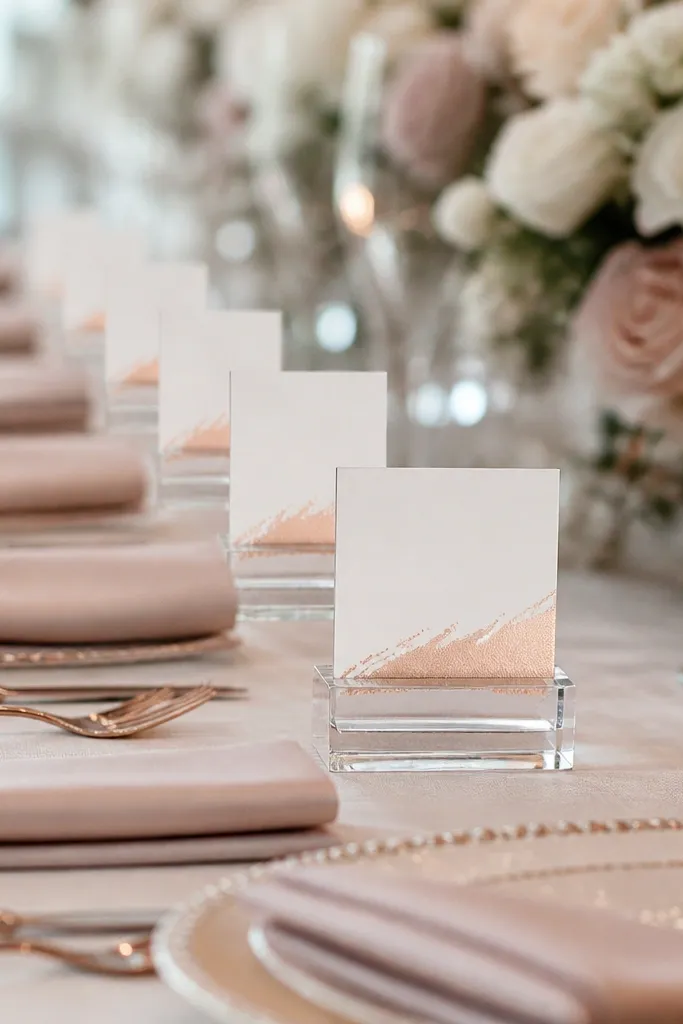
Place cards look like a premium stationery set when you use foil lettering and consistent card size. Acrylic holders keep everything readable and tidy. I like rose gold foil because it pairs well with both warm marigold decor and cooler silver accents.
Cut cards to 4x2.5 inches, matte white or cream cardstock. Apply rose gold foil using a stencil and foil transfer adhesive, then punch a small top notch if your acrylic holders require it. Insert into acrylic holders and keep every card aligned by pressing the base edge against a ruler.
Use the same font style across all cards; even simple cursive looks expensive when consistent.
Don’t print foil on glossy paper; it reflects flash and makes letters hard to read.
19. Sari Border Fabric Garland with Knotted Loops
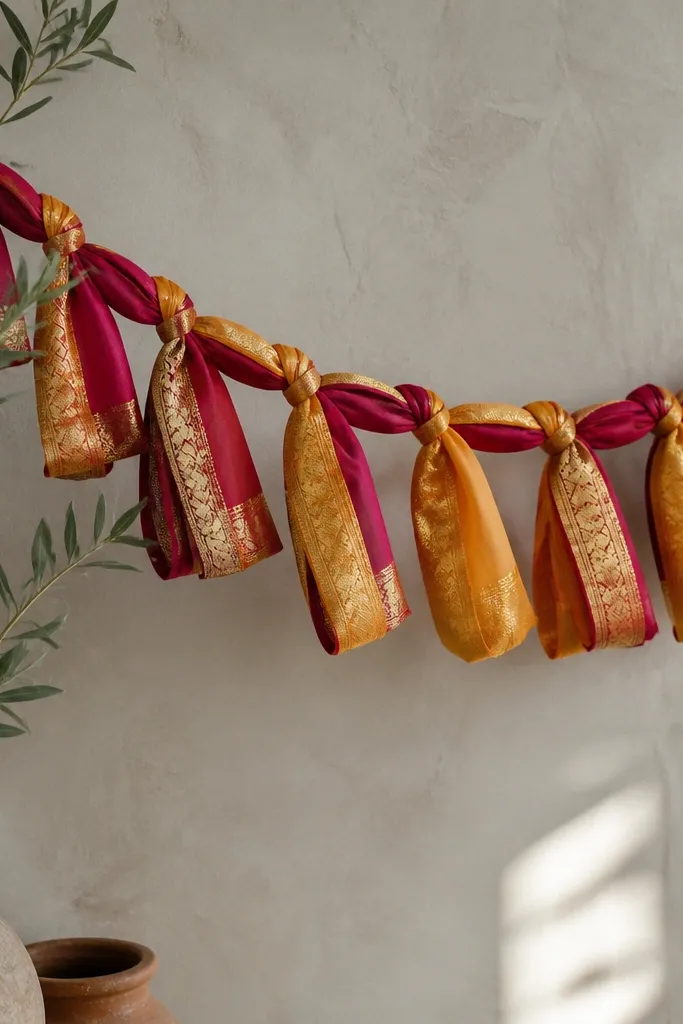
Using actual sari border fabric gives you instant texture and a woven edge that craft store trims can’t match. The knotted loops create movement and hide uneven cutting. This garland looks stunning on stage sides because the woven gold edge catches light when people walk past.
Cut sari border strips into 18-24 inch lengths. Fold to create loops and knot at the center using matching thread, then alternate with solid silk pieces if you want breathing space. Space knots 6-8 inches apart on a light jute line for a hanging garland.
Steam the garland after assembling; knots relax and the loops hang evenly.
Don’t cut strips too short; short loops look like scraps and lose the drape effect.
20. Floral Foam + Satin Rosette Centerpiece Tray
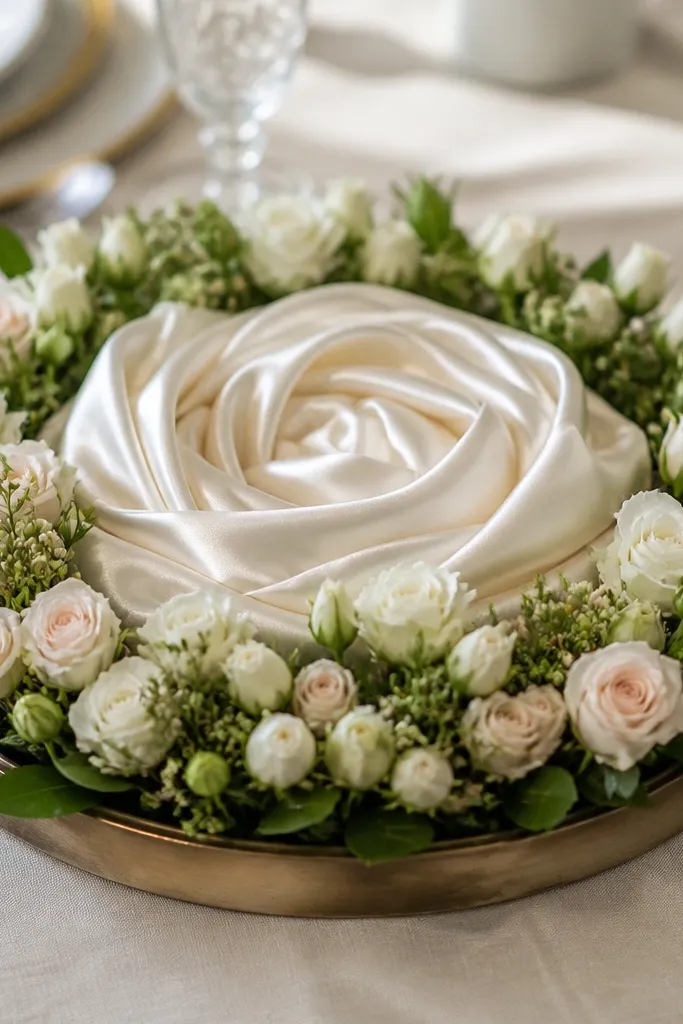
Centerpieces look polished when the base is styled, not just filled with flowers. Satin rosettes give a soft foundation that frames the blooms and hides foam. I’ve used this for reception tables because it photographs cleanly from above.
Quick tipLimit your flower count to one main flower type and one filler green so the tray looks intentional.
Use a shallow tray (12-14 inches) and cover floral foam with satin fabric, tucking edges under to hide seams. Make rosettes from 1.5-inch satin ribbon loops, glue into a spiral pattern around the foam top. Insert small bud flowers and greenery in a tight circle, keeping stems concealed by the rosette layer.
One warningDon’t let foam show through; if you see any green foam, the whole centerpiece reads cheap.
21. Mehendi Stall Signboard with Fabric Flags and Gold Tape
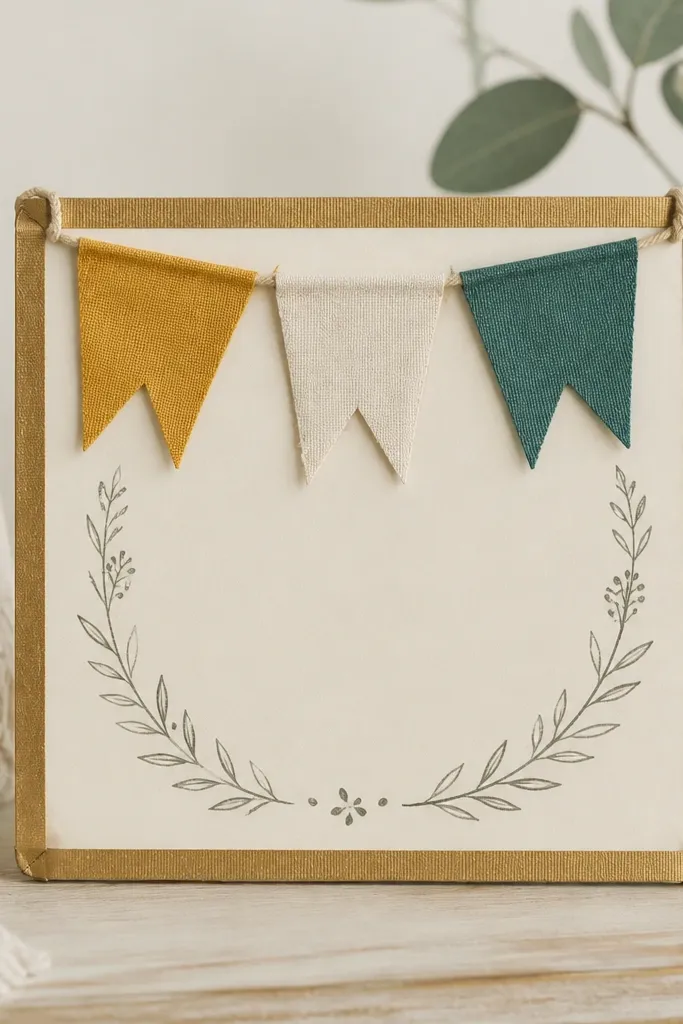
Fabric flags make a stall look like an event brand, not a random table. Gold tape border lines keep the sign crisp and photogenic. I’ve used this setup at mehendi entrances where the background is chaotic, and the clean sign gives your photos a focal point.
Quick tipUse a ruler when placing gold tape; crooked lines instantly make it look homemade.
Mount a 16x10 inch foam board on a stand. Border it with 1/2-inch gold washi tape in a straight rectangle. Hang 3-5 fabric pennants from a string across the top and hand-letter the text with a fine paint marker on cream fabric or board paper.
One warningSkip thick marker scribbles; they look amateur on camera.
22. Tulle + Pearl Chair Back Bows for Wedding Seating
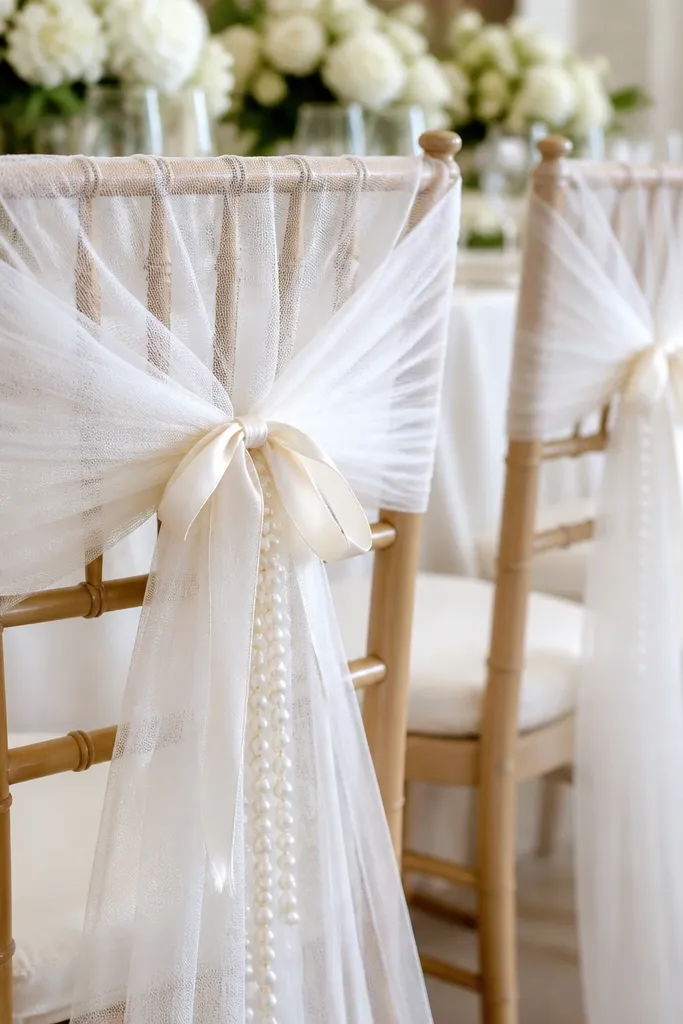
Chair back bows look stunning when the tulle is layered and the pearls hang in a straight line. I use a center satin tie so the bow sits flat and doesn’t twist. White tulle with small pearl strands gives a soft bridal look without adding heavy weight.
Quick tipUse the same number of tulle layers for every chair so the back row looks uniform in photos.
Cut tulle into 20-inch strips and layer 3-4 strips per bow, then tie around the chair back using a 1-inch satin ribbon. Add a 12-inch pearl strand by tying both ends under the center ribbon. Keep pearl strand width narrow so the chair back doesn’t look crowded.
One warningDon’t use tangled pearl garlands; they twist and look messy from the side.
23. Antique Gold Candle Holder with Rope Wrap Base

Jute rope plus antique gold paint looks like a vintage decor piece, and it works with Indian weddings because it blends warm textures. The rope wrap hides uneven surfaces and creates a natural grip texture for the finish. Put it with gold and marigold and it looks intentionally styled.
Quick tipUse two light coats instead of one thick coat so the gold doesn’t look lumpy.
Wrap a plain glass jar or small tin with jute rope in tight coils, securing with thin glue dots. Let dry, then paint over with antique gold spray paint in two light coats. Add a small strip of lace around the top edge and place a tealight inside.
One warningDon’t skip sealing; unsealed rope can darken when it picks up candle heat.
24. Color-Matched Acrylic Standees with Vinyl Cut Silhouettes
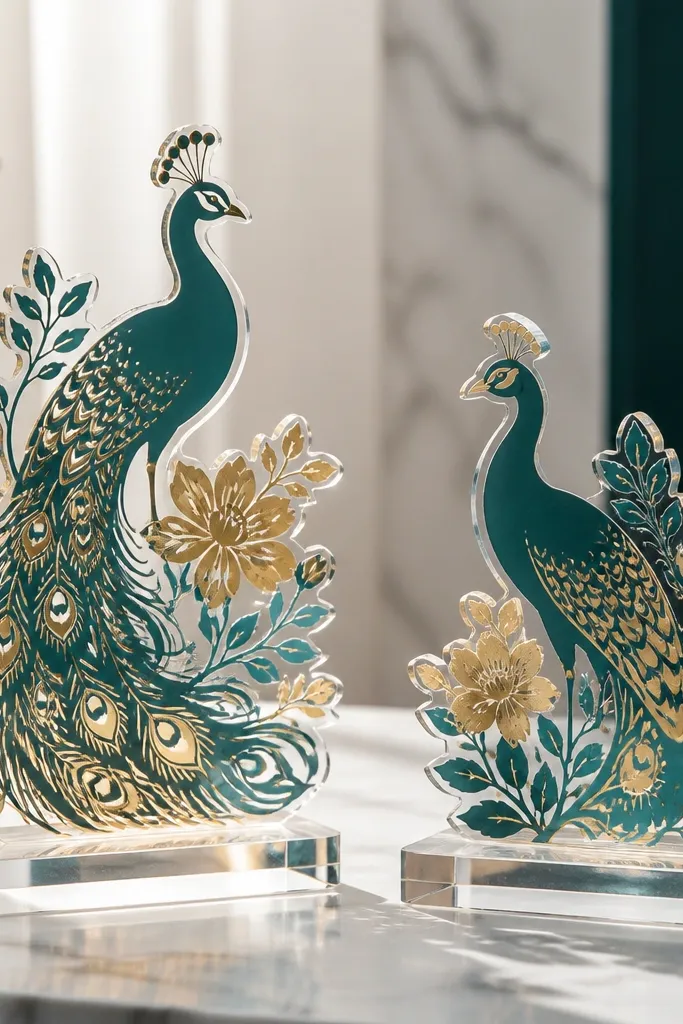
Acrylic standees look clean and modern when the silhouettes are vinyl-cut and placed flat. The clear base keeps the focus on the design, and matching colors tie it to the wedding palette. I like peacock and floral silhouettes because they look Indian without needing heavy illustration.
Quick tipPress vinyl with a squeegee slowly; bubbles ruin the clean look.
Cut vinyl in your chosen color (teal, gold, or both) and apply to printed acrylic sheets or directly to acrylic standees. Use a small acrylic stand base or foam stand behind the acrylic. Keep silhouettes 3-4 inches tall for tabletop use and 10-12 inches tall for entry photos.
One warningDon’t use printed sticker sheets; they peel and look cheap when light hits.
25. Rangoli-Inspired Rice Flour Stencil on Fabric Runner
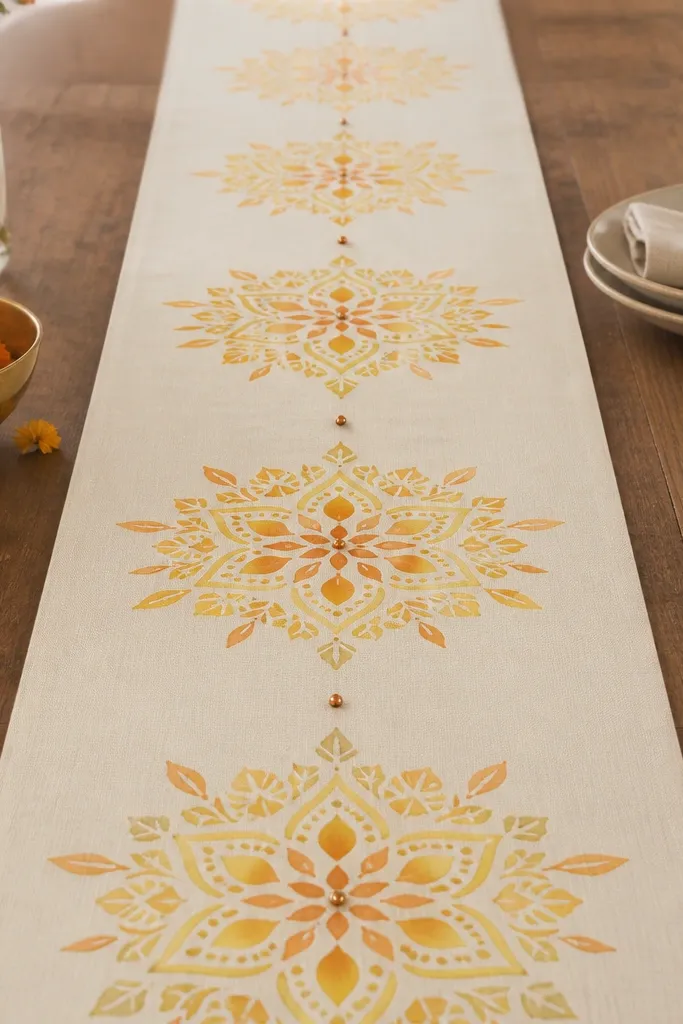
This looks stunning because it brings the rangoli vibe into decor without messy powder all over the venue. Stenciling on fabric gives a clean, repeatable pattern, and you can add a few beads to mimic the sparkle of rangoli lights. I’ve used this for mehendi and reception tables and it reads very “Indian” in photos.
Use a stencil made from thick plastic or cardstock. Mix fabric paint with a little textile medium for a softer texture, then stencil onto a cream cotton or linen runner. Let dry and then outline the center motif with tiny 3mm beads stitched with thread.
Practice on scrap fabric to get the paint thickness right so it doesn’t bleed under the stencil.
Don’t use watery paint; it bleeds and makes the pattern fuzzy.