1. Linen-Feel Photo Coaster Set with Monogram Corners
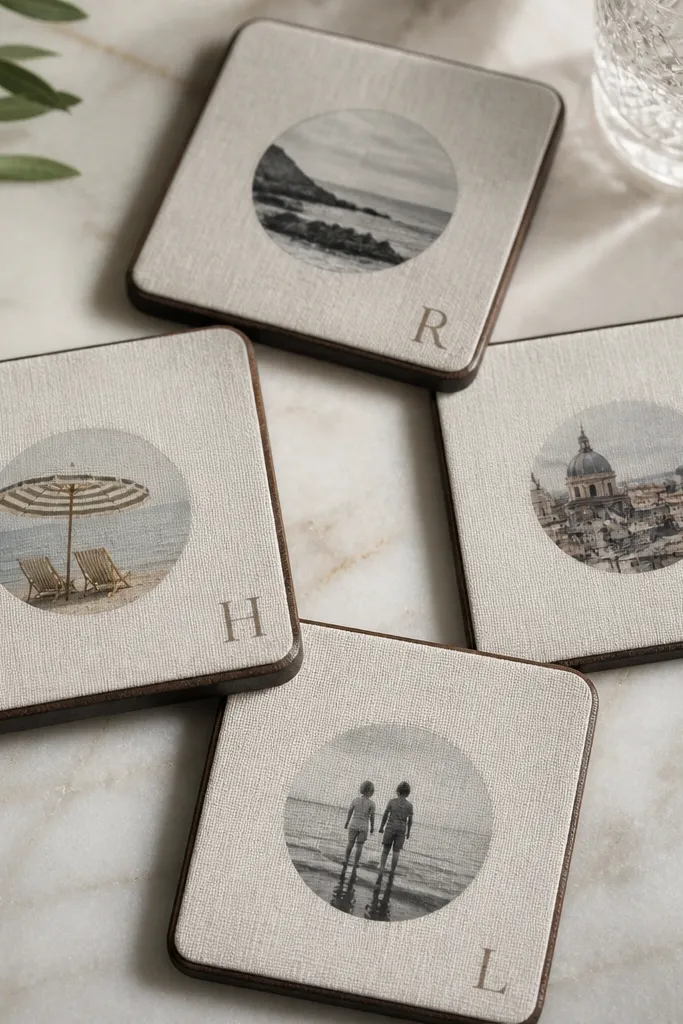
These coasters look like something you’d buy for a wedding registry because the surface has a soft fabric texture and the monogram placement feels designed. I use a photo circle so the couple has a personal element without printing a full collage. The warm inked edges tie everything together and hide minor trimming mistakes.
Cut 4 coasters from 1/4-inch cork sheets or thick craft foam at 4x4 inches. Cover the top with a linen-look fabric or faux linen cardstock, then glue the photo circle (1.5-1.75 inches) with Mod Podge or fabric glue. Finish by sealing the fabric top with 2 thin coats of matte sealant spray. Use a stencil for the monogram so it stays crisp.
Use a scrap piece of cardstock as a spacer under the photo circle so it sits perfectly centered while glue sets.
Avoid glossy sealant — it makes fabric and inked edges look cheap in direct light.
2. Kraft Wedding Welcome Sign on a Reclaimed-Board Style Frame
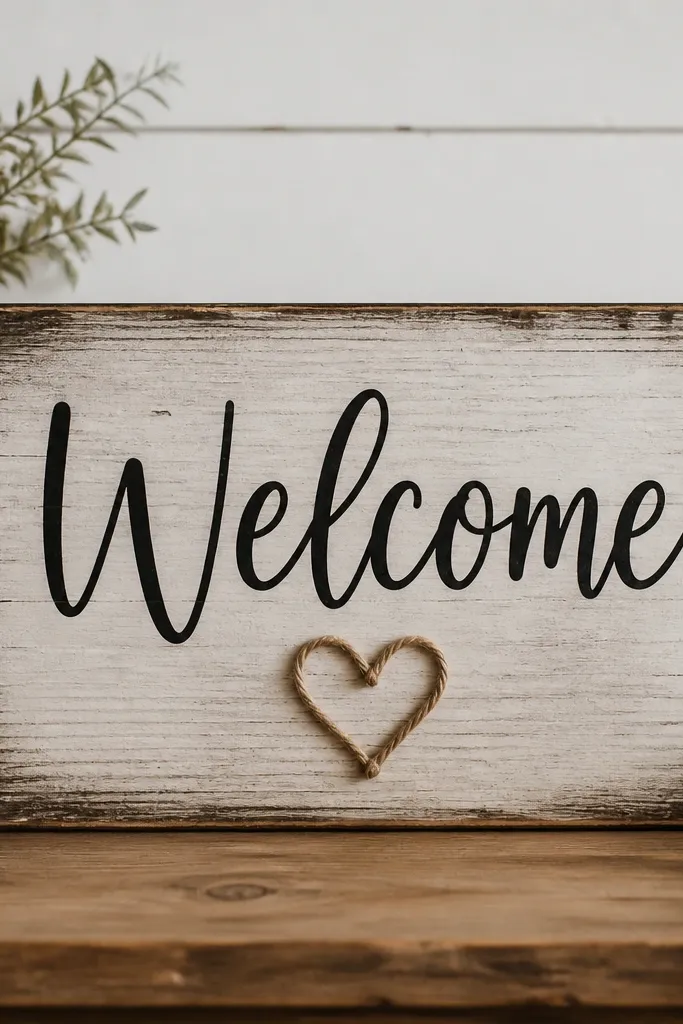
This sign reads warm and personal in wedding photos, and it’s easy to build without buying real reclaimed wood. The “reclaimed” look comes from a stain wash and light distressing, not from expensive boards. Kraft paper + black lettering gives sharp contrast that shows up from across the room.
Start with a 12x18-inch plywood panel or foam board. Paint a thin base coat in warm gray, then dry-brush raw umber and wipe back with a paper towel. Add a kraft paper layer for the text area and glue it down with spray adhesive. Letter with a paint marker using a ruler for straight lines. Add twine heart with hot glue and finish with matte clear coat.
Do one test letter on scrap first — black paint marker can look different after sealing.
Don’t center the twine heart by eyeballing it — off-center looks sloppy fast.
3. Bride and Groom Name Candle Labels in Vinyl-Style Script
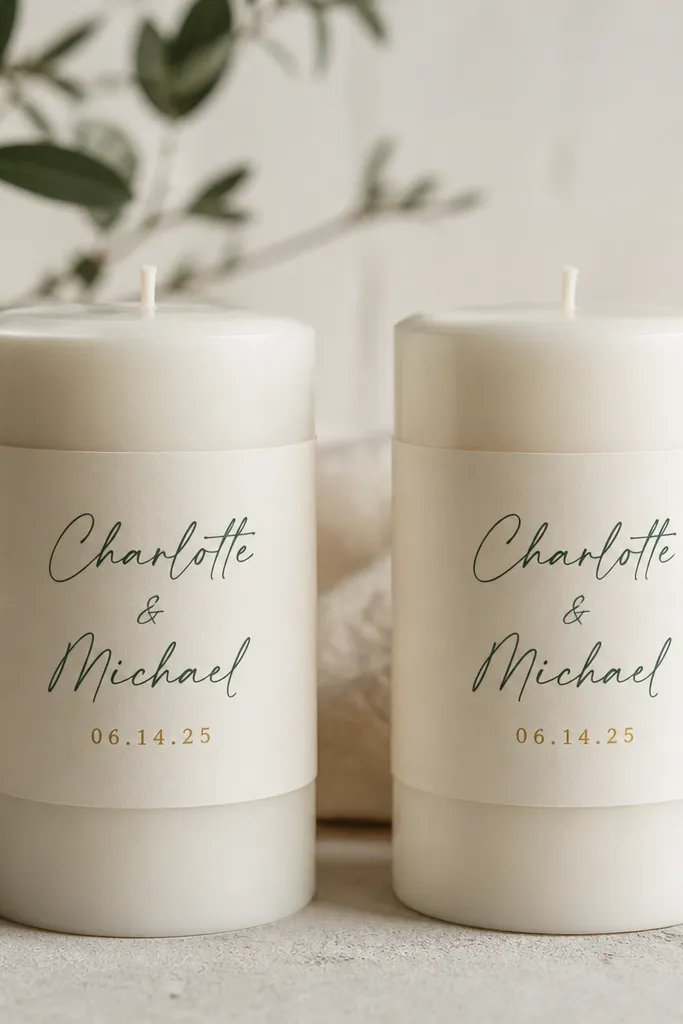
Labels turn plain candles into a personalized gift without the mess of custom candle making. Script lettering looks expensive when you keep spacing consistent and use strong contrast. The gold foil effect line adds that “wedding stationery” vibe.
Buy two plain pillar candles or votives. Cut label strips to fit: measure circumference and cut a strip that wraps with a 1/2-inch overlap. Print or hand-letter names in a dark green or black using a fine-tip paint pen. Add a thin gold line for the date using gold paint marker. Seal the label with a clear matte spray so it doesn’t smear.
Quick tipUse a small strip of double-sided tape under the overlap before sealing — it keeps the label from sliding.
One warningAvoid thick glitter labels — they catch light and look messy on camera.
4. Personalized Couple Key Tray with Faux Leather Catchall
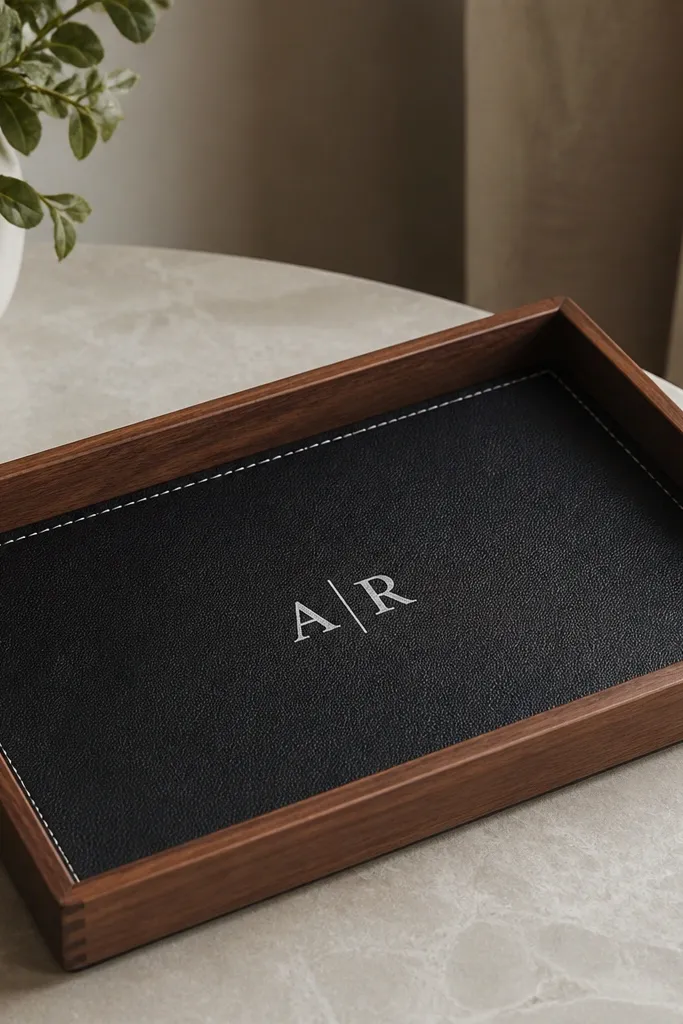
A key tray gets used every day, so it feels like a real gift, not a one-time decoration. Faux leather gives that premium look, even on a budget. White-painted stamped initials read clean and modern next to warm wood.
Use a shallow wooden tray (around 8x5 inches) or glue together a frame from thin craft wood. Cut a faux leather piece to fit the top insert and glue it down with strong craft adhesive. Stamp initials with a small letter punch set or trace and paint carefully with a sponge. Add thin faux stitching lines using a white paint pen along the edge.
Quick tipRough up the wood lightly with 220-grit sandpaper so adhesive grips better.
One warningAvoid glossy faux leather — it reflects fingerprints and looks shiny in photos.
5. Fabric Bookmark Set for the Couple's First Library Night
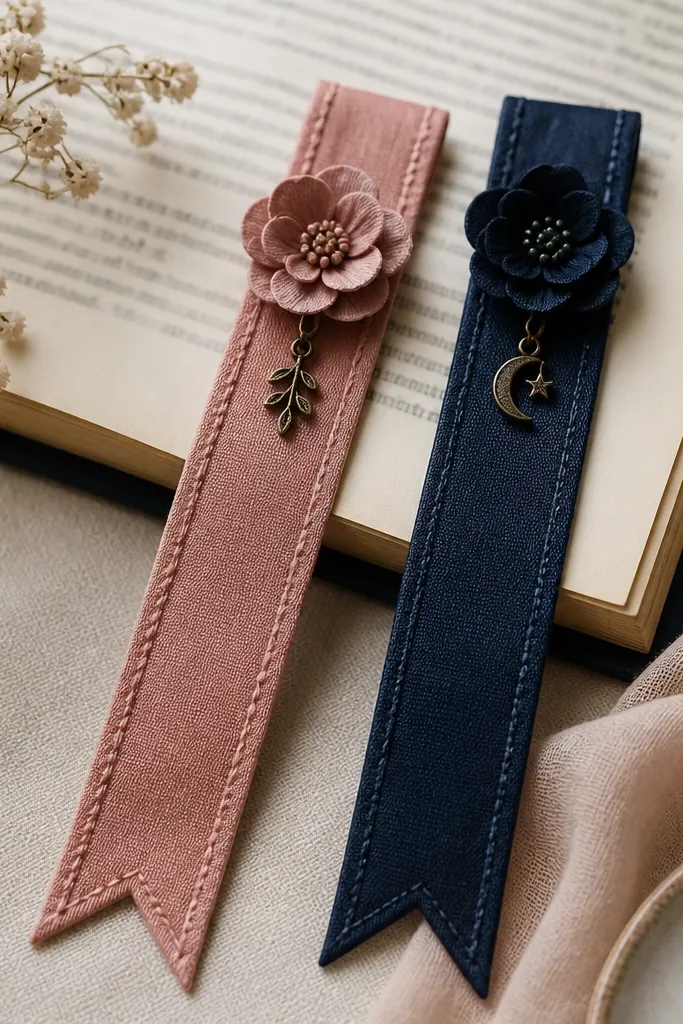
Bookmarks are small, thoughtful, and practical, and fabric makes them feel handmade in a good way. The stitched edges prevent fraying and look neat even up close. A small charm adds a tiny surprise without needing expensive supplies.
Cut fabric strips 2 inches wide by 10-12 inches long. Fold and stitch or fold and glue the edges inward for a clean finish. Add a layered fabric flower using felt petals and a button center. Attach a small metal charm with a jump ring at the top. Seal the flower with a light dab of fabric glue to keep it from shifting.
Make the backing fabric slightly darker so glue lines don’t show through.
Avoid slippery satin — it slips out of books and looks messy after a week.
6. Mini Terrarium Card Holder with Sand and Moss Texture
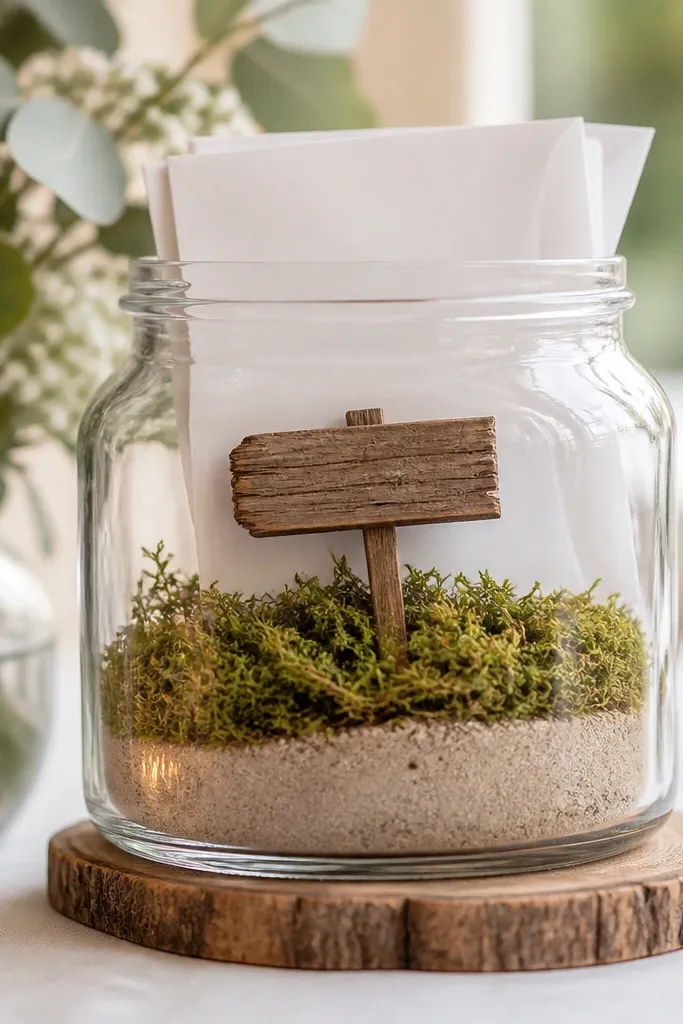
This looks like a tiny garden display, which makes wedding cards feel special. The sand and moss textures add depth that flat paper can’t. It also works as a reusable keepsake after the wedding.
Use a small jar with a wide mouth. Add a base layer of sand (about 1 inch), then glue faux moss on top. Create a tiny sign from craft wood or thick cardstock and paint it with acrylic. Seal the jar with a ribbon around the neck and tie a small bow. Put it near the card table so guests see it.
If you use real moss, let it dry fully and spray lightly with clear matte varnish to keep it from shedding.
Avoid loose moss without glue — it sheds onto envelopes.
7. Stamped Fabric Coaster Ribbons for a Bride-to-Be Shower
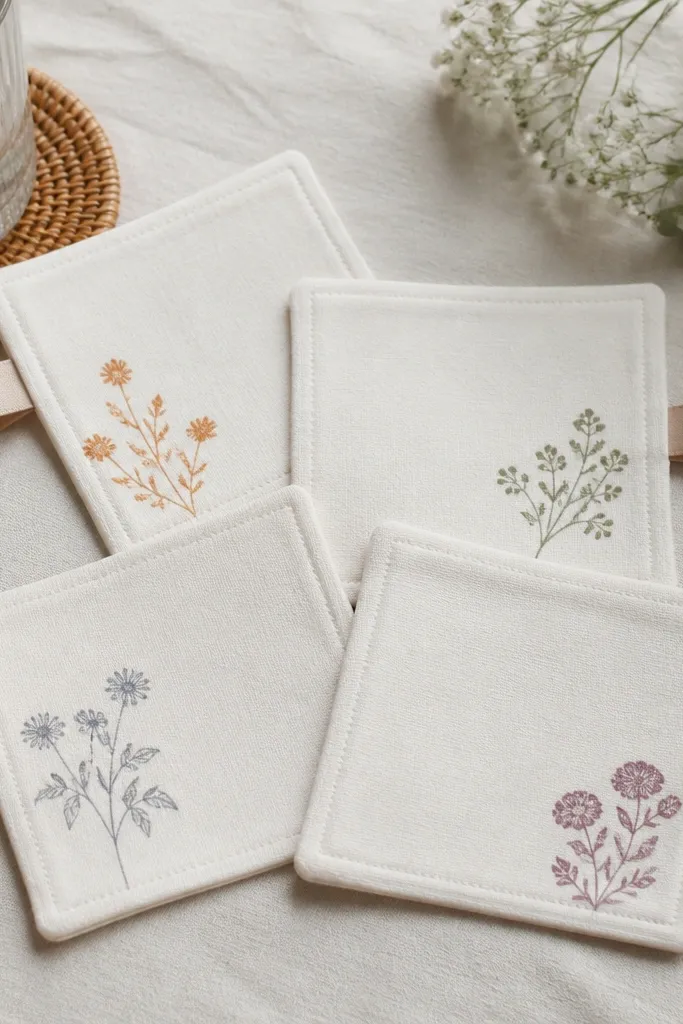
These fabric coasters feel like a set, not random crafts, and the stamp pattern makes each one look intentional. Ribbon loops make them easy to grab from a basket, which matters at a shower or rehearsal dinner. Stamping also avoids complicated painting.
Cut cotton into 4.5-inch squares and fuse a thin layer of interfacing or iron-on stabilizer behind for firmness. Use fabric stamp blocks with ink made for fabric. Add a ribbon loop by gluing a 1-inch ribbon strip to the back. Gift them folded into a small ribbon-tied bundle.
Quick tipTest your stamp on scrap and press for 10 seconds — fabric stamp ink needs time to set.
One warningAvoid thin cotton without stabilizer — it folds and looks unfinished.
8. Mr and Mrs Table Number Set from Mason Jar Frames
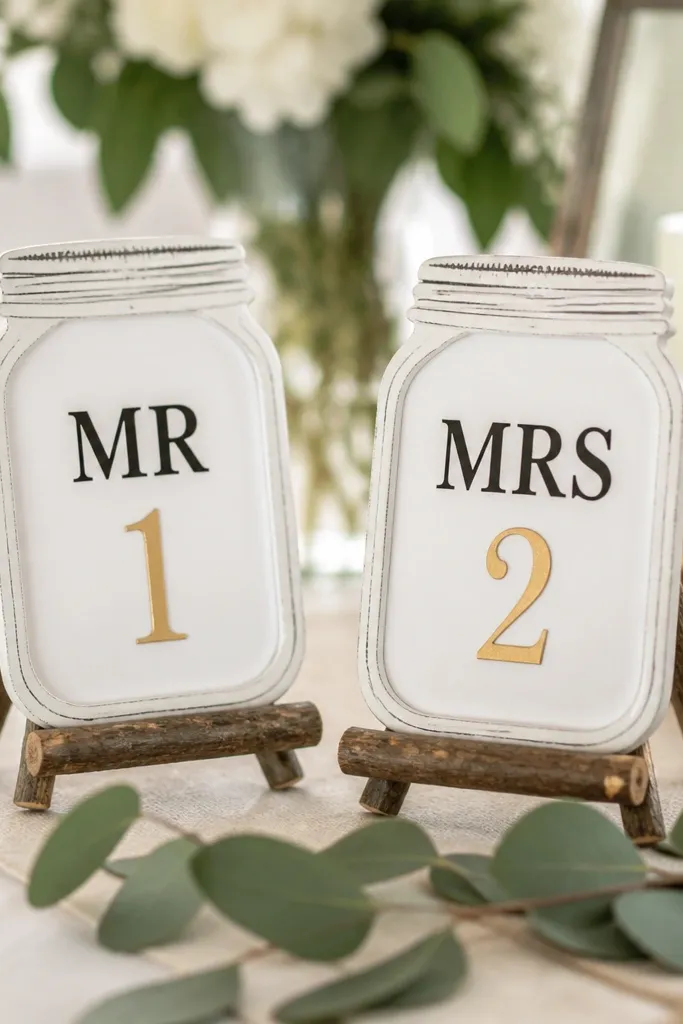
Table numbers usually cost more than they should, but you can build a set that matches the wedding color palette. The jar frame look adds a vintage feel that holds up in photos. Bold typography reads across tables.
Cut small wooden sticks or use dowels for stands. Make frames from thin craft wood strips or repurpose mini jar lids with a backing. Print or paint labels: “MR” and “MRS” plus numbers 1-6. Color code: black text with a gold number line. Glue labels to the frame backing and seal with matte clear coat.
Keep numbers at least 1.25 inches tall so they’re readable without squinting.
Avoid tiny font — you’ll get complaints from guests and blurry photos.
9. Wedding Date Map Print in a Simple Floating Frame
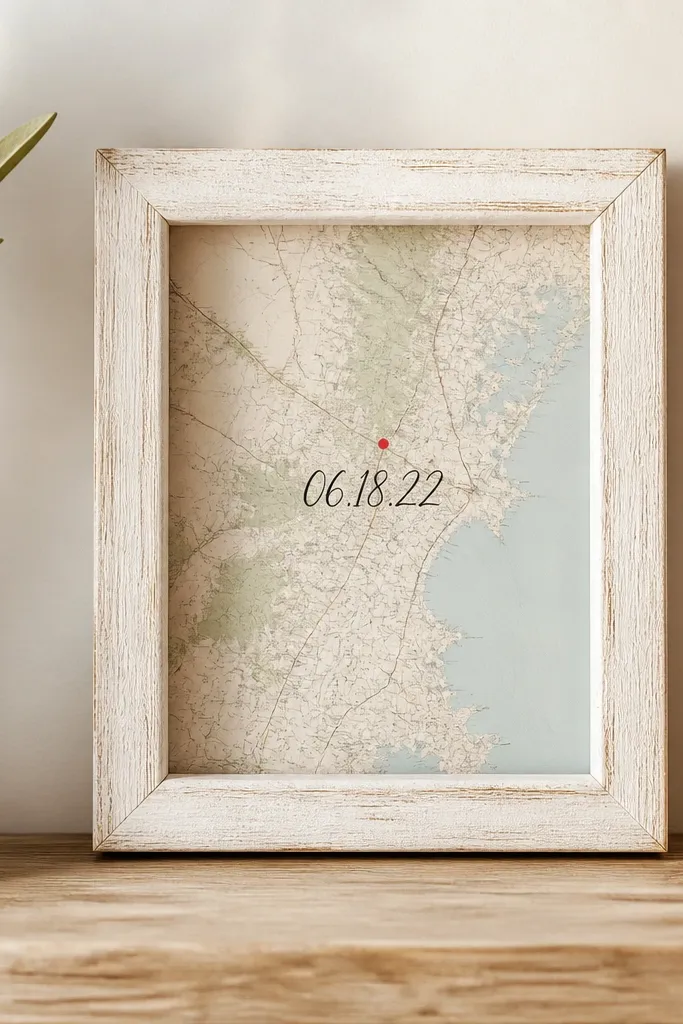
This gift feels personal even when you keep it minimal. A map print plus one marker dot gives meaning without clutter. Floating-frame style makes the paper look crisp and protected.
Print a map section (or use an atlas page) and trim to fit an 8x10 frame. Add the date in the center using a fine brush pen. Put a red dot at the chosen spot using a paint dotter. Whitewash the frame with watered acrylic and wipe back so wood grain shows. Use acid-free tape or photo corners to mount paper.
Use photo corners instead of glue so you can swap the print later if you change your mind.
Avoid using regular tape directly on paper — it yellows over time.
10. Custom Recipe Card Box with Chalkboard Front Panel
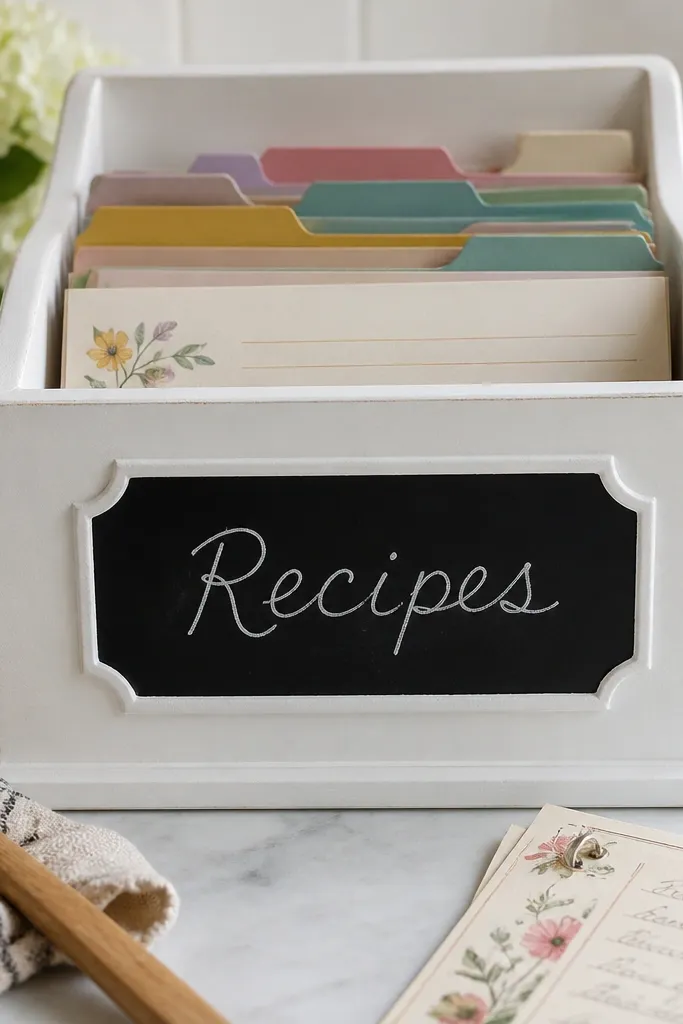
If the couple cooks, this becomes a real tool. Chalkboard on the front gives them flexibility and keeps the gift feeling current. The card box structure makes it look like a store-bought product.
Use a plain wooden organizer box or build one from thin plywood. Paint matte white or soft cream and let it cure overnight. Cut a chalkboard vinyl or paint a small panel and attach with adhesive. Add dividers from cardstock and label with a permanent marker. Seal the rest of the box with matte varnish so it wipes clean.
Quick tipWrite the chalk text on a scrap test panel first — chalk thickness changes how letters look.
One warningAvoid shiny varnish on the box — reflections ruin the clean matte look.
11. Hanging Garden String Art with Twine and Thumbtacks
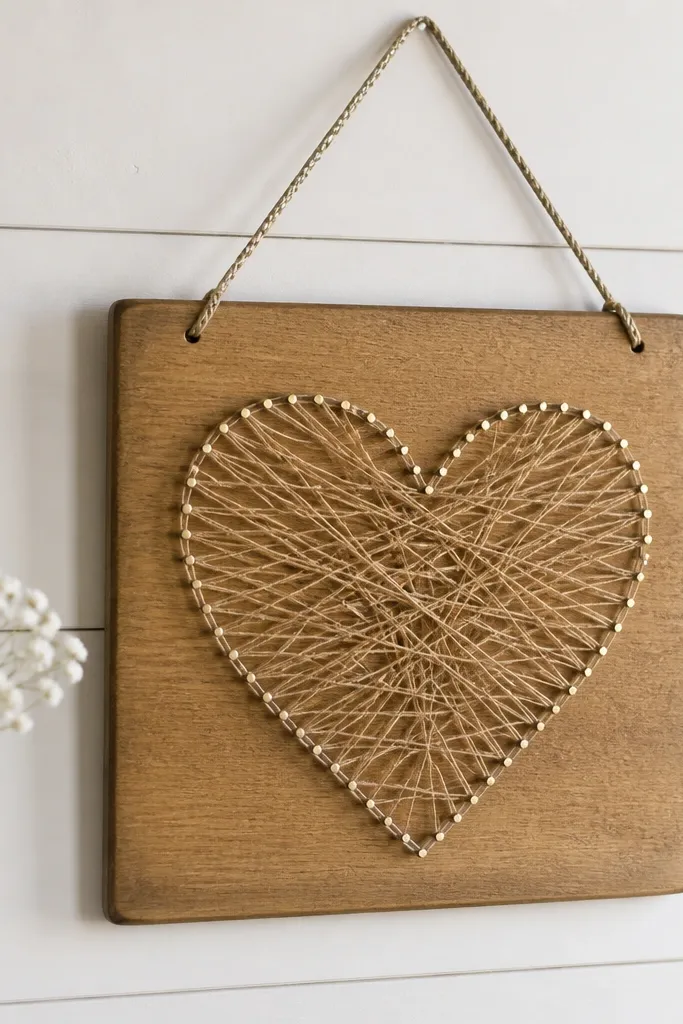
String art looks impressive because the pattern creates depth. It also fits wedding aesthetics because you can choose soft colors and simple shapes. For budget, twine is cheap, and tacks are easy to source.
Use a small 8x10 board. Sketch a heart or initial monogram lightly in pencil. Place tacks along the outline about 1/2-inch apart. Wrap twine in diagonal passes, tightening each line and keeping tension consistent. Tie off the string on the back and hang with braided cord.
Tap tacks in straight lines using a ruler edge so the outline looks clean.
Avoid loose twine — it sags and looks like a craft project from a rush job.
12. Personalized Champagne Bottle Tags with Layered Cardstock
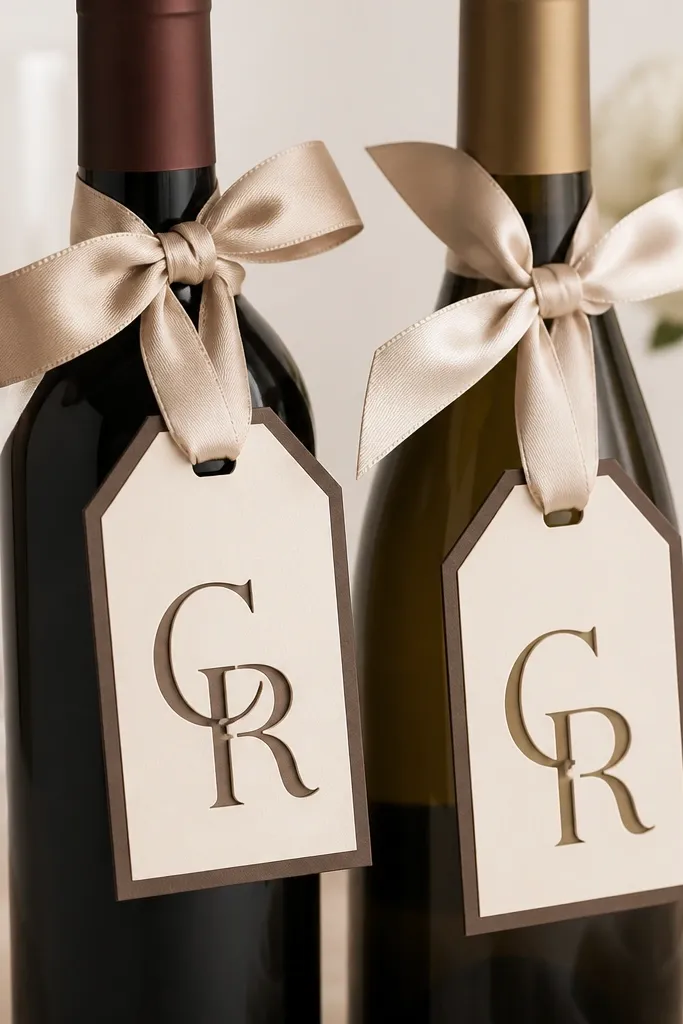
These tags make a simple bottle feel like a gift with intention. Layered cardstock gives a crisp, dimensional look without heavy tools. The initials cutout makes it feel custom even if you keep text short.
Cut tag shapes from cardstock: 3.5x4.5 inches for the base and slightly smaller for the top layer. Add an initials window with a craft knife. Glue layers together and punch two holes for ribbon. Use satin ribbon in a wedding color like sage or blush and tie a neat bow. Add a date line with a metallic pen.
Quick tipUse a paper trimmer for clean tag edges — the tag size stays consistent across both bottles.
One warningAvoid thin paper tags — they bend when you tie the ribbon.
13. Bride and Groom "First Home" Wall Hanging from Dowels and Twine
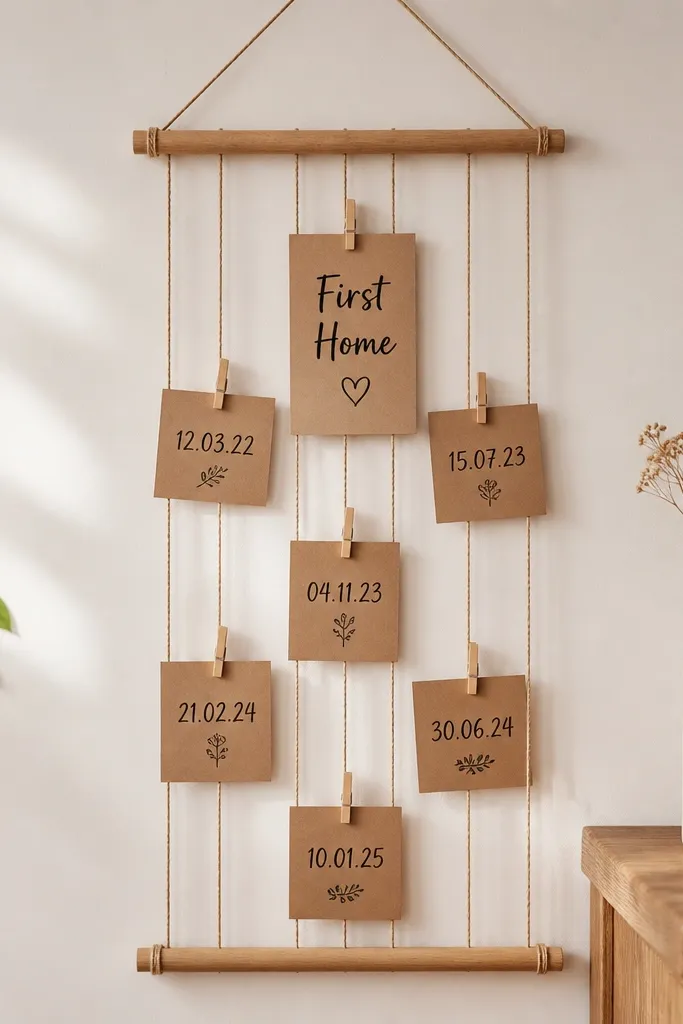
This is one of those gifts that looks like wedding decor but becomes a personal timeline. Cards are cheap, and twine makes it feel airy in photos. Small clothespins let you update it later.
Cut two dowels to about 18 inches and 6 inches. Tie twine vertically in evenly spaced lengths and attach the cards with mini clothespins. Paint “First Home” on kraft cards with a stencil and add the date in smaller writing. Wrap the dowel ends with ribbon and tie for a finished look.
Space the cards so the largest date line sits at eye level when hung — guests will notice it.
Avoid uneven dowel spacing — it makes the hanging look crooked.
14. Watercolor-Style Seed Packet Wedding Favor with Tiny Tags
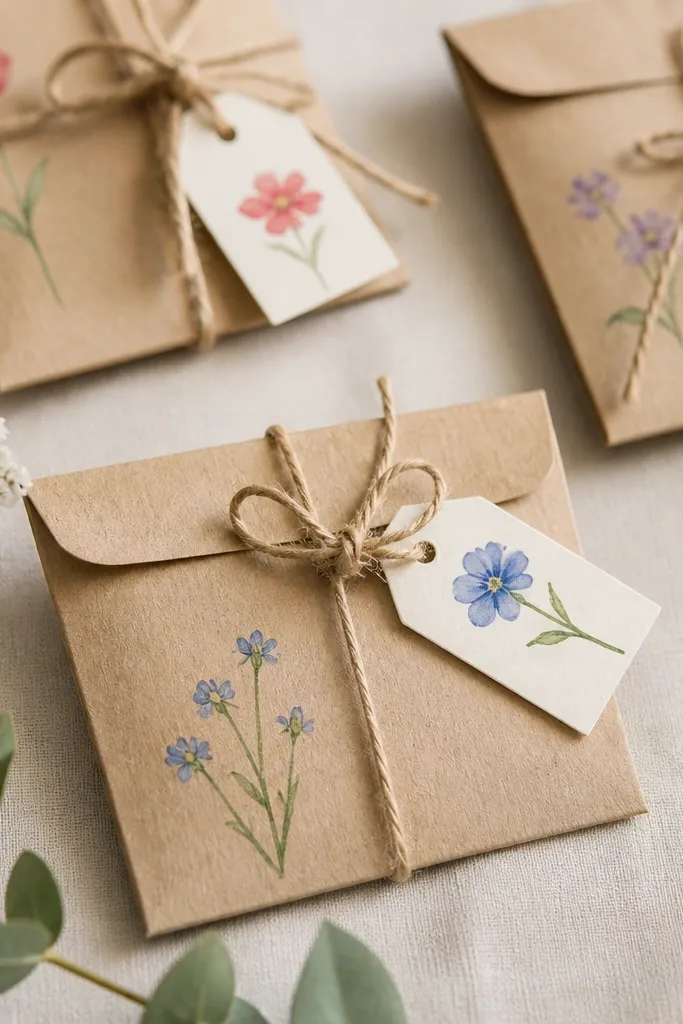
Seed favors get used because people plant them, and the paper packet looks cute on the favor table. Watercolor-style spots add softness and keep the packets from looking like plain office supplies. Tiny tags make them feel like a real craft gift, not a generic favor.
Buy bulk seed packets or small leftover seed packets and label them yourself. Make kraft envelopes about 3x5 inches, then add a watercolor flower spot using diluted acrylic or watercolor paint. Tie a tag with twine and include the seed type and planting instructions in tiny writing. Seal the envelope with a narrow glue strip so seeds don’t spill.
Quick tipWrite planting instructions on the back of the tag so the front stays clean in photos.
One warningAvoid heavy paint that soaks through the kraft — it warps the envelope.
15. Monogram Wood Ornament Keepsake for the Tree or Shelf
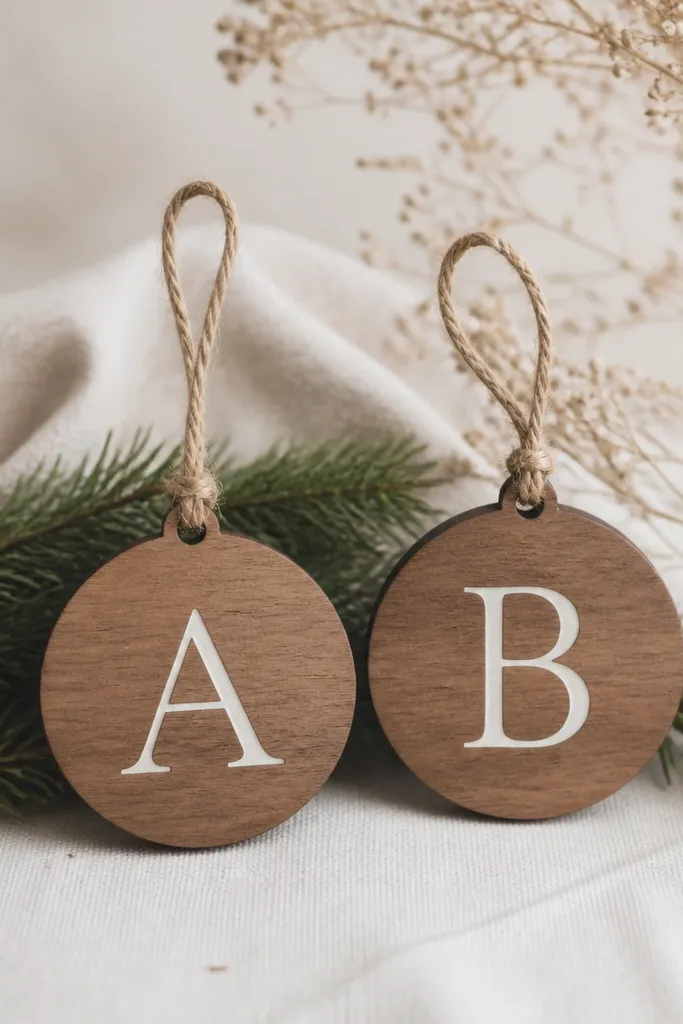
Wood ornaments make a wedding gift feel like something that continues after the event. Monograms keep it personal without needing long text. Jute loops and matte paint look cozy in winter photos and simple shelf styling.
Use pre-cut wood circles or thin plywood tags about 3 inches wide. Paint one side matte and stencil initials in white or gold. Add a small coat of matte sealer. Drill a tiny hole near the top and thread jute twine through. Pair two ornaments — one for the bride, one for the groom — with matching colors.
Use painter’s tape as a stencil edge guide so the monogram stays sharp.
Avoid glossy paint — it looks plasticky on wood.
16. Personalized Wine Glass Charms from Polymer Clay and Brass Rings
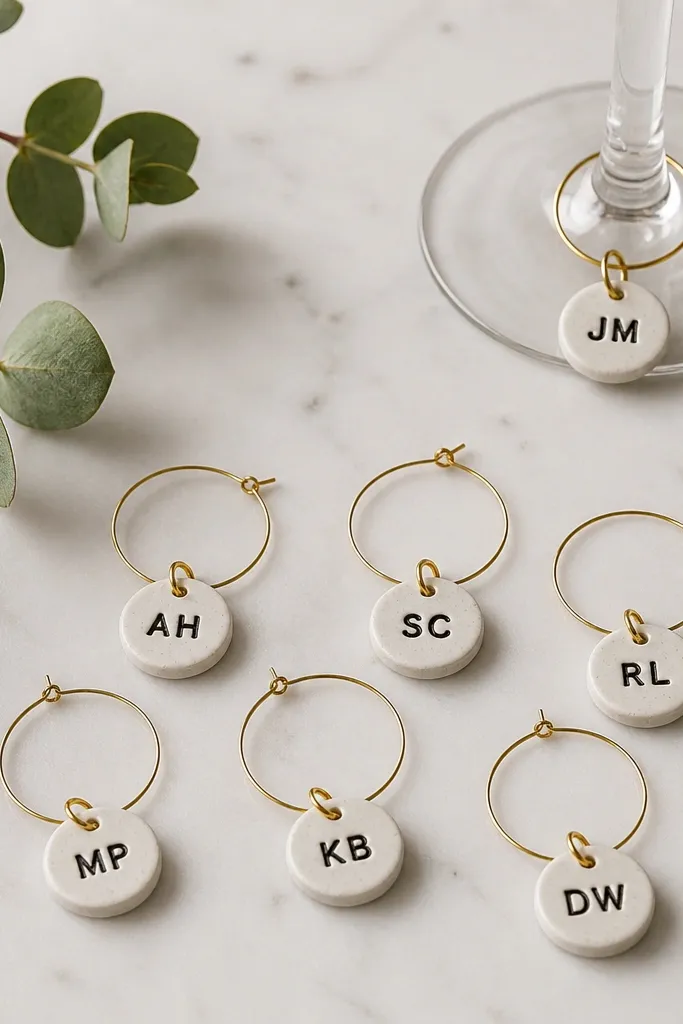
Glass charms solve a practical problem at the reception and still look cute. Polymer clay holds tiny details, so initials look neat. Brass rings make it feel more “jewelry” than craft.
Roll polymer clay into 1-inch disks and press initials lightly with a letter punch. Bake according to the clay package directions, then seal with a clear matte or satin glaze. Attach each disk to a small brass jump ring and then to a wire loop. Color match the ring or choose black/cream charms for a neutral wedding palette.
Quick tipMake a matching set of 6-10 so they cover guests who lose theirs.
One warningAvoid skipping the glaze — unsealed clay scratches easily.
17. Embroidery Hoop Frame with Fabric Pockets for Letters
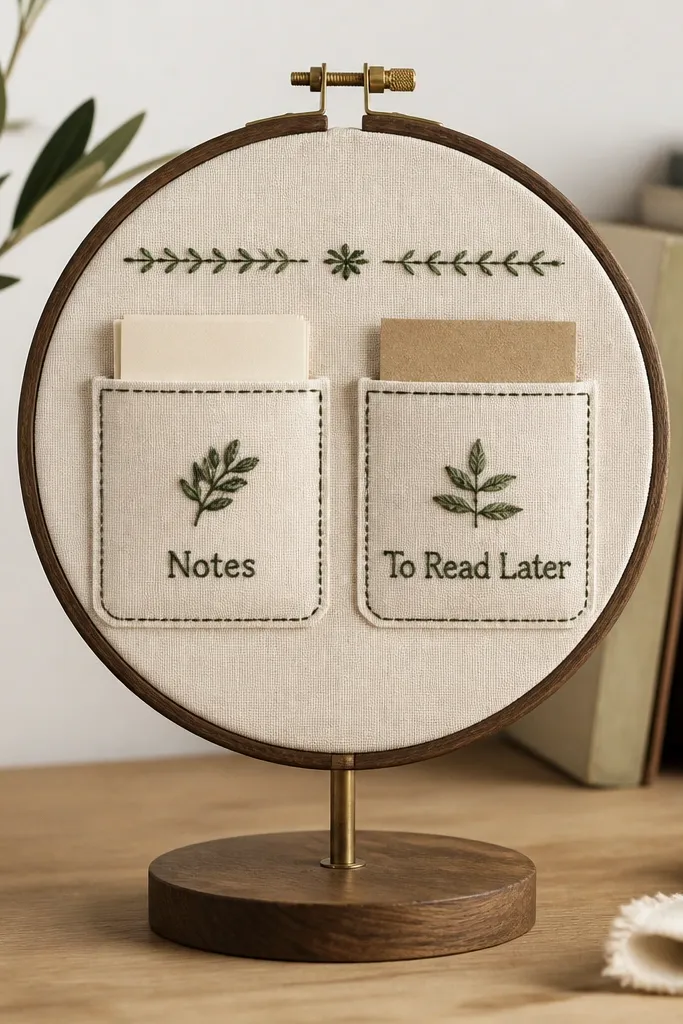
This gift is sentimental without being fragile. Fabric pockets let the couple store letters, receipts, or vows in a way that stays neat. The embroidery hoop makes it look like wall art, not a random folder.
Use a 6- or 7-inch embroidery hoop. Stretch linen-look fabric over the hoop and pin or glue the backing. Stitch two pockets from coordinating cotton. Label with embroidery thread or paint pen for crisp text. Mount the hoop with a small stand or use a ribbon hanger.
Quick tipIron fabric flat before stitching — puckers show immediately in photos.
One warningAvoid bulky seam allowances inside pockets — they make envelopes hard to slide in.
18. Wedding Aisle Spotify-Style Song Notes in a Mini Accordion Card
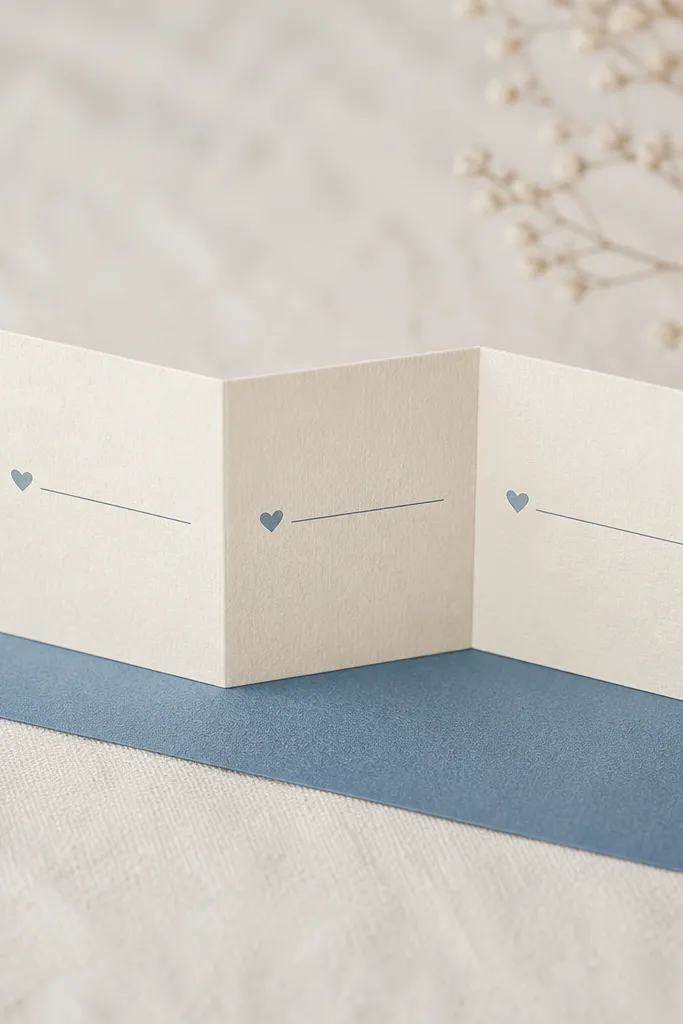
This is a fun gift for couples who love music, and it feels modern without needing tech. Accordion cards look cute because the folds create layers and motion in close-up photos. You get a personalized “playlist moment” with just cardstock and a pen.
Cut cardstock strips about 4x6 inches for a tri-fold accordion. Score folds every 2 inches so it opens evenly. Decorate each panel with a song title and artist in neat handwriting. Add a small date sticker and a ribbon tie. Seal with matte spray so handwriting stays crisp.
Quick tipUse a ruler for the fold lines and press hard — cheap accordion cards look wobbly fast.
One warningAvoid handwriting that runs to the edges — leave a 1/4-inch margin.
19. Saltwater-Safe Bath Bomb Gift Wrap with Custom Label Sticker Sheet
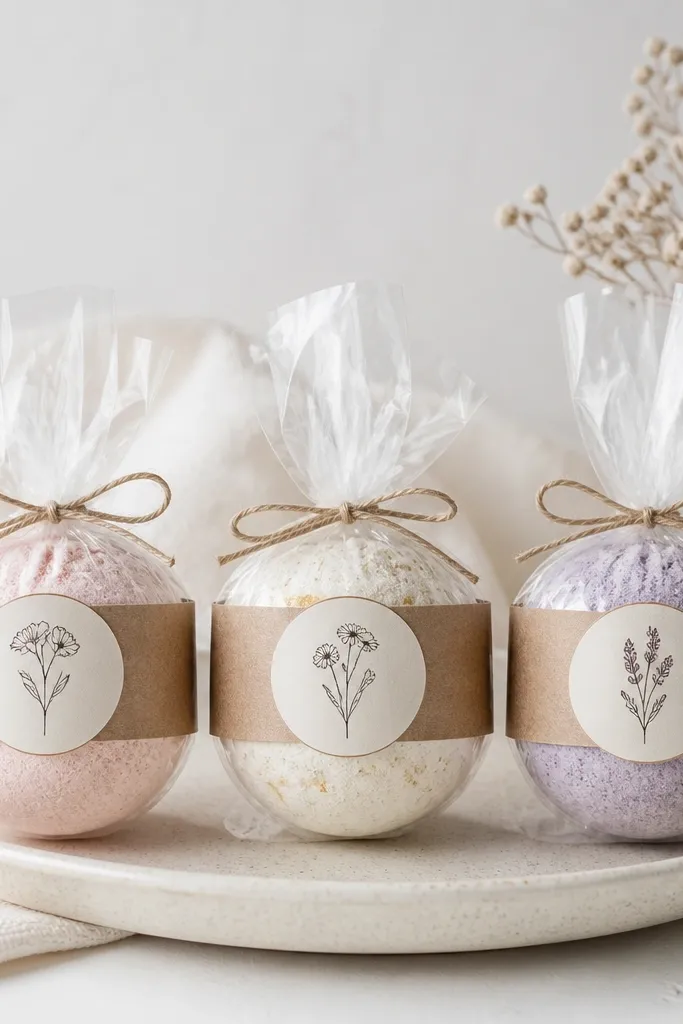
Bath bombs turn a budget wedding gift into a spa-feeling package. The real win is the sticker band — it makes the whole set look coordinated. Aligning labels matters; crooked stickers scream “last minute.”
Wrap bath bombs in clear cellophane and twist the top with ribbon. Create belly bands from cardstock 2 inches wide that wrap around the middle. Print or hand-letter names and date, then add a small icon. Use double-sided tape for a smooth, flat wrap and seal the sticker with a matte clear coat if it smudges.
Quick tipMeasure once: wrap a strip around the bath bomb and mark where it meets before cutting the rest.
One warningAvoid labels that wrinkle — they ruin the premium look.