1. Satin Ribbon Napkin Rings With Mini Paper Florals
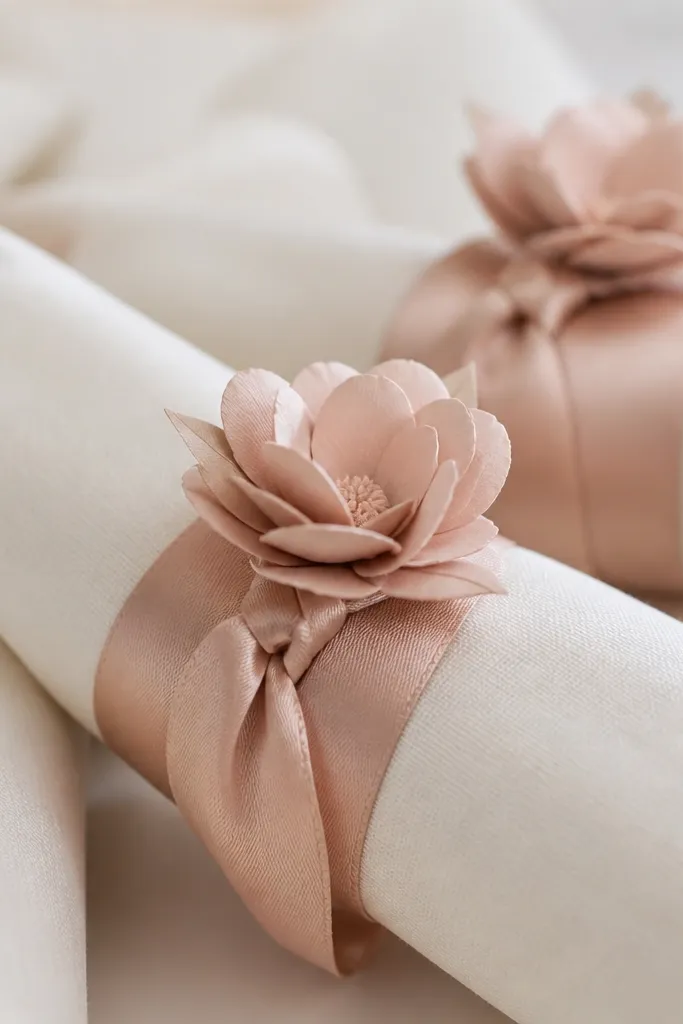
I love these because they look like a boutique detail but they’re just ribbon and paper. The satin ribbon gives a soft shine that reads well in photos, while the mini paper florals add color without bulk on the table. Use only two flower colors plus one accent (like sage) so the set looks intentional. They also make a nice “giftable” touch if guests take them home.
Quick tipMist the paper flowers with a tiny bit of matte spray from 8-10 inches away so they don’t look glossy under flash.
Cut 1-inch wide satin ribbon into 10-12 inch lengths. Wrap around a 1-inch diameter foam ring or a cardboard circle spacer and glue the overlap on the underside. Layer paper flowers from 2-inch and 1.5-inch circles (thick cardstock, not printer paper) and glue a small fabric or paper leaf behind the flower. Finish the knot so it sits on the front of the ring.
One warningDon’t use thin craft paper — it crumples where the ring bends and the flowers look tired.
2. Kraft Card Escort Cards on a Roll-Up Stand
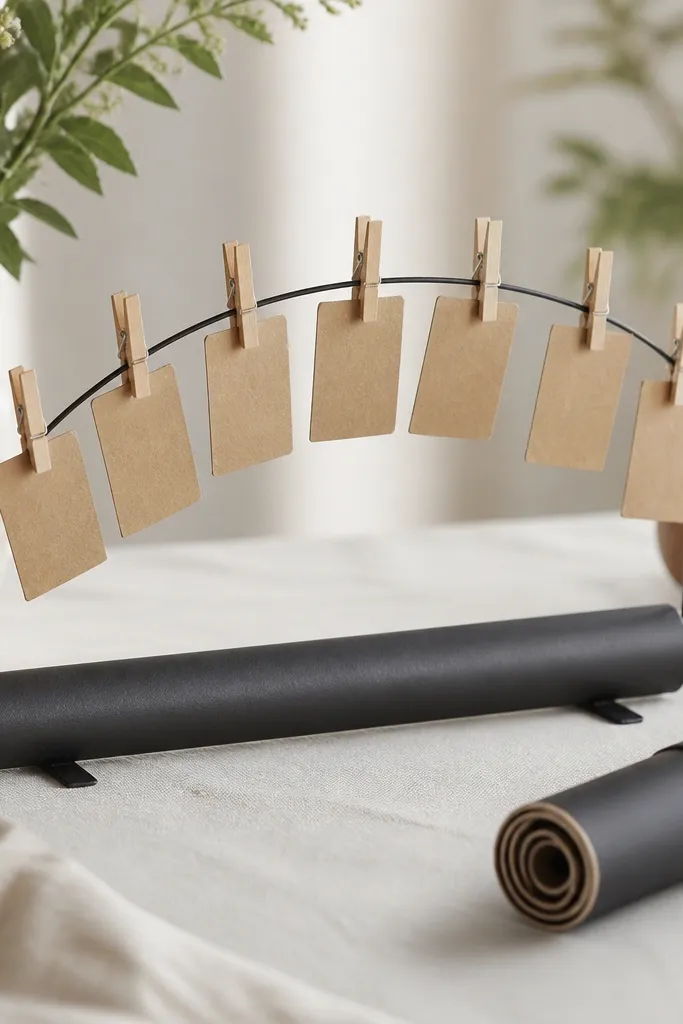
This is the best beginner-friendly escort setup because it’s tidy and it scales fast. Kraft cardstock looks warm with black ink, and clothespins let you swap cards without re-gluing. The roll-up stand keeps everything off the floor and makes setup quick. It also photographs cleanly since the cards are upright and evenly spaced.
Use 3x4 inch kraft cards with a 1-inch top margin for the clothespin. Print name text in a simple font at 28-34 pt and leave the top area blank. Attach each card to a small clothespin, then clip clothespins onto a curved wire or a roll-up display rack. Aim for 0.25-0.5 inch gaps between cards.
Add a thin strip of colored washi tape on the back of each clothespin to code seating sections without reprinting anything.
Skip handwritten names on tiny cards — uneven letters read messy in photos.
3. Floating Candle Votives in Clear Glass With Faux Leaf Bands
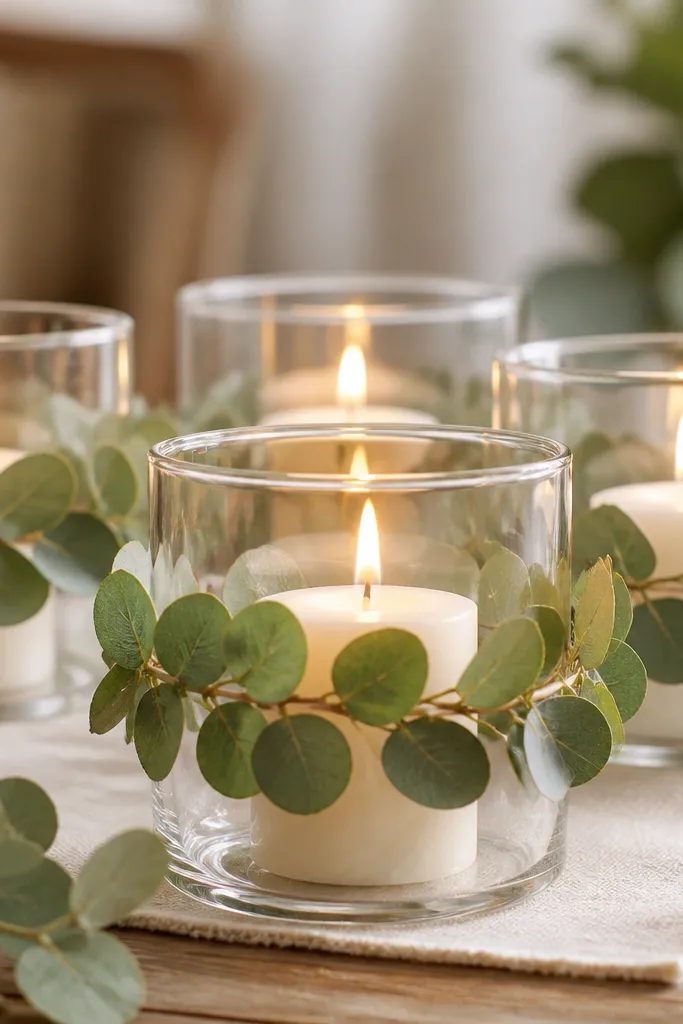
Clear glass makes the candle light look brighter without adding extra decor clutter. The faux leaf band gives texture and hides the jar label area, so everything looks finished. I’ve used this for both indoor receptions and covered patios; it reads natural and not overly “crafty.”
Quick tipUse a lint roller on the jar before gluing leaves — dust makes glue spots look cloudy.
Pick 3-4 inch clear votive cups or small jars. Wrap a thin strip of faux greenery (about 12-14 inches long) around the jar and secure with hot glue at the back. If the leaves shed, seal the base with a tiny dab of glue so strands don’t fall during transport. Use tea lights or LED candles for safety.
One warningDon’t glue leaves directly over a dirty surface — they peel during setup.
4. Pressed-Leaf Place Cards in Acrylic Pouches
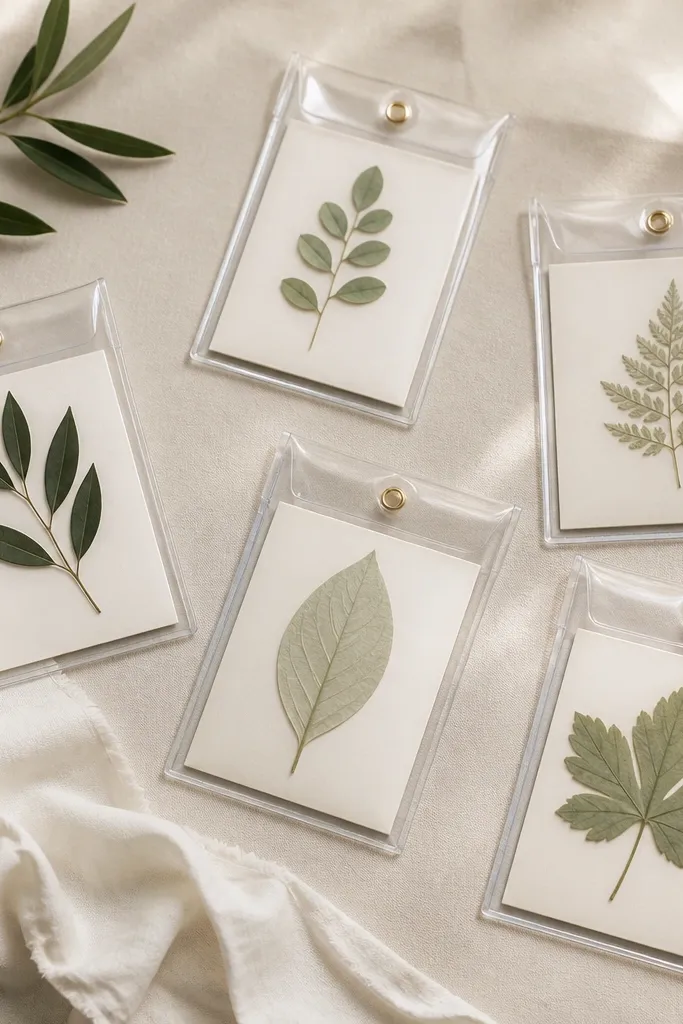
Pressed leaves look expensive because they’re real, flat, and slightly imperfect. The acrylic pouch protects the leaf and keeps it from crumbling, which matters if you’re handling place cards all day. You get a clean, gallery-style look without fancy equipment. It also gives your table a consistent botanical theme.
Press leaves between book pages for 1-2 weeks, then trim edges with small scissors. Print place card names on 4x6 cardstock and cut to fit a 2x3 inch card window. Place leaf in the pouch first, then slide the printed card behind it. Seal the pouch with the included adhesive strip or heat-seal if you have a pouch sealer.
Choose leaves with thin veins (like small fern types) so they press flat without thick ridges.
Don’t use fresh leaves — they turn brittle unevenly and the card warps.
5. Wood Slice Table Number Stands With Stenciled Numbers
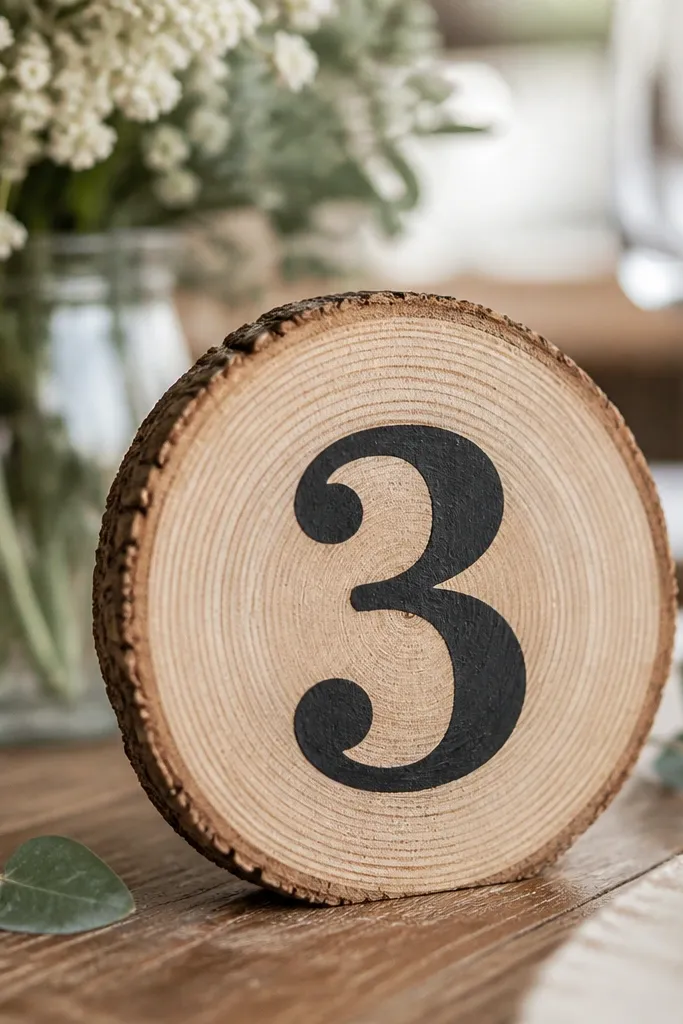
Wood slices add warmth fast, and stenciled numbers keep it readable from across the room. I like painting the numbers instead of using vinyl because the edges look handmade-but-clean. This craft also hides small imperfections in the wood slice because the stencil covers the center.
Quick tipWarm up your stencil placement with painter’s tape and press for 10 seconds each time to prevent paint bleed.
Buy 2-2.5 inch wood slices (or larger for a bigger look) and sand the top lightly. Use a stencil with numbers sized for 4x6 cards (around 2.5 inches tall). Paint with acrylic craft paint, then seal with a matte varnish. Attach the card to a small wooden easel clip or a folded cardstock stand glued behind the card.
One warningDon’t skip sealing — acrylic paint scuffs easily when guests bump the stands.
6. Tulle Aisle Runner Clips Using Safety Pins and Satin Ribbon
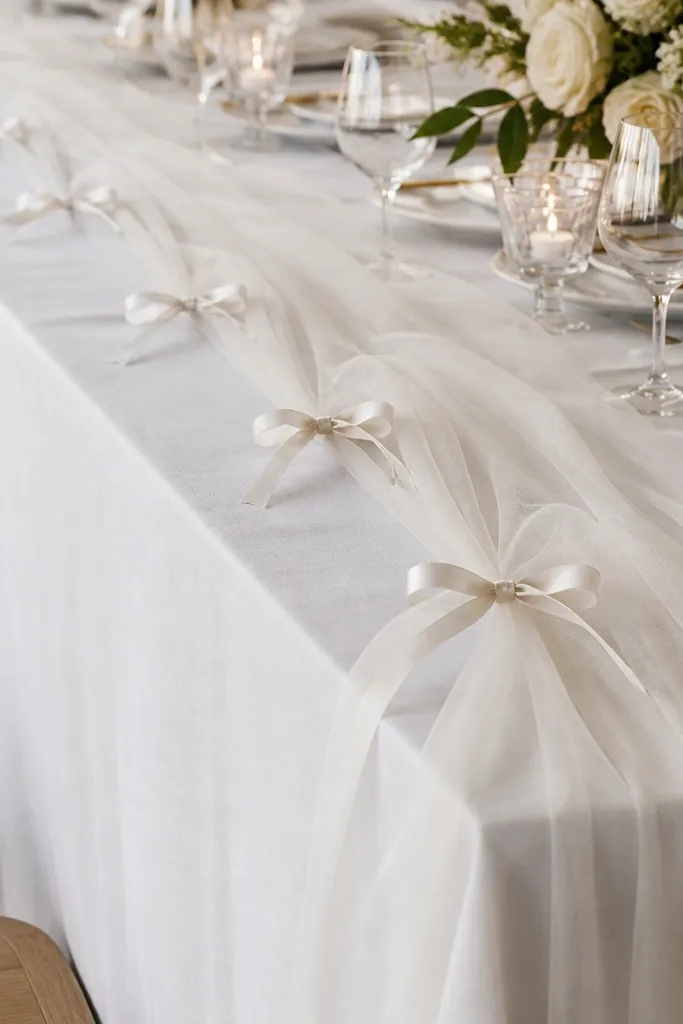
If you want aisle drama without sewing, this is it. Tulle drapes beautifully and hides imperfect floor seams, while satin ribbon bows give you a crisp focal point at each clip. The trick is spacing and pin placement so the runner looks intentional, not saggy. It also comes up quickly for cleanup.
Use 6-9 inch wide tulle strips or a long tulle runner (about 3-4 feet wide for a fuller look). Fold the tulle into soft gathers and clip to the floor with 2-inch safety pins inserted through the tulle only. Tie small satin ribbon bows (roughly 6 inches per bow) over the pin area so you can’t see the hardware. Space clips every 2-3 feet along the aisle.
Lay the tulle, step back, and adjust clip spacing before you pin the last third — that’s where it usually starts looking uneven.
Don’t use too much gather — it bunches and guests trip if the runner lifts.
7. Photo Booth Frame Made From Picture Molding and Spray Paint
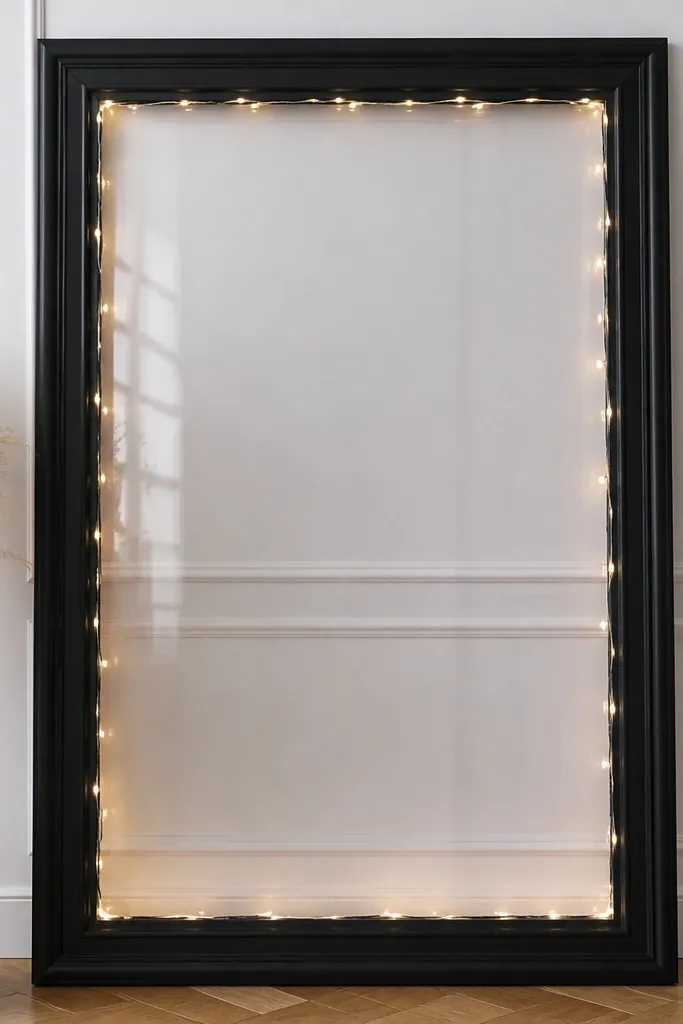
A frame instantly makes photos look like a planned station instead of a corner with props. Picture molding gives you straight edges and a solid look even if you’re a beginner. Matte spray paint hides minor scuffs and keeps it from looking shiny or cheap. The fairy lights add a warm outline without needing complex wiring.
Use 1-inch wide picture molding cut to your desired size, like 36x48 inches for a medium booth. Sand lightly, wipe with a tack cloth, then spray paint in thin coats. Add a backing panel from foam board inside the frame. Wrap a battery fairy light strand along the inner edge and secure with small clear tape points.
Use painter’s tape to mask the inner edge so the paint line stays crisp around the opening.
Don’t paint in heavy coats — drips show up fast in flash photos.
8. Paper Lanterns in Two Sizes With Hidden Tissue Weight
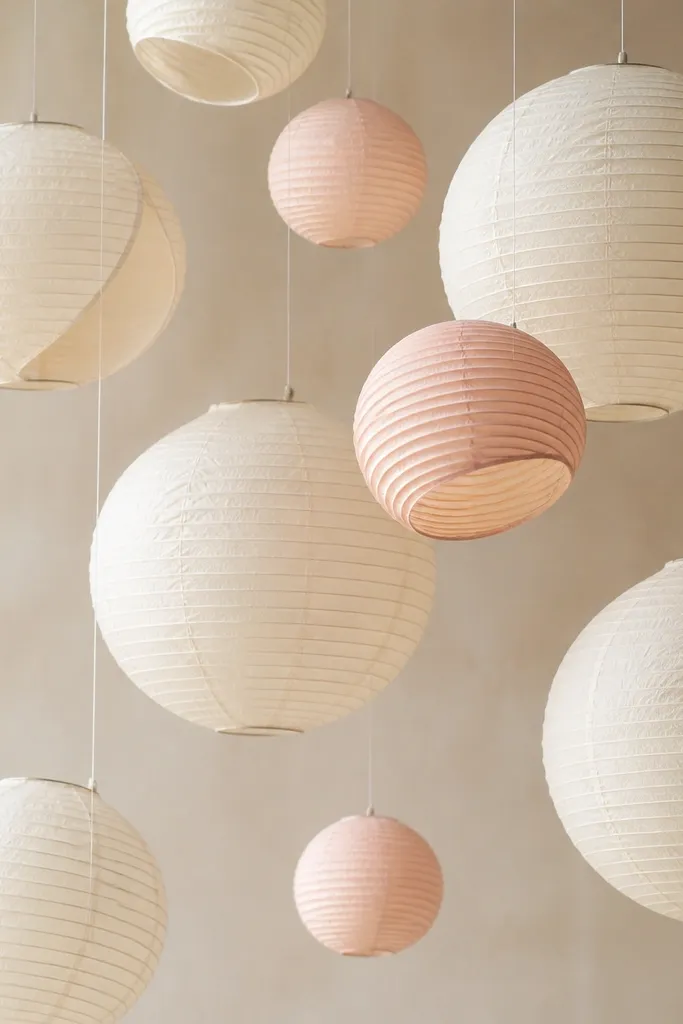
Paper lanterns are the easiest “wow” craft because they create instant overhead dimension. The two sizes make it feel curated without you doing complicated design work. I like adding hidden tissue weight at the bottom so lanterns hang evenly instead of twisting. This looks great over a dance floor or buffet wall.
Quick tipTie the fishing line to a ceiling hook first, then hang lanterns one by one so you can adjust height on the spot.
Use pre-folded tissue paper lanterns sized around 10-12 inches and 6-8 inches. Open the lanterns fully and check the hang point. Add a small round of tissue or a tiny weighted paper circle inside the bottom seam so it pulls the shape straight. Hang with clear monofilament fishing line for an invisible look.
One warningDon’t hang all lanterns at one height — the ceiling looks flat and photos look staged.
9. Candle-Glass Centerpiece With Floating Marbles and Dried Citrus
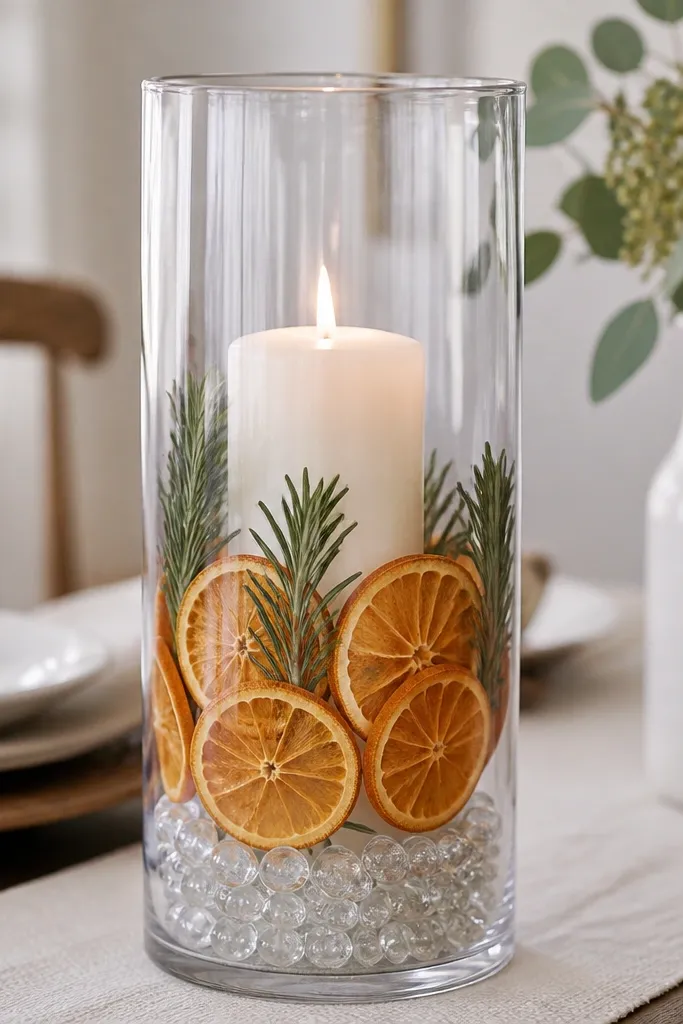
This centerpiece looks like you spent more time than you did. Clear marbles give weight and a crisp sparkle under light, and dried citrus adds color without needing fresh flowers. It’s also beginner-friendly because you’re not building stems or wiring bouquets. The smell is a bonus if you use real dried citrus.
Use a 6-8 inch glass cylinder vase and add 1-2 cups of clear marbles at the bottom. Place a small LED candle or a real tea light in a holder centered inside. Arrange dried orange slices (1.5-2 inches wide) around the glass and tuck rosemary sprigs behind the slices. Keep citrus pieces clustered on one side so it looks directional, not random.
Wipe the glass with glass cleaner right before setup — fingerprints ruin the sparkle.
Don’t use wet citrus — it stains and makes the glass look cloudy.
10. Embroidered-Look Napkin Edges Using Iron-On Transfer Pens
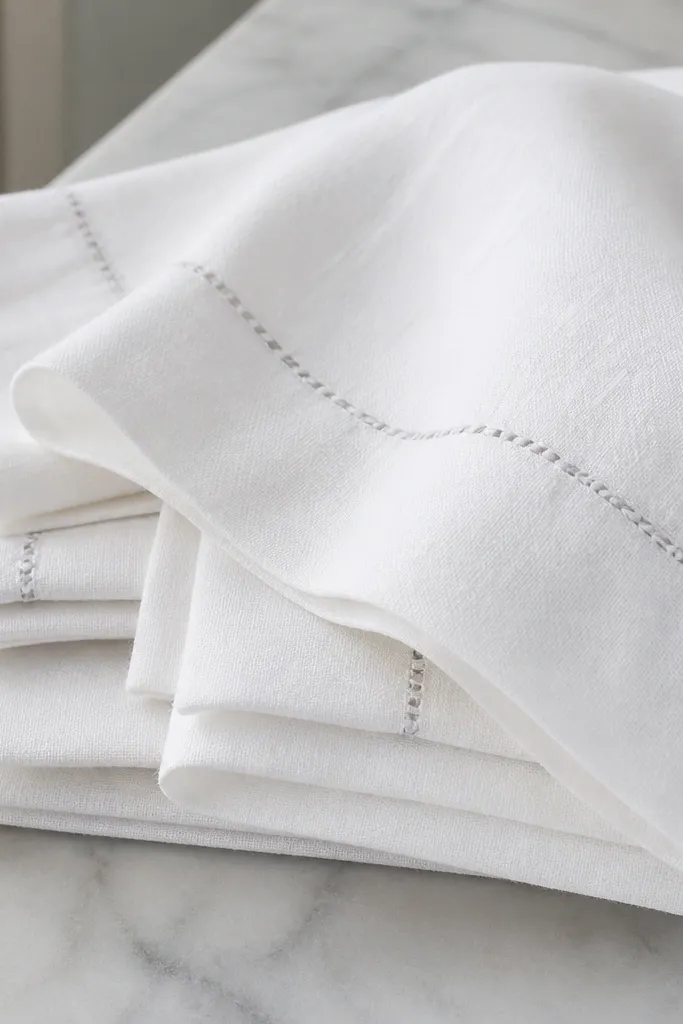
I’ve done this on linen napkins when someone wants “crafty” but not messy hand stitching. The iron-on transfer pen lets you draw a stitch path, then you add simple top-stitch style lines. It looks like embroidery in photos because the line weight is consistent. You also keep everything uniform across a full table set.
Start with white or cream linen napkins with a clean edge. Use an iron-on transfer pen to draw a dashed stitch border about 0.5 inch from the edge. Press lightly with a warm iron to transfer the line. Then stitch with embroidery thread using a straight stitch or a simple running stitch in light gray or sage so it reads soft.
Do one napkin as a test and adjust line spacing before you trace the whole stack.
Don’t use black thread on off-white napkins — it looks harsh and cheap fast.
11. Painted Mason Jar Vases With Faux Finishing Using Sponge Dabs
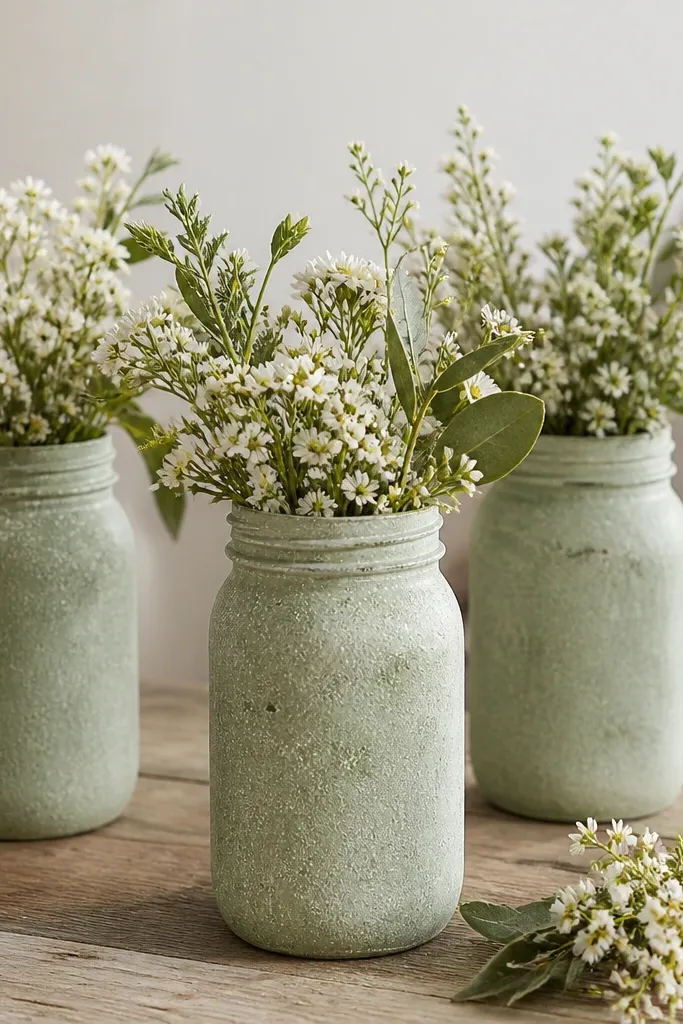
This is my go-to when someone wants a “designer” color but doesn’t want to buy ceramic vases. Sponge dabs create texture so paint doesn’t look like a flat craft coat. It also hides brush marks, which is the beginner pain point. Pair sage jars with white blooms for a clean, calm look.
Clean and dry mason jars, then lightly sand for grip. Use matte paint (like sage green) and apply with a sea sponge in short dabs around the jar. Leave a thin clear window near the top so it looks airy. Seal with matte clear spray once dry. Add small bunches of flowers with short stems so the jar doesn’t look overcrowded.
Paint one jar first and compare it in daylight against your table linens before you commit to the whole batch.
Don’t use glossy paint — it catches light and makes chips and seams stand out.
12. Mod Podge Wedding Map Coasters With Cork Backing
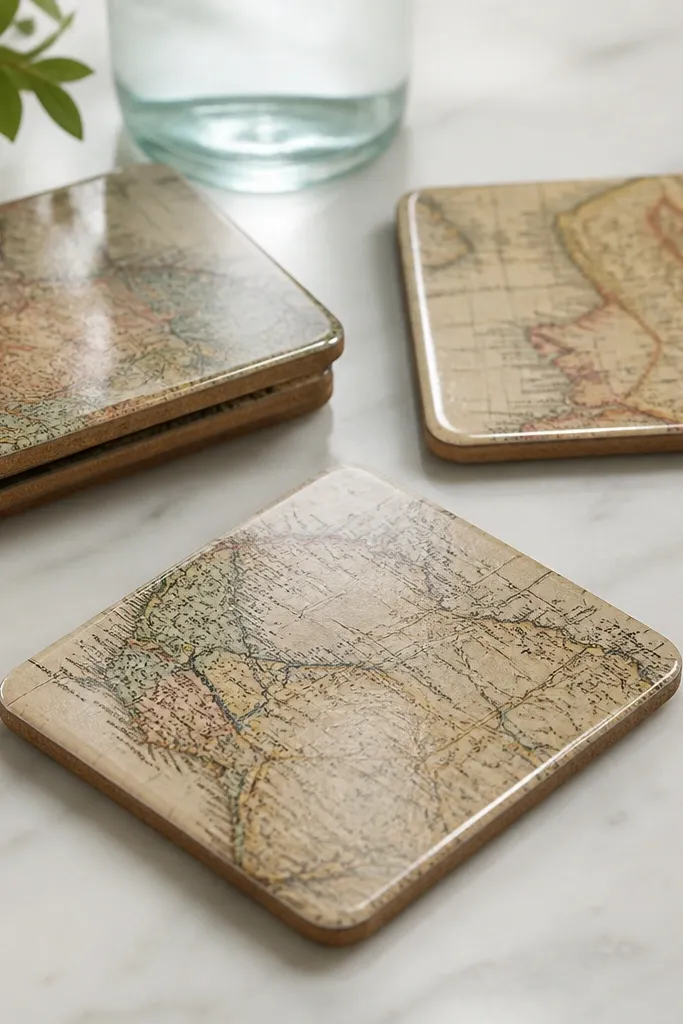
Map coasters are personal and they’re practical, which is why they work for beginners. The map print gives instant texture, and Mod Podge seals it for daily handling. Cork backing keeps the coaster from sliding and protects the table surface. These also double as guest favors if you package them with a ribbon tag.
Quick tipTrim the paper with a craft knife while the coaster is on a cutting mat so edges stay crisp.
Cut map paper to size for 4-inch cork coasters. Use a foam brush to spread a thin layer of Mod Podge, lay paper down, smooth bubbles, then add another layer on top. Seal edges so no paper fibers lift. Let cure 24-48 hours flat before using.
One warningDon’t rush the curing time — early stacking causes sticky edges.
13. Mini Hanging Floral Tags for Gift Tables Using Twine and Fabric Scraps
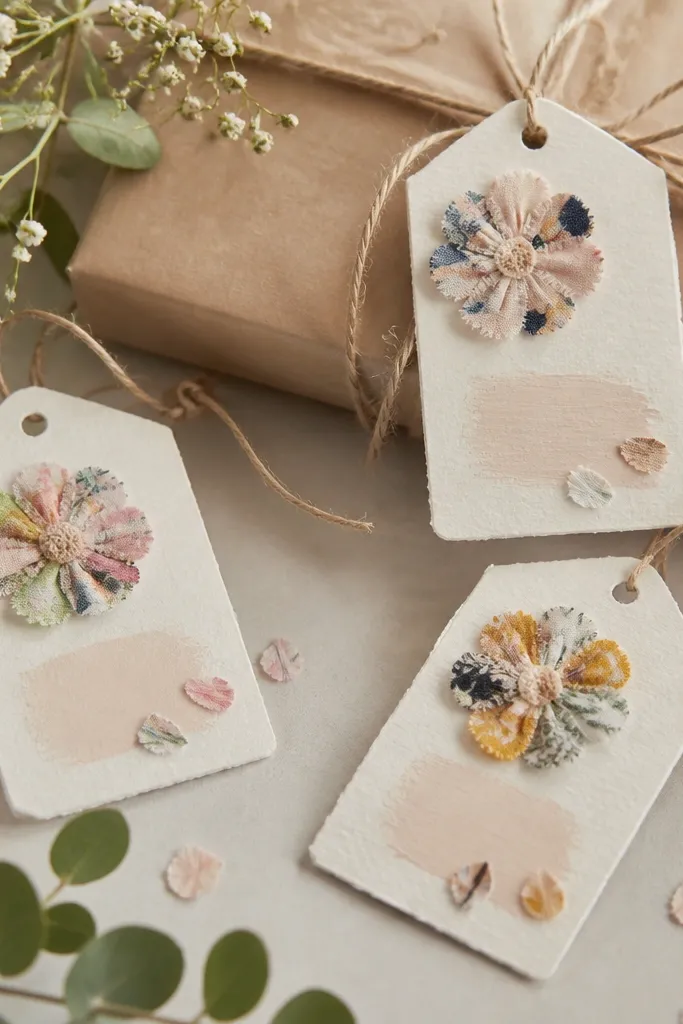
These tags make a gift table look styled without taking over the space. Twine looks natural and matches almost any wedding palette. The fabric scrap flower keeps the craft from looking like generic paper signage. You can also use the same tag size for chair gifts, welcome treats, or table favors.
Quick tipStamp or print text first, then glue fabric — glue can smear ink if you do it in the wrong order.
Cut 2.5x3.5 inch kraft tags and punch a hole at the top. Wrap a 6-8 inch piece of twine through the hole and tie around a small dowel or display string. Make tiny fabric flowers by cutting 3 circles (about 1.2, 1.0, 0.8 inch) and layering them with a stitch in the center. Glue the fabric flower onto the bottom corner of each tag.
One warningDon’t use slippery satin twine — knots loosen during setup.
14. Crepe Paper Backdrop Fringe Using One Roll and Measured Cuts
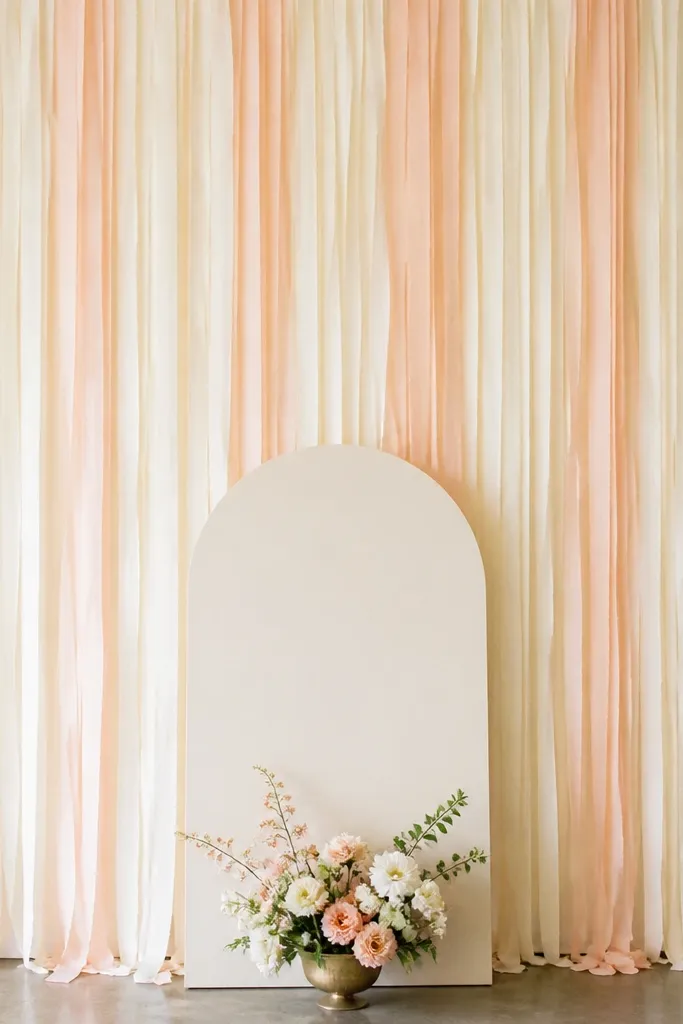
Measured crepe fringe makes a backdrop that looks like you hired someone. The trick is cutting strips to a consistent width and length, then tying them to a simple rod or ribbon line. Crepe paper is forgiving — it frays slightly and catches light in a way that looks soft on camera. This works for a ceremony photo spot, dessert backdrop, or sweetheart table wall.
Quick tipHang the line first, then tie fringe while standing at the side so you can check alignment as you work.
Use crepe paper rolls and cut strips 2 inches wide and 24-30 inches long, depending on your backdrop height. Fold each strip in half and tie to a horizontal ribbon or dowel line using a simple loop knot. Alternate colors every other tie so you don’t end up with random blocks. Keep knots aligned by counting ties per row.
One warningDon’t pull crepe too tight while tying — it curls and creates gaps.
15. Personalized Acrylic Welcome Sign Using Vinyl Cut Letters
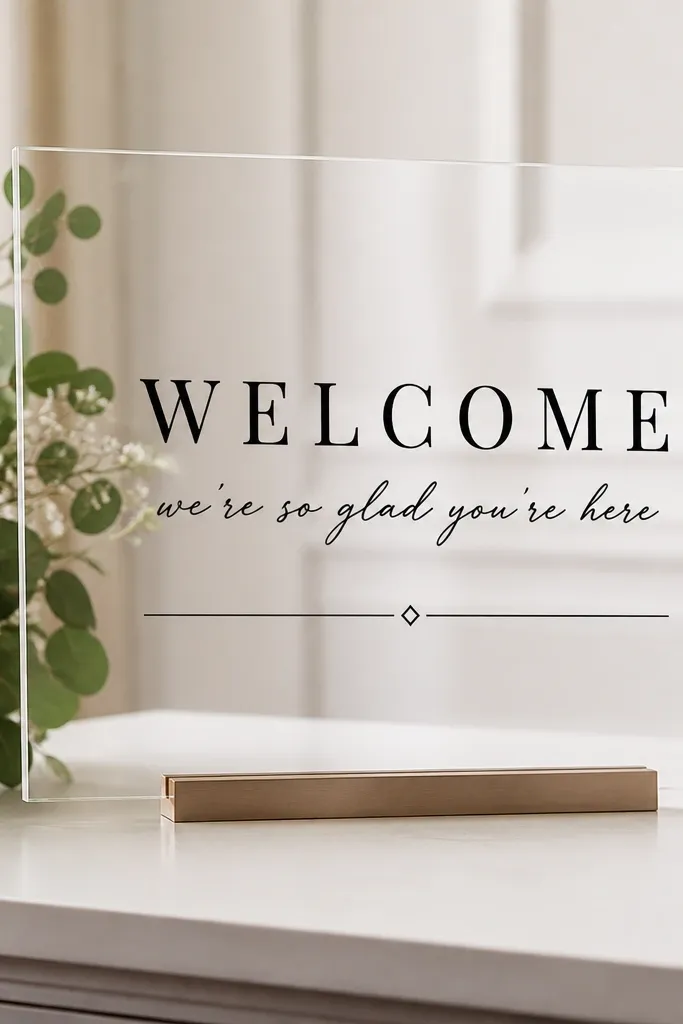
A vinyl-letter acrylic sign is the cleanest “big impact” craft for beginners. The acrylic looks sleek in photos, and vinyl letters stay sharp even if you’re not confident with handwriting. Keep the design simple: one greeting line and two lines of info. It looks finished even from across the room.
Buy a clear acrylic sign blank in your size, like 8x12 or 12x18 inches. Clean with rubbing alcohol so vinyl sticks. Apply vinyl letters using transfer tape, burnish with a plastic squeegee, then peel the backing. Add a small stand or use wall-mount hardware depending on your venue.
Do a paper mockup on the wall first and measure letter placement — centering on the table is not the same as centering on a stand.
Don’t apply vinyl to dusty acrylic — you get bubbles that don’t flatten.