1. Chalk Paint Bud Vases with Linen Wrap Bands
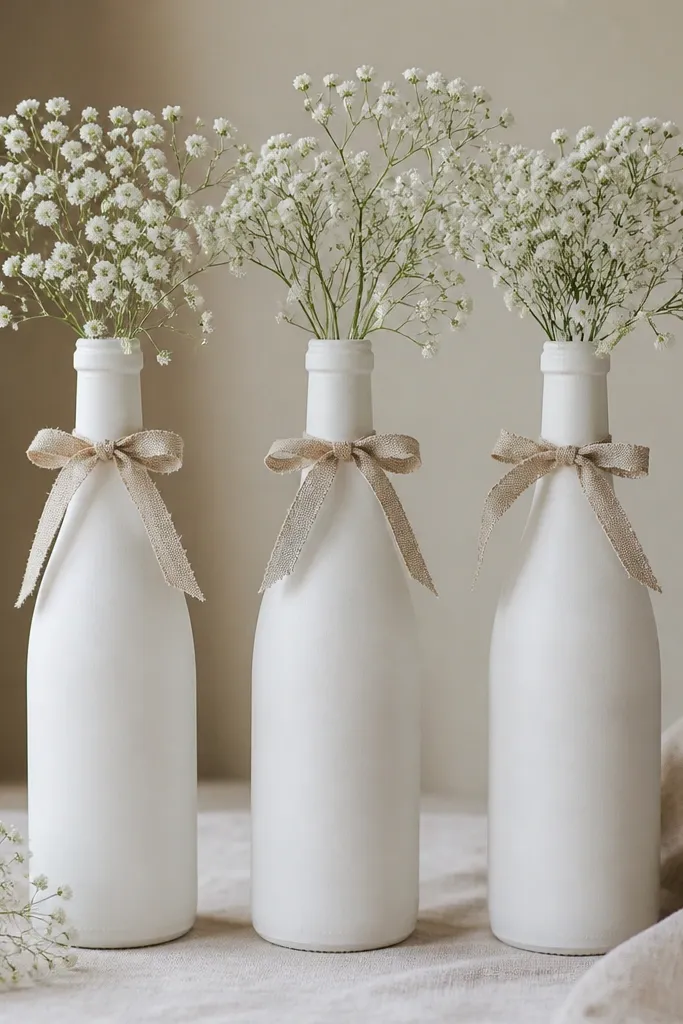
I love this for small spaces because it reads soft and intentional without taking up table volume. The matte warm white hides bottle imperfections, and the linen band keeps it from looking like a plain paint job. Add 2-3 stems per bottle and you get a high-end “curated” look without needing a big floral budget. It also photographs well because the matte finish reduces glare from overhead lights.
Paint bottles with chalk paint or matte acrylic in warm white. Do two coats, then lightly sand the highest spots after the first coat so it looks even, not streaky. Wrap a 1-inch linen band around the neck and secure with a hot glue dot under the knot. Use mini stems like baby’s breath or eucalyptus tips so the opening stays neat.
Cut linen into 10-12 inch lengths so the bow sits flat and centered, not lumpy.
Avoid thick ribbon layers that cover the neck — they make the bottle look bulky and unfinished.
2. Gold Foil Label Bottles with Clear Tape Edges
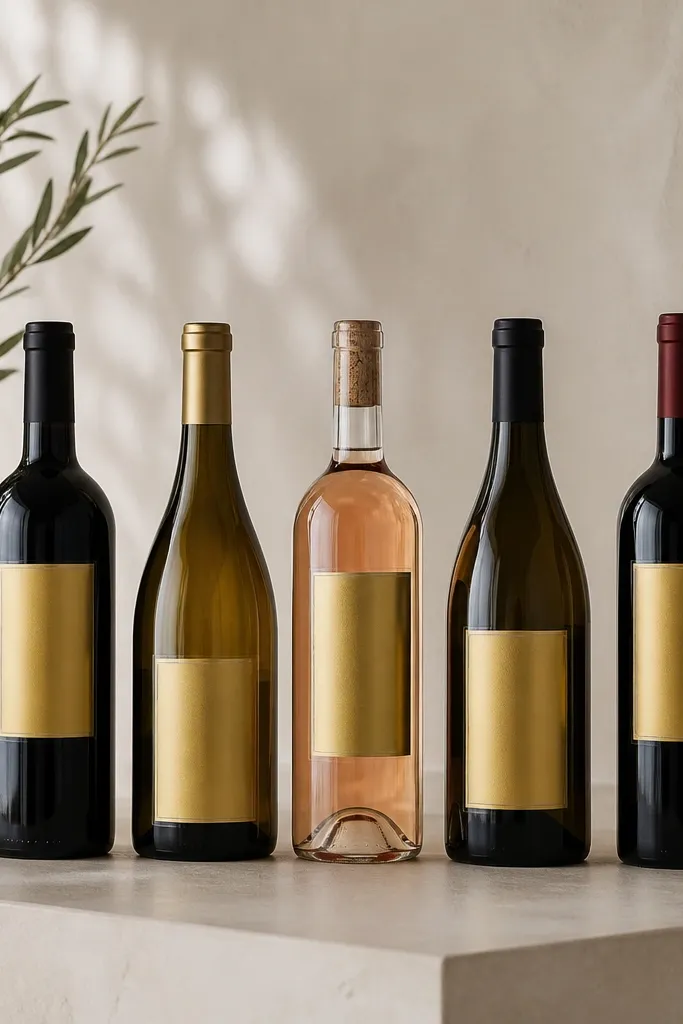
This is the chic option when you want the bottle to stay glass-forward. Gold foil on a clear, controlled placement looks like a store-bought label, especially when the edges are sharp. I’ve used this for couples who want minimal decor but still want everything to match in photos. It also works with any wedding color palette because gold sits in the middle.
Clean and dry bottles thoroughly, then cut gold foil sheets into 2.5 x 3.5 inch rectangles. Lay clear packing tape over the foil to create a stiff label shape, then press it onto the bottle. Add a small printed sticker or handwritten name on top of the foil using a fine-tip gold or black paint marker. Keep labels aligned at the same height across all bottles.
Use a ruler and painter’s tape guide marks so every label lands at the same level.
Avoid freehand label placement — crooked rectangles scream DIY in photos.
3. Spray-Painted Ombre Bottles for Table Clusters
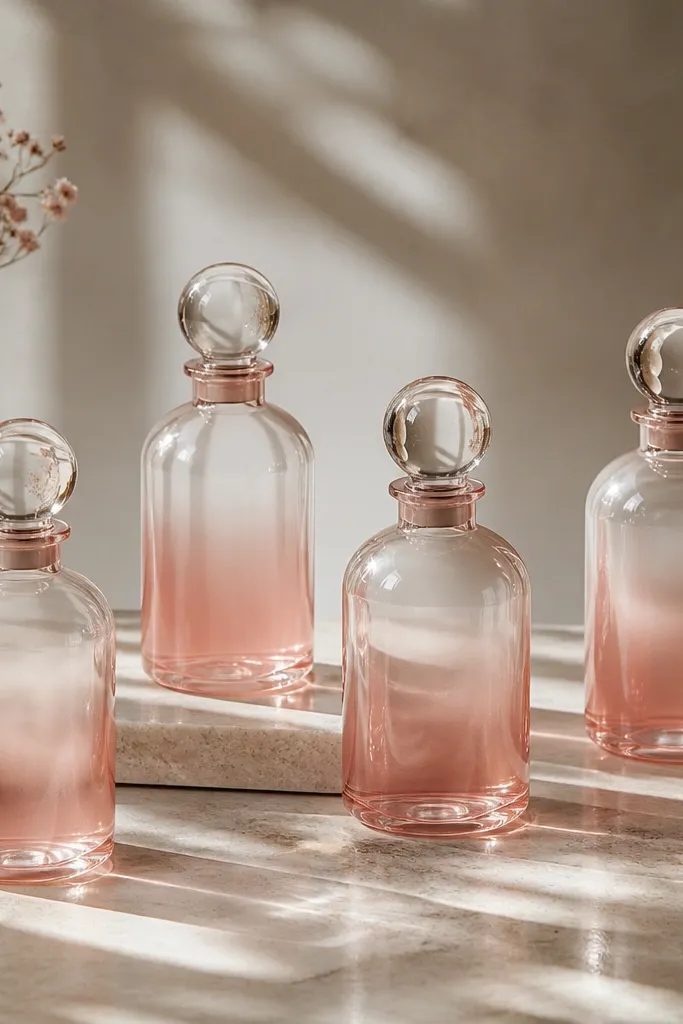
Ombre looks expensive because it mimics painted glassware, and it adds color without covering the whole bottle. For small-space weddings, ombre is a great way to make a cluster feel cohesive even if you mix bottle shapes. I’ve used blush-to-clear and sage-to-clear; both look calm in natural light. The gradient also makes the bottles look taller in photos.
Mask the top area with painter’s tape so you only spray the lower third. Spray a base color (like blush) about 10 inches up from the bottom, then lightly mist a second color (or the same color thinned) so it fades upward. Hold the can 10-12 inches from the glass and overlap passes. Finish with a satin clear coat to even out texture.
Quick tipPractice on a scrap bottle or cardboard first to dial in how heavy your first pass is.
One warningAvoid spraying too close — it causes drips and a rough edge line.
4. Twine-Tied Bottle Vases with Dried Lavender Stems
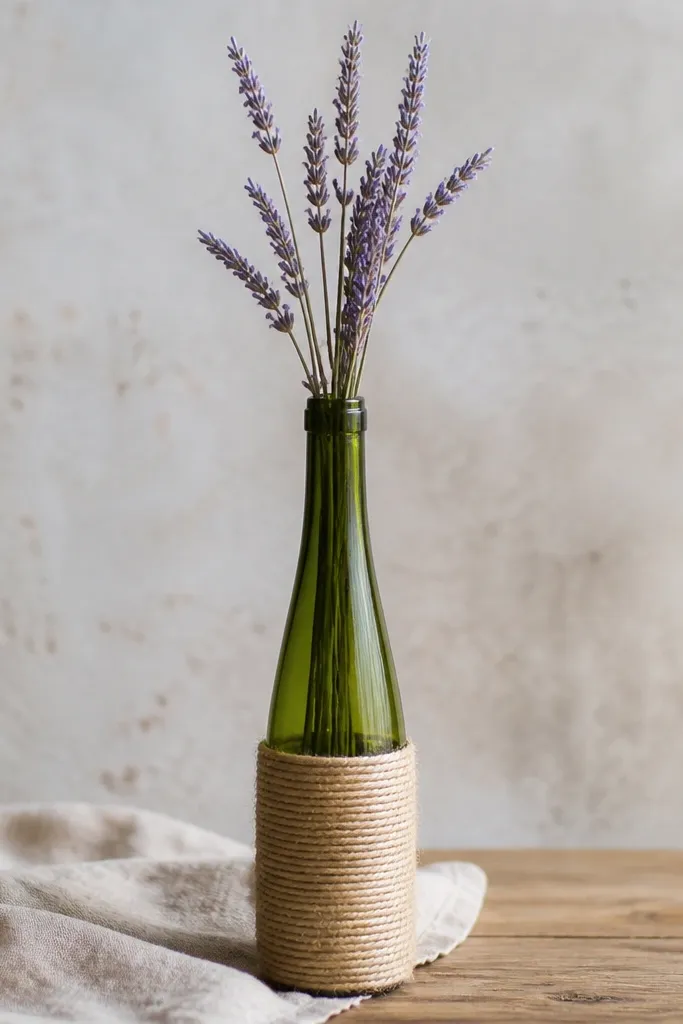
Twine makes wine bottles look like they belong in a rustic-meets-chic setting, and dried lavender gives you that clean, intentional texture. The spiral wrap creates a pattern that reads well even from across a small table. I like this when the wedding has a neutral palette or an early evening vibe, because the twine texture catches light softly. It also lasts longer than fresh stems if the event runs late.
Start with a thin strip of hot glue at the base of the wrap, then coil twine upward with tight spacing. Keep the spiral even by counting turns: about 14-16 coils for a standard wine bottle. Tie off the twine under the neck, then trim ends. Fill with a small amount of water if you’re using fresh stems, or keep it dry for dried lavender.
Quick tipUse a small dab of clear glue on the underside of the twine end so it does not lift before the ceremony.
One warningAvoid loose wraps — uneven spacing makes the whole bottle look like a craft project.
5. Marble-Effect Bottles Using White Acrylic + Toothpick Swirls
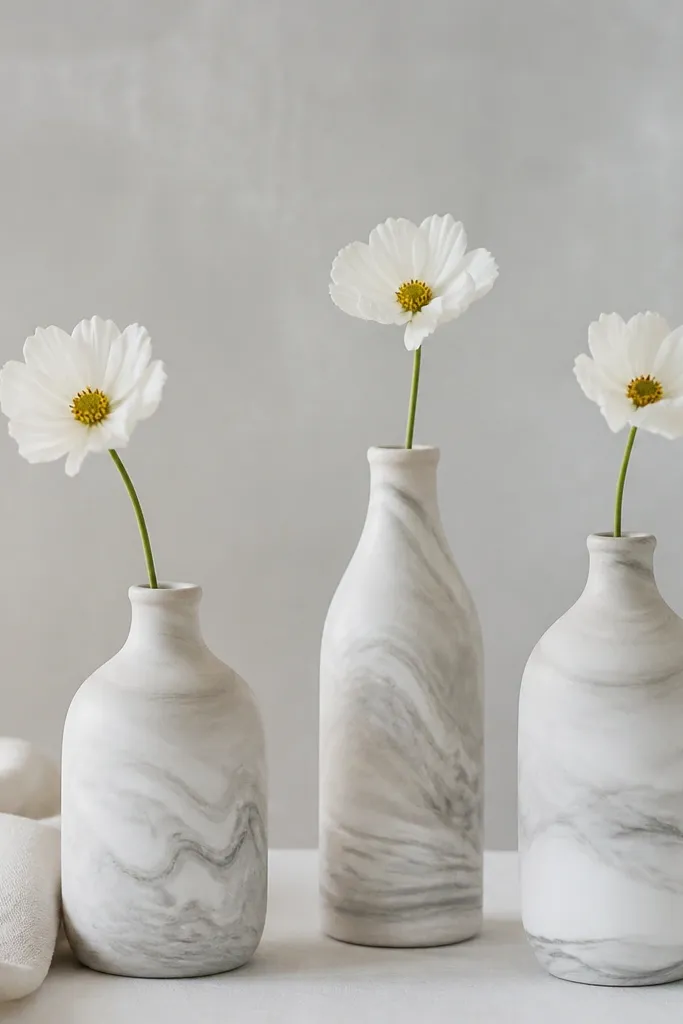
Marble effect looks luxe without requiring resin. The milky base softens the glass, and the gray swirls create depth. I’ve used this style with black-and-white weddings because it photographs cleanly and does not fight for attention with the table linens. The single-stem styling keeps it from looking busy.
Brush a milky white acrylic base (thin coats) and let it dry fully between coats. Drop small dots of gray acrylic on top while the base is slightly tacky, then drag a toothpick through in short, curved lines. Wipe the toothpick occasionally so lines stay thin. Seal with satin clear spray once dry.
Quick tipDo swirl sizes in two scales: 1-2 inch long wisps and a few shorter ones for realism.
One warningAvoid thick gray blobs — they look like paint smudges instead of marble.
6. Pressed Flower Bottle Labels on Clear Vinyl
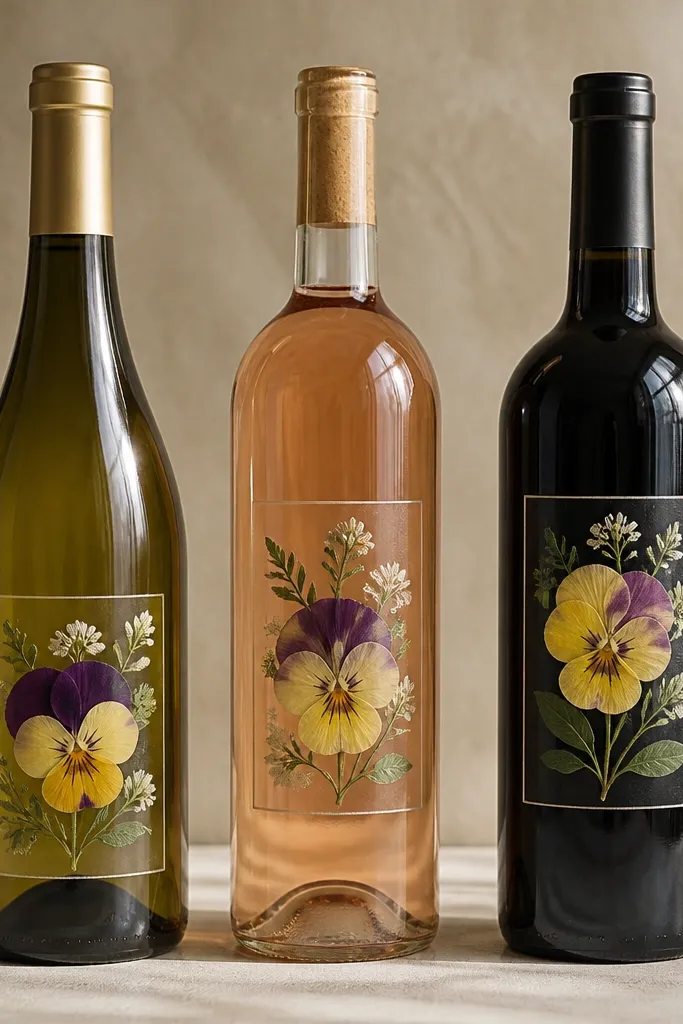
This is for couples who want delicate detail without huge arrangements. Pressed flowers are tiny, but when you put them under clear vinyl and place them cleanly, they look like a custom invitation detail. The glass stays visible, so it still feels airy for small spaces. It also works great for spring weddings when you want the decor to feel personal.
Press flowers between book pages for 1-2 weeks so they flatten. Cut clear vinyl label sheets into rectangles, place pressed blooms inside, and seal edges with clear tape or craft glue. Add a tiny printed date sticker under the flowers. Center each label at the same height and keep the bloom orientation consistent.
Quick tipChoose one bloom type and one leaf type so the labels look coordinated, not random.
One warningAvoid labels that wrinkle or bubble — bubbles show immediately in flash photos.
7. Rope-Wrapped Wine Bottles with Mini Candle LED Caps
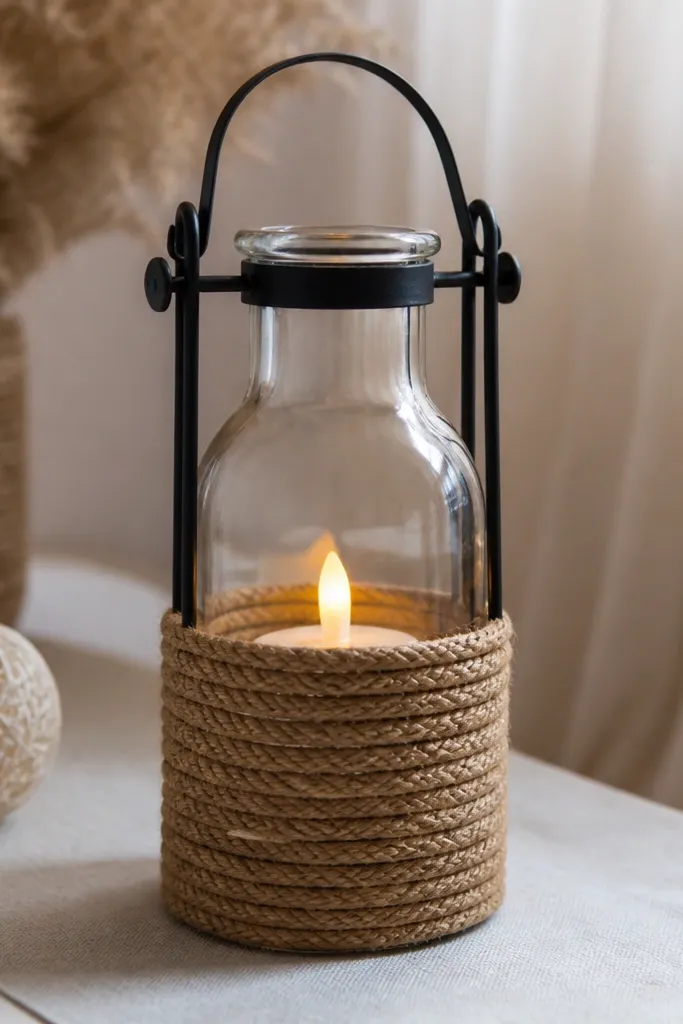
Rope wrapping makes the bottle look like a lantern piece, and LED tea lights create that warm glow without smoke concerns. This is the first craft I reach for when the ceremony is outdoors and you want a cozy look on a tight table. The rope texture adds depth, and the light sits low so it does not block sight lines. It also makes the bottle feel intentional even if you have only a few.
Wrap jute rope around the middle using hot glue dots spaced about 1 inch apart. Leave a small gap at the top so you can place an LED tea light inside the opening. If the LED sits too low, add a thin ring of craft foam as a base. For stability, keep the bottle on a flat tray or use a candle plate underneath.
Quick tipPick LEDs with a realistic flicker mode — the rope texture makes cheap lighting look obvious.
One warningAvoid using real candles in tall bottles unless you have a tested, stable holder.
8. Painted Bottle Bottoms with Glitter Drip Line
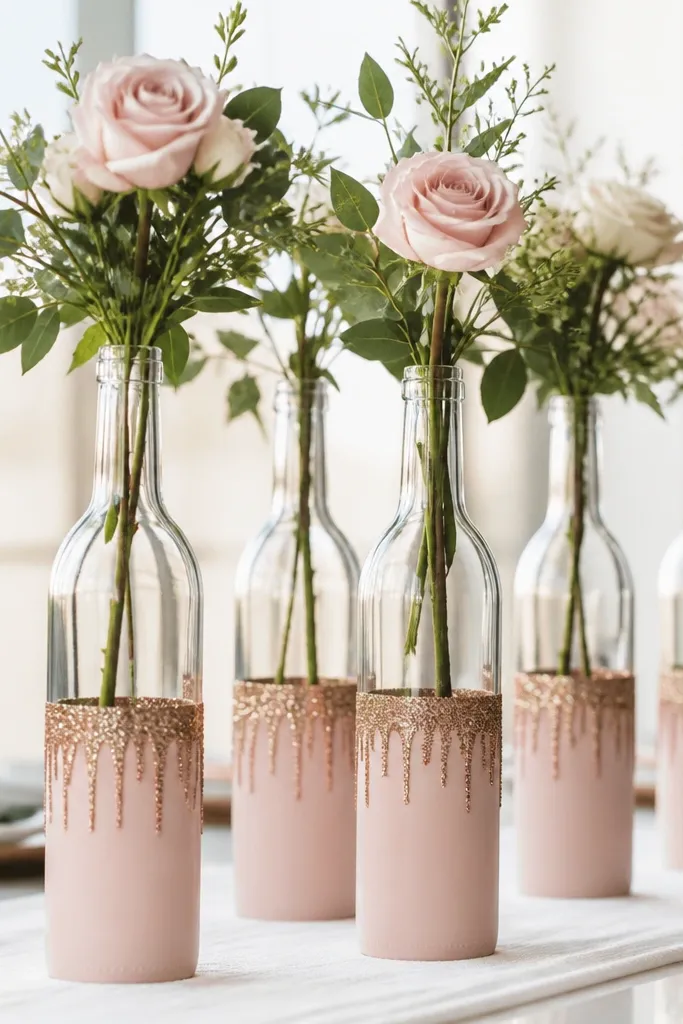
This craft is a cheat code for glam without covering the whole bottle. The matte blush gives you a smooth base, and the glitter drip line adds sparkle where the eye already goes. I like it for evening receptions because the glitter catches light with minimal mess. It also looks clean when you keep the drip line consistent across bottles.
Mask the bottle with painter’s tape so you paint the bottom third only. After matte blush dries, apply a thin line of craft glue around the bottle at the tape edge height. Sprinkle fine glitter, then tap off excess. Seal with a light clear coat so glitter stays put but does not clump.
Quick tipUse fine glitter (not chunky) so it looks like a finish, not a craft jar.
One warningAvoid uneven glue thickness — the drip line becomes lumpy and uneven.
9. Monogram Vinyl on Clear Bottles with Sage Sprigs
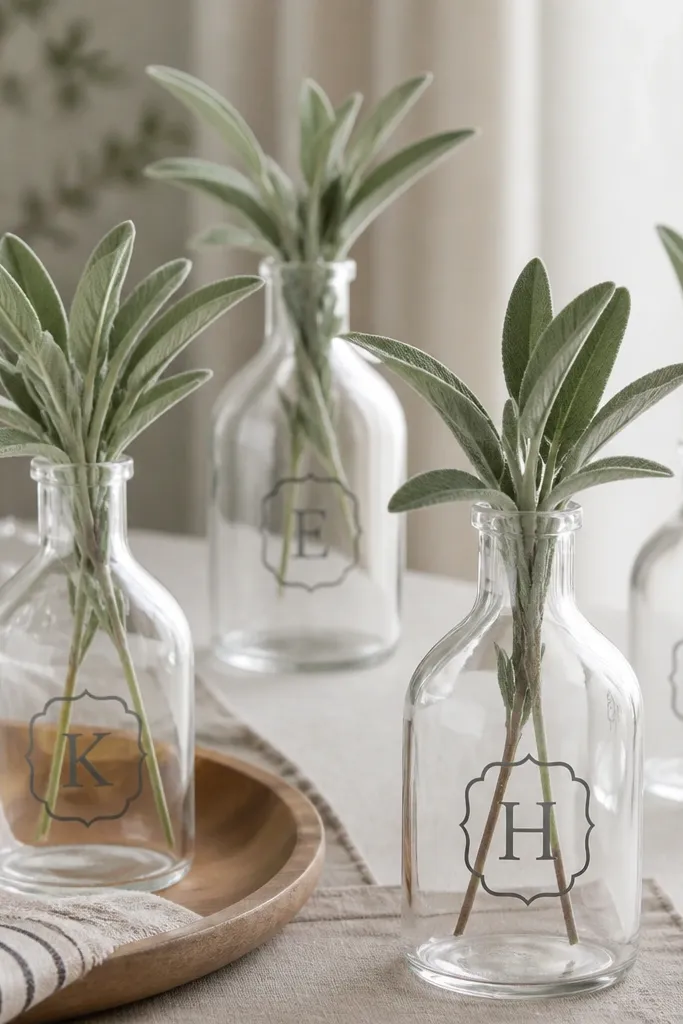
If you want chic and modern, keep the glass clear and add a crisp monogram. Vinyl lettering looks sharp and consistent, which is the hardest part to fake by hand. Sage sprigs make it feel fresh and slightly European without needing big floral work. This also works for small spaces because the decor stays airy and light.
Clean bottles, then apply removable vinyl letters or stencil vinyl for a crisp edge. Use sage sprigs, olive branches, or small rosemary for a tight, structured look. Keep stems trimmed to about 4-6 inches above the opening so they do not flop. If you want extra hold, add a small piece of floral foam inside the neck.
Place vinyl at about 3.5 inches above the bottle’s widest point for a balanced look.
Avoid large vinyl sizes — oversized letters make clear bottles look like party favors.
10. Satin Ribbon Bow Bottles with Color-Matched Wrap
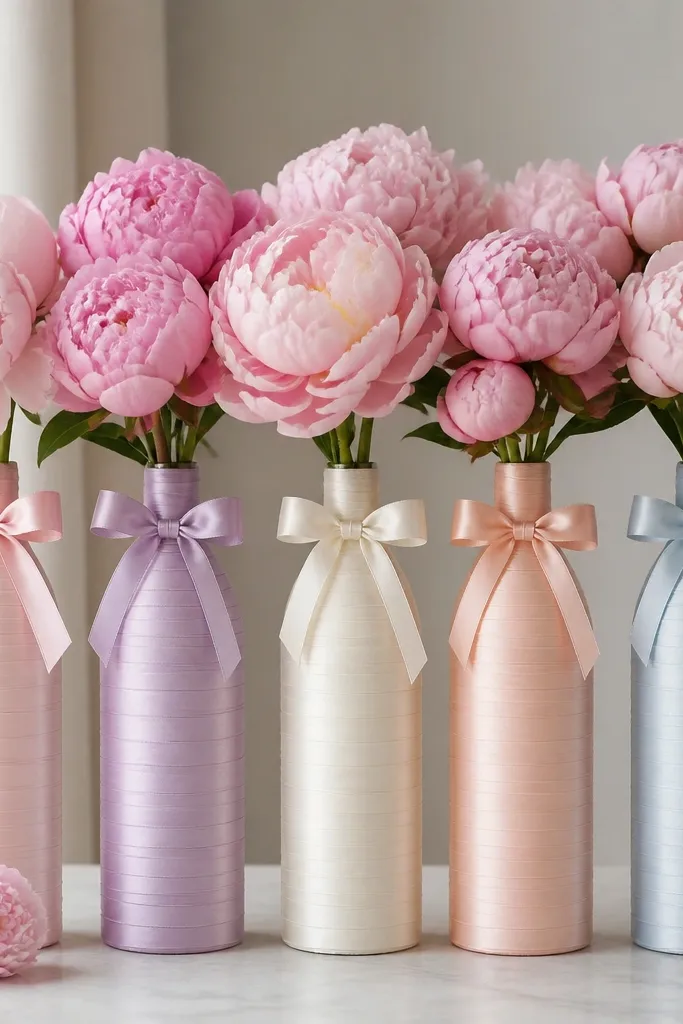
Satin ribbon adds instant “wedding” energy because it sits glossy and clean in photos. A matching wrap makes the bottle look like part of the table styling, not a random repurposed item. I’ve used this for indoor dinners where the lighting makes satin shine without looking tacky. It also lets you control the color story with one simple material.
Wrap a 1/2-inch satin ribbon around the neck and secure with hot glue at two points. For the cleanest look, do a second band around the lower third using the same ribbon, then tie a bow at the neck. Use one type of flower per bottle — peonies, ranunculus, or garden roses — and keep stems short so the bow stays visible.
Steam the ribbon flat before wrapping so it does not show creases.
Avoid messy hot glue strings near the ribbon edge.
11. Fabric-Covered Bottle Sleeves with Hidden Velcro
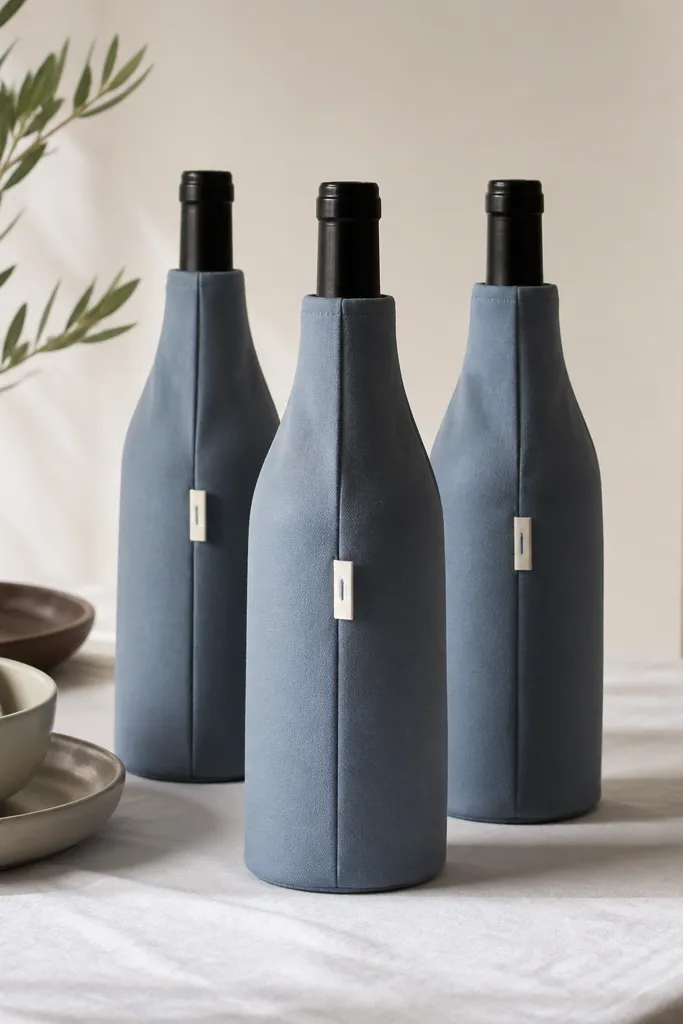
Fabric sleeves make bottles look like decor objects, not crafts, and they hide labels, scuffs, and uneven paint. In small spaces, sleeves help because you can swap colors quickly for different events without repainting glass. The chic part is the fit — smooth fabric with a clean closure line. This also works if you’re doing a themed wedding weekend and want consistent styling.
Cut fabric rectangles to wrap around the bottle with a 1/2-inch overlap. Sew a straight seam for a tube, then hem the top edge so it sits clean around the opening. Add a strip of Velcro inside the overlap so the sleeve comes off for washing. Use cotton lawn, linen-cotton blend, or sturdy satin for less wrinkling.
Quick tipAdd lightweight fusible interfacing to the fabric so it stays crisp and does not collapse around the glass.
One warningAvoid stretchy knits — they cling unevenly and wrinkle in photos.
12. Beaded Net Bottle Accents with Pearl-Style Drops
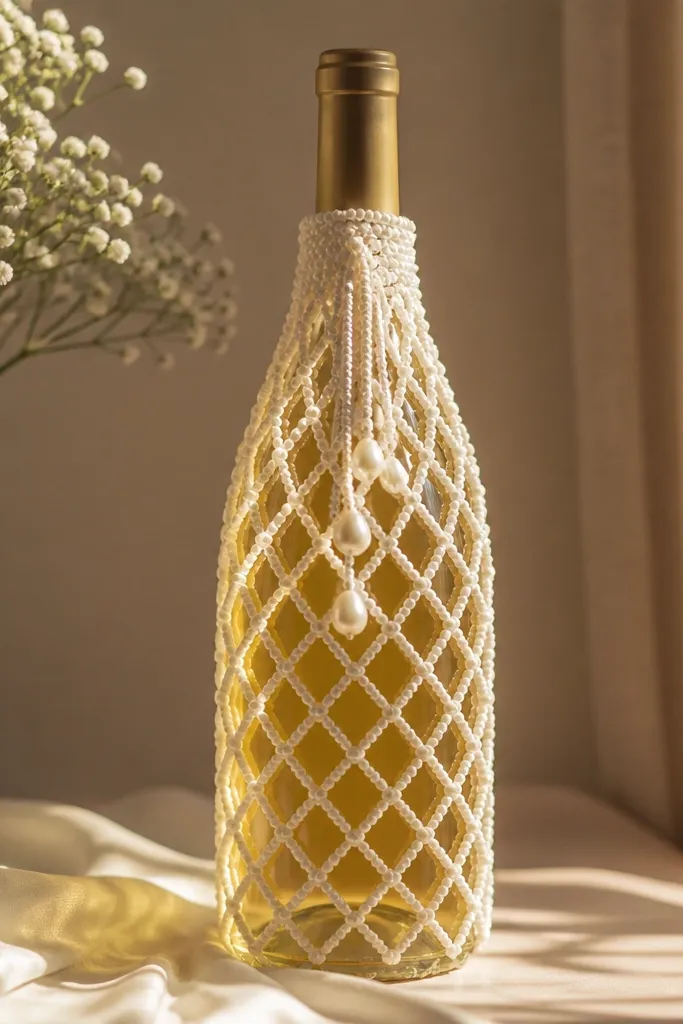
Beaded net is one of those materials that looks “wedding” instantly because it sparkles without heavy glitter. The net also hides imperfections in the glass, so you do not need perfect painting. I like it for intimate ceremonies where you want a lot of shine but not big centerpieces. The pearl drops add a vertical accent that looks good in close-up photos.
Wrap fine beaded net around the bottle and secure at the back with hot glue strips. Leave 1 inch at the top open for flowers or LED candles. Add pearl-style drops by threading them on thin fishing line and tying to a small loop of glue under the neck. Choose warm white net so it looks soft, not icy.
Test the net fit by holding it against the bottle — you want snug, not stretched, so beads sit evenly.
Avoid heavy glue blobs — they show through the net and look messy.
13. Blackboard Paint Bottles with White Menu-Style Text
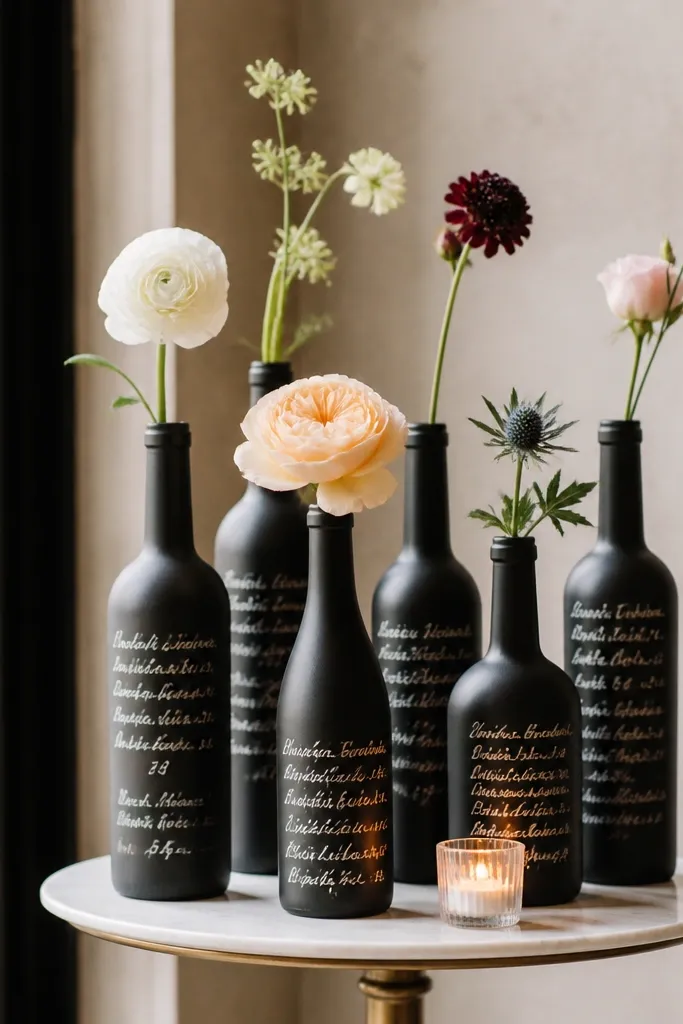
Blackboard paint gives you a chic, readable surface that you can customize for the day. I’ve used these as table accents where guests can see names, dates, or a short note. White paint markers look crisp and high-contrast, which matters under reception lighting. For small spaces, this keeps signage off the table and makes the bottle itself the sign.
Prime glass with a bonding primer if your paint chips easily, then spray or paint matte blackboard paint. Let it cure fully — 24 hours is safer for smooth writing. Write with a white paint marker or acrylic pen. Add a single stem in a small water insert so the bottle stays light and readable.
Quick tipPlan your text layout first by lightly sketching pencil marks that you erase after painting.
One warningAvoid glossy black — it reflects light and makes marker text look washed out.
14. Terracotta Clay-Glazed Look Bottles with Brush-On Texture
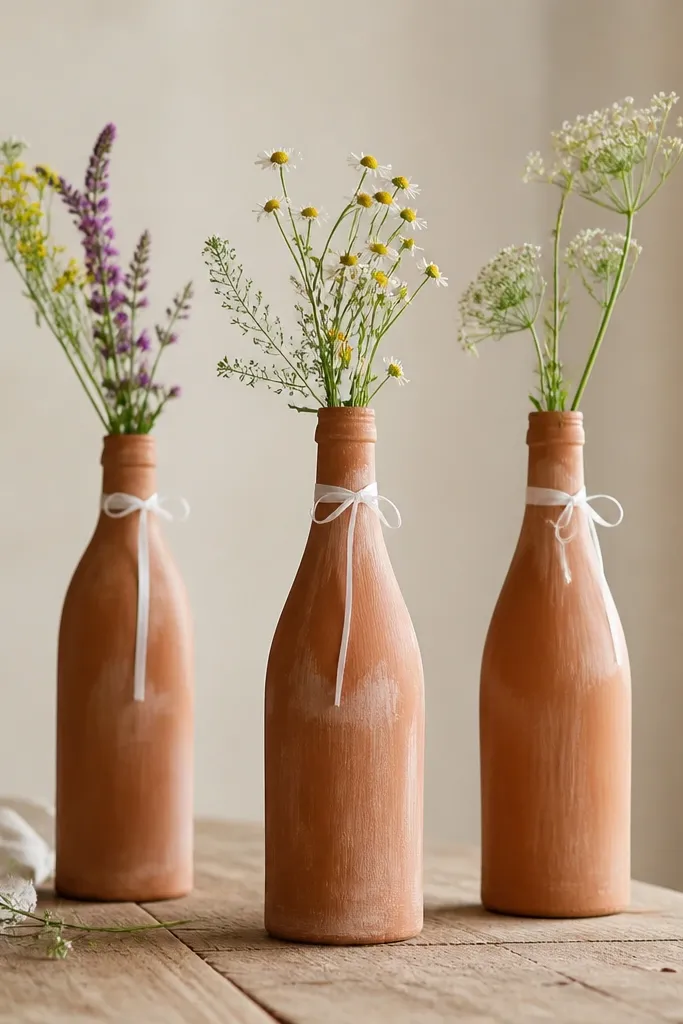
Terracotta has that warm, grounded look that still feels wedding-appropriate when you keep the styling clean. The brush-on texture makes each bottle slightly different, which reads handmade instead of cheap. I’ve done this in small backyards where the decor needs to blend with natural surroundings. It also pairs beautifully with cream, sage, and dusty rose flowers.
Use terracotta craft paint and apply it with a wide flat brush for visible strokes. Mix in a tiny bit of off-white acrylic to soften the color in the highlights. After it dries, lightly glaze with watered-down matte medium so it looks like a clay finish. Tie a 1/2-inch cream ribbon under the neck and keep stems short.
Quick tipUse a damp cloth to wipe paint off the bottle shoulder so the neck stays clean and chic.
One warningAvoid painting too smooth — the clay look needs texture to feel intentional.
15. Solar-Lit Bottle Vases with Faux Water Beads
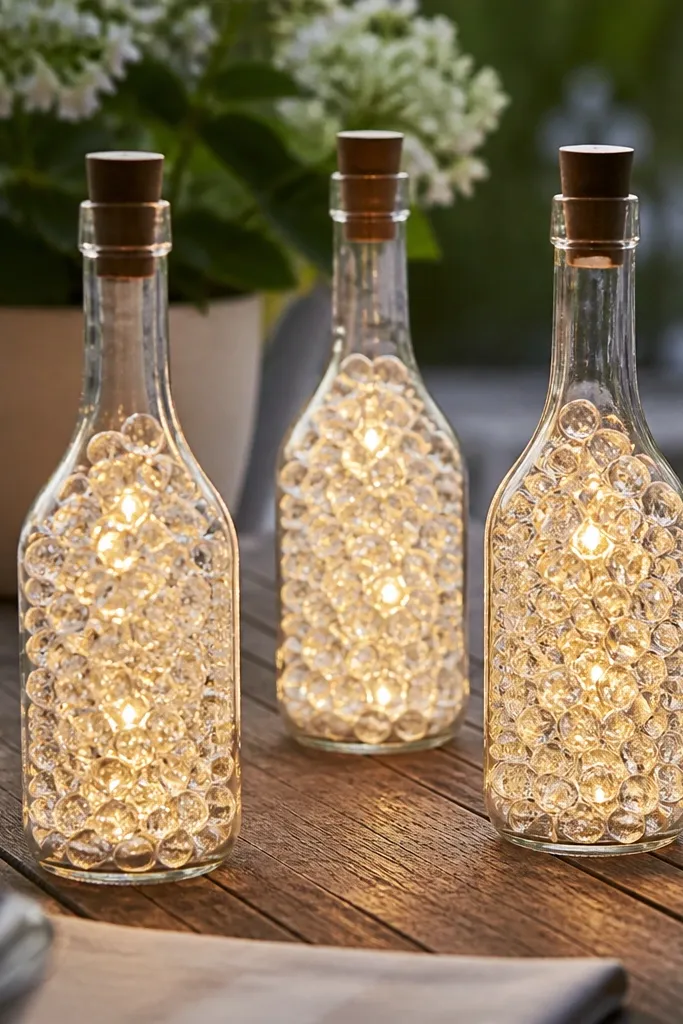
This one looks magical at dusk and it is great for small spaces because you do not need real flowers if the setup is short. The clear beads scatter light like tiny highlights, and the bottle shape makes the glow look purposeful. I used it on a patio where we had limited fridge space for fresh stems. It also works for couples who want a modern, minimal look without ribbon and paint.
Use clear LED mini lights or battery tea lights placed inside the bottle opening. Fill the bottle with clear gel beads or clear acrylic craft beads (enough to cover the light base). If you’re using real gel beads, keep them dry before the event and add just before setup so they do not leak. Top with a single greenery sprig if you want a natural touch.
Quick tipChoose LEDs with a warm white setting so the glow matches most wedding lighting temperatures.
One warningAvoid cloudy beads — they turn the glow dull and make the bottle look dirty.