1. Seasonal Burlap + Satin Welcome Banner on a Wood Rod
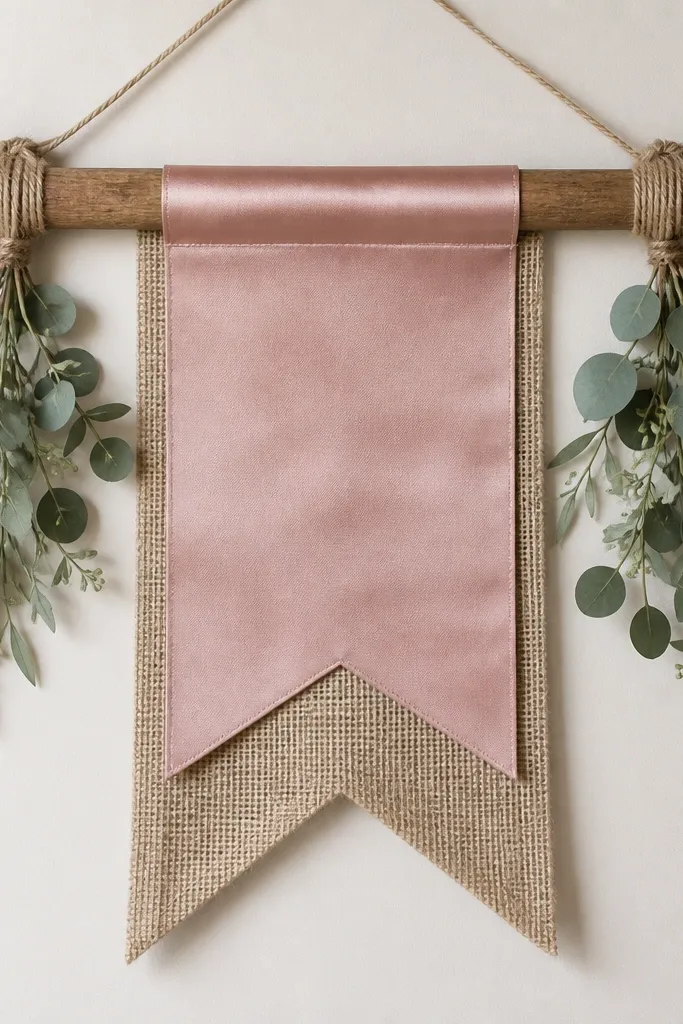
This works because burlap gives texture at arm’s length, and satin ribbon adds the highlight that reads clearly in photos. I layer two widths of fabric so the banner looks full without being heavy. The hand-lettered strip stays readable from the aisle, especially when you use a darker ink on the satin. Dusty rose + eucalyptus green looks good year-round, but you can swap the accent color for your season.
Cut burlap into 10 triangle flags, each about 10 in wide with a 6 in drop. Use a 2.5 in satin ribbon as the center “sign” band, about 36 in long, and wrap it around the rod with fabric glue. Tie eucalyptus sprigs with floral wire and hide the ends behind the rod with hot glue on the wood only.
Write on satin with a paint pen made for fabric, then heat-set with a hair dryer on high for 2 minutes before you attach it.
Avoid thin burlap that frays easily — pre-cut and seal raw edges with a light coat of Mod Podge.
2. Mason Jar Bud Vases With Paint-Drip Galaxy Accents
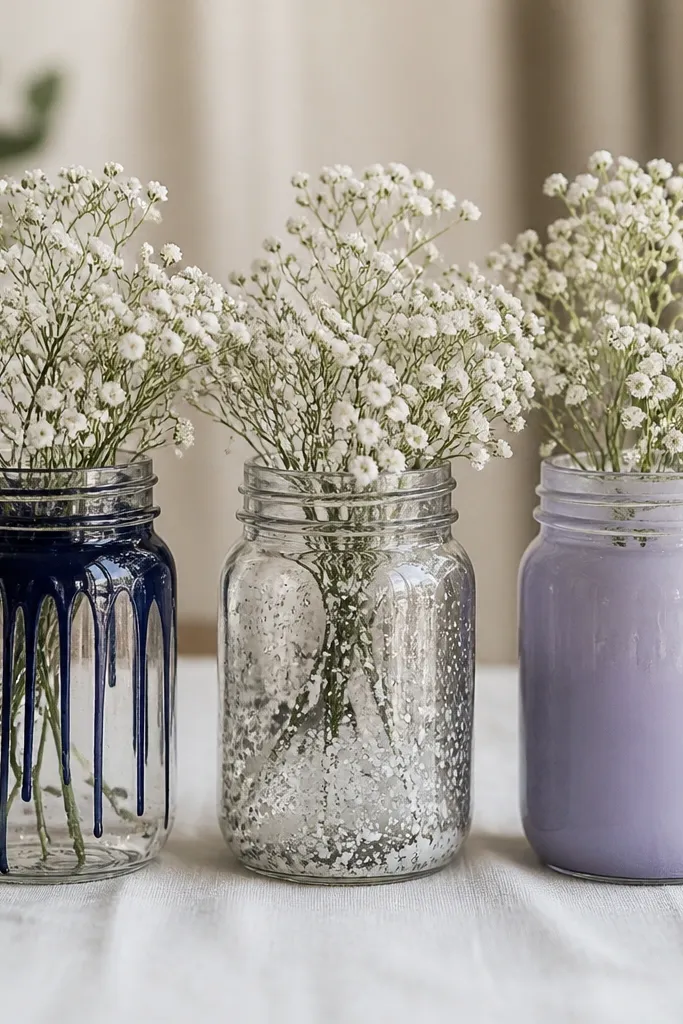
Clean jars with rubbing alcohol. Paint only a 2.5 in band at the bottom using acrylic craft paint, then add drips with a toothpick held above the jar wall. Add a few silver dots with a sponge or fine brush. Cure for 24 hours, then fill with water and cut stems short so water doesn’t splash onto the paint.
Paint-drip glass looks artsy but still wedding-appropriate when you keep the colors controlled. The trick is to do a solid base color at the bottom and only a few drips up the sides, so it reads clean instead of messy. Silver speckles mimic twinkle lights in photos. It’s also practical: jars are reusable and you can swap flowers based on the season.
One warningAvoid painting the rim — water and handling will chip it fast.
Quick tipUse painter’s tape to mask a straight “horizon line” so the base band stays crisp.
3. No-Sew Tulle Chair Sashes With Double Knot and Ribbon Tail
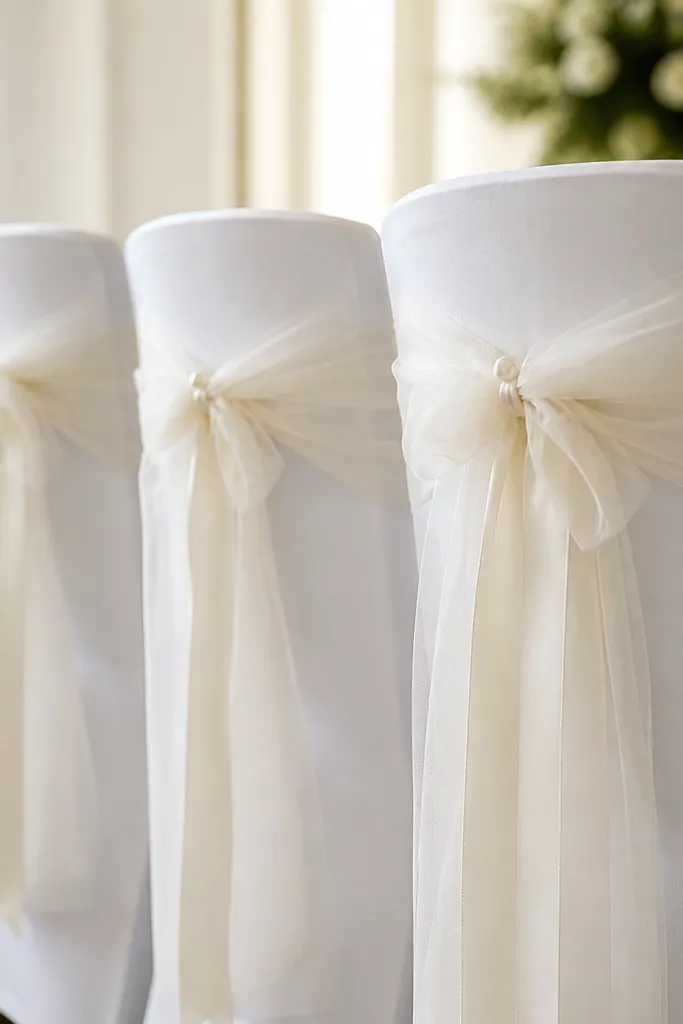
Cut tulle strips 20 in long and 12 in wide. Fold in half, wrap around the chair back, and tie a double knot behind. Attach a 1 in satin ribbon tail with a pearl-headed pin at the front, around 4 in below the top knot. Make sure all knots face the same direction across the room.
Tulle chair sashes photograph soft and romantic without needing sewing. The double knot keeps the tulle from sliding down when guests sit and stand. I like adding a satin ribbon tail because it gives a clean line in photos and hides the tulle knot. A small pearl pin keeps the top from flaring.
One warningAvoid using slippery satin ribbon without a grip — go for grosgrain or add a tiny piece of clear elastic inside the knot.
Quick tipSteam the tulle lightly before tying so it falls in smooth folds instead of stiff creases.
4. Floating Candle Votives in Clear Acrylic Blocks
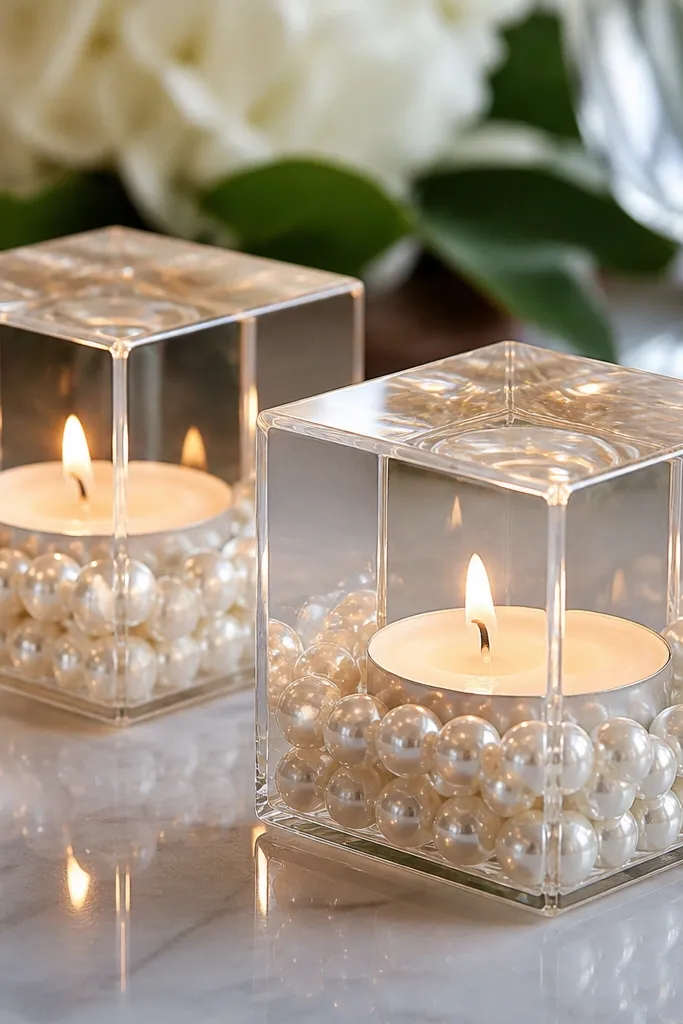
Acrylic blocks make candles look custom because they refract light across the table. When you center the candle and add a small base ring, the whole thing looks intentional instead of like a craft store hack. I’ve used this for both winter and summer weddings — you just swap the filler around the base. Clear + pearl reads elegant in dim lighting.
Choose acrylic blocks with a cavity sized for tea lights (about 1.75 in wide). Place a thin circle of faux pearl garland or a loop of string pearls around the candle base, then set the candle in the center. If your venue is windy, use flameless LED candles inside acrylic for safer setups.
Wipe acrylic with microfiber and a tiny bit of glass cleaner so you don’t get smudges under spotlighting.
Avoid real candles directly touching acrylic — use a flameless candle or a heat-safe insert.
5. Pressed Flower Place Cards in Acrylic Frames
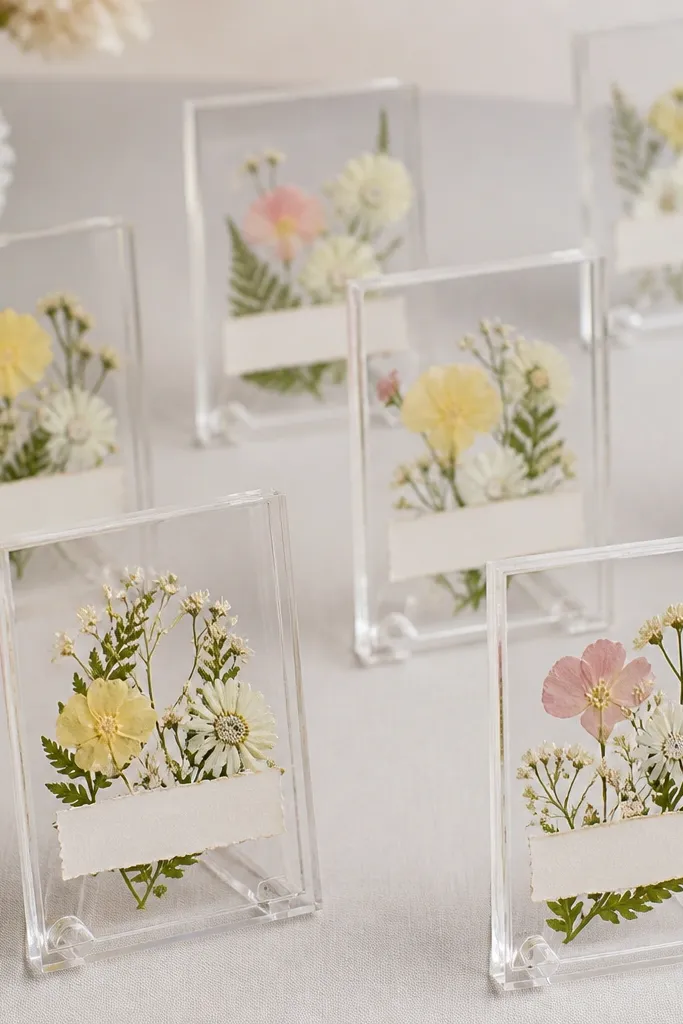
Press flowers between book pages for 1-2 weeks. Cut card stock to fit your acrylic frame (leave a 1/8 in margin). Glue the flower to the card with a tiny dot of clear-drying craft glue, then write names on a separate strip and glue it below the flower. Seal the card with a light spray of clear acrylic sealer if your frame allows it.
Pressed flowers make place cards feel personal, and acrylic keeps the paper from getting wrinkled by condensation. The look is clean because the flowers sit behind a clear window and the name strip stays crisp. I like using thin, flat flowers like pansies and daisies because they don’t bulk up the card. This also works for seasonal themes by swapping flower color and type.
One warningAvoid thick petals like roses unless you trim them — bulk causes uneven gaps.
Quick tipPress flowers in the exact size you want by placing them on parchment before pressing.
6. Floating Photo Table Numbers With Wood Clothespins
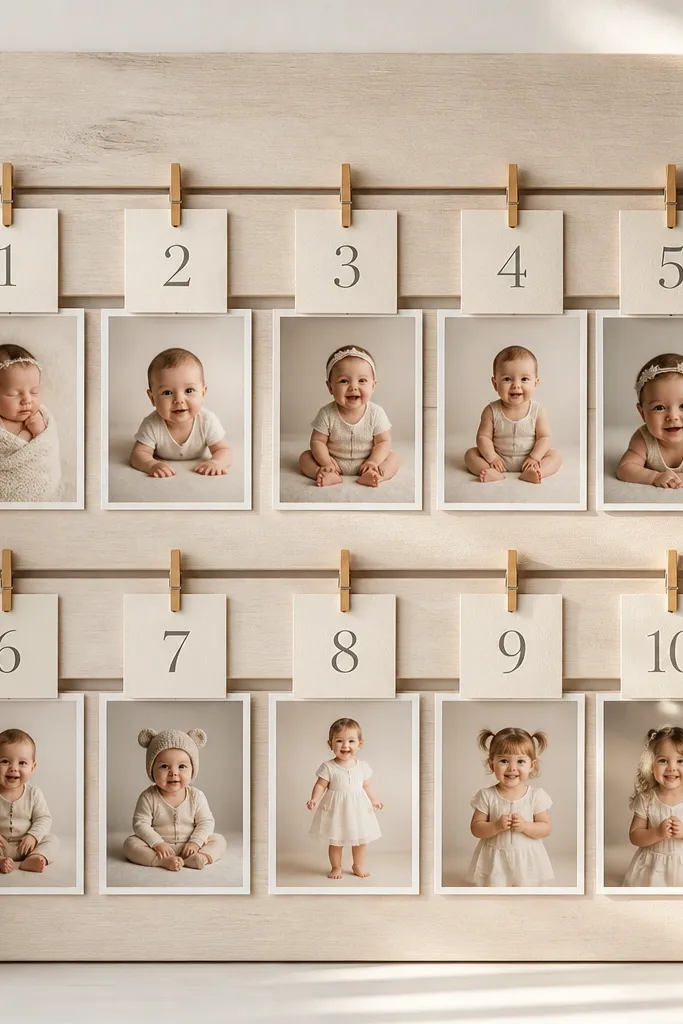
Cut a board to 24 in wide by 10 in tall. Paint it with matte white or leave natural and seal with clear matte varnish. Use 10 clothespins evenly spaced, and clip a 4x6 photo with a 2.5 in cardstock number card above it. Print numbers in a bold serif or simple sans for readability.
Clothespins give you a “floating” layered look without buying fancy stands. The photo + number pairing makes it easier for guests to find tables fast. I like printing photos in black and cream so the display stays cohesive even if your wedding colors vary. This also hides minor photo imperfections because the layered elements break up the visual.
One warningAvoid glossy photo paper on a matte board — glare turns names hard to read.
Quick tipMark clothespin positions with painter’s tape first — spacing matters more than the design.
7. Whisper-Soft Felt Flower Napkin Rings With Pearl Center
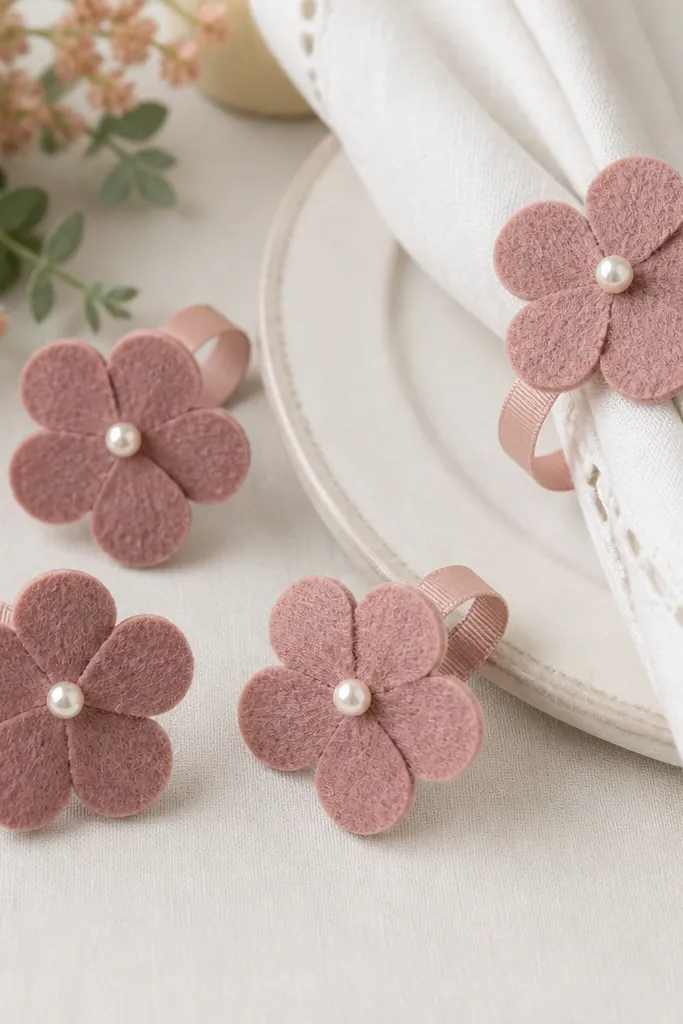
Felt napkin rings look soft and expensive because the petals have shape and depth. The pearl center makes the set feel bridal without needing actual flowers. I like felt because it doesn’t wilt and it survives repeated handling. They also match well with fall and winter weddings since felt reads cozy in warm lighting.
Cut five 1.5 in felt petals per ring, plus one small base circle about 1 in. Layer petals around the base and stitch or glue the center. Glue a 6mm faux pearl in the middle. Form a ring by wrapping a 1 in wide felt strip around a paper towel tube and gluing the ends.
Use fabric glue for the pearl and hot glue only for felt seams — it holds better without soaking.
Avoid rings that are too tight — felt stretches and wrinkles if you force the napkin.
8. Citrus + Rosemary Runner for Long Tables
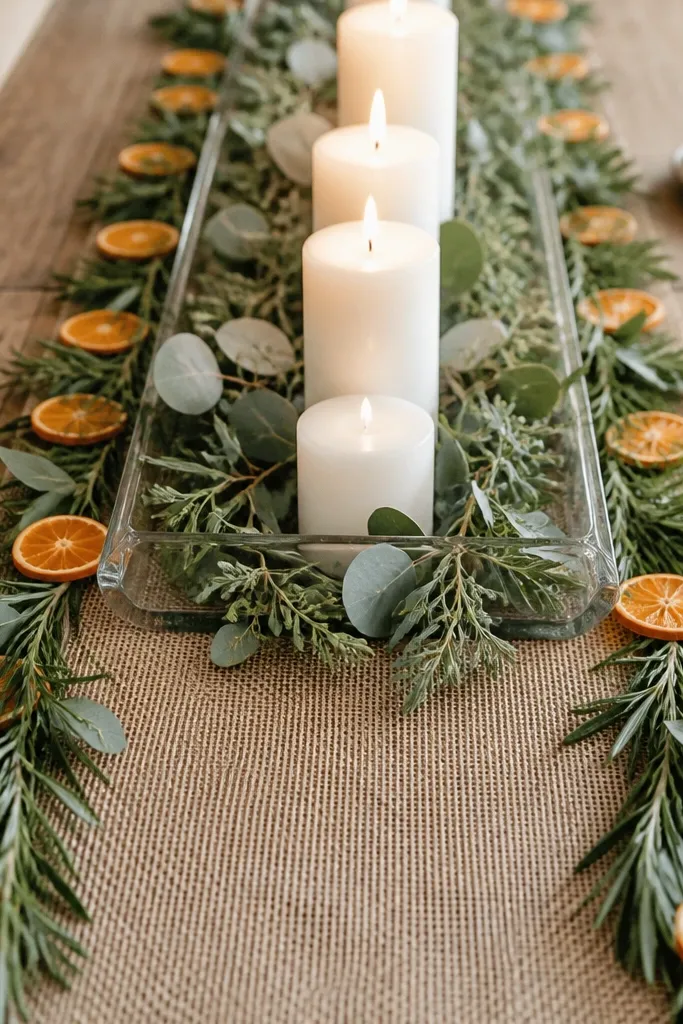
This is a craft that looks like a florist did it, but it’s mostly assembly. Citrus slices add color that reads bright even in dim venues, and rosemary keeps the whole runner from feeling too sweet. The runner also works as a centerpiece base, so you get two looks from one piece of work. It’s especially good for fall and winter because it looks seasonal without getting heavy.
Use a burlap runner 14-16 in wide and 8-10 ft long depending on your table. Lay parchment paper on top to protect the table. Pin rosemary sprigs with floral wire into the burlap and place dried orange slices in a line. Add a clear tray in the center for candles so wax drips don’t hit the runner.
Dry orange slices in the oven at 200°F for 2.5-3 hours, then cool completely before arranging.
Avoid fresh citrus — it sweats and stains quickly.
9. Vinyl Record Coasters With Gold Edge Paint
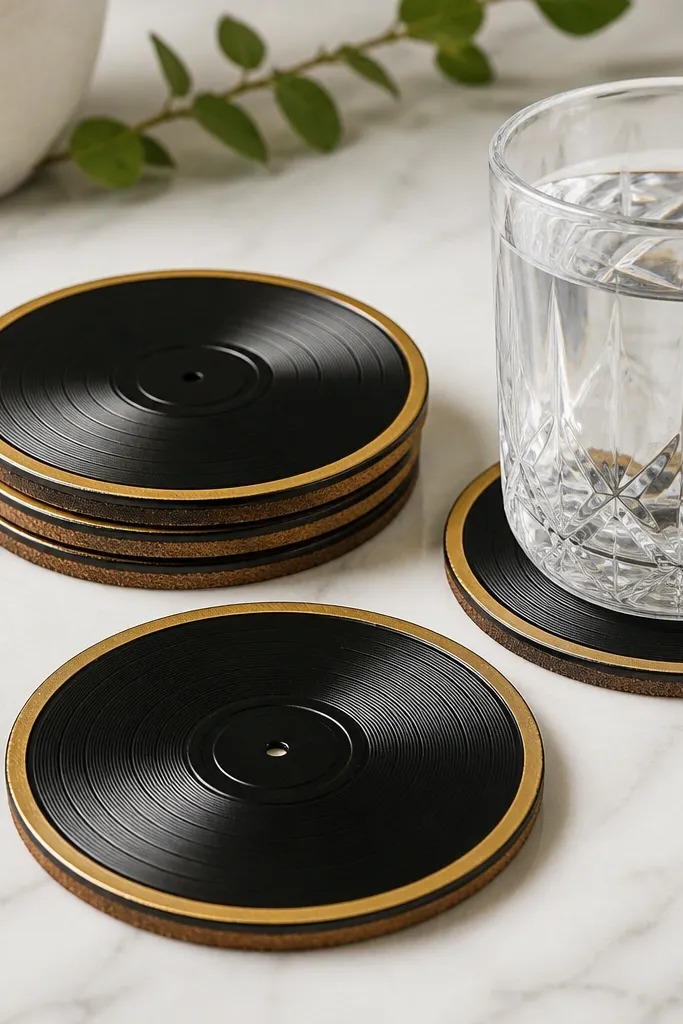
Trace and cut 4.25 in circles from cork sheet for coasters. Glue cork to the bottom of the vinyl with strong adhesive meant for vinyl. Paint only the outer 1/8 in edge with gold acrylic paint, then let dry flat for 24 hours. Add a clear matte seal if you want them to resist scuffs.
This is one of those DIYs that looks like a designer object, not a craft project. The vinyl groove texture catches light around the edges, and gold paint frames it cleanly. I’ve used these as favors and as table place settings — they photograph well and feel sturdy. It’s perfect for modern weddings with a black-and-gold or charcoal palette.
One warningAvoid painting the top — gold flakes under hands and makes a messy look.
Quick tipUse painter’s tape as a mask around the edge for a crisp gold ring.
10. Hand-Painted Glass Vases With Navy Fade and White Dots
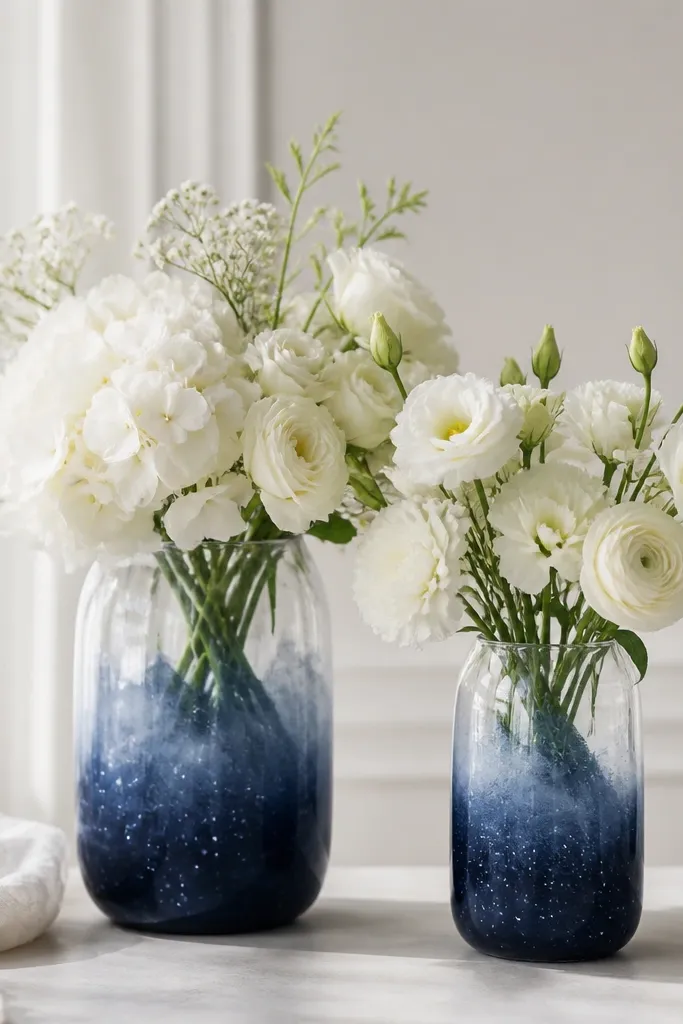
Use glass paint or acrylic mixed with a paint medium so it adheres to glass. Mask the top area with tape so the fade stops cleanly. Sponge navy paint up from the bottom for a soft gradient, then add dots with a small round brush. Cure according to the paint directions, usually 24-48 hours.
The navy fade gives you a gradient that looks expensive, and the white dots add a fun, modern detail. This craft looks best with single-stem flowers or a tight bouquet because the vase becomes the star. I’ve done it for evening weddings where the lighting makes the paint look like it’s glowing. It also fits spring and winter when you pair navy with white and a light accent color.
One warningAvoid thick paint — it looks chalky on glass and flakes.
Quick tipPractice the fade on a scrap bottle so you don’t oversaturate the first vase.
11. Origami Envelope Place Card Holders on a Wire Base
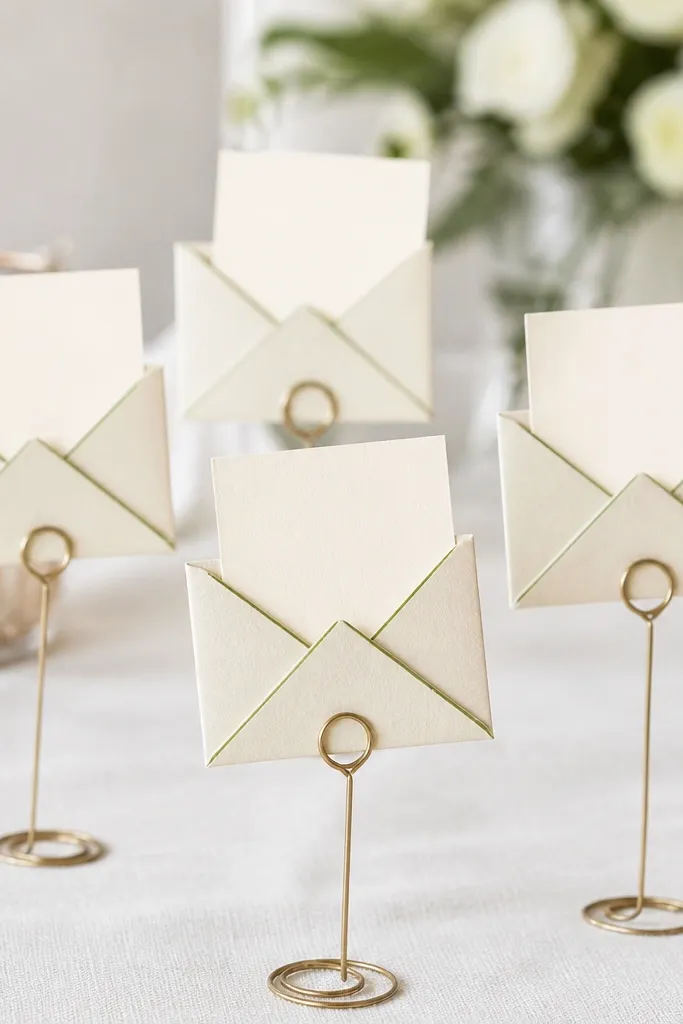
Use 110-130 lb cardstock for sharp folds. Fold a simple envelope with a 3 in base and 4.5 in height, leaving a pocket opening. Create a wire loop base by bending floral wire into a small circle and adding two twists at the bottom so it stands. Tape the envelope to the wire only at the back corners.
Origami envelope holders look tidy and purposeful because the card sits inside a “pocket,” not leaning randomly. The wire base keeps them upright even if table settings get bumped. I like using thick cardstock so the folds stay crisp. Pick a seasonal accent color for the fold line and it looks coordinated with your wedding palette.
One warningAvoid flimsy paper — it collapses when guests handle the place cards.
Quick tipScore folds with a butter knife edge for cleaner creases.
12. Printable Menu Cards on Heavy Cotton Paper With Wax Seal
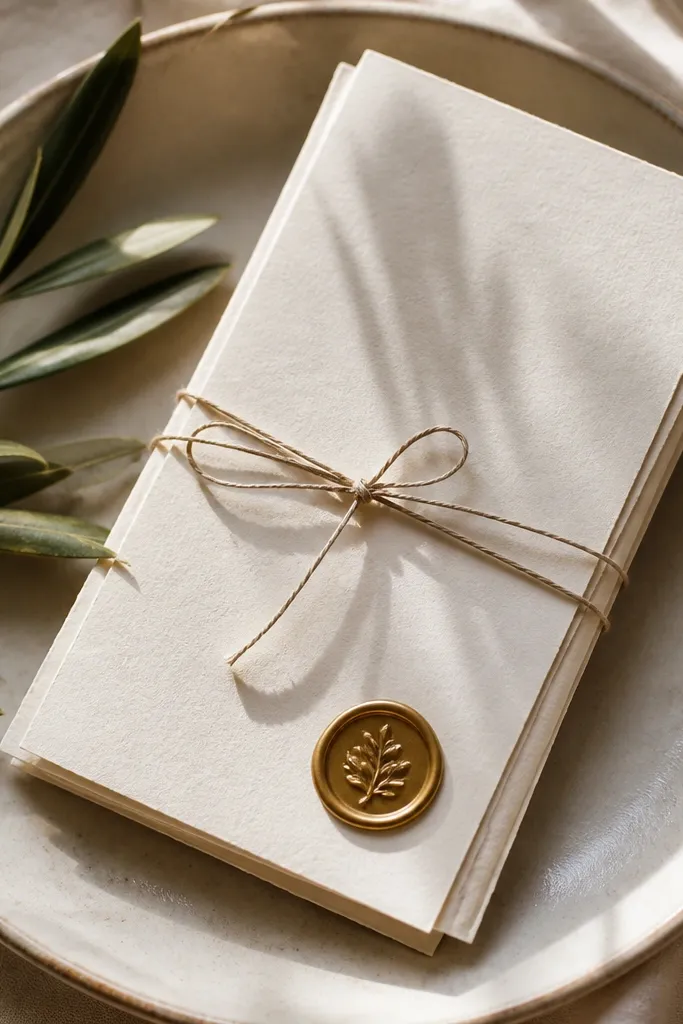
Print menu text on cotton cardstock or cotton rag paper sized for your printer. Cut to 5x7 in or fold to 5x7. Add a wax seal sticker or real wax seal on the top corner, then tie a 6 in piece of twine around the card. Use a glue dot under the twine ends so it doesn’t loosen.
Cotton paper makes even a basic menu look like stationery. The wax seal adds a tactile focal point that reads well under flash photography. I keep the design simple: one line of typography, a small icon, and a seal that ties to the wedding monogram style. It’s a low-effort craft that still looks high-end.
One warningAvoid placing wax on thin paper — it tears when you press the stamp.
Quick tipUse a laser printer if you can — inkjet ink smears when wax touches the paper.
13. Glittered Wooden Heart Tags for Favors and Seating
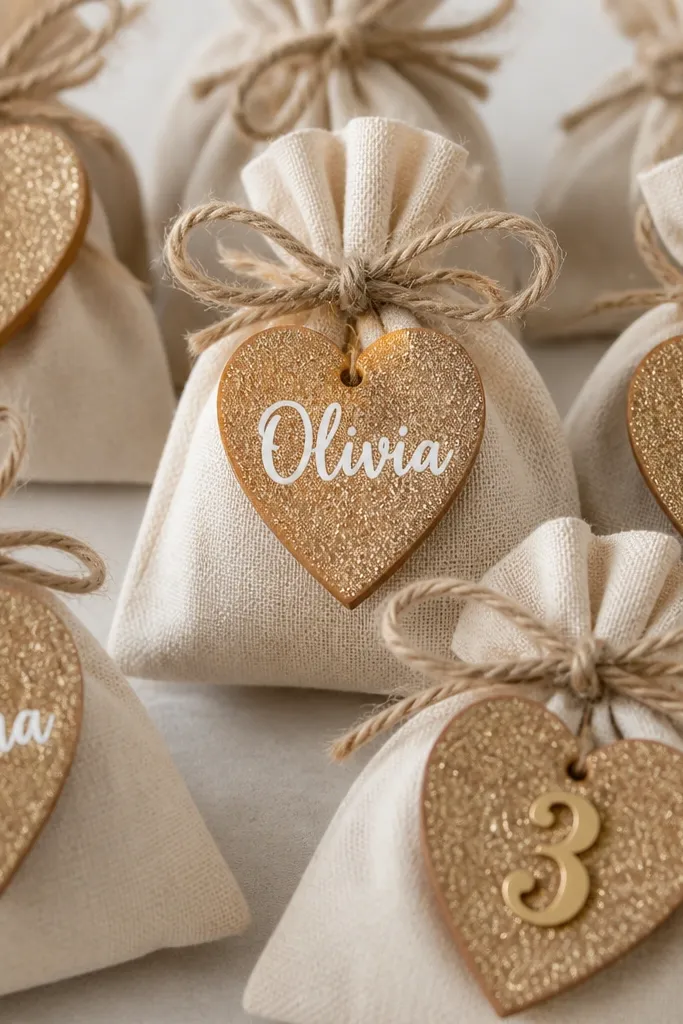
Wooden heart tags look handmade even when you’re just assembling, and the glitter gives sparkle without needing expensive rhinestones. I like using a light glitter top layer because it doesn’t scratch or shed as much as chunky craft glitter. They also work as seating tags or as labels for candy jars. Choose one main glitter color and one text color so it looks intentional.
Buy pre-cut wooden hearts or cut 2.5 in hearts from thin plywood. Sand lightly, then paint a thin base coat (white or blush). Mix fine glitter with a clear craft gel medium and brush it on for smooth coverage. Let dry fully, then paint names with a small detail brush. Punch a hole at the top and attach twine.
Seal with a clear matte spray so glitter doesn’t rub off on hands.
Avoid chunky glitter — it looks messy and can shed onto table linens.
14. Ribbon-Wrapped Unity Candle Holder With Book-Page Decoupage
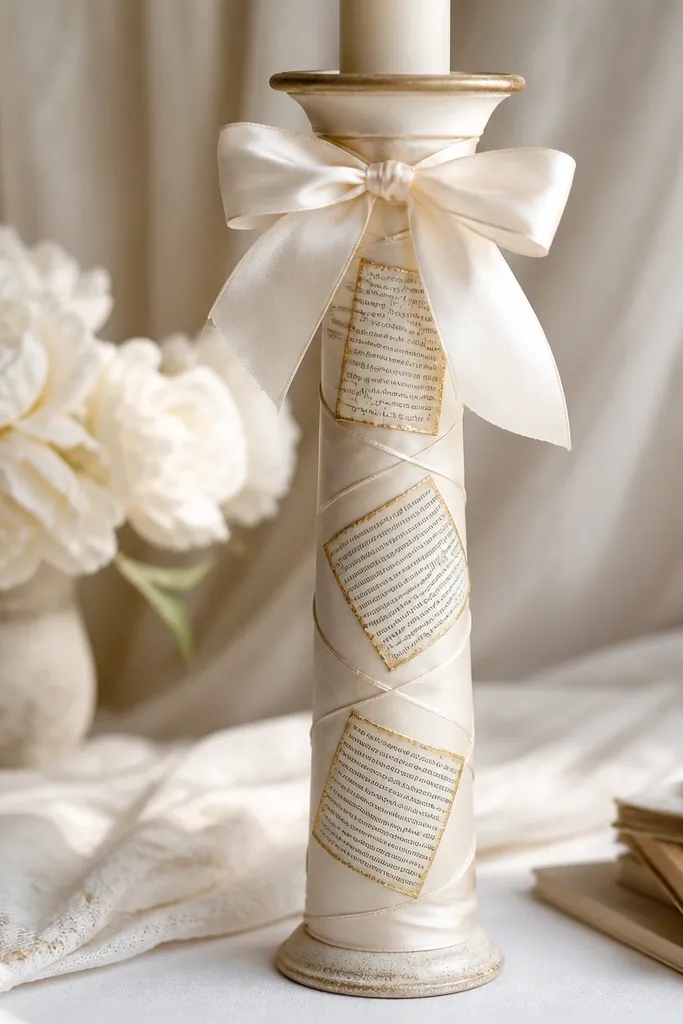
Use a plain glass or ceramic candle holder. Tear book pages into small rectangles and decoupage with Mod Podge, leaving a 1/8 in gap between pieces for texture. After drying, rub gold ink lightly along edges with a sponge. Wrap the holder with 1 in satin ribbon, then tie a bow at the top over the seam.
This craft makes a unity candle setup feel custom without buying a pricey holder. Book-page decoupage adds an antique texture that looks great next to modern satin. I use a gold ink edge to keep the look clean in photos, especially under warm venue lighting. If your wedding theme is vintage or literary, this fits perfectly.
One warningAvoid glossy Mod Podge if you want candlelight to look soft — matte looks more flattering.
Quick tipUse a foam brush for Mod Podge to avoid streaks in the decoupage.
15. Terra Cotta Pot Planter Centerpieces With Painted Rim
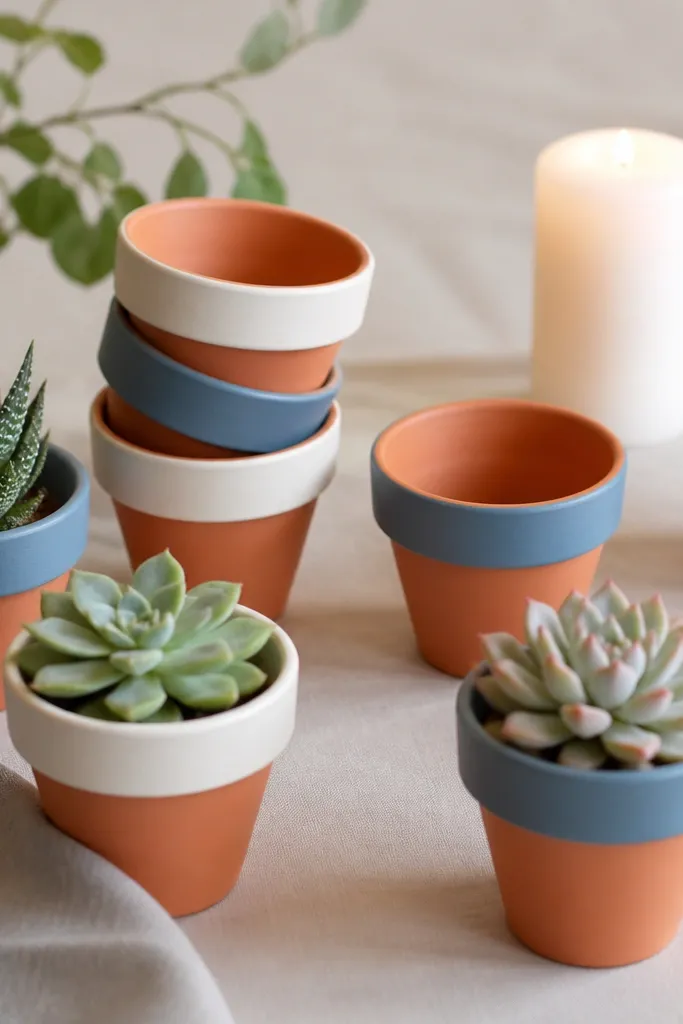
Paint a 1/2 in band around the pot rim with acrylic paint and a small foam brush. Let it dry, then add a second coat if needed. Plant small succulents or place faux greenery. For candles, use a small glass tea light holder in the center so wax stays contained.
Terra cotta pots look casual and grounded, and painting only the rim keeps them from looking messy. Succulents make the centerpieces last through the night, and the pots are easy to reuse as favors later. I like pairing white rims with a muted blue accent for a seasonal look that doesn’t scream one specific month. It also works indoors because terra cotta holds its shape and texture.
One warningAvoid painting the inside of the pot if you’re using real plants — it can affect soil.
Quick tipMask the rim with painter’s tape to get a clean circle.
16. Photo Booth Backdrop Using Honeycomb Paper Panels
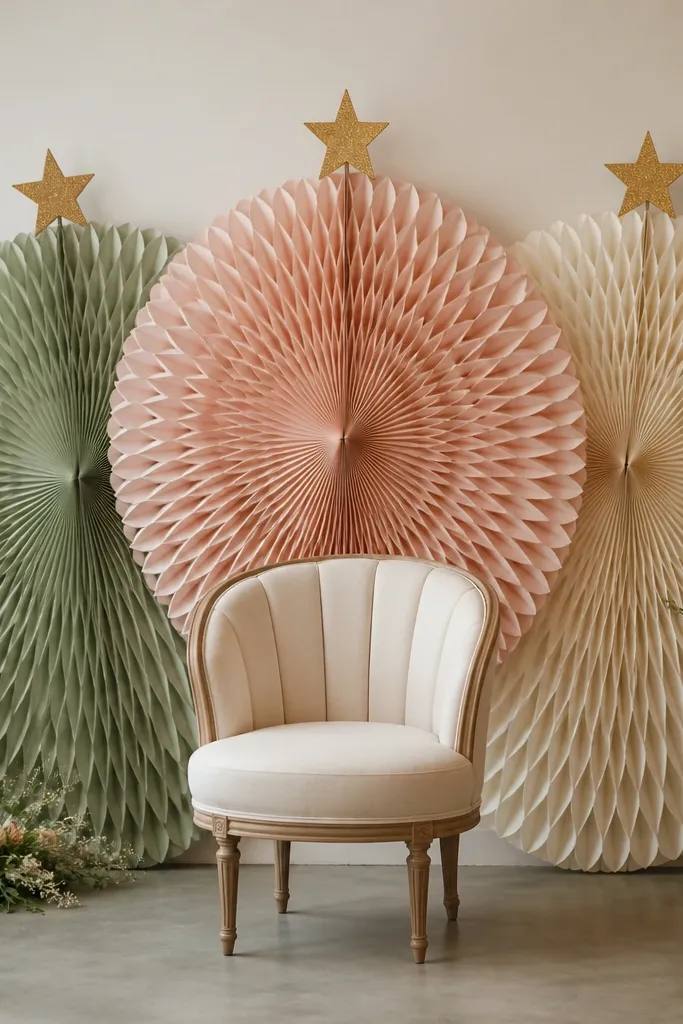
Buy pre-made honeycomb paper panels or fold your own using 8-10 in grids. Hang three panels from a curtain rod with clear fishing line. Add a few star cutouts made from metallic cardstock and tape them lightly so they don’t tear. Place a simple sign prop in front and keep the floor clear.
Honeycomb panels create depth that looks great on camera because the shadows show up even with flat lighting. You don’t need a lot of decor because the structure itself fills the frame. Keep colors in a tight set and repeat them so it doesn’t look like a craft store wall. I’ve used this for both indoor and covered outdoor booths.
One warningAvoid mixing too many colors — honeycomb texture already adds visual noise.
Quick tipUse a single height target — panels should align at the top so the backdrop looks straight in photos.
17. Candlelit Table Numbers on Repurposed Picture Frames
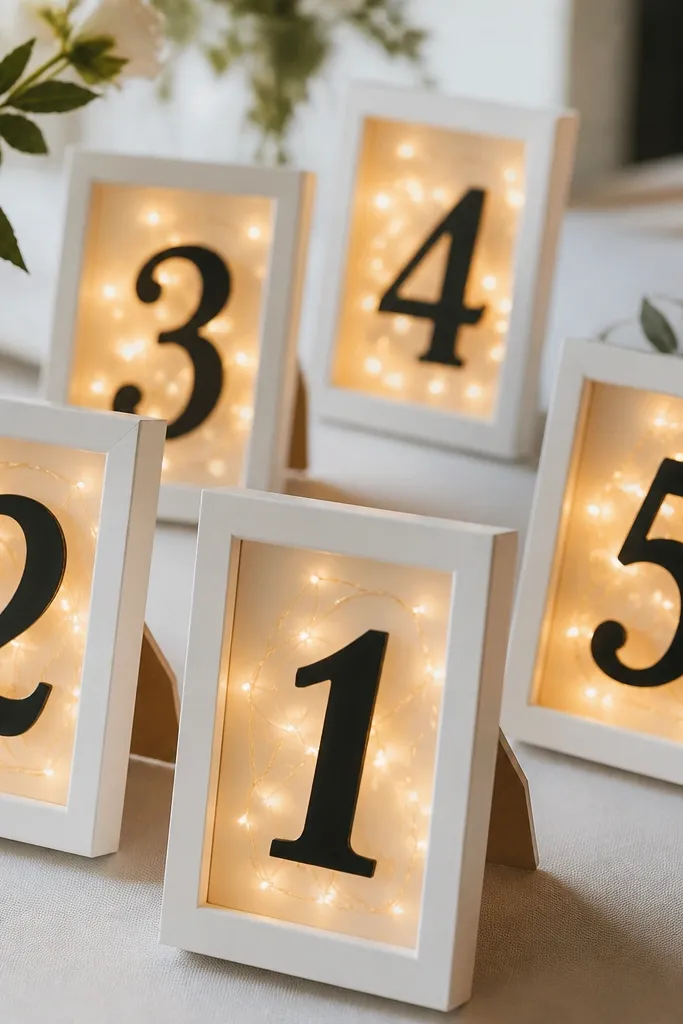
Picture frames make table numbers feel like decor, not signage. Adding fairy lights inside the frame makes the numbers readable in low light and creates a warm, cozy look. I prefer black vinyl numbers because they stay sharp even when the lights flicker. This is a craft I’ve done for evening receptions where daylight fades fast.
Use small frames about 8x10 in. Remove the glass and back if you want easier wiring. Place fairy lights inside and tape the battery pack to the back. Cut numbers from black vinyl or print on cardstock and glue. Reattach the back with a few screws or hot glue on the frame edges.
Test battery lights before sealing the back so you don’t have to open it again at midnight.
Avoid placing lights too close to paper — it can warm up and warp it.
18. Handmade Paper Fans for Ceremony Aisle Photos
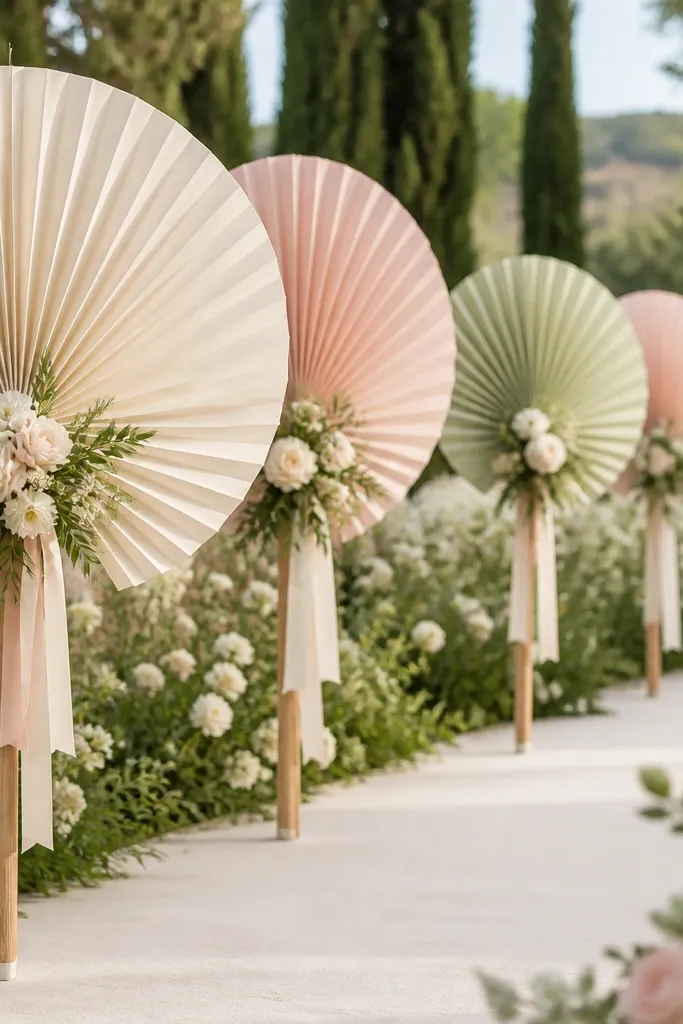
Paper fans look airy in photos and create motion when you wave them during entrances. I’ve used them at both spring and winter weddings by swapping paper colors and adding a bit of metallic. The key is using thicker paper so the folds don’t collapse. This craft also doubles as a guest prop for a short moment.
Use 12x18 in cardstock for each fan. Fold accordion-style with 1/2 in pleats, then glue the ends together. Attach to a wooden dowel with a ribbon wrap at the base. Tie a small ribbon and faux greenery cluster near the top where it catches light.
Use a hot glue gun carefully at the fold base — it holds pleats better than paper glue.
Avoid thin printer paper — it tears and sags on the dowel.
19. Fabric Flower Bouquet Pin for Bridal Accessories
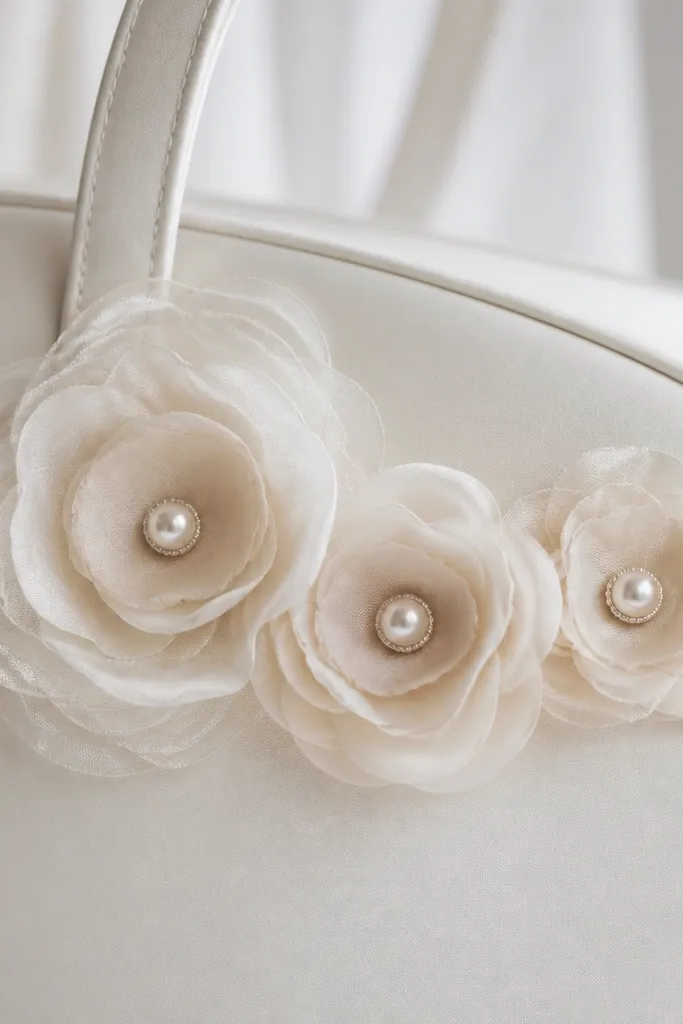
This is my favorite “small craft, big impact” accessory. Fabric flowers add softness and texture without the cost of fresh blooms. I like organza and chiffon because they look light in photos and they catch backlight. Make it in your wedding colors and then pin it to a sash, bouquet handle, or hair clip.
Cut 20 circles from chiffon and organza in three sizes (2 in, 1.5 in, 1 in). Stack and gather each circle at the center with thread, then glue a pearl button on top. Add a backing circle of felt and sew a pin back onto it. Attach to a satin ribbon strip with a few stitches so it doesn’t spin.
Use a needle and strong thread for the center gather so it stays tight after hours of wear.
Avoid heavy glue on fabric — it stiffens petals and looks shiny.
20. Wedding Favor Candy Jars With Chalkboard Labels and Twine
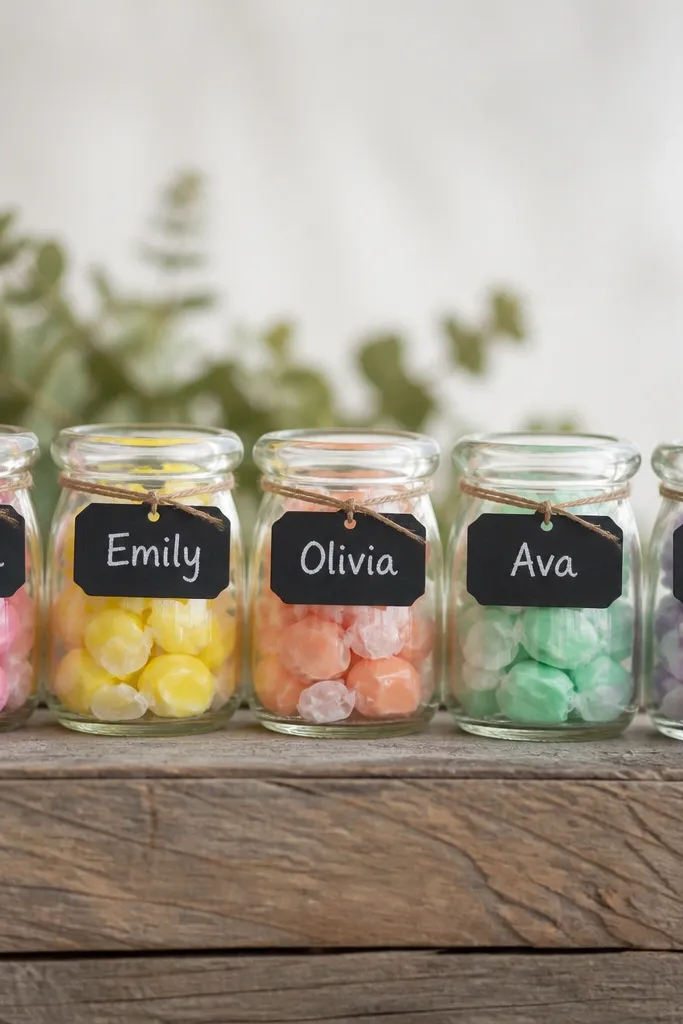
Fill 8 oz jars with wrapped candies, leaving 1 in headspace. Cut chalkboard label paper into strips and wrap around the jar. Use a hole punch and twine to tie the label so it sits straight. Write with white chalk marker and seal with a light chalkboard top coat if you want it to resist smudging.
Candy jars are simple, but the look changes completely when you add chalkboard labels. Chalkboard stays readable in different lighting and gives you flexibility to write names without printing. I like using small jars because they’re easy to place on tables and guests notice them without digging. This is one of the best crafts for a weekend build because assembly is fast.
One warningAvoid glossy label material — it reflects candlelight and makes the text hard to read.
Quick tipUse a ruler to draw label lines so all names sit on the same baseline.
21. Beaded Candle Mantel Garlands With Needle-Threaded Beads
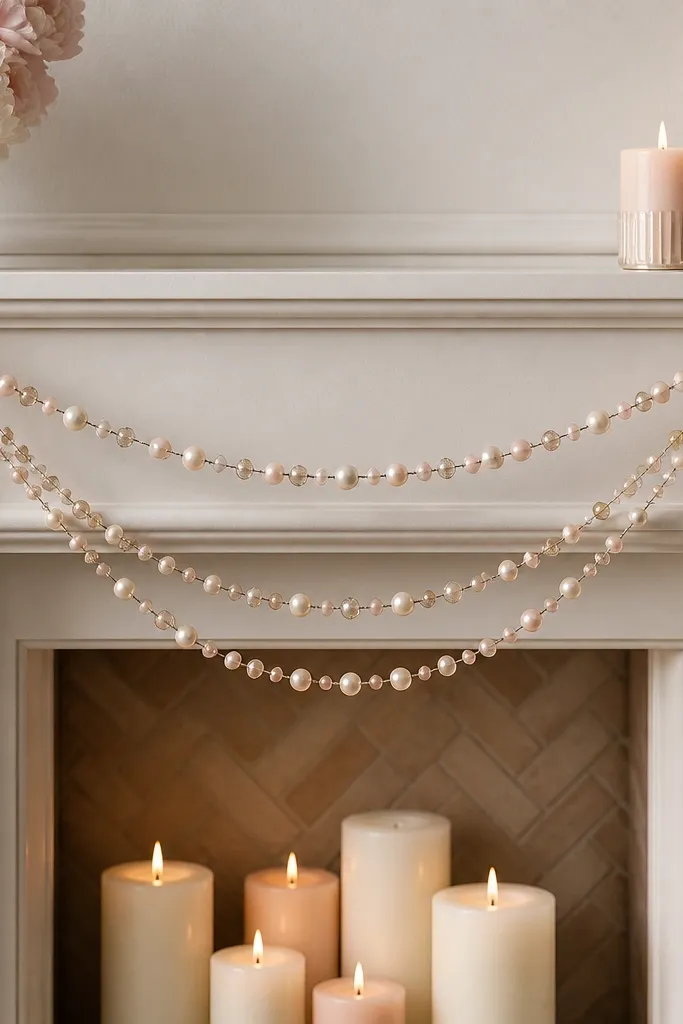
Thread 6mm pearls and 4mm blush beads onto clear nylon thread. Keep spacing even by using a small bead spacer method: tie knots every 12-14 beads. Form a gentle wave by attaching one end to a hook and letting the garland curve naturally. Finish ends with a tiny tassel made from ribbon and a few seed beads.
Beaded garlands add sparkle without looking like costume jewelry when you keep bead sizes consistent. Needle-threaded beads hang smoothly and don’t tangle as easily as chunky beaded strands. I like using a pearl base with one blush accent strand because it looks bridal under warm lighting. It also works for winter mantels and summer ceremony stages.
One warningAvoid mixing too many bead diameters — it creates a lumpy look in photos.
Quick tipAdd a small weight at the bottom of each end tassel so the garland hangs evenly.
22. Painted Wooden Hangers for Wedding Welcome Signs
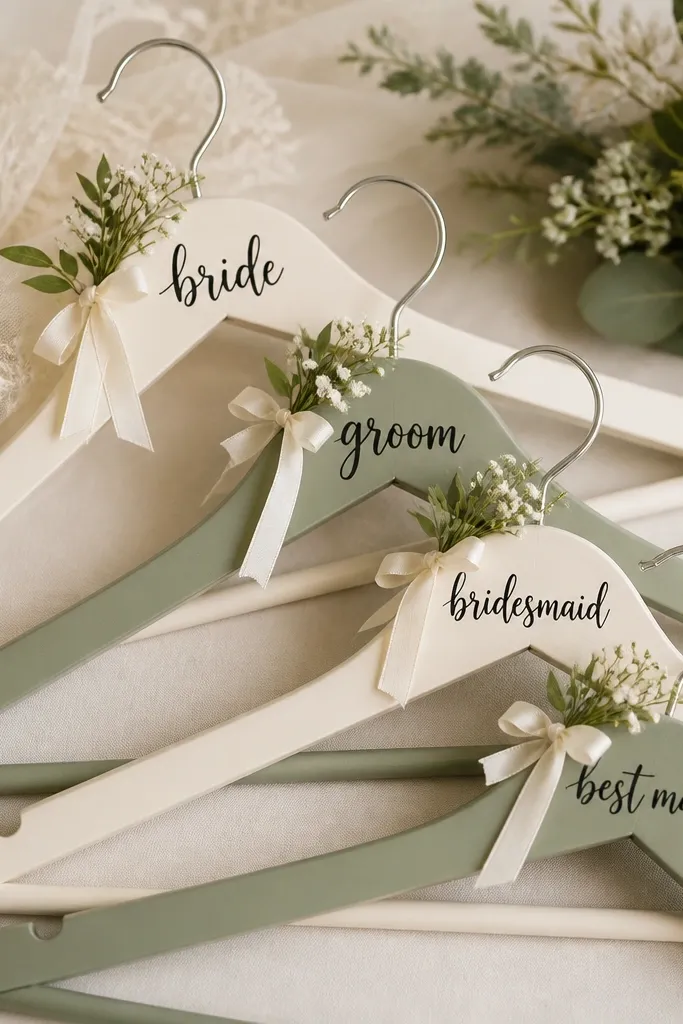
Sand hangers lightly, then paint with matte acrylic. Let dry and do a second coat for coverage. Write your phrase or names using a stencil and acrylic paint marker. Attach a thin satin ribbon bow at the hook and add a small faux greenery piece held with floral wire.
Wooden hangers make a welcome sign that looks like decor even when it’s not “signage.” You get a clean, modern shape with a built-in hook for hanging at the entrance. I like painting the hanger solid first, then writing with a paint marker to keep strokes even. This craft also works for seasonal themes because you can swap the accent color with your palette.
One warningAvoid glossy paint — it reflects the camera flash and washes the text out.
Quick tipUse a stencil for the first letter set — freehand looks uneven when the hanger is curved.
23. Fabric Scrap Confetti Toss Bags With Stamped Labels
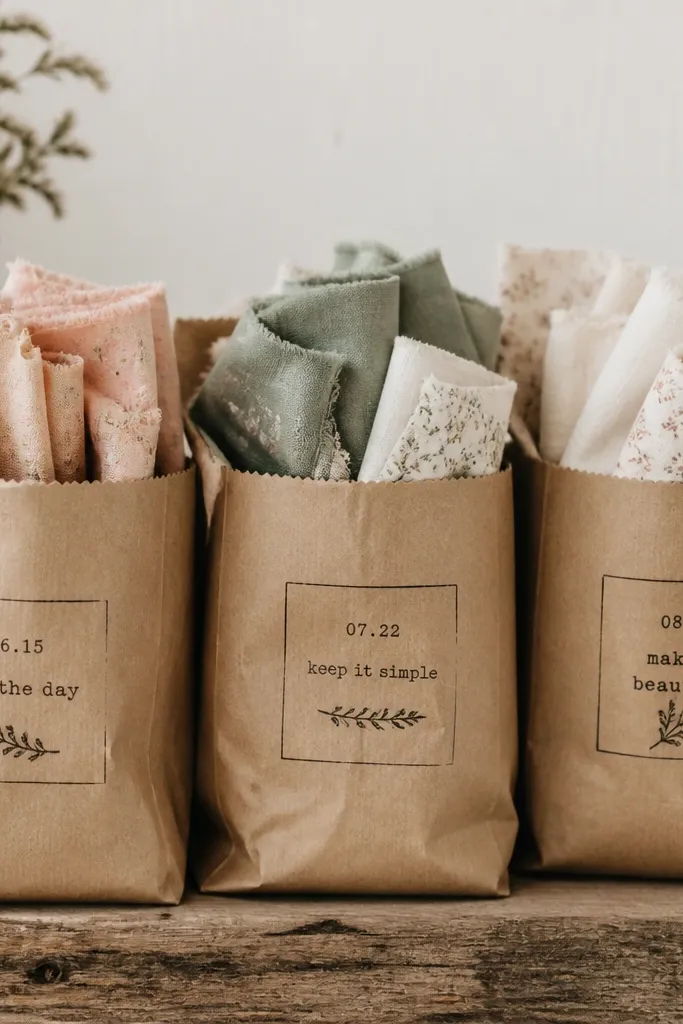
Cut fabric scraps into 1 in strips and fold each strip in half, then trim to 2 in lengths. Fill each kraft bag with about 2-3 tablespoons of fabric pieces. Use a simple rubber stamp on label stickers and adhere to the bag front. Seal with a mini clothespin or a strip of washi tape.
Fabric confetti looks softer than paper and it doesn’t leave sharp bits on shoes. I use folded fabric strips for a gentle “snow” effect that reads sweet in photos. The stamped labels make it feel like a coordinated stationery set, not loose craft supplies. This works for outdoor weddings because the pieces flutter instead of blowing into sharp corners.
One warningAvoid synthetic slippery fabric — it clumps and doesn’t flutter.
Quick tipTest toss density: too much fabric looks like a pile, too little looks sparse.
24. Crepe Paper Peony Bouquets for Aisle Vases
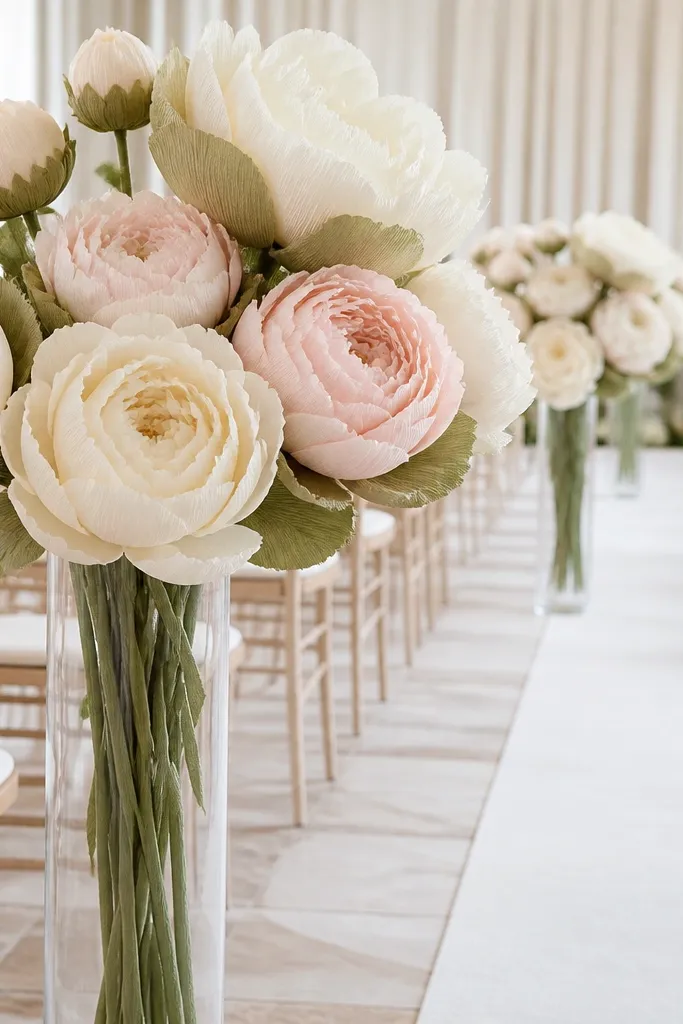
Cut crepe paper strips and shape into petal rounds with a slight twist at the base. Build a center bud first, then add larger petals around it. Use floral wire stems and tape with green floral tape. Arrange in tall vases with a foam insert so the bouquet stays upright.
Crepe paper peonies look real from a distance and they don’t wilt when the ceremony runs long. The ruffled petal layers create volume that reads well in aisle photos. I prefer ivory + blush because it matches most venues and doesn’t clash with bridesmaid dresses. You can make these in batches and place them in simple vases for a clean aisle look.
One warningAvoid thin crepe — choose crepe with enough body to hold ruffles.
Quick tipMake one peony first and measure it against your vase before you commit to the full batch.
25. Geometric Table Confetti Cutouts From Metallic Cardstock
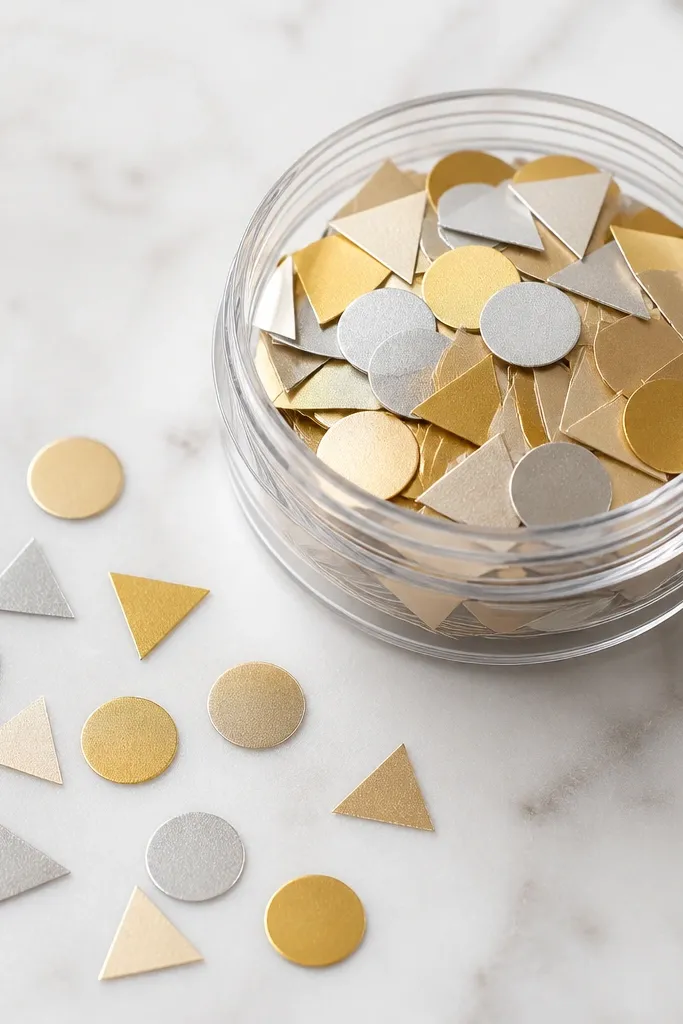
Geometric confetti looks modern and clean, and metallic cardstock gives sparkle without glitter mess. I like triangles and small circles because they scatter nicely across tablecloths and read well in flash photos. Keep the set to two metallic shades plus one matte neutral so it looks classy. This craft is also fast — cut, pack, and you’re done.
Use a 65-80 lb metallic cardstock. Punch triangles with a craft punch or cut with a rotary cutter and ruler. Make two sizes: about 3/8 in and 1/2 in. Store in small jars or envelopes for each table, then sprinkle right before guests arrive.
Mix confetti with a few larger pieces (about 3/4 in) so photos capture variation.
Avoid full glitter cardstock — it sheds and makes tables look dirty.