1. Framed Fabric Map of "Home" Coordinates
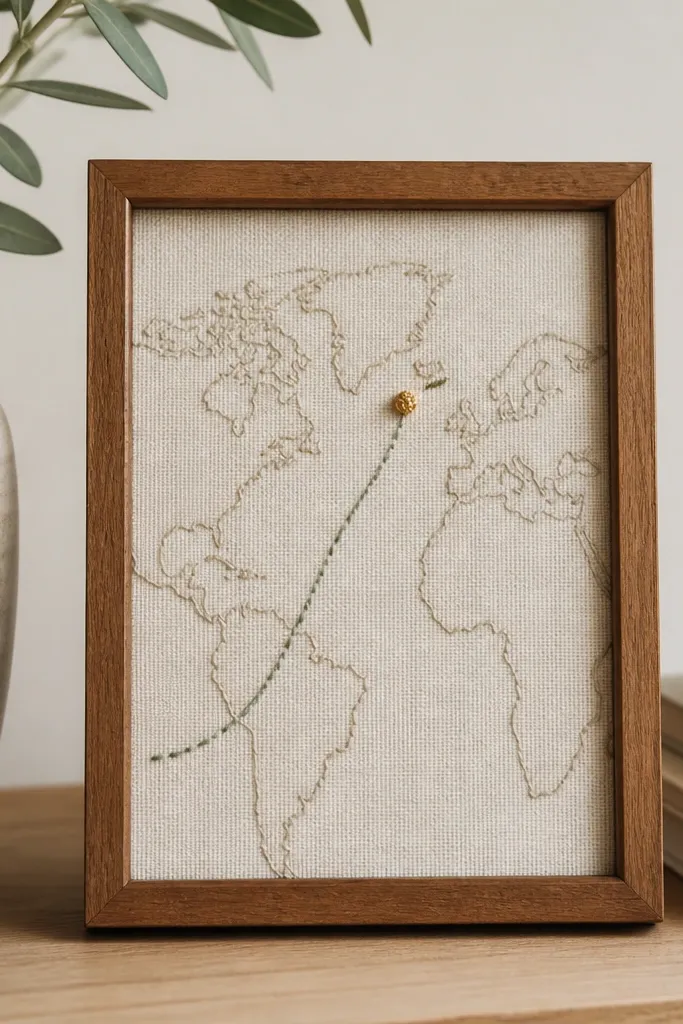
This gift looks thoughtful because it has a personal story without needing a long essay card. You’re turning a simple coordinate point into a tactile piece using fabric texture and a single stitched route. The cream fabric keeps it soft, while a muted sage stitch reads calm and modern. I’ve made this for couples who don’t want more clutter, and it still gets framed and hung.
Print the coordinates on plain paper, then use it as a template under your fabric. Stitch a straight “route” line from a starting point to the coordinate spot using a size 6 embroidery needle and 1 strand of embroidery floss. Use a thin gold fabric marker or a tiny gold brad to mark the exact pin point.
Quick tipUse a piece of 1/4-inch foam board behind the fabric so the fabric sits slightly raised inside the frame.
One warningDon’t use multiple colors of thread or the route becomes visually noisy fast.
2. No-Sew Canvas Word Art for Their First Name Initials
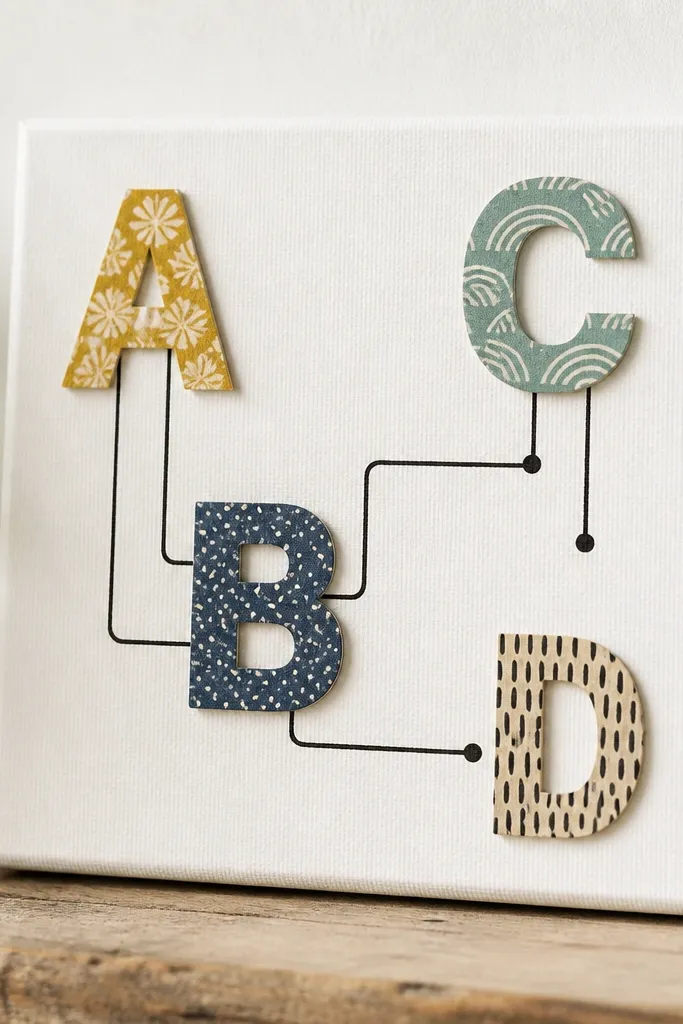
This is the kind of gift that looks like it came from a design shop because the composition is clean. You’re using big shapes and negative space, not tiny details. The letters pop because the patterned cardstock contrasts with the solid paint field. It’s also a great option if you’re short on time but want something that reads modern.
Paint a 10x10 canvas with two coats of matte acrylic in warm white. Cut two large initials from patterned cardstock (matte, not shiny) and glue them down with craft glue. Add thin black line accents with a fine-tip paint marker to tie the layout together.
Quick tipKeep your initials at about 60% of the canvas width so it looks bold from across the room.
One warningAvoid glossy cardstock — reflections make the letters look cheap under indoor light.
3. Photo Strip Tea Towel With Sticky-Back Vinyl Labels
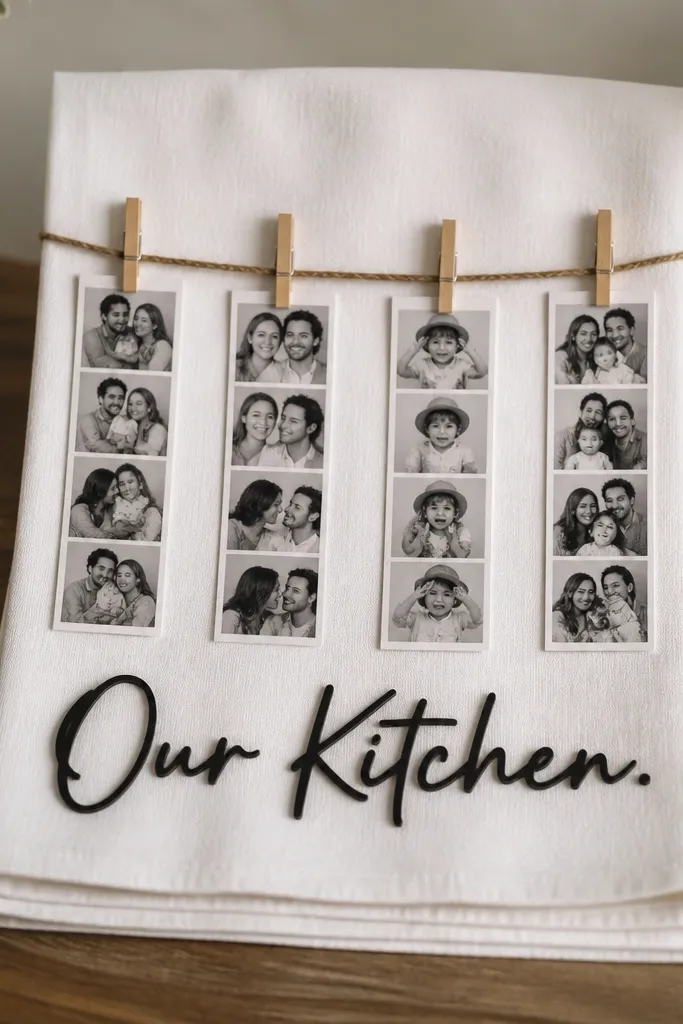
A tea towel is practical, but the photo strip makes it personal. Vinyl lettering stays crisp, and the mini photos give that “we actually did this” feeling. I like using a small grid layout so it looks intentional and not crowded. Couples use these constantly, so it doesn’t get stored away.
Print 4 mini photos in black-and-white at about 2x3 inches each. Trim and attach them under a clear plastic photo holder sleeve or stitch them to a small strip of fabric using a straight stitch. Add vinyl text with a Cricut or pre-cut vinyl — keep it to one line like “Our Kitchen” in a simple font.
Wash the towel once before you start so the fabric shrinks and the layout stays neat after the first wash.
Don’t use regular iron-on transfer — it cracks on cotton after a few washes.
4. Wedding Date Scratch-Off Keepsake Card Set
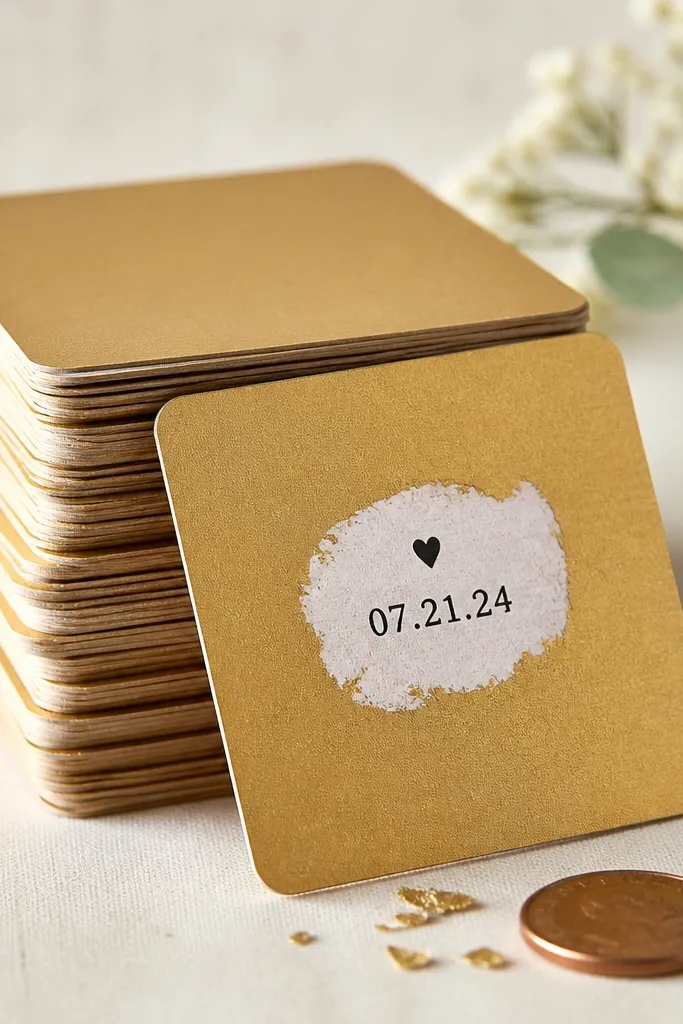
Scratch-off cards feel fun and special because you’re adding a reveal moment. The gold layer looks premium, and the black date text keeps it readable. I’ve given these to couples who like interactive gifts — it becomes something they open together. They’re also cheap enough to make a set of 6 without stress.
Use small blank cards (A2 or 3x5). Print the date and a short prompt like “First year plan” on the card front. Paint a scratch layer with a metallic craft paint mixed with a bit of dish soap, let it dry hard, then use the included stylus or a wooden skewer to scratch.
Quick tipMake the prompt text small — the gold layer should be the main event.
One warningDon’t make the scratch layer too thin or it won’t reveal cleanly.
5. Pressed Flower Coasters With Clean Resin Edges
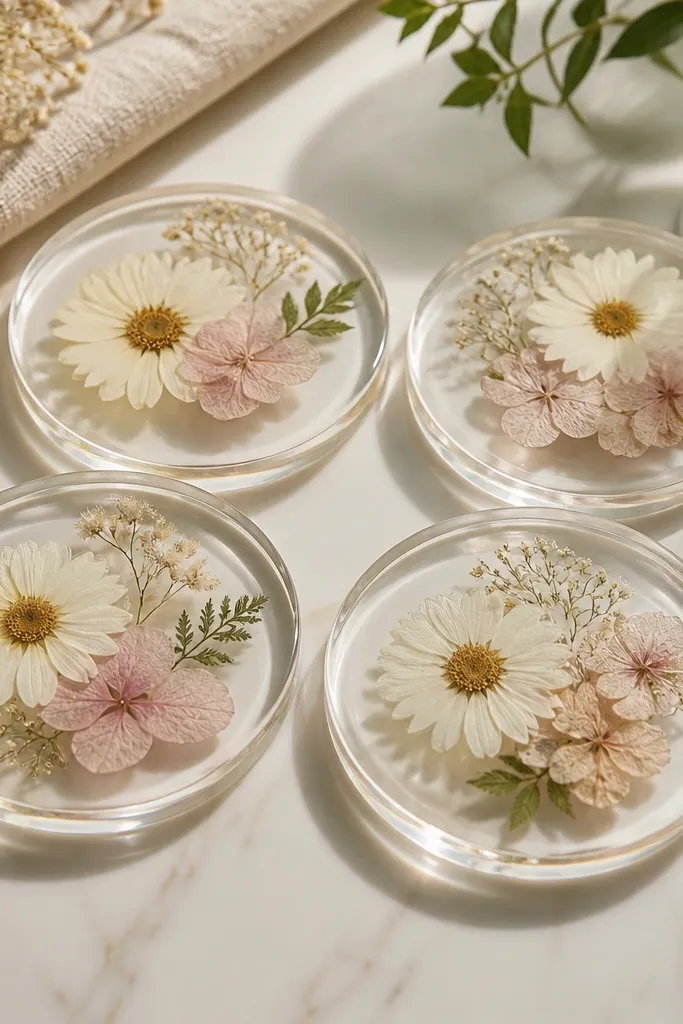
Pressed flowers turn a basic coaster into a real keepsake. Resin gives you that glass-like finish that looks expensive even when you’re using store-bought coaster blanks. The trick is centering and spacing so the flowers look curated, not random. This is a perfect gift for couples who host.
Use 4 round coaster blanks (about 4 inches). Press flowers between book pages for 1-2 weeks, then trim them so they don’t overlap. Pour a thin first resin layer, place flowers, then pour the final layer. Let cure fully before use.
Choose flowers with flat petals like daisies or small baby’s breath so they don’t float under resin.
Don’t rush the cure — moving them early leaves cloudy spots.
6. Recipe Card Box With Their Favorite Meal Prompts
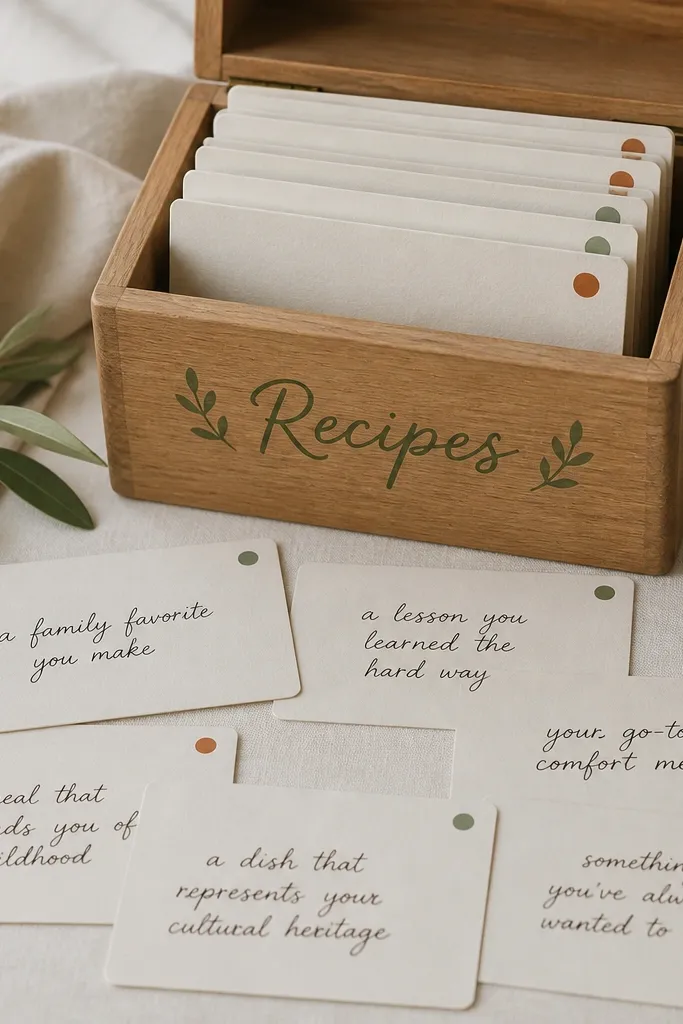
This gift is personal because it turns memories into future dinners. The recipe box looks neat, and the prompts make it easy for them to start writing right away. I like adding tiny color dots to each card so the set looks coordinated. It’s also a great option if they’re moving or already have everything else.
Buy a plain wooden recipe box and sand it lightly. Paint the lid in matte white or natural wood stain, then add a vinyl label or hand-lettered title. Create 12 cards (3x5) with prompts like “Our first breakfast together” and “Best rainy-day meal.”
Use one pen for all writing — a single fine-tip black pen makes the set look uniform.
Don’t use too many fonts on the cards; stick to one style.
7. Personalized Salt and Pepper Bottle Labels in Script + Date
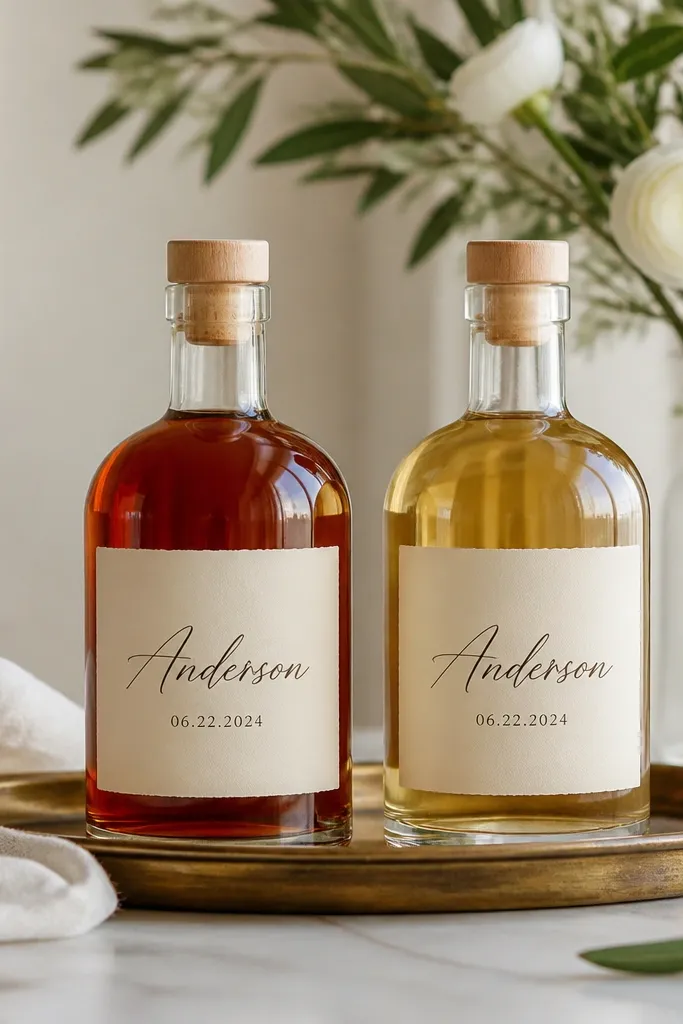
This is one of my fastest wedding gifts because it’s basically design + print. The couple gets something they’ll see every day, and the labels make it feel like their kitchen belongs to them. Cream paper with black ink looks clean and timeless. It also works for couples who hate clutter but love practical upgrades.
Clean and dry the bottles thoroughly. Print labels on matte sticker paper sized to wrap smoothly, then add a clear laminate sheet cut to fit for water resistance. Use black ink for the script and set the date in a smaller sans-serif font.
Quick tipLeave a 1/8-inch gap at the seam so the label doesn’t wrinkle where it overlaps.
One warningDon’t put labels on damp glass — they peel within a week.
8. "Us" Candle Set With Custom Labels and Matchbook Spine
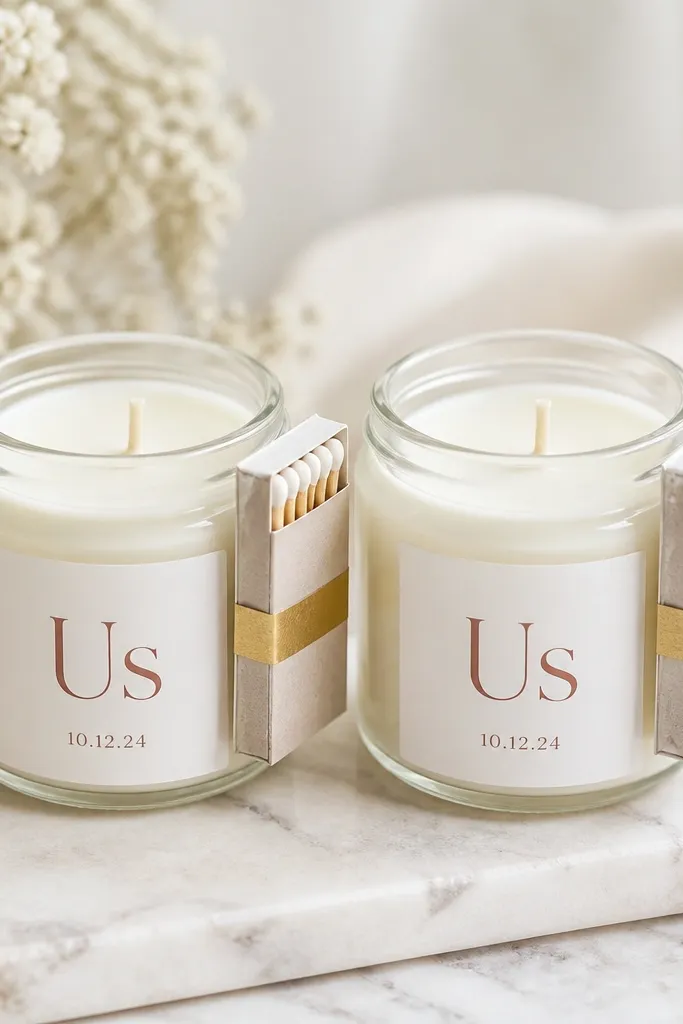
Candles are always welcome, but custom labels make them feel like a gift, not a generic purchase. The pair looks better than one because the labels line up visually. I like jars with matte glass so the label feels attached, not floating. This is a sweet option for couples who want cozy decor.
Buy two 8-ounce candles with unscented or light scents. Make labels in two sizes: a large one for the jar front and a small strip with the date. Add a matchbook using a strip of washi tape or thin gold tape down the side.
Quick tipChoose one scent note family like vanilla + sandalwood so the set feels cohesive.
One warningAvoid busy label layouts — keep it to two lines of text.
9. Mini Wall Hanging With Embroidery Hoop and Fabric Banner
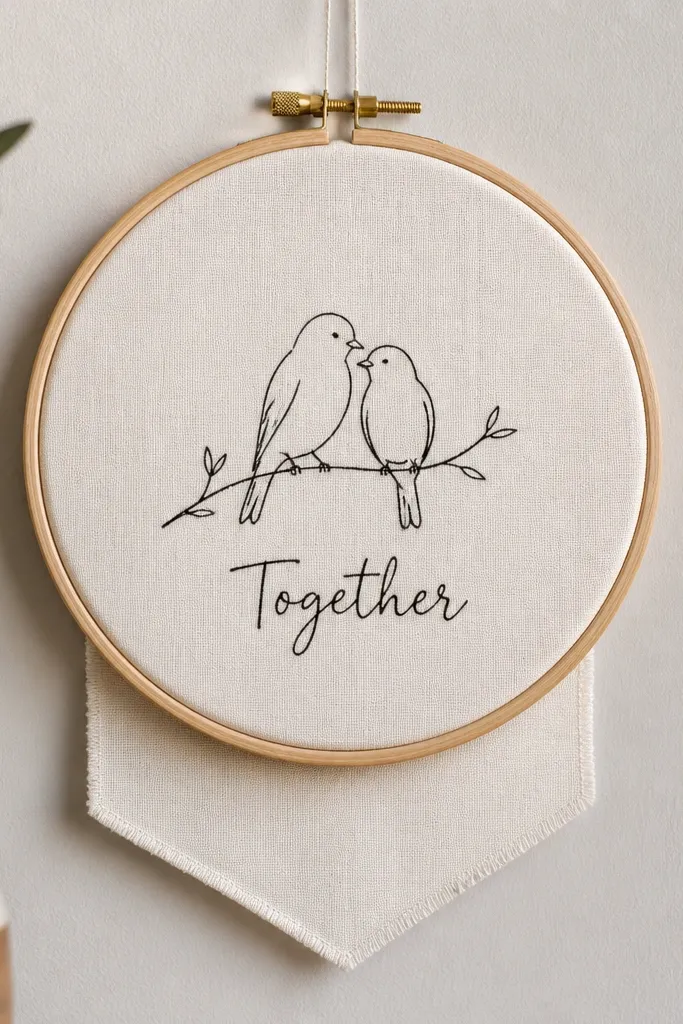
Hoop art is quick and looks artsy because the fabric stretches cleanly. The banner format gives you room for one meaningful phrase and one illustration. I’ve used fabric dyed in sage and cream because it photographs well and matches lots of home decor. It also hangs easily without hardware.
Stretch cotton fabric over a 6-inch hoop and trim excess. Use fabric paint or a stencil for the phrase, then add a simple line drawing with a fine brush. Secure the back with hot glue and wrap the hoop edge with thin twill ribbon.
Quick tipStitch a small “loop” on the back with ribbon so it hangs straight, not crooked.
One warningDon’t stretch fabric unevenly — wrinkles show immediately in photos.
10. Wedding Handprint Frame Using Air-Dry Clay Impressions
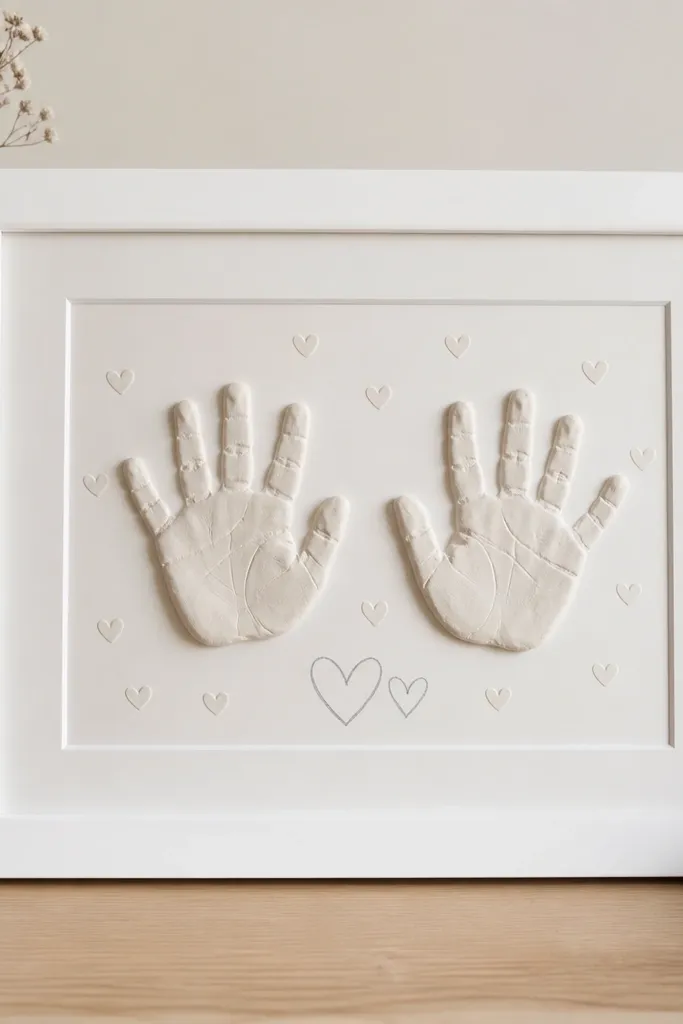
This one gets emotional fast because you’re capturing actual hands in a tangible way. Air-dry clay is easy to shape, and it doesn’t need an oven. The frame makes it look like a finished keepsake, not a craft project. I’ve seen couples put this on a shelf because it’s small enough to live with everyday decor.
Roll air-dry clay to about 1/2-inch thickness. Press both hands gently, then remove and smooth edges with a damp finger. Let dry fully, then paint the clay with matte white or leave it natural. Mount it in an 8x10 frame with a background paper and simple name text.
Quick tipDust hands with a tiny bit of cornstarch before pressing so fingers don’t stick.
One warningAvoid thick clay — it can crack during drying.
11. Stamped Linen Napkins With Their Initials and Date
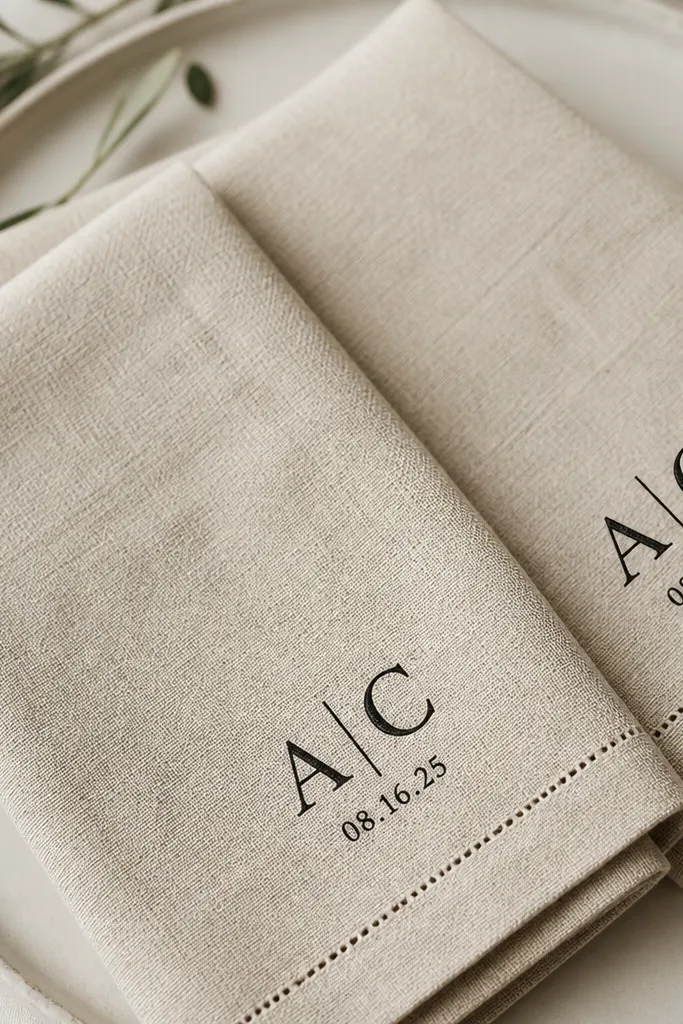
Linen napkins look fancy because the fabric already has texture. A stamp in the right spot makes them feel custom without complicated sewing. I like using one corner placement so the napkins stay elegant when folded. This gift lands well for couples who host dinners and actually use linens.
Buy a set of plain napkins in light beige or natural cream. Use fabric stamp pads or block printing ink labeled for fabric. Stamp initials on one corner and date on the same corner edge, letting ink dry between napkins. Heat-set if the ink instructions say to.
Test your stamp on a scrap first — linen texture changes how ink spreads.
Don’t stamp while the fabric is wrinkled — creases distort letters.
12. Hanging Photo Clip Garland With Button-Tie Ends
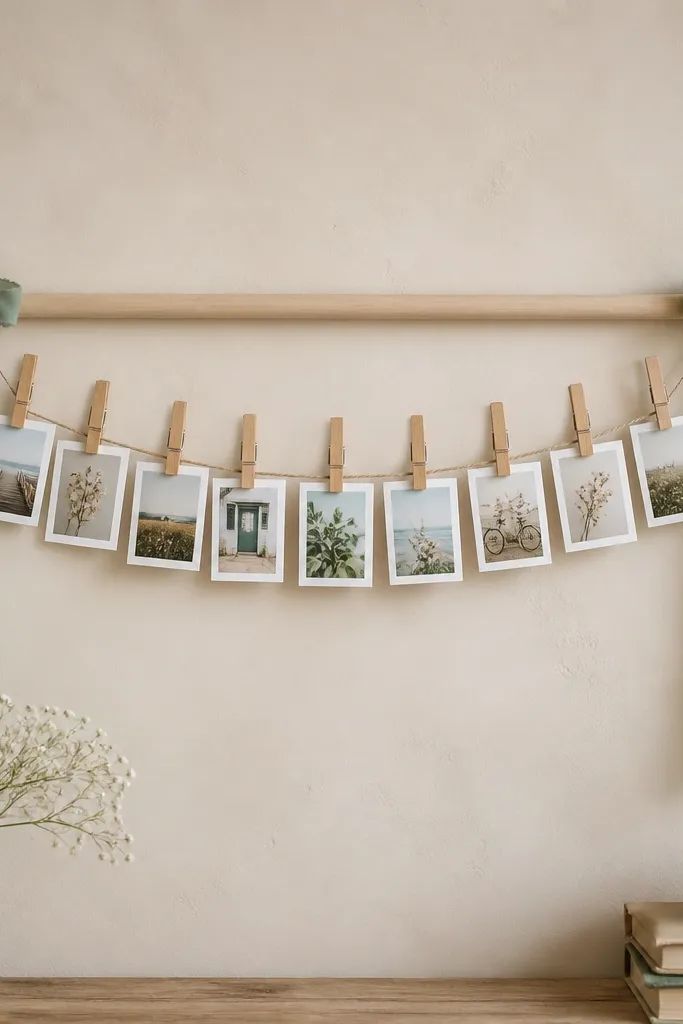
This turns a stack of photos into a living display. The clips make it easy for the couple to swap pictures, so the gift keeps evolving. I like it for couples who don’t want one framed photo — they want a wall moment. The button-tie ends add a handmade detail that looks intentional.
Use a thin twine line or cotton cord with 10 mini clothes pins. Choose photos in consistent tones like black-and-white or lightly tinted color. Tie ribbon around the dowel ends and hot-glue or stitch small buttons at the tie point.
Space clips evenly about 2.5 inches apart so it looks tidy instead of random.
Skip super-bright neon ribbon — it fights the photos.
13. Custom Map Coasters Made From Scrap Wood Slice Sides
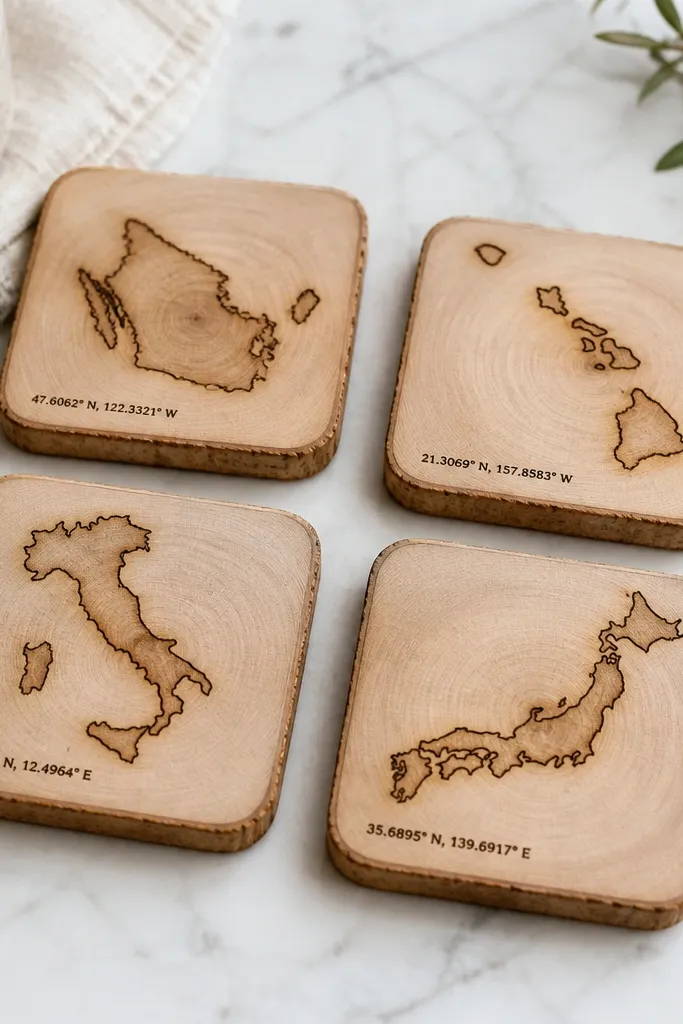
If you’ve got small wood offcuts, this is a satisfying way to use them. The burned map lines feel warm and handmade, and the wood color makes it look like a real craft shop product. It’s also great for couples who love rustic decor. You can keep the design minimal so it doesn’t look busy.
Use 4 square wood slices about 4x4 inches and sand edges smooth. Print a simple map outline, tape it to the wood, then use a pyrography tool to burn the lines. Finish with a thin clear matte sealant so drinks don’t soak in.
Quick tipBurn lightly first — you can always go darker, but you can’t undo it.
One warningDon’t skip sanding — rough edges make the set feel unfinished.
14. Painted Wooden "Together" Sign With Magnetic Back
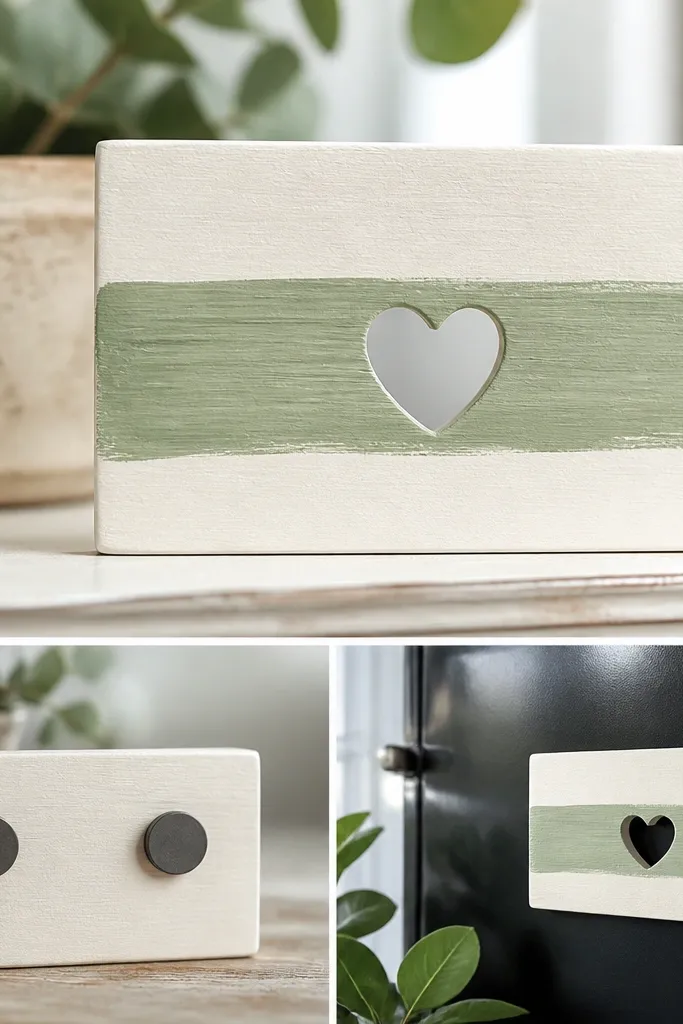
Magnetic decor is underrated for gifts because it gives couples an easy place to put it. The wooden sign reads warm, and the magnetic back means they can stick it on the fridge or a metal pantry cabinet. I like adding one heart cutout so the light hits it and it doesn’t look flat. This is quick because you’re painting and mounting, not building furniture.
Sand a small plywood board and paint the base matte cream. Add a sage stripe with painter’s tape and paint the word “Together” using a stencil. Glue strong neodymium magnets to the back, then seal the front with a matte clear coat.
Use painter’s tape for straight lines — hand-free stripes always look wobbly.
Don’t use glossy sealant — it shows fingerprints and glare.
15. Personalized Wedding Date Keychain With Photo Transfer
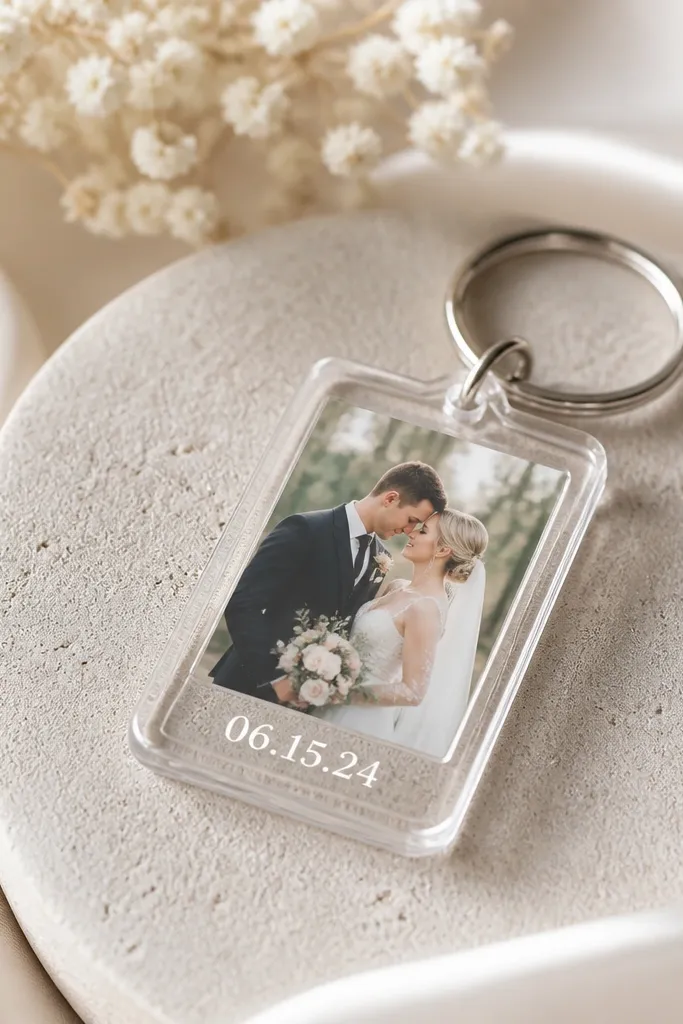
Keychains are small, but they feel personal when you put a photo and a date together. Photo transfer + clear acrylic makes it look crisp and modern. I’ve done this for couples who travel and keep their keys together every day. It’s also a good option if you want a gift that won’t sit around.
Print a photo sized to fit an acrylic keychain blank. Use a photo transfer medium or gel method for image transfer onto the acrylic, then seal with a clear topcoat. Add the date with a vinyl decal or printed sticker sealed under the clear layer.
Choose a photo with strong contrast so the transfer reads clearly at small size.
Don’t overfill the edges with sealant — it can fog the clear acrylic.
16. Couples Promise Jar With Mini Envelopes and a Template Card
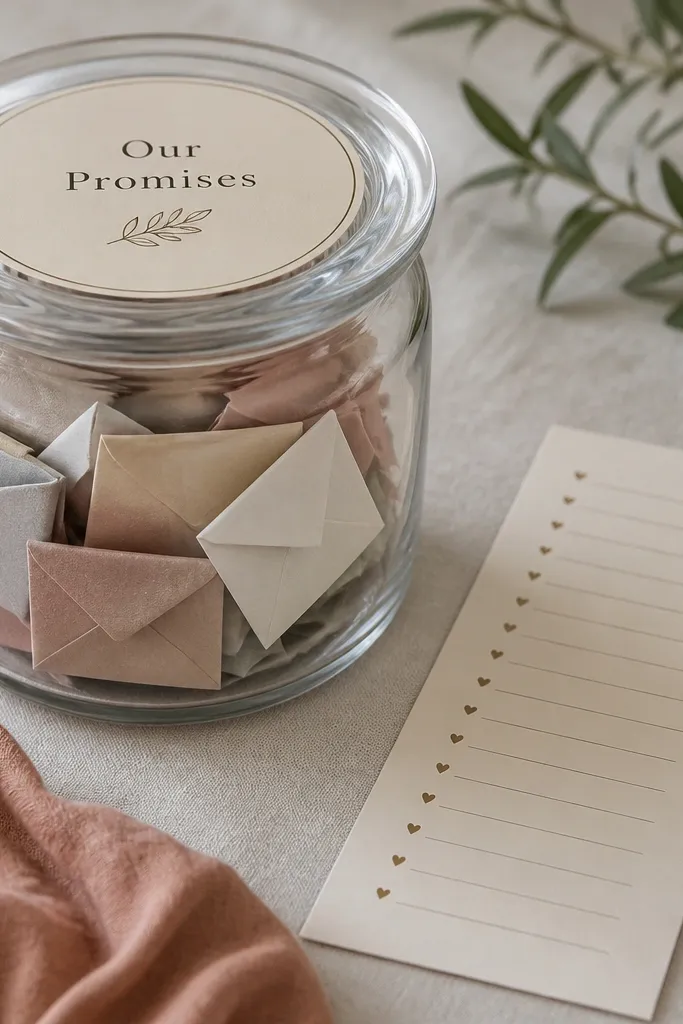
This gift is interactive without being cheesy because the prompts are short and specific. Mini envelopes keep each promise separate, so the jar doesn’t turn into a messy pile. I like pairing it with a template card so the couple can add more promises later. It’s a cozy gift that feels personal during the first months of marriage.
Use a quart-size jar with a metal lid. Fold 12 small paper envelopes, write one prompt per envelope, and place them in the jar. Make a label for the lid and add a small strip of cardstock with instructions like “Pick one on anniversaries or hard weeks.”
Quick tipUse thick paper for the envelopes so they hold their shape when handled.
One warningDon’t cram the jar — leave space so the couple can pull envelopes out easily.
17. Paper Flower Wall Frame With Layered 5-Petal Blooms
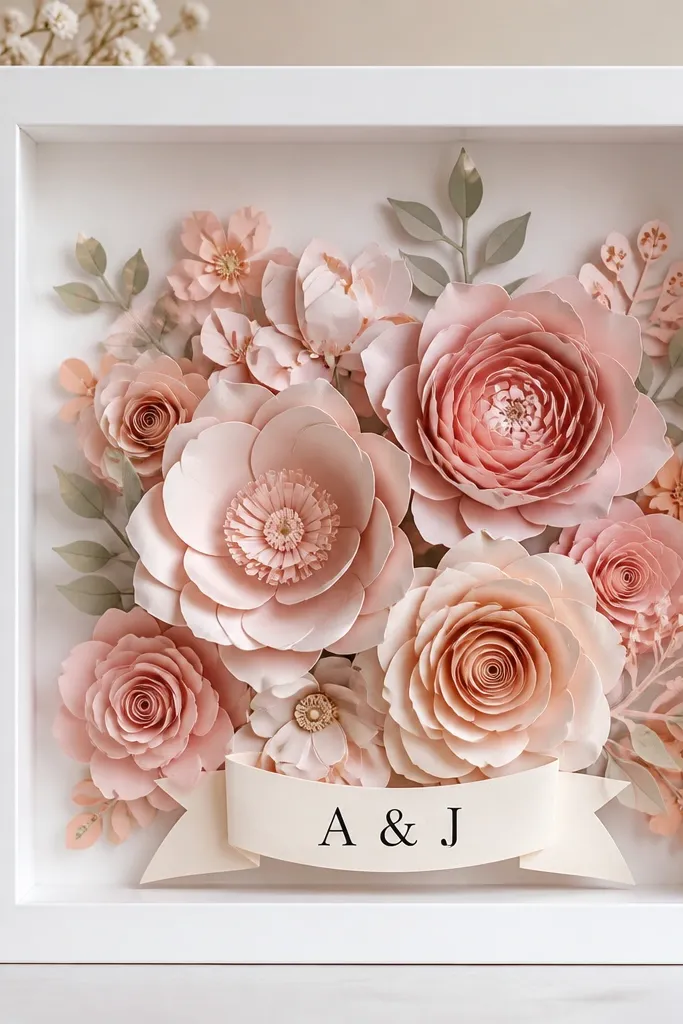
Paper flowers look impressive because shadows and layers create depth. A shadowbox frame makes it look like wall art, not a craft. I like 5-petal blooms because they’re easy to cut and still look full. This gift works great for couples who want decor but don’t want real flowers to die.
Cut 5 layers per flower from cardstock, each layer slightly smaller by about 1/4 inch. Shape petals by curling edges over a pencil, then glue layers from largest to smallest. Arrange 6-8 flowers inside a 8x10 shadowbox and add a small vinyl banner at the bottom.
Quick tipUse matte cardstock — glossy paper reflects light and makes petals look flat.
One warningAvoid uneven glue dots; they show as lumps on the petal edges.
18. DIY Wedding Gift Bud Vase With Painted Slim Glasses
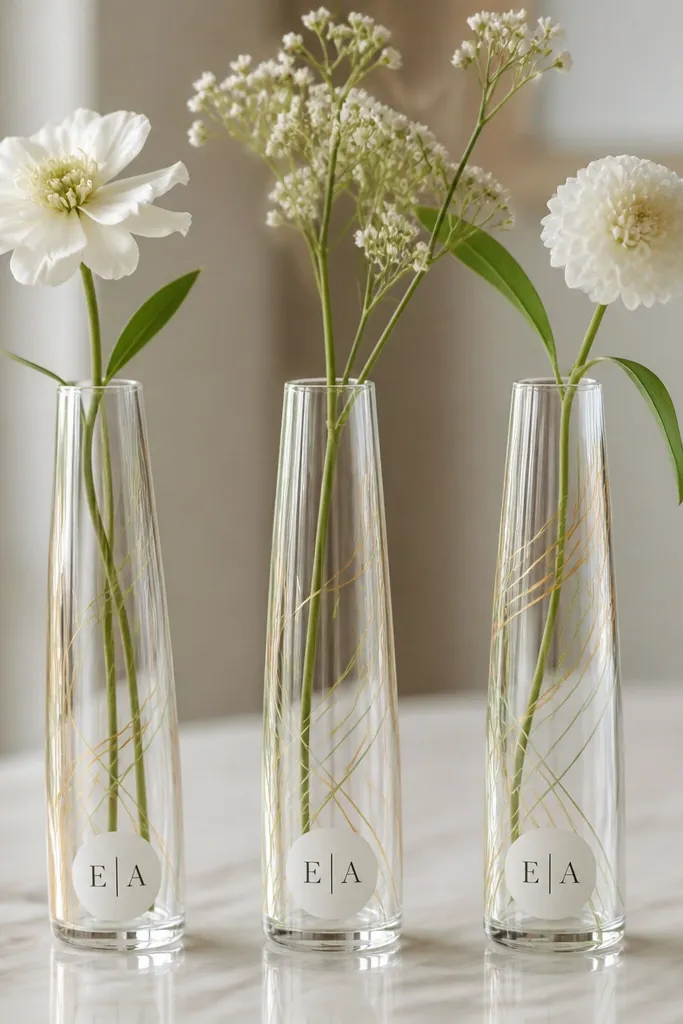
This is one of those gifts that looks like it took longer than it did. Slim glasses and thin paint lines read modern, and the bud vase scale fits any shelf. I like adding gold accents because it ties into wedding details without being flashy. You can fill with one stem each for a clean, styled look.
Use small bud vases or slim drinking glasses cleaned and dried. Paint thin lines with a fine craft brush using metallic acrylic, and let dry fully. Add vinyl initials on the side, then fill with a single stem like eucalyptus, baby’s breath, or dried lavender.
Paint the line first, then apply vinyl after — you get sharper edges and fewer paint smears.
Don’t use thick paint — it chips and looks uneven on glass.
19. Personalized Wine Glass Charm Tags With Twine Loops
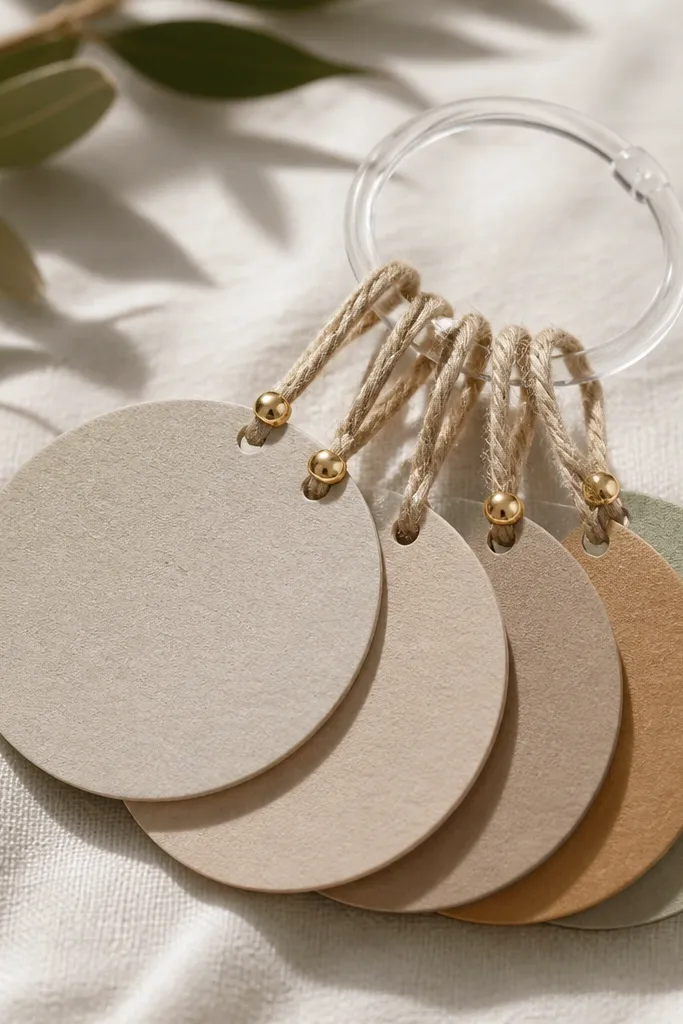
These are party-ready and useful for couples who host. The charm tags help guests keep track, and the initials make it feel personal. I like the circle tag shape because it looks clean and reads well from a distance. It’s also quick because you’re cutting and tying, not building anything complex.
Cut 8-10 circle tags from cardstock about 2.25 inches wide. Punch a hole near the top, thread twine through, and tie a small loop. Add a gold bead on the twine for a subtle accent, then write initials with black marker or apply vinyl letters.
Quick tipSeal the cardstock with matte clear spray so it wipes clean after drinks spill.
One warningDon’t skip hole reinforcement — twine tears cheap paper quickly.
20. Linen Bookmark Set With Embroidered Initials and Tassels
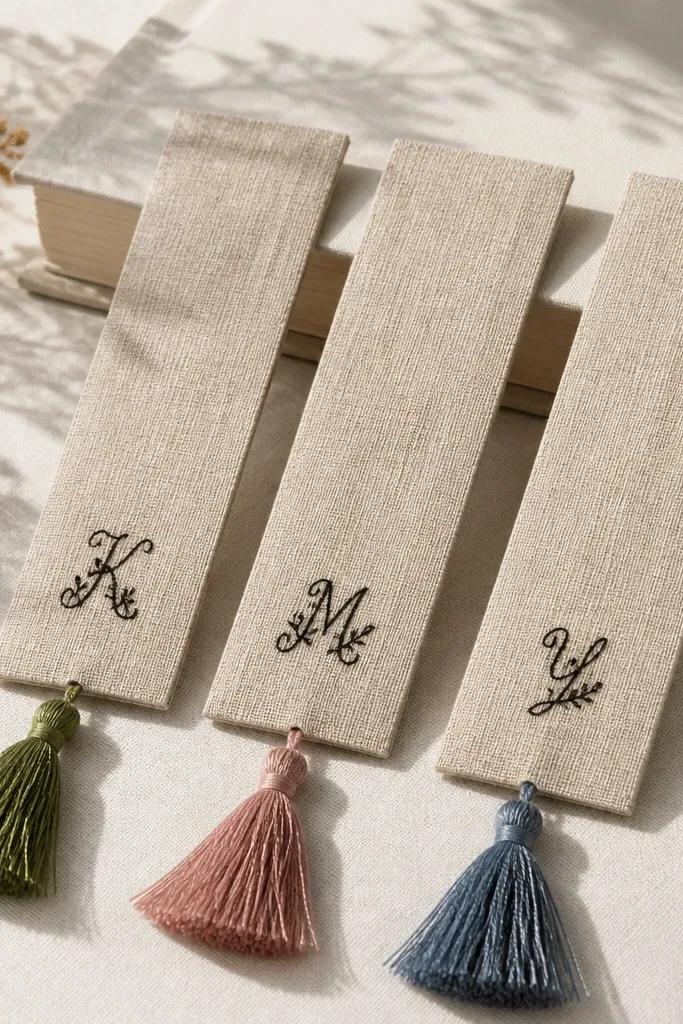
Bookmarks are a gift people actually use, and linen makes them feel special. The embroidered initials look neat because you’re doing one small detail instead of a big design. Tassels add motion and a handmade finish that photos well. I made these for a couple who loves reading together, and they used them immediately.
Cut linen strips about 2 inches wide and 8-9 inches long. Fold the top edge and glue or stitch to prevent fraying. Embroider one initial using backstitch with black thread, then tie a small tassel using embroidery floss at the bottom.
Trim tassel threads to the same length with a ruler for a crisp look.
Don’t skip edge finishing — frayed edges read messy, not handmade.