1. Ribbon-Loop Napkin Rings from Satin Offcuts
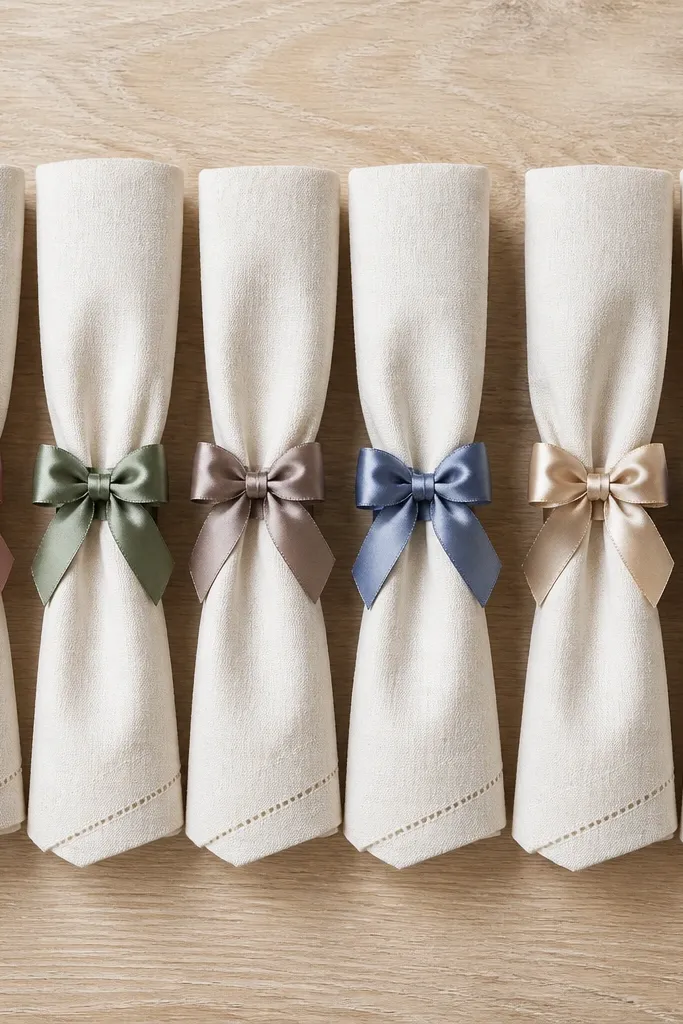
Start by cutting ribbon into 12-inch lengths for standard dinner napkins (adjust to 14 inches if your napkin is oversized). Fold one length in half, then tie a tight knot at the fold — the goal is a loop that sits about 1 inch wide. Trim the ribbon tails to 2.5 inches and angle-cut them so they don’t look blunt. Finally, slide the ring onto the folded napkin and fluff the bow so the loop faces forward.
This is the craft I use when I want a “wedding table” look without buying metal rings. You make each ring from 3/8-inch or 1/2-inch satin ribbon and tie it into a neat loop so it catches light softly instead of looking flat. I like these on champagne, ivory, or warm gray napkins because the ribbon adds contrast without turning the table into a candy store. If your guests are wearing warm-toned outfits, dusty rose or rust ribbon looks flattering in photos. For cooler palettes, choose sage or slate blue. The loop shape also hides small wrinkles in napkins, which matters when you’re staging for pictures right before the meal.
One warningDon’t use thin, flimsy ribbon that curls after tying — it looks messy in close-up photos.
Quick tipPress the satin flat with your fingers after cutting, then tie while the ribbon is slightly tensioned so the knot stays crisp.
2. Foam Board Photo Booth Frame with Faux Marquee Bulbs
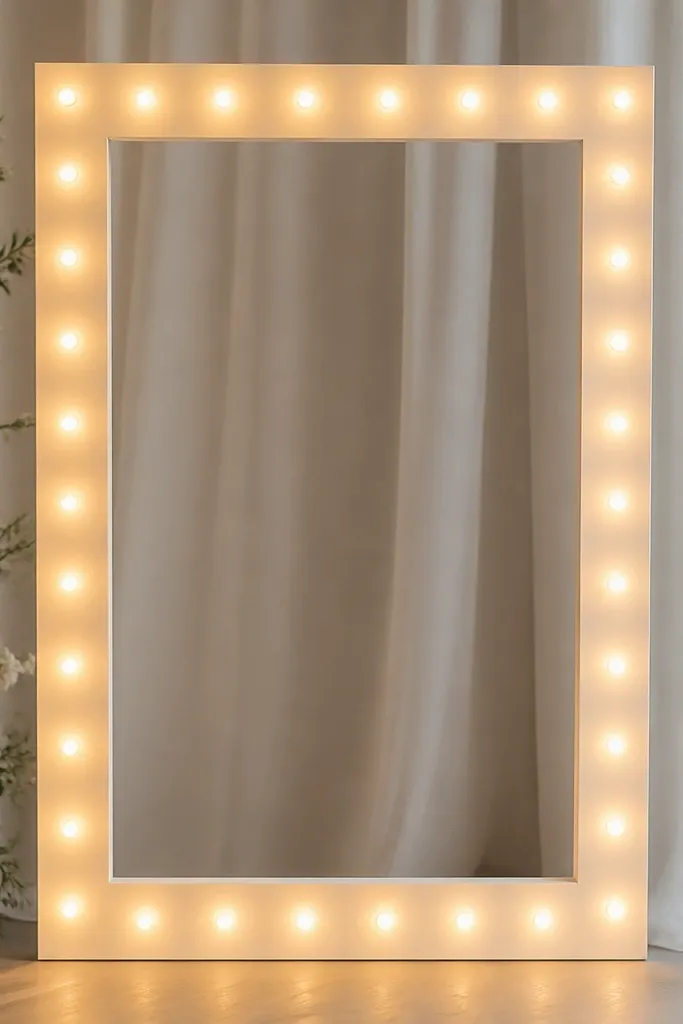
Start by cutting a rectangle from white foam board — for a typical booth, go 36 inches wide by 30 inches tall. Mark a border area of 2.5 inches, then cut the inner rectangle out so you have a frame. Lightly sand the edges for smoothness. Hot glue fairy lights along the inside border, spacing bulbs about 1 inch apart, and tuck the battery pack behind the frame so the viewer only sees light. Finally, add a printed “photo booth” or monogram insert behind the inner opening using double-sided tape.
If you want a photo booth backdrop that looks expensive, this frame does it with almost zero fuss. Foam board keeps the edges straight, and the faux “marquee” bulb effect comes from warm fairy lights tucked behind a cut border. I like white foam board because it photographs cleanly and pairs with almost every wedding palette. This design flatters people of all skin tones because the warm bulbs add a gentle glow at the face level, not harsh overhead light. It also works for both day and night weddings — at night it looks like a mini storefront; in daylight it still reads as a styled prop.
One warningDon’t skip sanding the foam edge — rough edges catch light and make it look like a quick school project.
Quick tipUse warm white (2700K) LED fairy lights so skin tones don’t look green or bluish.
3. Pressed Flower Place Cards in Clear Acrylic Sleeves
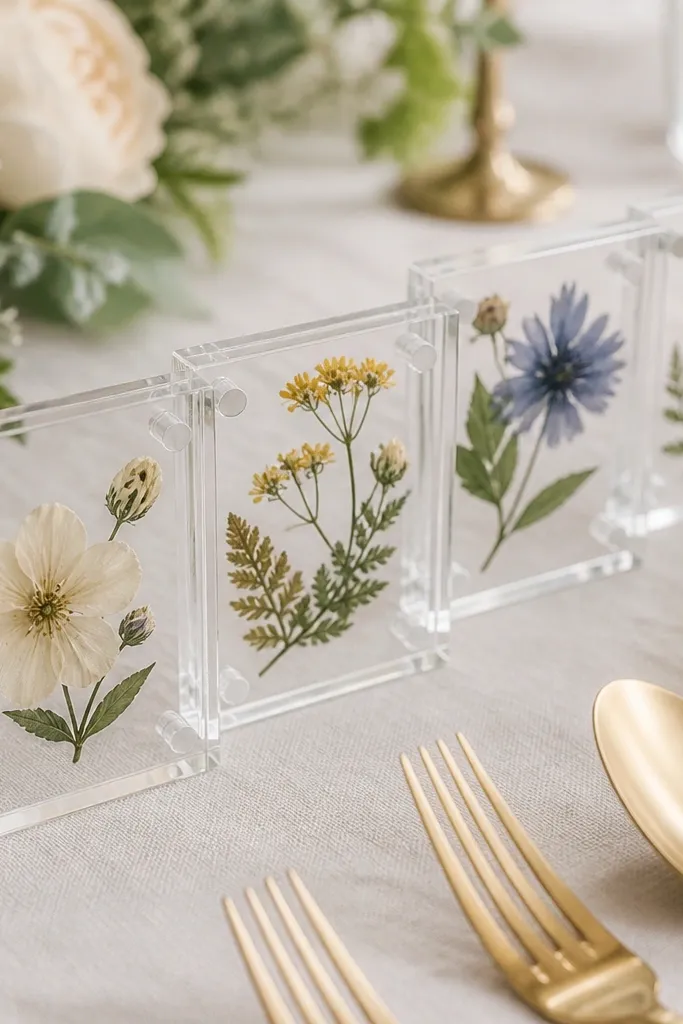
Start by pressing flowers for at least 5-7 days in a book with parchment paper so the petals don’t stick. Print place cards on 220 gsm ivory cardstock, then cut them to fit your acrylic sleeve size (I like 3.5 x 2 inches for a clean layout). Place one pressed flower piece near the top corner of each card, then slide the card into the clear sleeve. Add the guest name with a fine-tip black pen on the cardstock before sealing if your sleeve is not fully open. Arrange the cards in a line so the flower placement reads consistently.
These place cards look delicate but they’re surprisingly durable because the flowers are protected in clear sleeves. I’ve used pressed daisies, tiny baby’s breath sprigs, and thin fern pieces — all flattened between book pages for a clean, flat lay. When you seal them in a clear acrylic or plastic sleeve, you get depth without the flowers turning brittle from handling. They flatter any table color because the clear layer lets your linens show through, and the flower tones do the styling. If your accent color is blush, use pressed rose petals; if it’s sage, use light green leaves and pale white flowers.
One warningDon’t use wet flowers right before sealing — moisture fogs the sleeve and ruins the clarity.
Quick tipPress flowers flat with parchment between layers — it prevents the “wrinkled petal” look under clear plastic.
4. Twine and Lace Aisle Markers with Wooden Clips
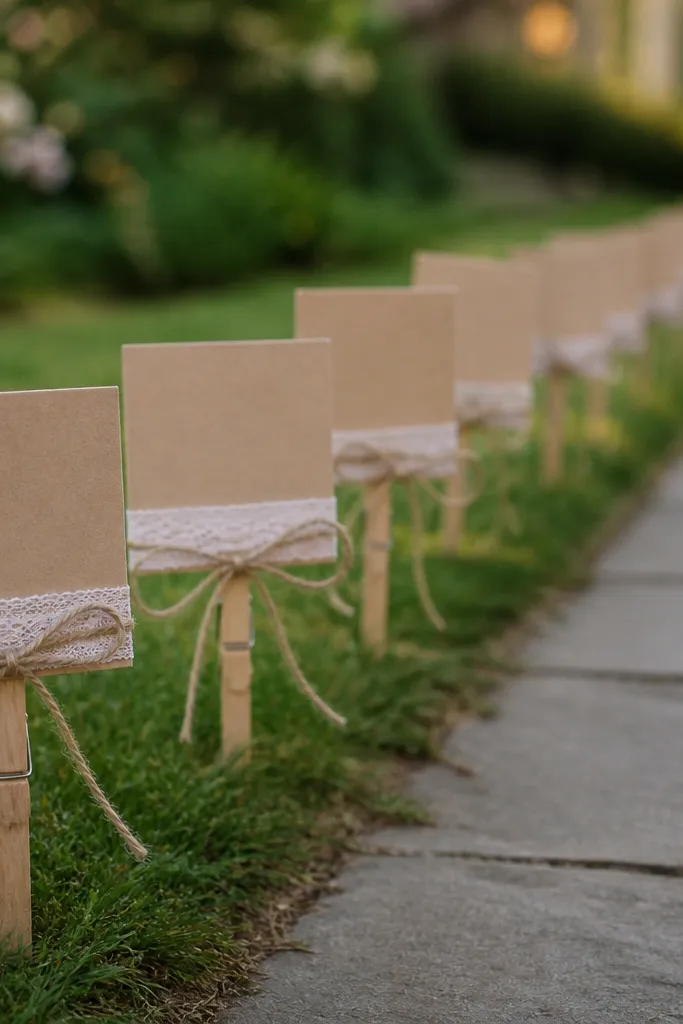
Cut banner strips from kraft cardstock or thick craft paper — 4 inches wide and 6 inches tall works well. Punch a small hole at the top center, then thread with twine and tie a tight loop. Add a 1.5-inch strip of lace behind the banner and secure it with a dab of hot glue at the back so the lace sits like a collar. Clip each marker to a small wooden stake or to a chair back using clothespins. Write “Row A” and “Row B” or “Please Stand Here” in black ink with a brush pen for crisp lines.
Aisle markers are one of the easiest ways to guide guests while still looking romantic. This version uses wooden clothespins and a short banner strip so the sign catches natural movement from a breeze. Lace + twine is a classic combo, but the trick is keeping the banner short so it doesn’t look like party decoration. The markers look great in outdoor venues because the wood and lace blend with greenery. In photos, the neutral twine keeps the palette calm while the lace gives texture close to the camera.
One warningDon’t hang paper signs without a stiff backing — they curl and look uneven in wind.
Quick tipUse weatherproof clear tape on the back of the paper where twine rubs so it doesn’t fray.
5. Mini Geometric Candle Labels with Chalk Marker
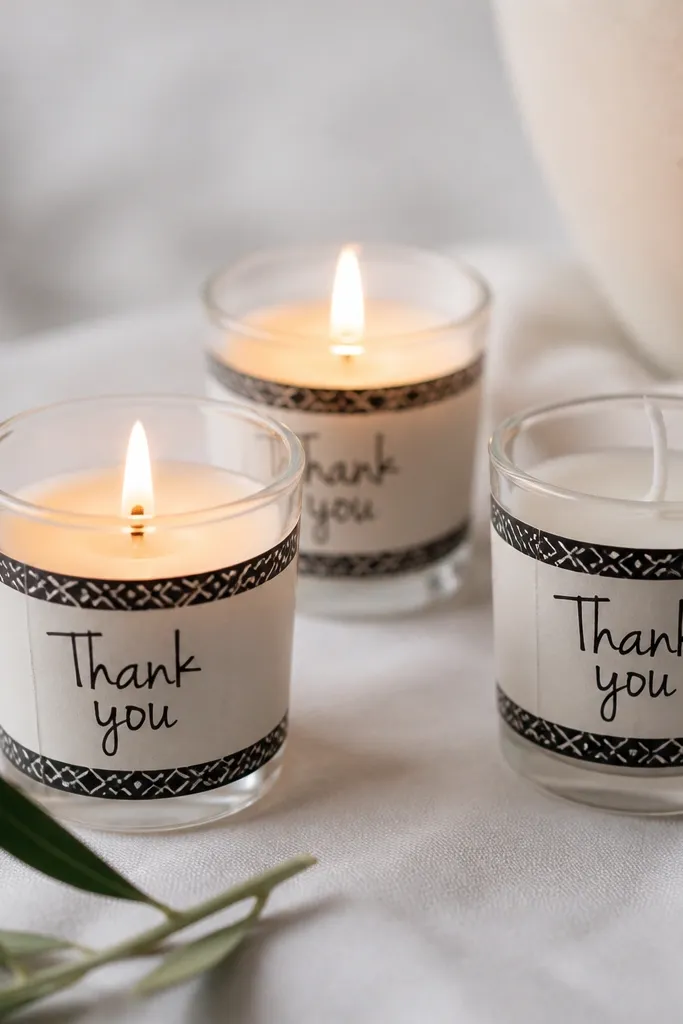
Candle labels are the quickest way to make simple votives look custom. I use cream cardstock bands wrapped around the glass and draw geometric shapes with a chalk marker — the matte finish photographs cleanly and doesn’t glare like glossy vinyl. Choose one label style and repeat it for a matching set. This flatters guests with warm complexions because the cream base keeps skin tones natural, and the black marker gives contrast without looking neon. It also fits both minimalist and rustic weddings — just change the geometric shapes.
Start by wrapping 2.5-inch-wide strips of cream cardstock around a votive glass and mark where they overlap. Cut strips so they overlap by about 1/2 inch, then wrap and tape the seam with removable tape. Draw a simple pattern: a thin triangle border at the top, or three small dots in a row on one side. Write the text in the center using chalk marker and let it dry 5 minutes. Finally, secure the strip with a tiny piece of double-sided tape at the overlap so it stays put during setup.
Test your chalk marker on scrap first — some brands smear on cardstock if the ink is too wet.
Don’t use thick glitter pens — they look bumpy on camera and cast shadows.
6. Tulle + Pearl Flower Girl Wand (No Sewing)
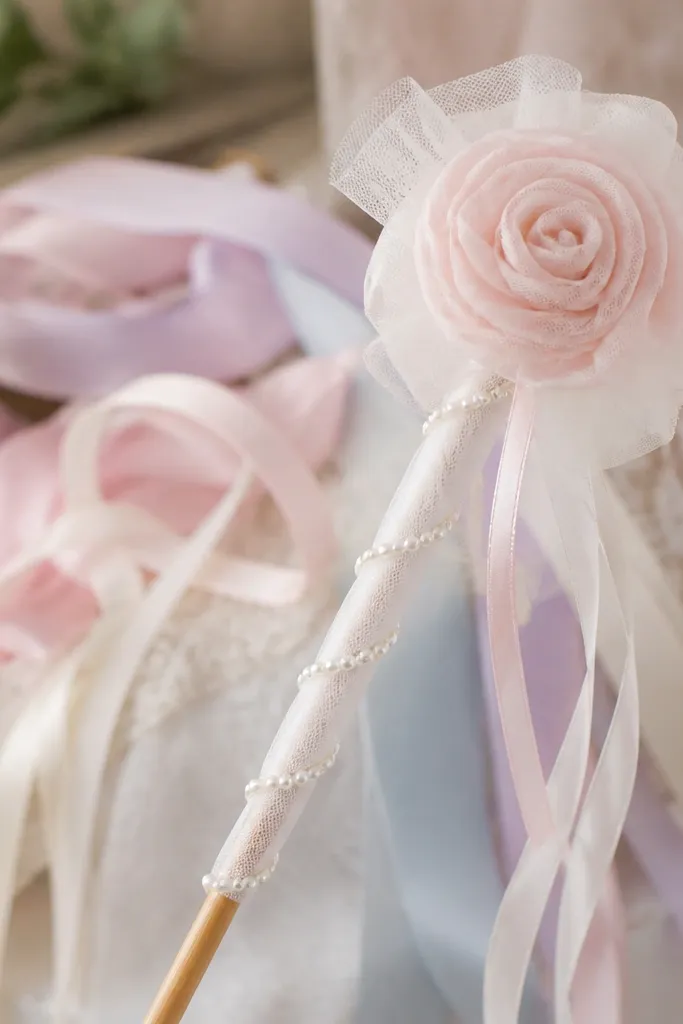
Start with a wooden dowel or lightweight stick and wrap it with satin ribbon from the bottom up to the top. Cut tulle into 12-inch strips, then bundle them around the top section of the wand. Tie a ribbon or thin elastic around the bundle to hold it tight. Hot glue pearl garland in a spiral from the top down, then trim any uneven tulle ends into a gentle cone shape. Finish with a small bow at the base of the tulle bundle.
This wand looks like it came from a boutique, but you can make it with hot glue and a few craft supplies. The tulle creates a soft puff that reads beautifully in motion, and the pearls add a high-end detail without needing lacework. I like using a 1-inch wide tulle strip folded and layered because it creates fullness without looking bulky. It flatters little ones because it’s lightweight and the top stays soft and safe. For photos, the white and cream tones keep focus on the child’s face and hands.
One warningDon’t over-glue — too much glue makes stiff lumps that snag dresses and look shiny.
Quick tipCut tulle with a rotary cutter for straight edges — it makes the puff look even.
7. Watercolor Seating Chart on Scrap Wood with Wire Clips
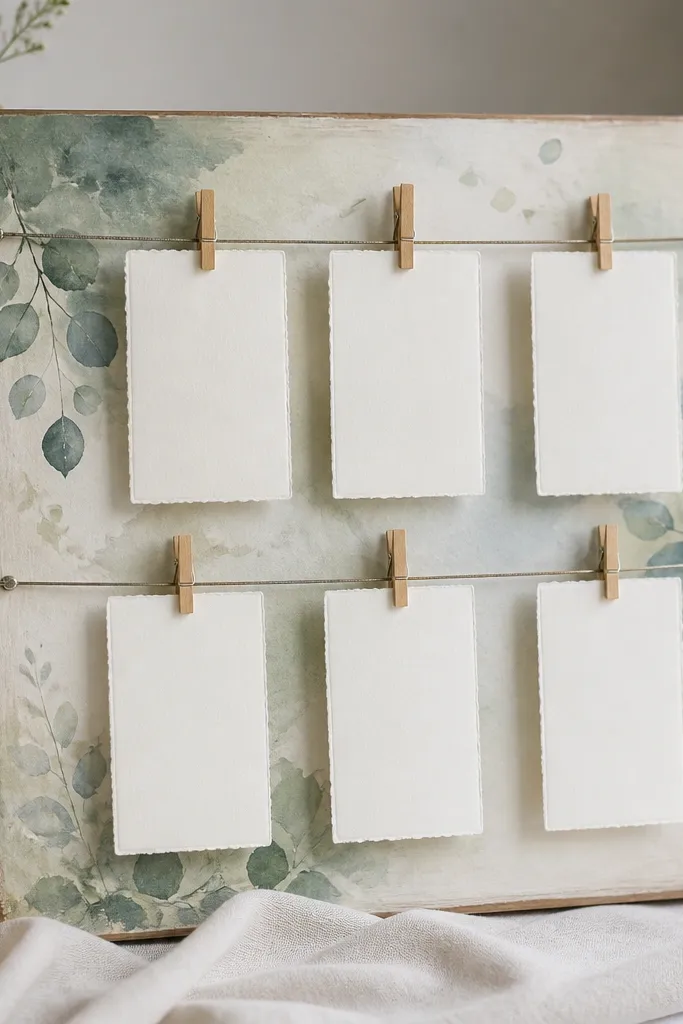
Start by sanding a scrap wood board and wiping it clean. Paint a watercolor wash in the top third only so the lower area stays for names. Drill or screw in two small eye hooks near the top corners, then stretch thin wire between them. Print label cards on cardstock, cut them to fit, and add small holes at the top corners. Clip cards onto the wire with mini binder clips or wire clips and arrange in neat rows.
A seating chart should be readable from across a room, and this setup keeps it clean and adjustable. The wood gives you texture, and the wire clips let you swap names without reprinting everything. I’ve done this with watercolor-style backgrounds because the color stays soft under warm lights. This works for every skin tone in photos because it’s not a bright neon sign — it’s a calm backdrop. If your wedding palette is earthy, use watered-down terracotta and sage; for a classic look, use light gray and dusty rose.
One warningDon’t make the lettering tiny — labels should be readable at arm’s length.
Quick tipUse painter’s tape to block off the name area before painting so you don’t get streaks under the labels.
8. Glitter-Free Confetti Cones from Patterned Paper
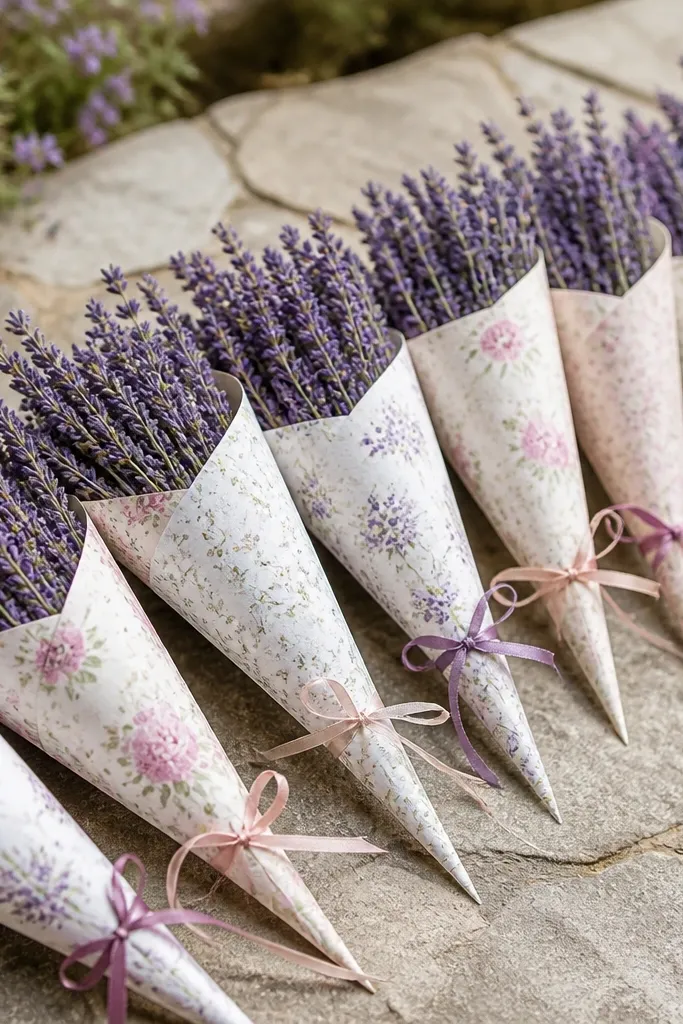
If you want confetti that looks good in photos and doesn’t shed glitter everywhere, use patterned paper cones filled with dried petals or lavender buds. The cone shape is simple, and the paper pattern makes each cone look styled even if the contents vary slightly. I like using 6x6-inch scrapbook paper so the cones are uniform. These cones flatter outdoor weddings because the dried botanicals match greenery tones. For indoor ceremonies, they still look beautiful and don’t create a mess on floors the way glitter does.
Start by cutting paper squares into 6x6 inches, then form each cone by rolling the paper into a tight spiral. Glue the seam with a thin line, then trim the bottom so it stands straight. Fill each cone with 1-2 teaspoons of dried lavender or rose petals. Tie a 6-inch length of thin ribbon around the top and knot it tightly. Place finished cones in a tray so they don’t get crushed before ceremony.
Let the glue dry fully before filling so the cone doesn’t soften.
Don’t overfill — cones split when you tie them if the contents are packed too tight.
9. Satin Bow Cake Topper from Cardstock Template
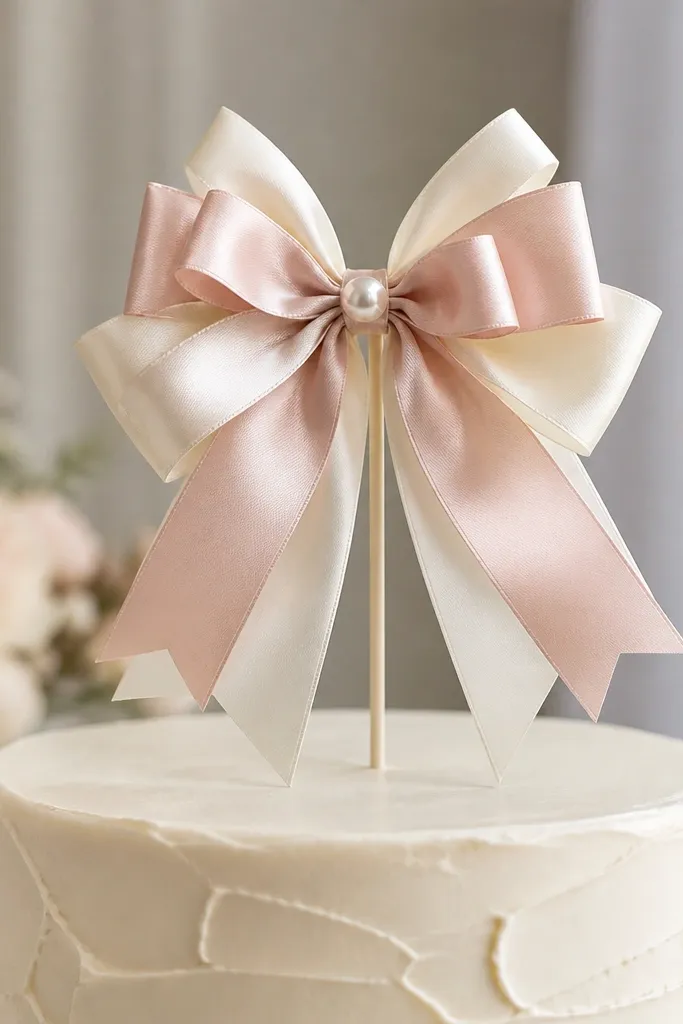
This topper gives you that “bridal” look without ordering custom acrylic. The trick is using a cardstock template to cut your bow loops so both sides match. Satin ribbon looks best when you fold it into layered loops and pinch the center — it gives dimension that reads in close-ups. It flatters the cake because it sits high and clean, and the neutral ribbon tones won’t fight with buttercream colors. Choose blush and ivory for classic cakes, or sage and cream for a modern garden palette.
Start by cutting a bow template from cardstock: one loop piece at 5 inches long and another at 4 inches long. Wrap satin ribbon around the template edges, then glue the ends on the back to form a loop. Layer the larger loop under the smaller one and pinch them together at the center with hot glue. Add a small pearl or rhinestone at the pinch point. Attach the finished bow to a thin wooden pick using glue and add a tiny ribbon wrap at the base so the pick looks finished.
Use double-sided satin if you can — it keeps the bow looking good from any angle in photos.
Don’t use ribbon wider than 1 inch for a cake topper — it looks heavy and droops.
10. Corded Wedding Vows Booklet with Simple Brads
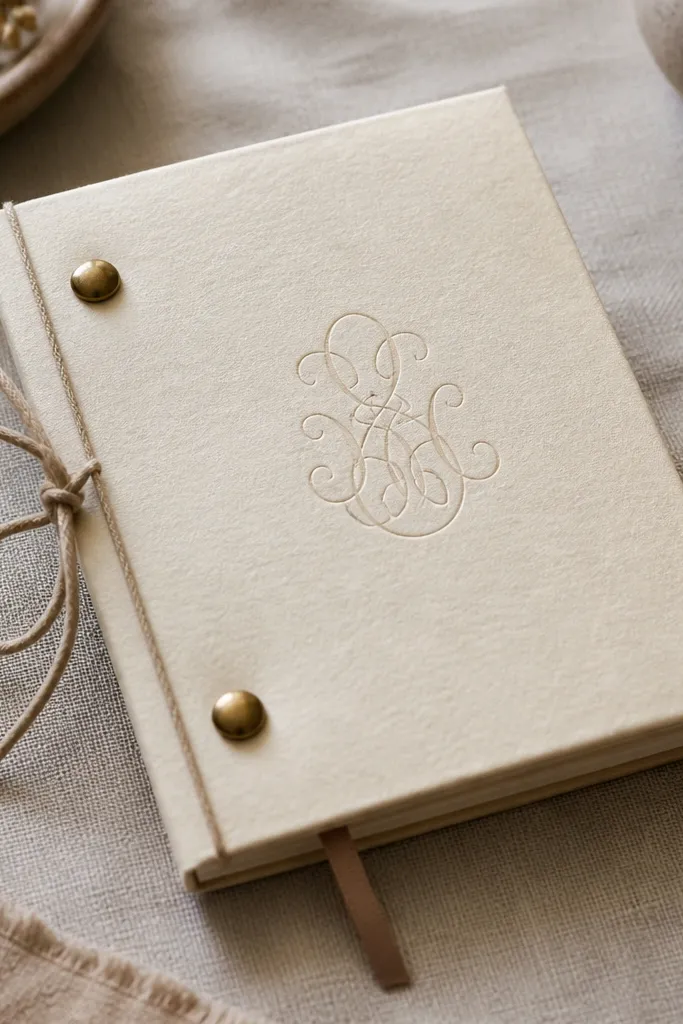
This is the craft I make when couples want vows that feel personal but don’t want a fancy binder. The booklet format looks neat on a table and is easy to hand out or set on chairs. I use folded cardstock pages and simple brads so the pages stay open without a bulky spine. It works for all venues because it’s flat and doesn’t take space. In photos, cream paper with black text looks timeless, and the cord tie adds a handmade touch without clutter.
Start with 8.5x11 paper folded in half to make 4.25x11 sheets, then print vows on the inside pages. Trim edges so your stack is even. Punch two holes near the spine area, about 1 inch from the top and bottom, then insert metal brads to hold the pages together. Wrap a thin cotton cord around the brad area and tie a small bow on the front cover. Add a ribbon bookmark strip inside by gluing it to the inner cover.
Print on 28 lb or heavier paper so the text doesn’t ghost through the page.
Don’t use cheap thin printer paper — it flops and looks worn fast during ceremony.
11. Macramé-Style Ring Napkin Holder with Cotton Cord
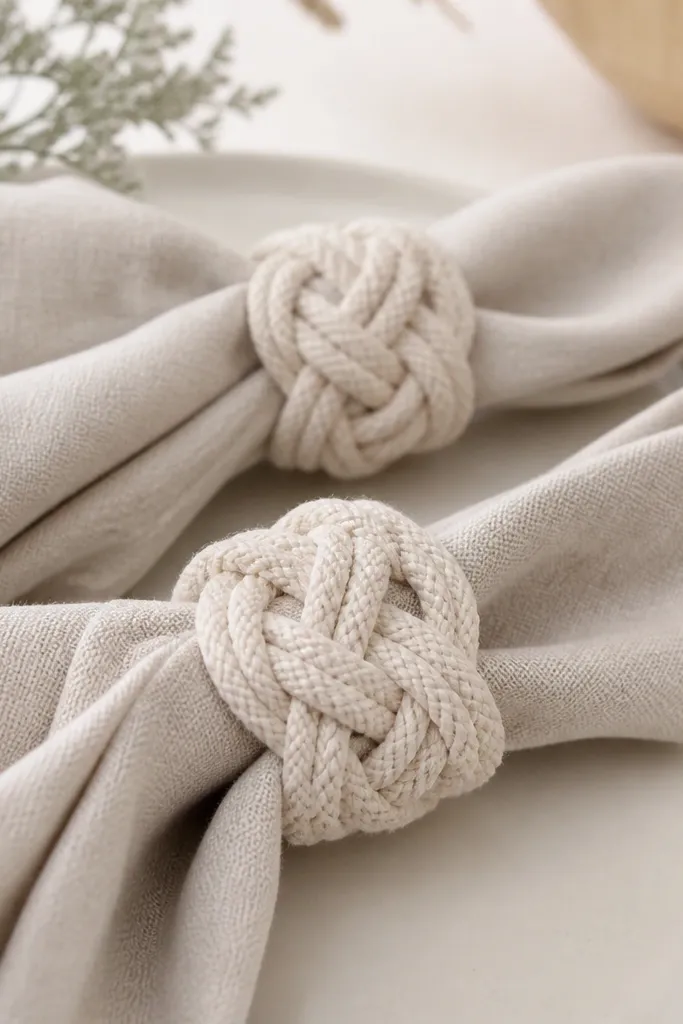
Start with a pre-cut metal or wooden ring about 2 inches wide, or form a ring from thick floral wire covered in tape. Cut 8 cord strands each at 18 inches. Fold strands in half and loop them through the ring to create a fringe, then tie repeating overhand knots at the top edge so the fringe locks in place. Trim ends to 1 inch lengths for a clean look. Slide the holder over a folded napkin and adjust the knots until the ring sits centered.
This is a beginner-friendly macramé look that doesn’t require a knotting board. You make a simple cord ring and tie a few repeating knots so it reads like macramé in photos. Cotton cord looks best in warm neutrals — natural, oatmeal, or light beige — and it matches linen napkins beautifully. It flatters tables where you want texture without color overload. The holders also keep napkins tidy when guests handle them, because the ring holds shape better than ribbon.
One warningDon’t leave long untrimmed ends — they look messy and tangle during setup.
Quick tipUse waxed cord or lightly stiffen cotton cord with fabric stiffener spray so knots stay neat.
12. Hanging Heart Photo Garland from Scrap Cards
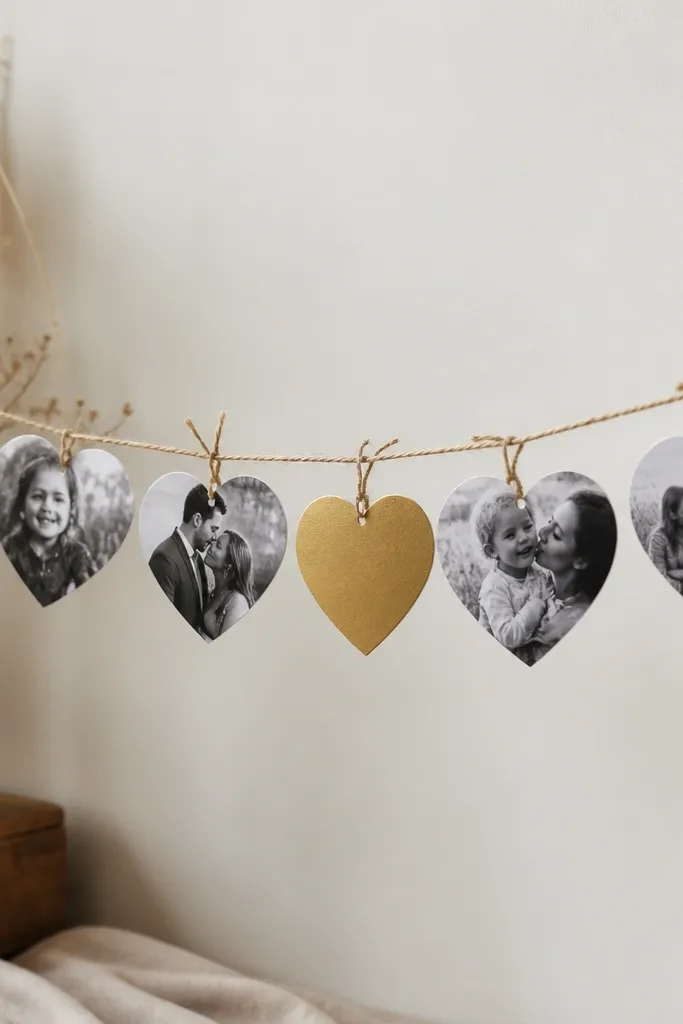
A photo garland turns a plain wall into something personal without a big build. I like heart-shaped cards because they read clearly even when people walk past quickly, and they match wedding styling without looking childish. The twine lets the cards hang with a soft curve, which looks good under string lights. This flatters your palette because you control the card backgrounds — kraft, ivory, or black — and the photos bring the warmth. It also works for couples who don’t want a lot of floral arrangements but still want “romance” in the decor.
Start by printing 2x2 inch or 2x3 inch photo strips on photo paper and trimming them to fit heart cutouts. Cut heart shapes from thick cardstock — use one color for the majority and one accent color for every fifth heart. Layer each photo heart on top of its cardstock backing and glue around the edges. Punch a small hole at the top point of each heart and thread onto twine with 1.5 inches between pieces. Hang the garland on two nails or hooks so it forms a gentle V shape in the middle.
Use matte photo paper so the garland doesn’t glare under overhead lights.
Don’t space hearts too far apart — the garland looks sparse and unfinished.
13. Waterproof Menu Cards with Laminated Corners
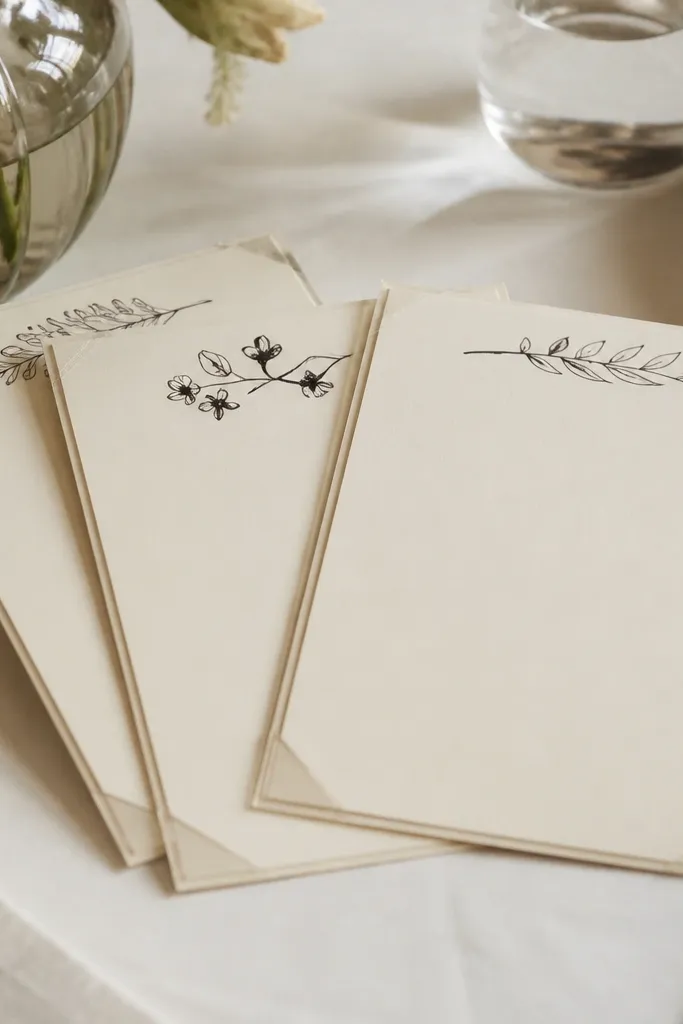
Start with 220 gsm cream cardstock cut to 4x6 inches. Print or handwrite the menu with a fine black marker, leaving a blank border of 1/4 inch. Apply clear corner protectors to the four corners, then add a thin strip of clear film over the center text area using a straight edge. Press firmly so no wrinkles show. Finally, place each menu on a small acrylic stand or fold-back tent style made from cardstock.
Menus get handled, bumped, and sometimes splashed, so I make mine with a waterproof trick. Instead of full lamination that can bubble, I use corner protection and a thin clear film on the text area. The result looks clean, stays readable, and holds up during outdoor receptions. It flatters any table because the cardstock stays matte and absorbs light instead of reflecting it. If your wedding uses black accents, black headings on cream paper look sharp and photo-friendly.
One warningDon’t laminate over waxy ink — it lifts and peels during handling.
Quick tipUse acrylic stands and wipe them with a microfiber cloth right before photos — fingerprints show up fast.
14. Painted Mason Jar Bud Vases with Splatter-Free Finish
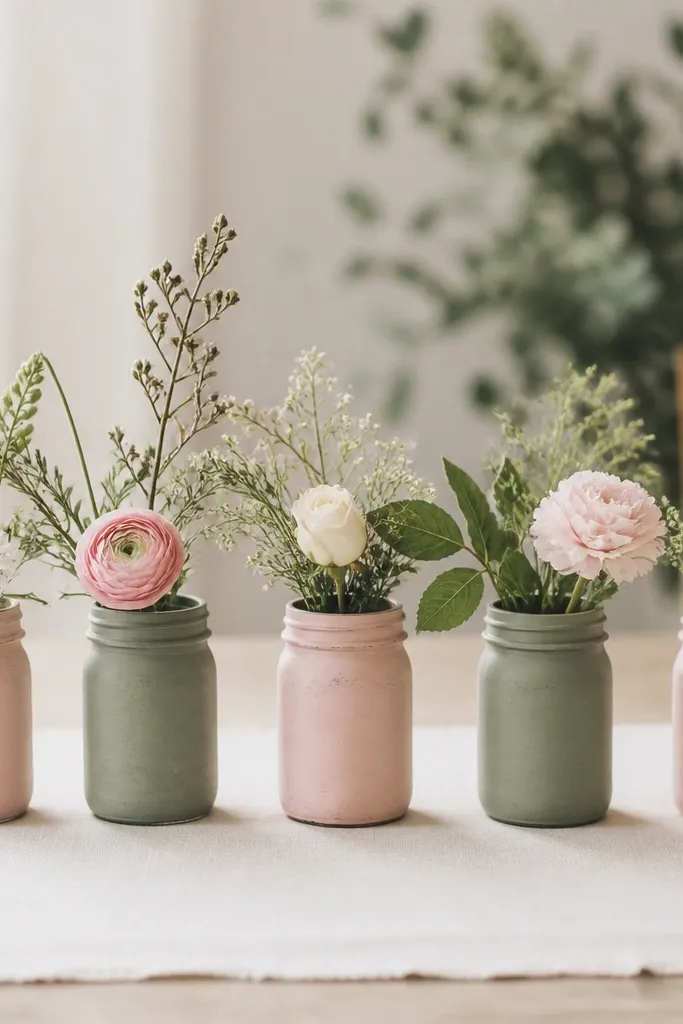
Mason jars are the easiest vessel, and painted jars make them look intentional instead of thrift-store. I use matte chalk paint because it softens the glass reflections and looks good in both bright and dim venues. The splatter-free look matters — beginners often shake the brush too much and end up with specks. These jars flatter warm palettes (peach, blush, cream) and cool palettes (sage, dusty blue) equally because the paint hides the jar’s glassiness. Put one stem per jar and the whole table looks curated without extra floral volume.
Start by washing and drying jars completely, then tape off a 1/2-inch band at the top rim so paint doesn’t build where flowers sit. Paint two thin coats of matte chalk paint, letting each coat dry 45 minutes. If you want a clean modern look, paint only the lower 70% of the jar and leave the top clear. Remove tape after the second coat is dry to the touch. Add a single stem and fill with fresh water right before the table goes out so the paint doesn’t wick.
Use a foam brush for even coverage — it reduces brush marks on curved glass.
Don’t paint over a wet jar — bubbles form and you get rough texture.
15. Acrylic-Style Heirloom Invitation Wax Seal on Paper
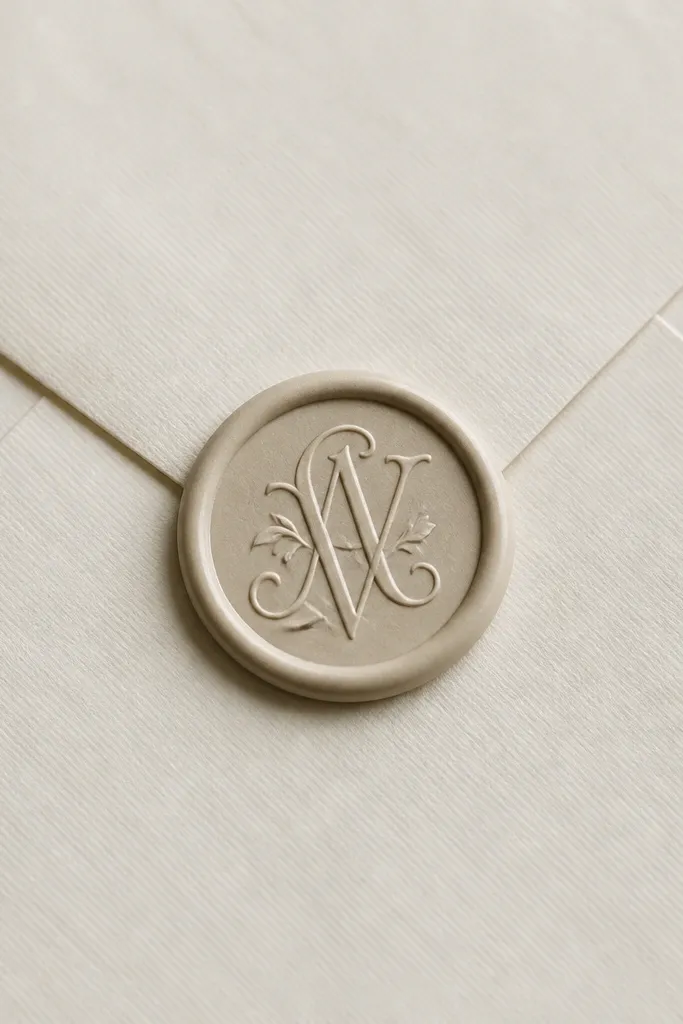
Start with clean, dry envelopes and decide where your seal will sit — usually 1.5 inches from the top flap line. Lightly mark placement with a tiny pencil dot so it’s centered. Press the wax seal piece onto the envelope front firmly for 20-30 seconds. If your sticker is glossy, buff the edges gently with a microfiber cloth so it blends into the paper texture. Finally, add a matching monogram sticker or tiny address label near the bottom so the whole layout feels planned.
Wax seals look fancy, but real hot wax is messy and slow when you’re doing a set. This “acrylic-style” approach uses pre-made wax seal stickers or heatless wax pieces that you press onto the envelope — it still gives that raised seal look in photos. I’ve used this for RSVP envelopes and it looks crisp without waiting for wax to cool. It flatters any invitation style because the seal sits in the center and creates a focal point. If you’re using gold foil accents, pair the seal color with bronze or dark brown for a classic match.
One warningDon’t place seals on textured envelopes without testing first — the seal can lift at the edges.
Quick tipWarm the sticker with your hands for 10 seconds before pressing — it adheres more evenly.