1. Thrift Belt Key Fob With Hidden Pocket
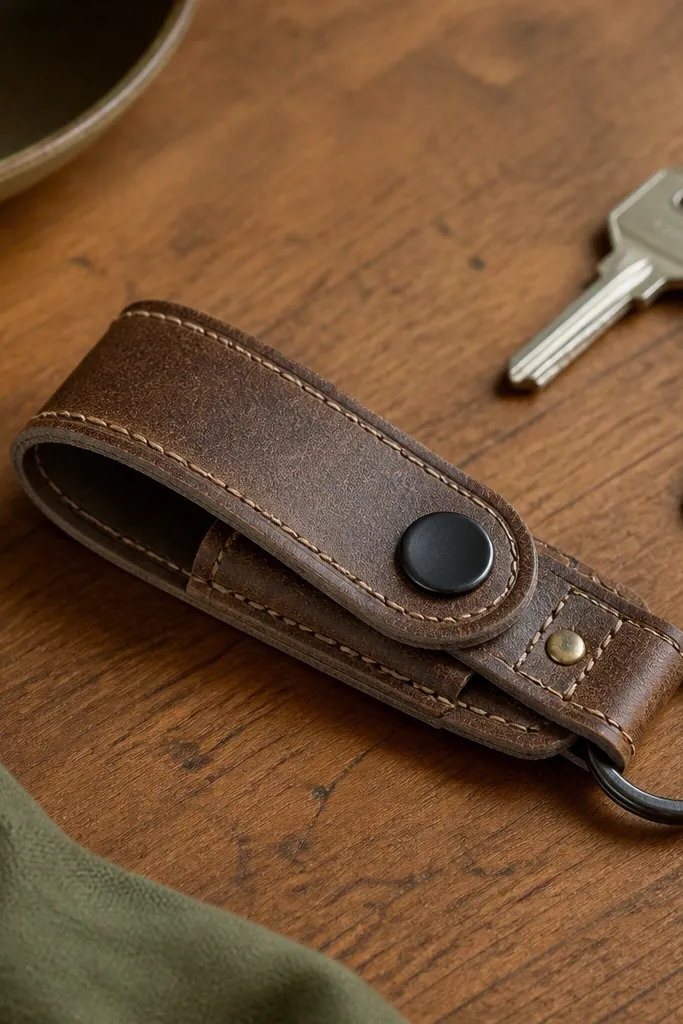
This gift looks expensive because the leather already has a worn-in texture and clean grain. The hidden pocket is the part he’ll actually use — spare cash, a folded transit card, or a small note. I like belt leather because it’s thick enough to hold shape without stiffeners. Pair it with black thread and one brass detail so it reads masculine and tidy.
Cut a 2.5 inch wide strip from the belt for the main fob and a 3 inch by 2.25 inch piece for the pocket. Use a leather hole punch to mark three stitch holes along the loop edge. Install a black snap with a snap setter, then stitch around the pocket perimeter with a waxed thread. This fits well as a year-round DIY valentines gifts for boyfriend that lives on his keys.
Sand the raw belt edges lightly and run a thin coat of leather edge dressing so it looks factory-finished.
Don’t use thin craft leather; it flops and makes the stitching look sloppy.
2. Map-Page Photo Frame With Waxed Thread Hinge
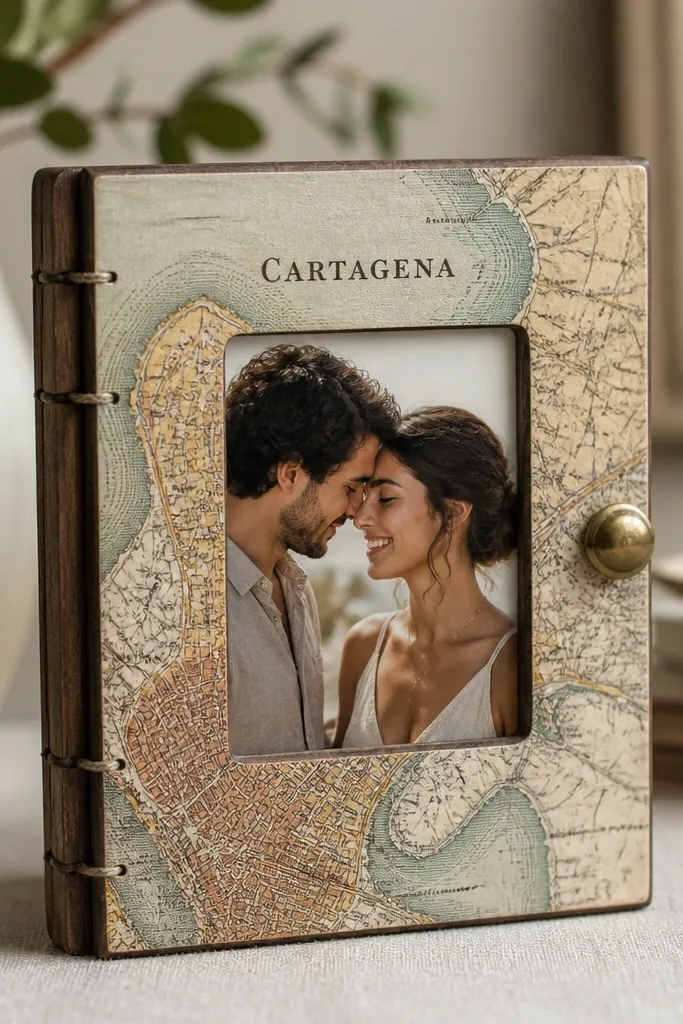
I’ve done this on three different frame sizes and it always looks charming because the map paper brings color without needing paint. The waxed thread hinge gives it a handmade feel without making it look fragile. It also stays sturdy because the hinge is wrapped around the frame edge, not just glued to paper. The brass catch keeps it closed and gives a satisfying snap when he opens it.
Quick tipSeal the map paper with a final coat of matte sealant so fingerprints wipe off.
Remove the old backing, then cut map paper to overlap the frame by about 1/8 inch on each side. Use matte Mod Podge in thin coats so the paper doesn’t bubble. For the hinge, poke two small holes on the left inner edge and wrap waxed thread in tight loops, then tie off on the back. Add a brass button catch on the right side so the frame closes flat.
One warningDon’t soak the paper with thick glue; it warps and the photo won’t sit straight.
3. Custom Beer-Label Coasters From Tile Scraps
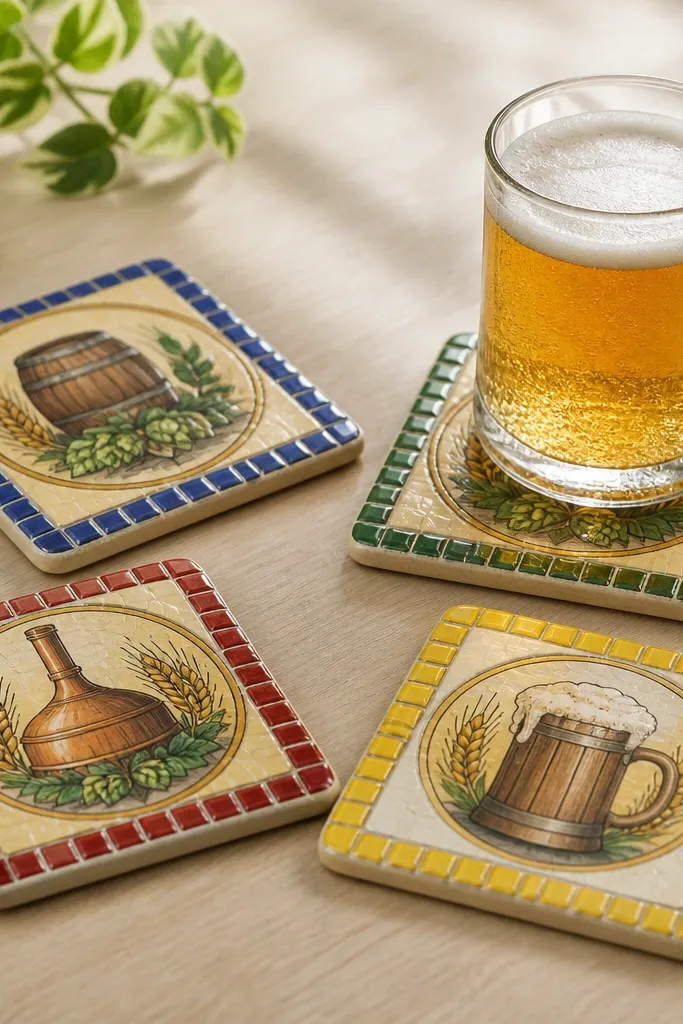
These are the kind of DIY valentines gifts for boyfriend that look playful but handle real spills. Tile scraps are flat, heavy, and naturally water resistant. I decoupage labels and then seal with multiple thin layers so the edges stay crisp. The glossy top catches light like store-bought coasters, not like craft paper.
Quick tipUse a foam brush instead of a regular brush to avoid streaks in the clear coat.
Cut or buy 4 inch square tile pieces and lightly sand the top surface. Print or cut labels (you can use old beer bottle labels with permission from your own collection). Decoupage with a foam brush, then seal with clear waterproof varnish in 3-4 thin coats. Finish edges with a quick sanding pass between coats.
One warningDon’t skip edge sealing; unsealed tile edges lift and look unfinished.
4. No-Sew Denim Patch Desk Organizer Pouch
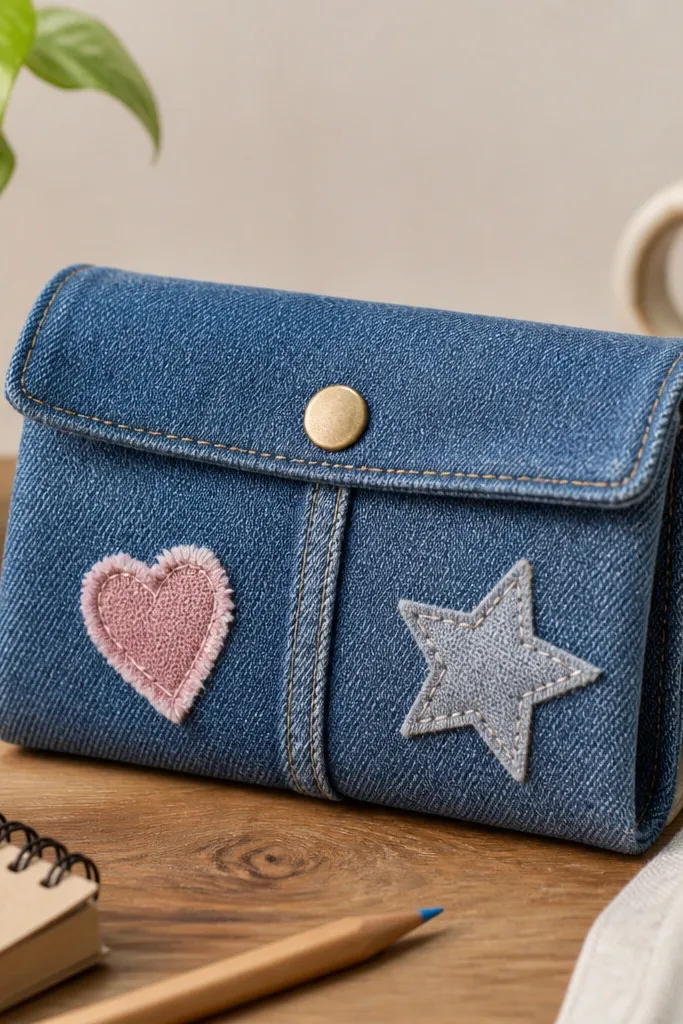
Denim is stiff enough to stand up, but still soft enough to feel handmade. Two compartments keep pens, chargers, and sticky notes from turning into a mess. I like using iron-on interfacing if you don’t want to sew — it gives structure where your fingers can’t. The patches make it personal without needing a lot of drawing skills.
Quick tipAdd a folded loop on the back for hanging by a desk lamp or hook.
Cut a 9 inch by 6 inch denim rectangle for the main body and a 9 inch by 3 inch panel for the divider. Add iron-on interfacing to the outer layer only. Use fabric glue or heat-and-bond tape to attach patches, then add a snap closure at the top corners. For the compartments, glue or stitch the divider panel about 1/4 inch from the sides.
One warningDon’t make it too tall; if it’s over 7 inches, it collapses when he reaches for items.
5. Thrift Frame Shadow Box for Ticket Stubs
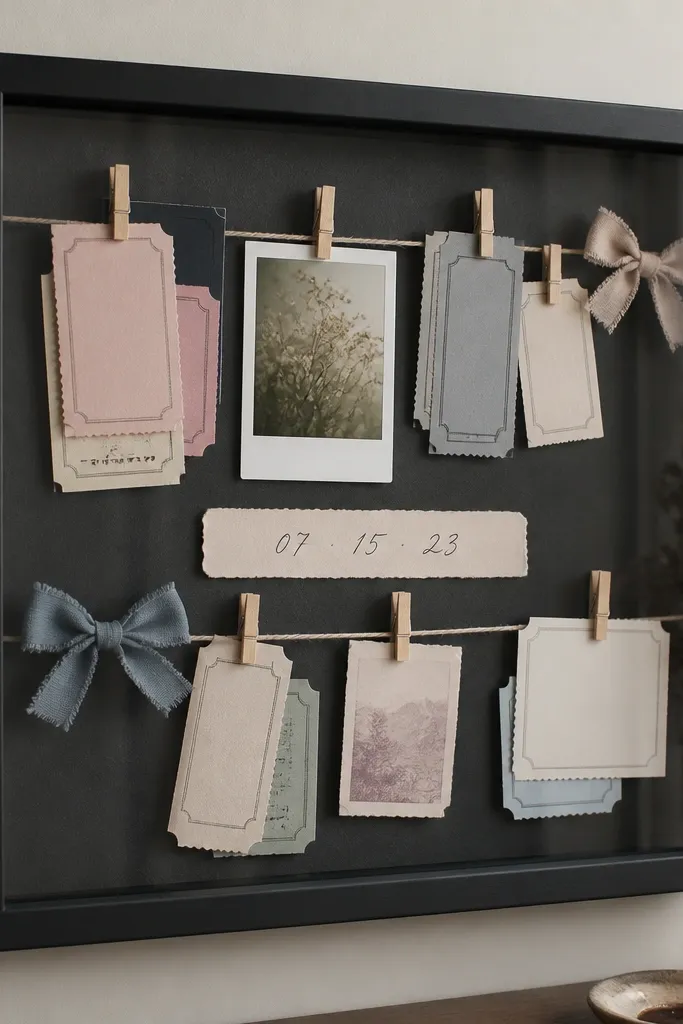
Shadow boxes look curated because you’re building layers, not just gluing flat paper. Ticket stubs add texture and real history, and they don’t look cheesy when you keep the layout tight. Clothespins give you a way to swap stubs for year-round updates. Dark backing makes every paper color pop.
Use a thrift shadow box with a removable backing. Cut charcoal cardstock to fit the back and glue it down. Arrange stubs in a grid, then attach mini clothespins along the top edge for easy swapping. Add a small strip of fabric as a “spine” behind the stubs so they sit at a consistent angle.
Write dates on narrow strips of paper and tuck them behind the stubs so the frame stays visually clean.
Don’t use too many fonts or colors; the inside turns into clutter fast.
6. Leatherette Wallet Insert for Receipts and Notes
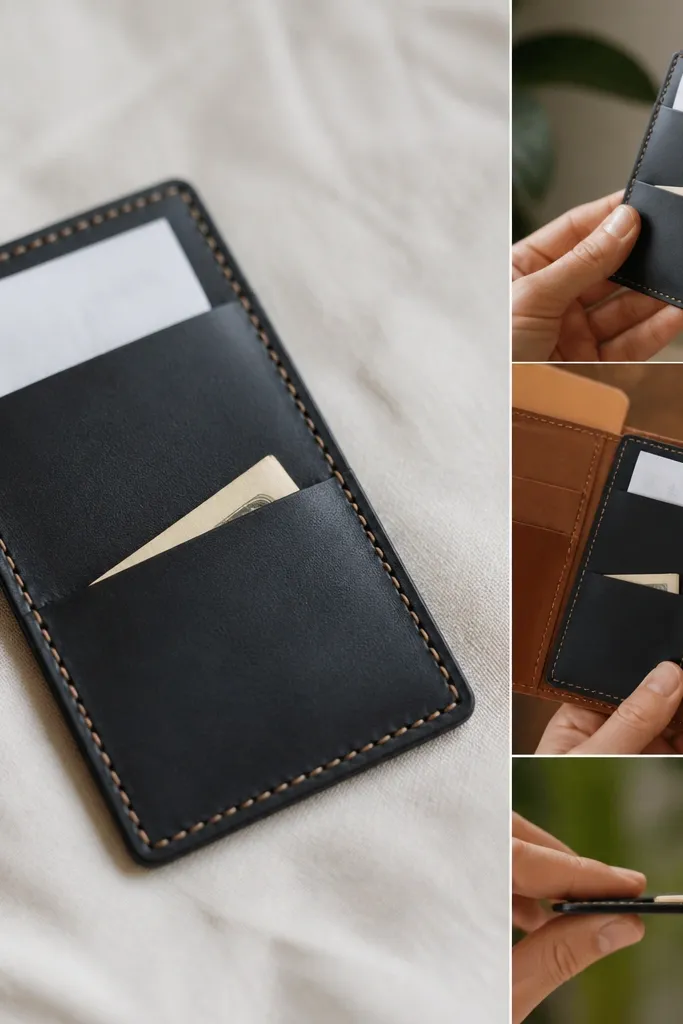
This is the kind of boyfriend gift he actually uses because it organizes the stuff that always ends up loose. Leatherette is forgiving and easy to cut cleanly, and stitching adds structure without making it bulky. Two pockets means he can separate receipts from personal notes. Keep it minimal and it reads intentional.
Cut leatherette into a 5.5 inch by 8 inch rectangle, then fold to create a pocket flap. Make two internal pockets from 3 inch by 4 inch pieces and stitch along the bottom edges. Use a straight stitch look with edge stitching every 1/8 inch. Insert fits best in a slim wallet — aim for a finished thickness under 1/4 inch.
Use a ruler and a metal cutting tool; uneven edges make it look store-bought-in-a-bad-way.
Don’t glue the pockets only; he’ll rip it with repeated pulling.
7. Vinyl Record Wall Hanging With Painted Spindle Heart
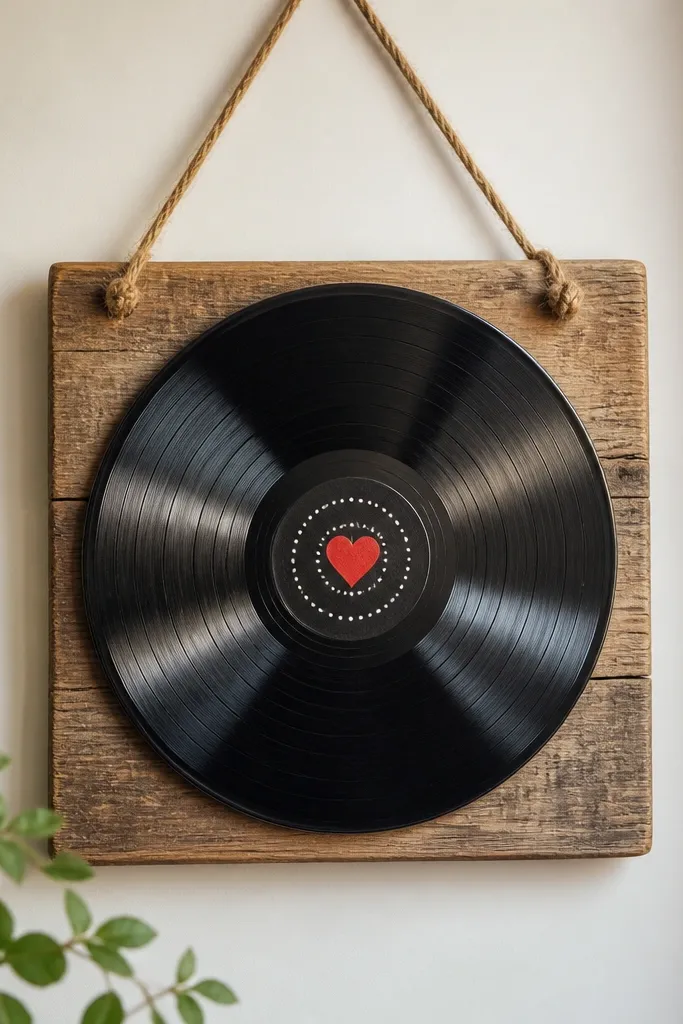
This works because vinyl has instant texture and contrast. The painted heart at the center makes it feel personal without covering the whole record. I’ve used matte acrylic for the heart and it keeps the shine balanced so it doesn’t look like a sticker. Jute rope adds a casual, lived-in vibe.
Quick tipClean the vinyl with rubbing alcohol first so paint doesn’t fisheye.
Remove the label area if you want a clean center, or cover it with painter’s tape circles. Paint a heart about 1.2 inches wide around the spindle hole and add small dot accents with a toothpick. Glue the record to a thin wood backing using strong construction adhesive. Add rope hooks on the top back for hanging.
One warningDon’t use glossy craft paint; it looks like a cheap decal on vinyl.
8. Candle Jar to Travel Match Holder With Brass Lid
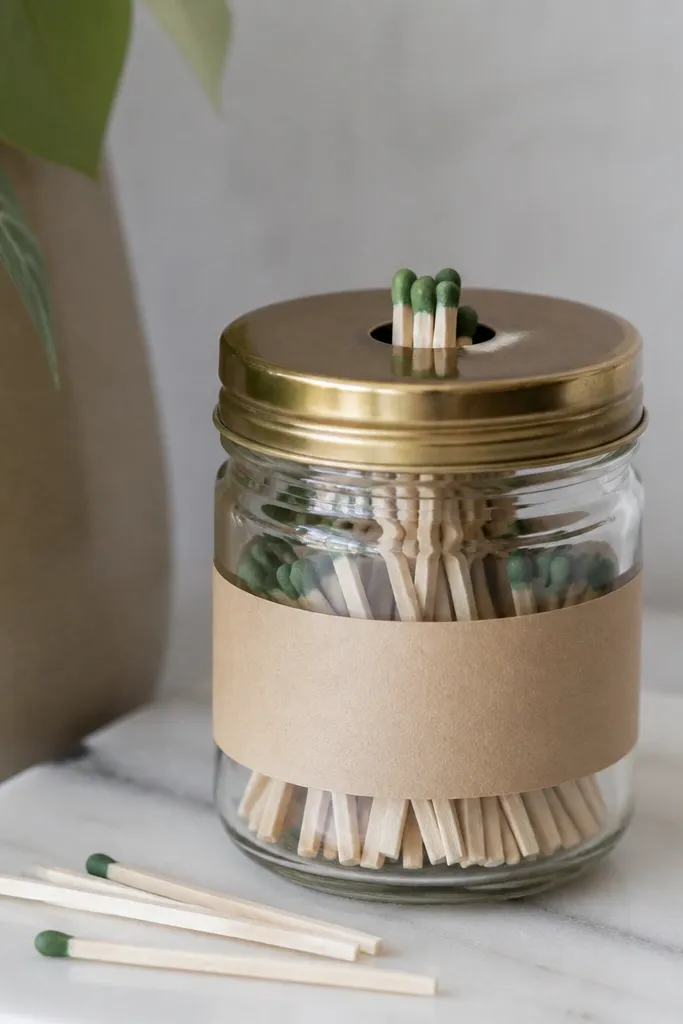
This is a practical repurpose that looks clean on a shelf or in a car console. The glass jar keeps matches dry, and the brass lid gives a warm, vintage feel. I like kraft paper labels because they hide the jar’s uneven residue after removing the candle wax. The match holder opening makes it easy to grab one without rummaging.
Remove all wax and wash the jar with hot soapy water. Dry completely. Add a kraft label using Mod Podge matte so it doesn’t peel. For the lid, use an existing brass lid or paint a metal lid with hammered finish spray, then drill a small slot near the edge for match heads to peek.
Add a tiny strip of sandpaper under the slot so struck matches catch reliably.
Don’t leave wax residue; it makes labels slide and looks messy.
9. Paint-Chip Love Notes on Wood Slices
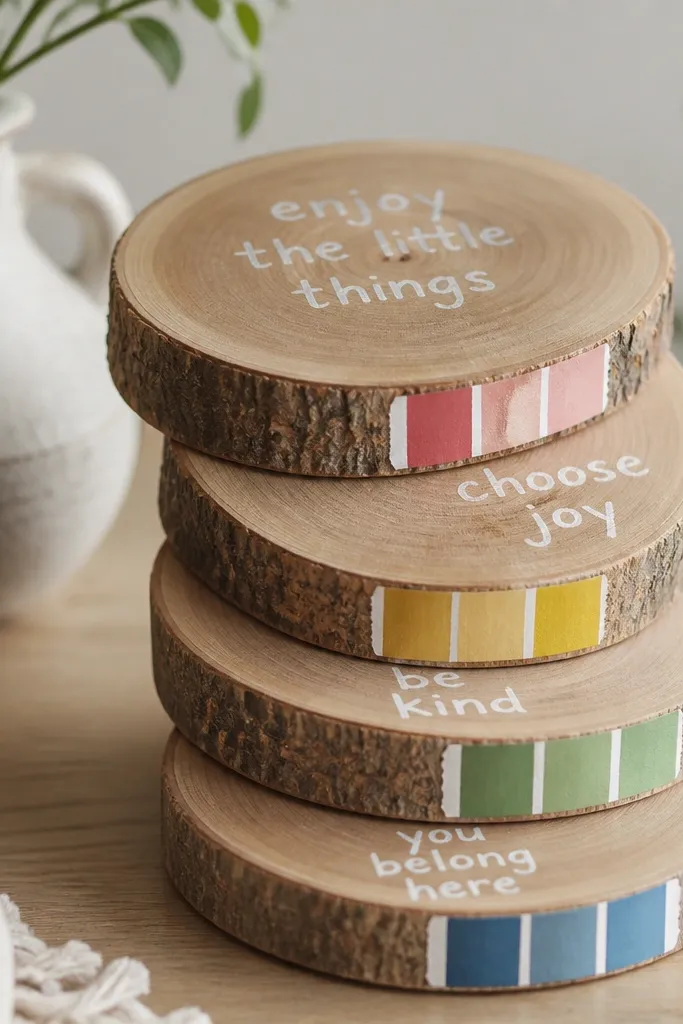
Wood slices feel personal because they show grain and age. Paint chips are already color-matched, so your notes look coordinated even if you’re using random thrift paper. I write short lines — one sentence — then seal with a clear matte coat. It turns into a gift he can pull from all year.
Buy 1.5 to 2 inch wood slices or cut from craft wood and sand edges. Paint or write messages with acrylic paint marker, then add a small strip of paint chip paper with a thin layer of Mod Podge. Seal each slice with matte clear spray. Tie slices together with a jute string and a small tag that says “Open when you need a reminder.”
Use a white paint pen for the message, not a regular marker; it stays legible on wood grain.
Don’t stack wet paint chips; they wrinkle and the colors look uneven.
10. Sew-On Name Patch Keychain With Matching Thread
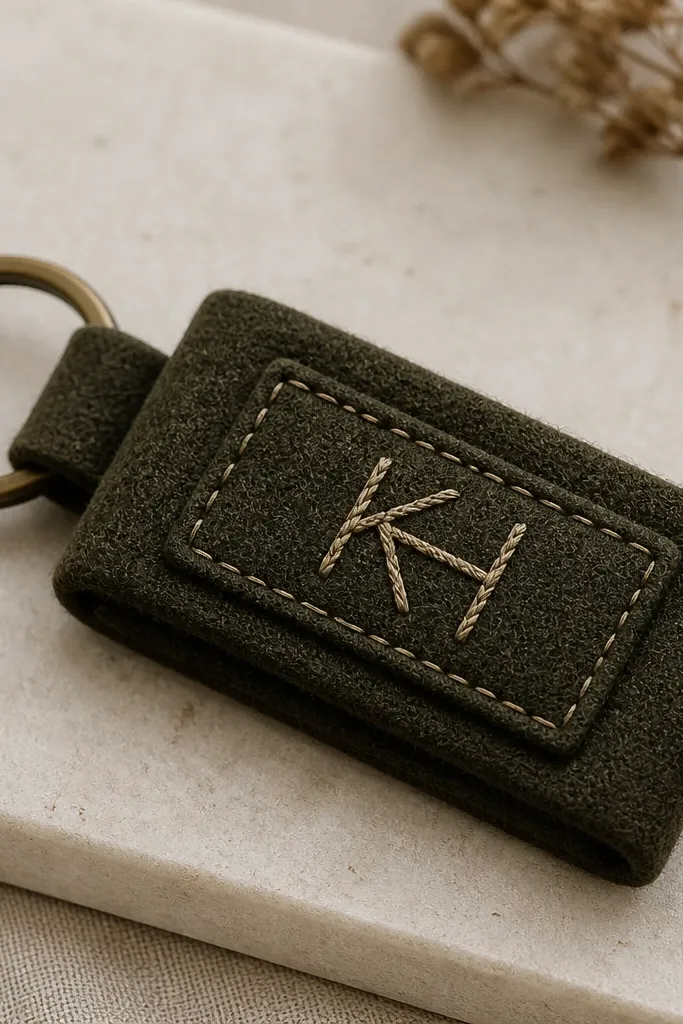
Felt is easy to cut and it looks clean with hand stitching. A name patch keychain is personal without needing photos. The matching thread color is what makes it look intentional — like you planned the palette. I like olive felt with tan thread and one tiny red accent stitch for that “real craft” look.
Quick tipUse embroidery floss doubled for thicker lettering and fewer passes.
Cut a 3 inch by 2 inch felt base. Cut a 2.2 inch by 1.4 inch felt patch for the front. Sew the patch onto the base using a straight stitch or blanket stitch. Add initials with embroidery floss and a simple backstitch. Finish by attaching a key ring to a folded felt loop stitched at the top.
One warningDon’t skip backstitch for letters; satin stitching makes felt lettering look shaky.
11. Repurposed Sweater Fingerless Gloves With Leather Button Closure
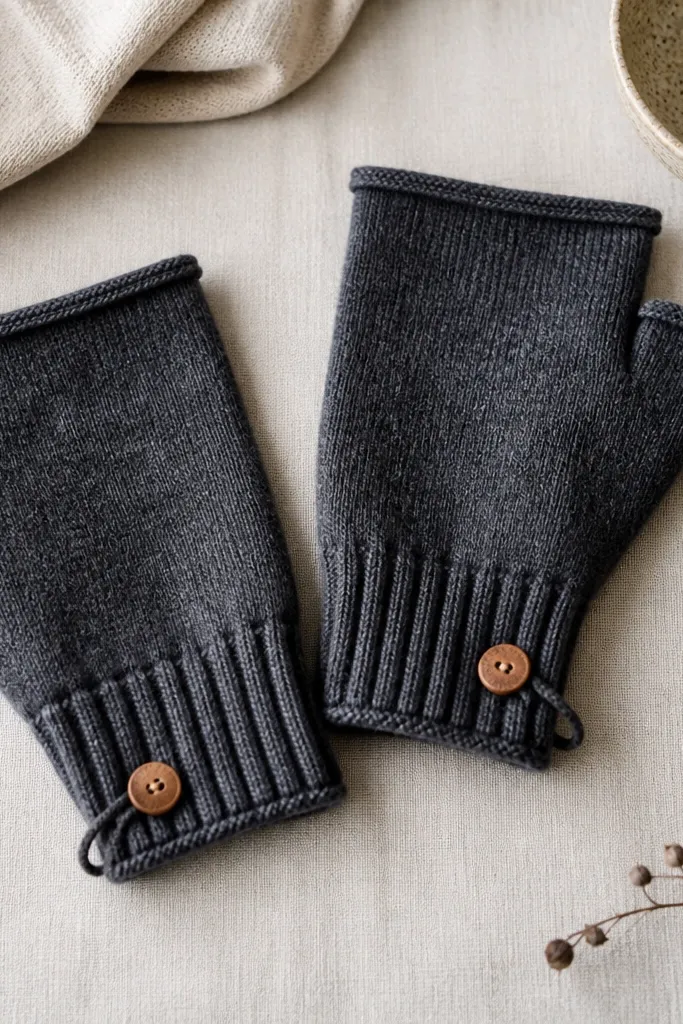
Upcycled gloves feel personal because knit stretches to the hand and looks cozy fast. The leather button closure keeps the glove from slipping when he’s driving or typing. I like sweater cuffs for this because ribbing already grips. Use contrasting thread so the stitching reads like design, not repair.
Quick tipWash and dry the sweater first so the glove doesn’t shrink after you gift it.
Cut two sleeves from a sweater, about 9 inches long each. Trim the thumbs off to create fingerless openings, then turn the raw edges under 1/4 inch and stitch with a stretch stitch or zigzag on a sewing machine. Add a leather loop tab and sew a button at the wrist. This gift fits year-round because it’s useful in winter and spring.
One warningDon’t cut the opening too high; if it covers the knuckles, he’ll hate wearing them.
12. Photo Transfer Mug Coaster Set on Cork
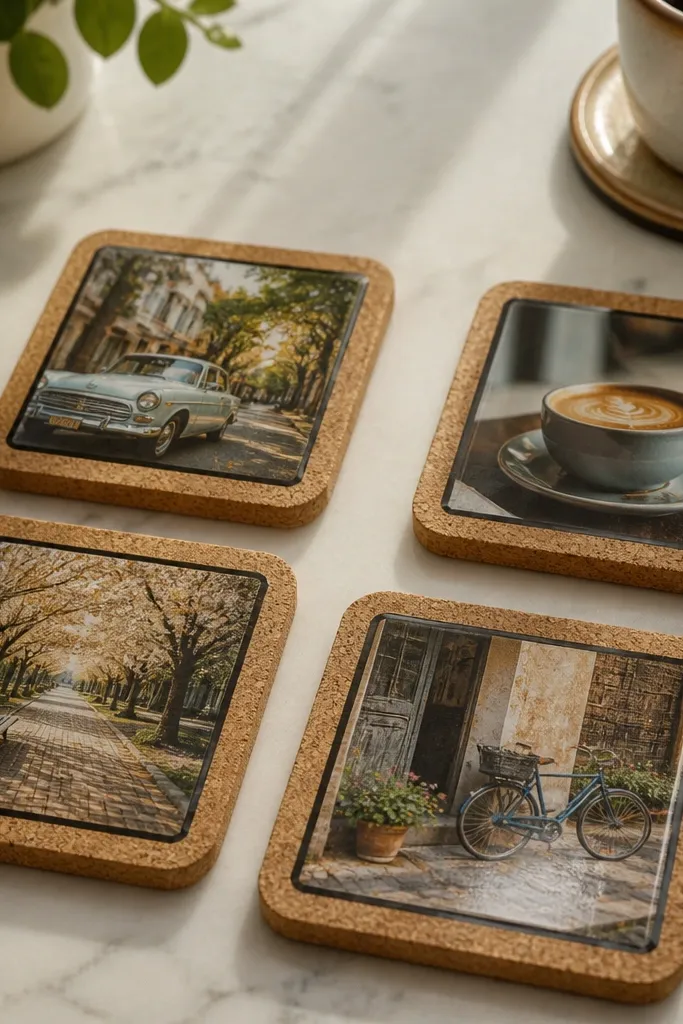
Cork handles heat and spills, so the coasters don’t warp like paper coasters. Photo transfer gives you a clean image without cutting tiny pictures into strips. I use mini photos and a border so the images don’t look washed out. The glossy top coat makes it feel store-bought.
Use 4 inch cork coasters. Print photos using a laser printer if you’re doing photo transfer medium, or use printed image sheets meant for decoupage if you’re using Mod Podge. Apply in thin layers and press out bubbles with a plastic card. Seal with 2-3 coats of waterproof clear varnish.
Pick photos with bold contrast — bright highlights and dark shadows — so the transfer stays readable.
Don’t use inkjet photos for transfer; the colors smear on sealing.
13. Thrift Sheet Music Love Chain Bookmark
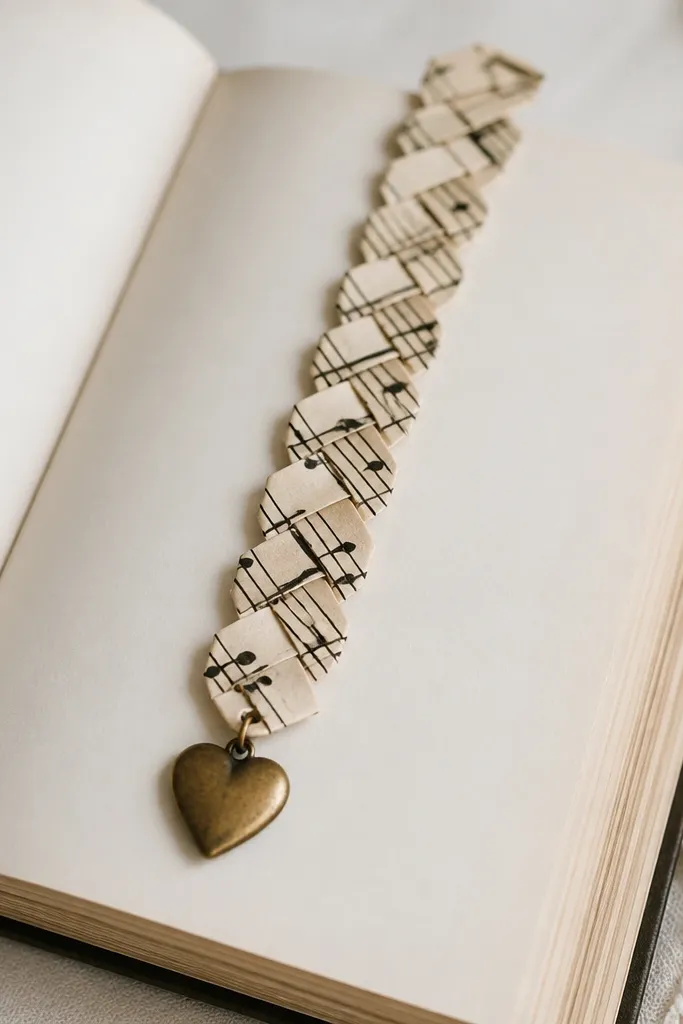
Sheet music paper has texture and it looks romantic without screaming “Valentine.” The chain format is also functional — it grips pages and doesn’t just slide. I like adding one small charm because it catches light when he moves the book. Keep the colors muted so it fits year-round reading.
Quick tipSeal the paper with a light spray of matte fixative so it won’t smear when handled.
Cut 10 strips of sheet music paper, each about 1 inch wide and 6 inches long. Fold each strip accordion-style, then glue ends to form links. Stack links and glue them together like a chain. Attach a jump ring to the last link and hang a heart charm or small letter charm.
One warningDon’t make the strips too thick; thick paper chain bookmarks feel bulky in books.
14. Car Dashboard Photo Clip With Magnetic Backing
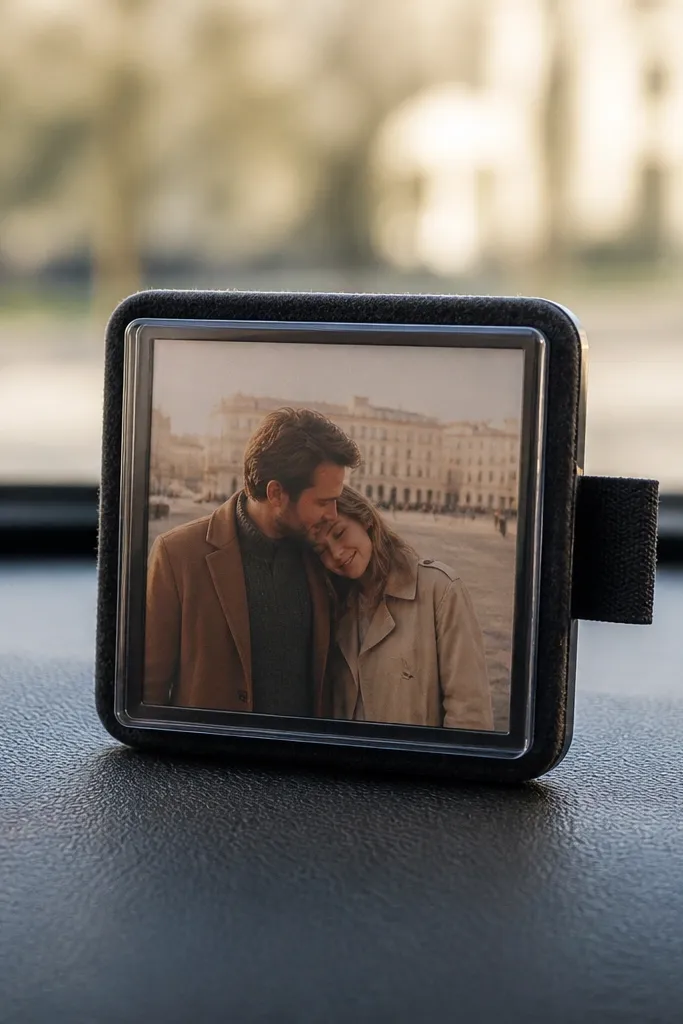
A dashboard photo clip feels personal and he sees it every day. Magnetic backing is key because it removes cleanly without suction cups failing in heat. Felt around the photo stops glare and gives a soft frame. Add a clear cover so it survives dust and sunlight.
Quick tipTest the magnet strength on your exact dashboard surface before you finalize the cover.
Cut a felt rectangle slightly larger than the photo, about 3.5 by 2.5 inches. Attach the photo with spray adhesive, then add a clear plastic sheet cut to match and tape the edges with clear packing tape. For the back, glue a strong rare-earth magnet to a felt tab. Put the magnet inside the tab so it doesn’t touch the photo.
One warningDon’t use flimsy magnets; they pop off when the car heats up.
15. Thrift Wood Coaster With Burned Initials and Oil Finish
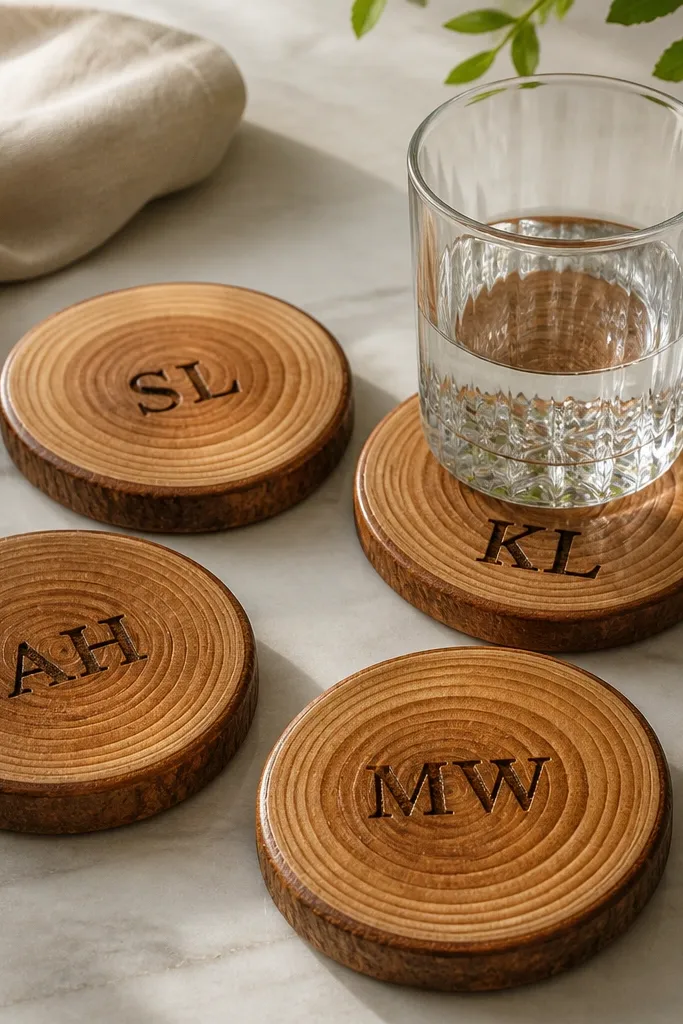
Wood coasters look masculine fast, especially when you burn initials instead of painting. Burning gives you natural contrast that matches the grain. Oil finish makes the wood feel smooth and it deepens the color without looking glossy or plastic. It’s a gift that looks good even when it’s sitting empty.
Quick tipBurn with light pressure and slower passes; it looks cleaner than trying to darken in one go.
Sand 2.5 inch wood rounds to 220 grit. Use a wood-burning tool set to a medium heat and practice on scrap first. Burn initials about 1 inch wide. Wipe on a thin coat of food-safe mineral oil or a hardwax oil and buff after 10 minutes. Repeat once more for a smoother surface.
One warningDon’t skip sanding; rough wood makes the burned lines look fuzzy.
16. Upcycled Tie Wrap Bracelet With Hidden Watch Strap Loop
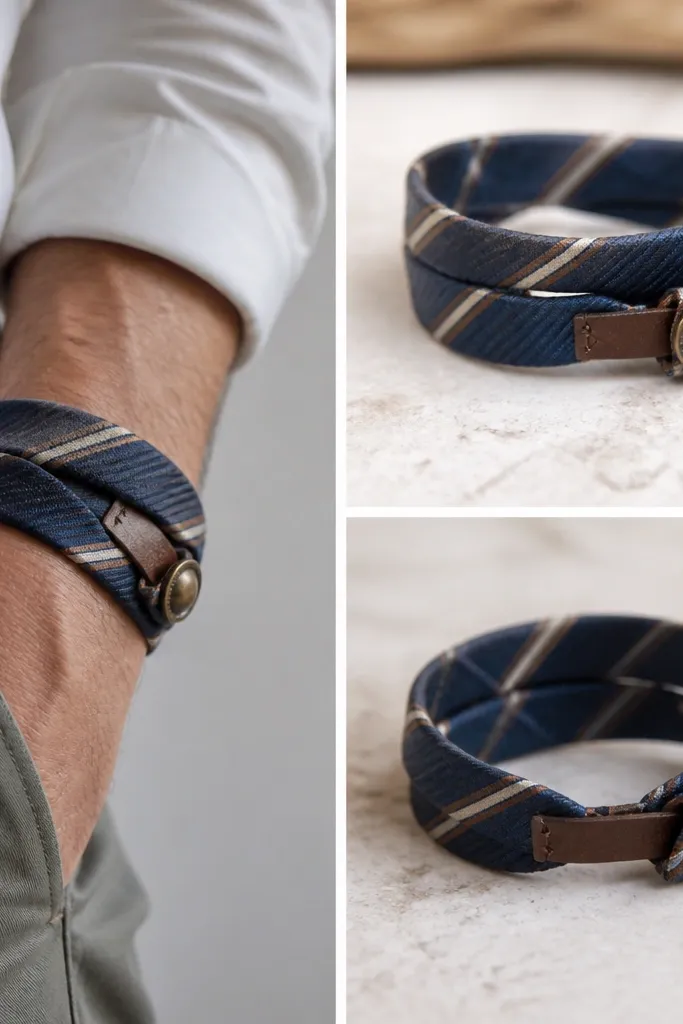
Tie fabric is sturdy and already patterned, so it instantly looks “designed” instead of handmade. The hidden loop gives you a secret function — he can thread a small strap or attach a tiny charm. I like wrap bracelets because they fit different wrist sizes and look good alone or with a watch. Use one tie pattern and one hardware color for a clean look.
Quick tipCut the tie fabric on a diagonal grain so it lays flat on the wrist.
Cut a tie panel about 1 inch wide and long enough for two wraps. Back it with lightweight fusible interfacing so it doesn’t flop. Sew the ends together at the back with a tight stitch, then add a metal button and small loop closure. For the hidden loop, sew a narrow channel on the underside so a thin strap piece can slide in and out.
One warningDon’t use frayed tie edges; trim and finish the ends or it will look like a quick repair.
17. Gel Pen Map Coordinates Notebook Cover
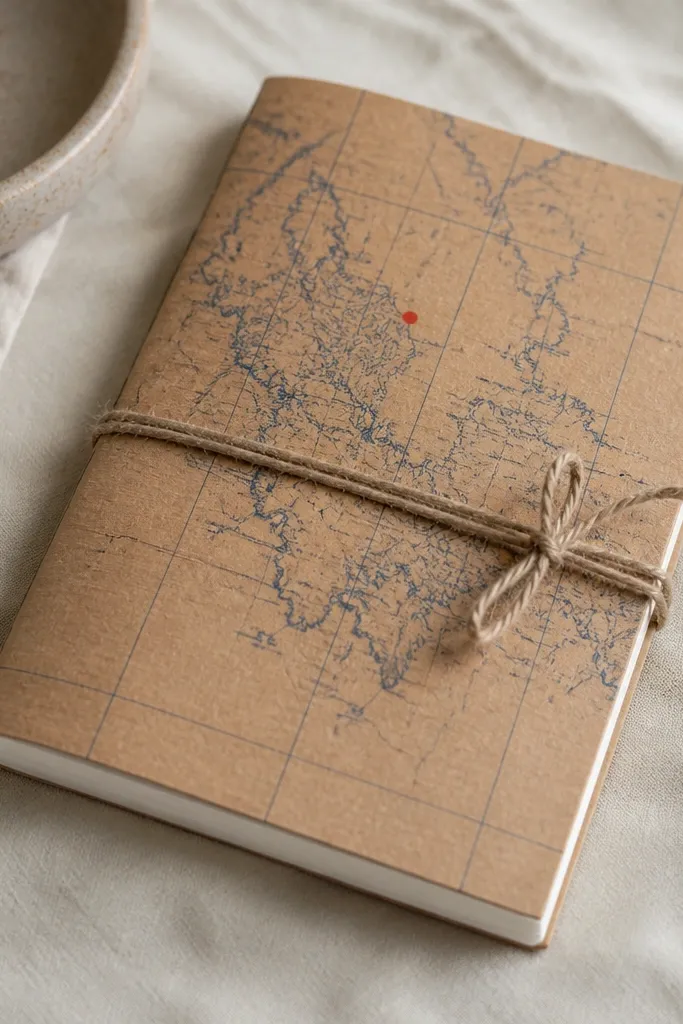
This one hits because coordinates are specific and personal, and the kraft paper makes it look like a real object, not a craft project. Gel pen lines look crisp and slightly imperfect in a good way. I’ve made covers like this for birthdays and they still look good months later because the paper holds up when sealed. The twine tie is the finishing touch.
Quick tipUse a ruler for the coordinate line; straight text instantly upgrades the look.
Cut kraft paper to wrap around the notebook cover with a 1/2 inch overlap. Seal it with matte Mod Podge so it resists smudging. Write the coordinates with a blue gel pen and add a red dot marker at the end of the line. Tie twine around the notebook spine using two holes punched through the cover.
One warningDon’t leave kraft paper unsealed; gel ink smears with hand oils.
18. Scented Drawer Sachet in Repurposed Pocket Liner
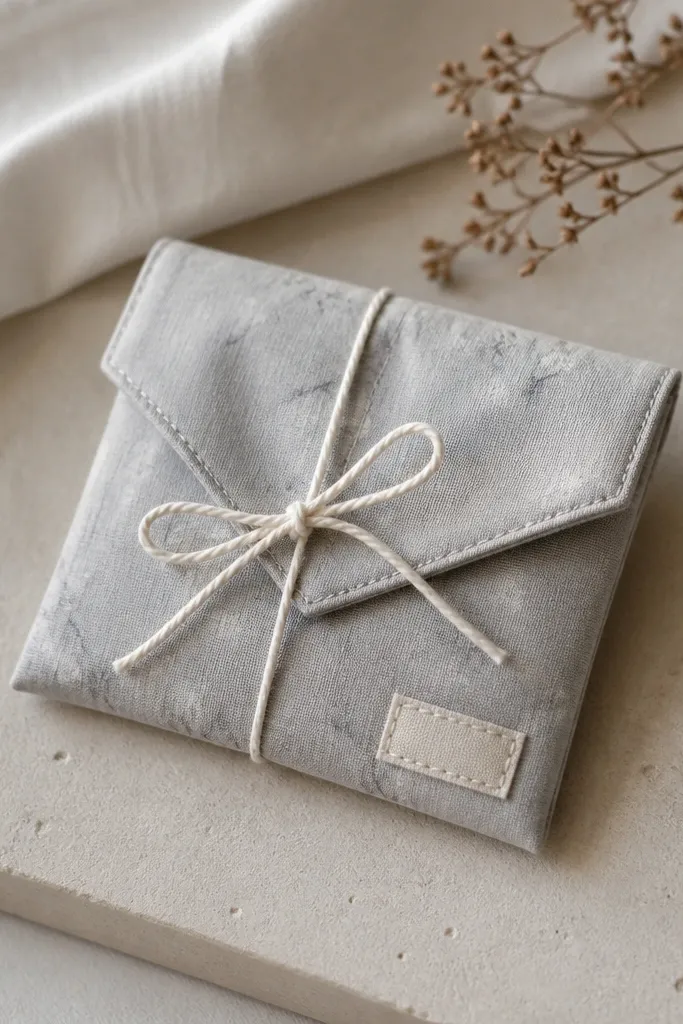
Sachets are a sneaky win for year-round DIY valentines gifts for boyfriend because they get used without thinking. The pocket-liner fabric holds scent longer than thin organza. I fill with a blend that smells clean, not perfumey: dried lavender, a pinch of cedar shavings, and a few drops of essential oil on a cotton ball inside the pouch. It’s subtle, but he notices when his hoodie drawer smells fresh.
Quick tipUse less essential oil than you think; heavy scent turns into headache fast.
Cut two 5 by 7 inch rectangles of pocket-liner fabric and sew three sides. Add a small inner cotton ball pouch so the oil doesn’t touch fabric directly. Fill with 1 to 2 tablespoons lavender plus a few pinches of cedar. Tie the top with twine and stitch a small label using fabric marker.
One warningDon’t use cheap potpourri; it looks dusty and smells stale quickly.
19. Pocket-Sized Toolbox Photo Holder From Popsicle Sticks
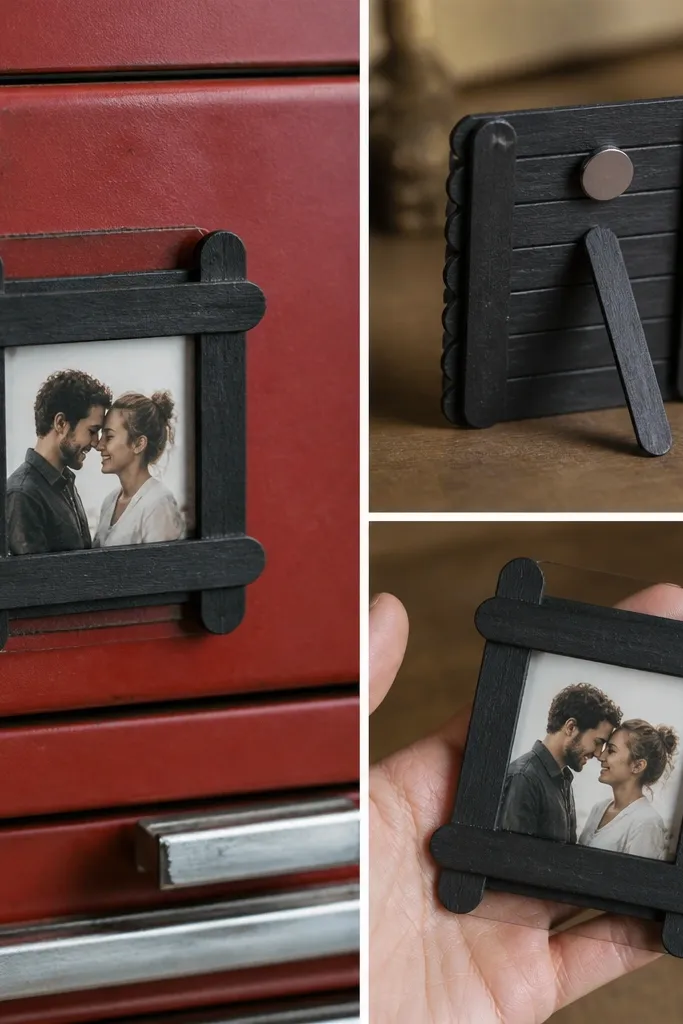
This is a fun DIY gift for boyfriends who live near a toolbox. Popsicle sticks are light, but if you glue with wood glue and add a clear plastic window, it looks sturdy. The magnet makes it reusable for work — he can swap photos without reassembling. I paint matte black so it doesn’t look like a kid craft.
Quick tipUse wood glue for strength; hot glue alone cracks with movement.
Glue popsicle sticks into a 3.5 by 2.5 inch frame and sand edges lightly. Paint with matte black acrylic and let cure fully. Add a clear plastic window cut to size and glue it in with a thin bead. Attach a small rare-earth magnet to the back with hot glue, then glue a fold-out stand from two stacked sticks.
One warningDon’t skip sanding; rough edges catch tape and make the window look misaligned.
20. Heat-Transfer Hoodie Patch With Faux Stitch Border
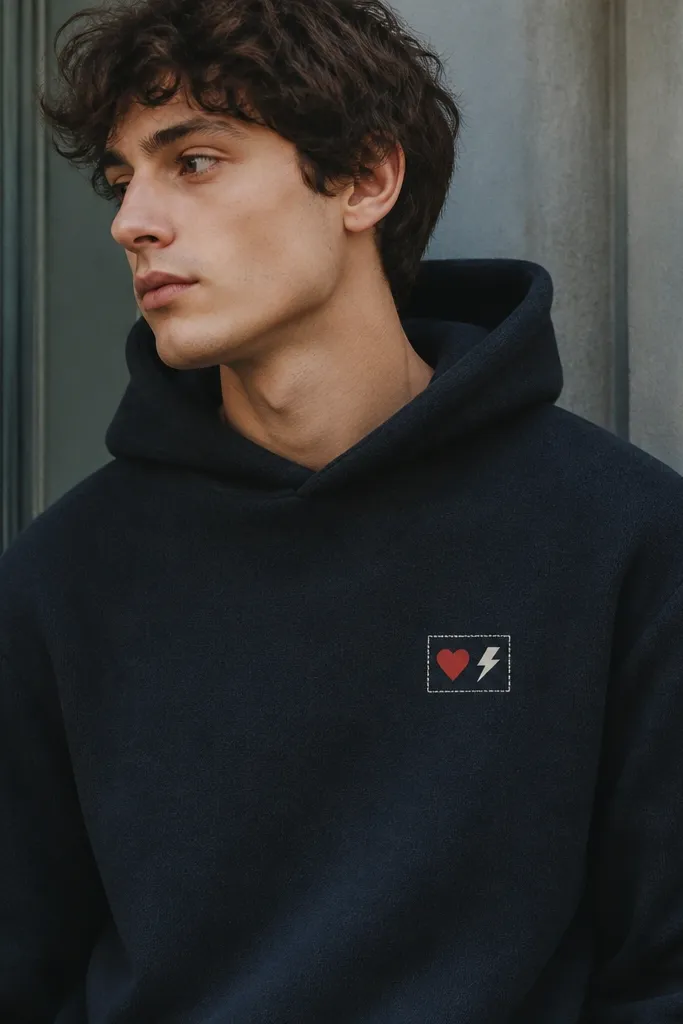
A heat-transfer patch is one of the fastest ways to make a hoodie feel like a gift and not a random item. The faux stitch border tricks the eye into thinking it’s sewn. I like simple graphics because they survive washing better than tiny details. Use two colors max so it doesn’t turn into a smudgy blob after a few cycles.
Quick tipWash inside-out in cold water and skip the dryer for the longest life.
Print a design on heat-transfer vinyl or use a transfer sheet made for fabric. Cut the patch shape with a small border so the edges don’t lift. Press with a heat press or iron on high heat and firm pressure for the full time on the transfer instructions. After it cools, press again lightly through a thin cloth.
One warningDon’t use super thin paper transfers; they crack at the edges and peel.