
1. Leather-look key organizer with his initials stamped in vinyl
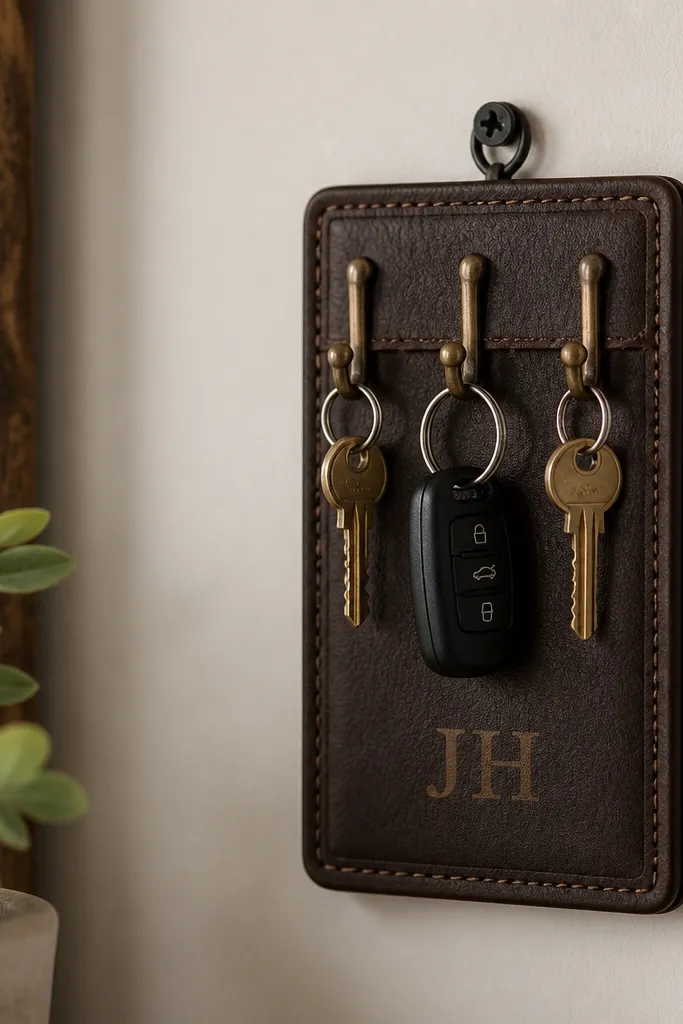
This one looks expensive because the faux leather vinyl has a real grain and the initials land like a shop-made stamp. I used a two-tone setup — dark brown body with tan lettering — because it reads clearly even in low light. The hooks keep his keys from disappearing in the same drawer, which makes the gift feel practical, not decorative. The clean rectangle shape also photographs well.
Cut a 10 x 6 inch panel, rounded at the corners, and back it with thin craft foam or a folded layer of cardboard for stiffness. Add three small screw hooks spaced 1 inch apart, centered horizontally. For the initials, cut tan vinyl letters, press them on, then seal over them with matte clear acrylic or Mod Podge Outdoor in thin coats.
Quick tipUse a ruler and mask tape to line up the hooks before you drill or screw — crooked hooks make the whole thing look DIY.
One warningDon’t skip edge sealing; unsealed faux leather edges curl and fray fast.
2. Desk cable cord wrap set in matching colors
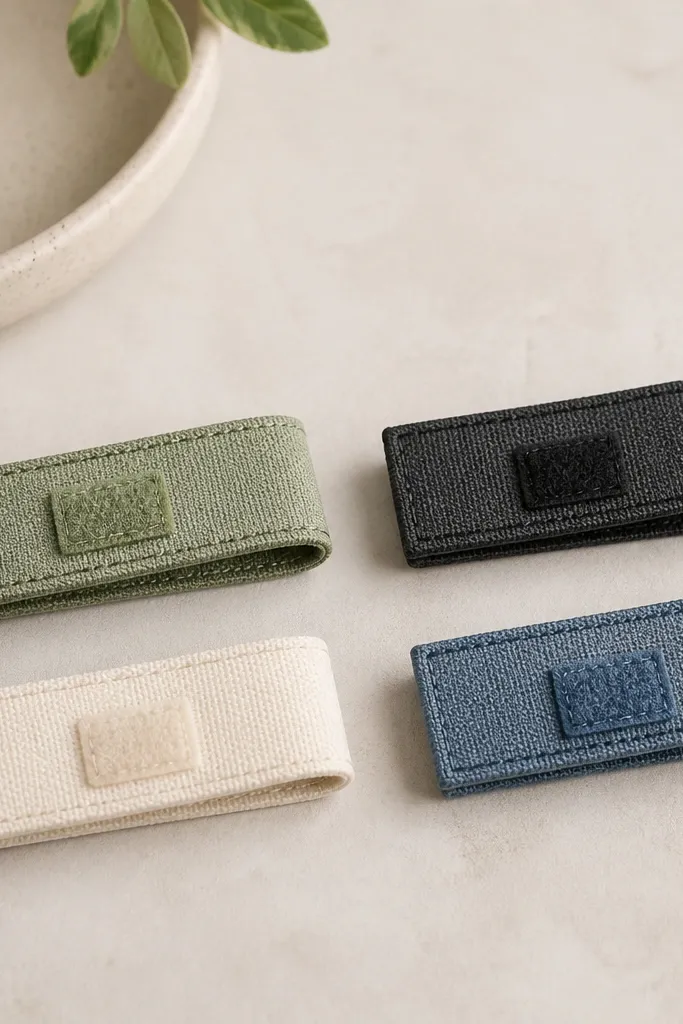
This is the “he’ll use it every day” gift that still looks aesthetic. The wraps hide the messy cable loops and keep them from tangling, so his desk looks calmer. I like solid colors with one accent thread color because it looks intentional. The Velcro makes it easy for him to wrap and unwrap without struggling.
Cut four strips of fabric 2.5 inches wide and 10 inches long. Fold each strip lengthwise, right sides together, sew along the long edge, turn, then topstitch 1/8 inch from the edge. Add a 1-inch Velcro square on the end flap and a matching Velcro patch on the inside.
Quick tipMatch the wrap colors to what he already has — if his laptop is silver and his mouse is black, go cream + charcoal + one muted accent.
One warningDon’t use slippery satin fabric; it slides off cables and looks messy after a week.
3. Framed "date we met" coordinates print with layered paper edges
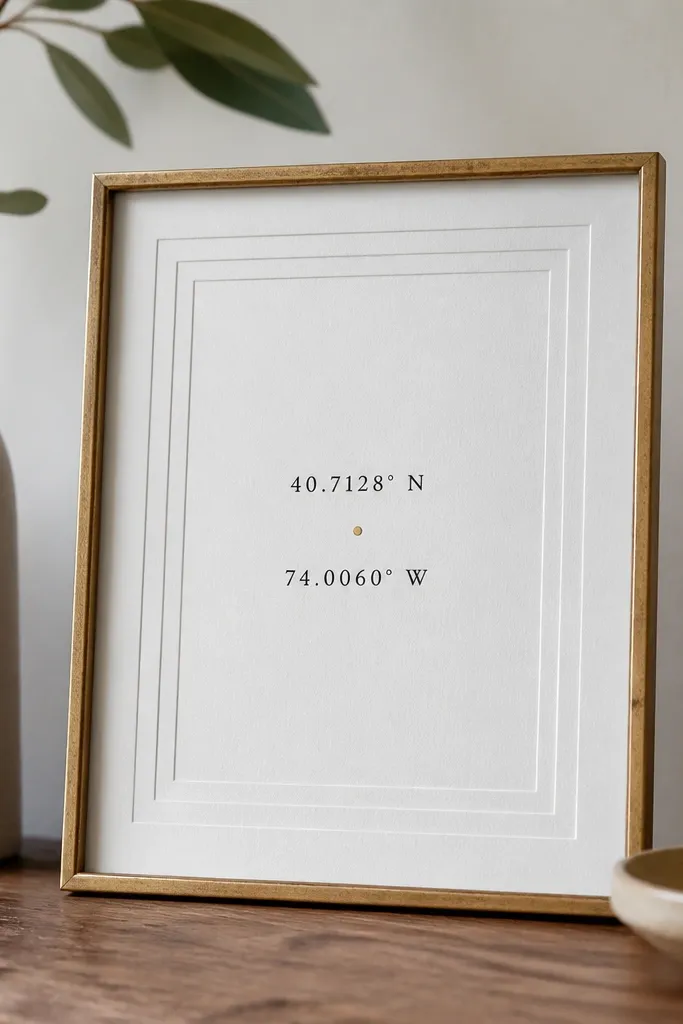
Coordinates look personal without turning the whole thing into a scrapbook. The layered paper edge makes it feel like a real studio print, not a home printer job. I keep the palette tight — off-white, black ink, and one gold dot — so it looks clean on a wall. The gold dot catches light and gives it a focal point.
Print coordinates on off-white cardstock, then cut a mat layer from white paper with a 1/4 inch offset window. Glue the layers with a thin line so the stepped edge stays crisp. Use a simple black or walnut frame, and put the gold dot sticker or foil accent on the corner of the text.
Write the date in tiny type under the coordinates so it reads like a signature instead of a headline.
Don’t use thick glue blobs behind the paper layers; they warp and show through.
4. Knitted mini wall hanger in chunky yarn with a wooden dowel
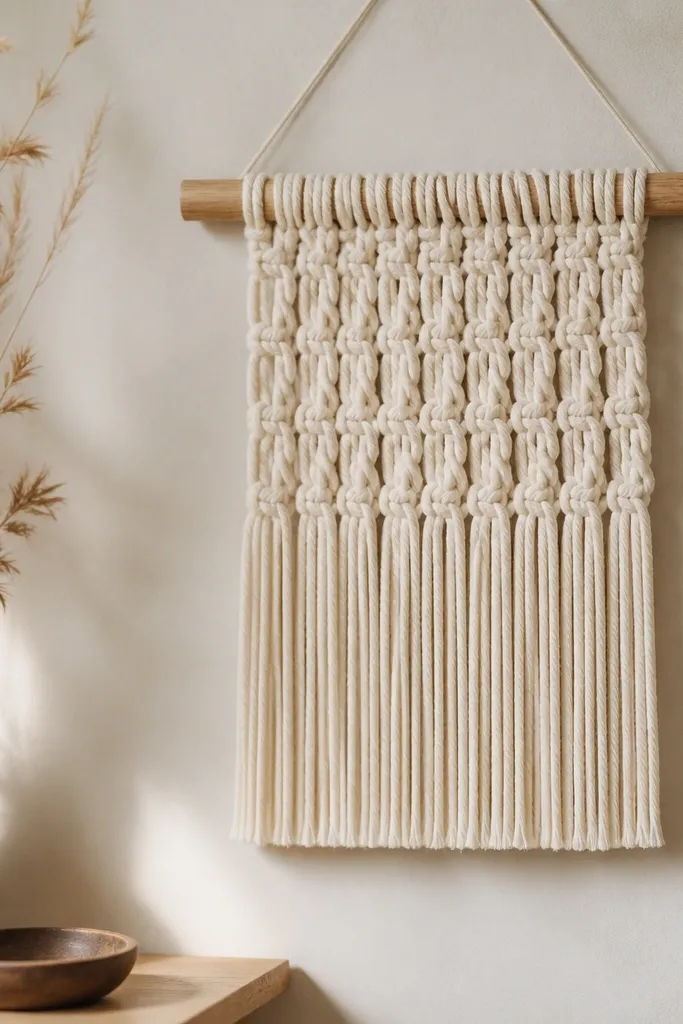
Chunky yarn has instant texture, and texture reads as “handmade” in a good way. The wooden dowel gives it structure, so it hangs straight instead of drooping. I like cream or oatmeal with a single stripe of muted olive yarn because it looks calm and modern. This one is a great fit if he likes neutral interiors or hates clutter.
Use arm-knitting or a simple knot weave. Cut 24-30 strands at 18 inches each, fold in half for loops, and attach to the dowel with a tight knot. Leave a 1.5 inch gap between knots for an even, airy look. Trim the ends after it hangs for a few hours so the fringe settles.
Quick tipMist the yarn lightly with water, hang it overnight, then trim — it gives cleaner lines.
One warningDon’t trim before it settles; the fringe ends uneven and looks rushed.
5. Reusable scent sachet jar with dried citrus and cedar shavings
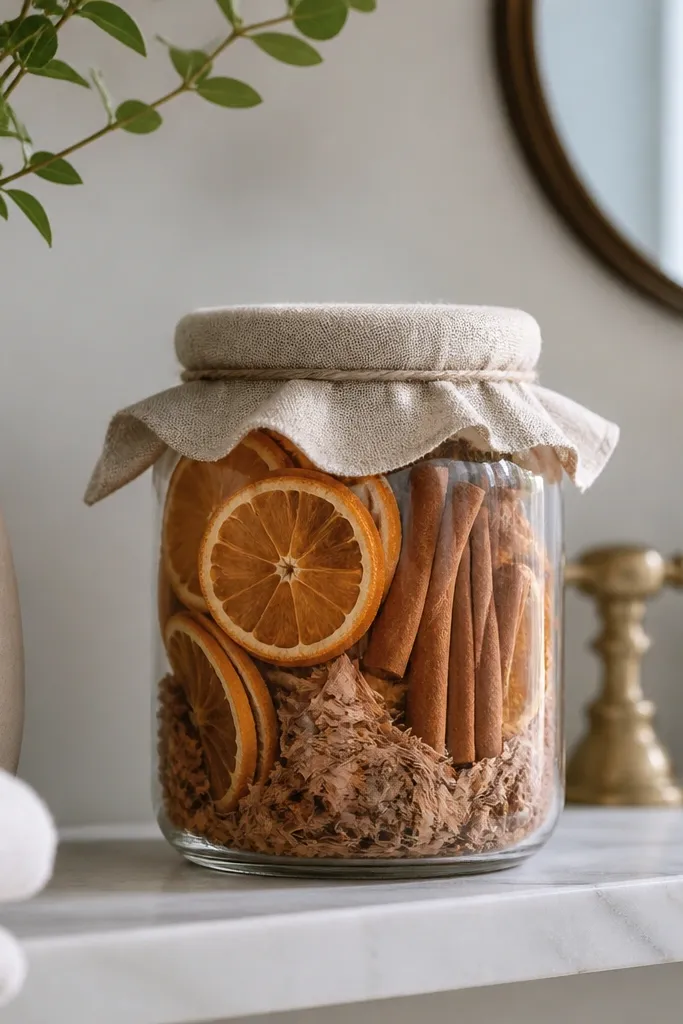
This looks like a decorative apothecary jar, but it’s also useful. The dried citrus brings a bright, clean smell, and cedar adds a deeper base that sticks around. I keep the jar small — around 8 ounces — so it fits a nightstand or bathroom corner without taking over. The fabric lid makes it look cozy instead of industrial.
Fill a clean 8 oz jar with 1/3 cedar shavings, add 2-3 dried orange slices, and tuck one short cinnamon stick. Cover with breathable cotton or linen fabric held by a rubber band or a screw-on jar lid with holes. Replace citrus after it loses scent; cedar lasts longer.
Quick tipAdd 3 drops of essential oil to a cotton ball and tuck it behind a slice so it releases slowly.
One warningDon’t seal the jar airtight; the smell gets trapped and turns flat.
6. Custom stained-glass style keychain using clear acrylic paint
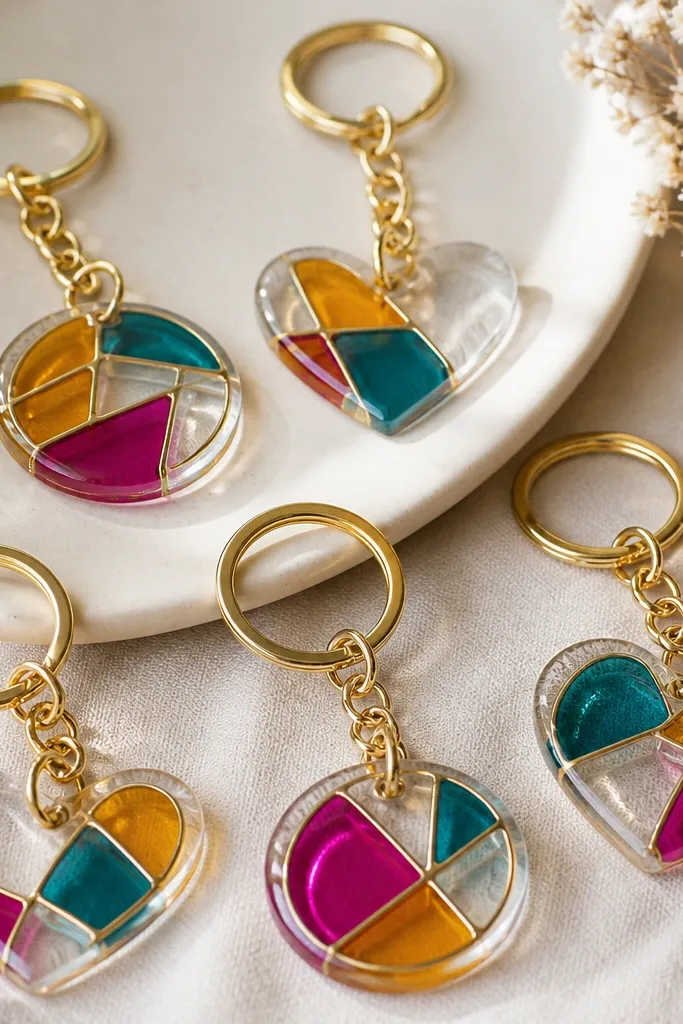
The stained-glass look is all about bold outlines and glossy color. Clear acrylic sheets let the light pass through, so it glows when the keychain catches sunlight. I like using thick black outline paint so the colors stay separated and don’t blur. It’s a fun gift for a boyfriend who carries keys everywhere.
Cut acrylic shapes with a template, then outline with black acrylic paint or fabric paint in a thick line. Fill sections with translucent acrylic colors. Let it cure fully, then punch a hole and attach a metal keyring with a jump ring.
Do 2 thin color coats instead of one thick coat; thick paint clouds the acrylic.
Don’t rush curing; moving it early makes paint smear into a muddy look.
7. Photo strip lightbox using washi tape and a small LED panel
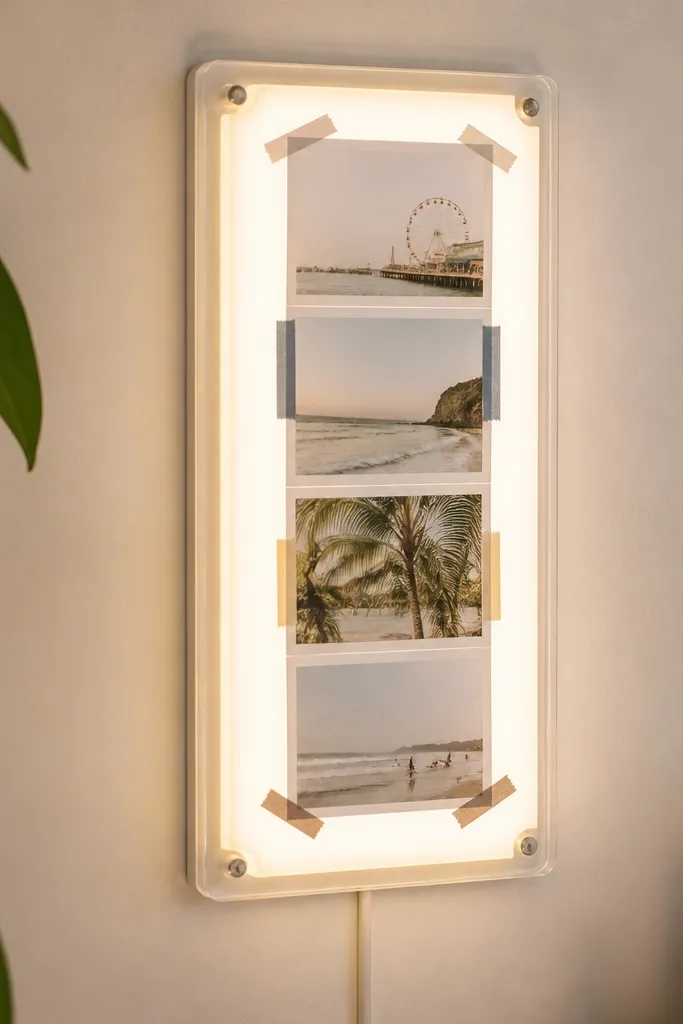
Light makes photos feel special. The washi tape grid makes it look designed because it creates straight boundaries and consistent spacing. Use warm white LED so skin tones in your photos look natural. This is the kind of gift that turns his desk into a “home” spot.
Print 4-6 photos in the same size, then lay them on a clear acrylic or plastic sheet. Tape borders with 1/4 inch washi strips and keep the photos aligned with a ruler. Put the sheet in front of a small LED panel (like a desk lightbox) and secure it with corners or a simple frame.
Quick tipPick washi tape with one pattern max; too many patterns fight the photos.
One warningDon’t use bright cool-white LEDs; it makes everything look harsh in photos.
8. Woven fabric coasters with a leatherette backing
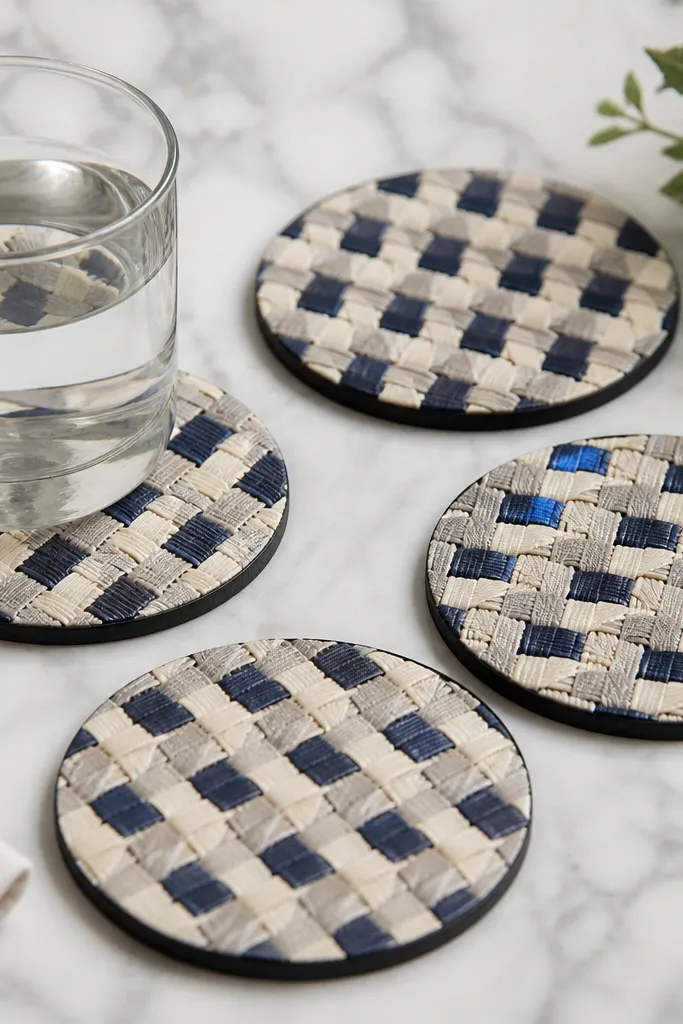
Woven coasters look like something you’d buy at a boutique, but they’re forgiving to make. The leatherette backing keeps them stable and protects the table from condensation. I like a three-color weave because it adds depth without looking busy. When the coaster sits still, the pattern reads crisp.
Cut 1 inch strips from cotton fabric and weave into 4-5 inch rounds using a simple over-under pattern. Back with a circle of leatherette cut slightly smaller, then seal the underside edges with fabric glue. Add a clear topcoat of Mod Podge for water resistance.
Quick tipUse heavier cotton, not thin quilting scraps, so the weave stays tight.
One warningDon’t skip sealing the top; fabric drinks water and stains quickly.
9. Personalized watch roll in faux suede with snap closure
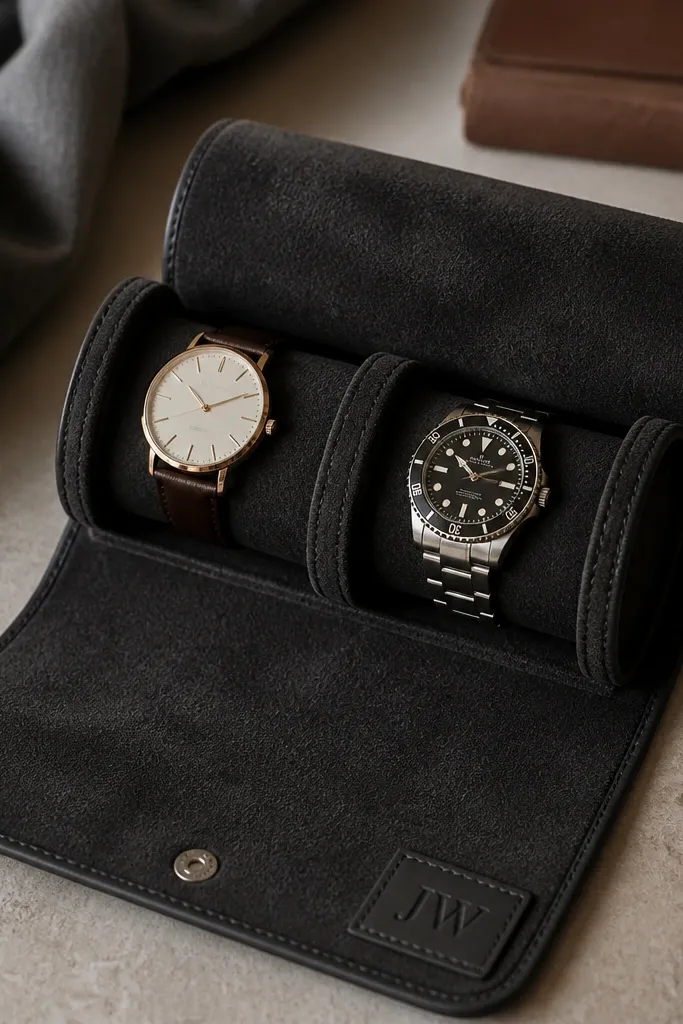
A watch roll is one of those gifts that feels thoughtful because it solves a problem he has. Faux suede looks soft and expensive, and it grabs the light in a flattering way. The snap closure keeps watches from sliding, even when he tosses it in a bag. Personalizing the label makes it look like it belongs to him.
Cut two rectangles of faux suede and interface the outer layer for structure. Sew slots by stitching a strip of suede across the interior at 1.5 inches from the fold, then topstitch the edges. Add a snap at the fold and a small stitched label with his initials using waxed thread.
Quick tipTest snap placement with the roll closed before sewing — you want it tight but not stretched.
One warningDon’t use slippery lining fabric; watches slide and the roll looks sloppy.
10. Upcycled denim wallet card holder with stitched edge binding
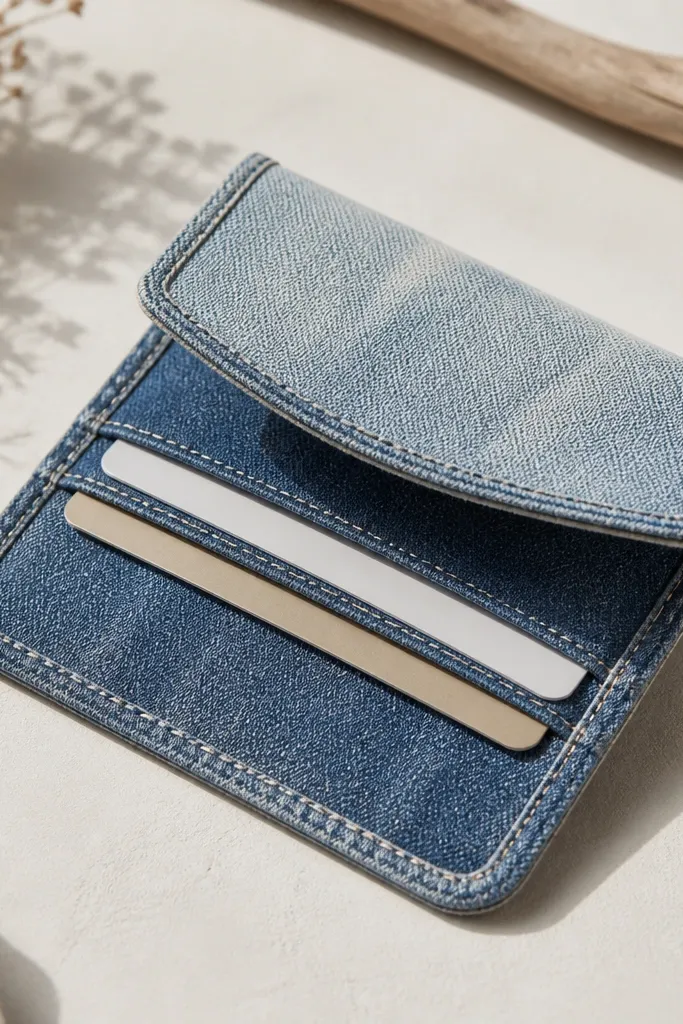
Denim holds up, and the faded look already feels personal. By adding stitched edge binding, you make it look intentional instead of like leftover scraps. I use a lighter denim patch as a “panel” so the wallet has a visual focal point. It’s great for a boyfriend who carries cards, transit passes, or a few essentials.
Cut a rectangle about 4 x 7 inches for the outer and 4 x 7 inches for the lining. Fold to create two slots, then stitch sides with a straight stitch 1/8 inch from the edge. Bind the perimeter with a strip of denim or bias tape, then stitch over the binding for a clean finish.
Quick tipUse a denim needle and heavier thread so the stitches don’t pop when cards slide in and out.
One warningDon’t skip reinforcing the fold line; it softens fast and the holder won’t stay crisp.
11. Candle tin mini planter with moss and tiny succulent cuttings
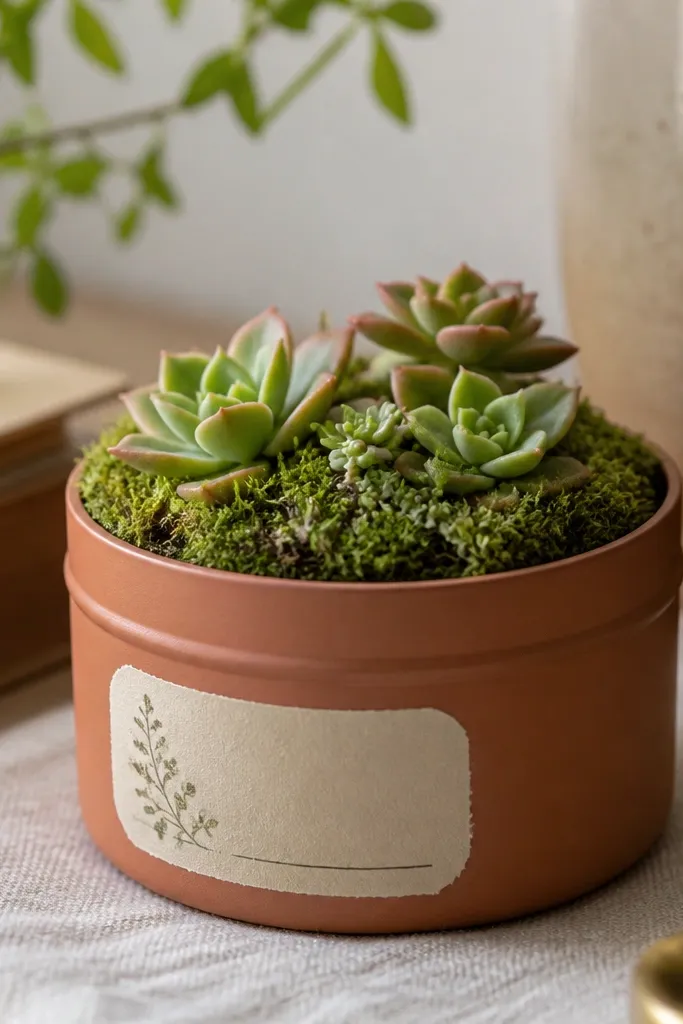
This is a gift that looks cute and still feels useful. The moss makes it look lush even with small plants, and terracotta paint makes the tin look like a real planter. I like tiny succulents because they handle neglect better than most houseplants. The label adds personality without clutter.
Clean out a candle tin and drill 2-3 drainage holes in the bottom if you can. Paint the outside with matte acrylic or chalk paint. Add a thin layer of gravel, then potting mix, then moss on top. Plant one or two tiny succulents and press moss gently around them.
Quick tipWrite the date on the inside rim with a paint pen so it stays hidden and doesn’t peel off the outside.
One warningDon’t pack moss too thick; it holds water and can rot the succulents.
12. Handmade leatherette card key fob with hidden pocket
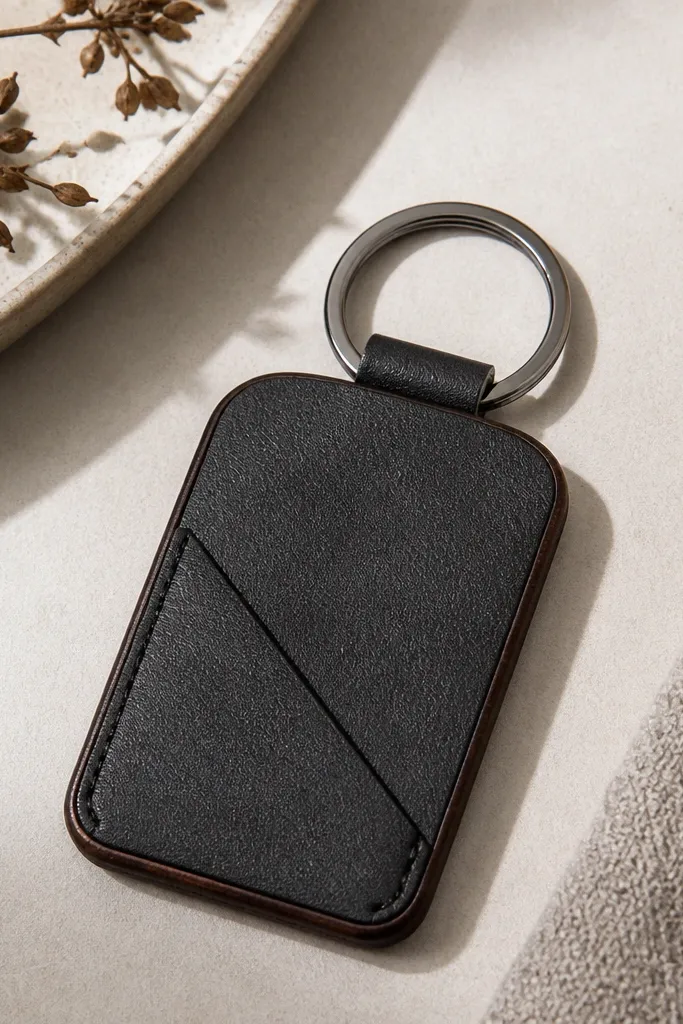
This is the kind of accessory that looks clean and practical, not bulky. The hidden pocket keeps a transit card or a small folded note without jingling. Leatherette is easy to work with and gives you that structured feel. The burnished edges make it look finished, even if you’re using a home sewing setup.
Cut a fob piece about 3.5 x 6 inches, then add a top strip for the keyring attachment. Sew a pocket panel on the front, leaving a 1/4 inch opening at the side. Add an edge binding strip and burnish with a smooth tool or wax.
Quick tipUse a stronger needle and stitch slowly at corners so the seams stay tight.
One warningDon’t leave raw edges inside; they fray and make the fob look cheap.
13. DIY custom lip balm label set with photo-printed sticker skins
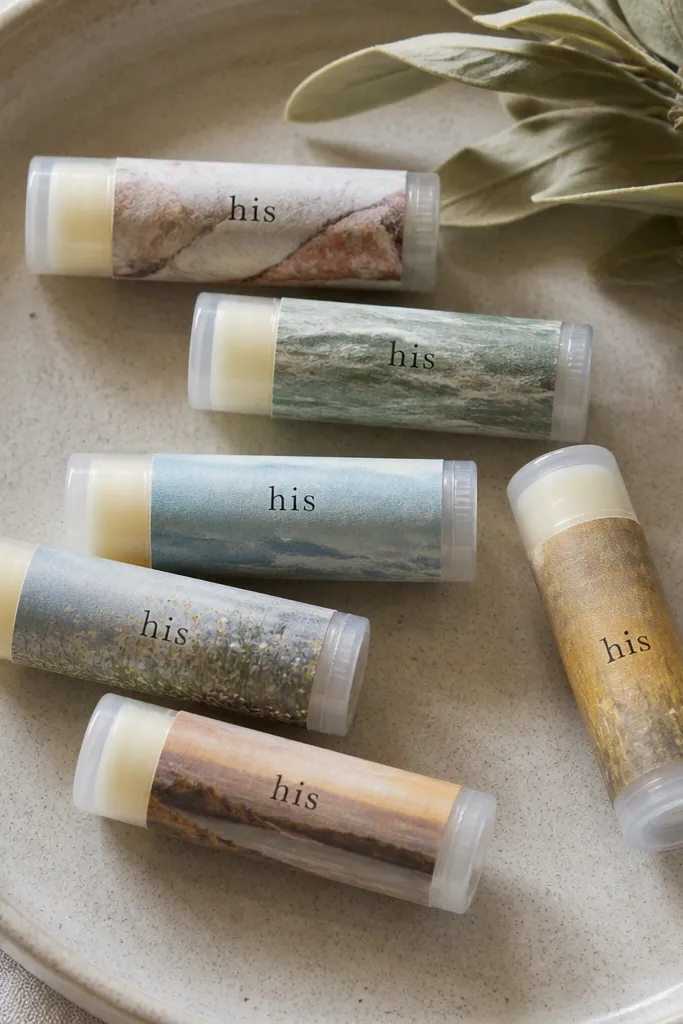
If he wears chapstick or lip balm, this is a gift he’ll actually use up. The aesthetic part is the label — photo-printed sticker skins make it look like a brand, not a hobby project. I use a matte label finish so it doesn’t glare in photos. The flavors can match his vibe — mint for sporty, vanilla for cozy.
Buy empty balm tubes or small twist-up containers. Print labels on sticker paper, then cut to fit the tube height. Wrap label around the tube and seal the edges with a thin layer of matte clear spray. Fill with your balm mix or pre-made balm base melted and poured into tubes.
Keep the label text high-contrast; black on cream reads best under bathroom lighting.
Don’t use glossy labels; they peel at the edges when the tube gets handled.
14. Upcycled bottle glass nightlight with frosted contact paper pattern
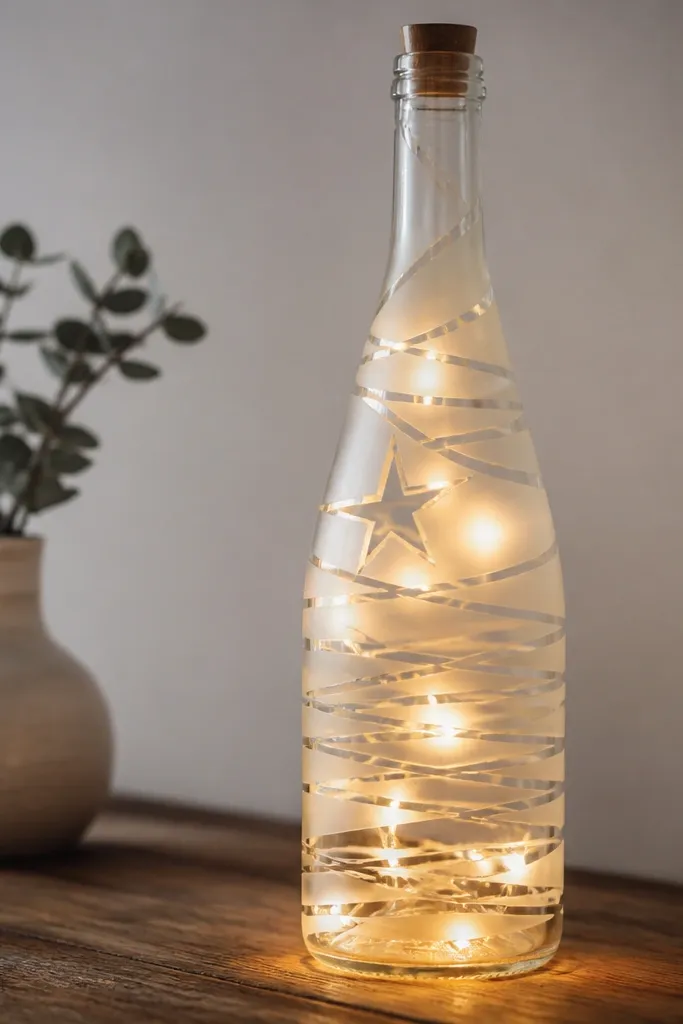
Glass + warm light looks good even if the design is simple. The frosted contact paper gives you a custom look without needing glass etching. I like thin line patterns because they read as modern and don’t look childish. This one is great for a boyfriend who likes ambient lighting.
Clean the bottle and remove labels. Wrap a piece of contact paper and cut a stencil pattern, then press it onto the glass. Put warm LED lights inside and secure with a small piece of tape or a bottle stopper. Remove any bubbles in the contact paper so the frosting looks clean.
Use warm white LEDs (2700K) so skin tones look natural if he uses it near his bed.
Don’t use paper directly on glass; it lifts from condensation and looks messy.
15. Minimalist map keychain using resin and a tiny map scrap
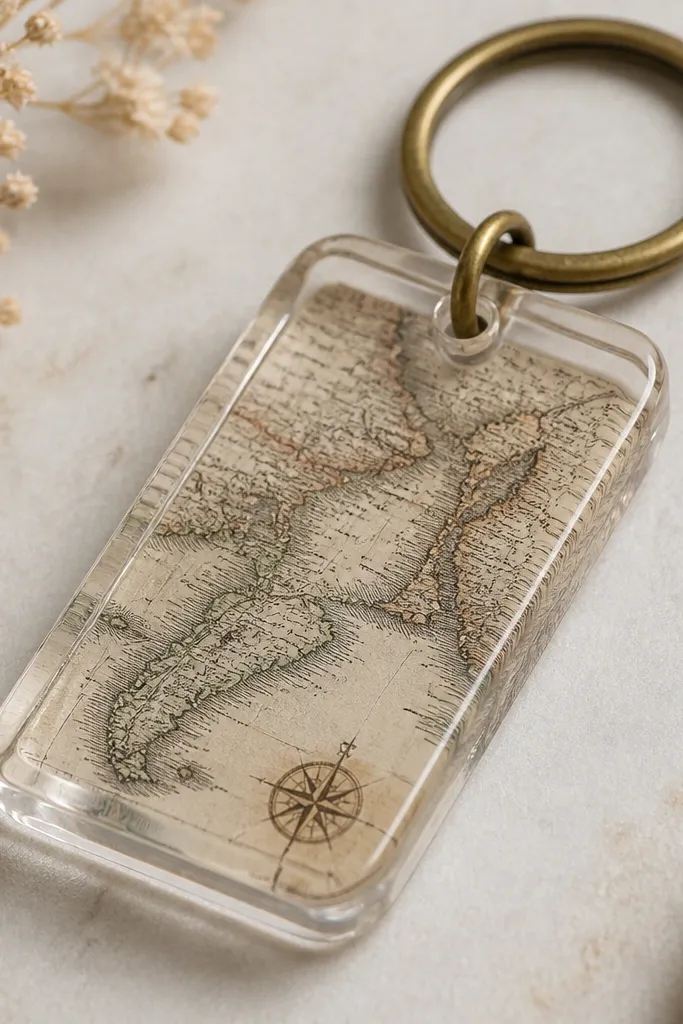
Resin makes a tiny scrap feel like a keepsake. The map gives you instant story without writing anything, and the clear resin makes it look glossy and premium. I like rounded rectangle shapes because they don’t chip as easily as sharp triangles. The embedded map stays readable if you keep the resin layer thin.
Cut a map scrap to fit a mold cavity. Mix a small resin batch and pour a thin first layer, place the map, then cover with resin. Pop bubbles with a toothpick and let cure fully. Attach a metal keyring once cured.
Quick tipUse a heat gun lightly over the mold to chase surface bubbles — keep it moving so you don’t distort the map.
One warningDon’t overfill; thick resin yellows faster and looks cloudy.
16. Guitar pick photo magnets on a metal board
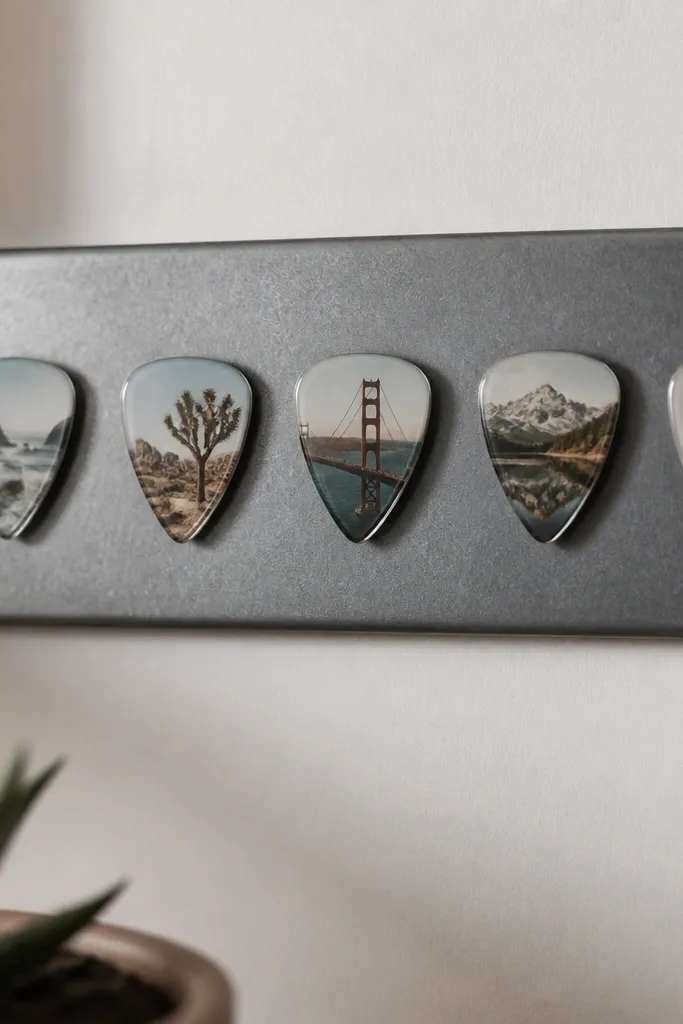
Guitar pick shapes are a perfect match if he’s into music or just likes the aesthetic. The photo magnets turn your favorite moments into something he sees daily on his fridge or metal desk. I like keeping the photos black and white with one color accent for a more cohesive look. Magnets also solve the “where do I put this?” problem.
Cut guitar-pick shapes from clear acrylic or use pick-shaped molds. Print tiny photos and trim them to fit under the clear layer. Seal photos with a thin clear epoxy or resin topcoat, then glue magnet sheets to the back. Arrange them on a metal board for a clean display.
Quick tipUse a single photo size across all magnets so the set looks like a collection instead of random pieces.
One warningDon’t skip trimming the photo edges; white paper showing looks cheap fast.
17. DIY "bar soap" gift with color-swirl layers and a custom wrapper
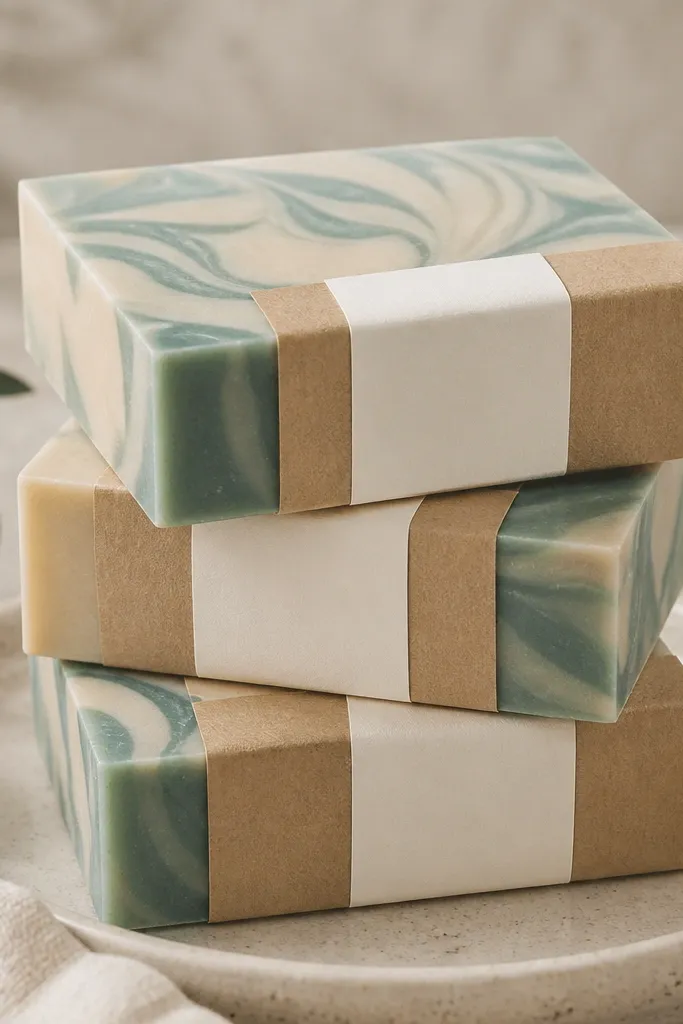
A handmade soap bar feels personal because you can pick color and scent like a signature. The swirl looks fancy, but it’s just controlled pouring and patience. I keep the colors soft — muted teal and warm beige — so it looks aesthetic on a bathroom counter. The kraft wrapper with a simple label makes it feel like a real product.
Use melt-and-pour soap base, melt in small batches, and pour each color in thin streams for swirls. Use a rectangular mold for clean edges and let it set fully before unmolding. Wrap with kraft paper and tape, then add a label sticker with his name and scent type.
Spray the top with 99% isopropyl alcohol right after pouring to pop bubbles.
Don’t rush unmolding; soft edges smear and make the bars look homemade in a bad way.
18. Upcycled sweater mug cozy with visible knit ribbing and tie closure
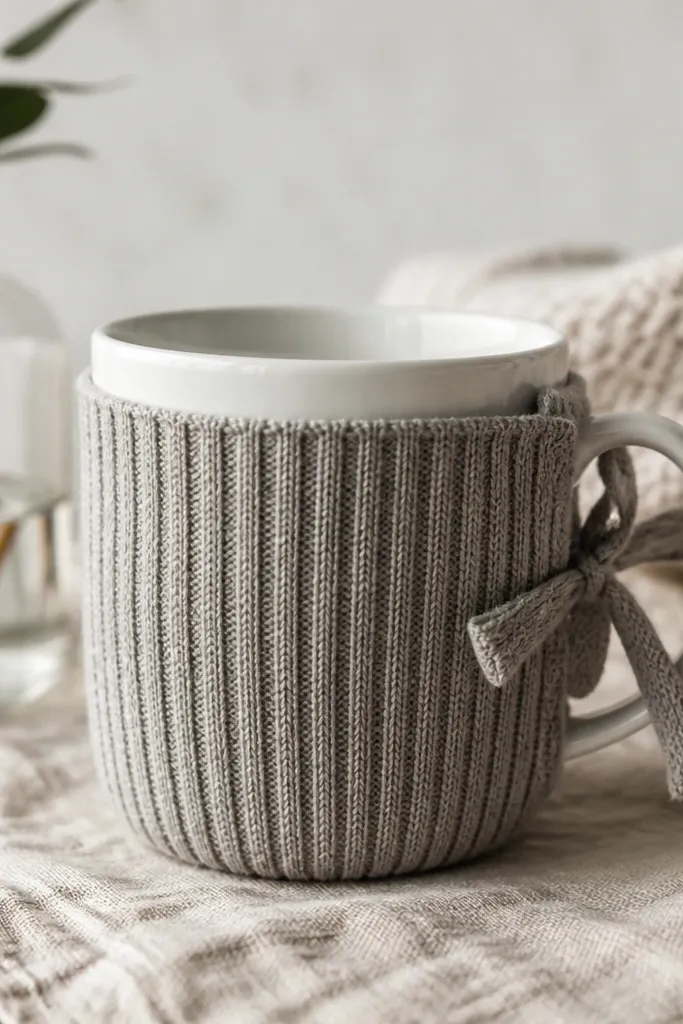
This one looks cozy without looking sloppy. The sweater cuff already has ribbing, so the cozy hugs the mug and keeps heat longer than flat fabric. I like using cuffs because they’re naturally finished — no fraying. The tie closure makes it easy to remove and adds a little style.
Cut a sweater cuff strip about 7 inches tall. Stretch it slightly to fit around the mug, then sew a seam at the back with matching thread. Add a small fabric tie from leftover sweater knit and stitch it in place. Trim loose threads and keep the ribbing facing outward.
Quick tipUse a mug as a template while sewing so the fit isn’t loose.
One warningDon’t cut a random sweater panel; it frays and looks uneven after washing.
19. Minimal wall shelf photo ledge using scrap wood and picture hooks
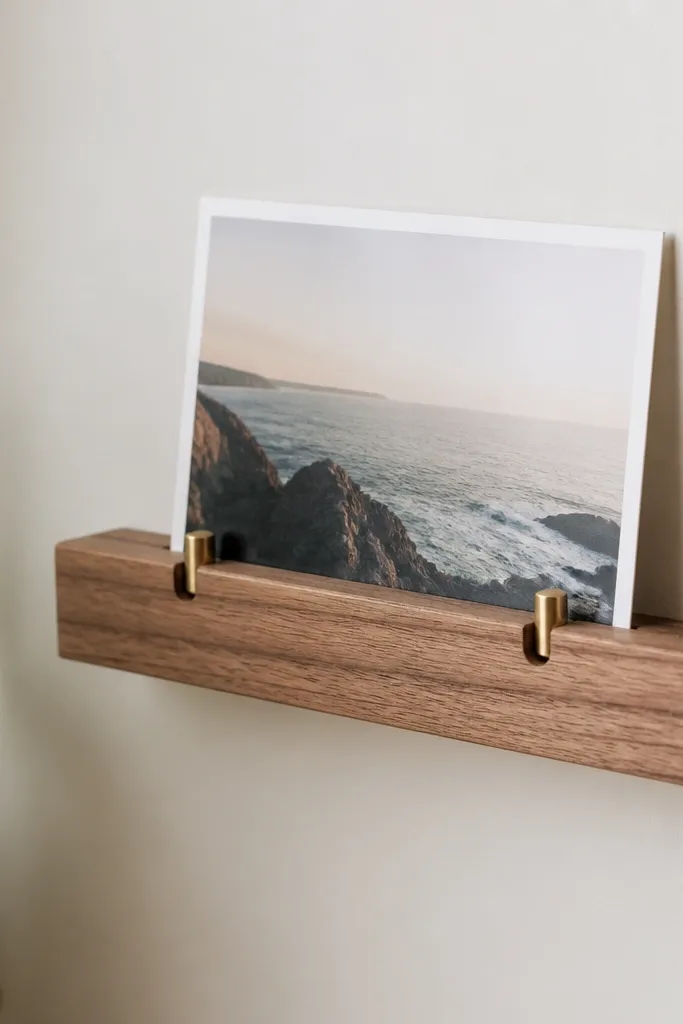
A tiny shelf makes photos feel curated without turning it into a whole gallery wall. Scrap wood stained light walnut looks warm and modern, and the matte finish keeps glare low. I like picture hooks because they hold the photo at a slight angle, which gives depth in photos. It’s also easy to swap photos later.
Cut a 10-12 inch ledge from scrap wood, sand smooth, then stain and seal with matte clear. Mount with two screws and wall anchors at studs. Add two small picture hooks or clips at the front edge and place a photo behind them. Keep the photo size consistent for a clean look.
Use a level and measure from the floor — crooked ledges look obvious immediately.
Don’t use high-gloss seal; reflections make it look cheap and glarey in daylight.
20. DIY watch band strap keychain using paracord and metal hardware
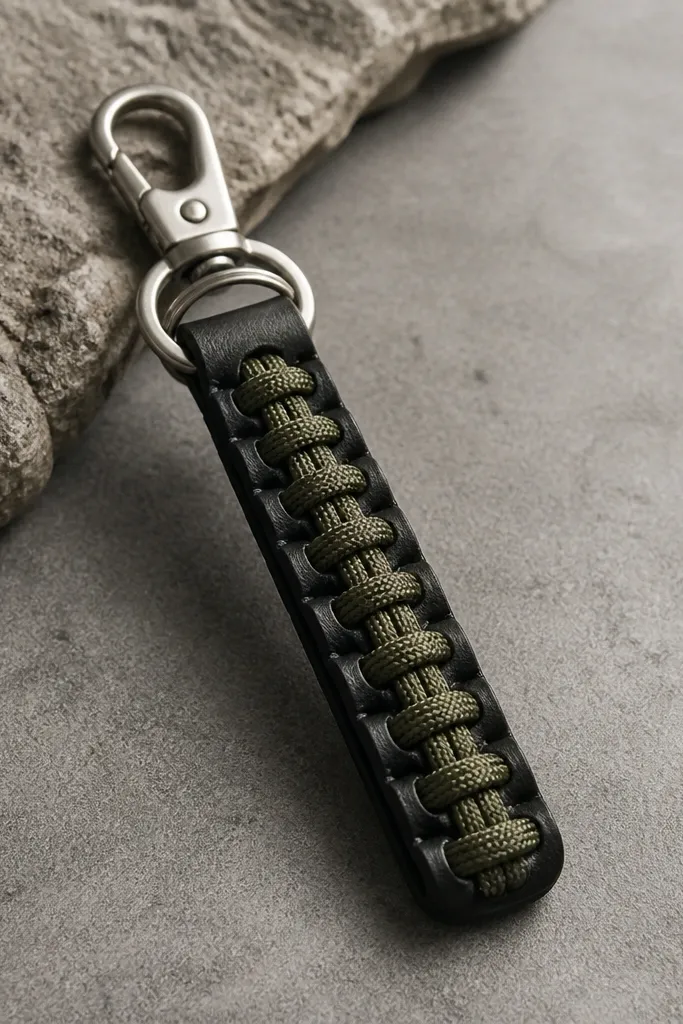
Turning an old watch strap into a keychain makes the gift feel like a second life, not a random craft. Paracord adds durability and texture, so it looks rugged but still clean. The metal hardware gives it that finished, functional feel. It’s a great choice for a boyfriend who likes outdoors gear aesthetics.
Cut the strap into a narrow strip and remove any stiff clasps if needed. Braid paracord through two strap loops, then tie off with a tight knot and melt the ends. Attach a metal key ring and a clip if you want it to clip onto a belt loop. Finish by stitching the paracord ends down with a few hand stitches.
Quick tipKeep the braid tight and even — loose paracord makes it look sloppy fast.
One warningDon’t skip melting paracord ends; frayed ends snag on pockets.
21. Custom "favorite order" snack jar with label and date window
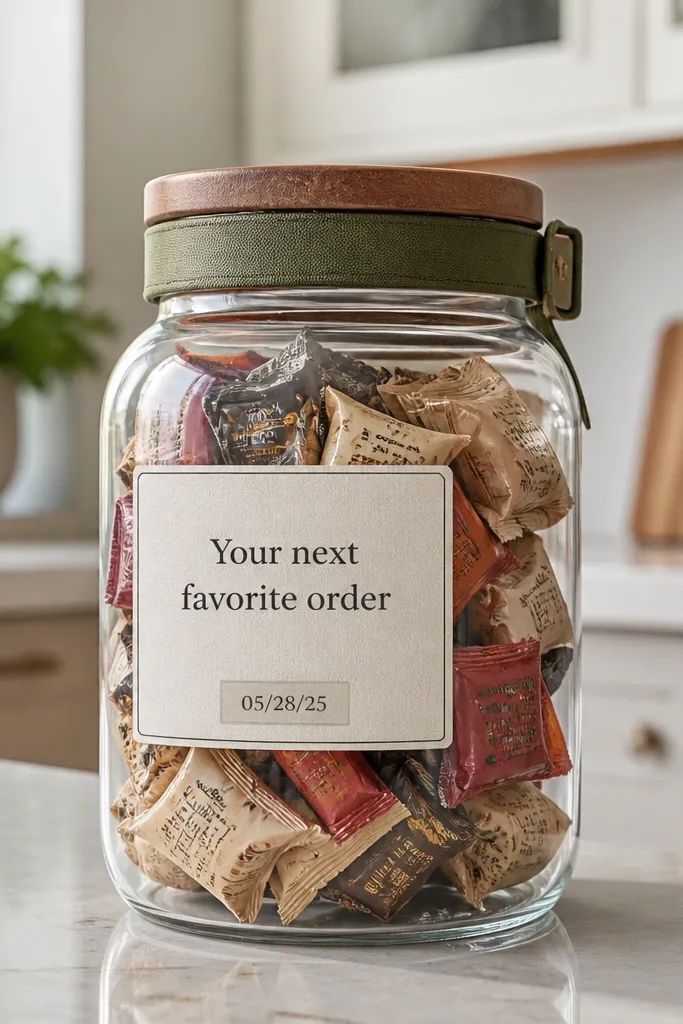
This is the aesthetic version of a “coupon book,” and it feels more exciting because it’s physical. The clear jar makes it fun to see what’s coming, and the label keeps it classy. I like using small, uniform snack items so the jar looks tidy. The date window gives him a reason to check it instead of forgetting it in a cabinet.
Pick 10-14 small items that match his tastes, then wrap each in a small piece of tissue or a mini cellophane bag. Write one instruction on a label strip, then add a date sticker for the week or month. Use a fabric ribbon band around the lid to hide ugly plastic edges.
Quick tipKeep the jar theme consistent — salty snacks only or sweet only — so it looks intentional.
One warningDon’t mix giant and tiny items; the jar looks messy and unplanned.
22. Resin bottle cap coasters with map edge inlay
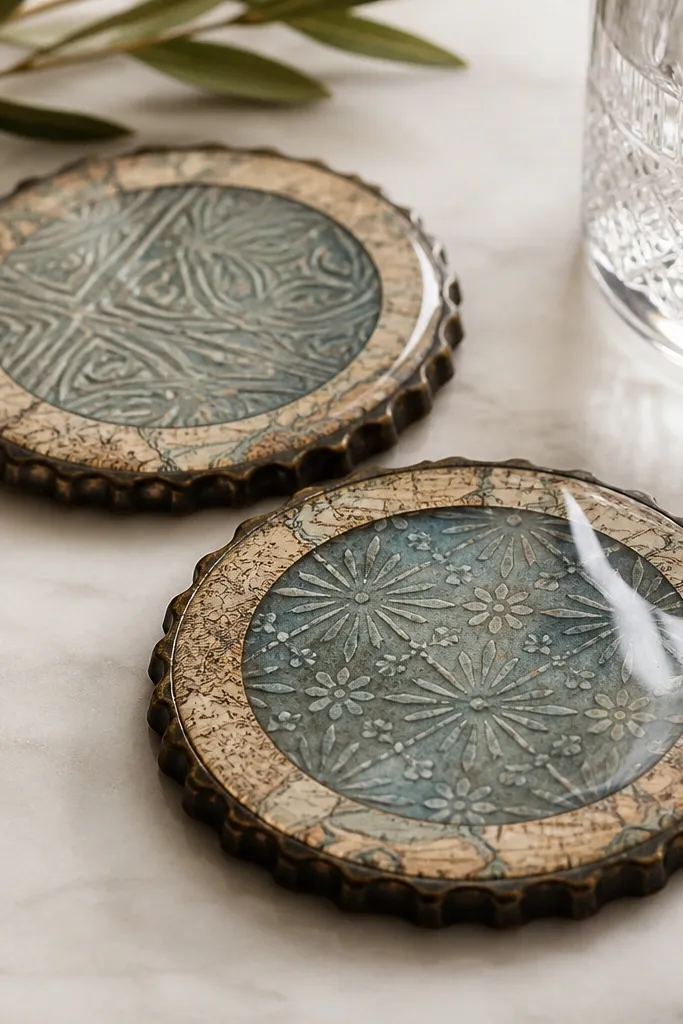
Bottle caps are flat, easy, and surprisingly good for resin. The map edge inlay gives you that handcrafted look without needing a full map embed. I like a thin ring effect because it stays clean and doesn’t overwhelm the coaster. Resin makes the surface wipeable, which matters if he uses them at his desk.
Clean bottle caps and rough up the surface lightly with sandpaper. Cut a thin circle of map paper and glue it around the inside rim. Mix resin, pour a shallow layer, set caps, then pour to top. Let cure flat and avoid dust by covering while it sets.
Quick tipSeal the bottom with a tiny amount of resin so the paper edge doesn’t absorb moisture.
One warningDon’t use too much paper; thick paper makes resin crack at the edges.
23. DIY bookmark set with pressed leaf lamination and waxed twine
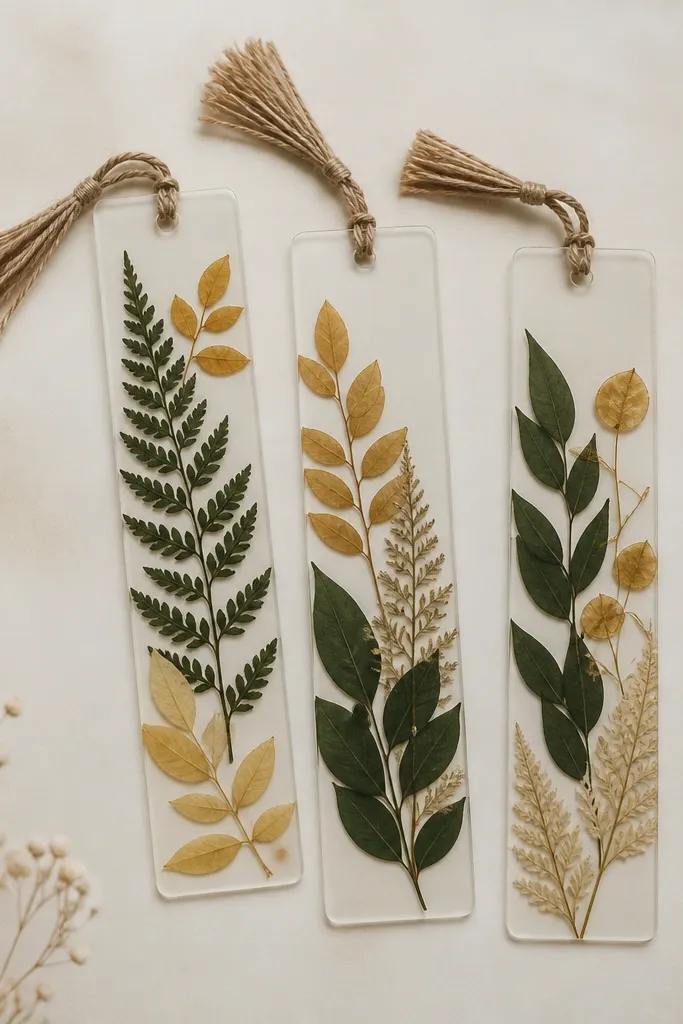
Pressed leaves look real because you’re preserving the shape, not printing a pattern. Lamination makes it durable for daily use, and the waxed twine tassel adds a tactile detail that makes the set feel gift-worthy. I keep the palette warm by choosing leaves that dry deep green and golden. The result looks delicate but holds up in a book.
Place pressed leaves between two sheets of clear lamination film and run through a laminator or heat-seal. Trim to a bookmark width about 2 inches wide. Punch a corner hole and tie waxed twine through, then trim tassel ends evenly.
Quick tipPress leaves flat for 1-2 weeks so they don’t look curled under the film.
One warningDon’t trap thick leaf veins; they create bubbles under lamination.
24. Wall-hung "ticket stub" shadow box with fabric pocket backing
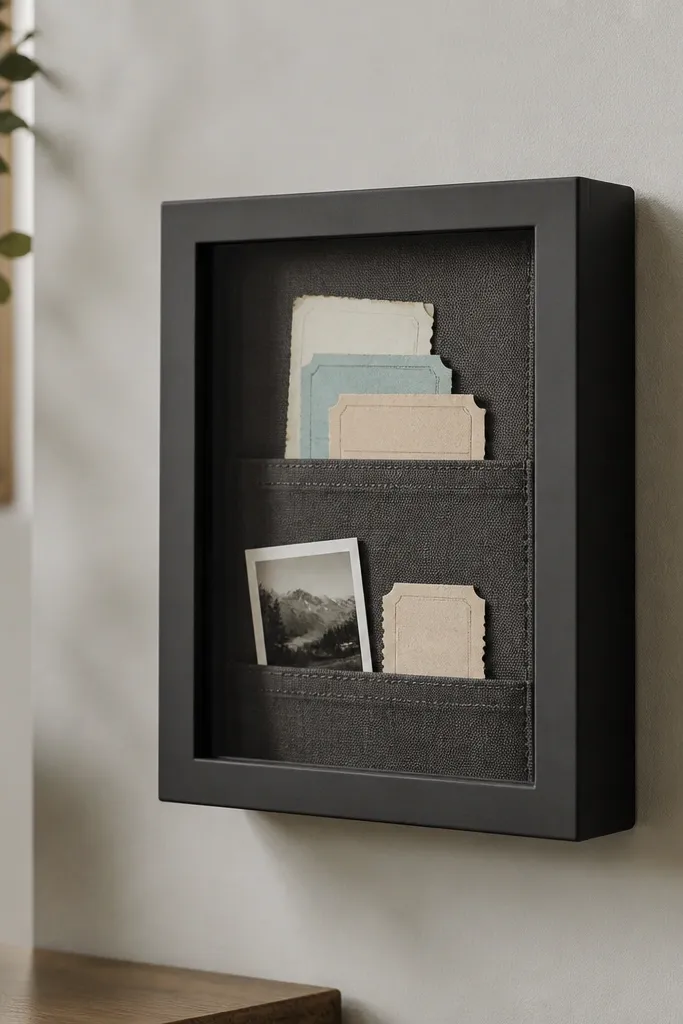
Shadow boxes look thoughtful because they protect memories from getting messy. The fabric pocket backing keeps paper from sliding around, so the arrangement stays neat. I like muted charcoal or deep navy for the fabric because it makes ticket colors pop without looking chaotic. One clear panel keeps dust away and makes it look like a collectible.
Use a small shadow box frame with depth or a deep frame. Cut fabric to size and stitch or glue pockets sized to your ticket stubs. Add a small photo on the bottom pocket and place stubs vertically. Secure a clear front or acrylic panel if your frame is open.
Quick tipUse a tiny label under each pocket in small handwriting so it looks like a curated display, not a random pile.
One warningDon’t use glossy fabric; it shows glare and makes the box look cheap.
25. Corkboard mini organizer with painted grid and pushpins
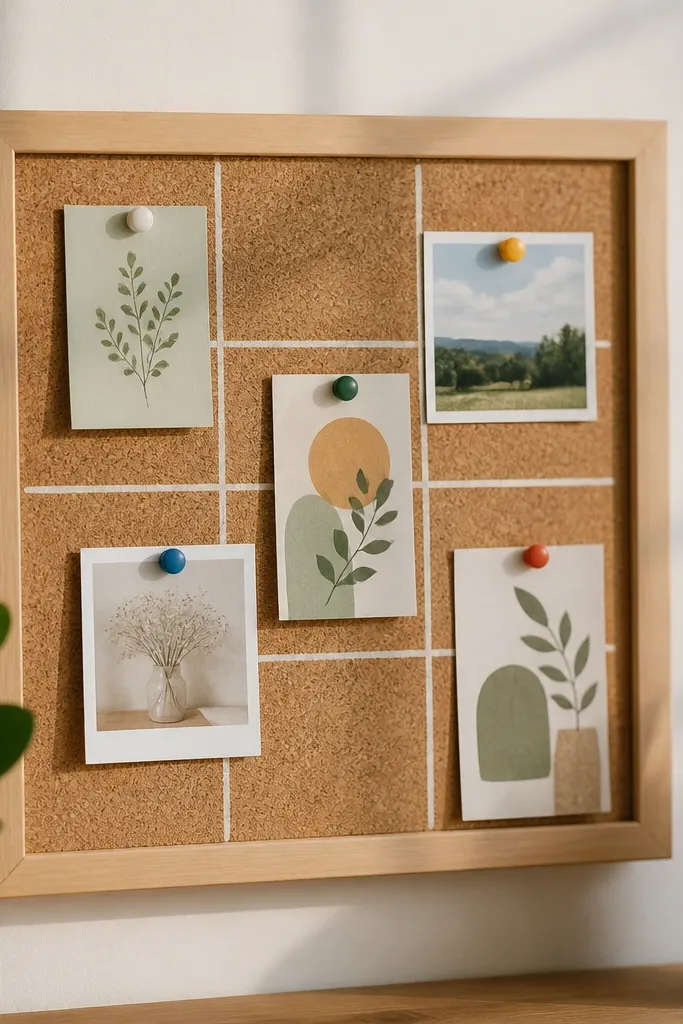
A mini corkboard makes everyday stuff look organized, and the painted grid adds the aesthetic. I like clean lines because they make the corkboard feel more modern than a random pin board. It’s great for a boyfriend who needs reminders for work, gym schedules, or appointments. The pushpins make it interactive, not locked-in.
Cut cork to a 8x10 size and frame it with thin wood strips. Paint a simple grid with acrylic paint, using painter’s tape for straight lines. Add a few pushpins and one small printed checklist card. Seal the frame edges with matte clear so it doesn’t look rough.
Quick tipPaint the grid first, then pin after it dries so you don’t smear tacky paint.
One warningDon’t skip sealing the frame; raw wood edges snag and get splinters.