
1. Denim Jacket Witch Collar with Velvet Tabs
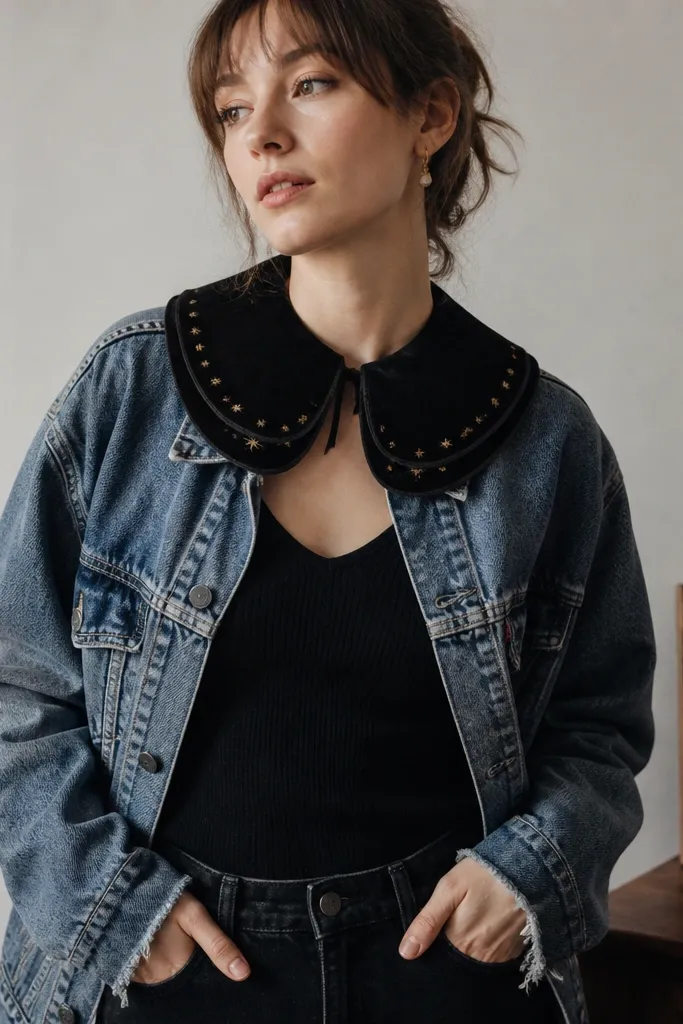
Start with a denim jacket you already own. Add a black velvet collar that frames your face like a cape edge, then stitch on tiny star shapes using silver thread or metallic fabric paint. Denim + velvet gives you contrast: rough texture against soft shine, which reads costume without turning it into a full cosplay build. Keep the rest of the outfit simple so the collar becomes the focal point.
Cut two collar pieces from velvet, each shaped like a short scalloped crescent that sits inside your neckline. Sew or glue them to a strip of black cotton bias tape, then attach the strip to the jacket collar with a few hand stitches on each side. For stars, use 1.5-2 inch stitched appliques spaced 1 inch apart. Works best with black jeans and a simple black top so the collar pops.
Quick tipIron the velvet lightly with a press cloth so it doesn’t flatten weirdly before you cut.
One warningDon’t use thin craft felt for the collar if you want it to look crisp — it collapses under party lighting.
2. Tulle Skirt Balletcore Ghost with Ribbon Waist
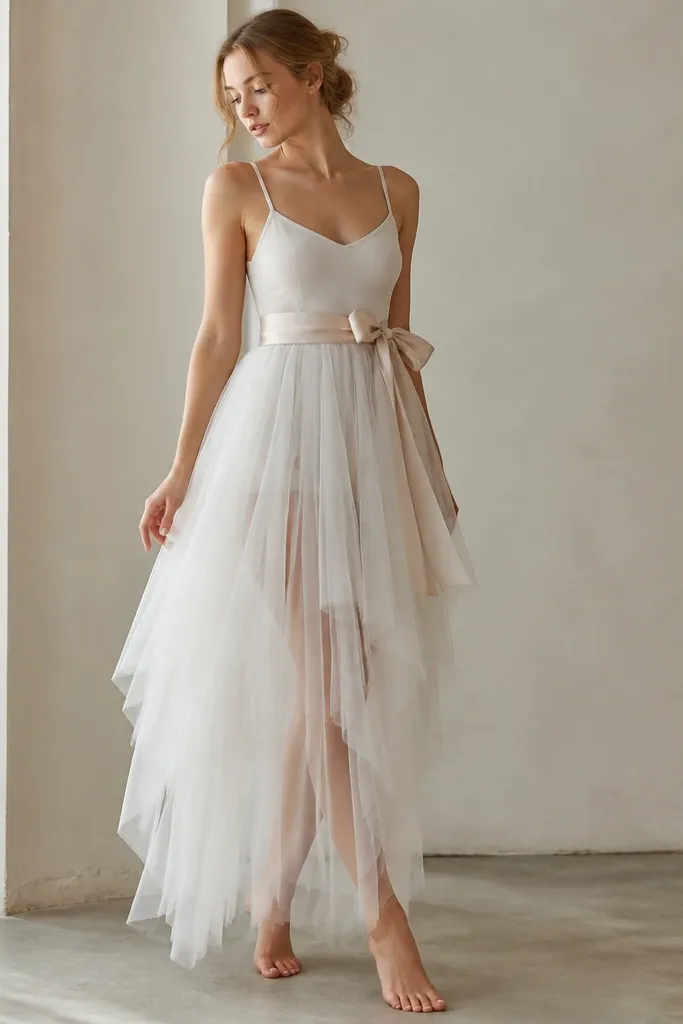
This is ghost energy without the cheap sheet look. Use a tulle skirt layered for volume, then hide the messiness with a clean satin ribbon waist. The nude slip under the tulle keeps it flattering and gives the tulle a gentle glow under flash. It looks aesthetic because the silhouette is controlled — full skirt, neat waist, soft movement.
Use tulle strips about 18-20 inches long for a knee-to-mid-calf skirt. If you have an old slip, keep it; otherwise use a seamless nude camisole as the base. Sew tulle to an elastic waistband in small sections, then cover the join with a 1.5-inch satin ribbon sash tied at the hip. Add a simple headband or small hair clips if you want extra cohesion.
Quick tipSteam the tulle after attaching it so the layers fall in the same direction before you wear it.
One warningSkip random tulle lengths — uneven panels look messy in photos, not ethereal.
3. Cardigan to Cape Conversion with Faux Fur Shoulder Peeks
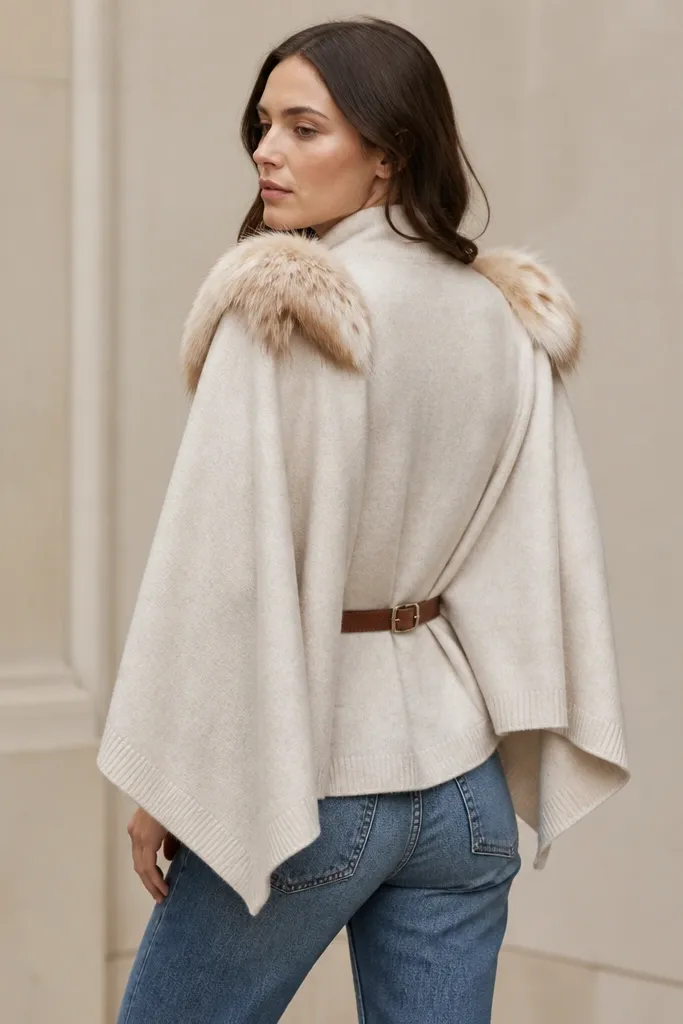
You already have the frame: a cardigan. Turn it into a cape look by adding shoulder faux fur and a waist tie so it reads like a character outfit. Faux fur shoulder peeks give that “designer” effect because they create a clear boundary line around your upper body. The rest stays cozy and wearable.
Choose a cardigan with buttons you can remove or leave closed. Cut two faux fur rectangles about 6x8 inches and attach them to the shoulder seams with hand stitches, then reinforce with a few hidden stitches inside. For the cape shape, either remove the buttons and let the front open or add two side snaps near the waist. Finish with a belt you can tighten without pulling fabric.
Quick tipHand-stitch the fur edges with a tight backstitch so shedding doesn’t start at the seam.
One warningDon’t glue fur directly to knit — it peels when you move.
4. White Shirt into Renaissance Chemise with Lace Cuffs
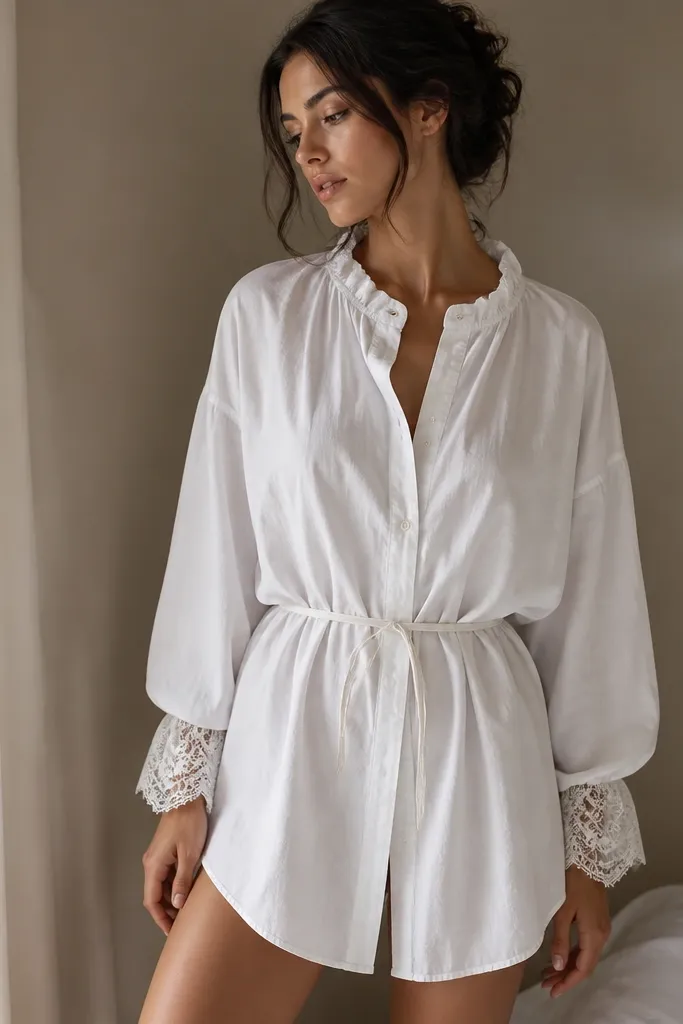
This one is all about transforming shape, not buying a costume dress. A white button-up becomes a chemise when you add gathered lace at the cuffs and a tiny ruffle at the neckline. The look stays aesthetic because it’s clean and symmetrical around your face. Lace reads romantic under warm lighting and flash.
Cut the bottom hem straight and leave it roomy. Remove or loosen the front placket if it bothers you, then create a gathered neckline using a strip of lace-backed fabric or lace trim. Add lace cuffs by sewing a lace band to the sleeve opening with elastic gathering stitches. Tie the waist with a ribbon belt so the silhouette shifts from “shirt” to “period.”
Quick tipUse a zigzag stitch on knit cuffs if your shirt fabric stretches — it prevents puckering.
One warningDon’t leave the collar stiff and untouched — it makes it look like a regular shirt wearing lace.
5. Leggings to Mermaid Tail Skirt with Scale Fabric Panels
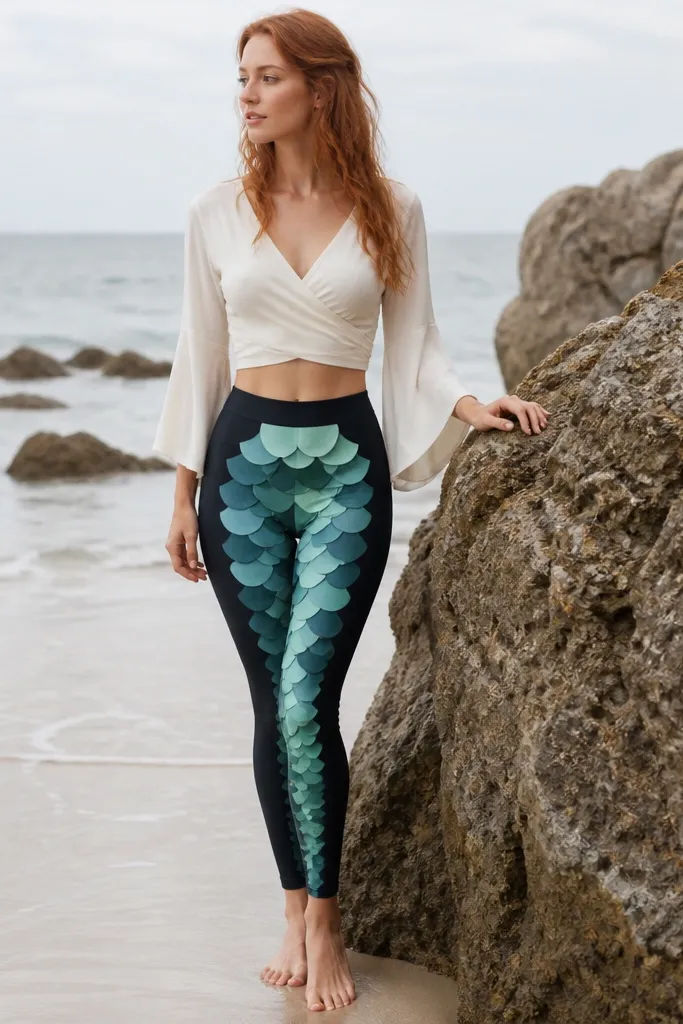
I love this because it moves like clothing, not like a rigid costume. Use leggings as the base and add scale fabric panels that create a tail illusion. Teal and seafoam read mermaid fast, and scale shapes catch light in a way that looks expensive. Keep your waistband clean so the focus stays on the scales.
Cut scale shapes from shimmery fabric or printed fabric with a scale pattern, about 4-5 inches tall each. Sew them in overlapping rows from hip to mid-thigh, then add a final row around the center front. Use black stretch knit for the underlayer so it blends into leggings. Attach the panels to a stretchy waistband strip so it stays comfortable when you sit.
Quick tipPin one row, walk around for 30 seconds, then adjust overlap before sewing the rest.
One warningDon’t make the scales too small — tiny scales look like craft foam in photos.
6. Hoodie to Space Pilot with Reflective Tape Chevrons
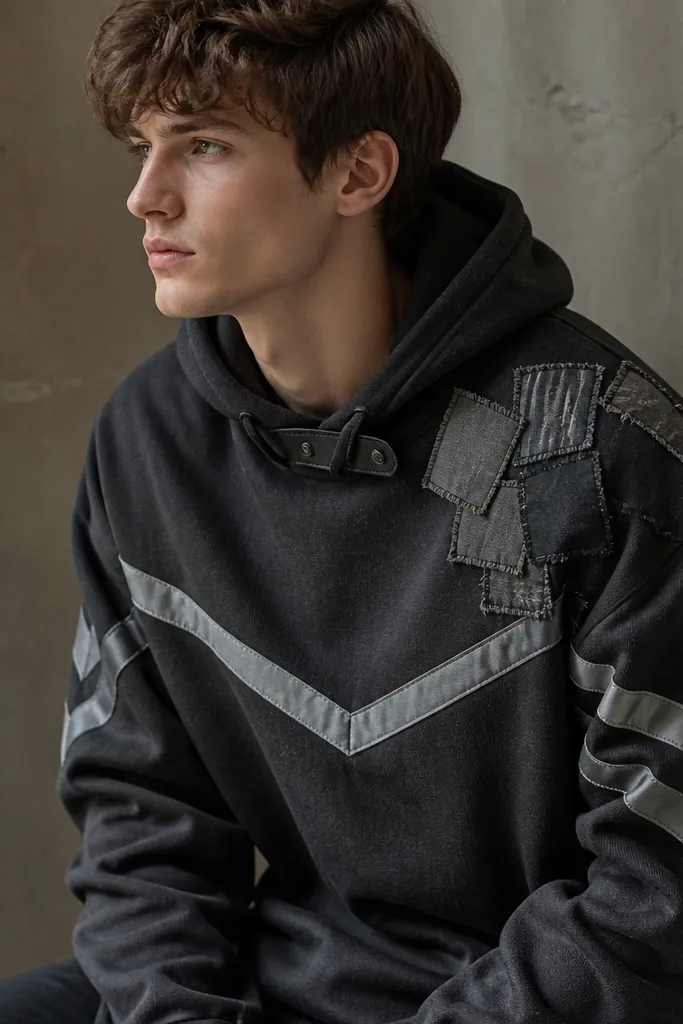
This reads sci-fi without painting yourself into a corner. Reflective tape gives you that “space suit” vibe in flash photos, and chevrons look intentional even if you’re using simple shapes. The hoodie keeps it wearable, and the reflective tape becomes the focal detail. Add a small strap to suggest a harness line.
Cut reflective tape into chevrons about 6 inches wide for the sleeve and 10 inches wide for the chest. Stitch tape edges with matching thread or sew through tape backing if it has one. Add a small patch panel using leftover fabric squares (black, gray, silver) stitched in a grid. Finish with a 1-inch faux leather strap attached at the collar with snaps.
Quick tipWash reflective tape items inside a laundry bag to keep tape edges from lifting.
One warningDon’t use hot glue on reflective tape — it peels when the fabric flexes.
7. Maxi Skirt to Goddess Drapes with Braided Rope Belt
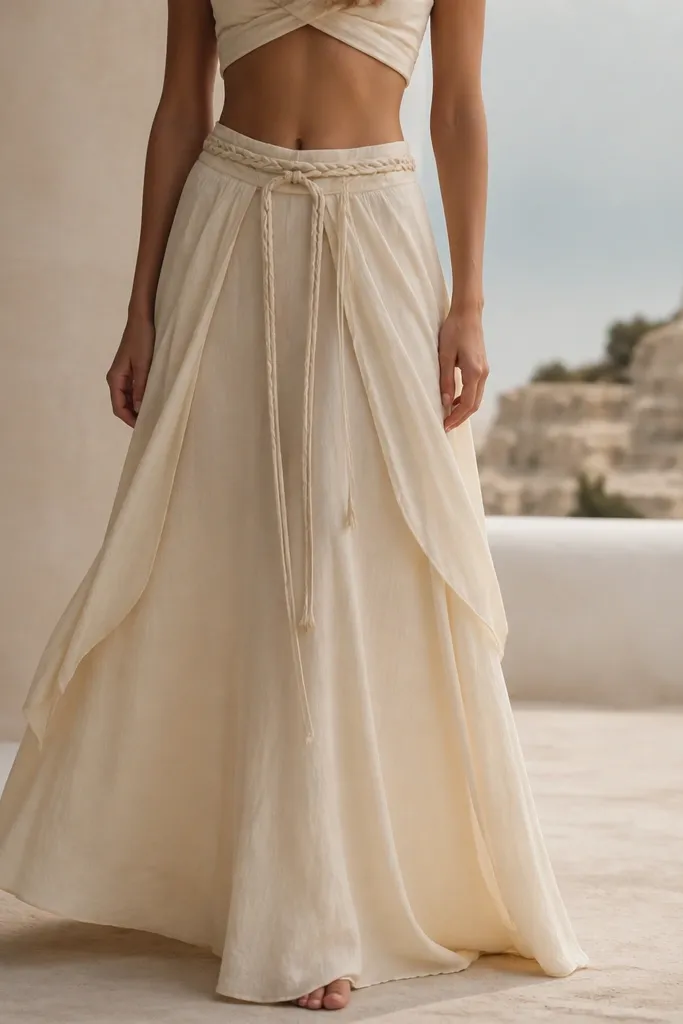
You can turn a plain maxi skirt into a goddess costume with one move: add drape panels at the waist. Braided rope belt detail gives structure, so the drapes look planned instead of tangled. Cream fabric keeps it soft and photogenic, and the rope adds a warm, textured contrast. The costume looks aesthetic because the silhouette is flowing and the waist detail is clean.
Use a skirt that’s already full or slightly gathered. Cut two long drape strips from lightweight cotton or linen — about 18-24 inches long and 10-12 inches wide. Attach the strips to the waistband seam at the front center and one side, then braid or tie a rope belt over them to hold the drapes in place. Add a small gold charm at the front if you want a focal sparkle.
Quick tipSteam the drapes before tying the belt so folds look intentional in photos.
One warningDon’t attach drapes to the skirt hem — it drags and makes the whole outfit look heavy.
8. Sweater to Cozy Owl with Fabric Feathers on Sleeves
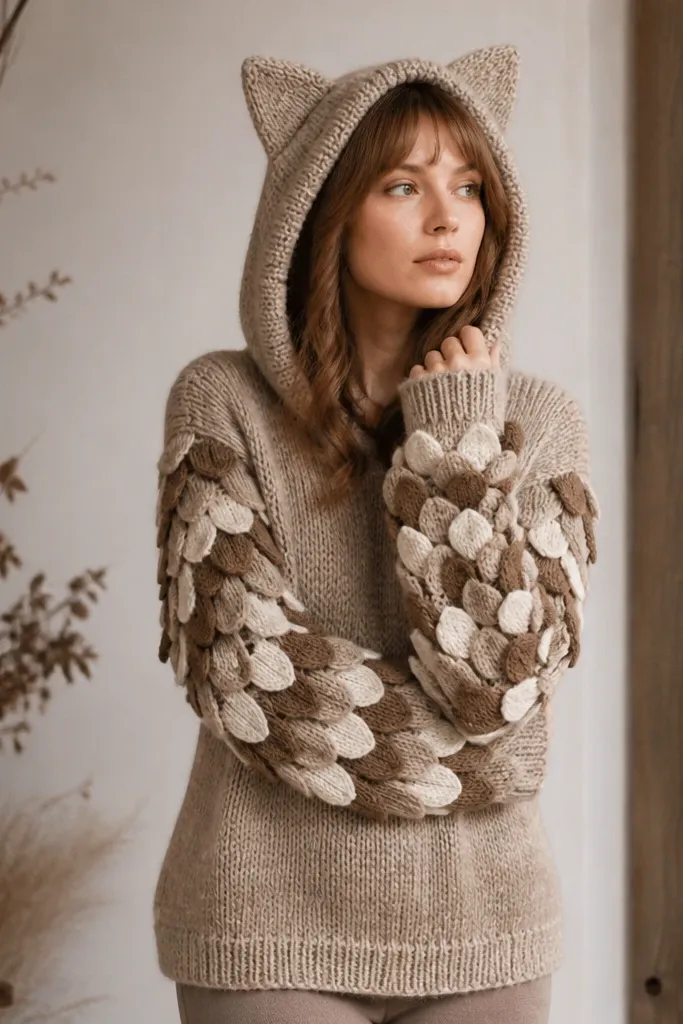
This is a closet-staple costume that stays comfy. Fabric feather pieces on the sleeves create the owl look without covering your whole body. Brown and cream layers give depth, and the hood ears make it instantly readable from a distance. You get an aesthetic look because the detail is placed where people naturally look — your face and arms.
Cut feather shapes from felt or sturdy fleece in 2-3 sizes. Sew or glue in rows along each sleeve from upper arm down toward the wrist. For hood ears, cut two triangle shapes and stuff lightly with batting, then stitch to the hood corners. Add an eye patch at the chest using two circles cut from white felt and black felt.
Use different feather sizes per sleeve so one doesn’t look like a sticker sheet.
Don’t make the feathers all the same size — it looks like a printed pattern instead of handmade.
9. Black Tee to Vampire Cape with Button-Tab Closure
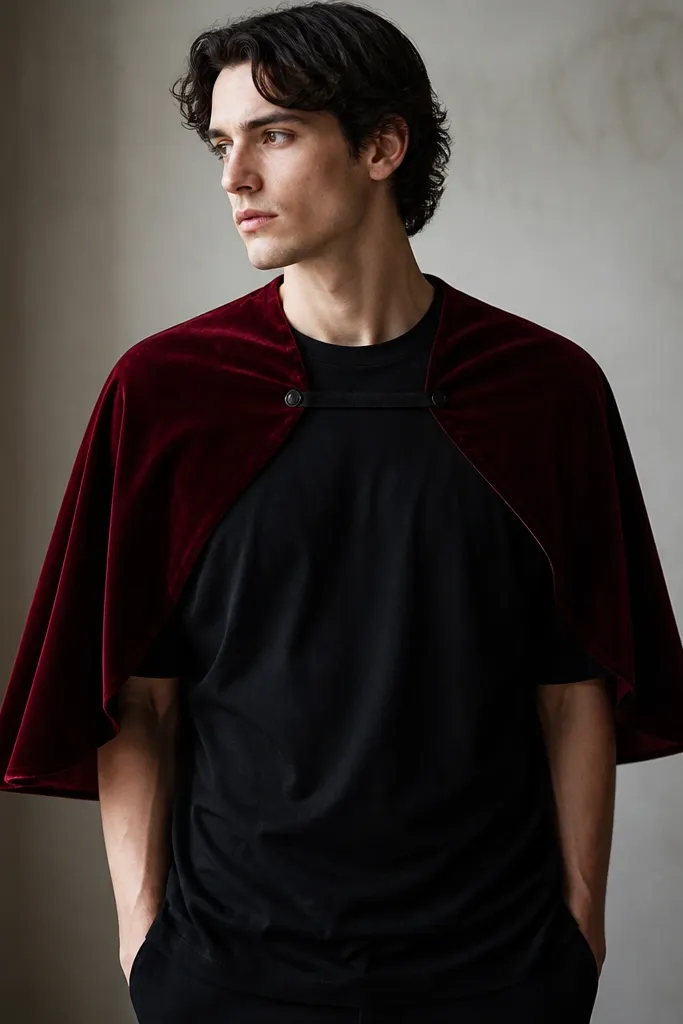
Red velvet on a black base looks vampire fast, and the button-tab closure keeps it from swinging like a loose sheet. The aesthetic comes from the clean shoulder line and the controlled cape length. It photographs well because the red sits high on your body and frames your neck. You also stay comfortable because it’s short and light.
Cut a cape panel from red velvet or velour, about shoulder-to-hip length. Sew two shoulder tabs from black fabric, then attach tabs to the cape and to the T-shirt neckline area. Close with small black buttons on each side so you can adjust fit. Add a black lace trim at the cape edge if you want extra detail.
Quick tipPress the cape edge with a seam iron before attaching trim so it lays flat.
One warningAvoid long capes if you’re in a crowded venue — they snag and look messy fast.
10. Denim Skirt to 90s Cyber Y2K with Neon Pocket Panels
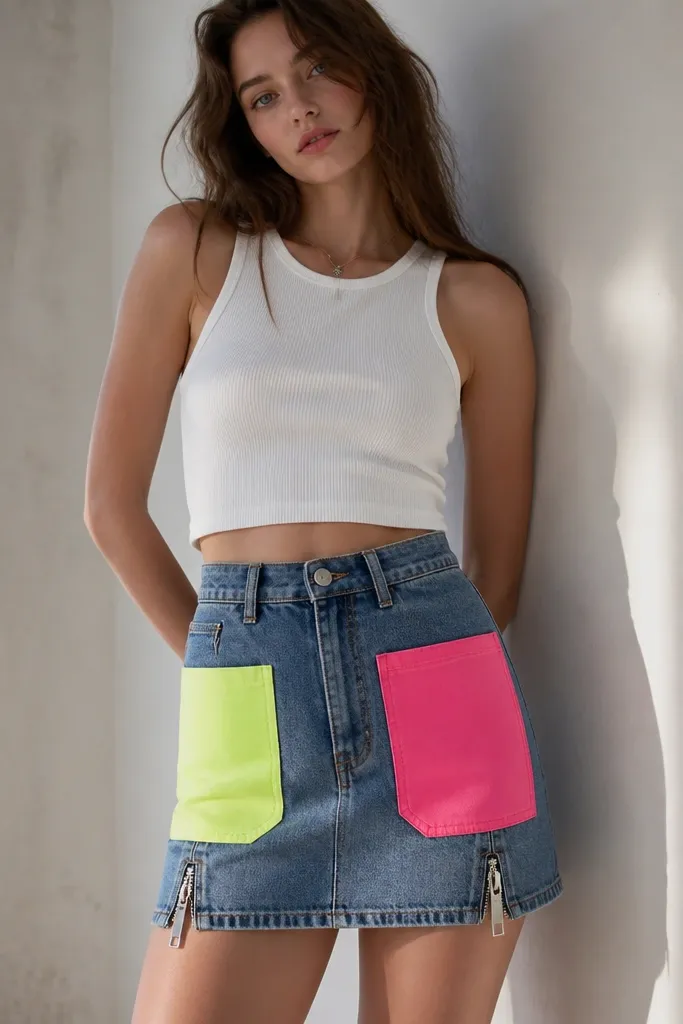
This is Y2K energy using what you already own: denim plus neon panels. Neon pocket panels create a graphic, modern look, and silver zipper pulls add a metallic edge. It reads aesthetic because the design is symmetrical and the accents repeat. The denim keeps it grounded so it doesn’t look like a Halloween costume.
Use a denim skirt with a front seam you can stitch to. Cut pocket-shaped panels from neon fabric (canvas, faux leather, or sturdy nylon) and stitch them onto the front at matching heights. Add a small zipper pull or two as dangling charms near the hem using metal rings. Finish with a neon belt or neon shoelaces to repeat color.
Quick tipMeasure pocket heights with a ruler so both sides match — it changes the look instantly.
One warningSkip glitter fabric unless it’s sealed — it sheds and looks cheap by hour two.
11. Turtleneck to Witchy Cat with Felt Tail and Collar Bow
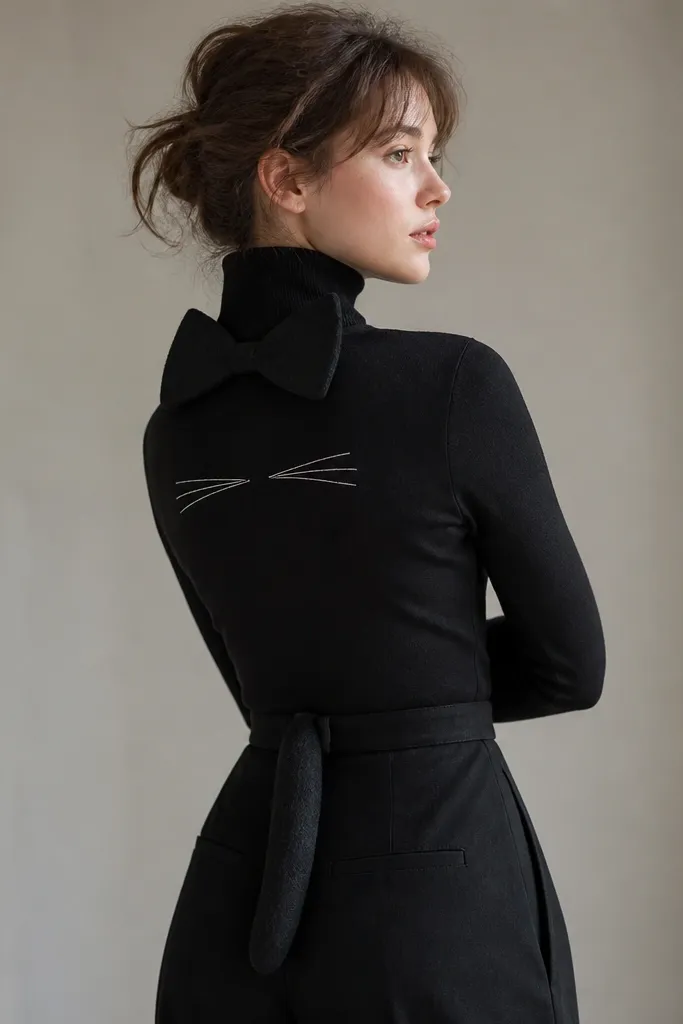
A turtleneck is perfect for cat witch vibes because it already frames your face. Add a felt collar bow to make it look intentional, then attach a tail that moves when you walk. The whisker lines on the chest are subtle but readable in photos. This setup looks aesthetic because it’s mostly black with one clean white accent.
Cut a felt bow from black felt, about 4 inches wide, then stitch it to the center front of the collar. For the tail, cut a long felt strip and roll it around a thin cardboard rod, then stitch down the seam. Attach the tail to a belt loop or a belt you wear over the turtleneck. Add whiskers using fabric marker and a stencil for 5-6 lines per side.
Quick tipUse fabric marker instead of paint — it stays flexible and doesn’t crack.
One warningDon’t attach the tail directly to knit — it stretches and twists out of place.
12. Satin Slip into Flapper Dress with Fringe Hem Bands
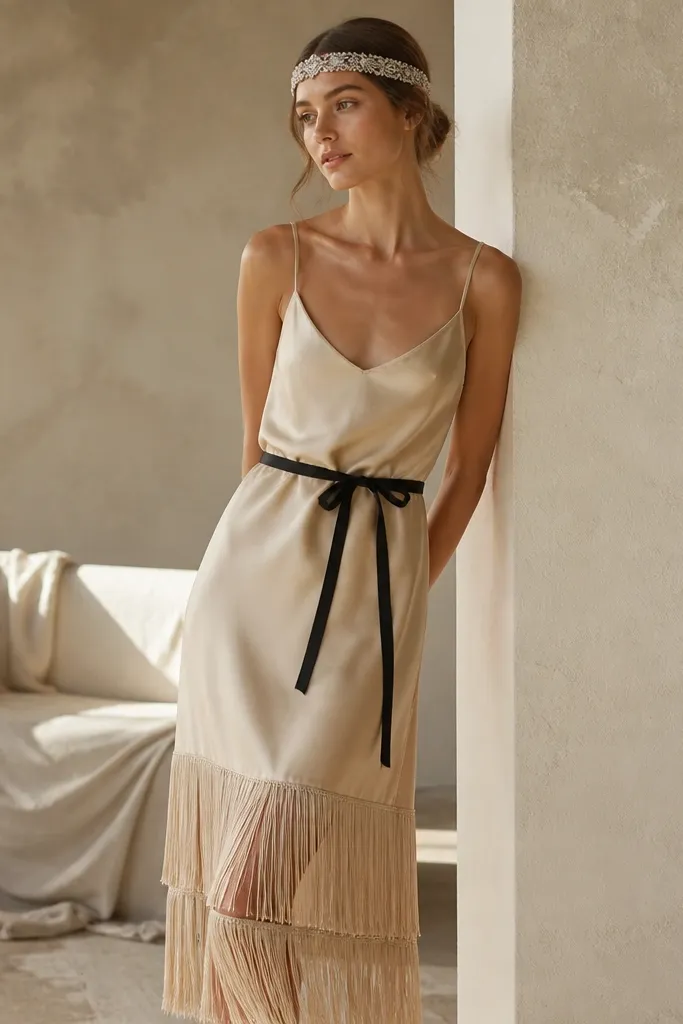
A satin slip is already the right shape for a flapper. Add fringe bands at the hem and a waist tie so the motion reads like 1920s dancing. Champagne satin with black accents looks expensive in photos. Keep the beading minimal — the fringe does most of the work.
Cut fringe strips from satin ribbon fringe or buy pre-made fringe in 2.5-inch widths. Sew or hand-stitch the fringe band around the hem, overlapping by about half an inch. Add a black ribbon tie at the waist by sewing ribbon loops to the side seams. Finish with a headband using leftover rhinestones or beads.
Do a quick dry run by walking and turning — if fringe tangles, reduce length by 1-2 inches.
Skip heavy beading all over the slip — it pulls fabric down and looks messy.
13. White Tee into Flower Child with Fabric Rosette Shoulder Straps
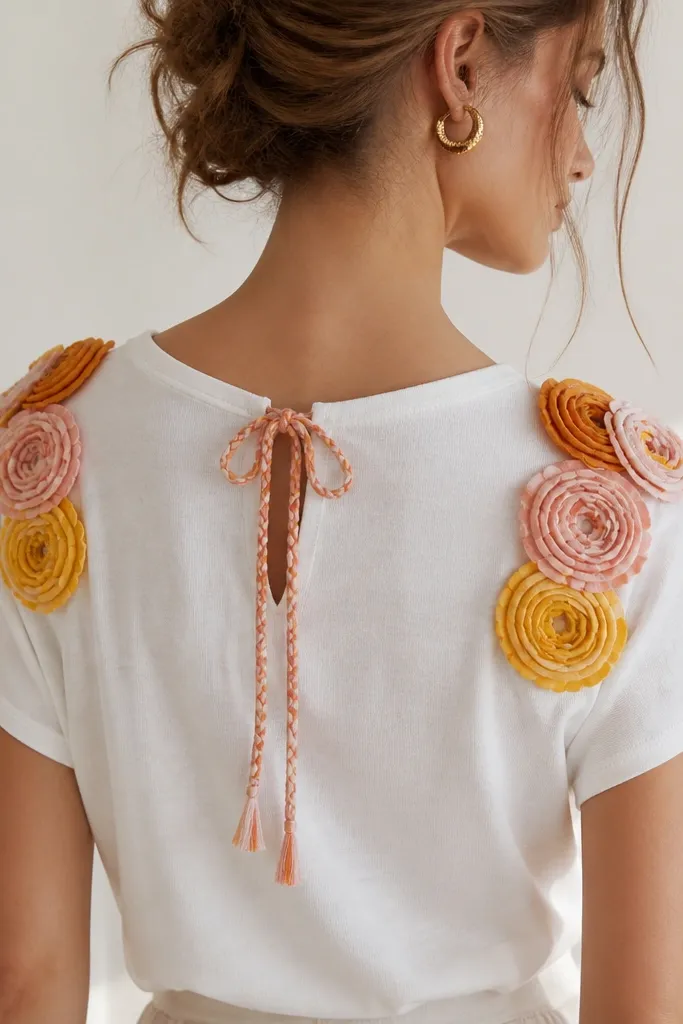
This is a soft, aesthetic costume that doesn’t scream Halloween. Fabric rosettes on the shoulders make your silhouette look decorated, and the white tee keeps it clean. Use fabric circles in warm tones so it looks like handmade flowers, not cheap applique stickers. The shoulder placement is key because it frames your face and keeps your hands free.
Cut fabric circles in 3 sizes (about 2.5, 3.5, 4.5 inches). Layer and stitch center points, then attach each rosette to a thin strap made from bias tape or ribbon. Sew straps to the front and back neckline area so the rosettes sit symmetrically. Add a small cord tie at the back to adjust tightness.
Use a slightly matte cotton for rosettes so colors look warm under indoor light.
Don’t make rosettes too flat — add a little gather at the center so they look dimensional.
14. Leather Belt to Robot Harness with Snap-On Pouches
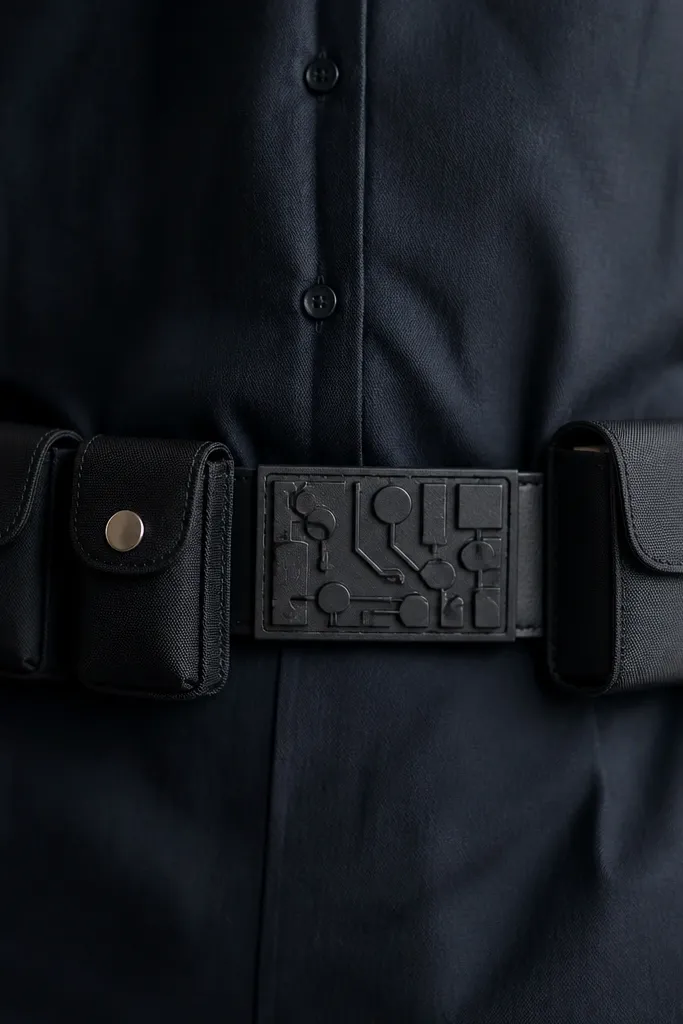
This costume is all about the belt area, and that’s where people look first in photos. A robot harness belt with snap-on pouches gives you function and style. Black fabric plus silver circuit accents reads tech without needing LEDs. The aesthetic comes from clean panel geometry — straight lines, consistent spacing.
Use a wide leather belt or faux leather belt. Sew a fabric panel on the center front with foam circuit lines painted silver. Make two small rectangular pouches from black canvas, each with a snap closure at the top. Attach pouches to the belt with a strip of velcro or sew-on tabs so you can remove them for comfort.
Mark snap placement with chalk so both sides align before sewing.
Avoid lumpy foam on the belt front — it makes the panel look uneven.
15. Striped Sweater to Spider Queen with Web Thread Spatter
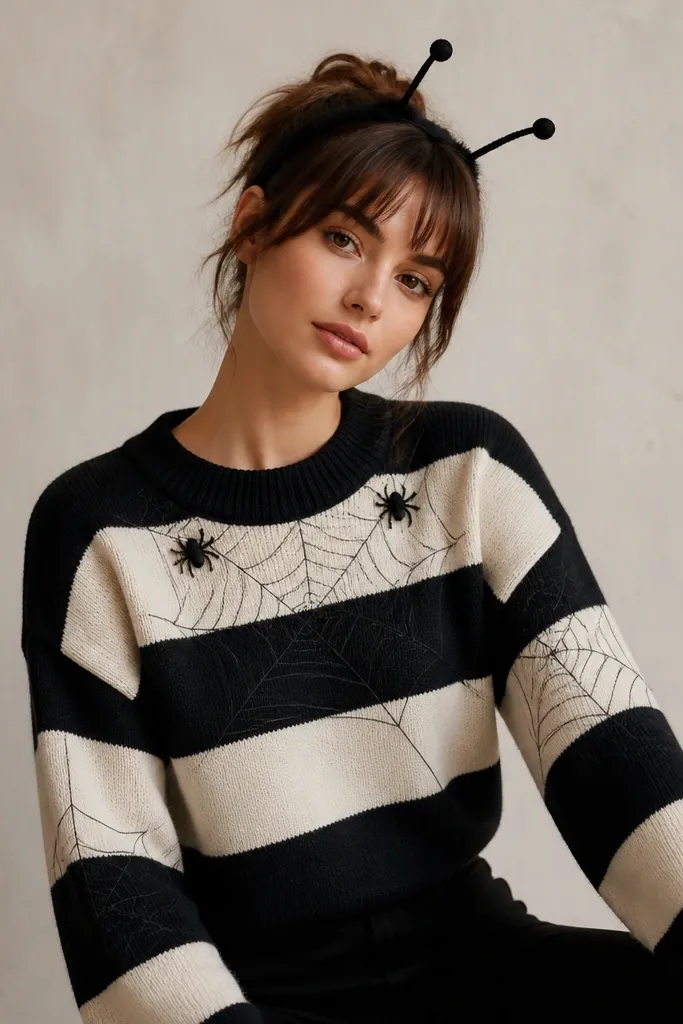
Striped sweaters are perfect because the contrast makes the web lines pop. Use thin thread or fabric paint to draw webs that follow your sweater’s natural stretch lines. Add a couple of small spiders so it’s not just random lines. This looks aesthetic because it’s controlled and placed — chest, upper arms, and one headband detail.
For web lines, pull 20-30 inches of white thread taut and tack it with small stitches over the sweater fabric. For spider shapes, cut small black felt circles with legs made from thin felt strips and stitch them in place. Add antenna to a headband using two thin pipe cleaner covered in black fabric. Keep webs mostly in the center of the chest and around sleeve cuffs.
Quick tipTest web placement on your body in a mirror first so it lands where your face frame is.
One warningDon’t flood webs with paint — heavy paint cracks and looks messy.
16. Bed Sheet to Cloud Cape with T-Shirt Neck Tie
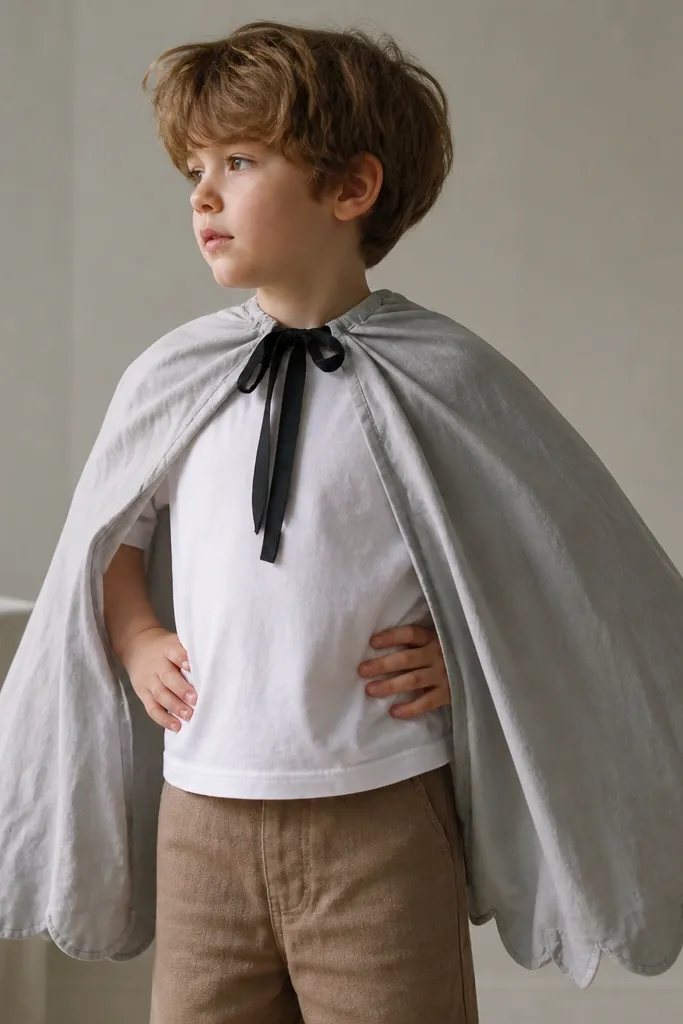
This one is low-cost but looks intentional because you shape the edge. A bed sheet is thin and drapes like a cloud, and the cloud-bump hem makes it read as sky fantasy. Use a darker tie so the neck area looks clean. The aesthetic comes from one clear silhouette: cloud cape over a simple outfit.
Cut a rectangle cape from a light gray or white sheet, about 40 inches long and 60 inches wide. Cut cloud bumps along the bottom edge using a plate or bowl to trace curves. Tie it with a neck strip cut from an old black T-shirt so it stretches and sits comfortably. Wear over jeans and a neutral top to keep the cape as the focal point.
Quick tipWash and dry the sheet once before cutting — it softens and stops weird stiffness.
One warningDon’t cut a straight hem — cloud capes need shape or they look like a blanket.
17. Joggers to Street Sorcerer with Embroidered Sigil Patch
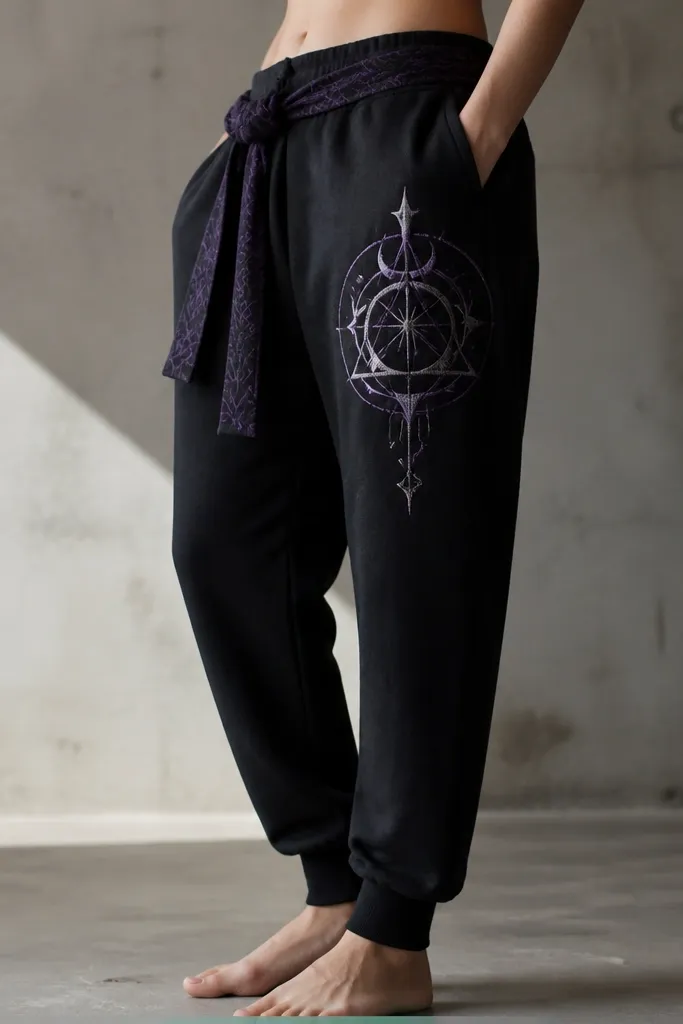
Joggers are a cheat code for comfort, and the costume can still look sharp. Add a big sigil patch where your leg hits camera framing — thigh or hip — then repeat a smaller symbol on the waistband. White and purple thread gives you a magical look without glitter. The aesthetic is clean and graphic.
Draw your sigil on paper first, then transfer it to fabric using chalk. Stitch with a simple running stitch and backstitch for thicker lines. Make a sash from matching fabric strip and tie it at the waist. If you want it to look store-bought, use a fabric backing and frame the patch with a straight stitched border.
Use embroidery thread in two shades for depth — one light base, one dark outline.
Avoid fuzzy transfer paper marks — they bleed and ruin the crisp look.
18. Sports Bra to Cheer Witch with Pom-Pom Trim and Bows
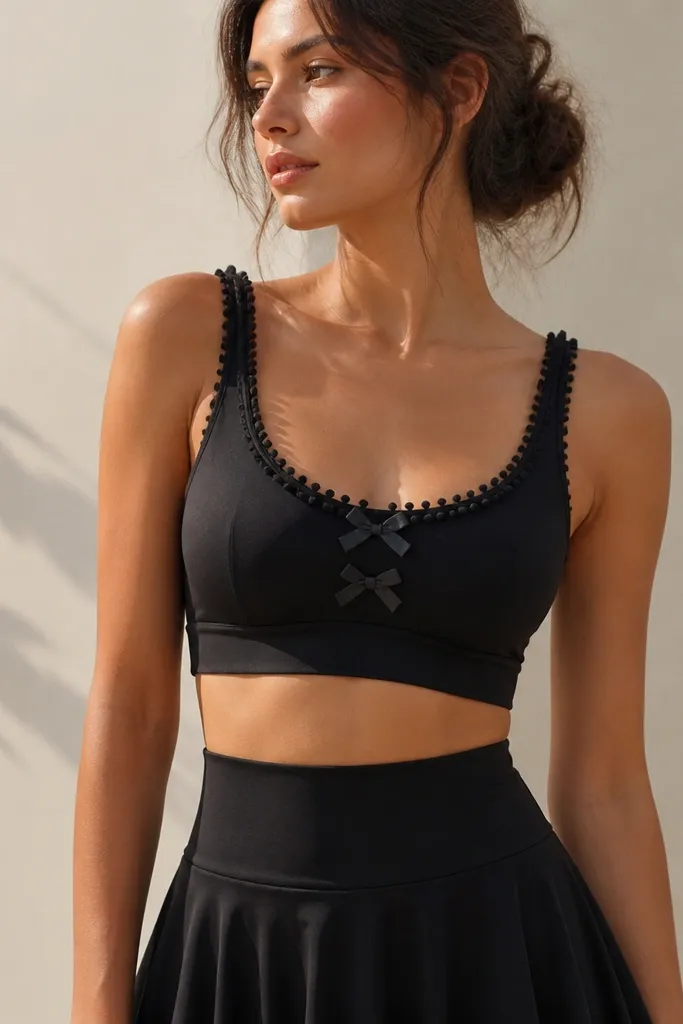
If you want an aesthetic costume that’s also comfy, start with a sports bra and add trim. Pom-poms give instant cheer energy, and black + deep green reads witchy without going full costume-store. Bows at the center keep the look cute instead of aggressive. The key is symmetry: both straps get the same trim amount.
Sew or hand-glue pom-pom trim along the edge of the sports bra where the fabric is flat. Add two small bows made from ribbon or fabric strips and stitch them at the center front. For the straps, measure from the top seam down 3 inches and attach pom bands in matching lengths. Pair with a high-waist skirt or leggings for a clean silhouette.
Quick tipPin trim in place first and wear the bra for 10 minutes — if it shifts, adjust before sewing.
One warningDon’t use heavy pom-poms that weigh down the bra fabric — it warps the fit.
19. Tote Bag to Post-Apocalypse Utility Belt Outfit
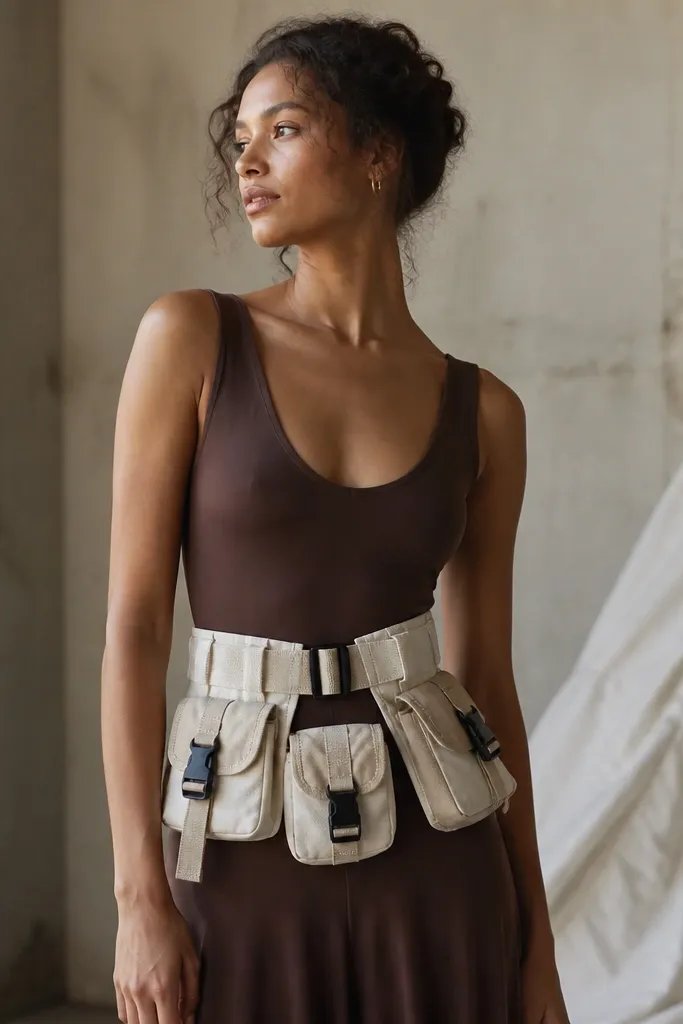
This costume is practical and looks cool because it uses real storage shapes. Repurpose a canvas tote into a utility belt panel, then add small pouches for “supplies.” It reads aesthetic because the design is modular — everything has a place, and the colors stay earth-toned. Wear it over a fitted black shirt and jeans so the belt panel becomes the focal point.
Cut the tote straps and attach them to a waist belt so the panel sits at your midriff. Add 2-4 small pouches made from leftover canvas or denim scraps, each with a snap or Velcro at the top. Use a strip of reflective tape on one pouch for a tech accent. Secure the panel with side ties so it doesn’t flop when you walk.
Quick tipUse a rigid cardboard insert behind the panel if it keeps curling — it makes the silhouette look intentional.
One warningAvoid mixing too many fabrics in one panel — it looks like random junk tied together.
20. Scarf to Dragon Wing Cape with Foam Backbone
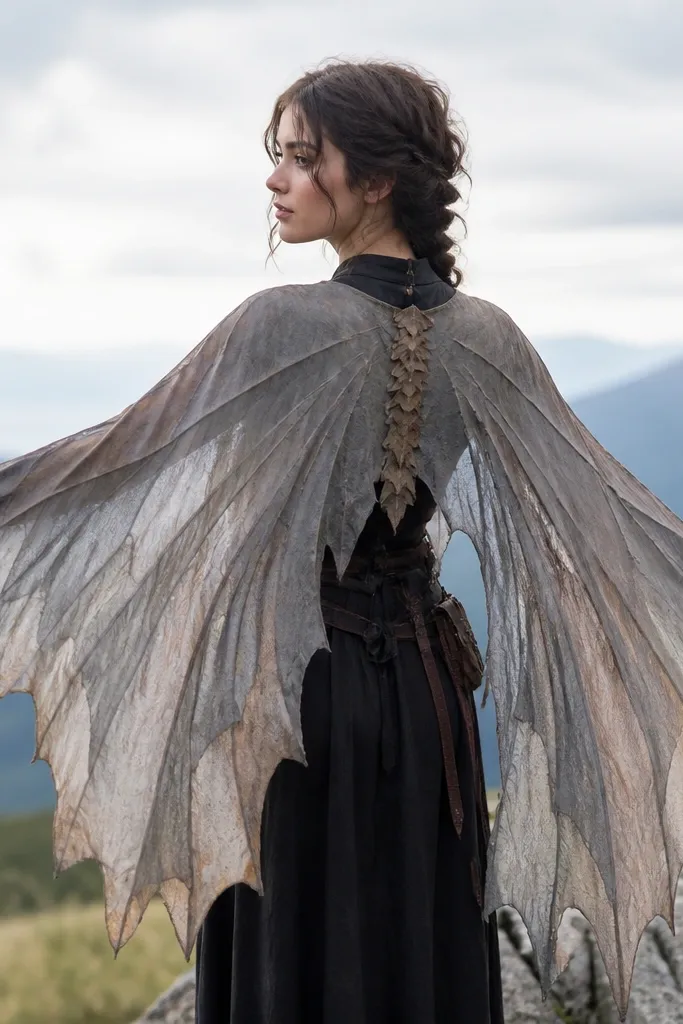
You can get real wing drama from something small: a scarf plus a light foam backbone. The foam keeps the wing shape so it looks like wings, not a drape. Choose a scarf with a subtle scale print or gradient — it gives the dragon vibe without painting. This is aesthetic because the wing silhouette is clear and frames your shoulders.
Cut two wing panels from a large scarf or multiple matching fabric pieces. Insert a thin foam strip along the top edge of each wing and stitch fabric around it. Attach wings to a cape base made from a simple rectangle of matching fabric, then secure with Velcro at the center back. Add feather tabs along the outer edge using small triangles stitched in rows.
Quick tipTry the wings on with a mirror before final stitching so the foam angle matches your posture.
One warningDon’t make the foam spine too thick — it creates bulky lumps and won’t sit flat under a jacket.
21. Blazer to Detective Noir with Pocket Watch Chain Detail
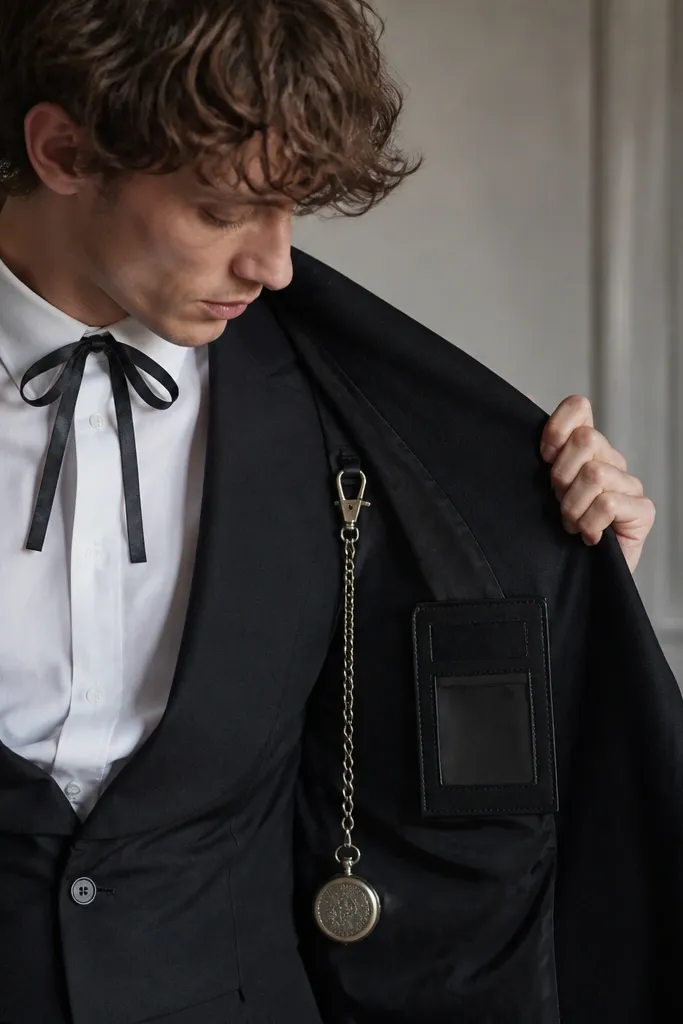
A blazer is already the costume base for noir, and one detail makes it look styled. Use a pocket watch chain (or a chain you already own) and attach it to the inside lapel so it falls naturally. Add a fake ID card holder with a photo you print, then sleeve it in clear plastic. The aesthetic is clean, dark, and sharp — the chain line is the focal point.
Sew a small fabric loop behind the lapel to hold the chain end, then stitch the chain so it hangs at chest height. Make an ID holder from clear plastic sleeve material and a fabric backing, then attach it to the blazer pocket with a few stitches. Add a satin bow or tie at the collar if your shirt allows it. Keep everything monochrome: black, gray, and one silver accent.
Quick tipUse a safety pin to test chain length before you sew it permanently.
One warningSkip bright colors for noir — neon ID cards kill the mood instantly.
22. Floral Dress to Vintage Fairy with Layered Tulle Hem Overlay
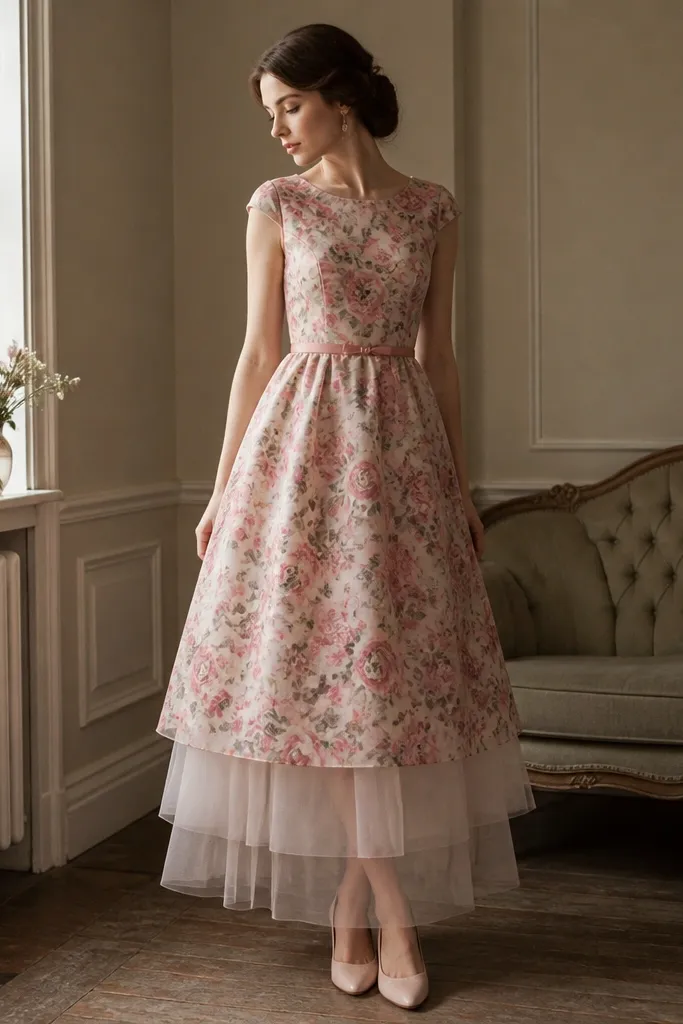
A floral dress becomes fairy-like when you add one airy element at the bottom. Layered tulle hem overlays move when you walk, and the translucency makes the dress look softer. Use pastel tulle in one color family so it doesn’t fight the floral pattern. The aesthetic is “natural with a twist” because the dress fabric still shows through.
Cut three tulle strips: one at 12 inches, one at 16 inches, and one at 20 inches wide enough to wrap around the hem. Hand-sew the layers to the inside hem so the stitches don’t show on top. Add a thin ribbon belt in a matching pastel to define your waist. If your dress is fitted, keep the tulle layers light so it doesn’t bunch.
Quick tipSteam tulle after cutting so edges look soft instead of jagged.
One warningDon’t attach tulle directly over thick seams — it puckers and looks homemade in a bad way.
23. Striped Socks to Giant Bow Leg Accents
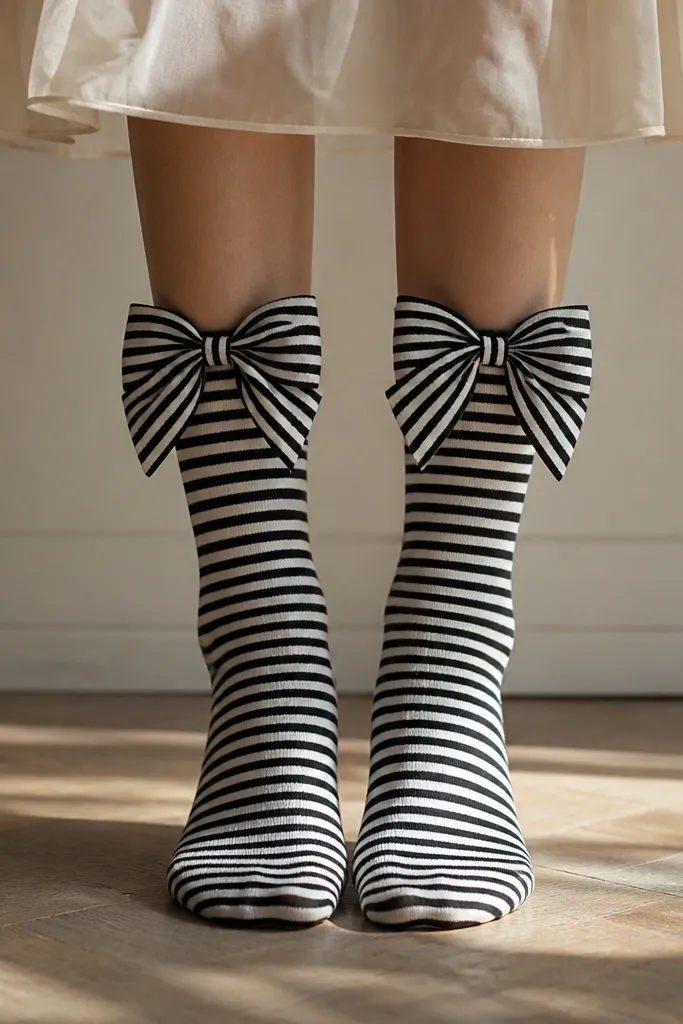
This is a costume trick for people who hate headpieces. Big bows on your calves make the outfit look designed, and socks are easy to repurpose. Use striped fabric so the bow matches your outfit and looks intentional. It reads aesthetic because it’s graphic and symmetrical, and it adds height to your legs.
Cut bow pieces from striped socks fabric if you can — cut the leg section first, then create a bow shape with two loops and a center wrap strip. Stitch the center wrap around the loops, then attach the bow to the sock using a few hand stitches or strong fabric glue at the back. Keep bow size around 6-7 inches wide so it shows in photos. Wear with a short skirt or shorts for maximum visibility.
Quick tipIf the sock fabric is stretchy, stitch the bow on with a zigzag stitch so it flexes.
One warningAvoid tiny bows — they disappear and look like an afterthought.
24. Old Sweater to Space Scientist with Color-Block Elbow Patches
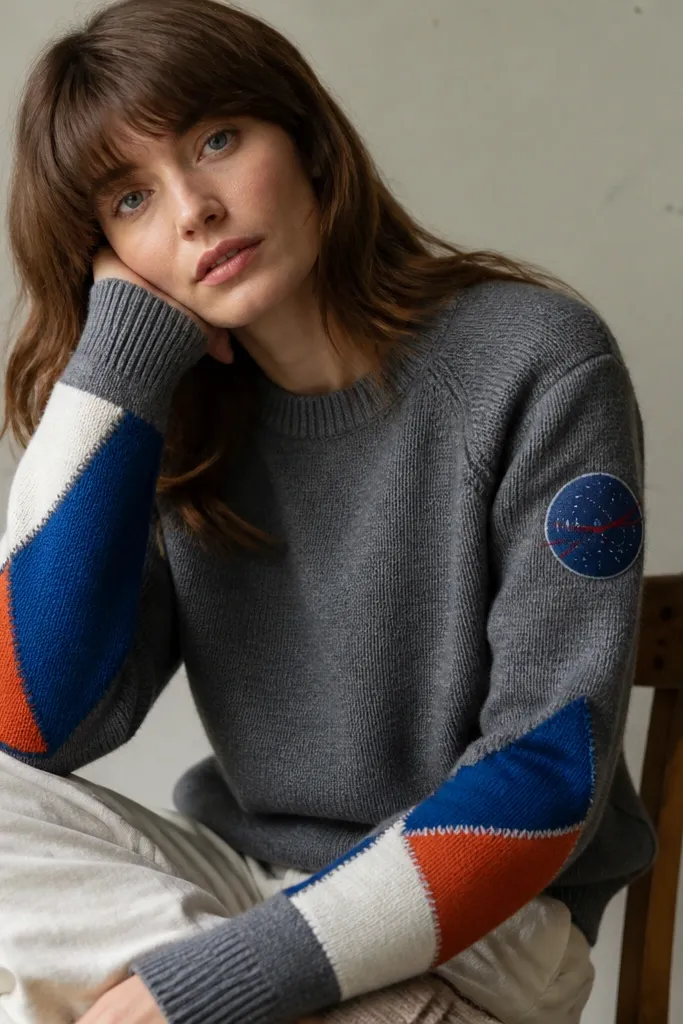
Color-block elbow patches look like lab gear without needing a lab coat. Use bold colors against gray knit so the patches pop in flash. The scientist vibe comes from placement — elbows and forearms are where “tools” sit. Keep the rest plain so the patches become the focal design.
Cut elbow patches from sturdy fabric like felt, canvas, or faux leather. Make two mirror patches for each arm, then stitch them over the elbow area with a tight zigzag. Add one small circle icon on the sleeve using fabric paint or stitched applique. If your sweater is loose, pin the sweater flat before measuring patch placement.
Quick tipLay the sweater on a flat surface and mark patch corners with chalk so both arms match.
One warningDon’t use shiny vinyl patches on knit — they peel and wrinkle.