1. Cardboard Robot With a One-Piece Chest Plate
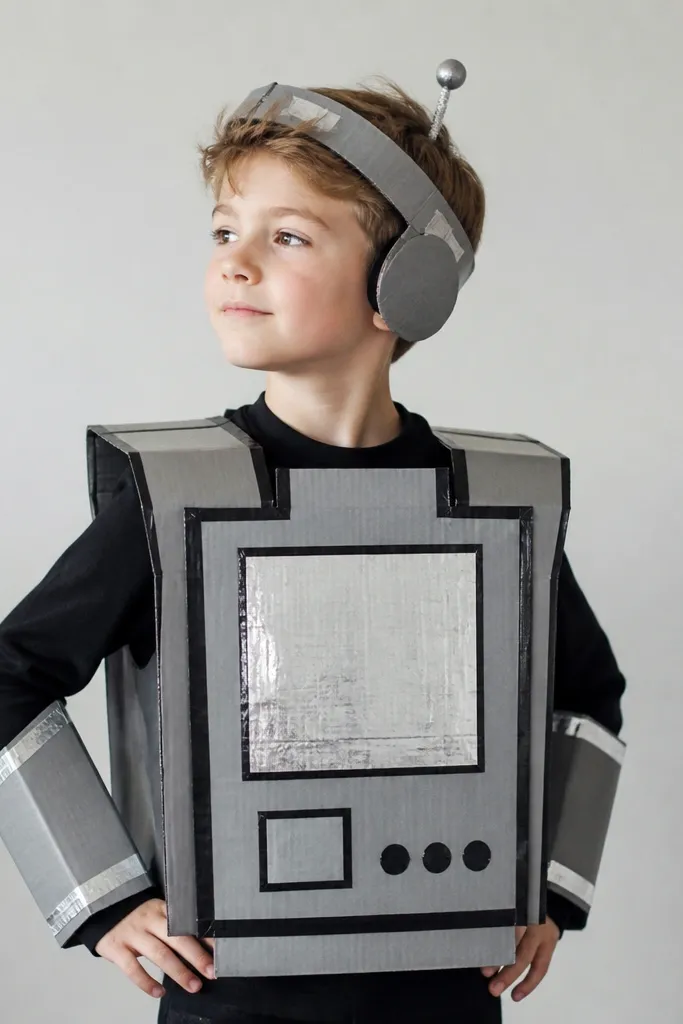
This looks creative because the chest plate is big, flat, and clearly “robot” from a distance. I use gray and silver acrylic paint for the metal effect, then I add thin black lines with a marker to mimic panel seams. The antenna makes it instantly readable even if the rest is simple. Pair it with a black base layer so the costume colors stay crisp instead of muddy.
Cut a torso rectangle from corrugated cardboard, about 10 inches tall and 8 inches wide, then round the corners. Paint two thin coats of metallic gray, let it dry fully, and draw seam lines with a black paint marker. Attach it with two straps made from elastic or scrap fabric — poke holes on the sides and tie securely around your shoulders and waist.
Add two small “display” squares from craft foam and glue them onto the chest, using one neon color (lime or electric blue) so it pops in photos.
Skip thin, bendy cardboard — it warps when you move and makes the whole thing look homemade in a bad way.
2. Thrift-Tee Space Princess With a Cut-Up Galaxy Skirt
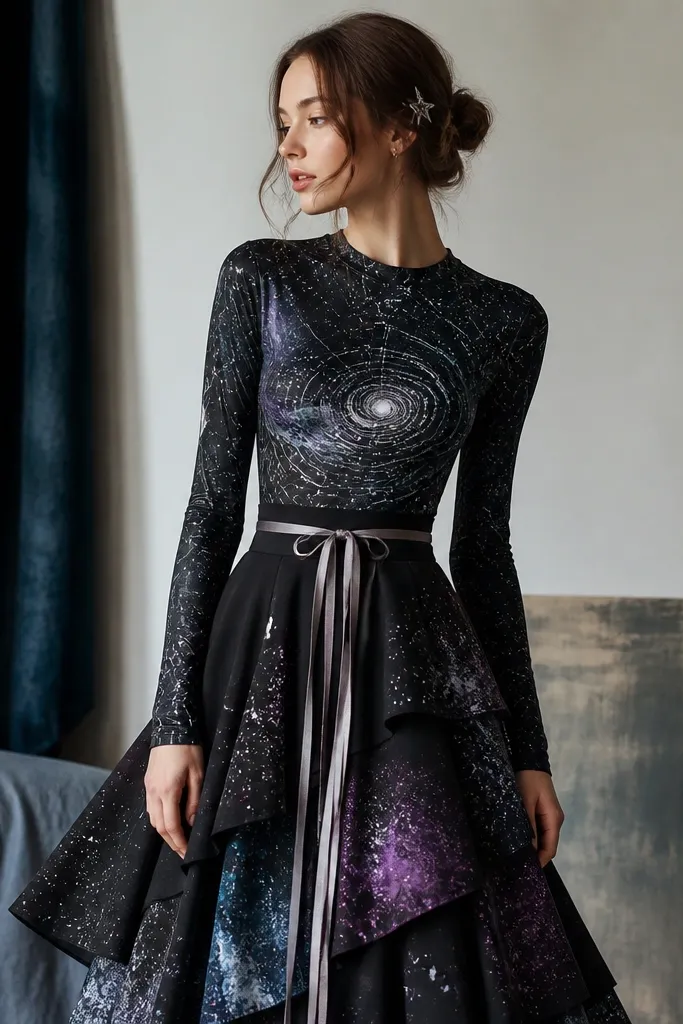
Start with a black T-shirt or fitted long-sleeve for the top. Paint a simple star map on the chest using white acrylic and a few curved lines, then add a small crescent moon on one side. For the skirt, cut 3-4 panels of black fabric or jersey, stitch or tie them to a waistband, then splatter purple and blue paint using watered-down acrylic.
The galaxy skirt reads as “space” instantly because the color splatter gives depth even in low light. I paint stars with a toothbrush and acrylic paint — it creates tiny, uneven dots that look more realistic than a stencil. The fitted top keeps the silhouette clean while the skirt does the visual work. Silver ribbon ties add a costume-like detail without needing a full belt pattern.
One warningDon’t use thick poster paint on fabric — it cracks and flakes after a few hours.
Quick tipSpray the finished galaxy fabric lightly with fabric-safe sealer so the paint doesn’t rub off onto your legs.
3. No-Sew Newspaper Viking Helmet + Shoulder Cape
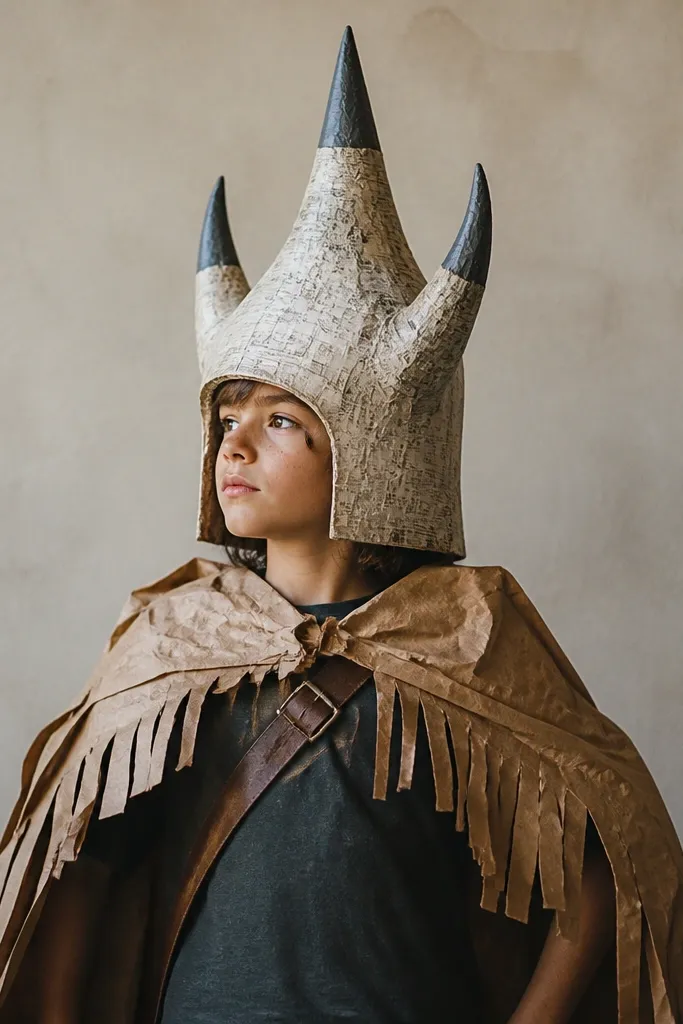
Tear newspaper strips and glue them over an inflated balloon or rolled paper form, building 6-8 layers. Let it dry overnight, pop the balloon, then trim the helmet opening. Paint with dark gray acrylic and dry-brush highlights. For the cape, cut a half-circle from brown paper, fringe the bottom edge, and secure it with a strap made from scrap fabric or a wide ribbon.
This costume looks legit because the helmet has height and the horns give a clear silhouette. The cape adds movement without heavy sewing. I shape the helmet with newspaper layers and glue, then paint it so it looks like weathered metal. The fringe on the cape catches light and makes the costume feel handmade in a good, intentional way.
One warningDon’t skip dry time — a still-wet helmet collapses and ruins the horn shape.
Quick tipAdd two small eye slits and a strap under the chin using elastic so the helmet stays put when you turn your head.
4. Faux-Leather Keychain Gargoyle Belt
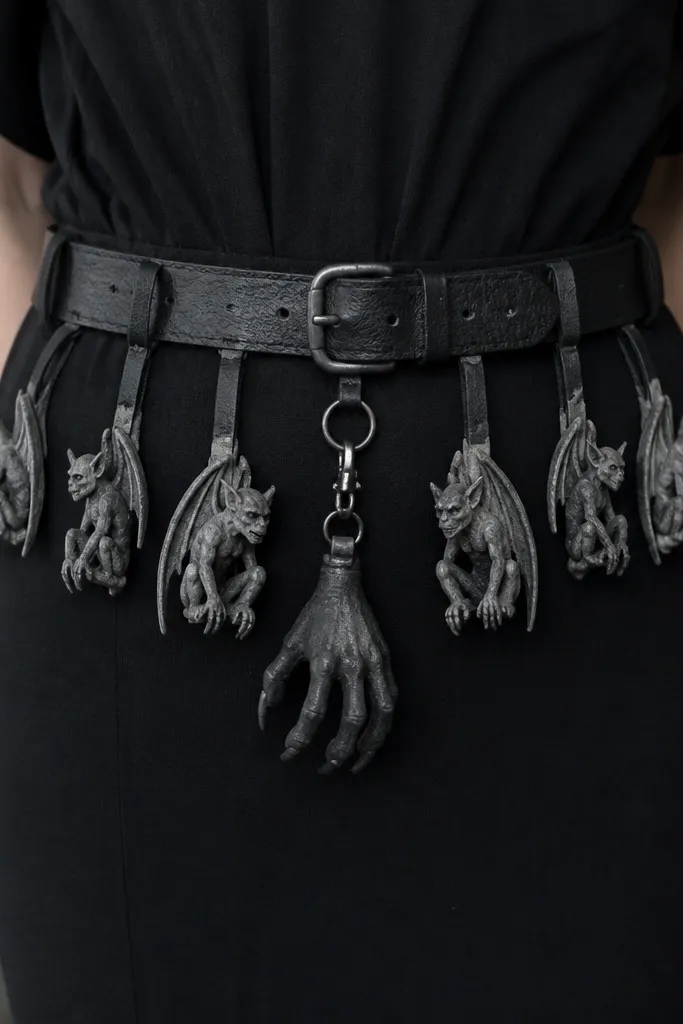
Use a wide faux leather strip or an old belt as the base. Cut gargoyle silhouettes from craft foam, heat-shape the edges slightly, then paint with charcoal gray and dry brush with lighter stone gray. Glue or rivet them onto the belt and add a center claw charm made from a foam offcut or keychain figure.
This is one of my favorite “easy but looks designed” costumes because the belt is the hero. Mini gargoyle charms read like gothic armor and they move when you walk. The trick is weathering: dry brushing gray over darker base paint makes the details pop. If you wear all black underneath, the belt becomes the whole story.
One warningDon’t glue charms flat — add a tiny foam spacer so they hang away from the belt and look dimensional.
Quick tipSeal painted foam with matte Mod Podge so it doesn’t rub off on your clothes.
5. Tulle Fairy Dress With a Spray-Painted Ombre Wand
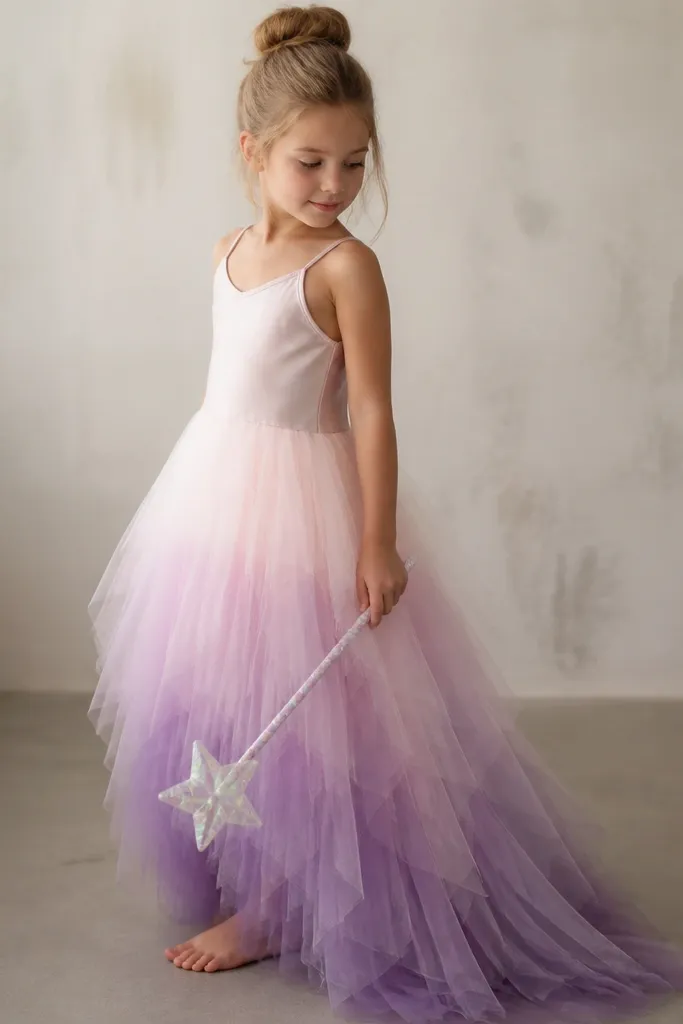
Add tulle strips to a slip dress or fitted skirt by hand-sewing or using fabric glue along the top edge. For ombre, dip sections of tulle into watered-down dye or use spray fabric paint in horizontal passes. For the wand, wrap a wooden dowel with iridescent ribbon, then lightly spray with translucent glitter paint and let it dry upright.
The ombre effect makes it look store-bought even when the construction is basic. I build the wand to match the dress colors so the costume feels cohesive. Tulle catches light and makes movement look magical in photos. You don’t need a complicated bodice — the layers do the work.
One warningDon’t use stiff craft glitter on skin — it transfers. Choose translucent glitter paint meant for crafts.
Quick tipUse a wide ribbon tie at the waist; it instantly makes a tulle layer look intentional instead of like random fabric scraps.
6. Glow-in-the-Dark Ghost Using a Bed Sheet and Fabric Paint
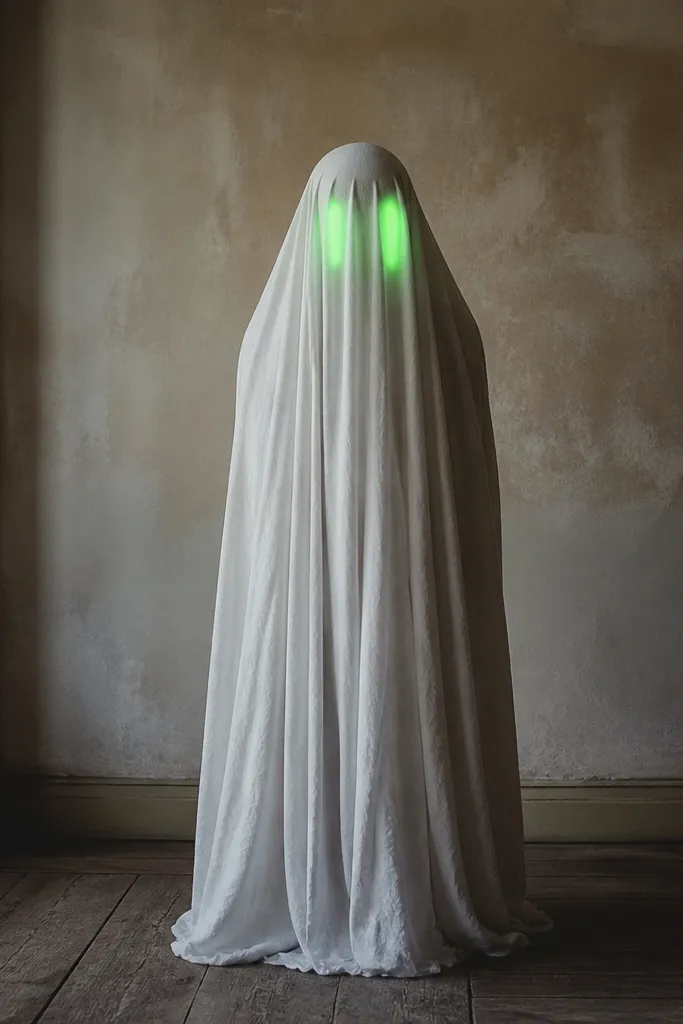
This is the classic ghost idea, but the glowing eyes make it look creative instead of generic. I paint the eyes with glow-in-the-dark fabric paint so they stay bright after the lights go down. The sheet drape is forgiving — it hides messy hems and uneven folds. Keep the ghost face minimal so it reads clearly in the dark.
Cut two eye openings in the sheet and reinforce the edges with small fabric patches. Gather the sheet at the shoulders using hidden stitches or safety pins. Paint the eyes with glow fabric paint in a simple oval shape, then add tiny dot highlights for expression.
Charge it under a bright porch light for 10 minutes before you leave.
Don’t use glow paint that’s only for paper — it peels off fabric and looks blotchy.
7. Upcycled Denim Socialite With a Stitched Photo-Card Purse
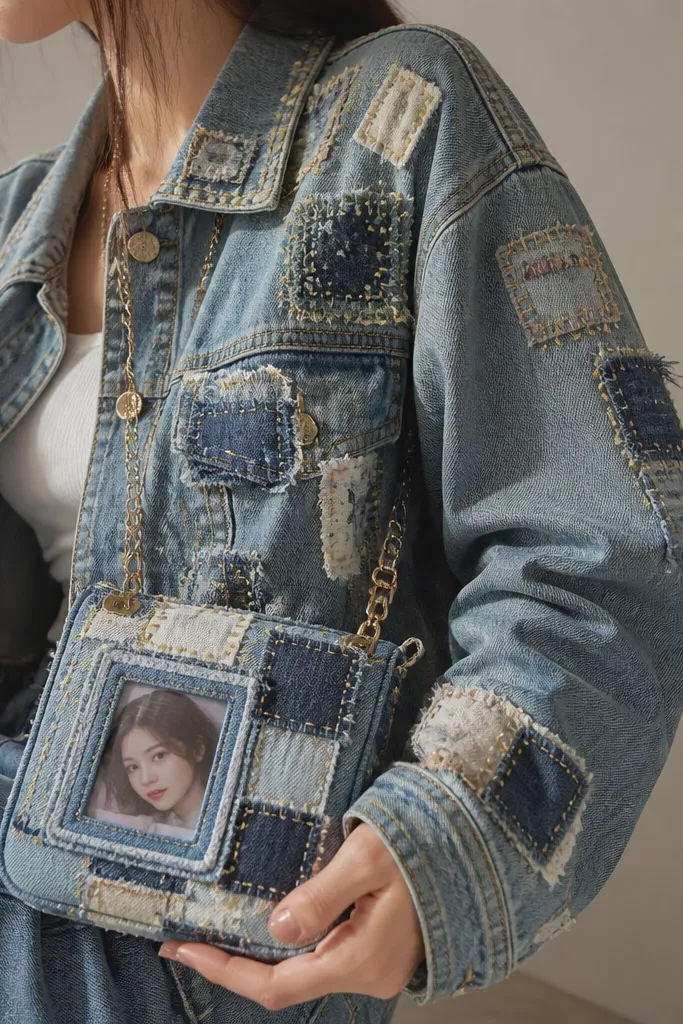
The costume looks “creative” because it’s personal and textured, not because it’s complicated. Denim plus stitching reads costume-ready even when you’re just wearing normal clothes. The photo-card purse acts like a prop, and props make outfits feel intentional. I frame the photo with clear vinyl so it looks like a mini collectible.
Find a denim jacket or jeans you can spare. Stitch on 6-10 small patches cut from other denim, then add gold thread lines in a few places for sparkle. For the purse, sew two denim rectangles, sandwich clear vinyl in the center, and stitch around it. Attach a chain strap from a thrifted bag.
Use a running stitch around the photo window; it looks like “handmade design” in a way straight seams don’t.
Avoid hot glue on denim patches — it peels when the jacket flexes.
8. Old Sweater Cat Cape With Button Eyes
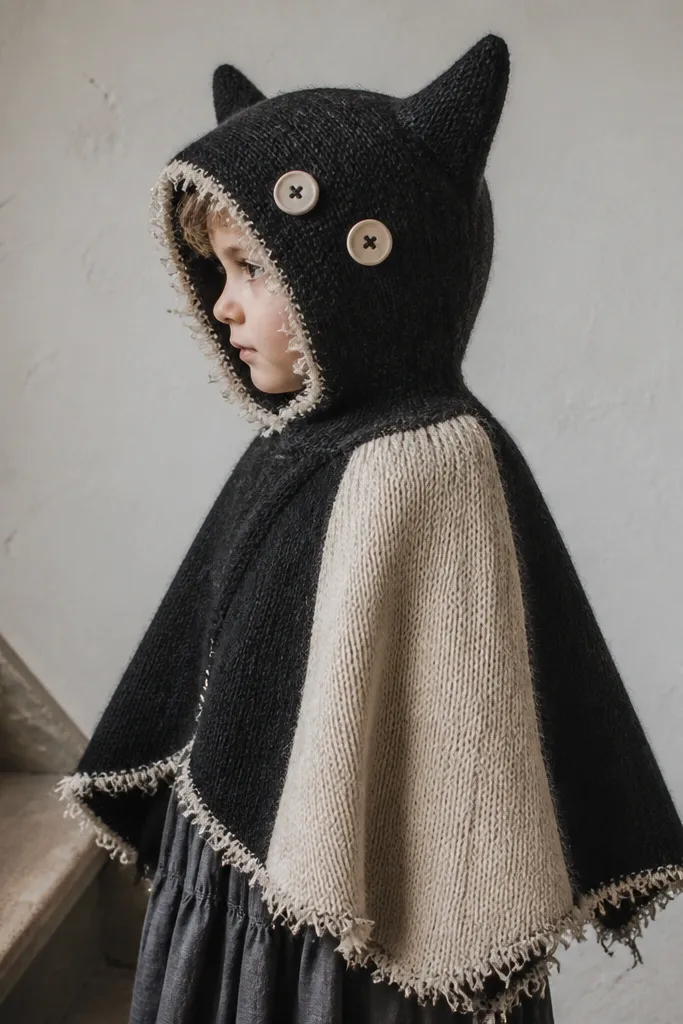
Cut the sweater front or back into a cape shape leaving arm holes if you want it like a poncho. Sew or glue the sweater collar area into a hood, then fold two ear points from leftover knit and stitch them in place. Add button eyes with strong thread and a small felt triangle nose.
This works because knit texture is already costume-y, and the cape shape is dramatic. Button eyes make the face look cute and readable without paint. I like using the sweater’s cuffs and seams to avoid messy cutting. The frayed edge looks intentional when you keep it clean and even.
One warningDon’t cut too close to thin areas — the knit can unravel and you’ll end up redoing it mid-party.
Quick tipUse two different yarn textures for the ears — like ribbed cuff knit for one and flat sweater knit for the other.
9. PVC Pipe Crown With Twine Wrap and Glitter Caps
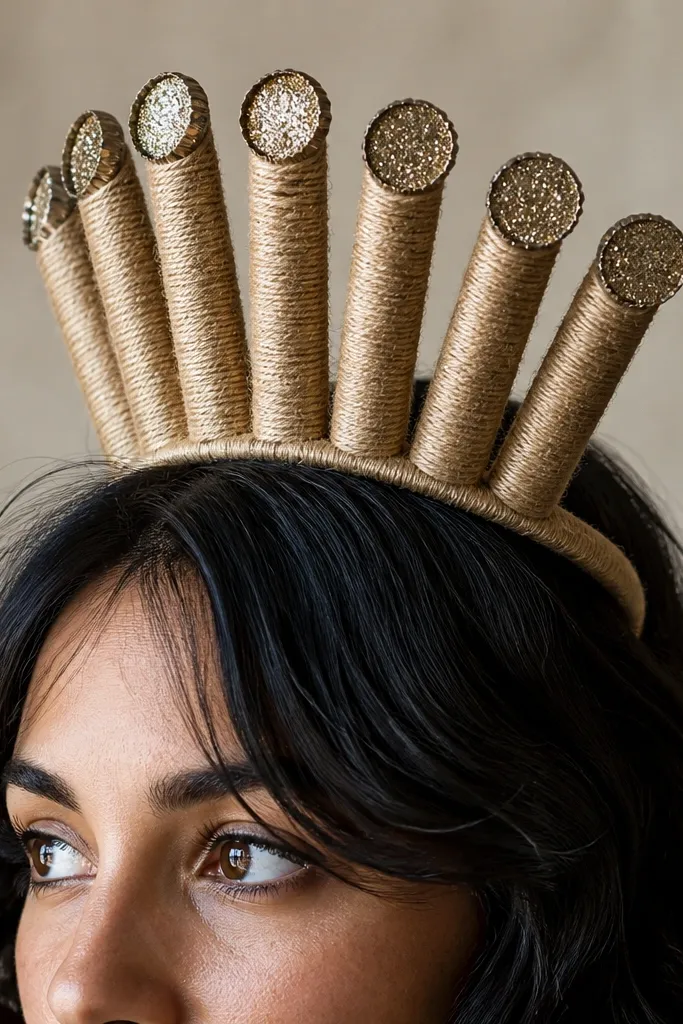
A crown is an instant costume marker, and PVC is easy to shape. Twine makes the plastic look handmade instead of shiny store plastic. The glitter caps at the tips give you that “magic artifact” look. Keep the color limited — tan twine plus one glitter color looks more designed than rainbow chaos.
Measure your head and cut 1-inch PVC segments for the base band and top points. Glue segments with PVC cement or strong craft glue designed for plastic. Wrap everything in twine, gluing every inch. Hot glue bottle caps or foam cones on the tips and paint/glitter them.
Sand the PVC lightly before gluing so the adhesive grips.
Skip super-thin twine — it leaves gaps that show the plastic.
10. Tinfoil Mermaid Tail Skirt With Fabric Tape Scales
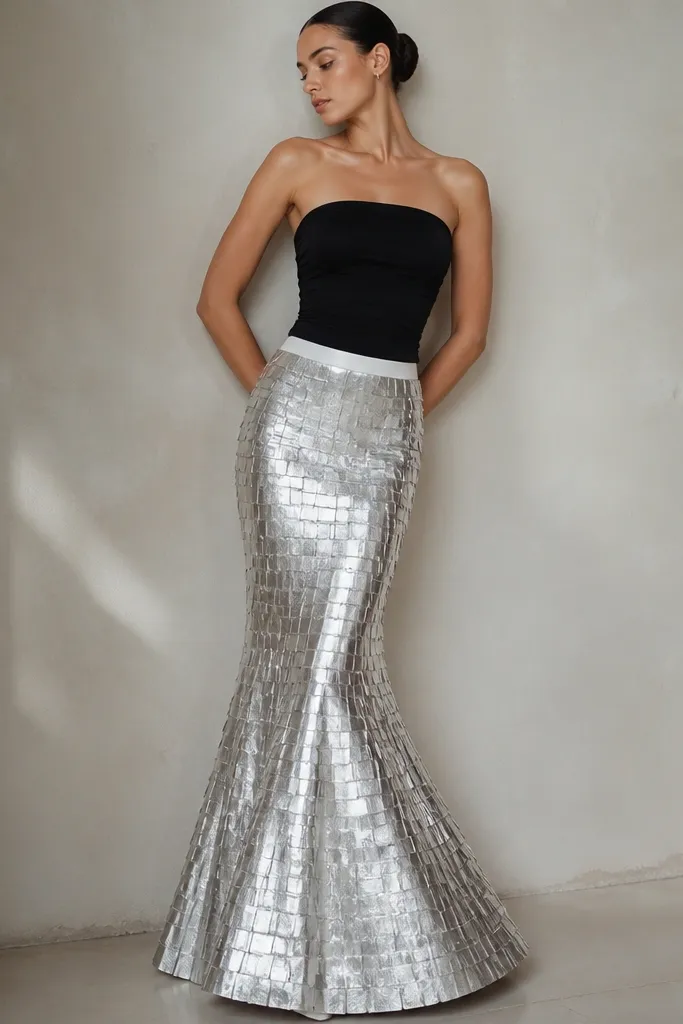
Metallic tape scales look like a tail because the overlap creates shadow lines. I’ve used tinfoil and metallic craft tape together, but the key is the overlap pattern. When you move, the scales shimmer and catch flash photography. Wear it with a simple top so the skirt stays the feature.
Create a base skirt from stretchy fabric or an old leggings-to-skirt conversion. Cut small strips of metallic material, then overlap them from waist to hem like shingles. Secure each row with clear fabric tape so it flexes. Add a waistband using elastic and sew or glue it securely.
Test the overlap height: 1 inch overlap gives a good scale look without making the skirt too stiff.
Don’t use duct tape directly on skin — it feels awful and can peel and stick.
11. Museum-Cardboard Frame Costume With Your Face in the Center
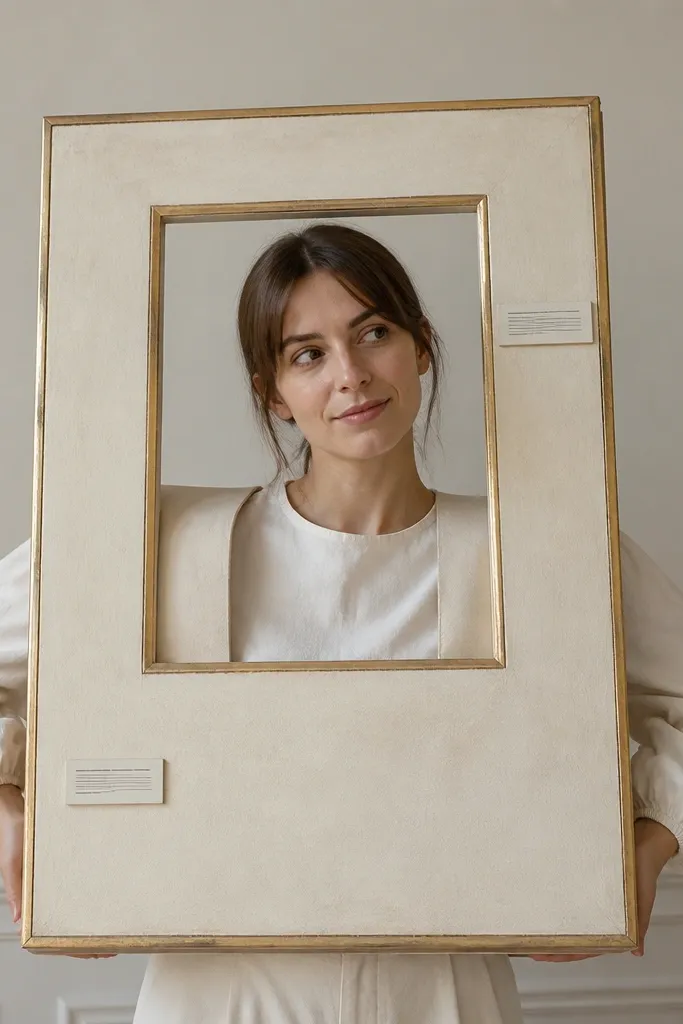
This costume reads like art because the frame is a simple, recognizable shape. It’s also funny in a smart way when you put your face in the center like a portrait. I paint the frame with cream acrylic and rub gold paint along the edges so it looks like an old gallery piece. The “label” strip adds realism without needing printed graphics.
Make a frame from sturdy cardboard about 18 inches wide and 22 inches tall. Cut a head hole and secure the frame with fabric straps that cross your shoulders. Paint cream, then dry brush gold at the corners. Add a small label strip at the bottom using a contrasting color and handwritten marker.
Use foam tape around the face opening so it doesn’t scratch your skin.
Avoid glossy paint — reflections wash out the label and look cheap under flash.
12. Recycled Towel Roll-Up Dragon With Foam Spikes
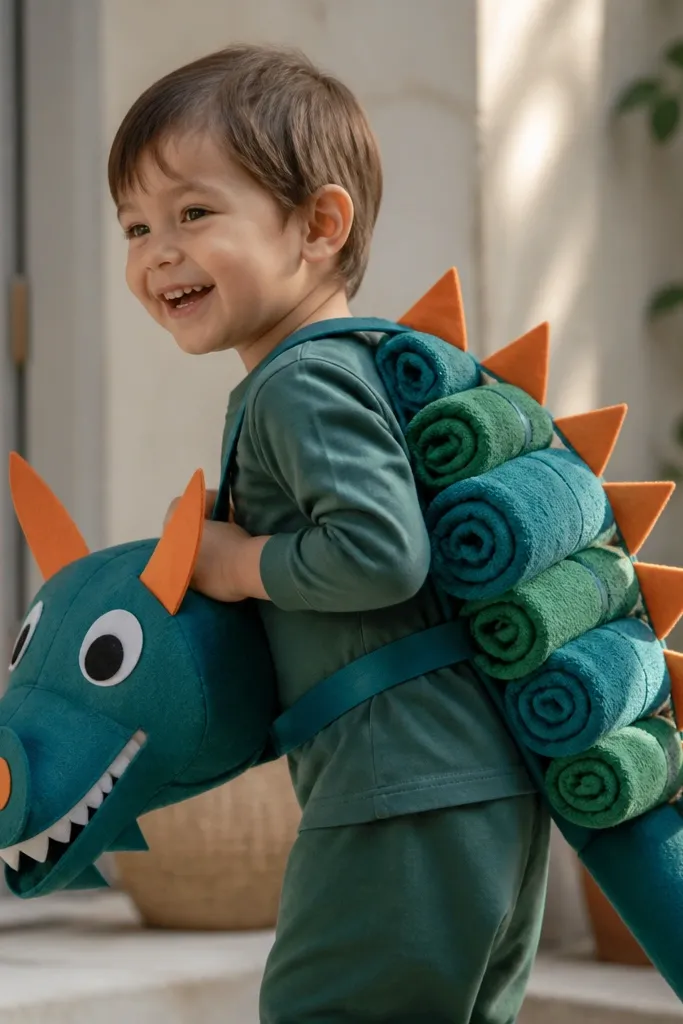
This one is fun because it’s built around a rolled shape — it looks like a dragon body even if you’re wearing a simple base. Foam spikes turn a towel roll into a creature. The felt snout gives expression without needing a full mask. It also feels comfortable because the towel is soft and flexible.
Roll a towel tightly and wrap it with elastic straps so it stays a cylinder. Cut foam spikes from craft foam and glue them along the top ridge. For the snout, use felt shaped like a rounded cone and attach it to the front with stitching. Add an eye patch from felt circles and a small black bead or button.
Stitch a small loop on the back so you can carry a “tail” prop or hold it in place while you move.
Don’t make spikes too tall — if they’re over 3 inches, they snag on people and look sloppy.
13. Scarf-to-Cape Witch With Stitched Star Grid
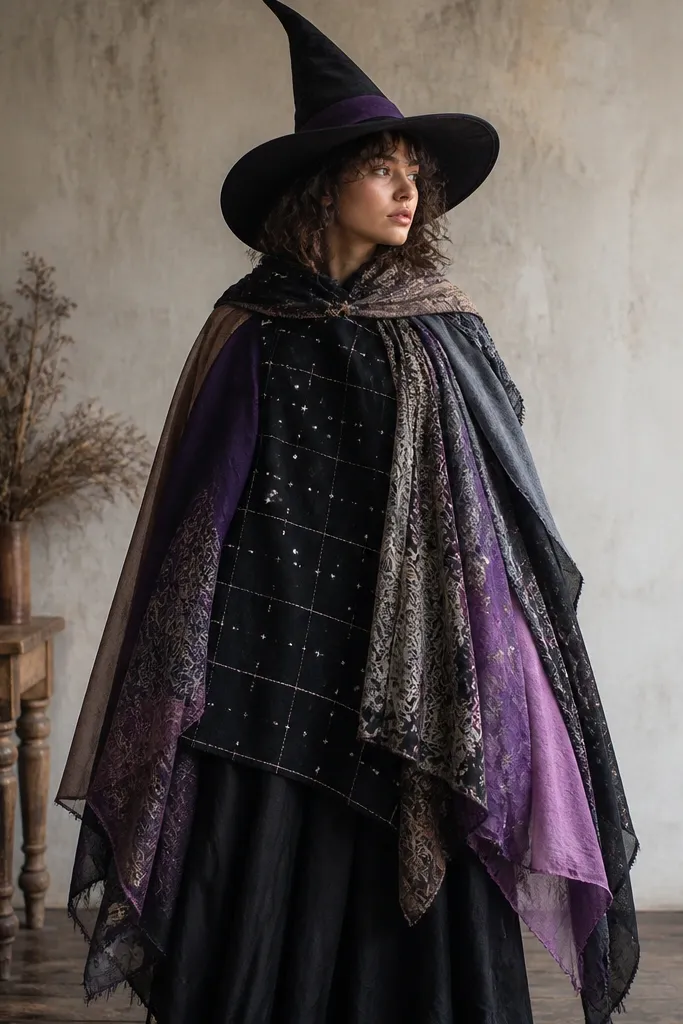
Scarves fall in a flattering way, so you get a witch cape without sewing a full garment. The stitched star grid makes it look intentional instead of “I wrapped fabric.” I use a black panel and white thread for the grid, then add star dots with fabric paint. It reads clearly in pictures and works even if the scarves are different textures.
Use 2-3 scarves, layering them over a black long-sleeve or dress. Pin or stitch the top edge to a small collar strip so the cape sits on your shoulders. Add a black felt panel on the chest with a grid of white thread and star dots. Finish with a pointed hat made from craft felt and a ribbon tie.
Choose scarves with similar weight so the cape drapes evenly.
Don’t mix super-sheer scarves with thick ones — the cape looks uneven and cheap.
14. Salvaged Bracelet Armor With Foil-Backed Strips
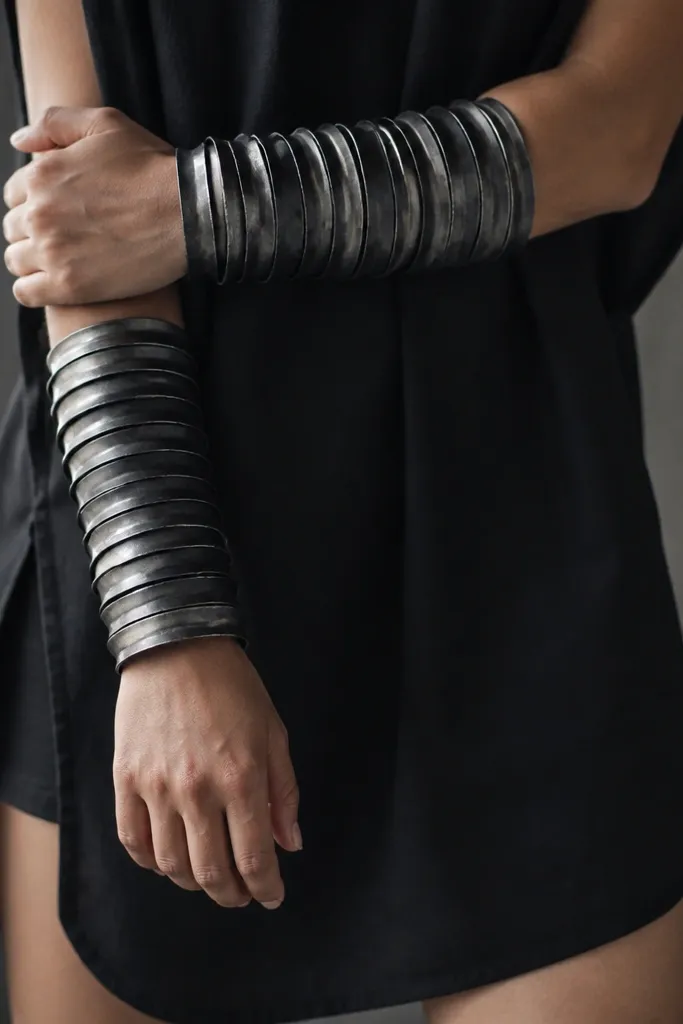
Use thrifted bangles or cut-up plastic containers for arm pieces. Line the inside with aluminum foil-backed craft paper or thin foil sheets, then paint over with gunmetal. Glue strips in overlapping layers from wrist to mid-forearm, leaving enough space to bend your elbow. Add a matching band around the upper arm if you want extra impact.
Armor bracelets look creative because they frame your arms and make your movement look themed. Foil-backed strips add a metallic edge without needing expensive chain or real metal. I like gunmetal paint because it doesn’t look like cheap silver craft spray. The outfit looks more “costume” when the armor repeats a single color across wrists and forearms.
One warningAvoid fully covering the inside of bangles — you need grip so they don’t slide off.
Quick tipLightly scuff the paint with sandpaper after drying so it looks used, not plastic-smooth.
15. Coffee Filter Flower Crown With Stamped Center Dots
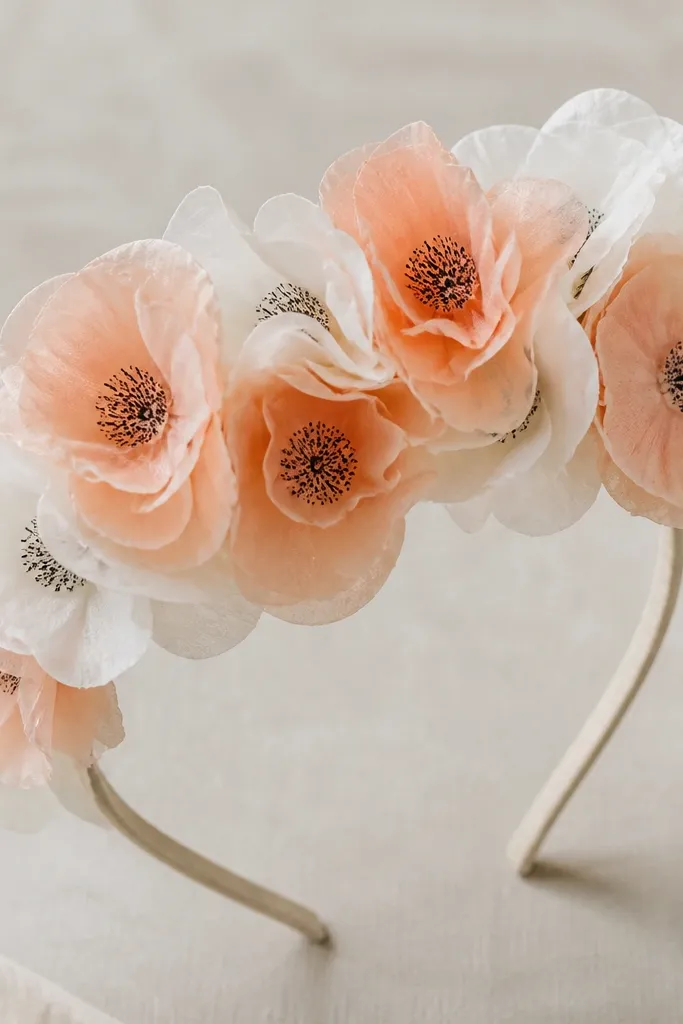
Coffee filters turn into flowers with almost no effort, and they look airy instead of stiff. The stamped center dots make each bloom look like it has a real flower center. I paint the filters with diluted acrylic, then let them dry curled so they keep that petal shape. Pair it with neutral clothing and the crown becomes the whole costume.
Dye or paint coffee filters in soft peach, blush, or pale yellow. Stack 3-5 filters per flower, then pinch the center and tie with thread or twist-tie. Glue flowers onto a stretchy headband. For centers, stamp dark ink or acrylic dot clusters using a small sponge.
Use a hot glue dot only at the base so the petals stay light and flutter.
Skip heavy paint — thick layers soak and make the filters collapse.
16. Hula Skirt Mermaid With T-Shirt Fringe and Beachy Shell Buttons
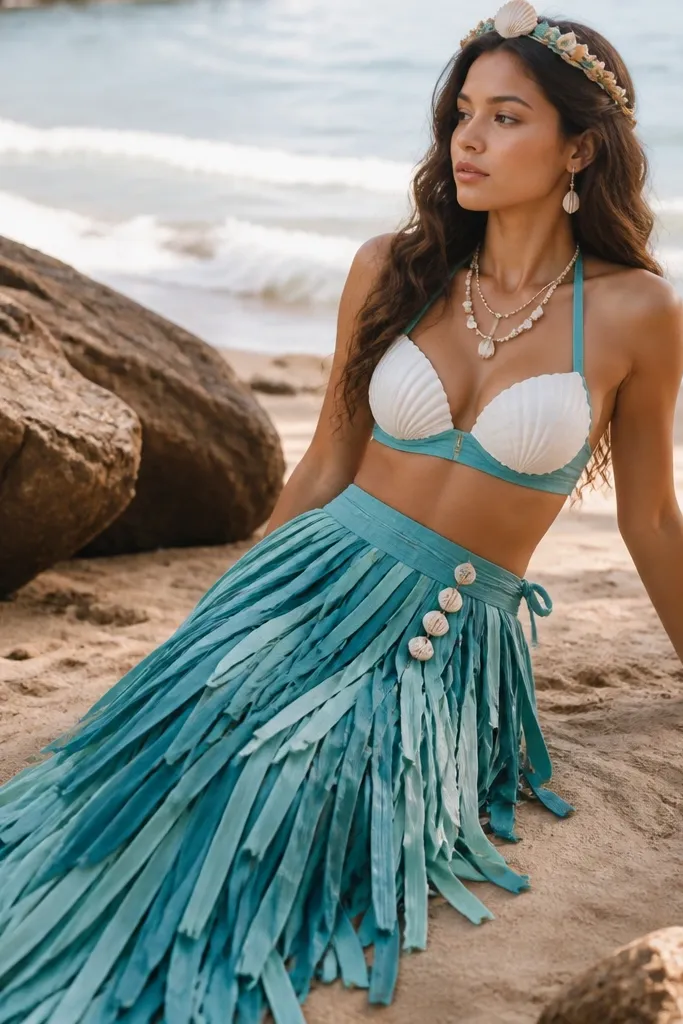
Fringe makes movement obvious, and that reads mermaid instantly. I build it from T-shirt strips because the knit stretches and doesn’t fray like craft fabric. Shell buttons give a cute focal point you can see from the front. Keep colors in a tight palette: teal, seafoam, and a warm sand accent.
Cut T-shirts into 1-inch wide strips, then knot them to a waistband made from elastic cord or an old belt. Layer two colors for depth — darker teal on the bottom edge and lighter seafoam above. Add a cluster of shell buttons on the front using strong thread or glue.
Trim the bottom fringe after tying so all strips hit the same length and look even.
Don’t knot too close together — you’ll end up with a stiff skirt that doesn’t swish.
17. Lego-Style Brick Hoodie Using Foam Squares
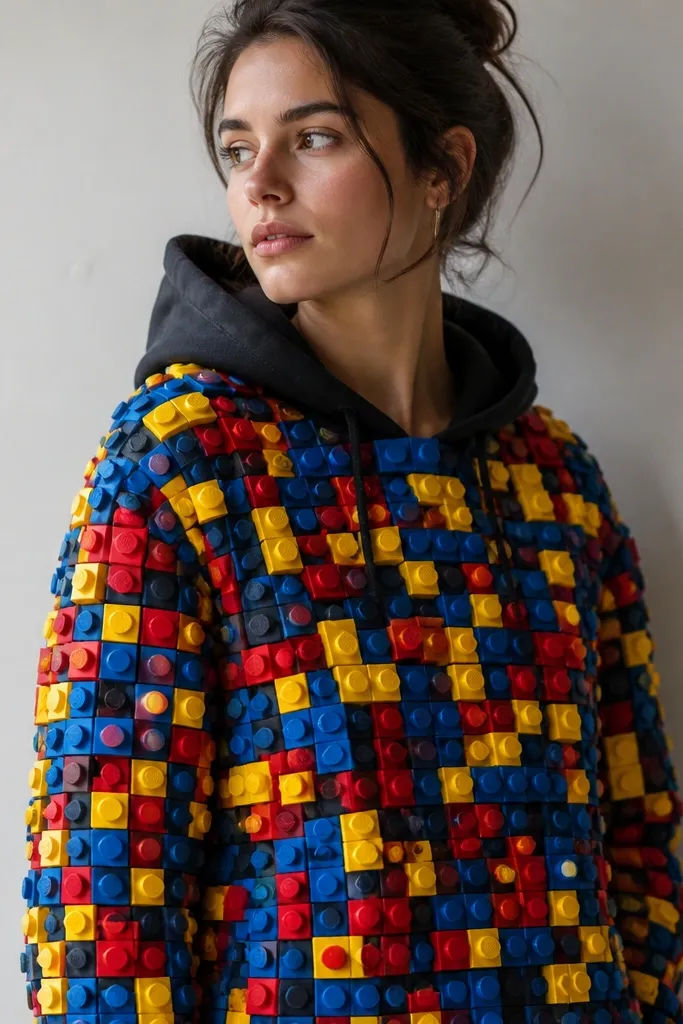
Cut foam into 2-inch squares and 1-inch squares for accents. Paint with acrylic and seal with matte Mod Podge. Glue squares onto the hoodie using hot glue for foam-to-fabric, then add small circles made from foam scraps as studs. Leave the zipper area clear so the hoodie still zips.
It looks creative because it turns a normal hoodie into a building-block character. Foam squares are lightweight, so you can wear it without feeling bulky. Round studs on top make it look like toy bricks, especially in photos. I keep the placement pattern simple: a “wall” layout on the chest and sleeves.
One warningDon’t cover the hood opening — it blocks your face and makes it uncomfortable.
Quick tipMix glossy and matte paint on studs only — it creates a toy-like shine without looking messy.
18. Laundry Basket Snowman With Fabric Scrap Buttons
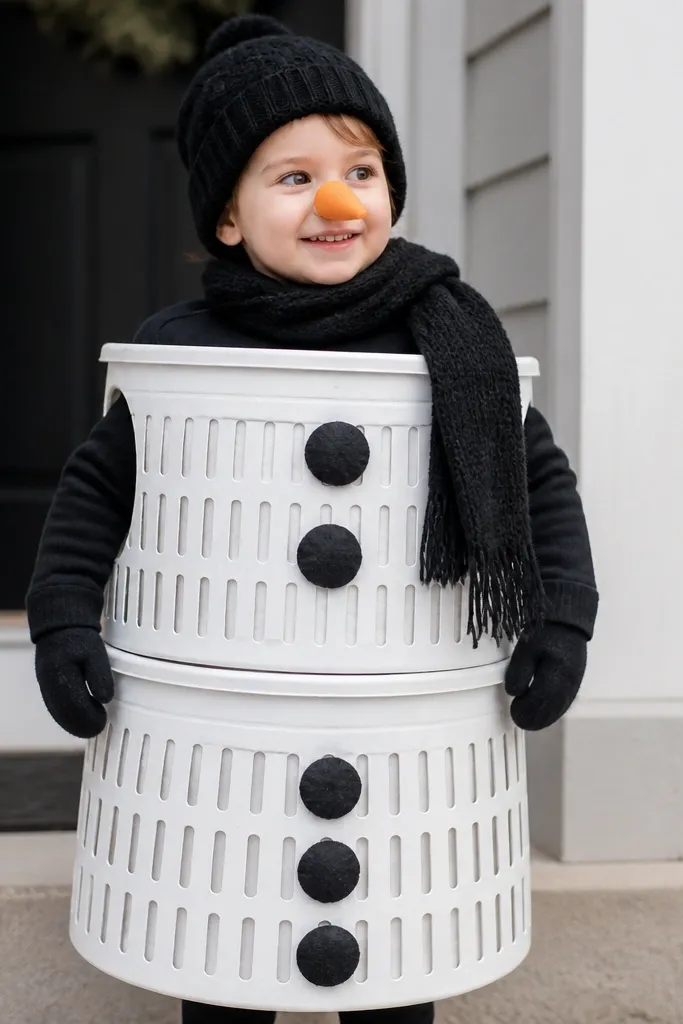
Laundry baskets make a snowman body shape fast, and the round form reads clearly from far away. Fabric scrap buttons look handmade and soft compared to plastic. The scarf adds a strong color contrast that makes the face area pop. This is also surprisingly warm because the baskets hold air and keep you covered.
Paint two laundry baskets with white acrylic, then let them dry. Cut a head hole in the top basket and paint a face area with black marker for eyes. Add an orange foam nose and sew or glue fabric scrap buttons down the front. Use a scarf wrapped around the neck opening and secured with safety pins.
Reinforce the basket stack with a hidden foam band or fabric strap so it doesn’t slip when you walk.
Avoid using plain spray paint — it chips and rubs off on your clothes.
19. Paper Plate Masked Cat With Whisker String
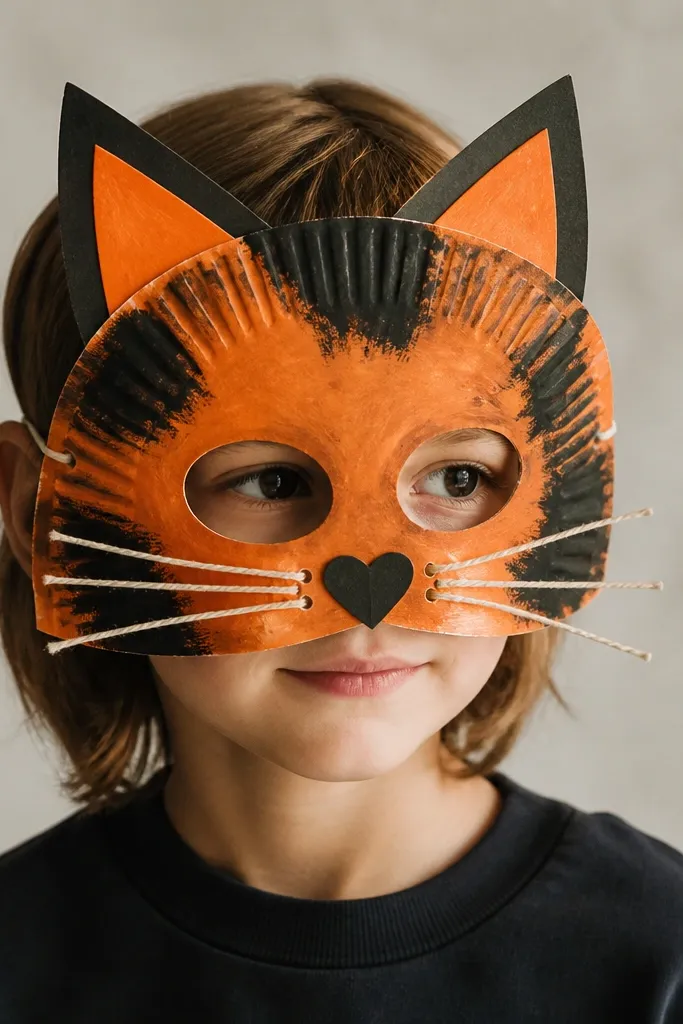
Cut ear triangles from craft foam or folded paper and glue them to the top of a painted paper plate. Cut eye holes and paint a simple nose and mouth. Punch holes at the sides and thread elastic for a secure fit. For whiskers, glue or tie 6-8 strings on each side and trim them to different lengths.
This is one of the fastest costumes that still looks designed because the mask has clear shapes. Paper plates are stiff, so the face stays crisp and reads as a cat immediately. Whisker string adds movement when you tilt your head, which makes the whole thing feel alive. Keep the palette two-tone so it looks like a real cat design, not random craft paint.
One warningDon’t use thick yarn for whiskers — it looks heavy and droops.
Quick tipUse a black marker to outline the eyes and nose — it makes the mask look finished even if your paint is messy.
20. Bottle-Cap Space Helmet With Clear Visor

Bottle caps make it look like a real sci-fi device, and the pattern gives it texture without complicated sculpting. A clear visor keeps your face visible and prevents claustrophobic discomfort. I paint the shell flat black or dark gray, then highlight edges with silver. The glowing circle detail makes the helmet pop even under party lights.
Use a large plastic container (like a thrifted storage bin lid shape) as the shell. Paint it matte black, then glue bottle caps in a grid or random cluster. Cut a visor from clear plastic (like a report cover sheet) and attach with glue around the rim. Add a small circle panel using a bottle cap painted neon and sealed.
Punch tiny holes around the rim and tie with fabric cord if you want the visor to be removable.
Avoid glossy paint — it reflects overhead lights and washes out the bottle-cap detail.
21. Fabric Scraps Patchwork Robin Cape
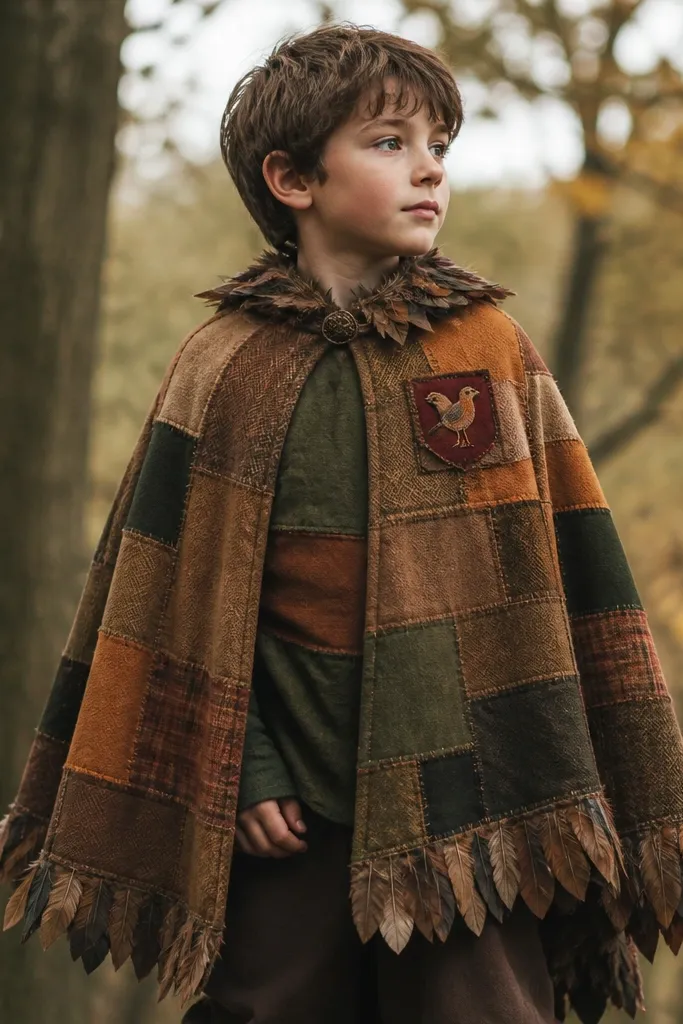
Patchwork looks creative because it has history — you can see different textures and colors. The key is keeping the patch sizes consistent so it reads as intentional. I like warm earth tones for a robin vibe, then I add one red chest patch to anchor the character. Feather-like trim on the edges makes the cape look like it belongs to a bird costume.
Cut fabric scraps into 4x4 inch rectangles and sew them into panels. Stitch the panels into a cape shape with a simple neckline. Add a chest patch from felt in red with a little stitched circle detail. Finish edges with feather trim made from felt cut into narrow strips and sewn down.
Press seams with a warm iron through a thin cloth so the patchwork lays flat before you attach it to the cape.
Don’t use only stretchy knits — they ripple and the cape loses shape.
22. Mirror-Tile Disco Vest From Cardboard and Foil Paper
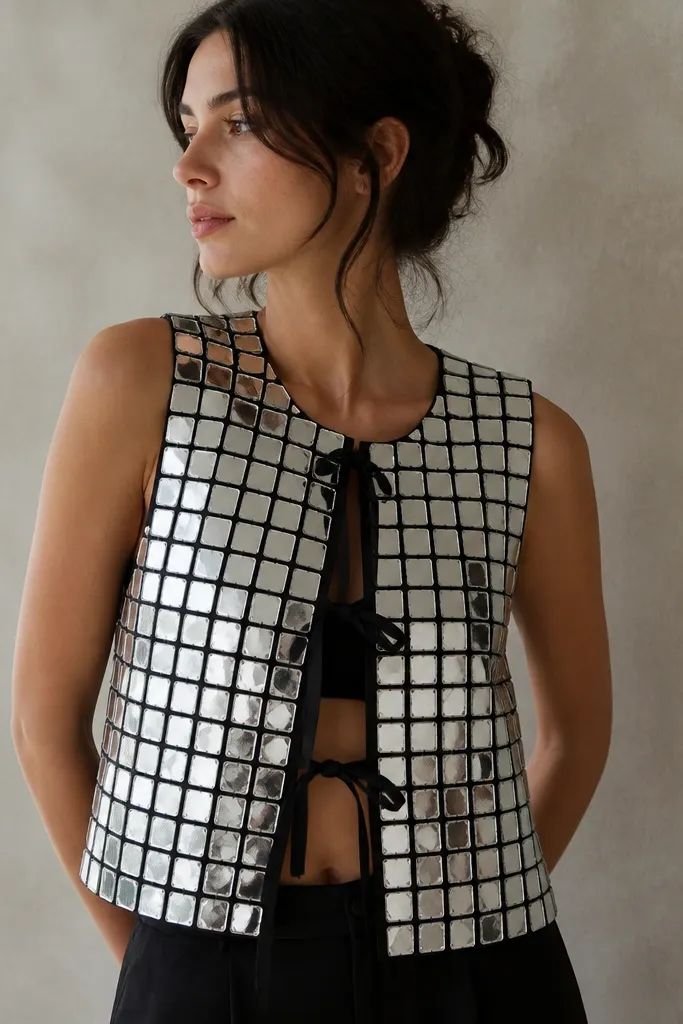
This vest looks like disco armor because the tile grid throws light back at the camera. Foil-backed craft paper gives you the mirror effect without the weight of real mirrors. The black base keeps it from looking like messy craft foil. It’s also easy to scale: you can cover only the torso and leave the rest simple.
Cut a vest shape from sturdy cardboard, covering from under the bust to mid-hip. Glue foil-backed craft paper squares in a tight grid, overlapping slightly so there are no gaps. Cut armholes and reinforce edges with fabric tape or thin ribbon. Tie it closed at the front with ribbon ties.
Use a hole punch and ribbon to create tie points at 4 corners so the vest sits flat instead of gaping.
Skip thin cardboard — it bends and the tiles pop off when you move.
23. Upcycled Turtleneck Vampire With Lace Collar and Fake Fangs
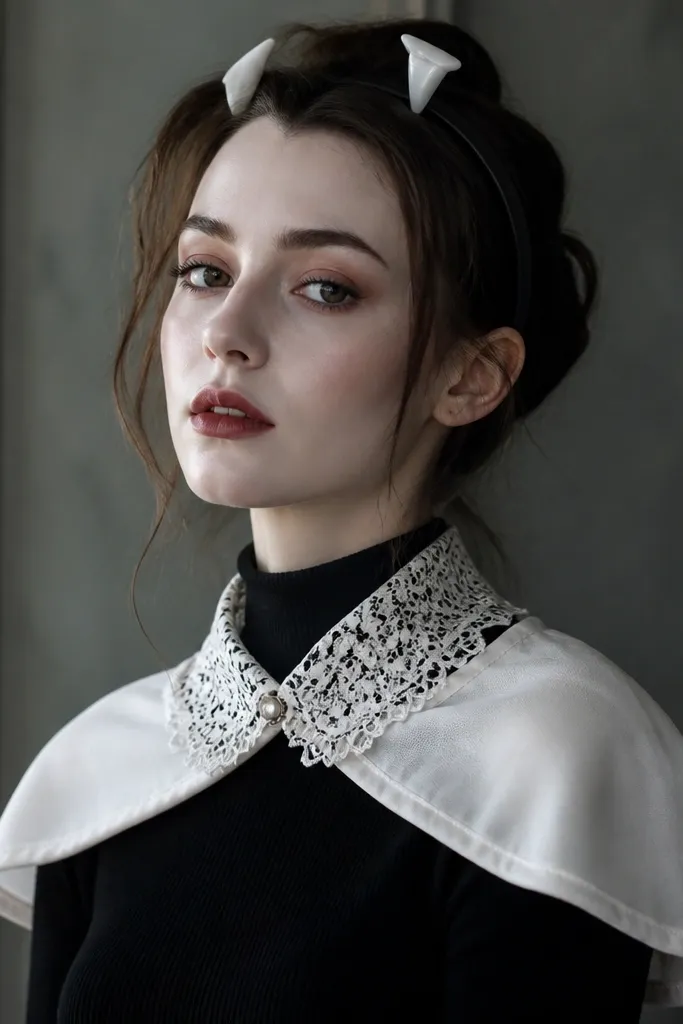
A turtleneck makes the vampire silhouette instantly, and the lace collar adds the “old-world” vibe without buying a costume set. I use felt for the cape drape because it holds shape and doesn’t slide. Fake fangs on a headband are more comfortable than biting into a mouth piece all night. This costume photographs well because the collar frames the face.
Cut a small felt cape panel and stitch or glue it to the shoulders of your turtleneck. Add a lace collar by pinning lace to a strip of felt and sewing the strip to the neck area. For fangs, glue two small white felt triangles onto a thin headband. Keep makeup simple: pale base and a dark line under the eyes.
Wash lace separately and iron it lightly so it doesn’t look wrinkled under flash.
Don’t use bulky foam for the cape — it sticks out and ruins the sleek vampire look.
24. Halloween Clown With Sock Puppet Hands and Stripe Sleeves
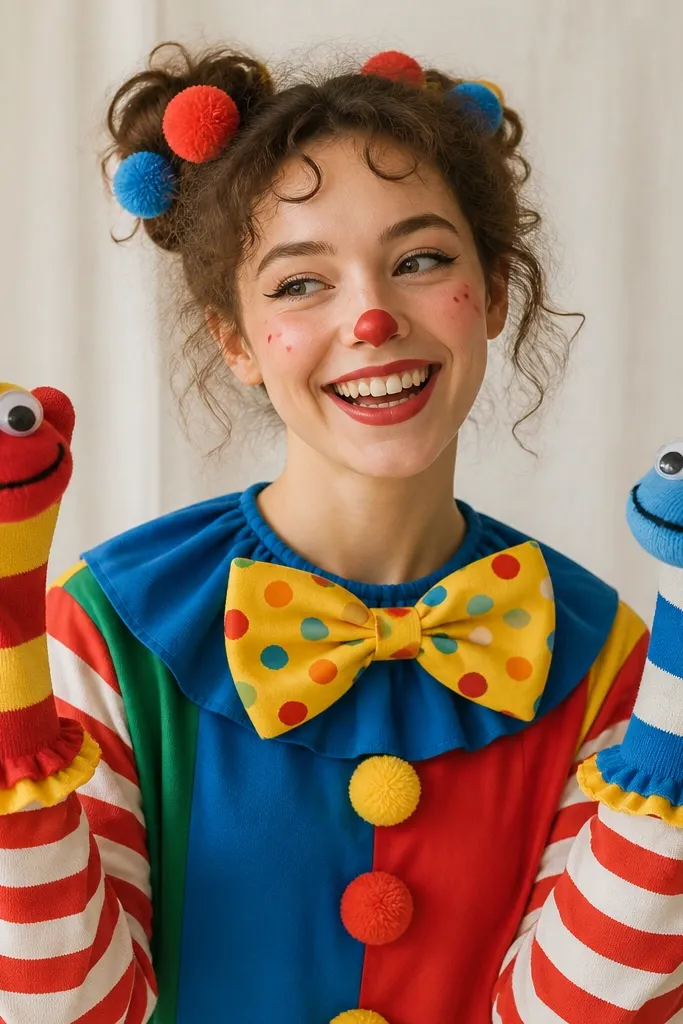
The sock puppet hands are the creative hook. They make your gestures look like the costume is alive, even if your clothes are simple. Stripe sleeves add instant clown energy, and a bow tie keeps the face area framed. I like using knit socks because they stretch and sit comfortably.
Use a long-sleeve shirt with stripes or add stripes with fabric paint and a stencil. For sock hands, cut the cuff area of a sock into a mitten shape and sew it to a wrist band. Add googly eyes and a stitched smile with black thread. Attach it over your hands with elastic so you can still move your fingers.
Paint stripes in two passes: one light base, one darker color, so the lines look crisp at a distance.
Skip loose strings on puppet faces — they snag and look messy in photos.
25. Recycled Paper Mache Masked Fox With Fabric Ears
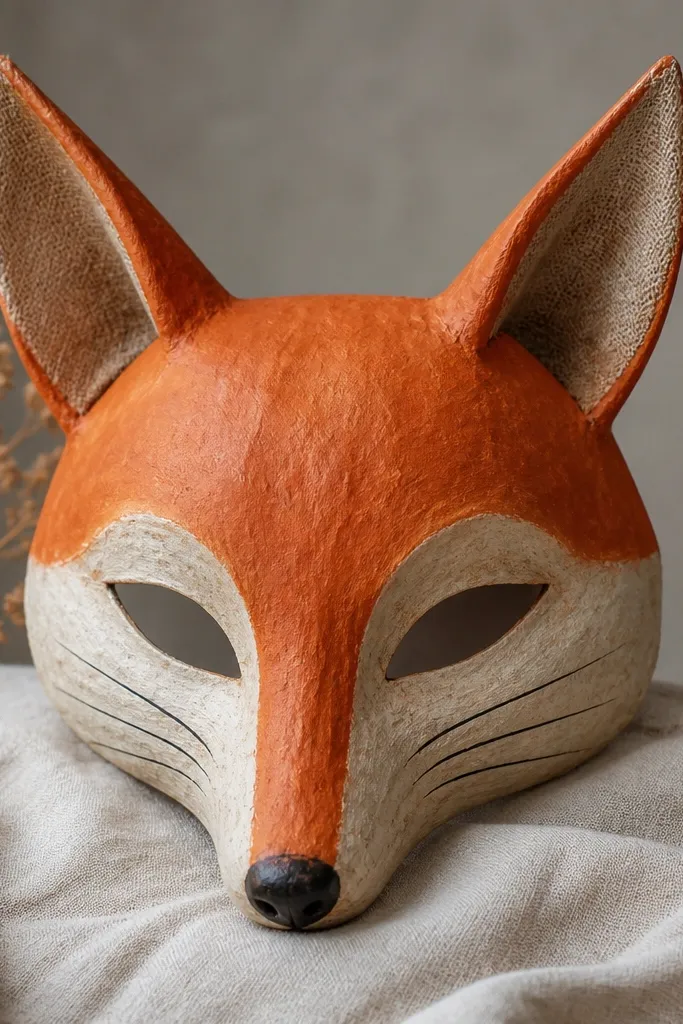
Paper mache gives you a smooth, snout-forward shape that reads as a fox instantly. Fabric ears soften the look and stop the mask from feeling too “hard craft.” The cream cheek and black nose details add contrast, which is what makes animal masks look expressive. I’ve worn this to parties where it gets compliments because it looks like a real character piece.
Build the mask over a balloon or bowl form using newspaper strips and paste, then let it dry completely. Cut openings for eyes and mouth, then sand lightly for smoother edges. Paint orange base, add cream muzzle, and draw whisker lines with a fine brush. Attach fabric ears with stitching or strong glue and reinforce at the base.
Add a thin foam strip around the eye edges so it’s comfortable for long wear.
Don’t paint directly on wet paper mache — it soaks and creates weak, patchy color.