
1. Zip-Tie Star Cape (no-sew, instant silhouette)
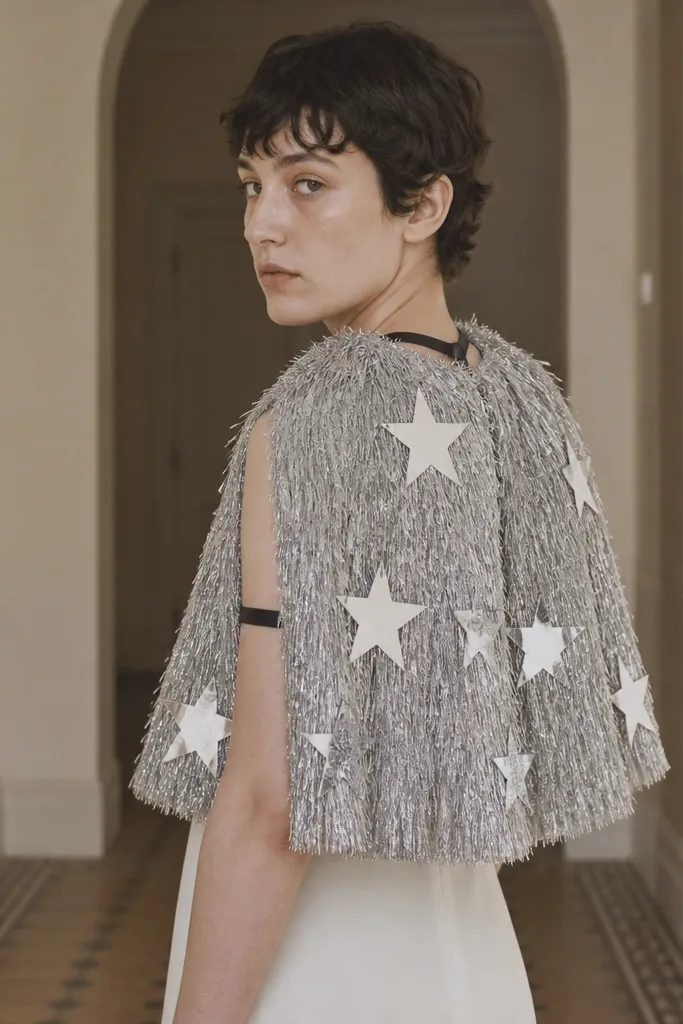
Start with a 1.5-yard by 60-inch metallic table runner or cheap metallic curtain panel. Cut five-point stars from thin craft foam or foil-lined cardboard, about 6 inches wide each. Attach stars with hot glue at the edges and secure the cape with two elastic loops — one at the neck and one at each upper arm.
This cape works because it creates a clear starburst silhouette without draping complicated fabric. I use a wide piece of inexpensive metallic fabric or even a table runner as the cape body, then add star cutouts that catch phone flash. The contrast between the silver base and bright star edges makes it look designed, not improvised.
One warningDon’t glue stars to the center of the fabric — glue the star edges so they sit flat and don’t ripple.
Quick tipAdd one strip of black ribbon along the star tips so the glitter doesn’t look messy in motion.
2. Thrift Denim Bowtie + Tulle Collar Villain
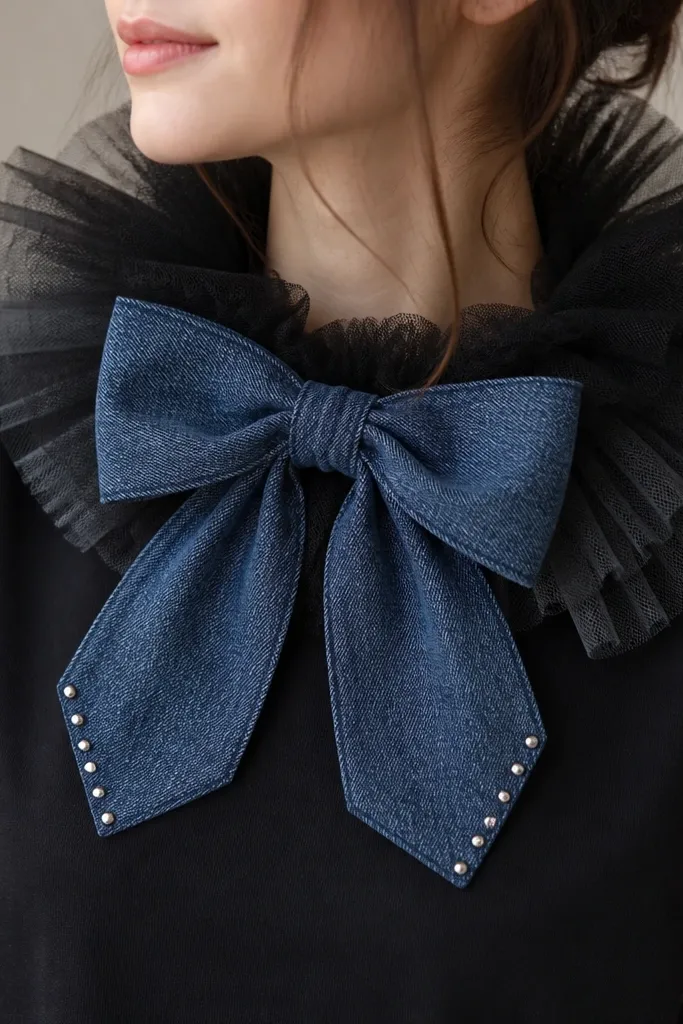
This is my go-to “small space” costume because it’s mostly accessories. The denim bowtie gives weight and structure, while the tulle collar adds drama without needing a full outfit. The look reads high-contrast in photos because the collar frames your face.
Cut the bowtie from a thrift denim pocket panel or the front of an old jeans leg. Make it about 7 inches wide and attach it with fabric glue or safety pins through the shirt collar area. For the tulle collar, cut two strips of tulle 12 inches long and layer them around a thin elastic ring that fits your neck.
Use dark tulle (black + charcoal) and add one silver button on the bow center for a crisp focal point.
Avoid using cheap, see-through tulle alone — it collapses and looks like costume wraparound fabric.
3. Cardboard Box Armor Shoulder Pads
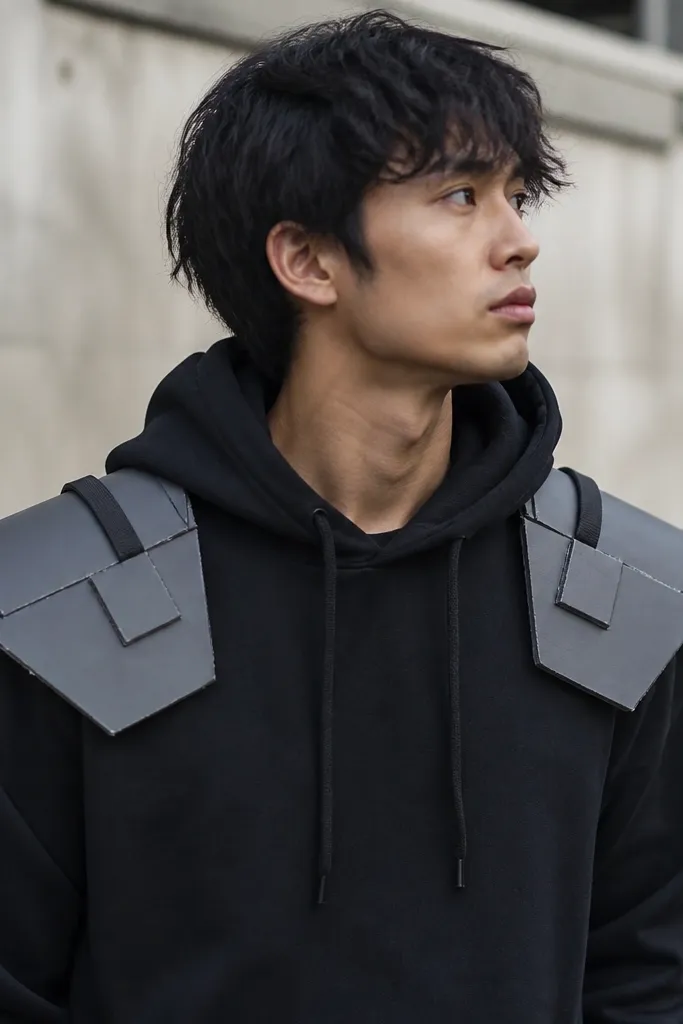
Armor is easier than it looks when you limit it to shoulders. Cardboard holds shape, and paint makes it look like metal plating. The raised rectangles and panel lines give depth even if you never add full body armor.
Flatten shipping cardboard into 1/8-inch sheets. Cut two shoulder pad shapes about 7 inches wide and 5 inches tall, with a curved edge for the shoulder. Paint with matte acrylic (gunmetal or dark slate), then add panel lines with a fine paint marker. Strap them with 1-inch elastic loops that hook around the hoodie seams.
Seal with matte Mod Podge or clear acrylic spray so the pads don’t scuff during the night.
Don’t skip sealing — bare cardboard turns soft fast and shows paper texture.
4. No-Sew Fabric Flower Headband + Petal Sleeves
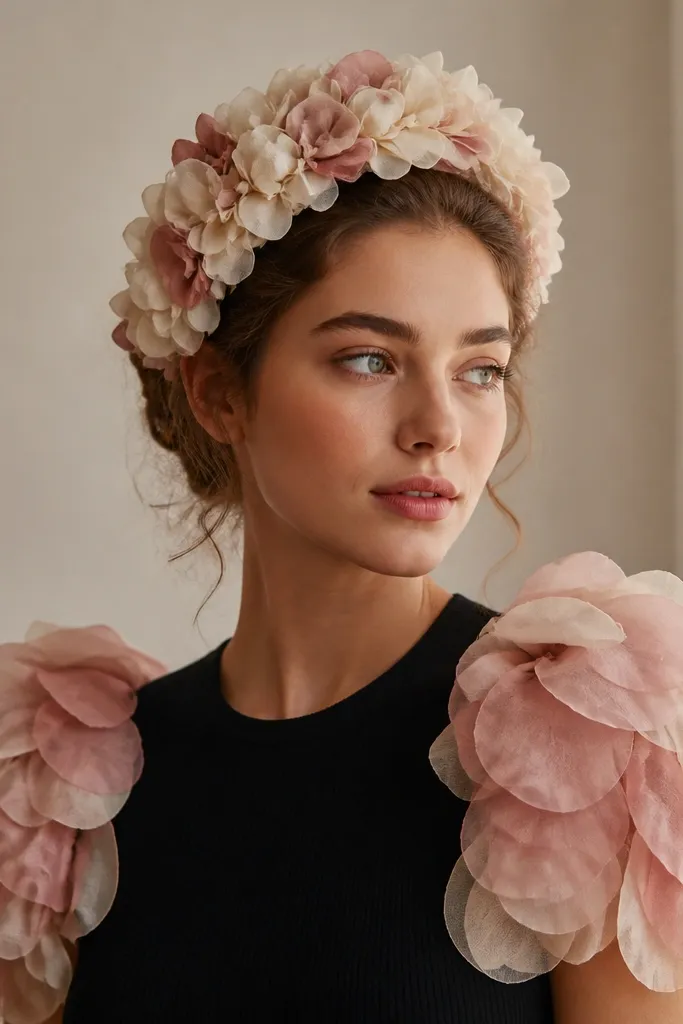
Make a headband from a store-bought plastic band covered with fabric glue and leftover satin scraps. Cut petal shapes from organza or chiffon, 4 inches long each, then stack them with small glue dots at the base. For sleeves, cut two rectangles of organza and gather them with elastic at the wrist so they puff slightly.
This costume turns your head and arms into the main event, which is perfect when you don’t have room to build a full outfit. The layered petals look like a costume crown, and the petal sleeves make your movement look intentional. Organza catches light and makes even a plain base outfit look styled.
One warningAvoid giant petals without structure — they droop and look like random fabric.
Quick tipUse a 1-inch wide fabric strip to bind each petal edge so it looks crisp instead of frayed.
5. Satin Scarf Mermaid Tail with Elastic Anchor
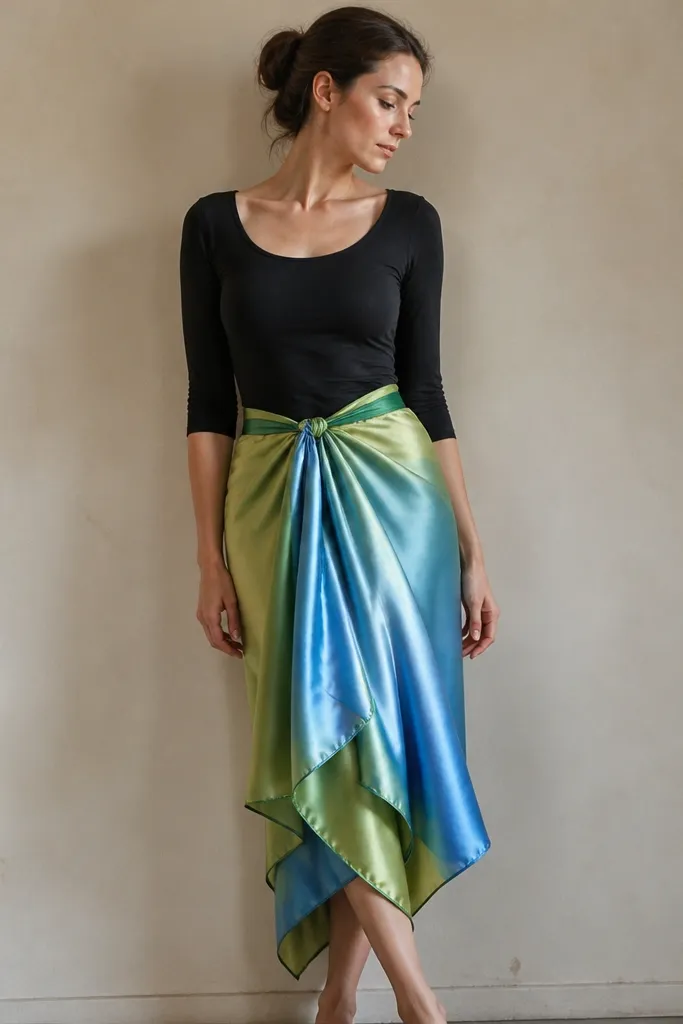
Use two long satin scarves in teal and seafoam. At the waist, make a belt from 1-inch elastic with a knot or safety-pin closure. Tie the scarf ends onto the belt in rows, then add a trim strip of small green ribbon loops or scale-like felt pieces along the front center.
A mermaid tail doesn’t need sewing if you anchor it at the waist and let the fabric drape. Satin scarves create smooth waves, and you get movement without bulk. The layered fall reads like scales when you add a simple “scale” trim line.
One warningDon’t attach the tail at the hips — it rides up and makes the drape look sloppy.
Quick tipTo fake scale texture, glue small overlapping felt triangles only on the front panel — skip the back so it stays light.
6. Tennis Ball Pom-Pom Ghost Hoodie
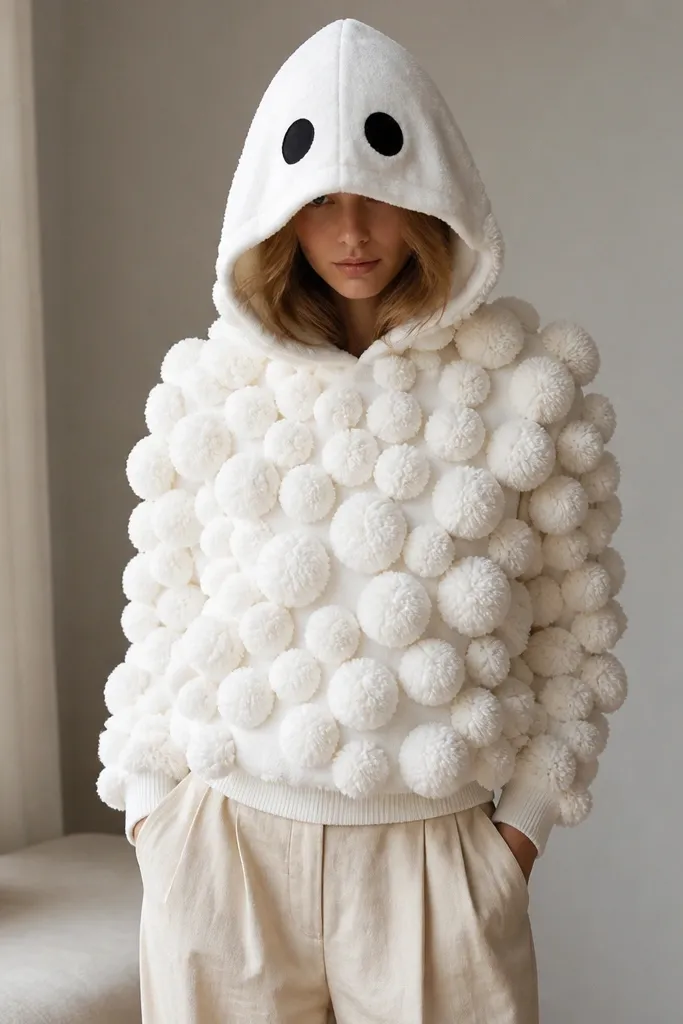
Cut pom-poms from yarn using a pom-pom maker or wrap yarn around a cardboard template. Hot glue pom-poms onto a white hoodie in a top-to-bottom grid. Add felt eyes on the hood front and a small mouth patch with black felt.
This ghost idea is tactile and photo-friendly because the pom-poms create a plush silhouette. The trick is keeping the cluster pattern controlled so it looks like a character, not random craft fuzz. It also hides cheap base fabric because the texture does the work.
One warningDon’t use too-slick yarn — pom-poms shed and look flat after a few hours.
Quick tipGlue the pom-poms in rows, not spirals, so it photographs clean from the front.
7. Foil Curtain Witch Hat + Fabric Glue Bands
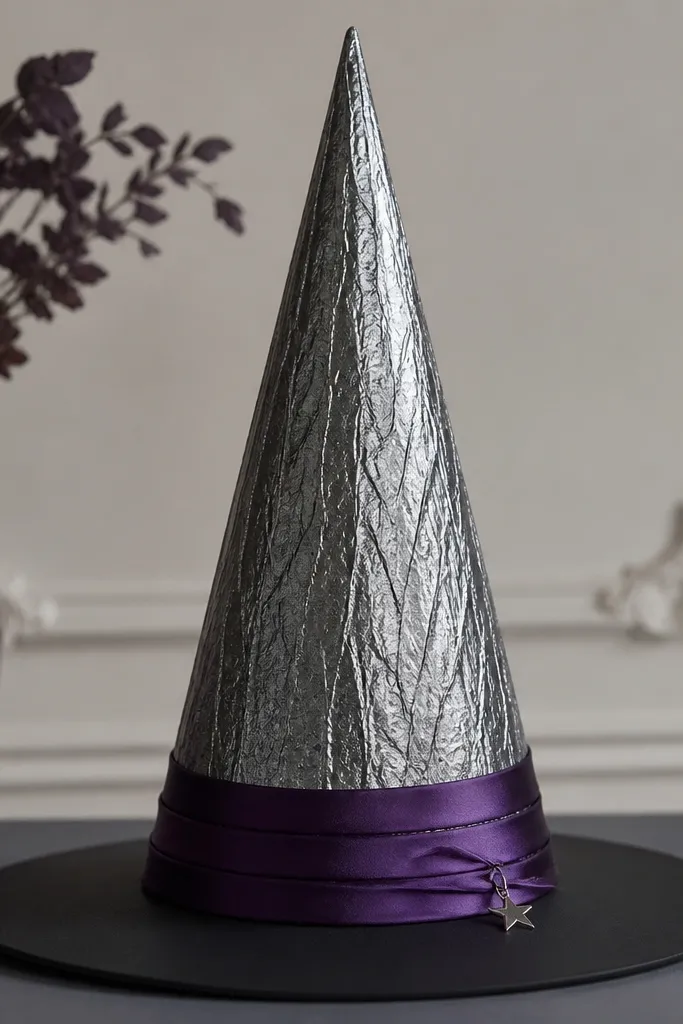
Form a paper cone hat (about 14 inches tall) and cover it with a black backing layer. Glue sections of crinkled foil curtain around the cone, smoothing with your palm. For bands, cut three 1.5-inch strips from purple satin scraps and glue them around the base — add a small star charm at the front with hot glue.
A tall hat is the easiest way to get instant costume energy in a small space. Foil curtain material gives a crinkled texture that looks expensive under warm lighting. Glue bands add polish without sewing.
One warningAvoid loose foil edges — trim the overlaps so the hat looks intentional.
Quick tipPress the foil with a dry cloth after gluing so it doesn’t wrinkle in weird places.
8. Old Belt + Card Stock "Medallions" Space Ranger
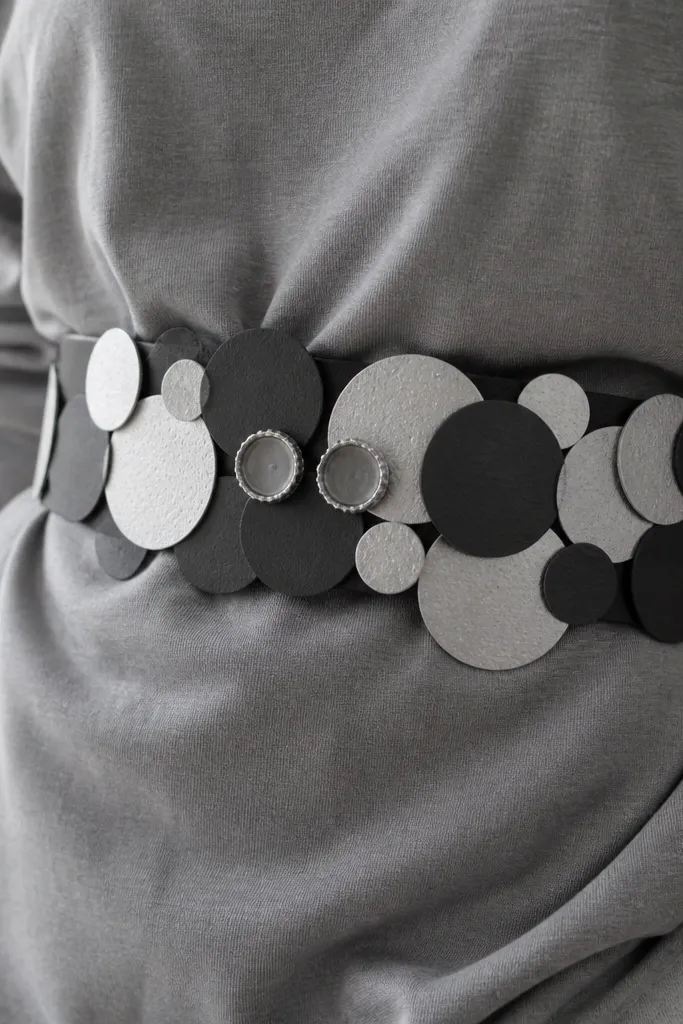
Cut circles from thick card stock or cereal box cardboard, about 2.5 inches wide. Paint them silver with black marker panel lines. Hot glue them onto an old belt — space them evenly with 1 inch gaps so it doesn’t look like a sticker sheet. Add two bottle caps at the center and glue tiny washers or beads as “bolts.”
This looks like sci-fi gear without building a full bodysuit. The medallions give a busy, technical vibe, and the belt keeps everything centered so it reads from a distance. Card stock is light, so you’re not stuck with heavy costume weight.
One warningAvoid gluing directly to stretchy fabric — medallions pop off when you move.
Quick tipSeal the medallions with clear acrylic so paint won’t scuff onto your shirt.
9. Sweater Sleeve to Arm Cuff Robot
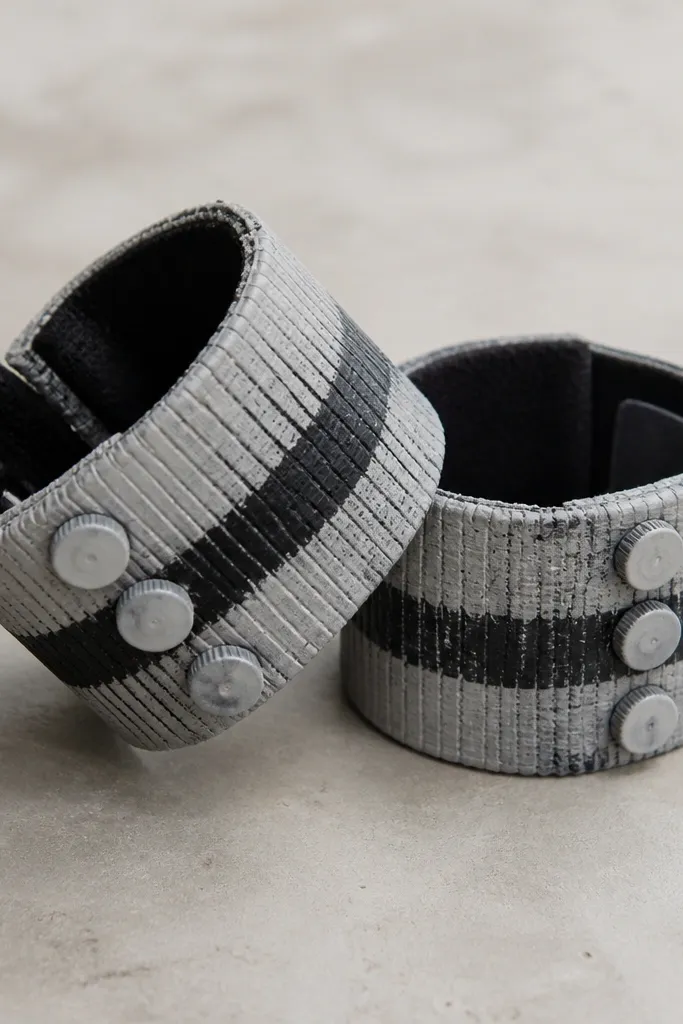
Cut two sweater sleeves off an old knit sweater, trimming length to 9 inches. Paint them light gray with fabric paint, then add black stripes with a sponge brush. Glue bottle caps or plastic lids as rivets and close each cuff with a Velcro strap sewn or glued to the inside seam.
Robot arms are all about the cuffs. Using sweater sleeves gives you a knit base that fits your forearm without measuring a pattern. Paint and rivets give the mechanical look while staying comfortable for a long night.
One warningDon’t use glossy paint — it looks wet and cheap on camera.
Quick tipStiffen the cuffs with a thin layer of fabric medium so they keep their shape after bending.
10. Curtain Ring Chainmail Skirt Panel
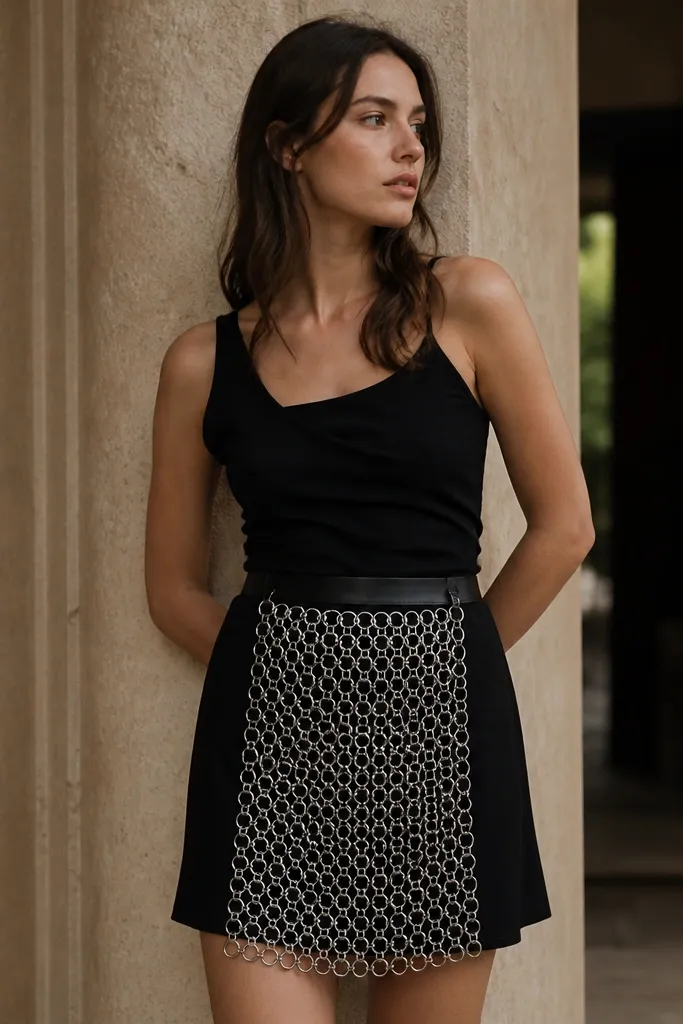
Buy a pack of small silver curtain rings (the kind used for shower curtains). Connect rings by threading one ring through another and twisting the opening shut. Attach the finished panel to a black skirt using a strip of elastic at the top — about 10 inches tall for a dramatic front effect.
Chainmail can look real without metal work if you use plastic curtain rings. The rings move with you and catch light, which makes it look like armor even when it’s lightweight. I like doing just a front panel so it stays easy to wear in a small space.
One warningAvoid mixing ring sizes — it makes the pattern uneven and looks like a craft project.
Quick tipMake the panel from three horizontal rows so it sits flat and doesn’t curve weirdly.
11. Dollar Store Feather Fan Shoulder Wings
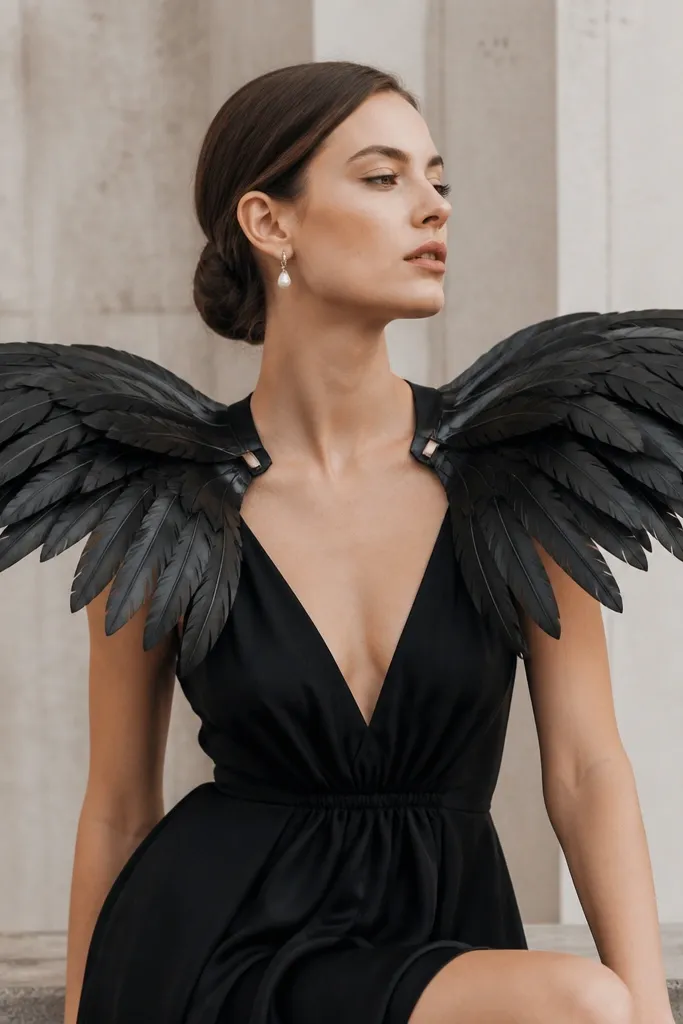
Cut two curved shapes from thin foam board about 10 inches wide. Hot glue feather pieces in rows from the bottom up, overlapping like shingles. Attach each fan to a small collar strap using alligator clips so you can take them off easily.
Wings are fast when you build them as fans instead of full wing spans. Feather pieces feel dramatic and move with your body, so you get that “costume” effect even in a studio photo. The curved foam board keeps the shape consistent.
Quick tipUse one color family — like black with a few white accents — so the wings look designed instead of random.
12. Tulle Roll-Up "Rose" Wrist Corsage
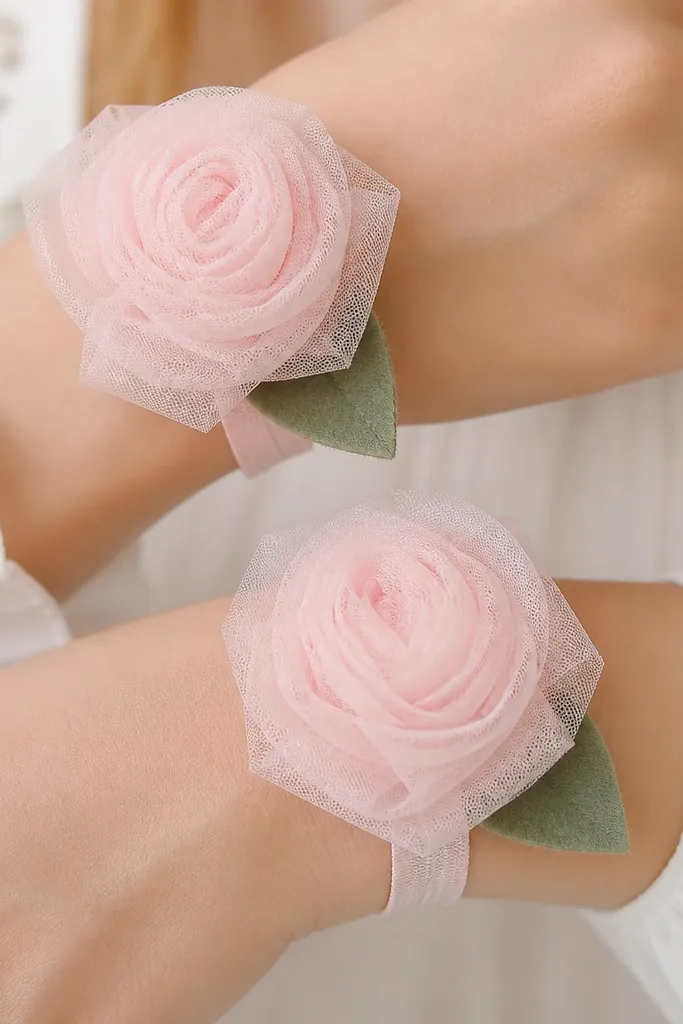
This is a small-space costume detail that reads big on camera. Rolled tulle layers look like fabric roses, and you can wear them with any outfit color. I use it as a “character marker” — people remember the hands and wrists.
Cut tulle strips 18 inches long and 3 inches wide. Roll tightly, then accordion fold the next strip and glue the base. Attach the rose base to an elastic loop that fits your wrist. Add a felt leaf cutout under the base for contrast.
Make one rose slightly bigger than the other wrist so your photo looks intentional.
Avoid flat, loosely rolled tulle — it looks like a bow, not a flower.
13. Thrift Suit Vest + Fabric Graffiti Panels
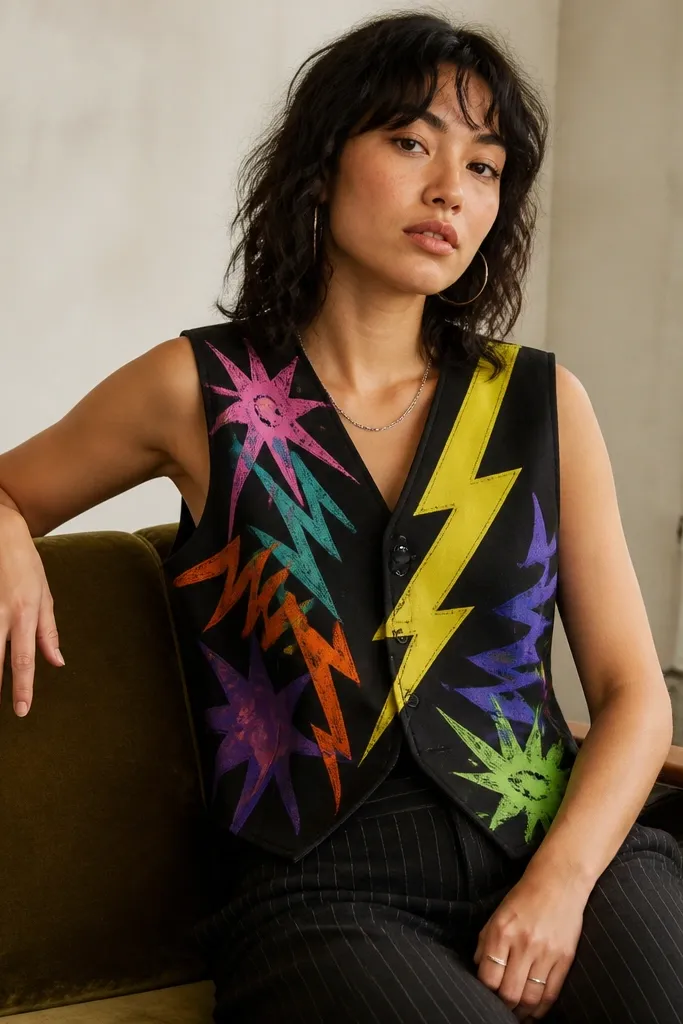
A vest is already structured, so you get the costume vibe without building from scratch. Fabric markers look crisp on natural fabrics, and you can layer shapes to create depth. The best part is you can keep your base outfit simple and let the vest do the identity work.
Find a thrift vest in cotton or canvas, sized close but not tight. Use fabric markers to draw 2-3 big shapes only — lightning bolt, splatter circles, and a tag line. Add one small patch made from scrap fabric using fabric glue so it looks like a real costume graphic.
Do the drawing on a flat surface and let it dry 24 hours before wearing so it doesn’t smear.
Avoid thin polyester vests — marker ink beads and looks uneven.
14. LED Tea Light Lantern Costume Bag
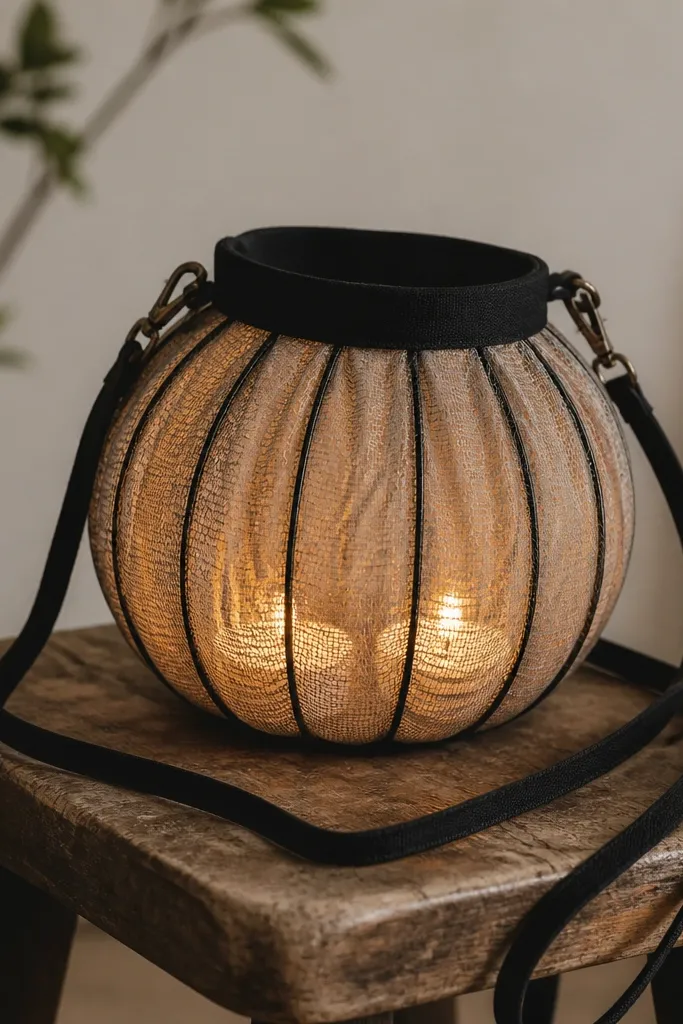
Use a cheap paper lantern or a lightweight plastic lantern as the form. Cover it with black tulle or a mesh fabric and glue it down around the rim. Place two LED tea lights inside and route the battery pack to a hidden pocket at the back with a small opening.
This is the one I build when I want something that looks magical without heavy materials. LEDs create the glow, and the outer mesh turns the light into a soft halo. It’s also comfortable because it hangs at your torso instead of dragging fabric behind you.
One warningAvoid real candles — paper lanterns and fabric are too risky for a night out.
Quick tipChoose warm white LEDs — cool white makes it look like a cheap toy on camera.
15. Sheet Music Paper Crown + Clip-on Ribbons
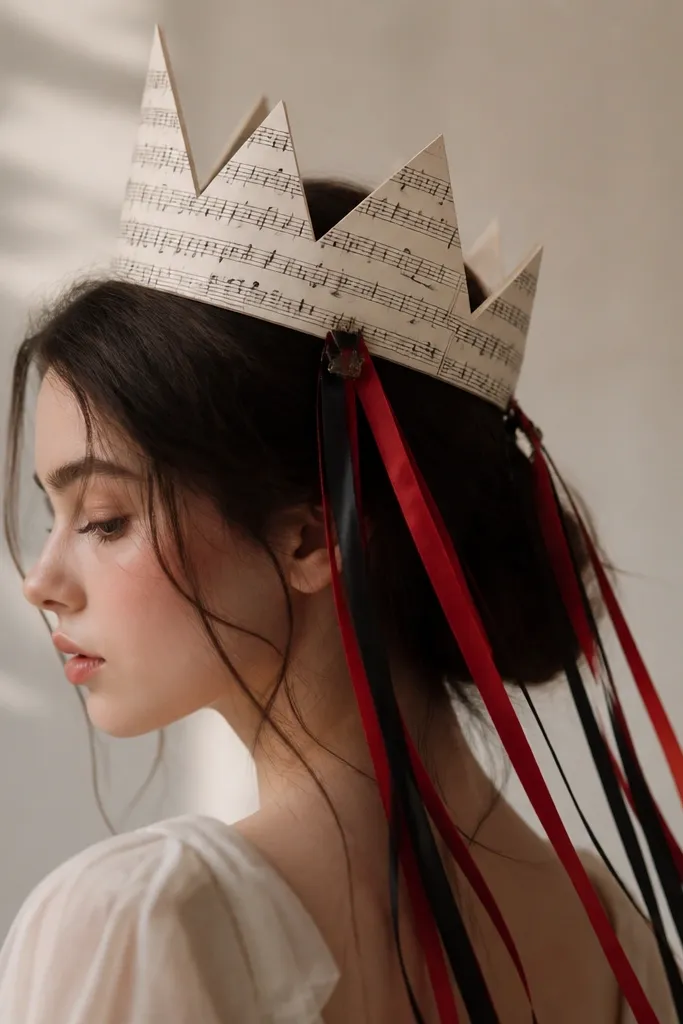
A paper crown sounds simple, but it looks legit when the folds are sharp and the colors are controlled. Sheet music gives instant theme without painting anything. Clip-on ribbons let you adjust the length for photos without re-gluing.
Cut a strip of cardstock about 2.5 inches tall and wrap around your head, then reinforce the seam with tape. Cut small triangles from sheet music paper, 3 inches tall, and glue them evenly along the top edge. Attach ribbon loops to hair clips and clip them to the sides of the crown.
Make the crown matte by sealing with matte spray so the paper doesn’t reflect harshly.
Avoid glossy paper — it creates glare that washes out the design in photos.