1. Velvet Raven Cape with Clip-On Beak
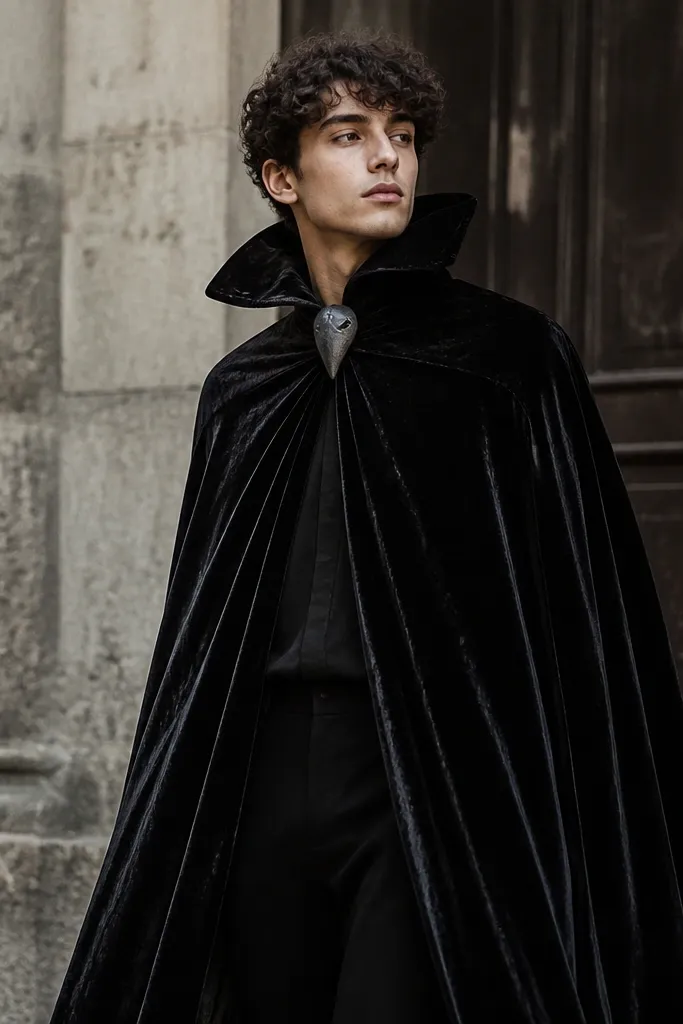
I made this cape from black velvet because it has that crushed, light-catching texture that reads “mystery bird” in photos. The beak is the smart part: it clips on, so you can remove it for a cleaner look later. The cape shape is a simple half-circle, which gives you instant wings when you move. It works year-round because you can style the same cape with different accessories: silver feathers for winter, a red ribbon for fall, or minimal jewelry for spring events.
Cut a half-circle cape with a 2-inch hem and a neck opening sized to your collarbone. Use heat-bonded interfacing at the neck edge so the velvet doesn’t stretch and sag. For the beak, cut craft foam in a teardrop shape, paint it with matte black acrylic, then add a thin dry-brush of dark gray for depth.
Sew a 1-inch strip of hook-and-loop velcro inside the collar and glue the beak clip to a matching loop so it stays secure without looking bulky.
Skip raw foam edges — they look chalky on camera.
2. Upcycled Denim Witch Hat with Folded Brim

Denim holds shape better than craft felt, so the hat stays crisp even after hours of wear. I like a folded brim because it creates a shadow line under the hat — that shadow reads spooky without heavy decoration. The silver chain detail makes it feel more “witchy fashion” and less Halloween costume. This is perfect for October events and also works for winter because denim reads heavier and warmer on camera.
Quick tipPre-wash the denim and iron it first. Wrinkles inside the hat show up in photos more than you expect.
Use a thrifted pair of jeans and cut the crown from the waistband area for strength. Form the crown into a cone, then stitch a folded brim from denim strips layered for thickness. Add a small inside band of cotton twill for comfort so it doesn’t scratch your forehead.
One warningDon’t use thin felt for the brim — it collapses and ruins the silhouette.
3. Glow-in-the-Dark Skeleton Hoodie Paint Job

This one is my go-to for year-round because the skeleton is graphic and simple, and the glow paint makes it pop at night events. I paint in layers: first opaque white for coverage, then glow pigment mixed into a thinner paint for the soft halo. The hoodie fabric makes the design look wearable rather than rigid like a printed costume. In daylight it reads like streetwear; at night it turns into a real effect.
Use fabric paint made for dark fabric or mix acrylic with fabric medium. Stencil the rib cage and spine with painter’s tape guides, then outline bones with a fine brush. After it dries, heat-set per the paint instructions so it doesn’t crack.
Wash test one corner first. If the paint rubs off after a gentle wash, you need a different paint or more heat-setting time.
Don’t paint thick blobs — they crack when the hoodie stretches.
4. Tulle Fairy Skirt with Hidden Elastic Waistband
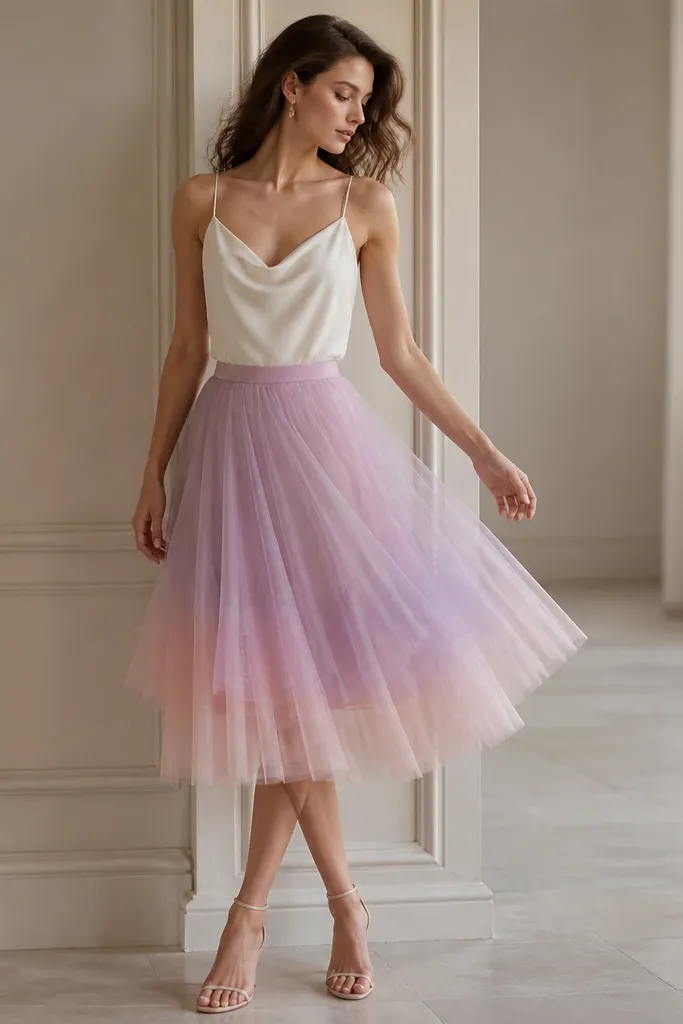
Tulle looks expensive when it’s layered with consistent lengths. I like a color blend of lavender base with a pink top layer so the skirt shifts tone when you move. The hidden elastic waistband keeps it comfortable and avoids that bulky costume waistband. You can dress it up for spring parties and still wear it for winter events with tights and boots.
Quick tipAdd one thin ribbon bow at the side seam so it looks intentional even in close-up photos.
Cut 18-24 strips of tulle in two colors. Each strip should be about 2.5 inches wide and 28-32 inches long depending on your desired hem. Gather strips onto an elastic waistband using a simple knot or a fabric gathering stitch, then trim the bottom into a gentle A-line.
One warningDon’t use one long strip per layer — it bunches and looks uneven.
5. Cardboard Robot Chest Plate with Velcro Straps
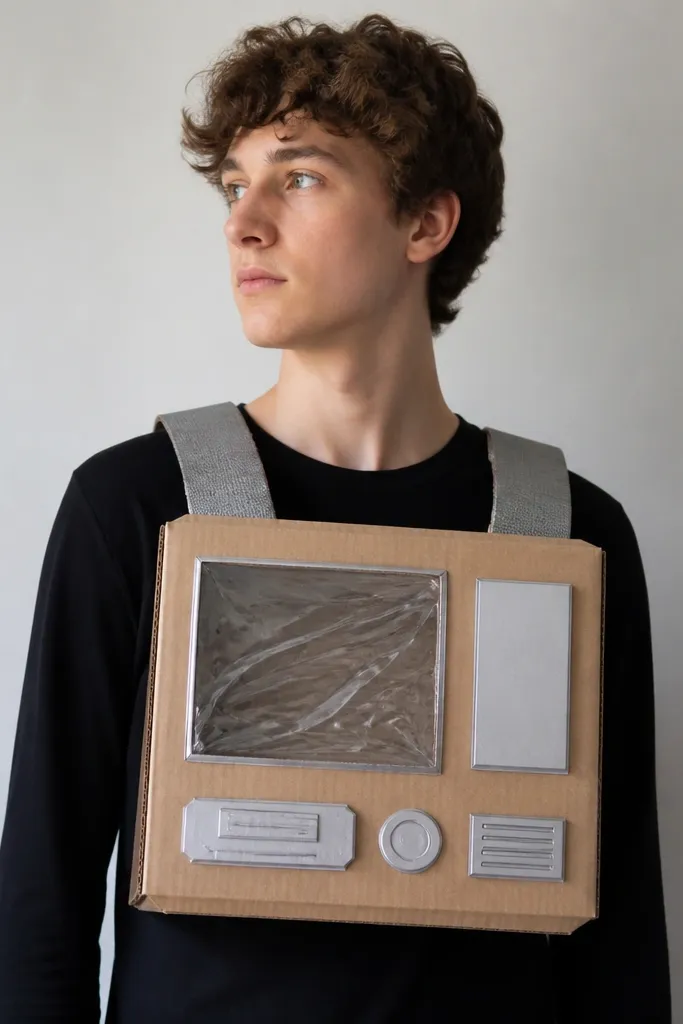
I know cardboard sounds flimsy, but sealed craft cardboard holds shape surprisingly well for short events. The chest plate gives you instant robot silhouette without building a full suit. I seal with matte Mod Podge or clear acrylic medium so it resists handling. The velcro straps make it wearable over different outfits, which is what makes it year-round.
Cut a chest rectangle from corrugated craft cardboard and add a second layer for thickness at edges. Paint it matte black, then glue on silver foam sheet details and small clear plastic “screen” pieces. Attach velcro hook strips to the back and loop strips to your shirt for quick on/off.
Score the cardboard lightly along bend lines so you can shape it to your torso without creasing.
Skip unsealed cardboard — it scuffs and looks gray in photos.
6. Satin Ghost Sheet with Face Cutout and Safety Pins

Satin ghosting looks better than plain white fabric because it reflects light with a gentle shimmer. The face cutout is the main trick: if it’s too tight, you’ll tug it all night and it’ll look messy. I keep the sheet slightly loose over the shoulders so it falls like a slow curtain. This works for spooky season and also for winter events when you want something moody but not heavy.
Use a light satin or poly satin sheet. Cut an oval for the face and hand-tuck the edges with a narrow hem or iron-on hem tape. Pin two small folds at the shoulders with safety pins so the fabric stays in place without sewing.
Wear a dark base layer under it. The contrast makes the ghost shape read instantly in photos.
Don’t use thick cotton — it looks like a tarp instead of a ghost.
7. Thrifted Scarf to Desert Mirage Wrap Costume

This costume is all about movement and color shift. I use one opaque sand scarf for structure and one sheer orange scarf to create that mirage effect when it catches light. It looks fancy without being complicated because wrap styling creates a strong silhouette. It’s also year-round because you can go minimal for summer heat or add a long sleeve base for colder months.
Choose scarves around 28-35 inches long. Cross the opaque scarf at the chest, then drape the sheer scarf over it so it hangs longer on one side. Tie at the waist with a hidden elastic belt underneath to keep it from sliding.
Add two small gold safety-pin “brooches” at the shoulder line. It reads intentional even if you don’t sew.
Skip scarves that are too stiff — they don’t drape and look like curtains.
8. Foam Flower Shoulder Armor for Spring Villain

Shoulder armor changes everything because it frames your face and adds “character” instantly. Foam flowers look dimensional when you paint with a dry-brush technique. I like a villain vibe with pretty flowers — it creates a contrast that reads fun and creative. Wear it in spring for garden parties and in fall with a leather jacket for a darker twist.
Quick tipMake petals slightly asymmetrical. Perfect symmetry looks like a craft-store headband, not armor.
Cut foam petals from 1/2-inch and 1/4-inch thickness sheets. Layer them with hot glue and stagger seams so the petals don’t look flat. Paint base colors, then dry-brush edges with a lighter shade for highlights. Attach to a fabric band that ties behind your back or velcros to a jacket.
One warningDon’t skip sealing — unsealed foam sheds powder when you move.
9. Repurposed Curtain to Pirate Coat with Faux Epaulets
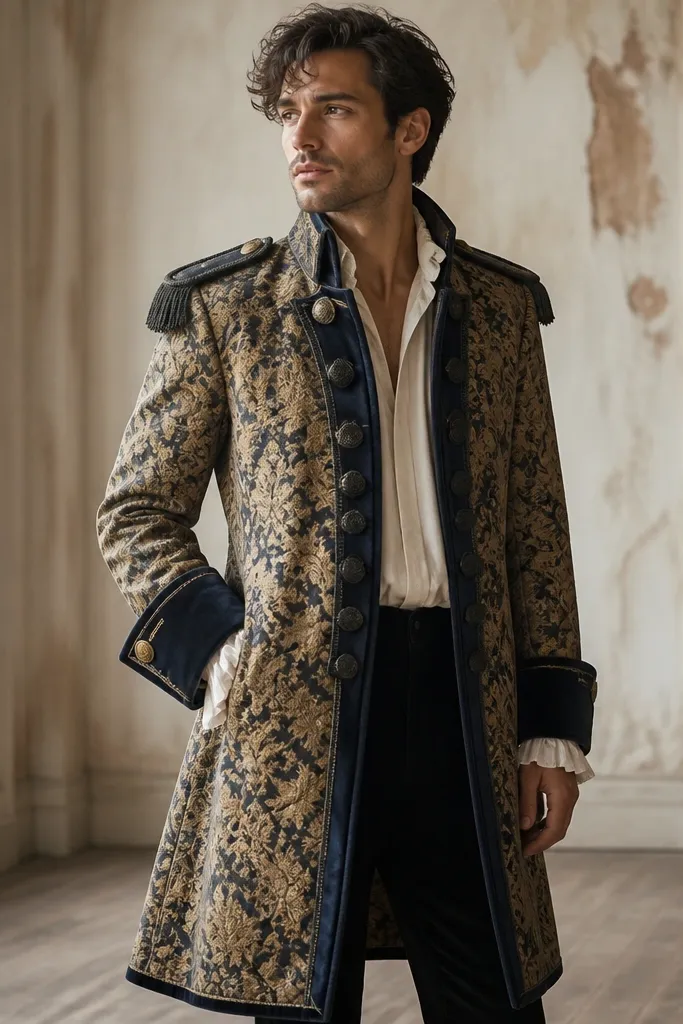
Curtain fabric is heavy and already has weight, so it makes a pirate coat that holds shape without expensive tailoring. Faux epaulets give you that pirate swagger instantly, even if you keep the coat simple. The pattern helps too — subtle motifs look more authentic than plain black in daylight. I’ve worn this to a winter indoor market and a summer themed night, changing the vibe with different belts and boots.
Use a curtain panel big enough for a coat front and back. Add navy bias tape trim and a simple A-line cut so the hem flares. Make epaulets from folded fabric strips with a button detail and stitch them onto shoulder points.
Add one inside pocket using the curtain lining — you’ll thank yourself when you need your phone.
Don’t use thin drapery — it collapses and the coat looks like a costume sheet.
10. Magazine Cutout Space Suit Belt Pack
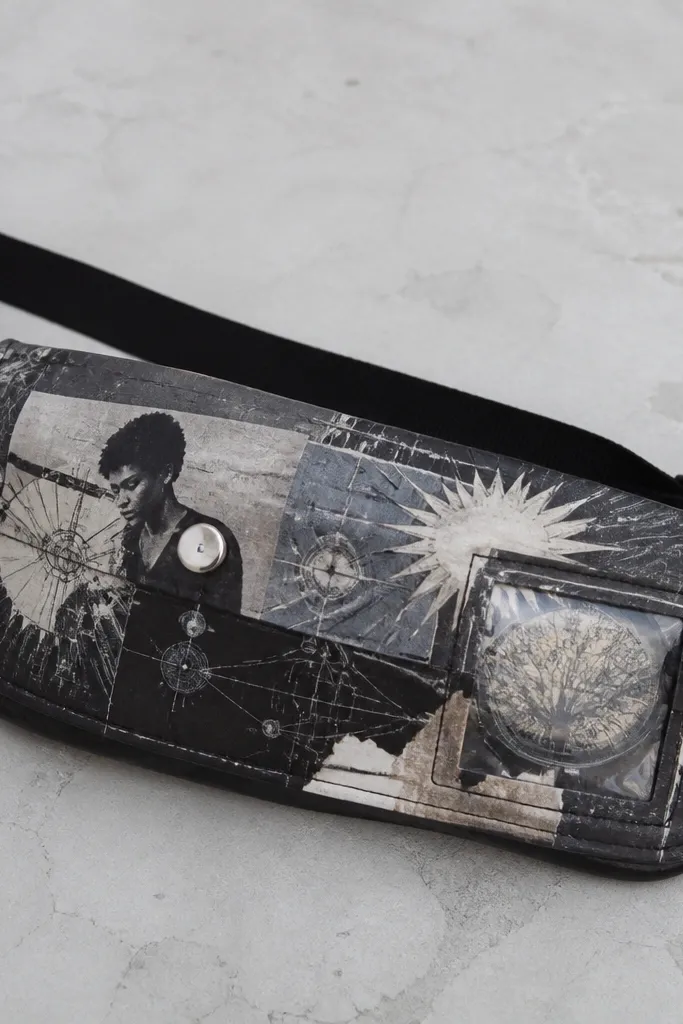
This is the fastest way I’ve found to make a costume look “designed” without sewing a full outfit. The belt pack works because it sits at hip level — people notice it in photos and it anchors your whole theme. I use magazine clippings for the graphic vibe and seal them so the paper doesn’t wrinkle. It’s year-round because you can pair it with a hoodie in winter or a crop jacket in summer.
Start with a plain black fanny pack or crossbody bag. Cut magazine shapes, arrange them like a control panel, and seal with matte Mod Podge in thin layers. Add a small clear plastic window over one section using hot glue along the edges.
Hit the final layer with clear matte spray so the graphics don’t look glossy under flash.
Skip thick glue piles — they dry with bubbles and show up under close-up shots.
11. Reversible Sequin Cape with Hidden Snap Closure
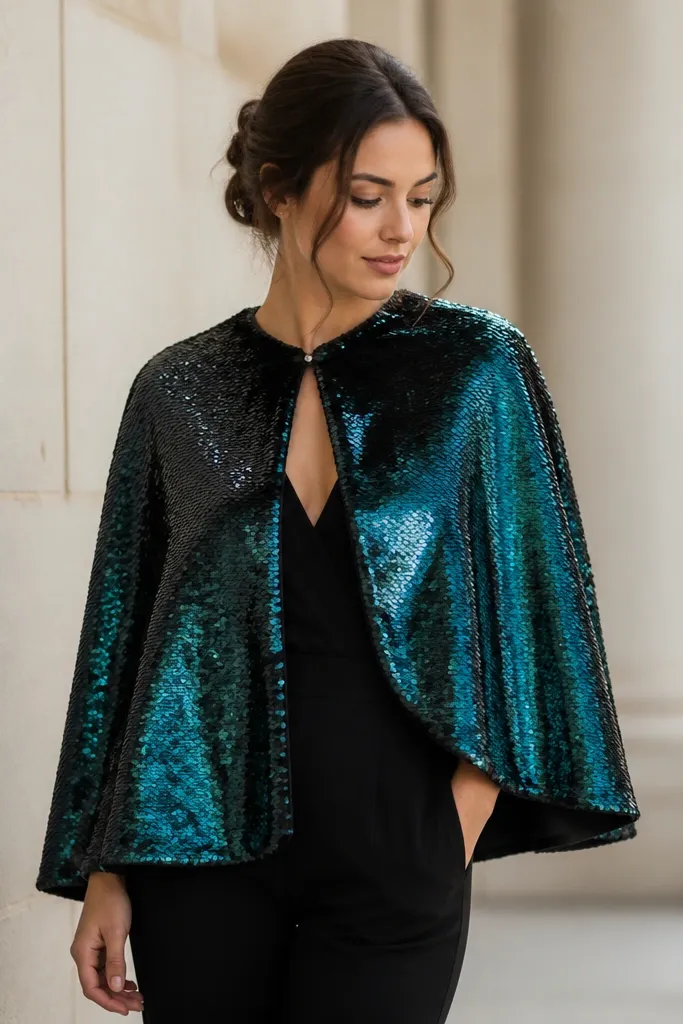
The reversible sequins give you two looks in one — teal for parties and black for more serious photos. I love the snap closure because it keeps the neckline tight and flattering instead of flapping. This is a high-impact piece that still feels manageable because it’s short. Wear it with jeans for a sci-fi vibe or with a dress for a winter party.
Use a reversible sequin fabric by the yard if you can find it, otherwise use one side sequins and add a solid lining. Hem the bottom with a narrow fold and tack the lining so it doesn’t snag. Install metal snaps at the neck and a couple along the front edge.
Add a 1-inch strip of soft lining at the chin so sequins don’t poke when you tilt your head.
Don’t let the cape hang from loose sequins — it twists and looks messy.
12. EVA Foam Katana Prop with Magnetic Sheath
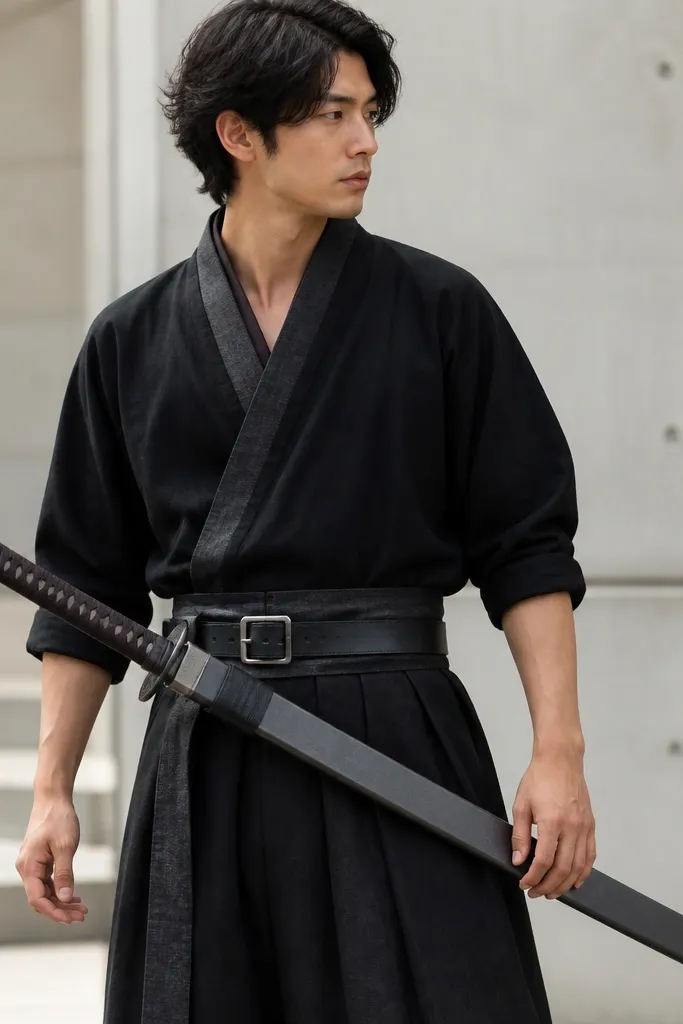
A foam katana looks real when the blade has two-tone shading and a sealed surface. The magnetic sheath is the key detail I always add because it makes the prop feel secure and satisfying in motion. I paint the blade with a silver base, then dry-brush charcoal along edges for depth. This works for anime nights in spring and Halloween in fall, and it pairs with simple black clothes year-round.
Cut blade from 1-inch EVA foam, then thin the edges with sandpaper for a tapered look. Heat-seal the surface with a foam-safe sealer or thin acrylic medium, then paint. Make the sheath from matching foam and embed small magnets so it aligns with the belt.
Test magnet placement with your belt on your body. You want the sheath to sit level, not angled.
Skip skipping the sanding step — a thick foam edge reads fake instantly.
13. Fabric Rope Belt with Knotted 'Mummy' Strips
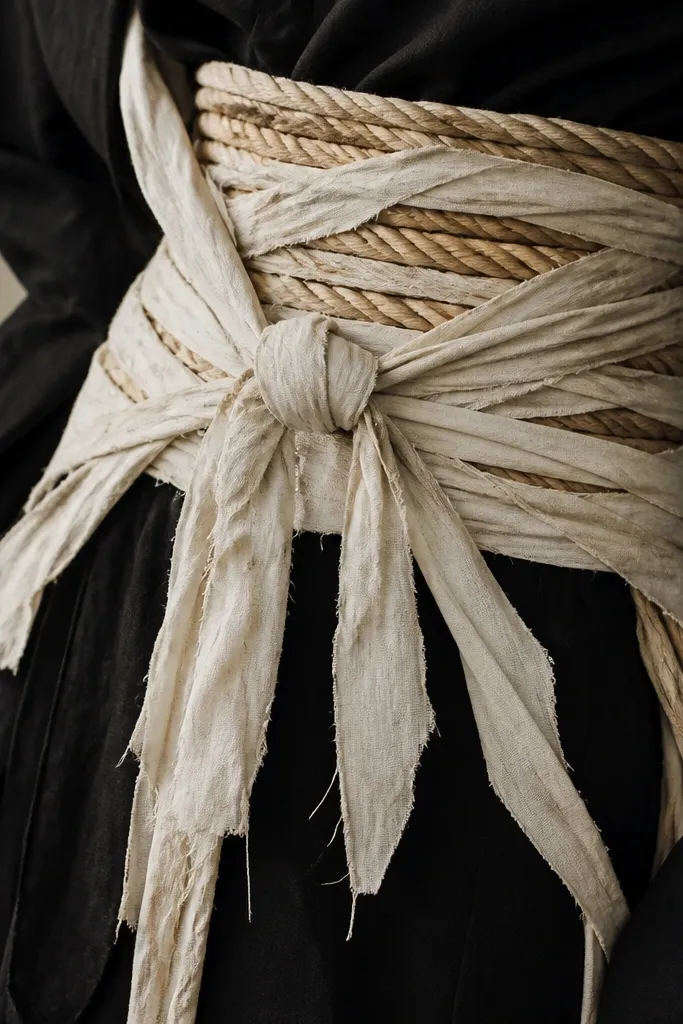
Mummy wraps look best when they’re controlled. I use torn strips that are uneven in width, then knot them in clusters so they don’t look like random scraps. The belt makes it feel like a costume accessory rather than messy fabric. It’s year-round because you can go light and minimal for spring events or go heavier for spooky nights.
Make a belt from braided rope or thick cotton cord. Wrap it with a base layer of fabric tape so the knots have something to grip. Stain strips with diluted coffee or tea for a subtle aged look, let dry completely, then knot onto the belt.
Keep the strips shorter at the sides. Long strips make you trip and they bunch at the hip in photos.
Don’t make every strip the same length — it looks like a costume kit.
14. No-Sew T-Shirt to Superhero Cape with Bias Tape Edges
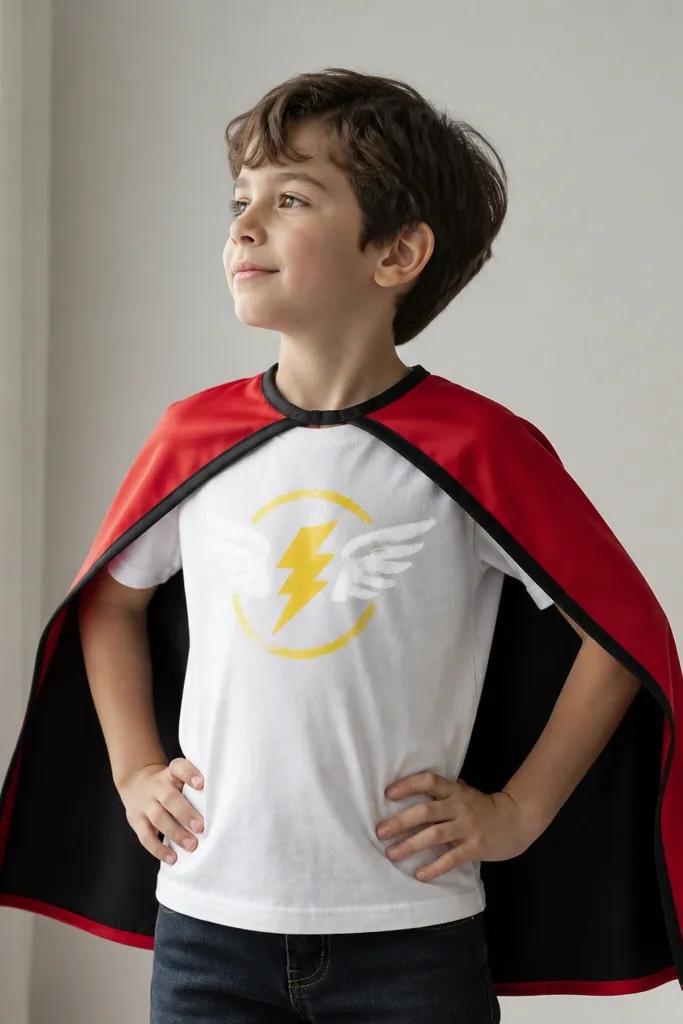
This is the cape I make when I need something fast and photo-ready. Bias tape edges make it look finished even if you didn’t sew much. I like a red-and-black combo because it reads bold in daylight and under indoor lights. The cape is year-round because you can swap colors and emblems for different themes without rebuilding the whole thing.
Quick tipUse a slightly stretchy fabric for the cape so it doesn’t flare out weirdly when you walk.
Cut a cape rectangle from a lightweight knit or old t-shirt fabric — about 24-30 inches long. Fold and press bias tape along the neckline opening, then stitch or use fabric glue for a no-sew version. Add an emblem with fabric paint and a stencil.
One warningSkip frayed edges — they look cheap in close-ups.
15. Upcycled Suit Vest to Steampunk Gear Harness
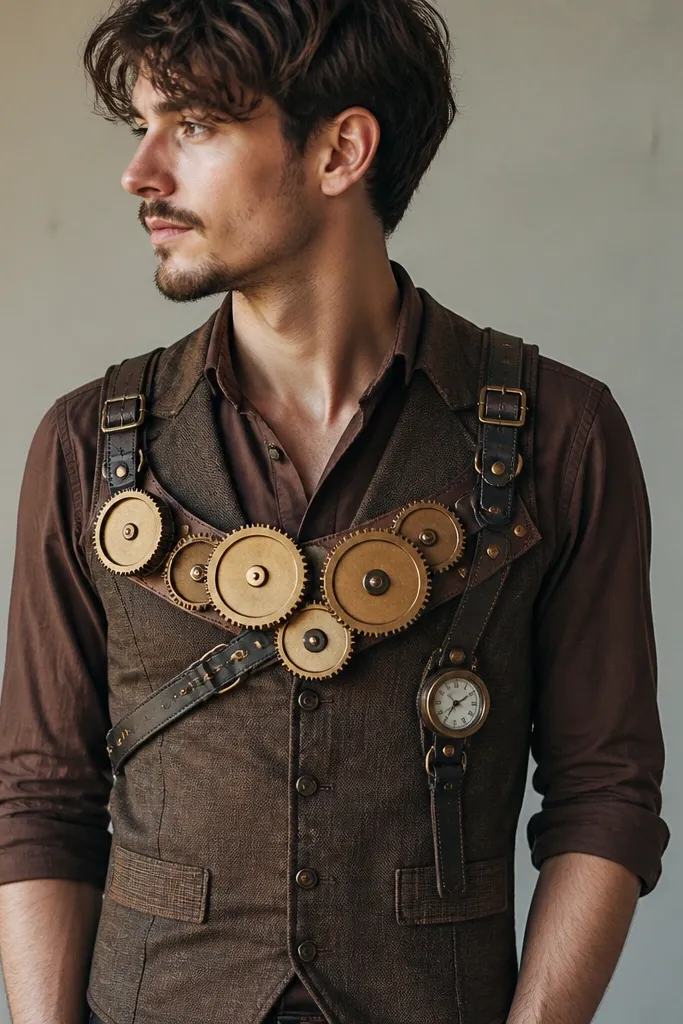
A suit vest is already shaped, so it gives you a strong steampunk silhouette without pattern drafting. The gear harness adds texture and story because it’s layered and slightly uneven. I use plastic lids and bottle caps for gears since they’re lightweight and easy to paint. This outfit works in fall and winter, and in summer it’s still wearable over a thin shirt.
Quick tipDrill tiny holes only if you need fastening. For most pieces, hot glue holds fine on costume weight builds.
Cut or repurpose a vest front and add a harness using webbing straps and buckles. Glue gears made from bottle caps and plastic lids onto the harness points. Paint with metallic acrylic in brass tones, then add black wash around edges.
One warningDon’t use flat paper gears — they reflect light flat and look like stickers.
16. Tote Bag 'Prop' to Apothecary Witch Cabinet Costume
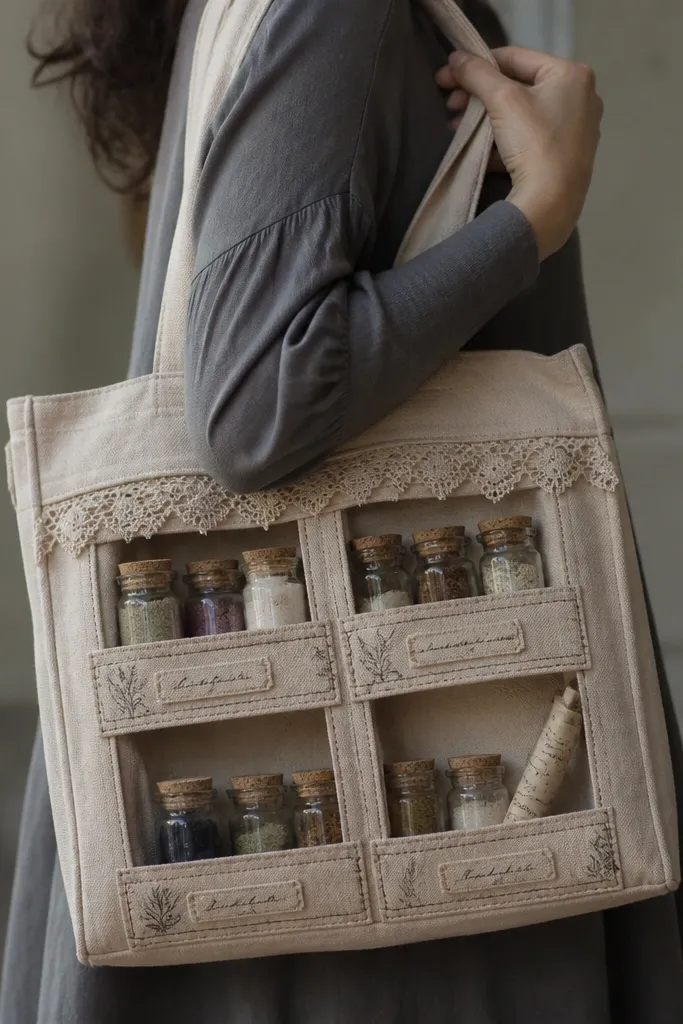
This is a costume that reads from across the room because your prop is the character. I build it around a tote bag with labeled “ingredients” and a few glass jars filled with colored sand or salt. The lace trim and handwritten labels make it feel old-school witch without going full cartoon. It’s year-round because you can fill it with different themes — spring herbs, winter potions, or spooky dust for fall.
Quick tipLine the bottom with a folded towel so jars don’t slide and scratch the tote.
Use a sturdy canvas tote. Add labels with fabric paint and a simple stencil for consistent lettering. Fill small jars with colored sand (food coloring mixed into sand works) or dried lentils for texture, then tuck them inside with crumpled paper to prevent clinking.
One warningDon’t use loose glitter. It ends up on clothes and looks messy fast.
17. Beanie-to-Mushroom Cap with Felt Gills

I love mushroom caps because they’re cute, recognizable, and forgiving if you mess up a seam. The beanie base keeps it comfortable and stretchy. Felt gills under the cap add depth, so it looks like a real mushroom from angles where a flat cap would fail. It’s year-round because you can make the colors more muted for winter or more bright for summer festivals.
Quick tipUse a slightly thicker felt for the cap top so it holds a dome shape.
Start with a red felt circle for the cap top and sew white felt spots in a random pattern. Build gills from thin felt strips in beige or light tan and stitch them to the underside. Attach the cap to a beanie by hand stitching around the brim.
One warningDon’t make the gills too long. They should sit under the cap without drooping onto your forehead.
18. Monochrome 'Cyber' Mask from Clear Plastic Report Covers
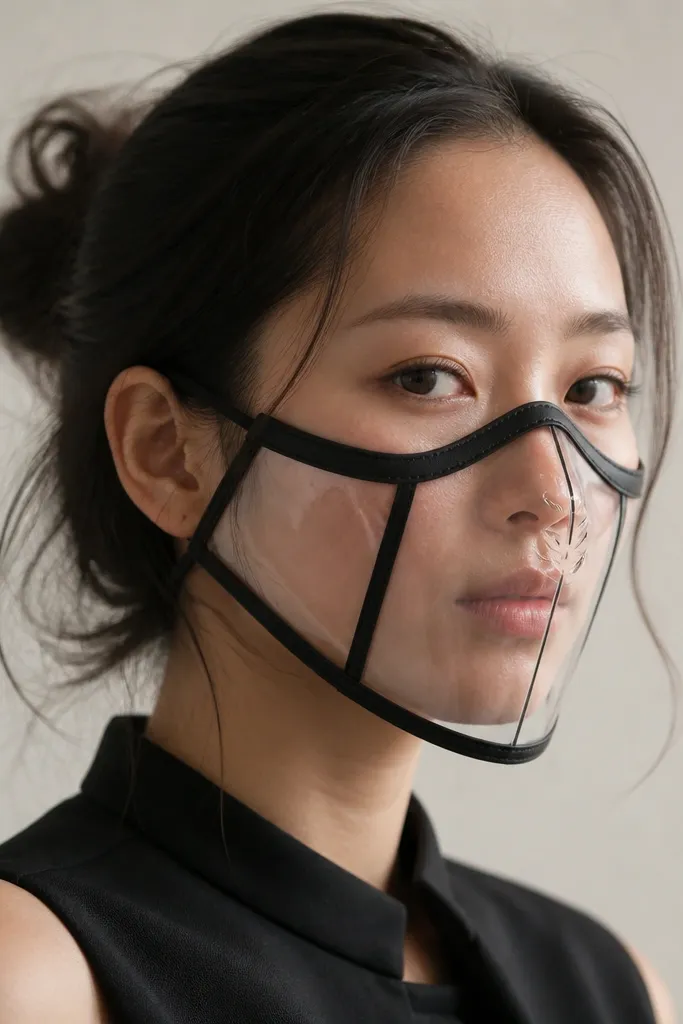
Clear plastic gives you that cyber look because it catches light and shows reflections. I pair it with matte black trim so the face area doesn’t look shiny and cheap. The shape is sharp and angular, which reads futuristic in photos. It works all year because you can swap the trim color for different themes without changing the base mask.
Use clear plastic report covers as the base. Cut angular panel shapes, then line edges with matte black fabric tape or thin foam strips. Punch holes and attach elastic straps so the fit is snug but not tight.
Wear it for 10 minutes before the event. If you feel pressure on your cheeks, adjust strap positions right away.
Skip leaving sharp edges. Sand and cover every cut line so it doesn’t scratch.