1. Bedsheet Galaxy Cape with Clip Closure
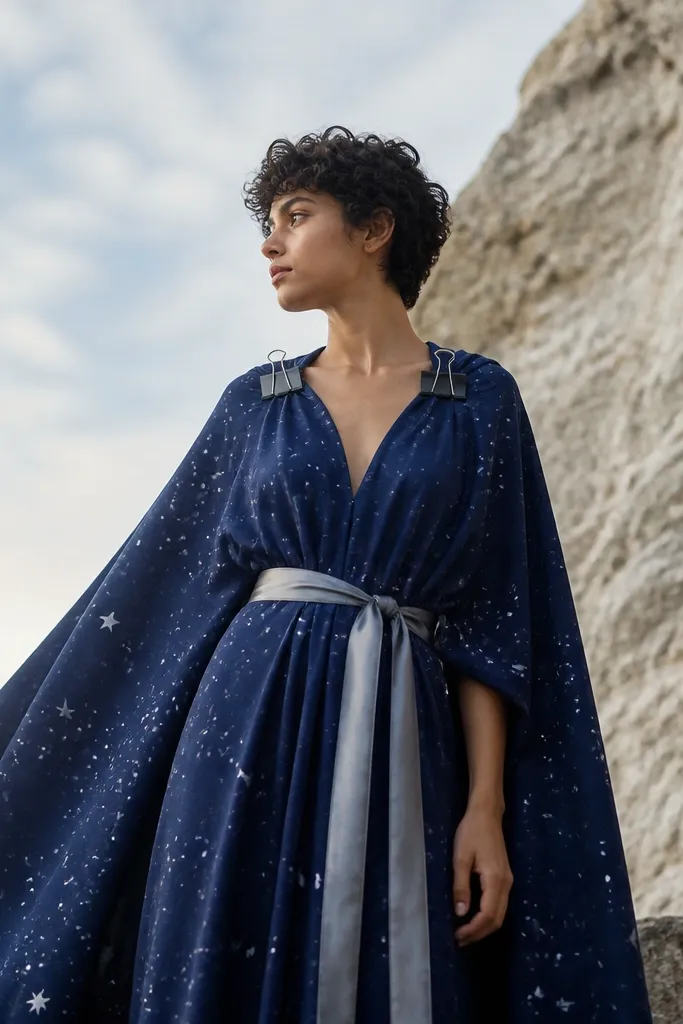
Start with a thrifted bedsheet in navy or black cotton. Spray-on fabric paint or acrylic mixed with a fabric medium makes the star pattern look like it has depth, especially if you add a few larger “moon” smudges near the bottom corners. This cape flatters almost everyone because it drapes from the shoulders and skims the body — it hides hips and balances wider shoulders with a gentle V shape. I like pairing it with fitted black leggings or bike shorts because the cape does the visual work.
Quick tipBefore you paint the whole sheet, test star density on a scrap and aim for 70% small dots, 30% larger ones — it reads like “space” without looking messy.
Fold your bedsheet into a half and cut a big rounded rectangle for the cape body, leaving a shoulder seam about 2 inches wide. Cut a V-shape at the front neckline, then hem the raw edges with a simple double fold (about 1/2 inch each fold) so it doesn’t fray. Lay the cape on your shoulders and mark where the clips will grab — I place two clips per side near the shoulder seam, then cover the clip mouths with small fabric tabs. Tie a satin ribbon or a thrifted belt at the waist to lock the silhouette for photos. Finish by painting stars: use a toothbrush flick for tiny dots, then add a few crescent smears with a soft sponge.
One warningSkip glitter paint on the inside edges — it sheds and gets all over your hands by hour two.
2. Curtain Panel Toga with Safety-Pin Hem
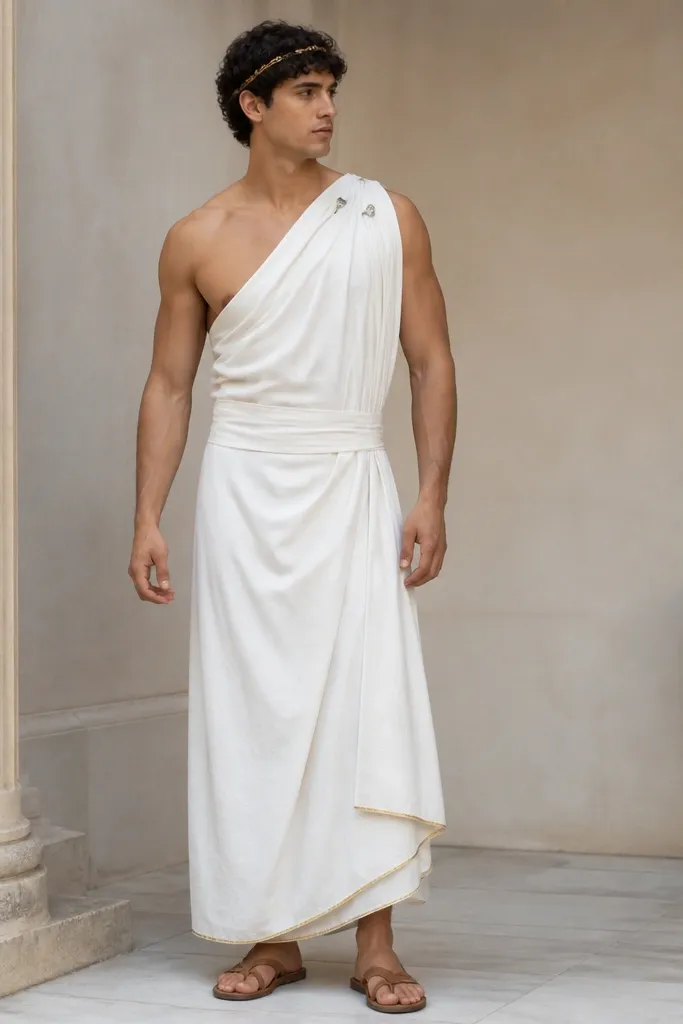
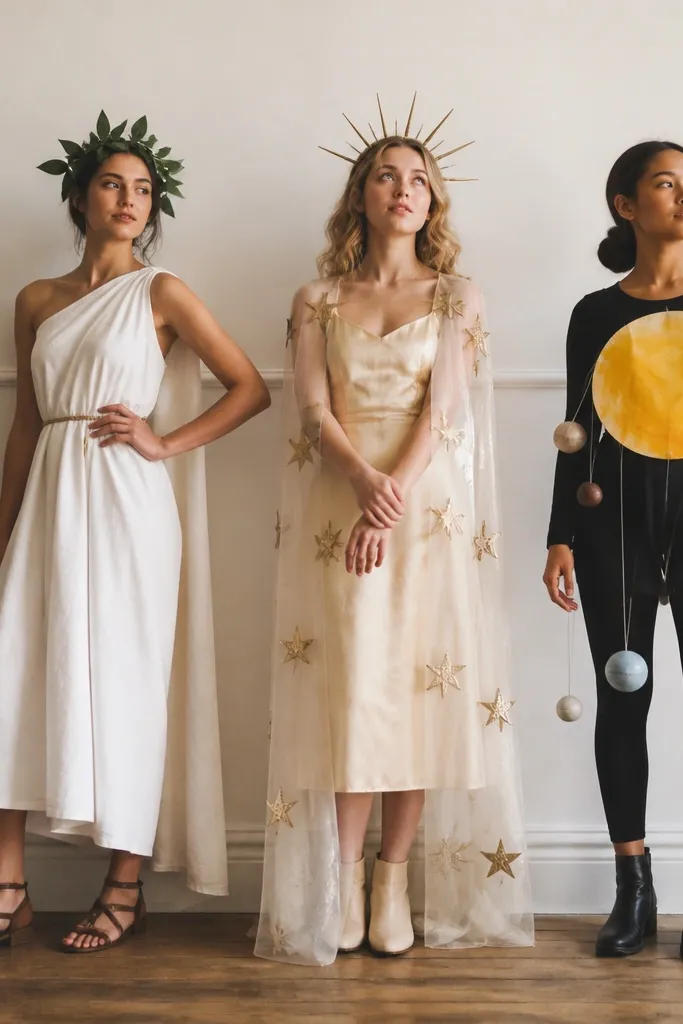
Use a cream or off-white curtain panel because it already hangs with good drape. The toga look works because it creates diagonal folds that pull the eye upward, which is flattering if you’re self-conscious about the midsection. Safety pins let you adjust the neckline and waist instantly without damaging the fabric long-term. If you’re fair-skinned, warm creams look better than stark white; if you’re deeper skin-toned, off-white with a gold trim pops under party lights.
Start by cutting the curtain panel into a rectangle about 5 feet long if you’re average height; shorter? Cut it to your knee to mid-calf range. Hem the bottom edge with a quick straight stitch so it stops twisting. Wrap it around your body so one end crosses your chest and lands over the opposite shoulder, leaving a gap for your collarbone. Pin at the upper chest with two safety pins spaced about 1 inch apart, then pin the waist fold so it doesn’t slip when you walk. Add a thin gold ribbon at the hem by hand-stitching it or tying it with hidden knots.
Wear a nude or cream seamless tank under it — the fabric drape looks intentional instead of see-through at the folds.
Don’t pull the fabric too tight at the waist — a toga should look wrapped, not compressed.
3. Thrift Belt "Armor" Vest with Velcro Straps
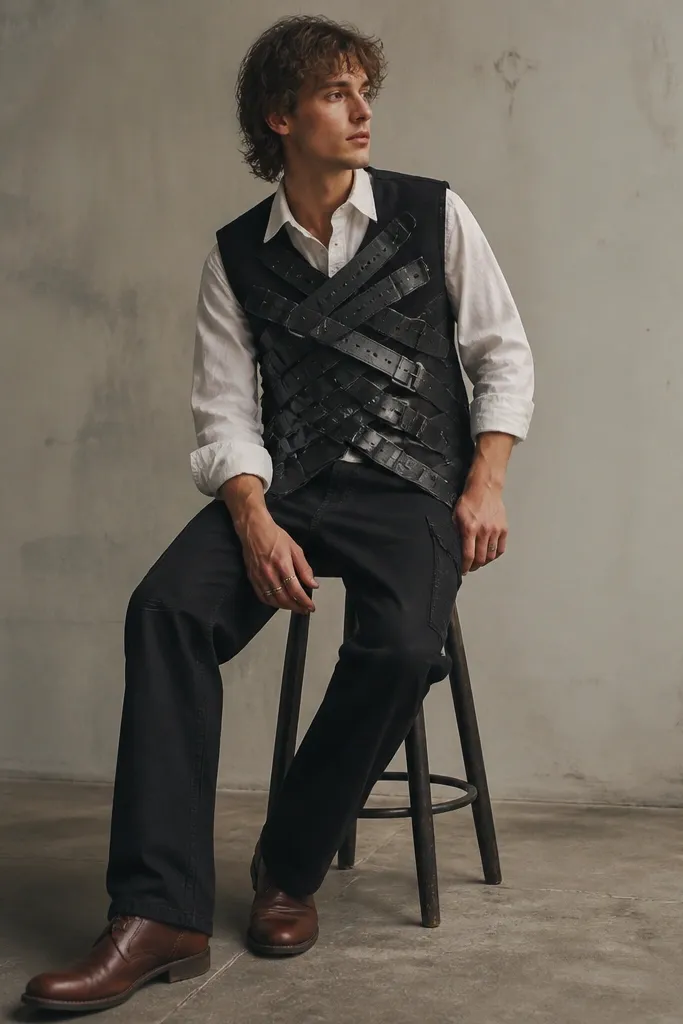
This is the “I look armored but I didn’t drill anything” build. You’re repurposing belt strips because they already have holes and edges that read like armor plating. Velcro straps keep the vest snug without pins poking your ribs, and the overlapping layout creates a real chest silhouette. It flatters a range of body types because you control where the plates end — shorter plates emphasize waist, longer plates add coverage.
Quick tipUse two belt colors: gunmetal for most plates and a darker charcoal for 2 “accent” pieces near the collarbones.
Find a thrifted denim jacket or a black vest base you can wear open. Cut 6-10 belt strips that are about 2 inches wide and long enough to overlap from shoulder to mid-torso. Paint them with gunmetal acrylic plus fabric medium, then let them dry fully. Sew small Velcro squares onto the back of each belt strip and onto the jacket front in matching spots, so you can remove and reattach plates for comfort. Put on the base, lay plates in a stagger pattern (top plates slightly shorter), then mark where you need strap tension and sew on two adjustable Velcro straps at the sides.
One warningDon’t use stiff cardboard plates — they crack when you sit and look costume-y fast.
4. Faux Fur Collar from a Scarf with Snap Buttons
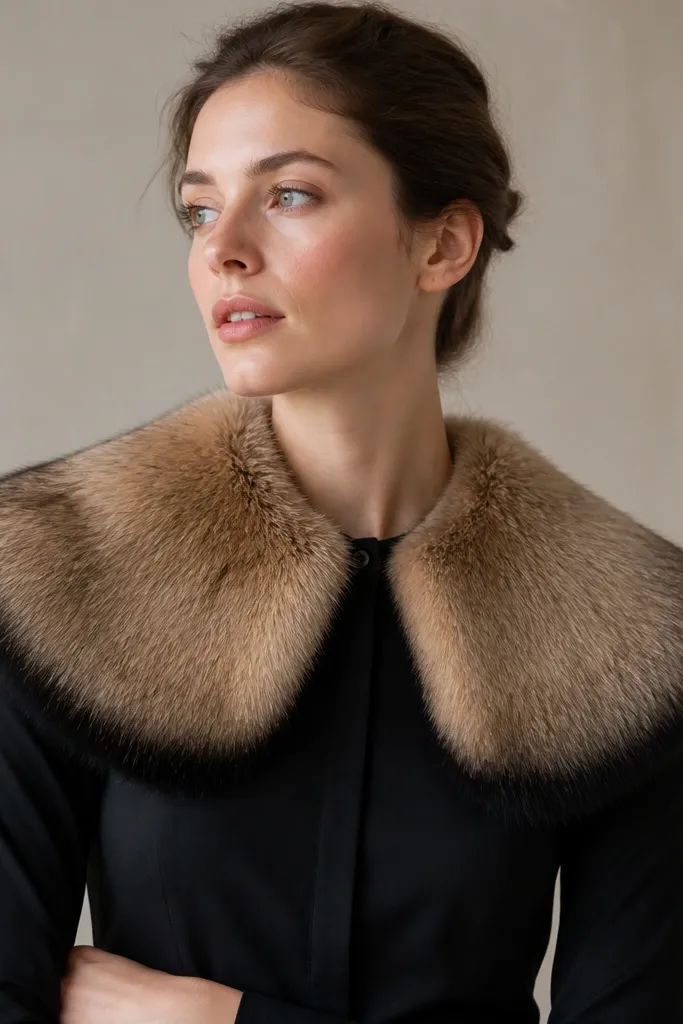
If you want instant “character” without building a full outfit, this collar trick is my go-to. Start with a faux fur scarf (the kind that already has a soft edge) and attach it to a plain top using snaps or sew-on hook-and-loop. The collar frames your face, so it flatters almost any neckline and draws attention to your jaw and cheekbones. Dark fur tones (black, espresso, deep gray) look best on camera because they don’t reflect harsh light.
Choose a plain black top with a crew or mock neck so the collar sits clean. Trim the scarf into a half-moon shape that wraps your neck without covering your face when you turn. Place the collar on your shoulders and mark where the center front gap should be — leave about 2 inches so you can breathe comfortably. Sew small snap halves to the top and matching halves to the fur edge, keeping them 1 inch apart. Finally, brush the fur with a slicker brush or a clean hairbrush to align nap in one direction.
Snap placement matters: put snaps slightly lower than you think so the collar doesn’t ride up when you lift your arms.
Skip hot glue on faux fur edges — it turns shiny and can peel when the nap flexes.
5. T-Shirt "Magician" Capelet with Ribbon Tie Back
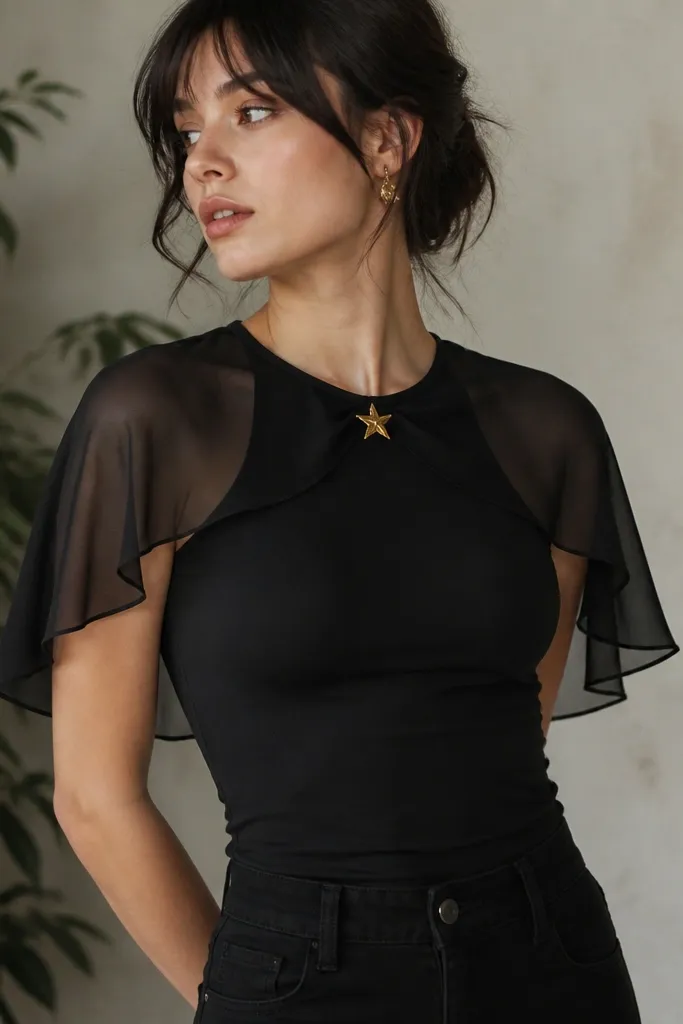
This is a renter-friendly costume trick that looks like you planned it for weeks. Use a black t-shirt as the base and add a small capelet from sheer fabric (chiffon or a lightweight organza). The capelet moves with you and creates that “floating” illusion when you swing your arms. It flatters because it adds vertical motion near the shoulders without adding bulk at the hips.
Cut the capelet from a sheer fabric rectangle about 20 inches wide and 14 inches tall, rounded at the bottom corners. Fold the top edge down 1 inch and stitch to create a casing. Thread a 1/4-inch elastic cord through the casing or tie a ribbon directly into the casing ends. Put on the shirt, hold the capelet at your upper back, and tie the ribbon so it sits 2 inches below your collar line. For the front, add a small brooch or fabric patch at the left chest to anchor the look visually.
Use a 2-inch wide ribbon and tie it in a tight double knot so it doesn’t loosen mid-party.
Don’t make the capelet too long — below the waist it turns into a snag machine.
6. Reversible Sheet Skirt with Elastic Waist and Fringe Hem
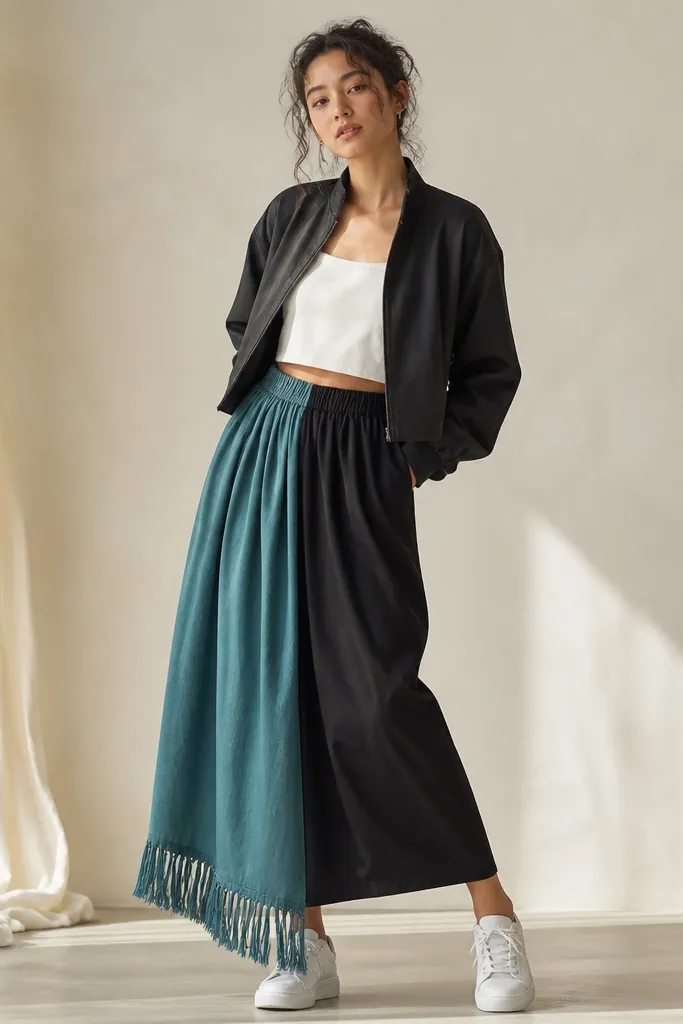
A reversible skirt gives you two costume looks from one build. Sheets are great because they’re wide, light, and easy to gather without expensive fabric. The fringe hem adds movement and reads as “costume texture” even when the pattern is simple. This works on many body types because the elastic waist adjusts and the gathered skirt softens straight silhouettes.
Quick tipAdd a hidden pocket by sewing a small scrap of cotton inside the skirt seam at the side — it makes the skirt feel like real clothing, not a costume.
Cut two panels from different sides of a thrifted sheet, each panel about your waist-to-hem length plus 2 inches. Sew the panels right sides together along the long edges, then turn right-side out. Hem the bottom with a fringe technique: mark 1-inch strips and cut them 4 inches deep, then tie the fringe ends into small knots so they don’t unravel. Create the elastic waist by folding the top edge in 1 inch, stitching a casing, and threading a 1-inch wide elastic band. Gather until it fits snug — you should be able to slide two fingers under the waist without digging.
One warningSkip slippery polyester sheets — they cling and the fringe tangles.
7. Cardboard + Fabric "Robot" Headband with Hot Glue Guard
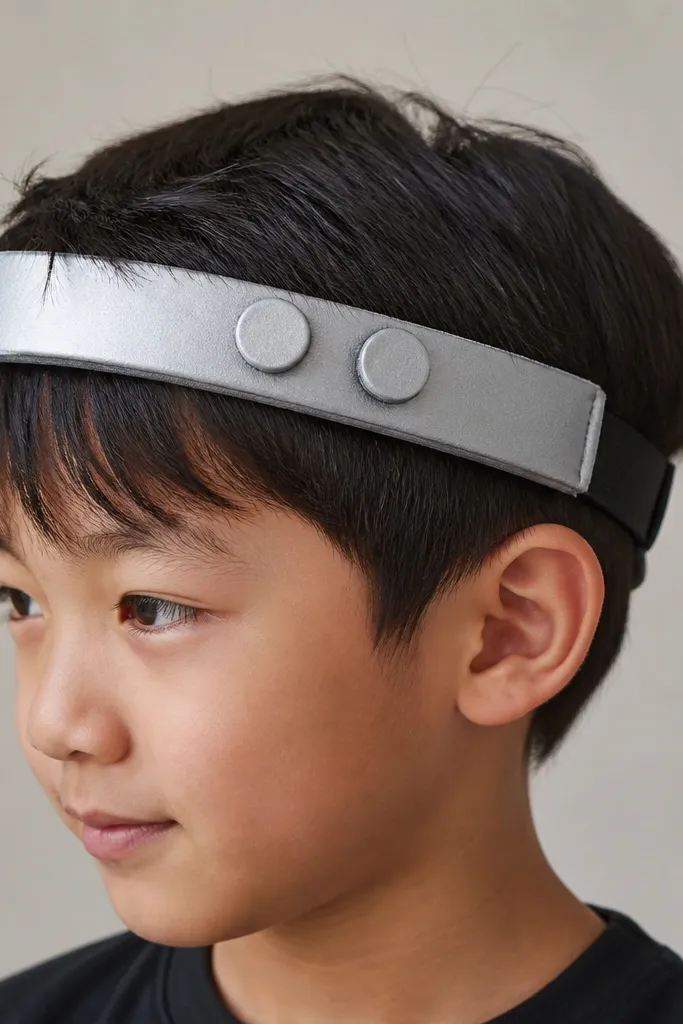
If you want a costume that reads from across the room, start with the head. This headband uses cardboard for shape and fabric for comfort, so it feels light and stays on during photos. The silver paint makes it look intentional, and the foam eyes create a clear silhouette. It flatters most faces because the band sits across the forehead and draws attention to your eyes.
Quick tipSeal all glue seams with fabric tape — it kills the shiny glue look on camera.
Wrap a black headband with black fabric tape so the base doesn’t show. Cut two cardboard rectangles and one top strip, then cover each piece with silver fabric or metallic wrapping paper secured with glue that you later seal with fabric tape. Paint edges with silver acrylic for a uniform look. Glue (or better, tape) two foam circles for eyes and add small black circles in the center for pupils. Attach the cardboard pieces to the headband with fabric tape strips on the inside so the glue doesn’t contact your skin.
One warningDon’t leave cardboard edges raw — they scratch and look unfinished.
8. Repurposed Tights Camo Bodysuit Overlay
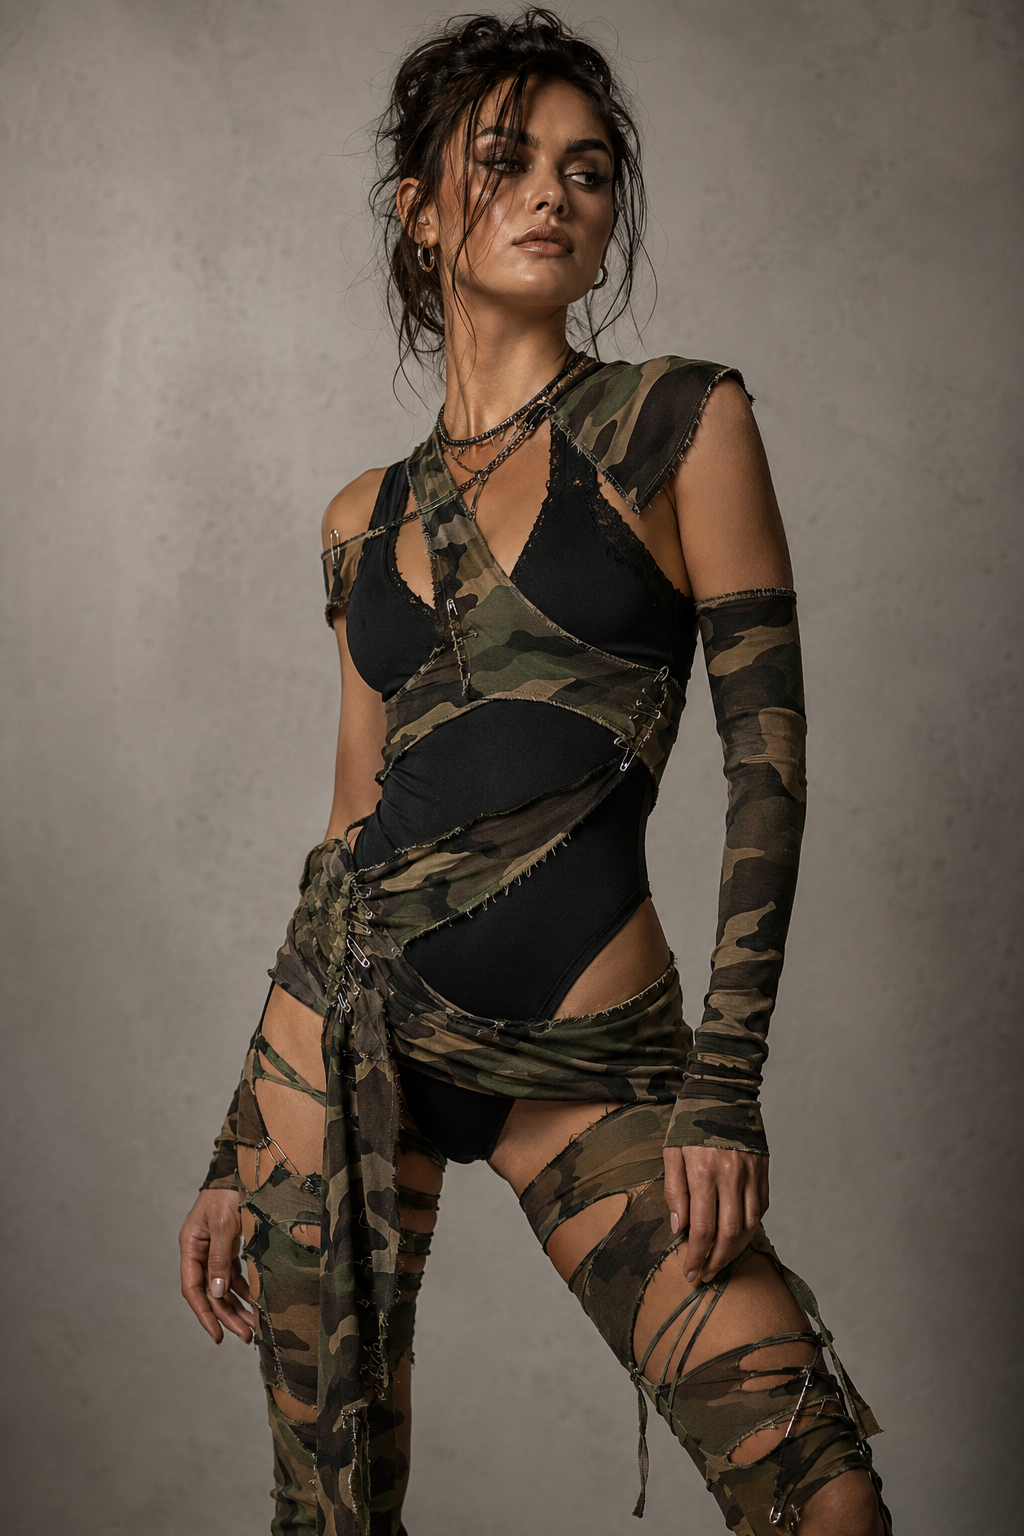
This one is sneaky-smart: tights stretch, so they make a camouflage overlay that moves with your body instead of sitting flat. Use patterned or solid tights in olive, brown, and gray, and cut them into irregular “patches.” The trick flatters because the overlay breaks up the torso into shapes, which makes the outfit look designed rather than painted on. It works especially well for medium to deep skin tones because the color contrast reads cleanly.
Put on a fitted base like a black or dark green bodysuit. Cut tights into 8-12 irregular patch shapes, then stretch each patch slightly so it curves to your body. Tie or sew the patches onto the base using thread and a few tight stitches at the edges, so you don’t need full coverage. Add a few knotted “tears” by cutting slits into one patch and tying the edges. Finish by attaching a narrow strip at the neck and one at the waist so everything stays aligned when you move.
Use a double layer on the center chest patch — it looks thicker and more “tactical” in photos.
Skip a fully covered overlay — it looks like cheap costume fabric and gets hot fast.
9. Thrifted Button-Down Vampire Collar Pop
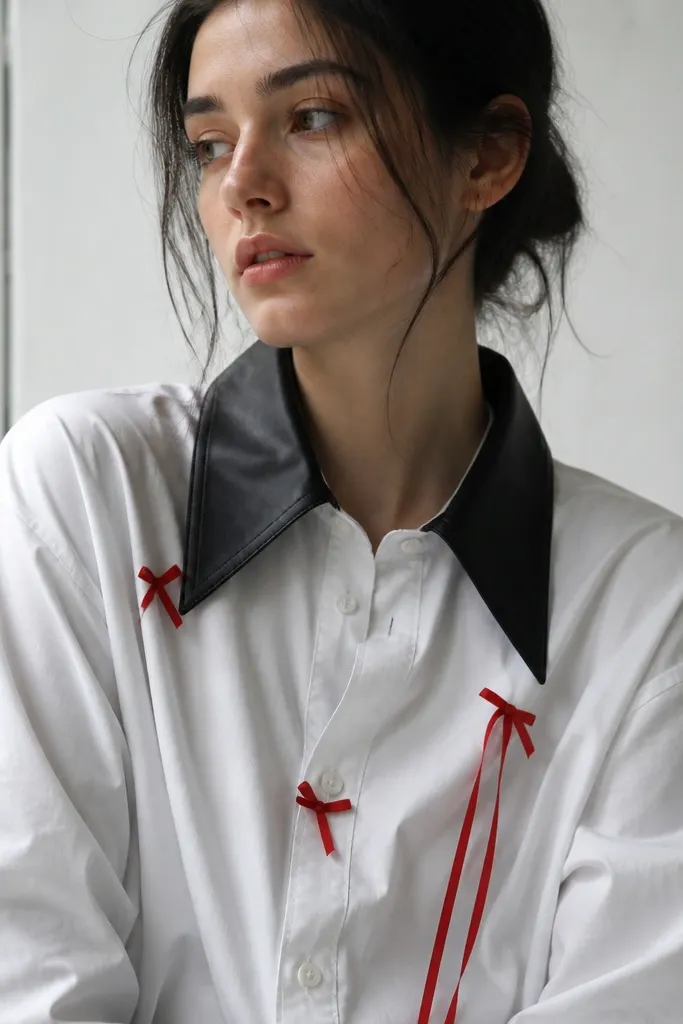
This is how you get vampire energy without building a full cape. Take a crisp button-down and swap the collar area with faux leather or thick felt, so the costume has structure right where people look. Velcro inside the neckline lets you remove it later and keeps the fabric from warping. It flatters by adding a bold frame around your face, especially if you have a longer neck or a narrow jaw — the collar width balances your proportions.
Quick tipUse a matte black felt if you want zero shine under flash photography.
Cut a collar shape from black faux leather or thick felt: two mirrored pieces that sit along the shirt collar points. Make them slightly wider than your natural collar so you get that dramatic “fang-adjacent” silhouette. Sew Velcro onto the underside of each collar piece and matching Velcro onto the shirt neckline seam allowance. Attach the collar, then add two small red ribbon strips at the center front as “blood tie” accents. Optional: add a tiny strip of black lace at the edge of the collar for a gothic texture.
One warningDon’t use thin craft foam — it curls and looks like a Halloween prop.
10. Paper Lantern Diadem from Grocery Bags
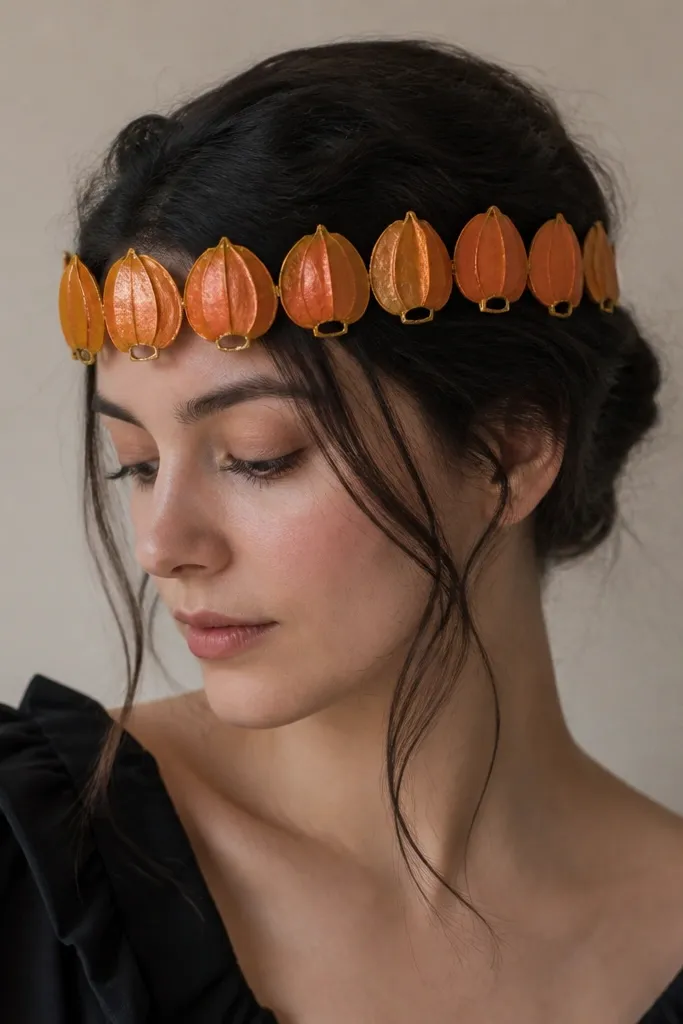
This one is for warm, cozy costume vibes. Grocery bags are surprisingly good for diadem props because they’re sturdy and slightly waxy, so they hold shape once painted. The lanterns create a repeating pattern that looks intentional, and the elastic band keeps it renter-friendly and comfortable. It flatters because it sits high on the face and gives a bright focal point — great if you want your outfit to look fun without adding bulk to your body.
Quick tipAdd a tiny “flame” dot in white at the top of each lantern for a quick highlight that shows up in flash.
Cut 10-14 small rectangles from brown grocery bags, about 3 inches tall and 2 inches wide. Score 1/2-inch folds down the rectangles, then shape each piece into a tube and tape the seam closed. Paint them orange with a lighter gold top edge, then let dry. Make a base by stretching 3/4-inch elastic around your head and knotting it, then tape lanterns onto the elastic with small strips of craft tape on the inside. Space them evenly across the forehead and secure any loose edges with extra tape.
One warningSkip wet paint layers — they warp the paper and make lanterns sag.
11. Sock + Fabric Flower Wrist Cuffs
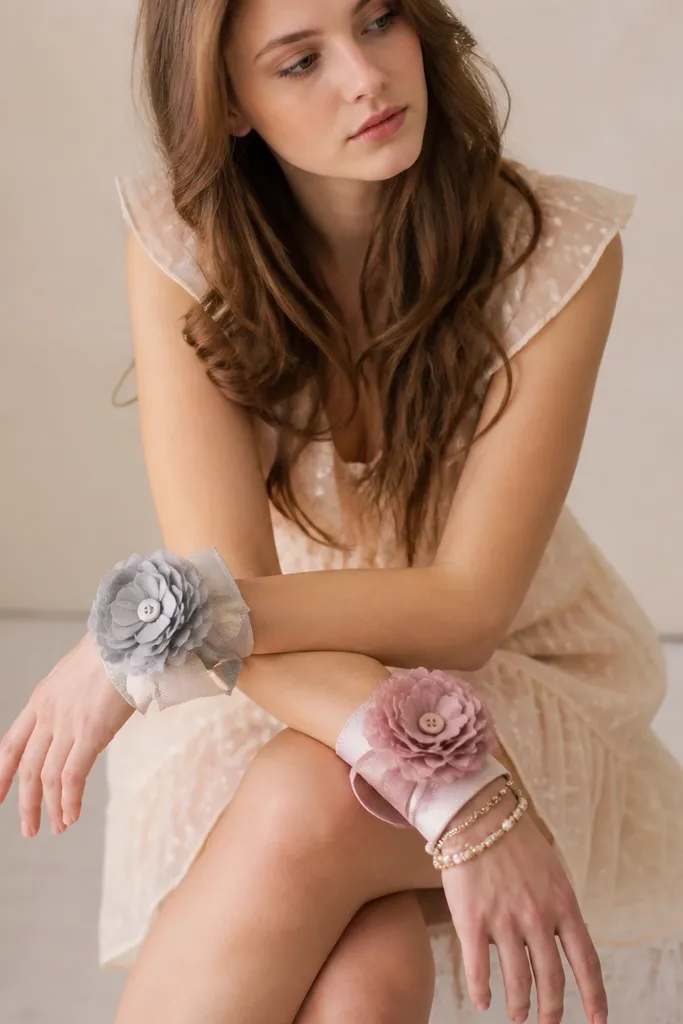
Wrist cuffs are the fastest way to make a plain outfit look like a costume. I use old socks because they’re already stretchy, so the cuff sits snug and doesn’t slip during dancing. Fabric flowers add color without making you carry a whole prop. This flatters by drawing attention to your hands and forearms, which looks great if you wear short sleeves or sleeveless tops.
Quick tipMatch the flower color to your shoes or bag so the outfit looks planned, not random.
Cut the toe off two socks so you’re left with a tube. Fold the tube lengthwise and wrap it around your wrist, then stitch the fold in place so it stays flat. Cover the sock with ribbon or fabric tape so it looks smooth, not bumpy. Add one large flower per cuff: sew the petals onto the ribbon-covered cuff and secure a button or bead center. Finish by tying a small bow on the underside so it looks neat from every angle.
One warningSkip stiff glue-only attachments — flowers pop off when you bump into doors.
12. No-Sew Tulle Skirt with Paper Clip Waistband
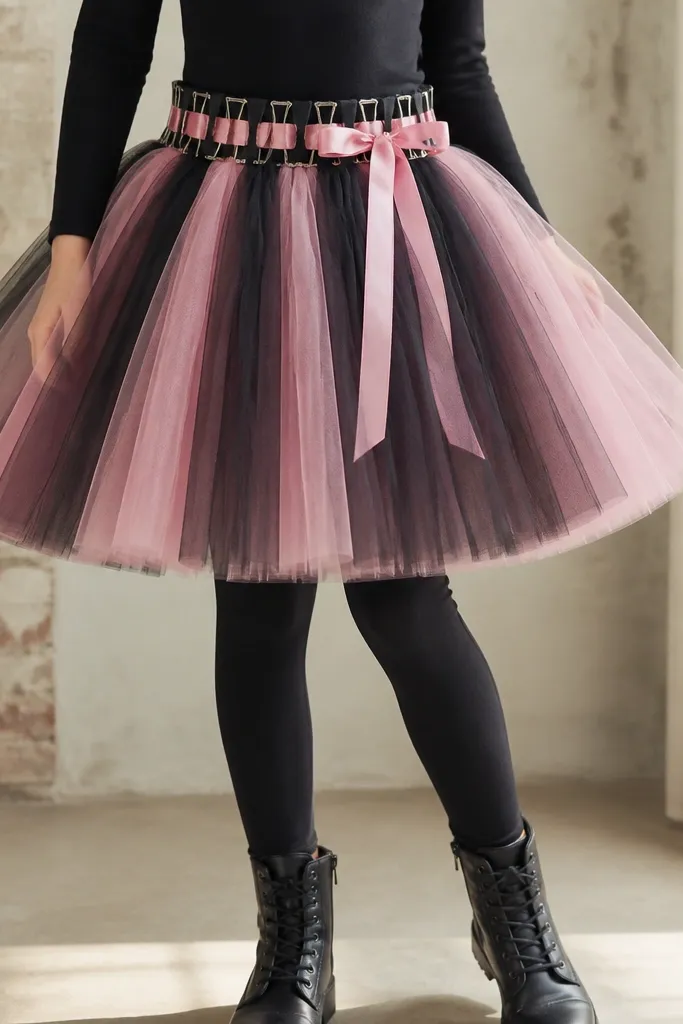
This is the “I need it tonight” skirt. Tulle is light, and paper clips give you a temporary waistband that holds layers without sewing or drilling. The skirt flares fast, so it reads like a full costume even if you keep the base simple. It flatters in a practical way: the tulle hides thigh lines and lets you move without restricting your legs.
Quick tipFor a nicer hem, trim all strips to the same length after you attach them — your skirt will look even.
Cut tulle strips about 12 inches long and 4 inches wide, then stack colors in alternating piles. Make a waistband by attaching ribbon to the inside of a line of paper clips — you want the clips to face inward so they don’t snag. Lay leggings or bike shorts down and wrap the paper-clip waistband around your waist, then clip the ribbon ends together. Tie each tulle strip around the waistband ribbon: fold strip in half, loop through, pull tight. Keep strips close together for a dense look, then trim any uneven lengths at the hem.
One warningDon’t use too-sparse strips — it looks like a messy craft project.
13. Foam "Fake Fur" Tail from a Rug Scraps Bundle
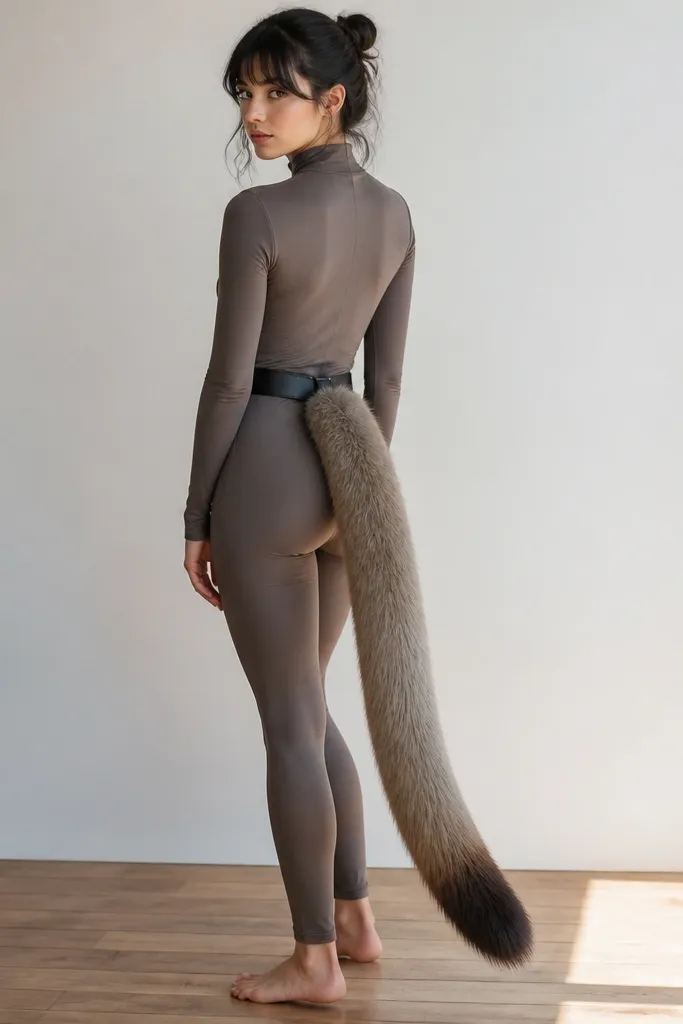
A tail makes any animal or fantasy costume instantly more believable. I build mine with rug scrap faux fur because it has a dense nap that looks real from a few feet away. The foam core keeps the tail from collapsing, and the belt attachment lets you remove it quickly. This flatters by adding a fun silhouette line behind you — it’s also great for photos where your back matters.
Quick tipBrush the fur in one direction before you wear it — it stops the tail from looking fuzzy and flat.
Cut a foam strip about 3 inches thick and 24-30 inches long, then taper one end with scissors. Wrap the faux fur rug scrap around the foam, trim excess, and stitch along the seam using a simple straight stitch or whip stitch. Add a darker tip by gluing a small extra fur patch at the tapered end. Attach to a belt: sew or tape a fabric loop to the tail base, then thread it onto a belt you already own. Position the tail loop at your natural waist so the tail sits slightly above your hips when you stand.
One warningSkip attaching directly to leggings — it twists and shifts when you sit.
14. Plastic Bottle "Armor" Shoulder Pieces with Fabric Straps
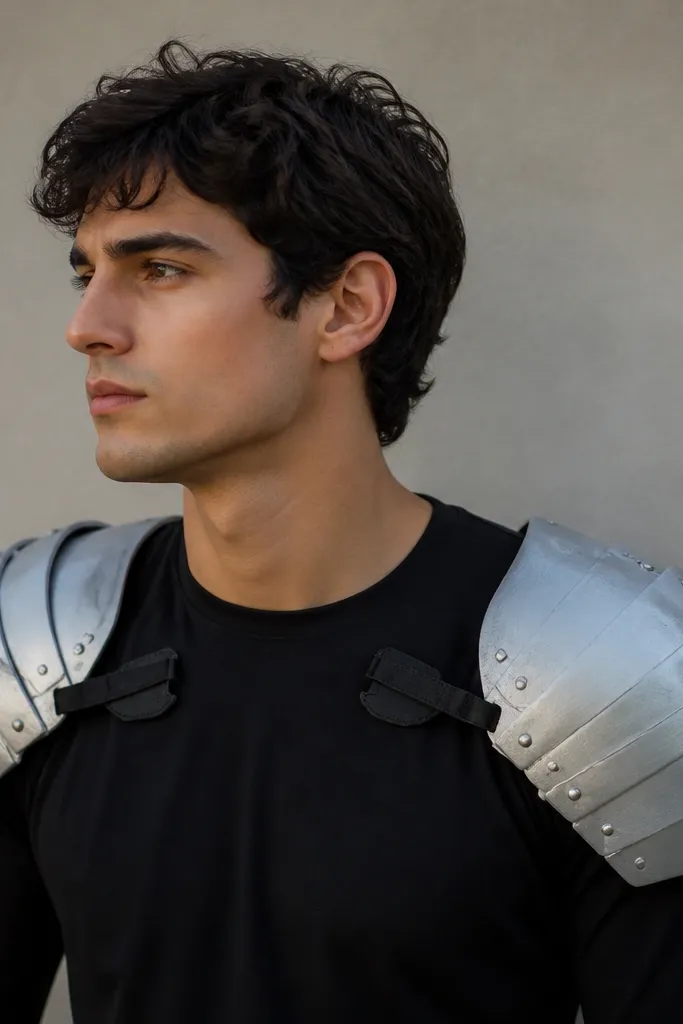
This looks like sci-fi armor without any drilling. Plastic bottles are stiff enough to hold a curve, and when you paint them matte you lose the cheap shine. Fabric straps with Velcro keep the pieces secure and adjustable, so you’re not constantly pulling them back into place. It flatters because it adds shoulder width and creates a strong upper silhouette, especially with fitted tops.
Cut two bottle shoulders: use the bottle curve near the upper part so you get a natural armor shape. Rinse and dry, then sand lightly with fine grit so paint sticks. Paint matte silver, then add fake rivets with a small dot of darker gray paint. Sew fabric straps to a backing strip of felt or thick cotton so the bottle doesn’t rub your skin. Attach the felt backing to your shirt with Velcro squares, and place the armor pieces on top, securing with matching Velcro on the straps.
Paint in thin coats and let each coat dry fully; thick paint cracks on curved plastic.
Don’t leave bottle edges sharp — sand and cover with a small felt strip so it won’t cut you.
15. Mason Jar "Potion" Bag with Ribbon Handle
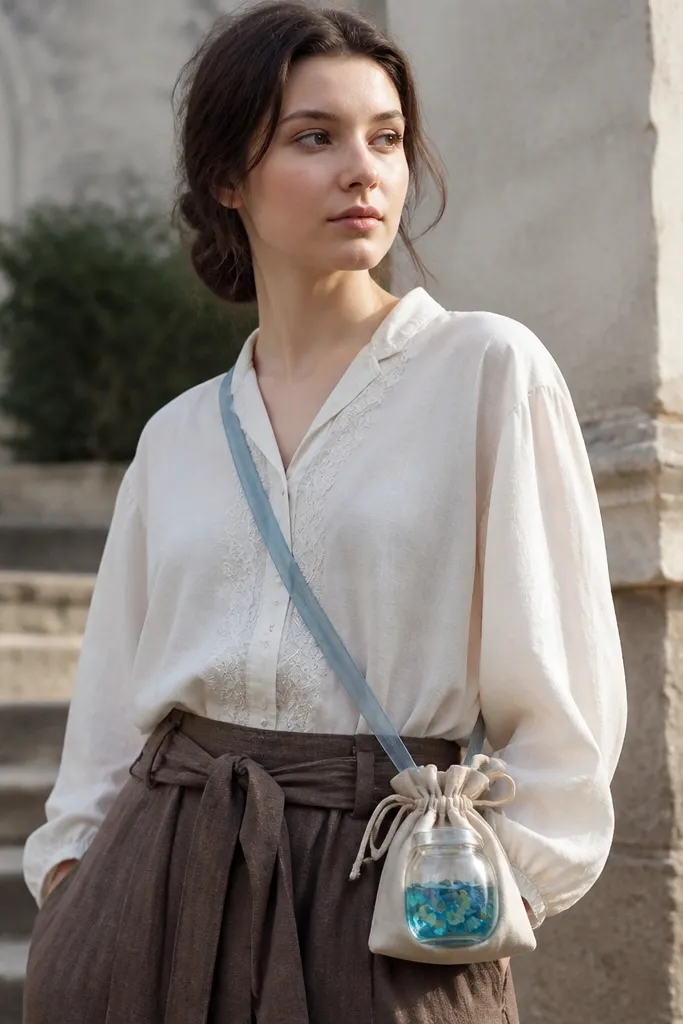
A potion prop instantly turns a simple outfit into a story. Use a clear jar or repurposed mini container and build the “liquid” effect with translucent colored fabric pieces inside, plus a few non-shedding confetti bits. The bag form matters: a jar on a string swings and smacks your legs, but a pouch strap keeps it stable. This flatters because it sits at your torso and draws attention to the center of your outfit.
Quick tipUse ribbon that’s 3/4-inch wide; thin ribbon twists and makes the jar swing.
Find a small jar with a lid and a fabric pouch you can make from scrap cotton. Cut a pouch rectangle, fold sides in, and stitch so it fits the jar snugly without crushing. Add the potion look inside the jar: tear translucent tissue or thin organza into strips, place them in the jar with a little waterless gel substitute or just layering for texture, and add a pinch of fine confetti that won’t fall apart. Tie a ribbon strap to the pouch sides with strong knots, then thread the jar into the pouch and secure with Velcro tabs on the pouch opening. Wear it across your chest and adjust strap length so the jar sits at sternum height.
One warningSkip loose confetti — it ends up on your shoes and looks messy by the end of the night.