1. Neon Tape Cyber Mail Carrier
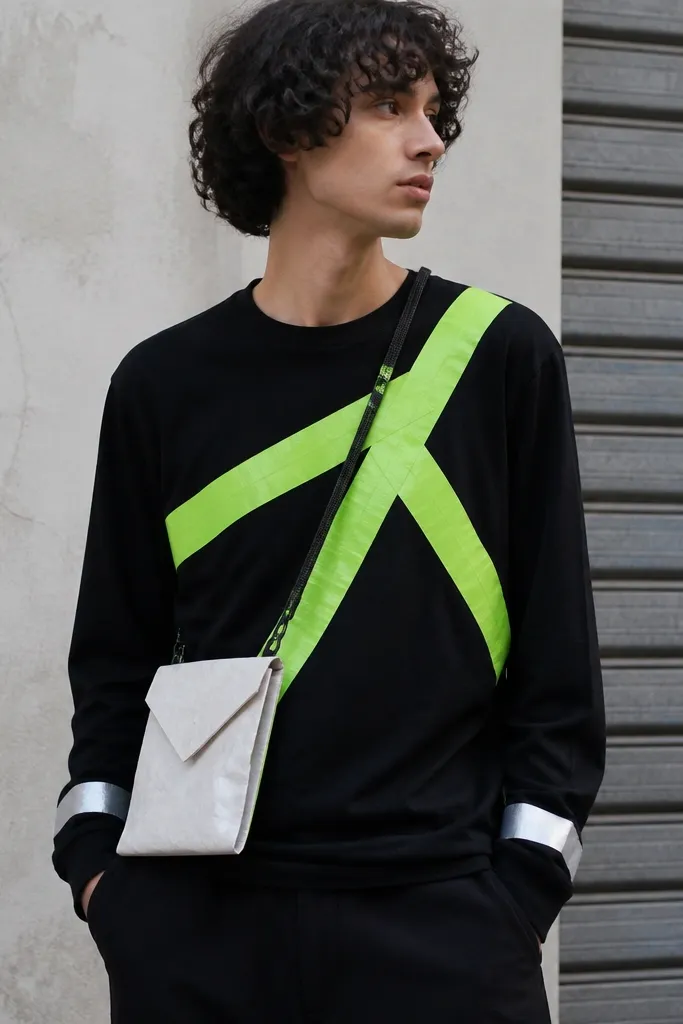
Use a black long-sleeve shirt and black jeans or leggings. Cut a recycled padded envelope or small cardboard mailer into a pouch shape, then glue fabric lining inside with hot glue. Add neon green tape in a diagonal “slash” across the chest and mirrored bands on each sleeve.
This costume is modern because the tape creates graphic lines like a tech jacket, not a random mess. Start with all-black base clothing so the neon tape pops under party lights. The crossbody pouch adds story without extra sewing. I like using reflective tape on cuffs because it catches phone flash and looks intentional.
One warningDon’t use more than two neon shades — three turns it into a craft fail fast.
Quick tipPress the tape edges with a credit card so they don’t lift later when you move.
2. Tulle Skirt Disco Ghost
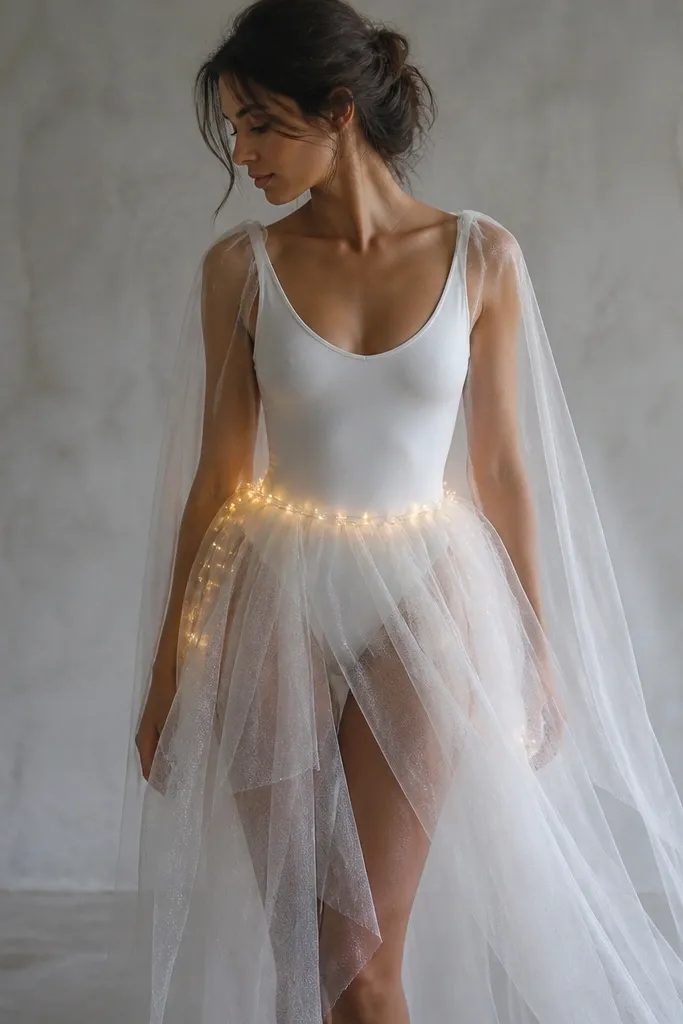
You need a white fitted base (bodysuit or stretch top) and a tulle length that reaches mid-calf. Cut 6-8 strips of tulle, 10-12 inches wide each, then tie them to an elastic waistband. Drape a piece of white mesh over your shoulders and secure with two bobby pins near the collarbones.
This is a “ghost” look that reads modern because the layers are lightweight and the lights are subtle. The silver tulle gives movement without looking like a Halloween sheet. LED lights tucked at the waist make it glow in motion, which looks great on dance floors. It’s clean, airy, and photogenic from multiple angles.
One warningDon’t use thick craft tulle with a heavy glitter — it looks scratchy and cheap in close-up.
Quick tipUse warm-white LEDs and keep them near the waist so the glow doesn’t blind the camera.
3. Denim Apron Time Traveler
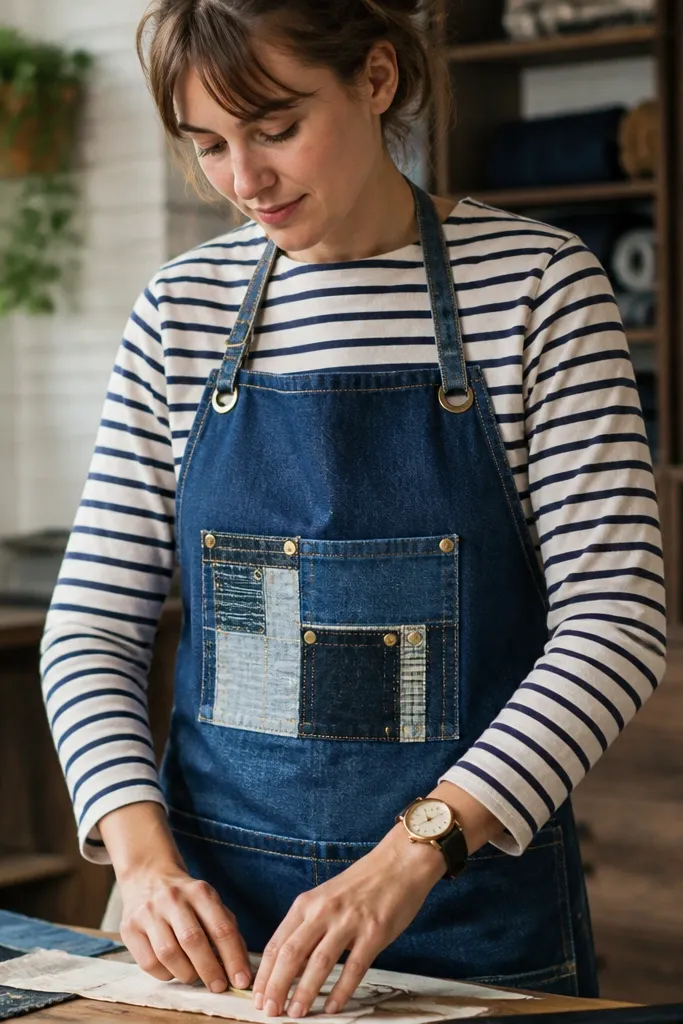
Denim reads modern instantly, and the apron silhouette looks costume-y without being bulky. The contrast of patch pockets makes it look like a real outfit, not a costume slapped on. Brass snaps add a “mechanic” feel. It’s also super forgiving if you’re moving around a lot.
Cut an apron from an old denim skirt or jeans: aim for 18-20 inches wide and 24-26 inches long. Add two big patch pockets from lighter denim scraps and stitch or hot-glue them down. Strap a cheap plastic watch or a repurposed pocket watch to your wrist using elastic and a glue-safe fabric strip.
Rough up the edges with scissors so it looks intentionally worn, not freshly cut.
Skip bright neon thread on denim — it looks like a school project.
4. Belt Harness Minimal Warrior
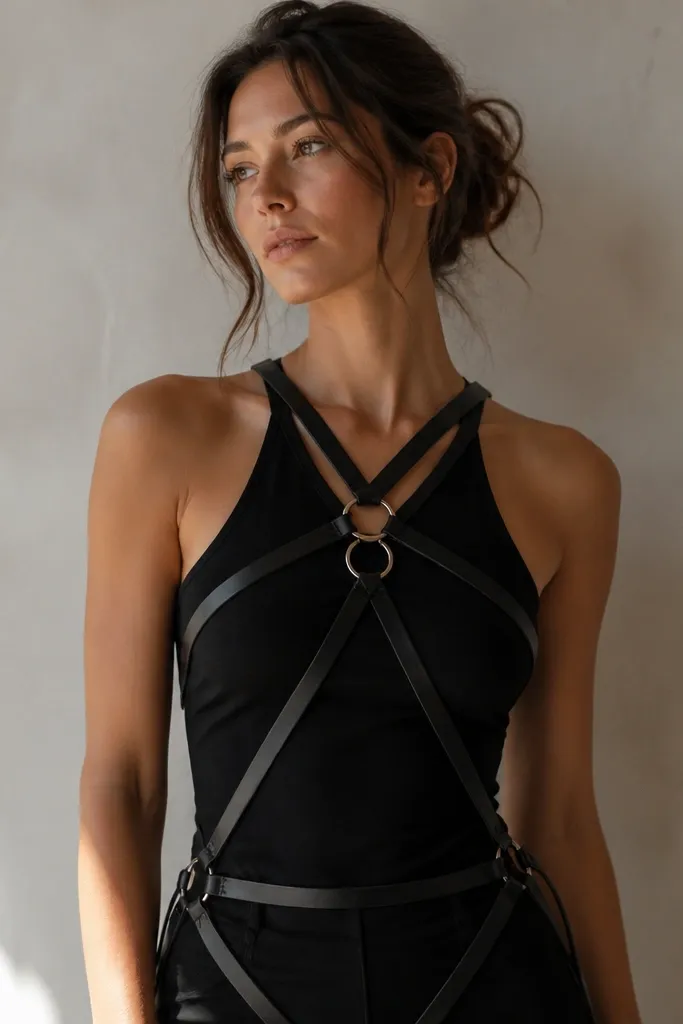
Use a black fitted top and black leggings. Cut faux leather strips 1 inch wide and 10-14 inches long. Attach strips to a central point using hot glue to hold them, then reinforce with a few stitches or strong fabric tape. Add two rings (keychain rings or bag hardware) at the upper chest and thread one strap through for a finished look.
This one looks modern because it’s clean, symmetrical, and hardware-forward. Faux leather strips give that sleek, tactical vibe without needing armor. The rings at the center make it instantly “designed.” It also works with any base outfit you already own.
One warningDon’t glue straps directly onto delicate fabrics like thin cotton — pull at the seams will show.
Quick tipLay out the harness on your body with masking tape first so the angles match your torso.
5. Cardboard Robot Shoulder Armor
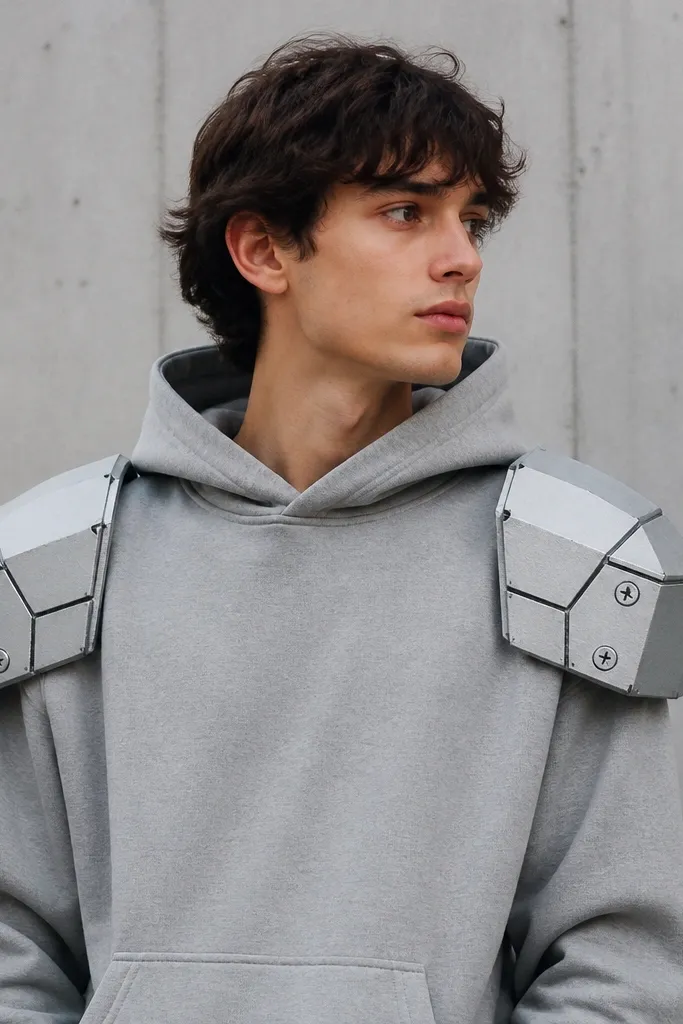
Cut two shoulder plates from corrugated cardboard, about 8 inches wide and 6 inches tall. Round the edges with scissors and score lightly so it curves over your shoulder. Paint with metallic spray or acrylic in thin coats, then use black paint or marker to draw panel lines. Attach with elastic straps that you glue to the back.
Cardboard armor sounds messy, but painted, it looks sharp and modern. The trick is shaping the shoulders like a rounded box so it doesn’t look like a costume prop. Metallic silver with black lines makes it read as “robot” in photos. You get structure without heavy materials.
One warningAvoid glossy metallic paint without sealing — it flakes when you sweat.
Quick tipSeal cardboard with clear matte Mod Podge so it survives a night of bumps.
6. Upcycled Scarf Collar Princess-Modern
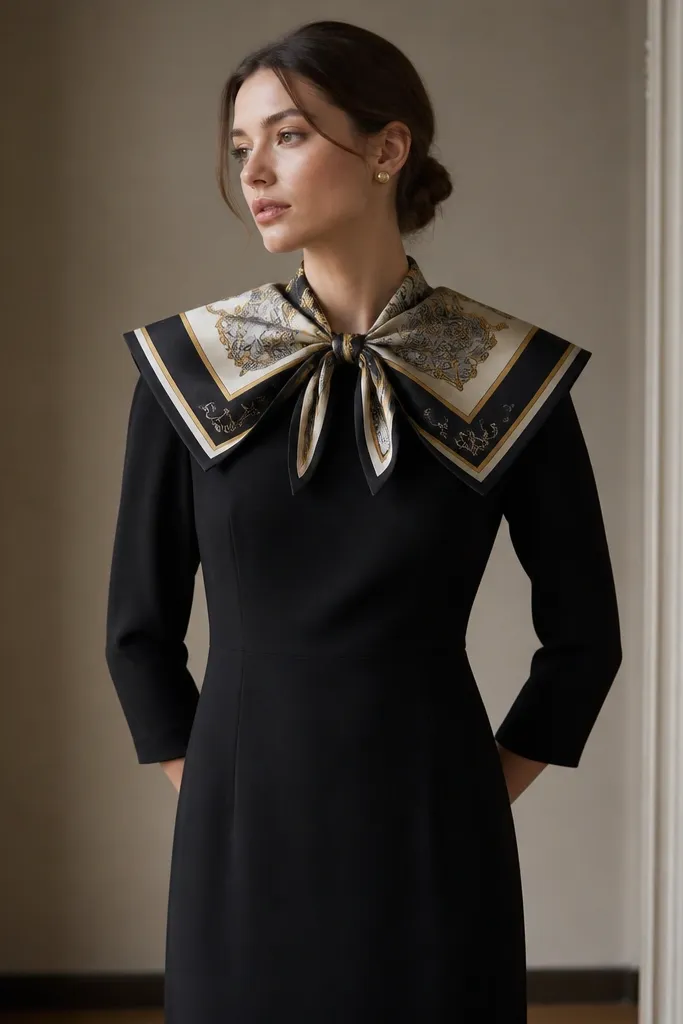
Choose a scarf with a sturdy weave (silk blend or thick polyester). Fold it into a wide V shape at the neck, then pin it onto your dress. Use fusible iron-on web or hot glue along the inside fold so it holds shape. Create a throat tie using a thin ribbon or the scarf tail.
This reads modern because the collar is the only big move and it frames the face with clean geometry. Scarves have already-finished edges, so you don’t fight fraying. The silk sheen looks expensive under party lights. It’s a “princess” idea without the full costume weight.
One warningDon’t use a super thin scarf — it collapses and looks like a neckerchief.
Quick tipTest the collar height by standing 6 feet from a mirror — if it hits your chin, lower the V by an inch.
7. Oversized Hoodie Magician Street Sorcerer
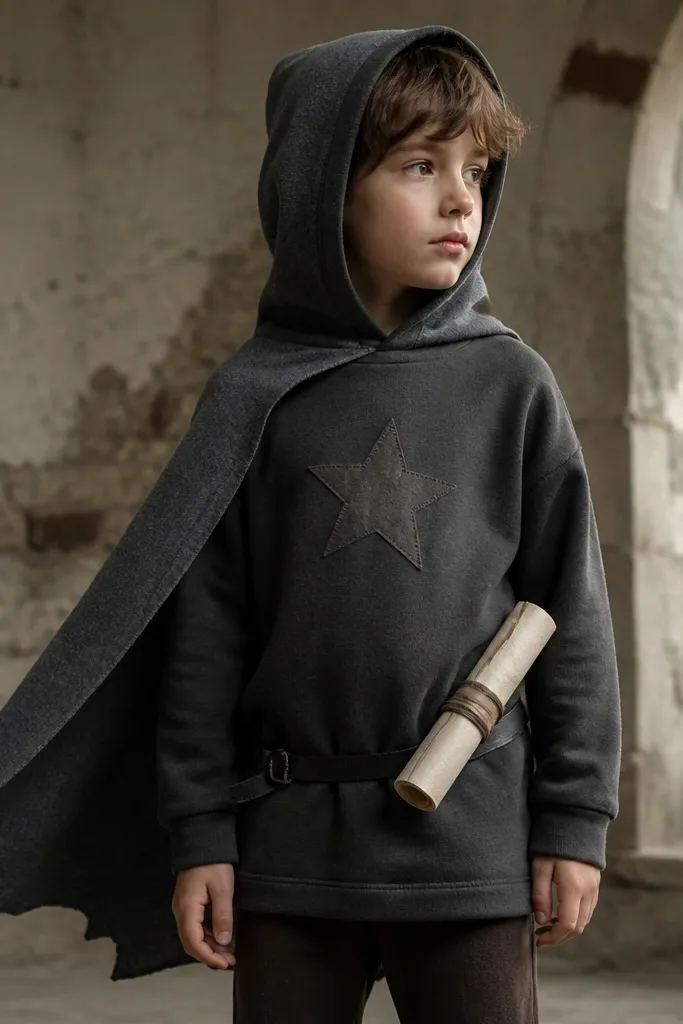
This is modern sorcery because it stays street-level: hoodie, boots, and one cape line. The faux-felt cape gives the “wizard” silhouette without dragging fabric everywhere. Star patches look good when they’re matte, not glittery. The scroll prop adds story and gives you something to hold.
Cut a cape from black felt that is 24 inches long and 30 inches wide. Attach it to the back of the hoodie with hot glue along the top edge, then stitch if you have time. Add a felt star (3-4 inches wide) to the chest. Roll kraft paper into a scroll, tie with twine, and tuck into a belt loop made from scrap fabric.
Use a cape that hangs just below your waist so it doesn’t swallow your silhouette on camera.
Skip glitter glue on felt — it sheds and stains hands.
8. Warehouse Chic White Shirt With Fabric Pocket Map
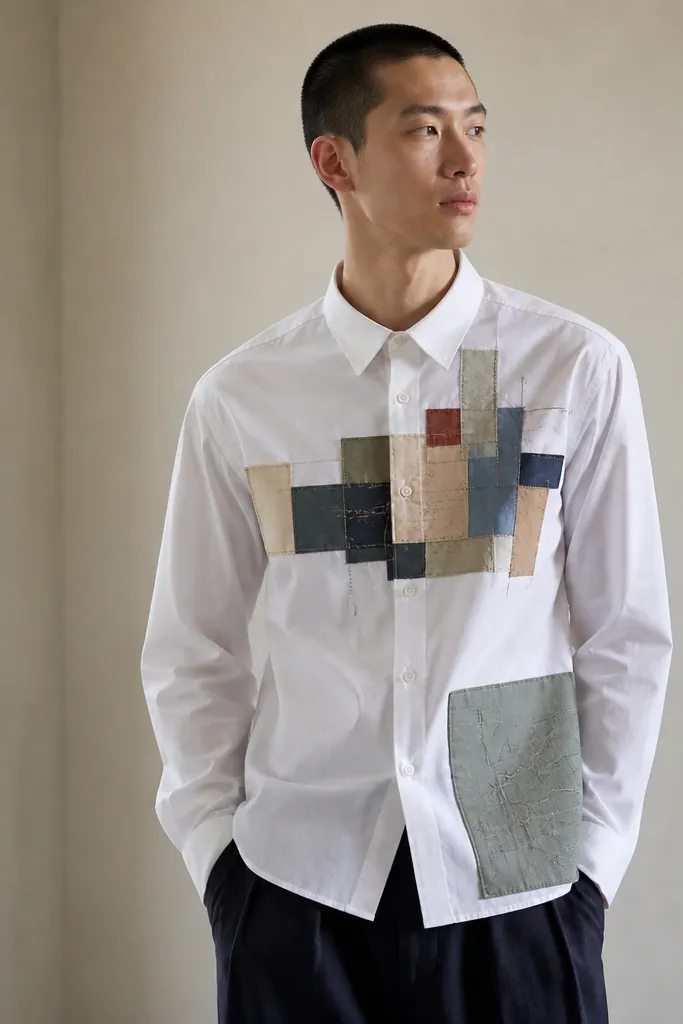
A plain white shirt becomes costume-grade when you add a map-like chest panel. The modern look comes from the clean button-up base plus a graphic patch layout. Fabric rectangles in muted colors (olive, rust, denim blue) look intentional and not like random scraps. It’s great for parties where you want “costume but I still look like me.”
Use a white button-up. Cut fabric rectangles 2x3 inches and 3x4 inches from leftover denim, canvas, and cotton. Arrange them in a grid on the chest and hip, then glue along the edges with fabric glue. Press with a warm iron through parchment paper if your glue allows it.
Keep the rectangles within a 7-inch wide band on your chest so it reads as one design.
Don’t cover the whole shirt — one graphic zone looks more modern than scattered patches.
9. Raincoat Slicker With Reflective Stripe
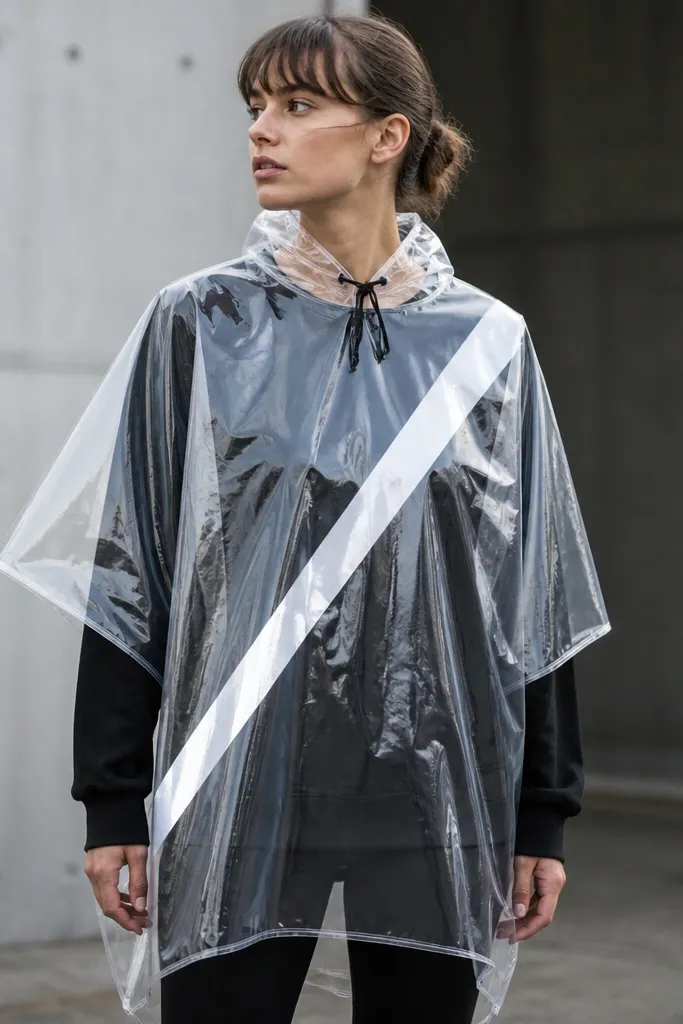
Buy or borrow a clear poncho and lay it flat. Apply reflective tape diagonally from one shoulder to the opposite hip, pressing edges firmly. Add a cinch cord at the hood using cord ends and a small knot so it frames your face. Wear dark layers underneath to prevent the poncho from looking washed out.
This is the quickest modern costume I’ve made for last-minute invites. A clear poncho already has that “slicker” shape, and the reflective stripe turns it into a designed look. It looks great in motion because the stripe catches light as you walk. You can keep your shoes and bag normal.
One warningAvoid cheap reflective tape that peels when stretched — press it flat and test on a small corner first.
Quick tipUse one stripe only. Two stripes look like a safety vest.
10. T-Shirt to Crop Cape With Binder Clip Closure
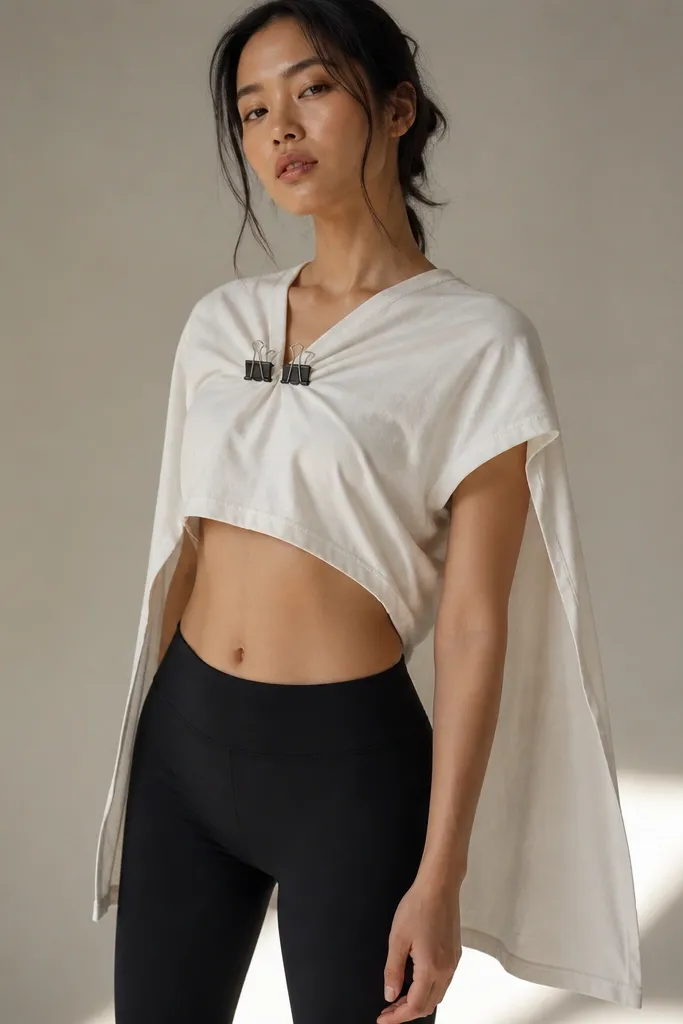
A cape without sewing is a lifesaver, and binder clips give it a modern, industrial feel. The cape drape looks intentional when the fabric falls straight from the shoulders. This idea is also easy to adjust for height and comfort. It reads “fashion costume” instead of “homemade.”
Take a long T-shirt and cut off the bottom hem so it becomes a long panel. Cut two neck holes about 6 inches wide total and pull the fabric over your shoulders. Secure the front with two binder clips where the overlap sits at your sternum. Pair with black leggings or jeans for a crisp silhouette.
Trim the cape length so it hits mid-hip — too long looks like a blanket.
Don’t use a stretchy fabric that rolls at the edges — choose cotton jersey or stabilize with a strip of iron-on tape.
11. Felt Flower Headband Pop Art
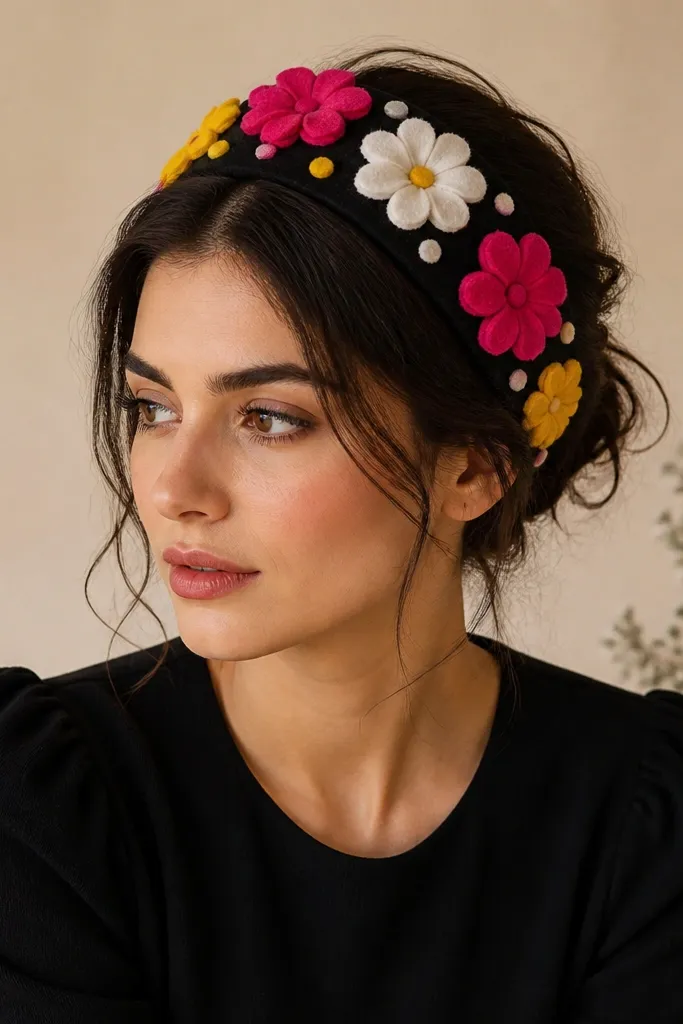
Use a wide black headband or a thick elastic band. Cut 3-4 flowers using felt circles layered into petals, 3 inches wide each. Glue them in a cluster across the front, then add small felt dots between flowers. Wear with a black top and minimal jewelry so the headband is the whole point.
Pop art works because it’s bold and graphic, and a felt headband is the fastest way to get that look. You don’t need a full outfit build — the headband does the heavy lifting. Felt flowers look clean and matte, which reads modern under harsh lighting. The black base keeps it wearable.
One warningSkip fabric glue that stays tacky — it attracts lint and looks messy by hour two.
Quick tipMake the biggest flower about the width of your forehead — if it’s smaller, it reads like a craft accessory.
12. Upcycled Denim Skirt With Safety Pin Studs
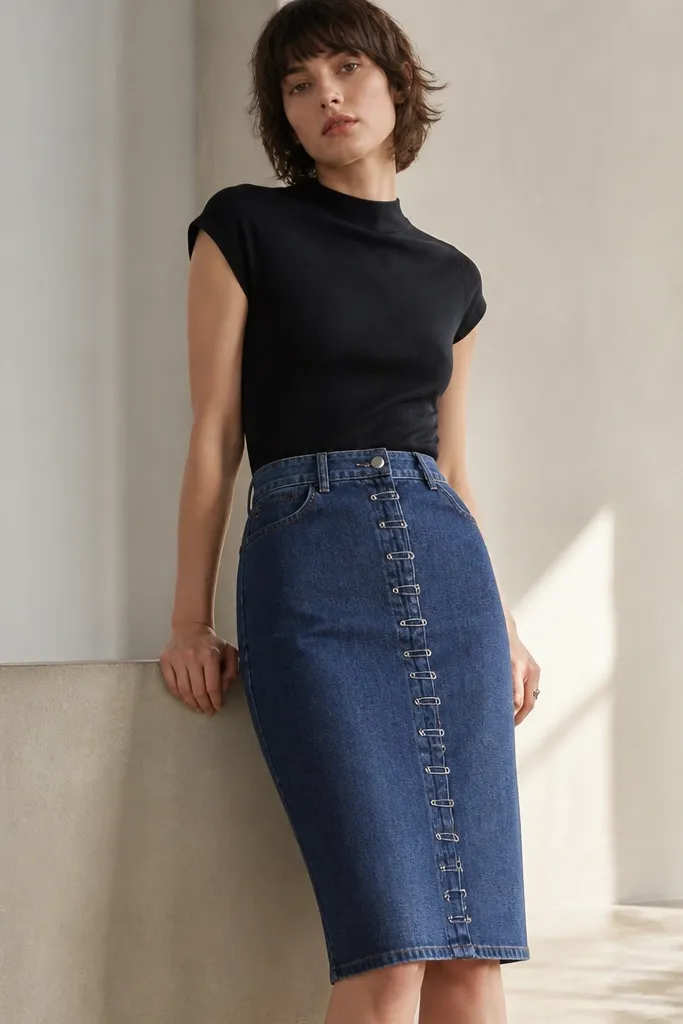
Safety pins look punk, but evenly spaced they read modern and intentional. Denim gives the right weight and texture, so the pins don’t look flimsy. This costume works because it’s mostly your clothing and one controlled detail. It also holds up well if you’re sitting, dancing, or leaning in photos.
Use a denim skirt you can stretch comfortably. Mark a straight line down the front seam with fabric chalk, then place safety pins every 2 inches. Rotate each pin slightly for the “stud” vibe. If you want extra security, hot glue the back hinge to the inside seam.
Lay the skirt flat and measure the spacing before you pin anything to your body.
Don’t pin through thin seams — the pins pull fabric and create holes.
13. Black Turtleneck With Fabric Tube Choker
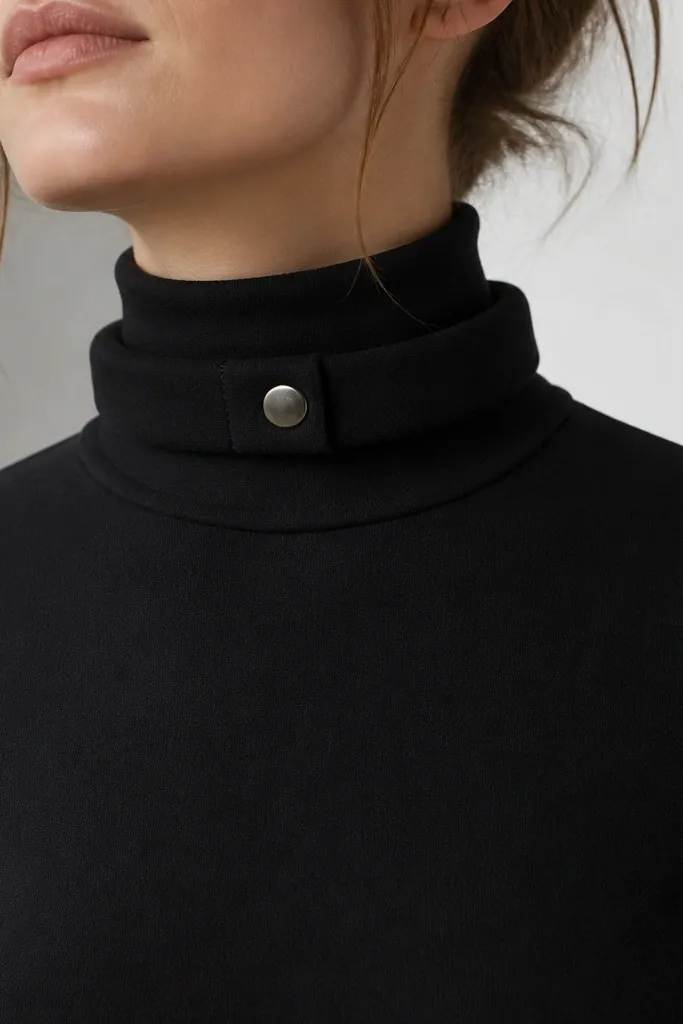
Cut a strip of stretchy fabric 18-20 inches long and 3 inches wide. Sew or glue it into a tube, then fold the ends inward and attach a snap (or velcro). Position the choker snugly above your collarbone. Wear with a black turtleneck or any top with a clean neckline.
A thick choker looks modern because it creates a strong frame around your face and neck. Using fabric tube keeps it comfortable and smooth for a whole night. The metal snap closure makes it look designed instead of improvised. It pairs with any simple outfit.
One warningAvoid stiff ribbon chokes — they cut into skin and look cheap when they crease.
Quick tipMake it slightly higher than you think — it photographs sharper.
14. Laundry Basket Shield Knight
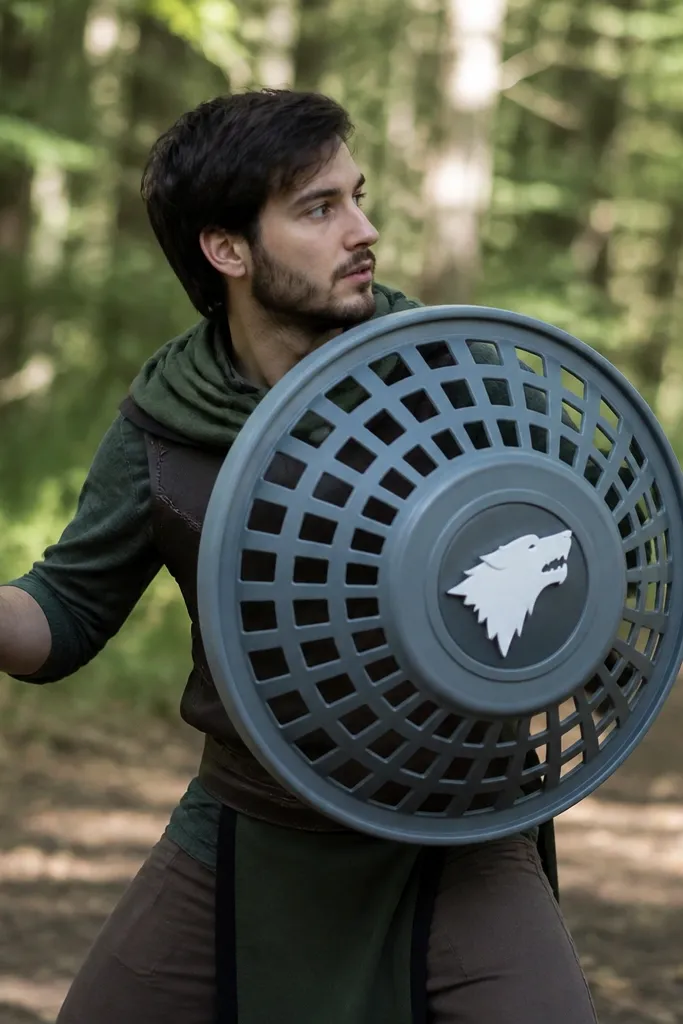
Find a plastic laundry basket with a flat front or choose a section of one panel. Cut a rounded shield shape, then sand edges lightly. Spray paint matte gray, then add a foam emblem (circle, lightning bolt, or monogram) glued at the center. Strap it with elastic across your shoulders and secure behind the back.
A laundry basket shield sounds hilarious, but the plastic holds shape and looks like armor in photos. The modern twist is matte paint and a simple emblem, not a bunch of fake rivets. It’s lightweight and you can move your arms freely. Perfect if your party has a photo booth and you want a clear prop.
One warningDon’t use glossy paint — it reflects harsh flash and washes out the design.
Quick tipDo a quick “arm swing test” — if the shield hits your elbow, trim and re-balance.
15. Sweater Sleeve Arm Cuffs
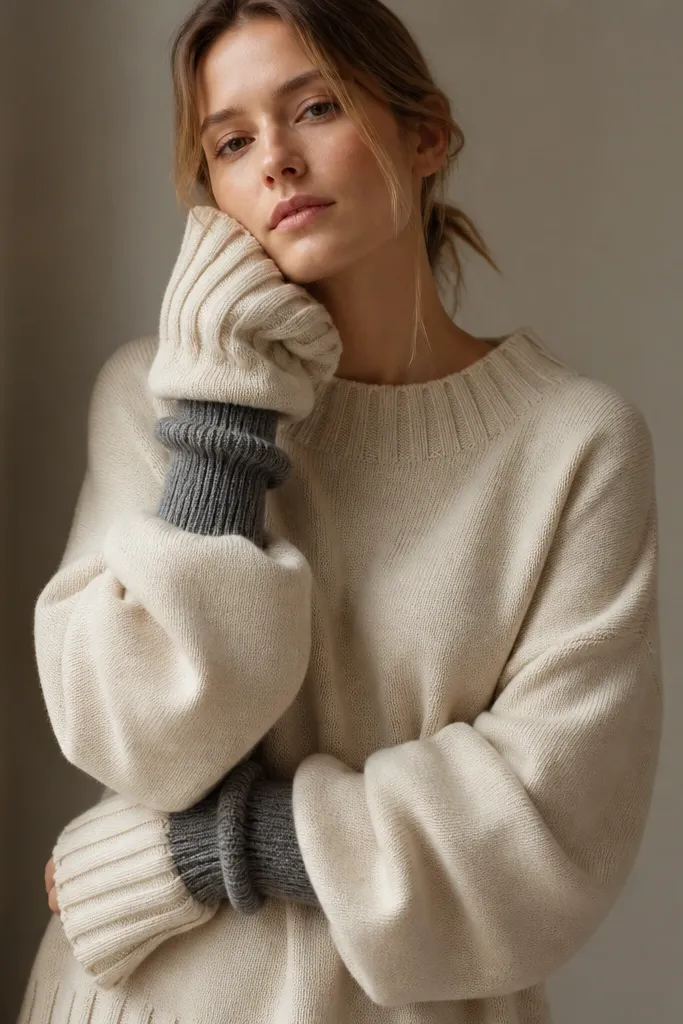
Arm cuffs turn a normal outfit into a costume fast because they add volume at the edges. Knit looks modern when the cuff shape is clean and symmetrical. I like using the sleeves of an older sweater because the texture matches your base clothing. It also feels comfortable when you’re standing around.
Cut two sleeve cuffs from an old knit sweater. Trim each cuff to 6 inches wide and 4 inches tall. Add a contrasting band by cutting a 1-inch strip from a different knit fabric or leftover ribbing and sewing/gluing it along the top. Wear over a long-sleeve shirt with fitted sleeves underneath.
Make both cuffs the same height by stacking them before you cut.
Don’t add too many layers — three stacked knits looks bulky and messy.
16. Black Leggings With Foil Line City Map
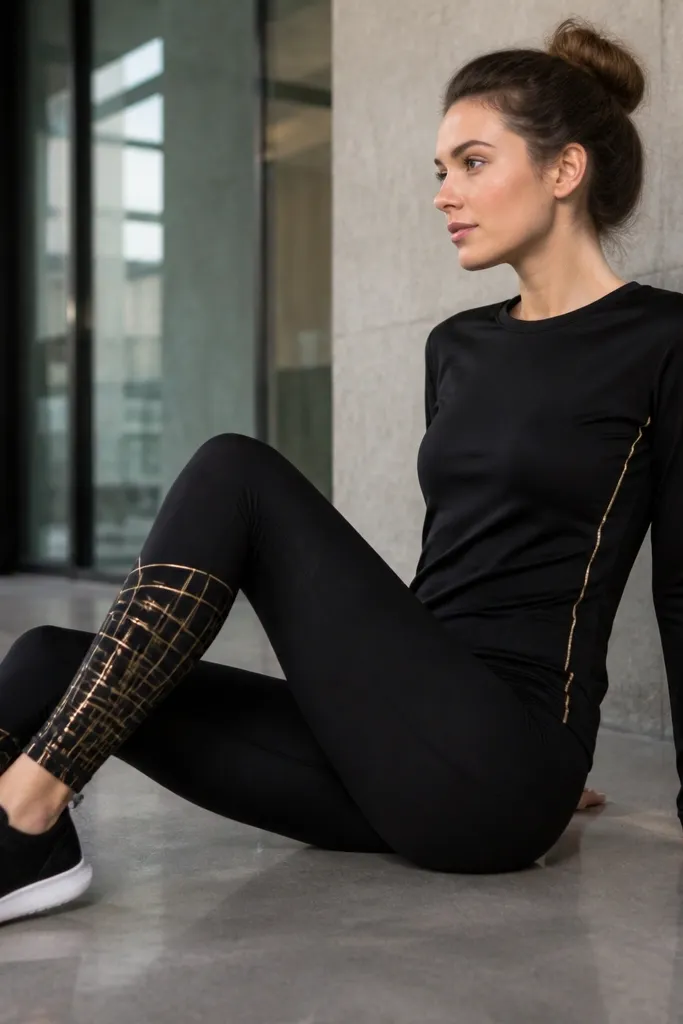
Gold foil lines give a modern “city map” vibe without building a full outfit. The look works because the lines are thin, consistent, and placed along your natural leg curves. Foil vinyl also looks great in flash photography. It’s a clean way to do “tech theme” without electronics.
Use foil vinyl or reflective craft vinyl. Draw a simple street-like pattern on paper first, then trace onto the vinyl with a marker. Press the vinyl onto clean, dry fabric using a heat press or iron with parchment paper. Add one matching stripe on the side of your top so the outfit feels connected.
Keep the patterns narrow near the ankle so they don’t look like thick bands.
Avoid applying vinyl to fabric with lint — it lifts at the edges in a few hours.
17. Recycled Towel Cape Poncho

Cut a towel to about 30 inches wide and 28 inches long. Cut a 7-inch slit in the center for your head, then cut fringe along one long edge (about 1 inch wide strips, stop 1 inch from the top). Tie the belt with a strip from the towel and knot it at your natural waist.
This is a modern cape idea that costs basically nothing if you’ve got old towels. A towel has absorbent texture and holds shape better than thin fabric. Dyed deep teal reads stylish in photos. Fringe at one edge makes it look deliberate instead of like laundry day.
One warningDon’t leave the towel edge untrimmed — raw frayed edges look sloppy beside intentional fringe.
Quick tipIf the towel sheds, wash it once and dry fully before cutting so fringe behaves.
18. Clear Tote Bag Ghost Carry
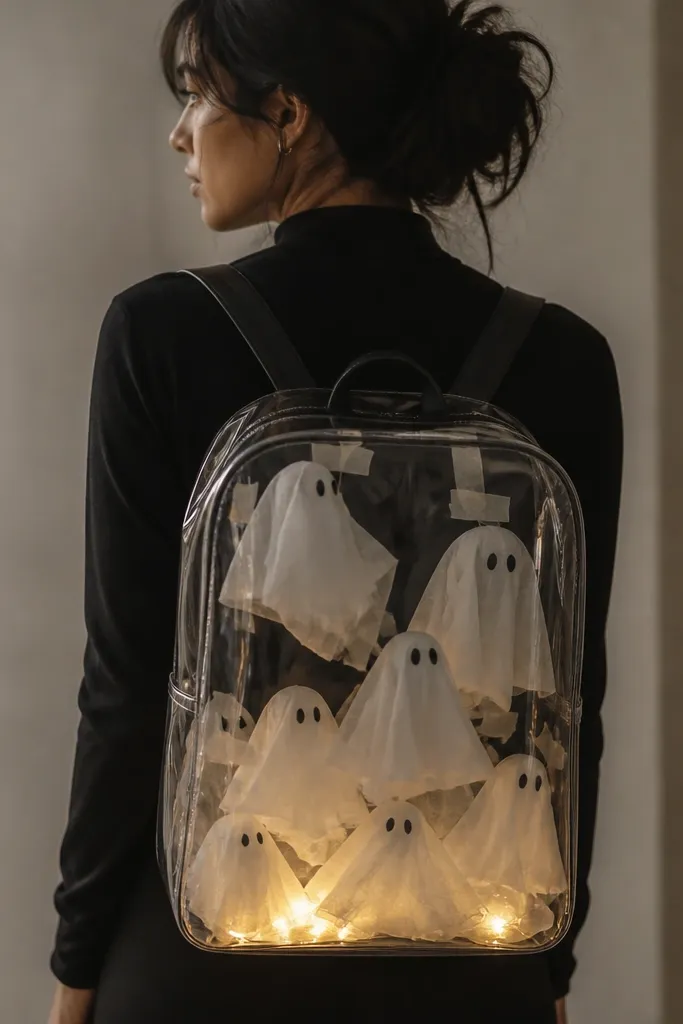
Clear bags are popular, and this turns one into a costume without hiding your clothes. The ghost shapes look modern when they’re simple silhouettes, not detailed cutouts. A small LED light inside creates a soft glow that reads eerie in a good way. You also get hands-free convenience.
Use a clear tote bag or clear plastic organizer. Cut white tissue paper into 6-8 ghost blobs and tape them to the inside walls. Add LED tea lights or a small battery light at the bottom center. Wear black underneath so the white shapes contrast sharply.
Make the ghosts bigger than you think — small cutouts disappear behind the bag texture.
Don’t overload the tote — too many pieces make it look cloudy and messy.
19. Sock Puppet Street Actor
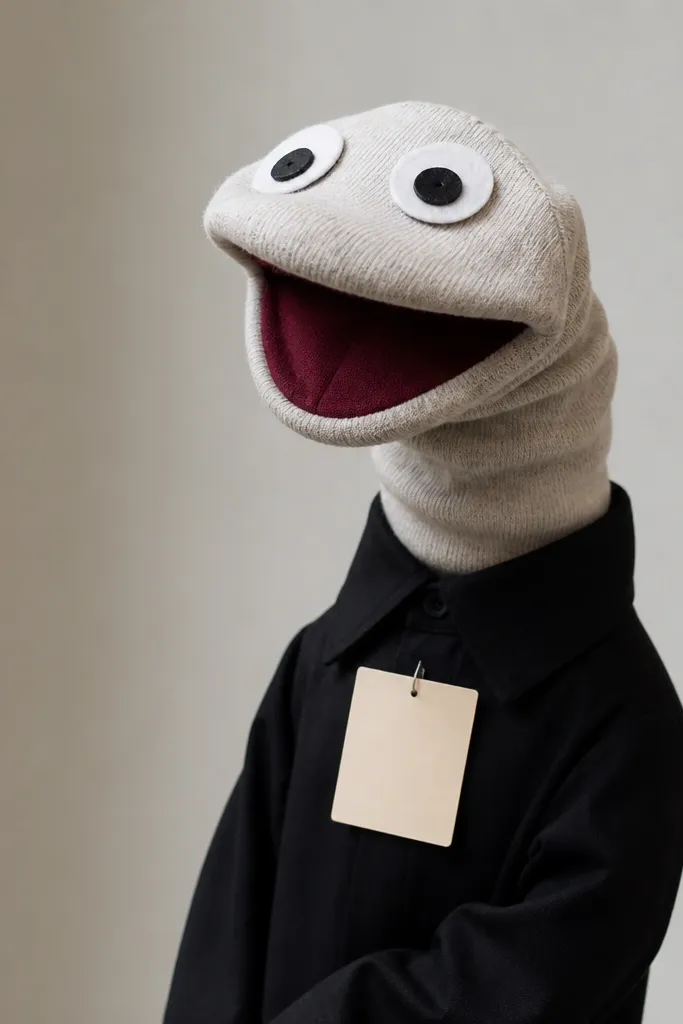
Use a long sock and stuff it lightly with cotton or scrap fabric. Sew or glue two felt eyes (about 1 inch wide) and a felt mouth strip. Add a small fabric tongue using pink felt. Pin a playbill card to your chest — cut it from cardstock and write a short “show title” in marker.
A sock puppet reads modern because it’s playful but controlled. Felt eyes and a simple mouth keep it clean and readable. This costume works best at parties with a lot of people because your puppet becomes an interaction tool, not just decoration. The “playbill” card makes it feel like a concept.
One warningSkip button eyes — they snag on fabric and look unsafe in crowded spaces.
Quick tipPractice two gestures: point with the puppet and tap your chest — it makes the costume feel alive fast.