1. Space Station Gremlins (DIY helmets + matching jumpsuit accents)
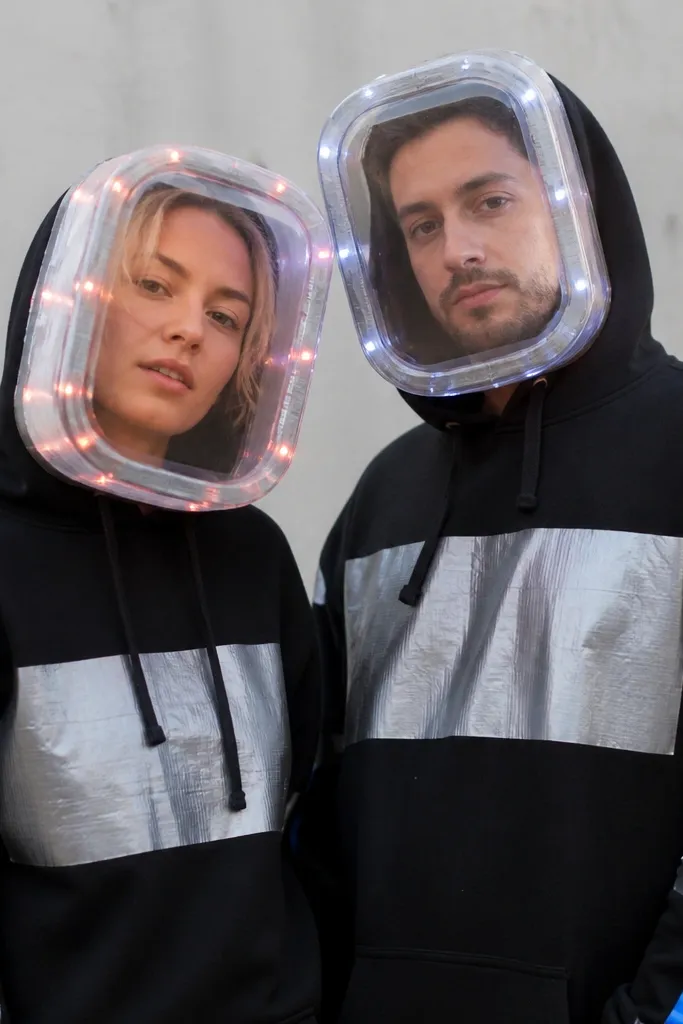
Step 1: Cut a rectangle of silver duct tape for the chest panel on each hoodie, then add two smaller “knobs” with folded tape corners. Place the panels at the same height on both bodies by measuring from the collar seam to the top edge of the panel. Step 2: For the visor, trace a storage-lid shape around a beanie or cap, then cut the plastic and round the edges with scissors. Tape a strip of black fabric or foam around the inside edge to stop sharp contact, then attach tiny LED puck lights around the rim with hot glue. Step 3: Add one stripe — red on one sleeve and blue on the other — using fabric paint or iron-on vinyl, and keep the stripe width the same on both.
This couple idea works because it gives you a strong, readable “tech” cue without needing a full suit build. Start with black hoodies or thrifted black tops, then add silver duct-tape panels that look like control panels. The helmets are the hook: clear plastic over the face makes the look feel sci-fi even in normal lighting. I’ve used this with pale and medium skin tones — the silver catches light and keeps faces from looking washed out. Keep both partners' builds identical except for one sleeve stripe color so the pair looks coordinated but not identical.
One warningAvoid random silver scraps everywhere; it looks like leftover tape instead of a designed control panel.
Quick tipDo a quick test photo with overhead light — if the visor glare is too intense, roughen the plastic with fine sandpaper so it diffuses the shine.
2. Bookstore Spells (DIY labels + matching "librarian sorcery" capes)
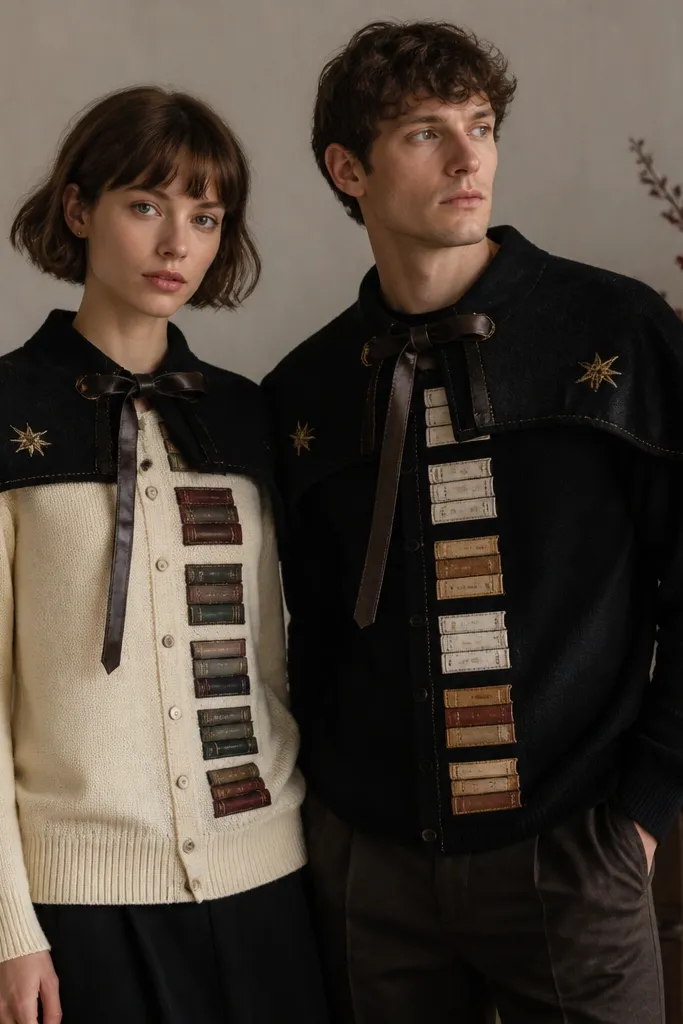
Step 1: Cut two cape rectangles from black felt, each about shoulder-length plus 6 inches, then hem the bottom edge with a zigzag stitch or glue-fold the felt edge. Add small gold star patches at the shoulder corners and stitch them down so they don’t peel. Step 2: Make book-spine labels from cardstock or thin craft foam, then cover with clear packing tape to protect the ink. Sew or glue 5-7 labels in a vertical column down the front of each cardigan/sweater at the same spacing. Step 3: Add a faux leather tie belt using a strip of brown faux leather and a simple knot; keep belt placement consistent so both partners look “cinched” in photos.
This is the costume I reach for when I want DIY to look expensive without complicated sewing. Felt capes read cleanly on camera because they hold shape, and the stitched star patches add a clear “spell” vibe. The book-spine labels give you a story element that’s easy to personalize — you can write titles with fabric markers, then seal with clear fabric spray. It flatters most body types because the cape drapes from the shoulders and the tie belt defines the waist line. I like cream paired with black because it keeps skin tones warm and makes the labels pop.
One warningAvoid printing labels on regular paper and leaving them unsealed; they crease and look cheap fast.
Quick tipWrite labels while the garment is flat on a table so the marker lines stay straight.
3. Neon Laundromat Ghosts (glow trim + matching basket props)
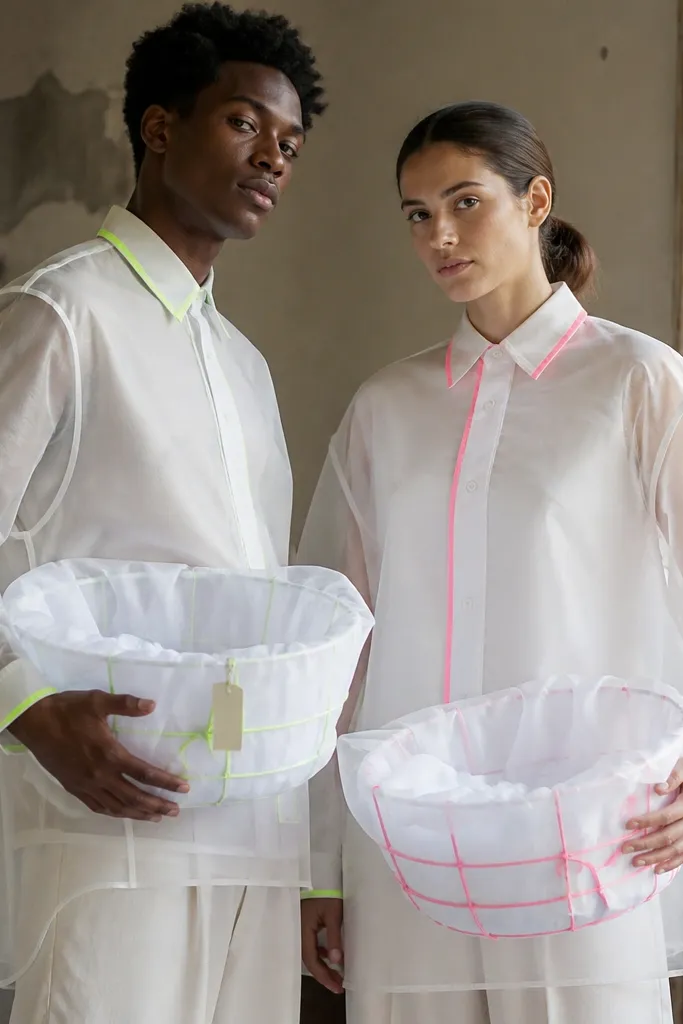
Step 1: Cut organza rectangles and layer them over the front of white shirts like a cape, then hand-sew the top edge or use fabric glue in a straight line. Keep the overlay about 2 inches wider than each torso so it drapes without sticking tight. Step 2: Add glow trim using sew-on reflective or LED strips: start at the collar, then wrap around each cuff at the same height for both partners. Step 3: Build basket props from wire coat hanger frames, wrap with white cotton fabric, and attach a fabric tag with black marker like “RINSE” or “SPIN.” Finally, hold the baskets at hip level so the tags face the camera.
This idea is all about contrast: white fabric looks ghostly, and neon trim makes it feel intentional and modern. Organza overlays move when you walk, so you get a ghost effect even without a full costume build. Matching basket props tie the couple together and give you something to pose with, which matters for photos. It also works for different heights because the overlay length and glow placement stay consistent. I’ve used this pairing on both warm and cool skin tones — the neon colors do the heavy lifting, and the white base keeps the face area clean.
One warningAvoid using thick foam cutouts directly on the chest; they cast harsh shadows and read as craft-store cheap.
Quick tipIf you’re using LED strips, secure the battery pack to the inside seam with a small Velcro patch so you can swap it quickly during the night.
4. Garden Gnomes, But Make It Punk (DIY felt mohawks + plaid belt sets)
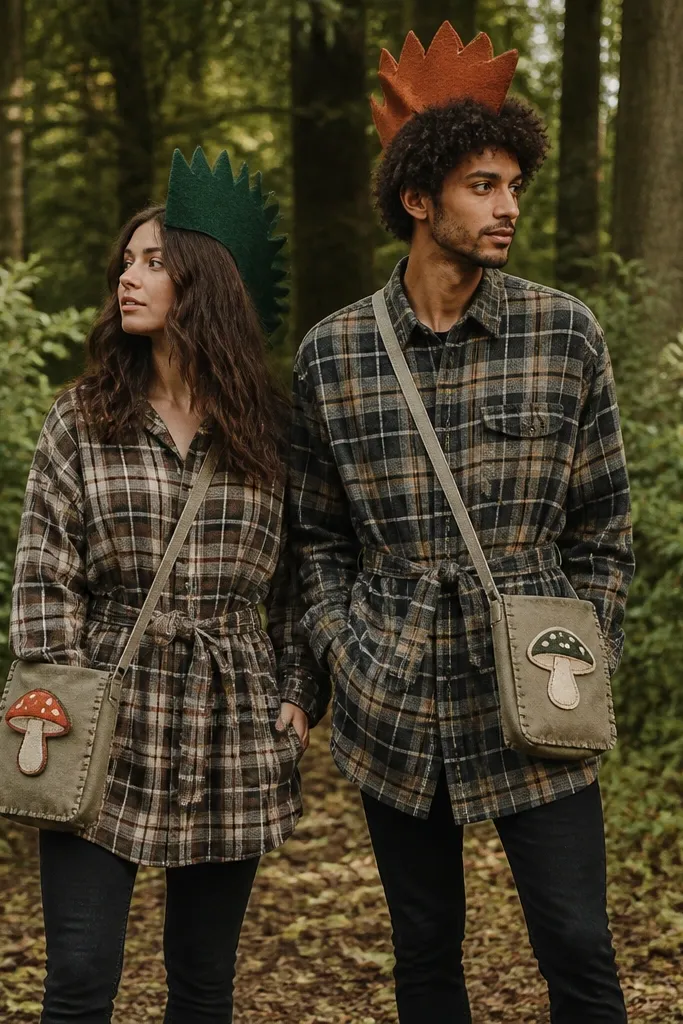
Step 1: Choose matching plaid shirts for both partners, then cut or hem so the top hits just above the knee on the taller person and mid-thigh on the shorter person. Add a belt loop area by sewing two small strips of fabric at the sides where the belt will sit. Step 2: Make mohawks from felt strips — cut a base strip that wraps like a headband, then sew three to five upright “spikes” on top. Use hot glue for quick assembly, then hand-stitch the base for durability. Step 3: Create mushroom patches from felt and stitch them onto canvas satchel bags at chest height. Finish with dark fitted pants and the same plaid belt width on both.
Punk gnomes work because they mash two strong silhouettes: the oversized plaid top and the spiky felt headpiece. Felt mohawks are light, comfortable, and they photograph sharply from the front. The matching plaid belt gives you that couple symmetry even when the mohawk colors differ. This flatters a lot of body shapes because the plaid top adds structure around the shoulders, while fitted dark pants keep the look grounded. I’ve put this together for slim frames and for curvier bodies — the key is keeping the belt at the natural waist so the outfit doesn’t hang like a sack.
One warningAvoid mismatched belt widths; it makes one partner look styled and the other look unfinished.
Quick tipPin the belt placement before cutting anything — moving it 1-2 inches changes the whole look.
5. Cardboard Robot Date (DIY rivets + matching antenna wiring)
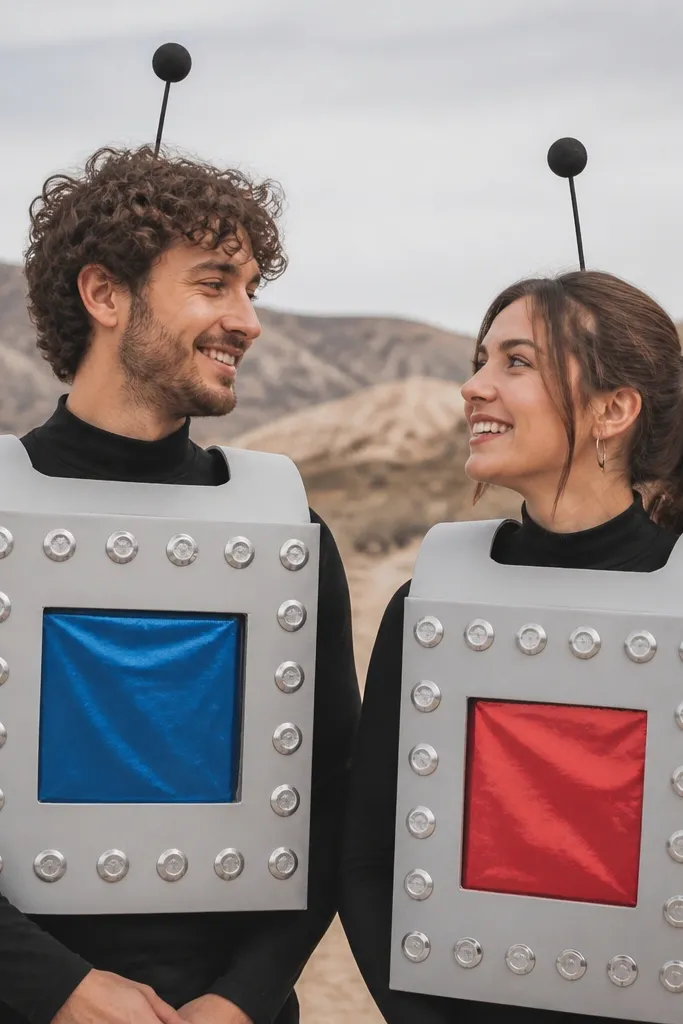
Step 1: Cut chest plates from corrugated cardboard — aim for about hip-to-chest coverage, then round corners so they don’t dig in. Paint the cardboard with matte gray acrylic, then glue on painted bottle-cap rivets in a grid (3 rows works great). Step 2: Attach the plates to a fitted black shirt using elastic straps or wide fabric tape strips at the shoulders and sides. Step 3: Make antennas from thin wire, wrap with black tape, and cap ends with small foam balls. Add the “screen” panel using reflective craft fabric cut into a rectangle, then glue it centered on each chest plate with one color per partner.
This is the easiest way I know to make DIY look graphic and intentional. Cardboard armor reads like a robot body from far away, and rivets give you instant texture. The antenna wiring is a small detail that makes the whole thing feel cohesive when you’re walking around. It also photographs well because the hard edges create crisp highlights. For skin tones, the gray armor keeps everything neutral; the colored “screens” (blue and red) add life without staining the face. If you’re worried about comfort, keep the armor short and use a soft underlayer so it doesn’t scratch.
One warningAvoid leaving raw cardboard edges exposed; they look unfinished in every close-up.
Quick tipSeal the painted cardboard with a thin layer of clear matte spray so it survives sweat and handling.
6. Cinnamon Roll & Coffee Cup (DIY felt food props + matching bows)
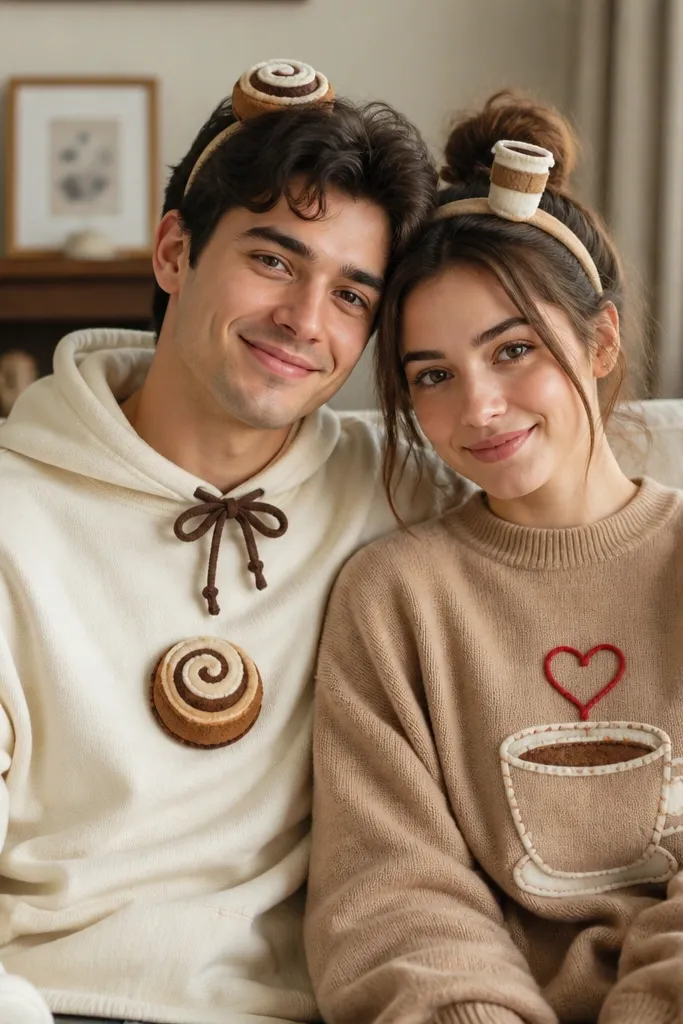
Step 1: Cut felt shapes for the cinnamon swirl: a large spiral base in tan, then a darker brown outer swirl. Pin or sew the spiral across the chest of a cream hoodie at the same height on both outfits. Step 2: Cut a coffee cup outline in tan felt and add a darker brown coffee panel inside it. Add a red heart-shaped steam line using small felt strips and glue it at the top center. Step 3: Make matching headbands: for the cinnamon partner, attach a small felt roll piece to a thin headband; for the coffee partner, attach a tiny “coffee sleeve” rectangle icon. Finish with matching bows at the collar — same size, different color if you want.
Food costumes are where DIY shines because felt props make everything cute fast, and you don’t need complex construction. The cinnamon swirl and coffee cup shapes are large, readable, and they match the couple theme without requiring identical outfits. The secret is choosing one consistent palette: cream, tan, and warm brown, plus one accent color like red. This flatters almost any skin tone because the warm colors sit near your face and look cozy under indoor lighting. I’ve worn this on both tall and short frames — the props stay at chest height, so the scale looks right.
One warningAvoid tiny felt pieces scattered around; big center shapes read better on camera.
Quick tipUse fabric glue for the first tack, then stitch the edges where hands and movement will tug.
7. Mirror Mirror Queens (DIY sequined capes + satin strap belts)
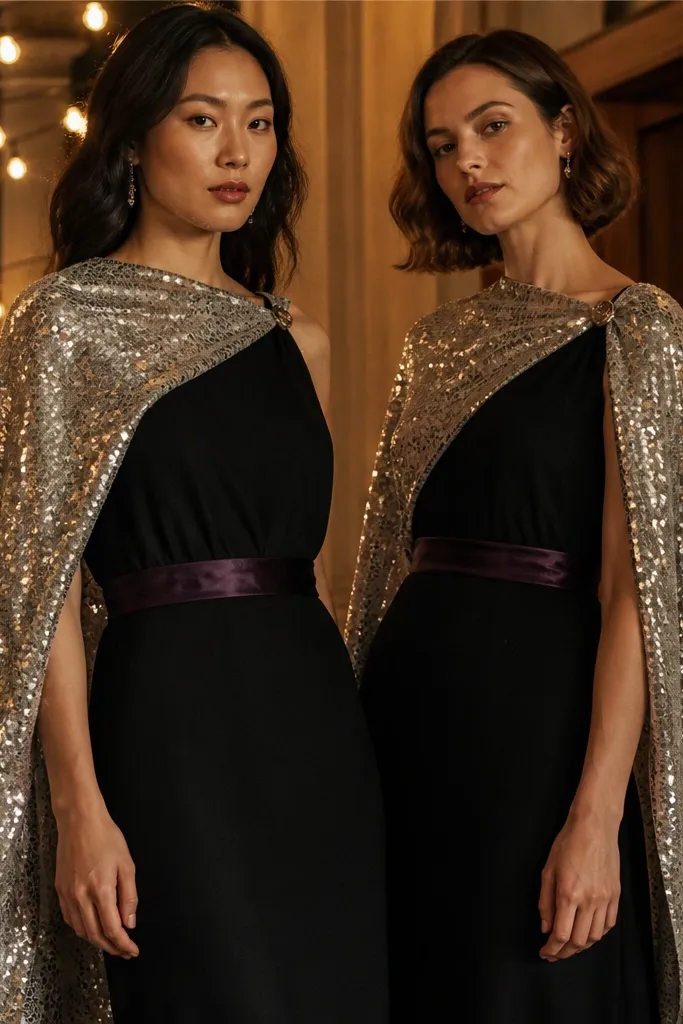
Step 1: Buy or thrift black slip dresses or fitted camisoles, then cut a cape from silver sequin fabric about 30 inches long. Hem the bottom by folding sequin fabric carefully and pinning before sewing so the stitches don’t show. Step 2: Pin the cape at one shoulder so it drapes diagonally across the back, matching the same pin height on both partners. Step 3: Add satin strap belts in deep purple: wrap at the natural waist and tie a knot at the side, then stitch the tail to keep it from slipping. Finally, add minimal jewelry in silver tone so it doesn’t compete with the sequins.
This is a “looks like you bought it” DIY when you do it with the right materials. Sequins create instant drama, but the trick is keeping the cape drape controlled. A black base dress keeps the focus on the cape, and the satin belt defines the waist so it doesn’t turn into a shapeless sparkle cloud. Purple satin is my favorite accent because it adds warmth and makes the silver read richer. It flatters most body types: the slip dress gives a smooth line, and the cape adds movement around the shoulders. Even if one partner has a different bust size, the drape stays flattering because it’s pinned at the shoulder.
One warningAvoid sewing sequins directly into a tight seam on the body; it puckers and looks sloppy fast.
Quick tipWear a slip or thin camisole under the cape so the sequins don’t scratch your skin during long photos.
8. Weather Report Heroes (DIY map capes + antenna hats)
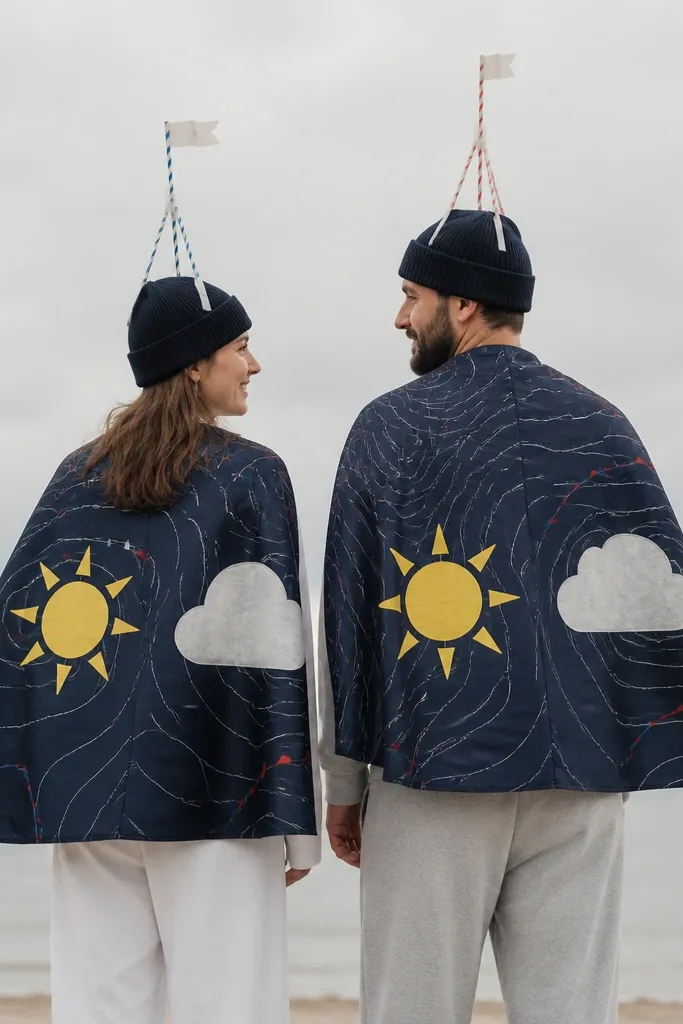
Weather report costumes are clean and graphic, which is why they photograph well. The map cape lets you keep the rest simple, and the icons give you instant clarity: sun for one partner, cloud for the other. Antenna hats are small but they add motion and personality when you turn your head. This works on different body types because capes hide fit issues and the plain tops keep the look from getting busy. I like navy because it looks sharp in daylight and doesn’t turn gray in indoor lighting. If you want uniqueness without chaos, this one nails it.
Step 1: Cut two cape shapes from printed fabric or a printed tablecloth you like — aim for a trapezoid so it drapes without clinging. Hem the bottom edge and reinforce the top seam where it will sit on shoulders. Step 2: Add icons: cut sun and cloud shapes from felt in bright yellow and light gray, then glue and stitch them onto the cape sides at the same height. Step 3: Make antenna hats from straws wrapped with tape, then poke them through a beanie top and secure with a small stitched patch. Add small paper flags at the ends and keep the antenna height consistent on both partners.
Test the cape length while standing — if it hits the knees, it blocks movement and looks bulky in photos.
Avoid using too many tiny icons; the cape should read as weather from far away.
9. Haunted Twin Telephones (DIY cord belts + matching mouthpieces)
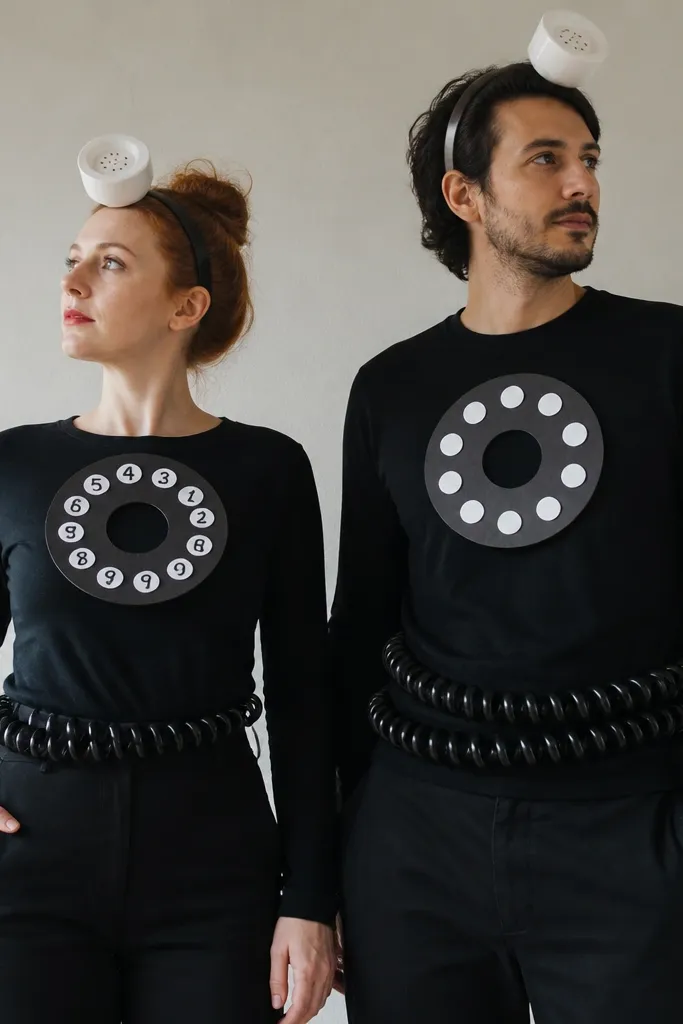
This couple idea is fun because it gives you a strong theme object — the phone — and turns it into wearable shapes. The coiled cord belt makes the silhouette interesting even from the side, and the mouthpiece headband gives you a clear “speaking into the line” pose. The dial graphic on the chest adds a focal point and lets you personalize with a number or symbol. It flatters different heights because the belt sits at the same waist point and the headband stays consistent. For skin tones, the white mouthpiece and dial numbers frame faces and keep the look from feeling too dark.
Step 1: Wrap a coiled cord around each waist, then measure where it sits comfortably while you stand and sit. Make a belt base from black fabric and stitch or glue cord pieces onto it so it doesn’t slide. Step 2: Create chest dials from cardboard circles, paint them white, then paint numbers or symbols in black. Glue the dial to the chest area of each top at the center line, keeping the dial size the same for both partners. Step 3: Make mouthpiece headbands from a white foam strip or thick felt — cut receiver-like shapes, glue them to a headband, and place them so they sit near the corners of the mouth. Finish with matching gloves or simple rings so the hands don’t look bare in photos.
If the cord belt is scratchy, cover the inside edge with felt so it stays comfortable for a full event.
Avoid hot glue only for cord attachments; it peels when you sweat or bend.
10. Royal Trash Astronauts (DIY foil suits + thrifted boots)
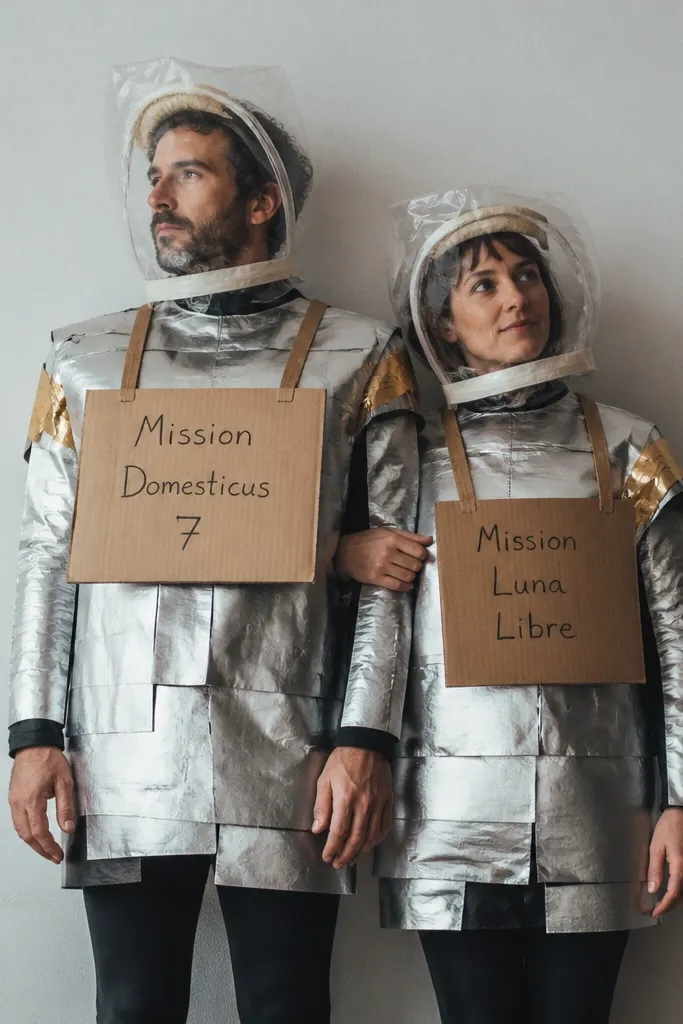
This is the DIY costume I make when I want something weird, specific, and still photogenic. Reflective panels create that “astronaut in a thrift store universe” look, and the cardboard chest plates let you add a personal mission name without buying anything fancy. The helmet is intentionally simple, which keeps the focus on the reflective suit and the couple’s shared story. It works for a range of body types because dark leggings anchor the outfit and the foil panels break up the silhouette. I like gold duct-tape shoulder bands because they add a royal element without needing embroidery.
Step 1: Use dark leggings and a fitted top as the base. Cut reflective material into overlapping rectangles about 4 inches wide, then glue them in vertical rows from waist to shoulder so the suit looks like it has armor plates. Step 2: Make chest plates from cardboard, paint them matte black, then write mission names in white paint marker. Glue plates to the front center, and add two small gold duct-tape shoulder bands at the upper chest like epaulettes. Step 3: For helmets, drape a clear plastic bag over a cap, tape the bottom to the cap, and add a soft cloth strip at the forehead line so it doesn’t press into skin. Finally, keep boots consistent: either thrifted similar boots or the same color sneakers with black socks.
Bring a lint roller — reflective material sticks to fuzz and shows it instantly on camera.
Avoid mixing reflective materials with different shine levels; it makes the suit look patchy.
11. Classic Couple Masks (DIY felt faces + matching monochrome outfits)
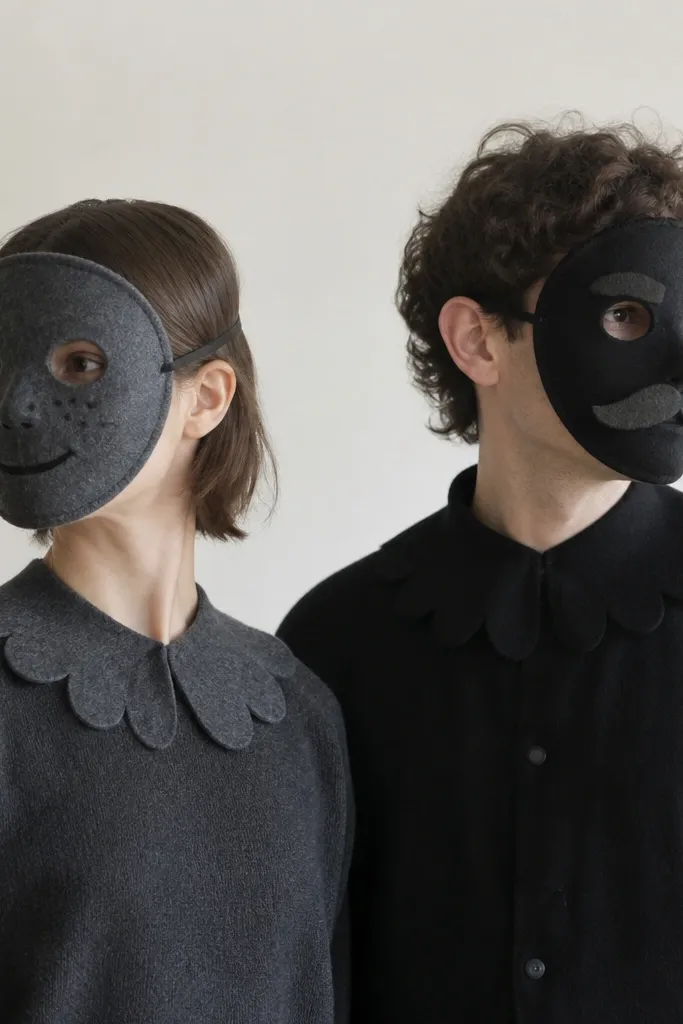
Step 1: Choose two monochrome outfits with the same silhouette (hoodie + pants works, or dress + leggings). Cut felt masks by tracing around a face print on paper, then cut eye holes and a mouth shape. Step 2: Attach elastic bands behind the head by sandwiching the elastic between two felt layers and stitching across. Add details like freckles with small dots of black felt or fabric marker, then stitch a simple felt collar piece at the neckline so both partners share the same finishing touch. Step 3: Keep the mask sizes consistent: measure from eye hole top to chin edge on both masks and match the proportions.
This idea is all about graphic simplicity. When you keep the outfits monochrome and put the “personality” into the mask, you get a clean couple look that doesn’t fight for attention. Felt masks hold shape, and you can make them with simple shapes — no need for sculpting. It flatters basically everyone because the mask frames the face and pulls attention upward. If you have glasses, it also works because you can design the mask with a gap around the bridge area. I’ve done this with couples where one partner is nervous about a big costume — the mask feels playful but still wearable.
One warningAvoid masks that cover too much of the face; they make expressions unreadable and look costume-y.
Quick tipUse two layers of felt for the mask so it doesn’t flop and ruin the photo line.