1. Sock Puppets on the Run (Street Characters)
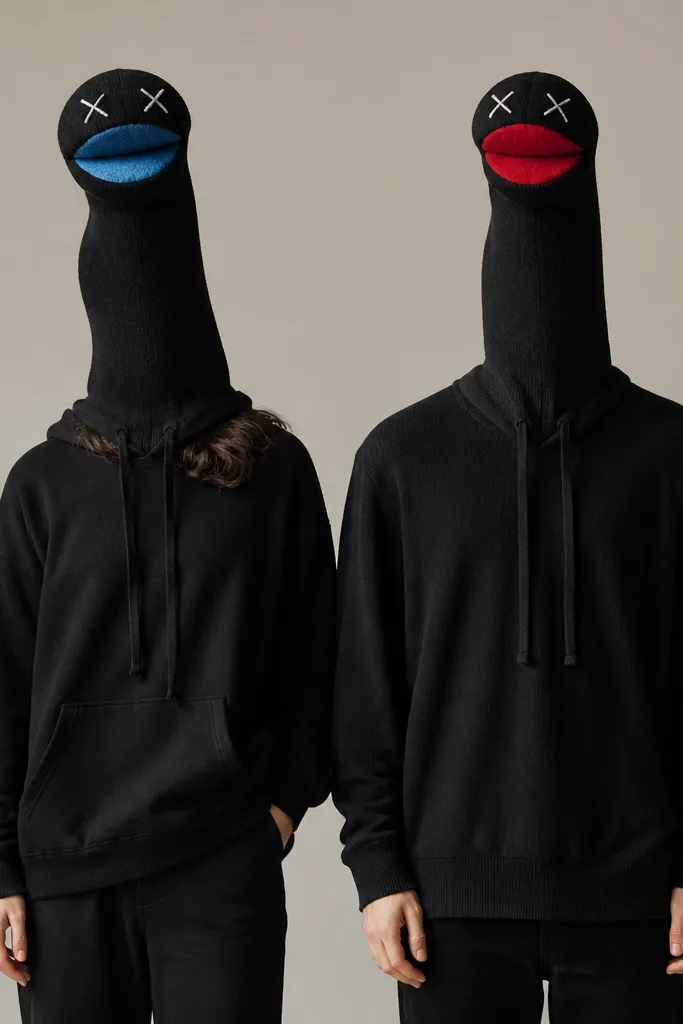
This one is low maintenance because the “costume” is basically a wearable puppet head, not a full outfit. You start with two matching dark basics so the sock puppets pop — think black leggings or jeans and a black hoodie. The sock head works best on people of any height because it hangs from the neck and stays readable in photos. I’ve done this on fair and deeper skin tones, and the felt faces still look crisp because you use white or light fabric for the eyes and mouth. Keep the puppet shape tall and simple; a sock toe automatically gives you a natural snout silhouette.
Start by cutting two old pairs of socks so each sock can become a puppet head — pull the sock toe area forward and pin it to your hoodie string or a strip of elastic. Then glue a felt face: use white felt for the eyes, black felt for pupils, and a contrasting felt mouth (blue or red) centered on the toe. Add two small felt ears on the sides by gluing at the top seam of the sock. Finally, run a quick test walk so the head hangs at chest height and doesn’t swing into your face.
Use low-temp hot glue on synthetic socks and press for 10 seconds so the felt doesn’t lift when you sweat.
Avoid using glitter foam for the eyes; it flakes and looks messy under flash.
2. Thrifted Denim Duo to 90s Band Posters
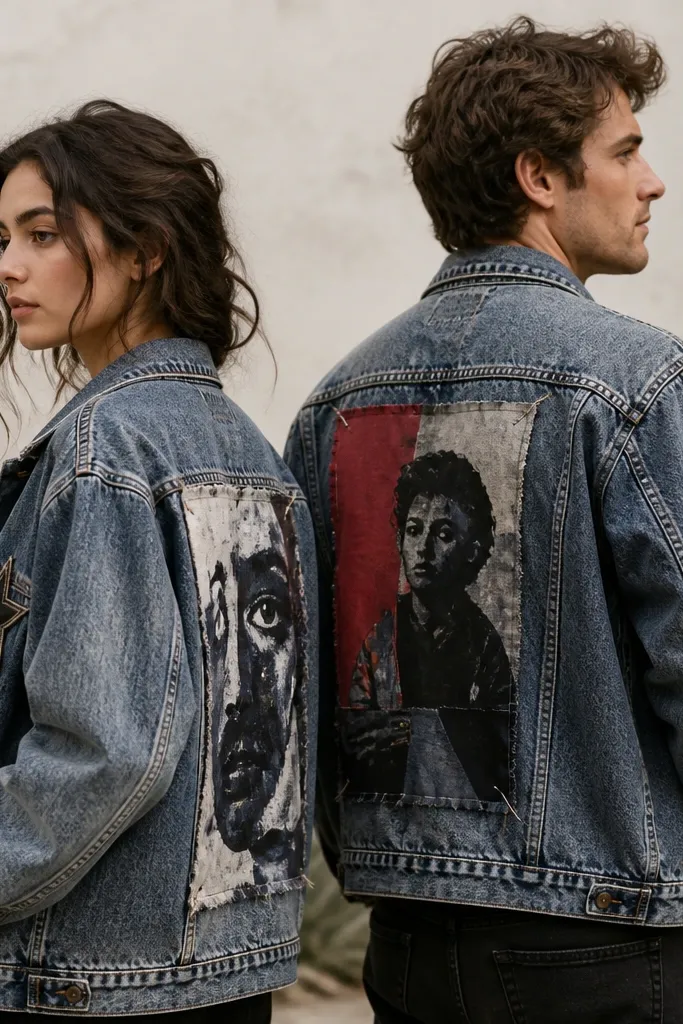
This costume looks like you planned because denim jackets already read “character,” and the poster patch turns it into a story. It’s flattering because denim structure holds shape on different body types — fitted denim jackets skim the torso while the back patch draws the eye upward. Choose one jacket style for both of you, then split the details so it’s a couple without being identical. I like using patch-like rectangles at the shoulder blades because they photograph well at arm’s length. On lighter skin tones, bright poster colors (hot pink, electric blue) pop; on deeper skin tones, use mustard yellow or teal for strong contrast.
Find two thrift denim jackets with similar fit at the shoulders. Cut poster rectangles from cotton shirts or canvas scraps and back them with thin interfacing so they don’t flop; then pin or glue the rectangle onto the center back. Add two matching “poster staples” using safety pins at the top corners for a real, lived-in look. On the front, glue a single felt patch symbol on each jacket — keep them simple and about the size of your palm.
Quick tipPre-wash the fabric scraps so the colors don’t bleed onto denim when you sweat.
One warningAvoid covering the whole jacket with patches; it turns into costume clutter and looks cheap fast.
3. Glow-in-the-Dark Witch and Familiar
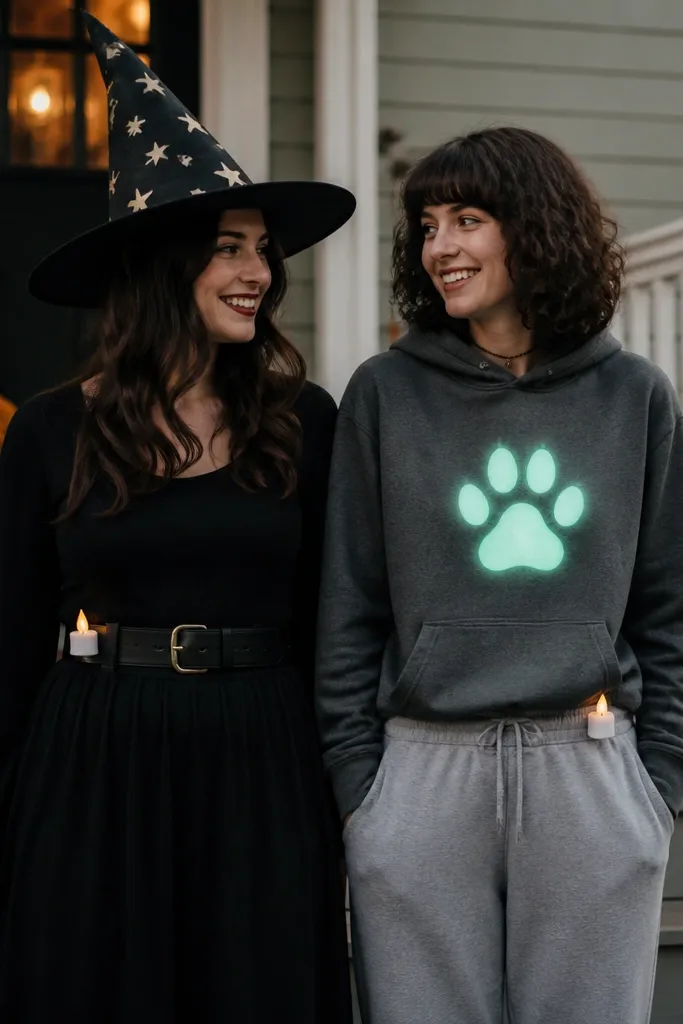
This is low maintenance because you’re not building a full wardrobe — you’re adding a couple of high-impact glowing elements. Start with a black dress or long top for the witch and a neutral gray outfit for the familiar so the glow reads cleanly. The glow-in-the-dark vinyl or fabric paint lines are readable on camera even when the room is dim. I’ve found this works on all skin tones because the glow is the main contrast, not your natural color. Keep the witch hat simple and structured using foam so it doesn’t collapse in photos.
Wear your base outfits, then paint or apply glow paw prints on the familiar chest using glow fabric paint through a stencil. For the witch, use foam for the hat brim and a simple cone top, then glue or sew in a trim of star stickers or glow dots. Add a wide belt from ribbon or thrifted fabric and tuck two small LED tealights into belt loops with a quick stitch or safety pin. Finally, test the glow under your phone camera so you place the brightest elements at chest and hat height.
Quick tipUse a stencil made from cardboard so your glow lines stay crisp instead of blotchy.
One warningAvoid painting tiny details freehand; glow paint exaggerates wobble under flash.
4. Zombie Couple With "Braided" T-Shirt Bandages
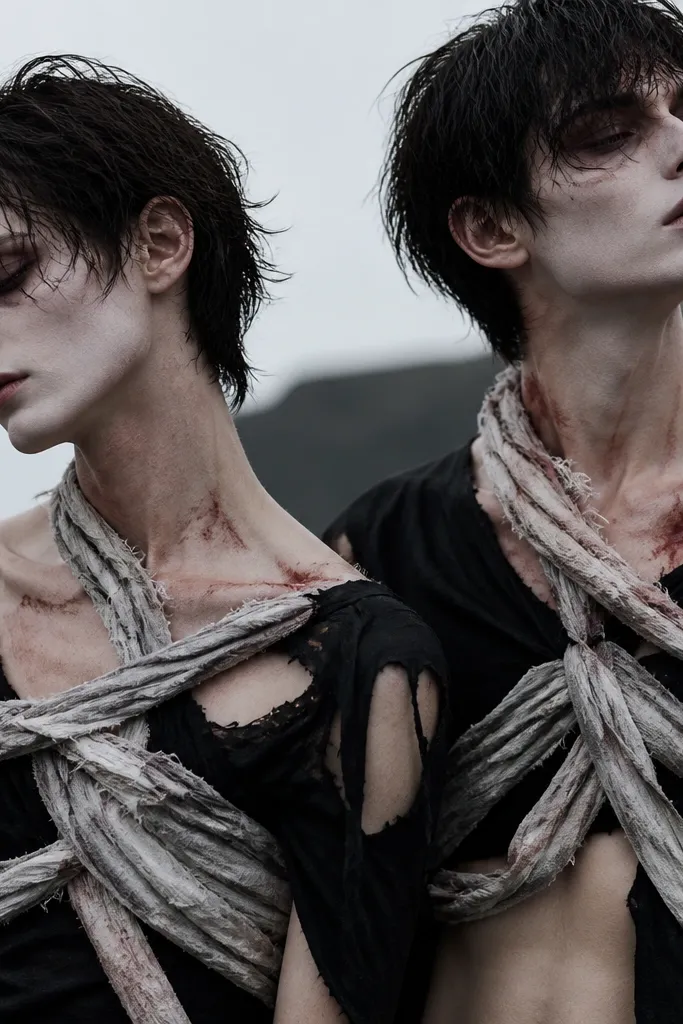
Bandage wrapping looks intense but is fast to do when you use soft cotton strips that conform to your body. This costume flatters because the wrap sits diagonally across the torso and creates a long line, especially if you keep it centered. I’ve used this on petite and taller frames; the braid pattern scales easily because it follows the same chest width. The pale makeup base helps the bandage look “worn,” and the dark stains anchor the look so it doesn’t read as plain Halloween dressing. Keep the palette to off-white bandages and dark gray-black stains for a believable, not-cartoon, effect.
Start by cutting long strips from an old white cotton tee into 1-inch wide bands. Lay strips across your chest in a diagonal pattern and pin or glue the ends to a black wrap shirt so they don’t shift. Braid three strips together near the center chest and glue the braid ends in place. Add fake blood stains at the collarbone and along one shoulder seam using a sponge so the texture looks uneven instead of painted smooth.
Use a damp sponge to dab blood on fabric; it soaks in and looks less shiny.
Avoid using thick, glossy fake blood all over; it looks like candy syrup.
5. Paper Crown King and Queen From Thrift Books
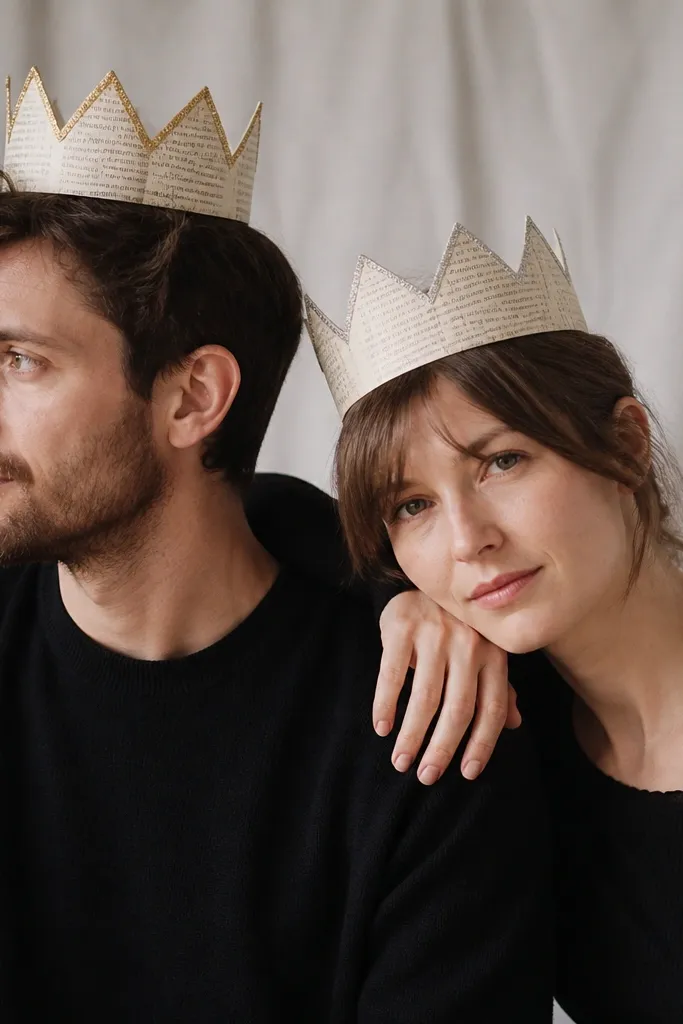
This is one of my favorite low-maintenance couple costumes because the crowns do almost all the work. Wear plain black tops so the paper crowns read as the “royal” element without adding extra bulk. The paper zigzag shape flatters most faces because it frames the forehead and pulls attention upward. It also works for different hair lengths: short hair shows the crown base, long hair can tuck behind it. Choose gold and silver outlines so photos look intentional even in mixed lighting.
Cut crown strips from thrifted book pages and fold them into a band that fits your head circumference plus 1 inch. Score small tabs along the top edge and glue into a zigzag peak pattern. For the king, outline the base and peaks with gold marker; for the queen, use silver paint or glitter pen along the same lines so they match but still feel different. Add a thin ribbon chin tie made from satin scrap so the crown stays put during walking and photos.
Seal the crowns with a light coat of matte Mod Podge so the paper doesn’t curl when you’re outside.
Avoid wetting the paper too much; it warps and makes the crown look uneven.
6. Raincoat Ghosts With Clear Vinyl Windows
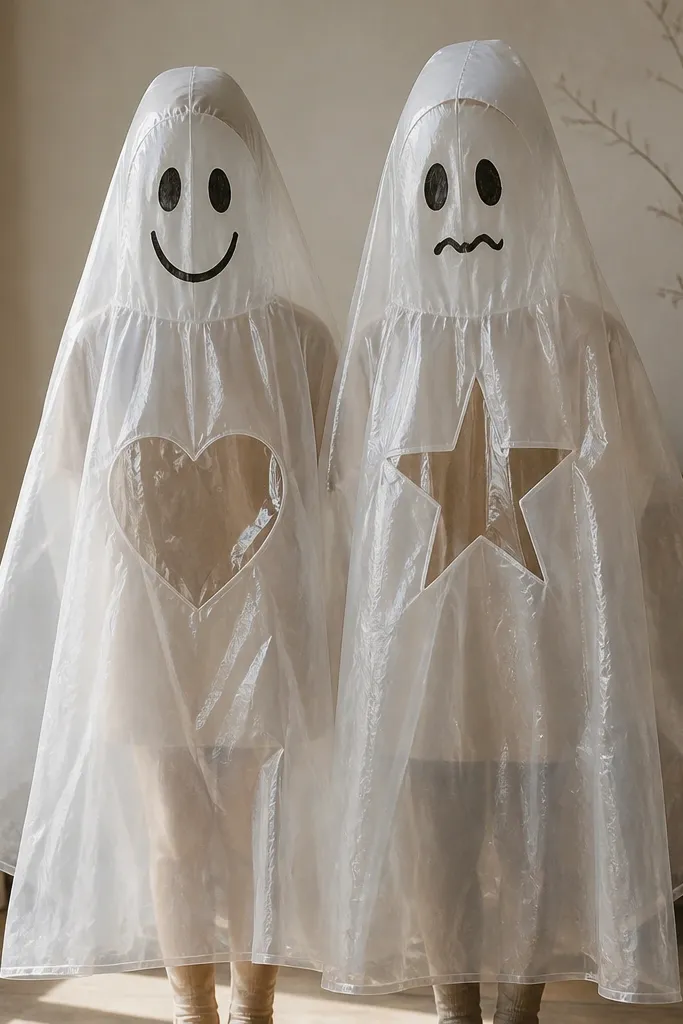
Clear vinyl ghosts look modern and still read as ghosts in daylight. The raincoat shape is low maintenance because you’re working with one garment form; you’re just adding a face and a window motif. It flatters because the loose outer layer hides the body line and keeps the silhouette airy. On deeper skin tones, the black marker face is high contrast; on lighter skin, use thicker black lines and add a gray wash around the mouth. The window shapes give you couple identity without needing matching outfits.
Cut hooded ghost shapes from a clear shower curtain or plastic tablecloth — trace a simple poncho pattern and cut sleeves wide enough for movement. Draw faces with black fabric marker or permanent marker on the front panel. Cut window shapes from a second clear material and glue them over the chest area so they look like “see-through” ghost details. Finish with a ribbon belt tied at the waist so the poncho doesn’t slip when you walk.
Quick tipUse fabric marker instead of regular marker if you want the face to survive light rain.
One warningAvoid tiny facial features; they disappear through plastic and look like blobs.
7. Cardboard Space Suits With Velcro Straps
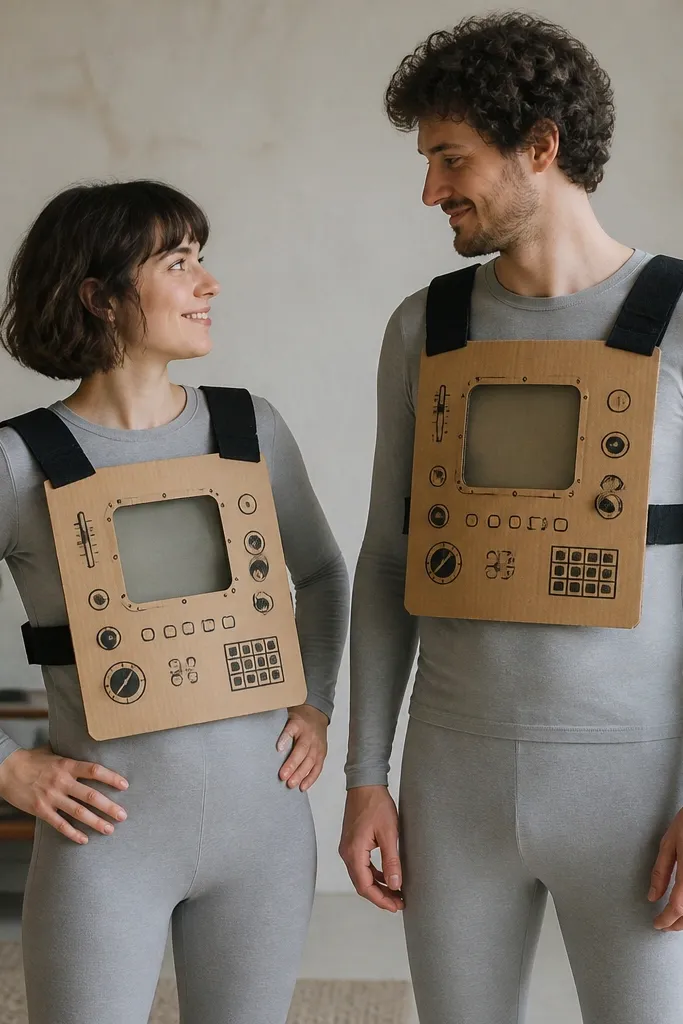
Cardboard armor sounds scary, but it’s actually low maintenance because it’s light and quick to attach over clothes. You get a strong “space suit” look without buying a full costume because the chest panel reads instantly on camera. This flatters most bodies since the armor sits on top of your outfit and doesn’t have to fit perfectly at the arms. I’ve done this on curvy and athletic frames; the Velcro placement lets you tighten where you need it. Use simple gray panels with black marker buttons and a single colored “window” to keep it clean.
Cut chest panels from corrugated cardboard and wrap edges with duct tape so they don’t fray. Draw control buttons with a black marker and add a colored window square using craft foam or colored plastic. Attach the panel using wide Velcro straps — one set over each shoulder and one set around the waist — so the armor doesn’t shift. Wear gray leggings and a long-sleeve top underneath for a consistent base, then add one small accessory: a cardboard “belt tool” glued to a belt strap.
Quick tipSpray a light mist of matte sealer over the cardboard so it holds up for multiple photos.
One warningAvoid hot-gluing cardboard directly to fabric; the seam peels after walking.
8. Matching Totes as "Haunted Mail" Delivery
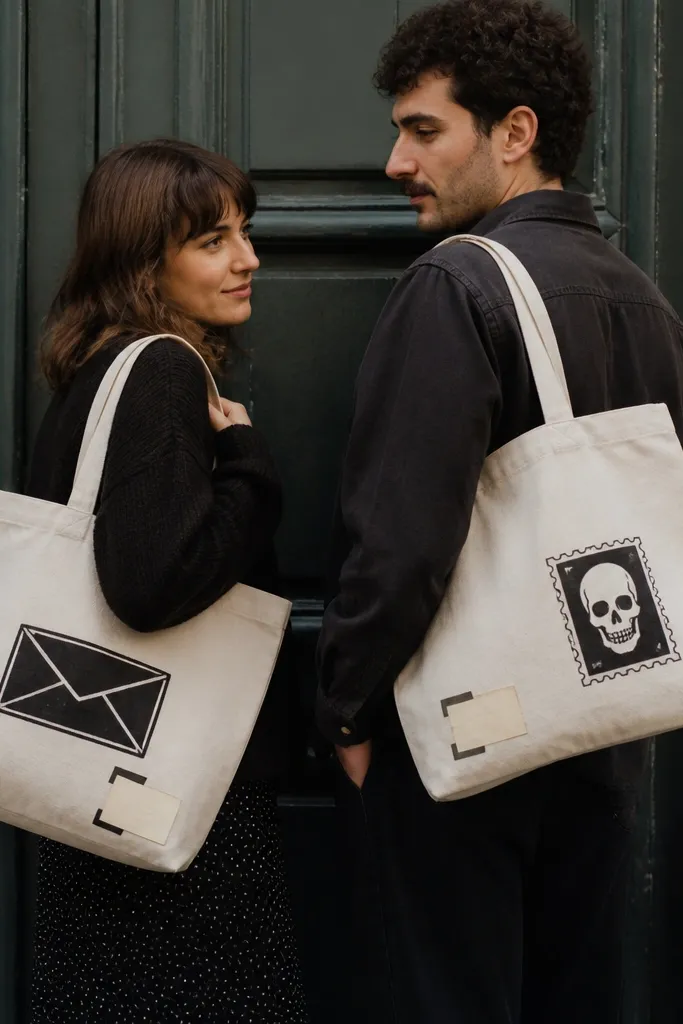
If you want Unique DIY Costume Ideas low maintenance that look thoughtful, do this mail-delivery concept. The totes create the costume identity without requiring you to wear a heavy outfit. It flatters because totes hang at hip level and your body stays comfortable underneath. I like using canvas totes because they don’t crease like thin bags and the paint sits cleanly. For skin tone contrast, keep the icons black and white with one accent color like neon green or blood red.
Find two matching canvas totes from thrift stores. Tape off simple shapes on the tote front and paint haunted icons using fabric paint — envelope, skull, or bat wing — and let them dry flat. Add an address label using paper printed or handwritten, then cover with clear packing tape for durability. Wear plain black or dark outfits underneath so the tote icons are the focal point, and add one matching detail like a ribbon “delivery tag” on the strap.
Quick tipPaint the icon slightly higher than you think; tote straps pull the bag down when you walk.
One warningAvoid watercolor paint; it smears when the tote gets handled.
9. Faux Fur Hooded Beasts From One Jacket
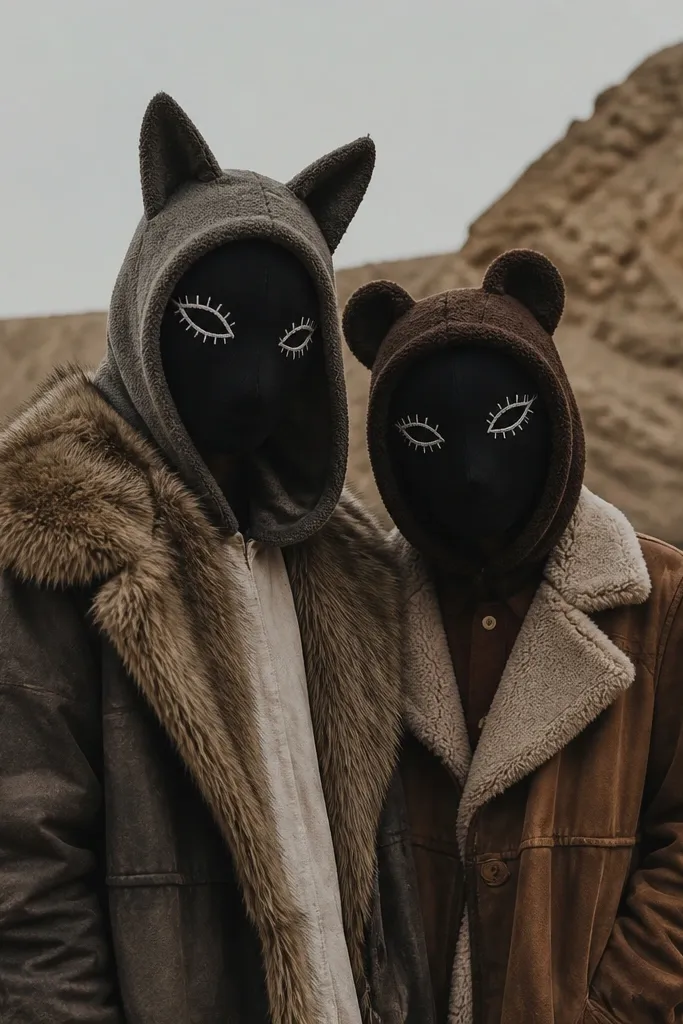
This costume works because it’s built around texture. A faux fur collar and felt ears read as animal instantly, and you don’t need full-body suits. It flatters by adding volume around the neck and keeping the rest simple; that balances slim frames well. I’ve worn this style on people with different skin undertones, and the black mask and white stitched eyes stay readable under flash. Keep the color family consistent: brown and cream for wolf, tan and black for bear.
Start with a thrift jacket that already has a collar or has a removable hood. Add felt ears to the hood using a triangle pattern and glue the base to the inside seam. Sew or glue a simple animal face mask from black felt with white stitched eyes and a small nose patch. Wear the same base outfit under both jackets — black leggings or jeans and a dark long-sleeve — so the animal headpiece is the only variation.
Quick tipUse a mask that covers from cheekbone to just below the nose; it looks like an animal without blocking your mouth movement too much.
One warningAvoid flimsy felt ears; they droop and look unfinished in photos.
10. Couple Bats With Clip-On Wings
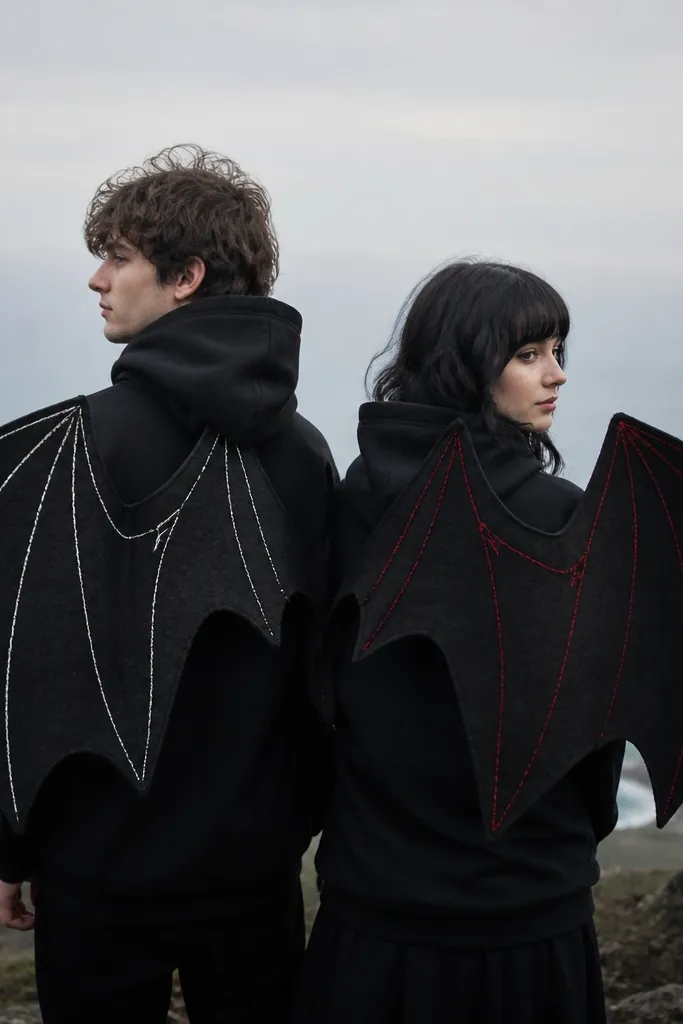
Wings are dramatic, but clip-on wings are the low-maintenance way to do it. You don’t need a full suit; you just attach wing panels over your clothes and go. This flatters because the wings sit behind your shoulders and create a V shape that elongates the upper body. I’ve done this with both skinny and curvy builds; the wing size stays the same and it still reads right from head-on. The wire frame makes the wings hold shape for photos without you constantly adjusting them.
Cut two wing shapes from black craft foam or felt, then insert thin craft wire along the leading edge for structure. Cover the wire with felt strips so it doesn’t poke. Attach wings with two clips each at the shoulder blade area — I use binder clips padded with tape — so you can remove them quickly after pictures. Add vein details using white or red thread by hand-stitching long curved lines across the wing surface. Wear black basics underneath so the wings are the only big element.
Clip wings on while standing and have your partner check from the side; wing angle changes the whole look.
Avoid heavy wings without structure; they droop and look like a costume blanket.
11. Upcycled Suitcase Couple With "Portal" Signs
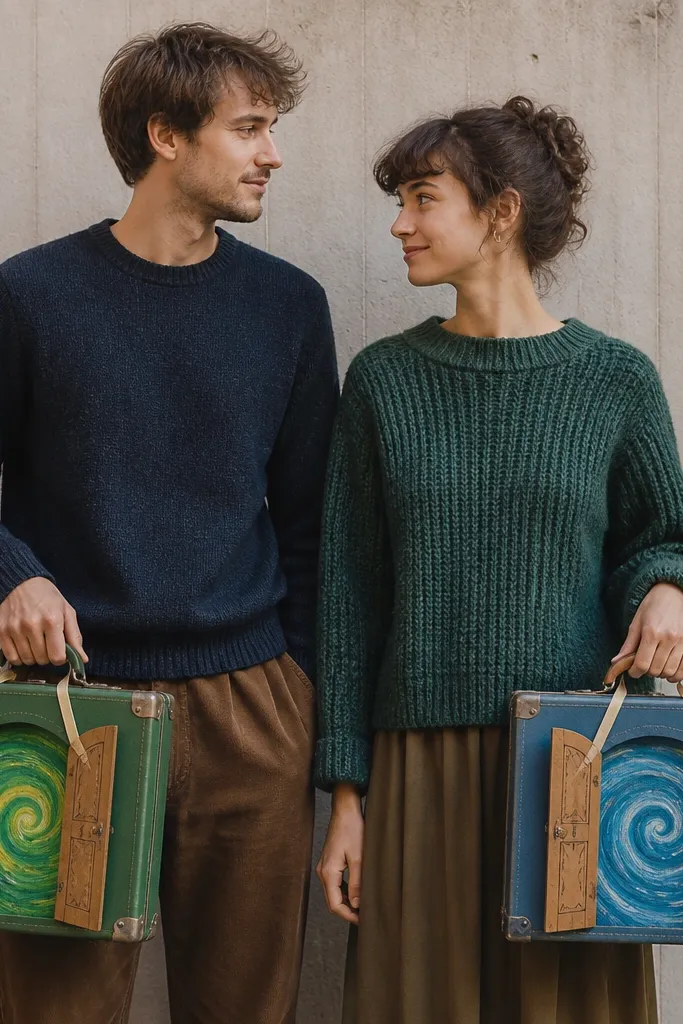
This is a prop-forward costume that looks like a concept photo. Suitcases are already the right shape for handheld or shoulder carry, and they make your pose natural. It flatters because you’re not forcing your outfit to match; the prop does the matching. I like this for couples where one person hates face makeup — you can keep clothing simple and let the portal sign be the main visual. Choose one swirl color for both, then make one suitcase show a star portal and the other show a moon portal.
Find two small suitcases or hard-shell storage boxes from thrift. Paint a cardboard “door” on the front — cut a rectangle and glue it over the suitcase face. Use acrylic paint to draw swirling lines inside the door; keep them thick for camera readability. Attach a ribbon handle loop so you can hold the suitcase at waist height. Finally, add a matching label strip on top — one label reads STAR, the other reads MOON — using printed paper sealed under clear tape.
Quick tipUse a black base coat first so the swirl lines look crisp instead of faded.
One warningAvoid thin paper doors; they bend and make the portal look sloppy.
12. Bride and Groom From Old Belts and Lace Scraps
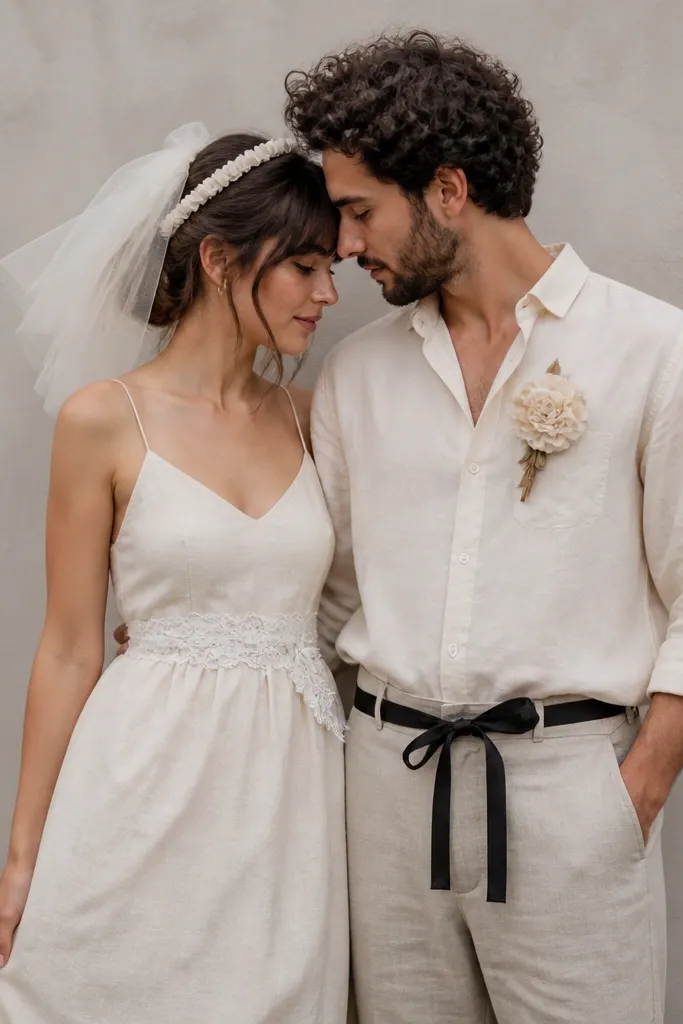
This costume is low maintenance because it’s mostly accessories, not full clothing. You can dress it up or down depending on your comfort, and the results still look like a couple theme. It flatters because belts define the waist and veil pieces frame the face. I’ve used this on different body types by resizing the belt width and placement — higher waist for shorter torsos, lower waist for longer torsos. Lace and tulle create a soft texture that photographs well on both light and deep skin tones. Keep the color palette to white plus one accent like dusty blue or black.
Start with an old belt or thrift belt for each person. Glue lace scraps onto the bride belt in vertical strips so it looks like layered trim. For the groom, wrap a satin ribbon around a plain belt and add a small fabric flower boutonniere clipped to the belt loop. Make a veil from tulle — cut a rectangle, fold it, then pin it to a thin headband so it sits over the forehead. Wear simple solid tops and bottoms underneath so the accessories stay the focus.
Pin the veil in two spots instead of one; it stops fluttering during pictures.
Avoid cheap tulle that tangles; check that it’s soft and not crunchy.
13. Pirate and Compass Mate With Map Fabric Cape
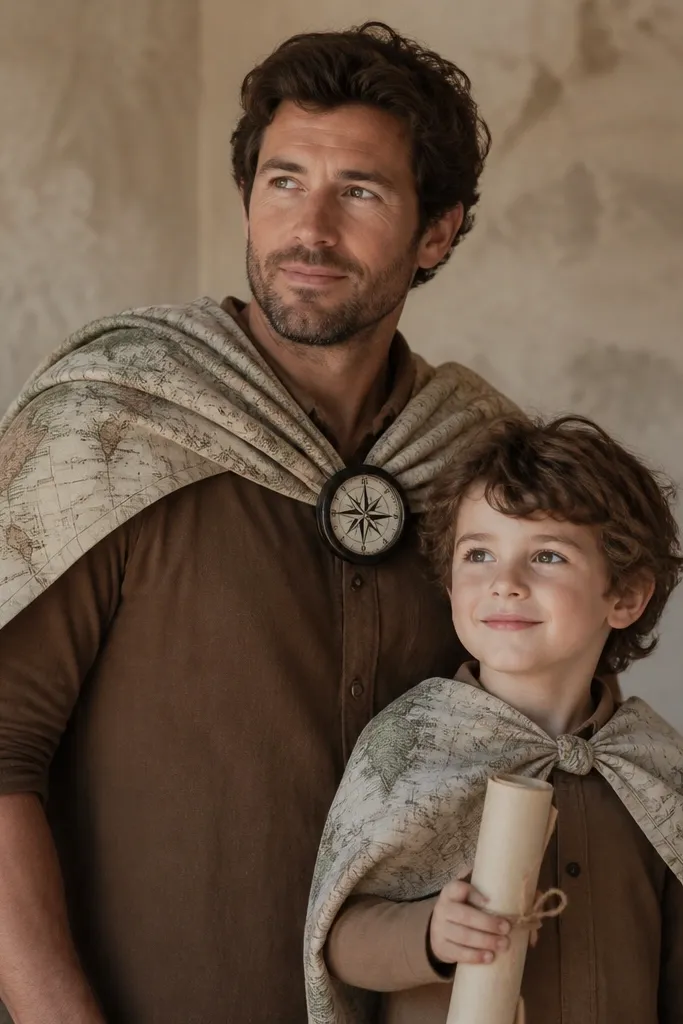
Capes look dramatic but are easy when you use map fabric or even printed bedsheets. The costume flatters because cape drape hides arm bulk and creates a vertical line from shoulder down. It works on different heights because you cut the cape to mid-calf for taller and to knee for shorter frames. I’ve worn map-based costumes in outdoor light; the ink lines stay readable without needing extra details. The compass prop gives you a clear “pairing” so people understand you’re a set, not random pirates.
Cut cape rectangles from map fabric: measure from shoulder to mid-calf and add 2 inches for hemming. Add a simple neck strap using ribbon so it sits securely. For the compass mate, make a foam compass circle and glue it to the chest area over the shirt; draw N, E, S, W with a fine marker. For the pirate, add a small eye-patch from black felt and a rolled paper prop tied with twine. Wear brown or black pants and boots or sneakers with dark soles so the look stays grounded.
Quick tipEdge-seal cape fabric with fray check or a quick zigzag stitch so it doesn’t unravel by hour one.
One warningAvoid capes that are too short; they look like a scarf instead of a pirate moment.
14. Emoji Lovers With Felt Face Patches on Hoodies
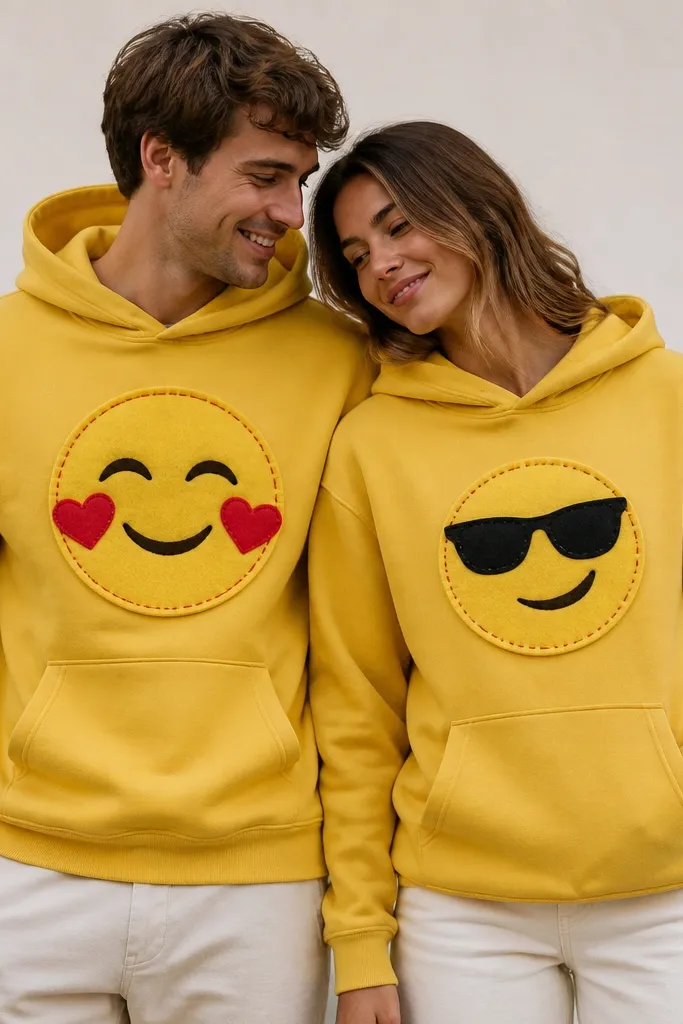
This is low maintenance because hoodies are already comfy, and felt patches are quick to attach. It’s flattering because the patch sits at chest height and creates a focal point that draws attention to your face. Emoji faces look good on all skin tones because the felt colors are solid and bright. Choose one base color for both hoodies (yellow, cream, or black) so it reads as a couple instantly. Keep the face patch about the size of a dinner plate for camera clarity.
Pick two hoodies that match in fit, ideally same brand or similar thickness. Cut felt shapes for eyes and mouth using templates you trace from a phone screen. Stitch the patch edges with thick thread — or glue if you’re rushing, but stitch looks cleaner if you can. Add a small “heart cheek” detail to one hoodie and sunglasses or a star to the other. Finish with matching pants and shoes in neutral tones so the emoji stays the headline.
Quick tipUse white thread for outlines; it makes the felt look crisp in flash photos.
One warningAvoid tiny eyes; they blur at distance and look like random dots.
15. Mismatched Witchy Cauldrons on Belts
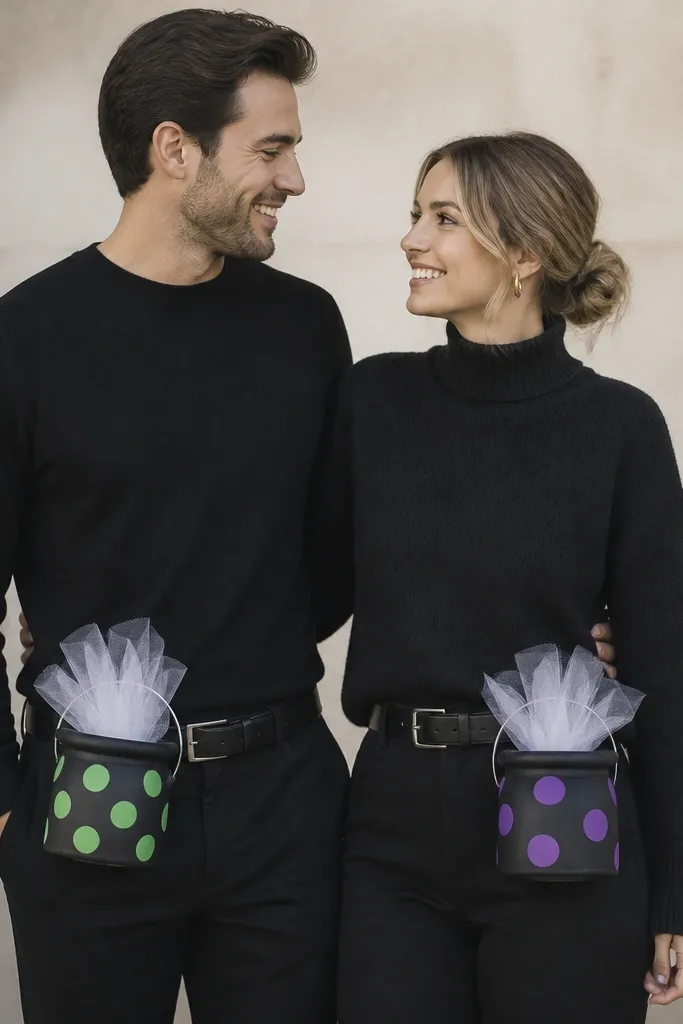
This is a clever low-maintenance idea because the cauldron is a handheld-to-belt prop hybrid. It looks intentional because it sits at waist height and swings naturally with your movement. It flatters by keeping your outfit simple while adding a focal element at the narrowest part of your body. I’ve used it with people who have larger torsos and smaller frames; the cauldron size stays consistent and the tulle steam adds vertical interest. Choose two different dot colors so your couple identity is clear without making you identical.
Start with two small paper buckets or foam cups from craft stores. Paint the outer surface matte black, then add dot patterns in green for one and purple for the other. Glue or staple a handle made from cardboard strip covered with duct tape. Cut tulle strips and glue them inside the rim so they hang like steam. Clip the cauldron to a belt using a small strap of Velcro or a safety pin through a reinforced cardboard tab.
Quick tipMake the tulle steam longer than you think; it looks better in photos when it moves.
One warningAvoid shiny paint; it reflects flash and makes the cauldron look plastic.
16. Dramatic Capes From Bedsheets With Velcro Closures
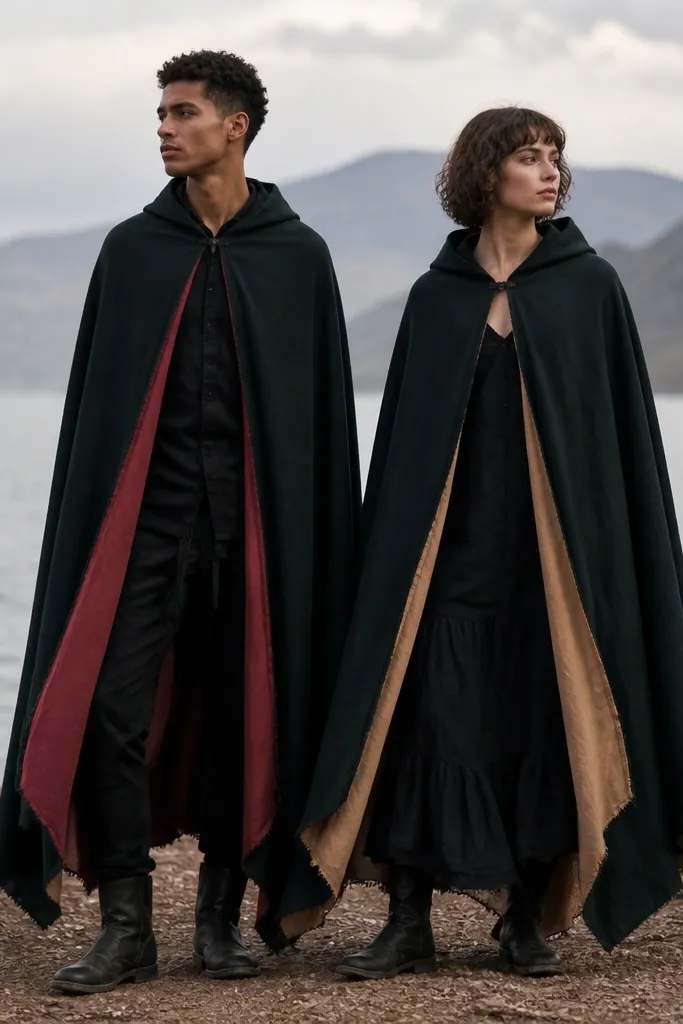
Bedsheet capes are the fastest way to get that “costume” silhouette. The low maintenance part is the closure: Velcro at the chest keeps the cape secure without pins. It flatters because capes create a clean outer line and hide outfit mishaps underneath. I’ve done this for couples where one person runs hot and the other hates tight clothes; capes solve both because they’re lightweight and air moves through. Choose one solid dark color for both and add a different inner lining color so you still look like a set.
Cut two cape shapes from bedsheets: measure from shoulder to mid-calf and cut a half-circle or simple rectangle with a curved shoulder opening. Add a narrow hem or leave a controlled fray if the fabric is thick enough. Sew or glue a Velcro strip at the chest center for each person so the cape closes neatly when you walk. Cut a small strip of contrasting fabric for the inside edge and glue it along the inner front so it shows when the cape moves. Wear dark leggings and boots or sneakers with the same base color.
Quick tipUse fabric glue for the lining so it stays flat — hot glue can stiffen and crack when you fold it.
One warningAvoid slippery satin sheets; the cape slides and ruins the silhouette in photos.
17. Feathered Headpieces From Paper Plates and Felt
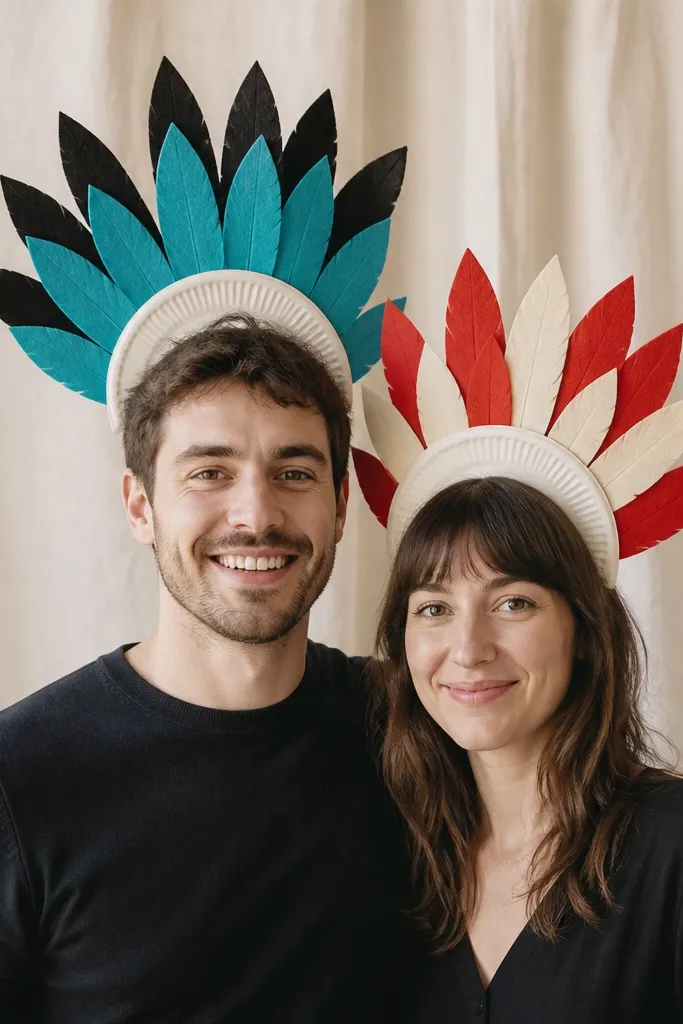
Headpieces are the easiest way to get a “wow” look without building an outfit. Paper plate bases are sturdy and light, so you can wear them for photos without constant adjusting. It flatters because the fan shape draws attention to your face and cheek area, which looks good on both round and angular faces. Choose two complementary feather color palettes so you read as a couple while still feeling different. This style works with short hair, long hair, and braids because the base sits on top and doesn’t need hair to hold it.
Cut two rings from paper plates — about 2 inches wide — and cut felt feather shapes in graduated sizes. Glue the feathers around the ring starting with the largest at the bottom and the smallest at the top. Add a second color accent by using two felt tones in alternating rows. Make a strap using ribbon so the headpiece sits stable; glue or staple the ribbon to the underside. Wear a simple black or dark outfit so the headpiece is the focal point, then add one matching accessory like hoop earrings or a small charm on a necklace.
Quick tipPut the headpiece on and mark the strap position with a pencil before gluing. It stops the “crooked crown” problem.
One warningAvoid making feathers too tall; they block your face in camera framing.
18. Couple "Mini Museums" With Frame-Back Props
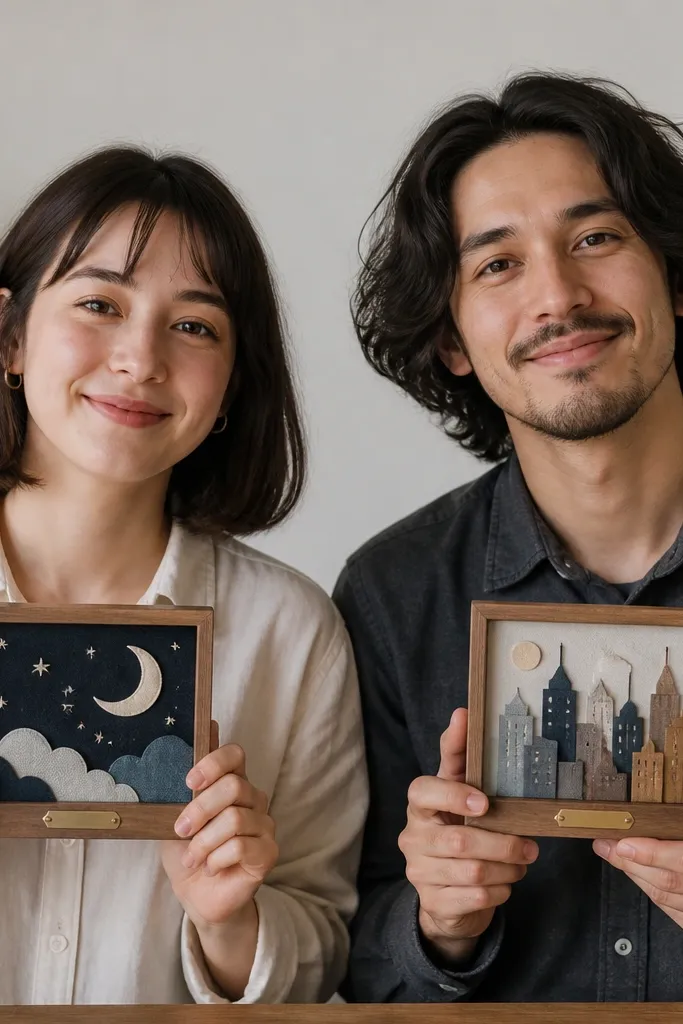
This is a low maintenance costume because the frames give you a ready-made pose. You don’t have to chase complicated makeup or heavy clothing; your “art exhibit” reads instantly. It flatters because the frame creates a vertical shape near your face and gives you something to hold without covering your body. I’ve done this with pairs of different heights; the frame size stays consistent and the scenes scale by using simpler shapes. Choose one theme element that matches — moon and city, or star and skeleton — so people understand you’re a set.
Find two thrift picture frames with glass removed or use frames without glass. Build scenes with fabric scraps, foam, and paper cutouts glued to a backing board — keep them bold and high contrast. Add a tiny nameplate strip at the bottom edge of each frame using paper and clear tape. Attach a ribbon handle to the back so you can hold it at chest height without straining your arms. Wear simple outfits in one color family (black or beige) so the frames stand out.
Quick tipUse foam cutouts for the main objects so they cast small shadows and look more 3D on camera.
One warningAvoid scenes with lots of tiny text; it turns into unreadable clutter in photos.
19. Candy Vendor Twins With Price Tag Belts
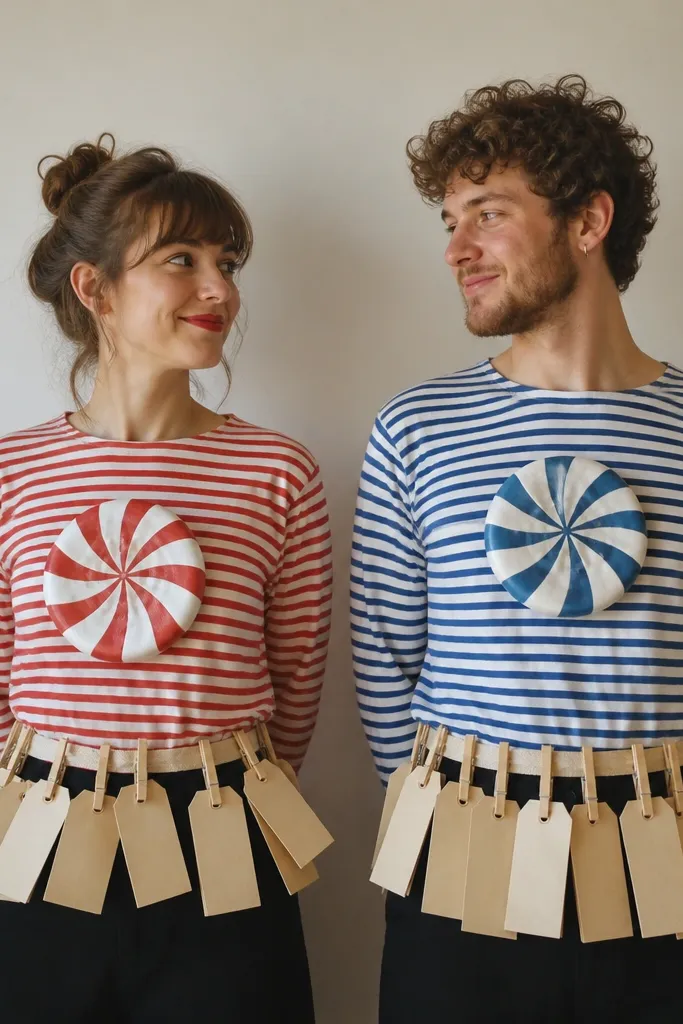
This looks cute and planned because it’s all about signage and small props. It’s low maintenance since you’re using a belt and shirt details, not sewing a full costume. It flatters because the belt sits at the waist and the hanging tags pull the eye toward your midsection. I’ve done it with both tall and short couples; the belt length adjusts and the tag size stays readable. Keep the stripes and colors consistent so it reads as a couple set even if the tags differ.
Start with two striped shirts in the same pattern weight. Make price tag belts by cutting a long fabric strip and gluing or sewing small loops along it for clothespins. Write or print big numbers on cardstock tags and seal with clear tape so they don’t bend. Clip tags to the belt so they move naturally. Add a small candy-themed icon on each shirt chest — a lollipop for one, a candy cane for the other — using felt pieces glued flat.
Quick tipUse clothespins with metal springs; they hold the tag better than flimsy plastic clips.
One warningAvoid writing tiny prices; go big like 5, 10, or 20 so it reads in a selfie.
20. Retro Ghost Couple With Sheet Ghost Capes
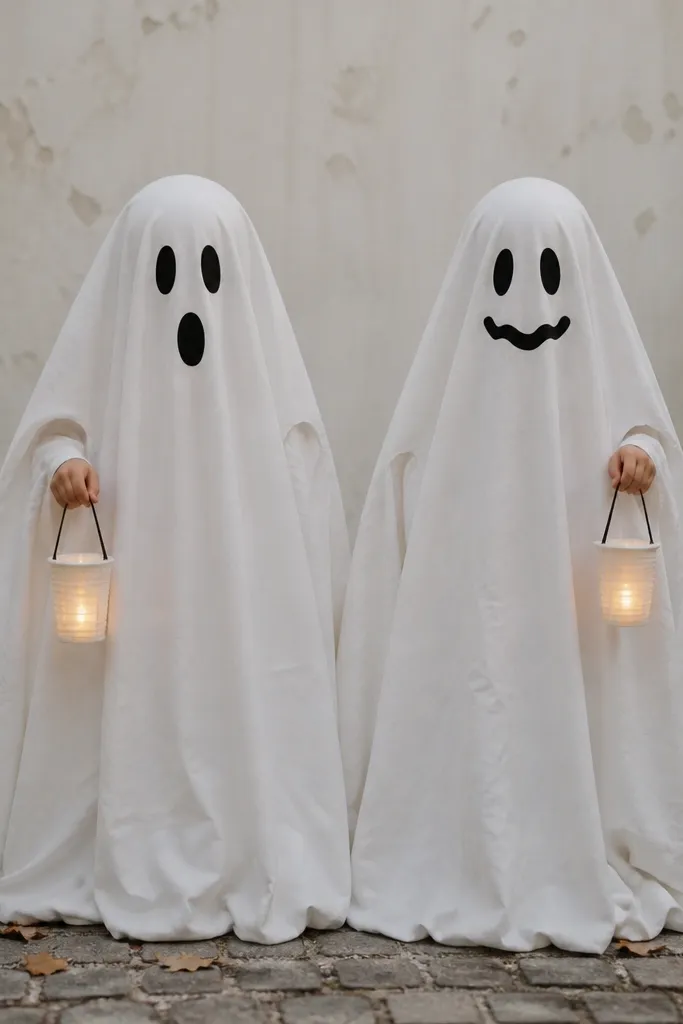
Sheet ghosts are the definition of low maintenance, but the trick is making the faces look intentional. You start with white fabric that drapes over your shoulders, which hides body shape and keeps the silhouette consistent. This costume flatters because the sheet drape softens lines and the lantern prop pulls attention to your hands. It works on all skin tones because the face openings and black marker features are the contrast. Keep the faces minimal: one oval mouth, one wavy smile — simple reads best in photos.
Cut two sheet ghost capes by measuring from shoulder to mid-calf and cutting an opening for your head. Cut arm holes about 6 inches wide and reinforce with a quick stitched hem or fabric glue so the fabric doesn’t tear. Draw faces with black fabric marker and keep the eye shapes similar size on both people so they look like a pair. Make lanterns by wrapping a paper cup base with cardstock and adding a handle from ribbon; place a small LED tea light inside. Wear dark pants underneath so the sheet doesn’t drag and catch dirt.
Quick tipMake the sheet slightly longer than you think and hem it; dragging fabric looks messy fast outside.
One warningAvoid using permanent marker on raw fabric; it can bleed and look smudged.