
1. Sheet-Cape Dracula with Clip-On Collar
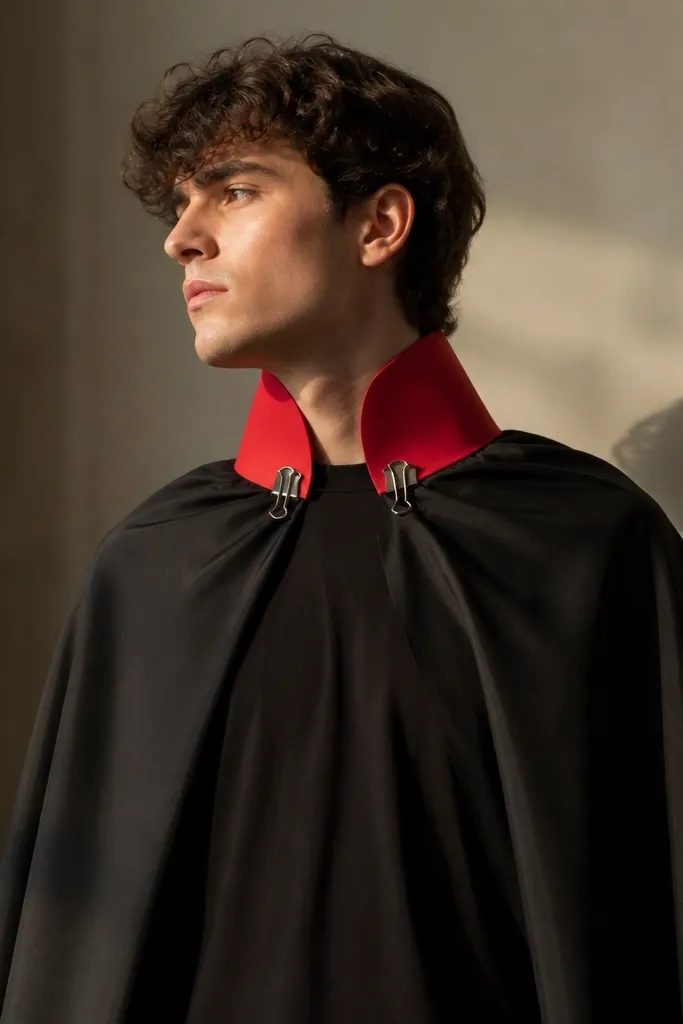
This Dracula look is the one I repeat every year because the silhouette does all the work. You drape a black sheet like a cape, then add a structured red felt collar that frames your face. The red shows up in photos even with low lighting, and it doesn’t require sewing. It flatters most body types because it falls straight down from the shoulders, and the V collar creates a vertical line that visually lengthens your neck and torso. If you have a longer torso, keep the cape hem around mid-thigh; if you’re petite, go closer to knee height so it doesn’t swallow you.
Cut your black sheet into a simple rectangle with a center slit at the top for your head, then drape it over a black long-sleeve so you can mark the shoulder width. Cut the red felt into a collar shape: two mirrored pieces with a shallow V at the front, about 6 inches tall at the points. Make two small strips of felt tabs and hot glue them to the inside edges, then clip the collar to your shirt using binder clips at the collar points. Finally, pin or clip the cape at your chest so it doesn’t slide when you move, and tighten with two safety pins at the inner sides.
Quick tipDust a little black fabric paint on the felt collar edges with a makeup sponge so it looks worn instead of brand-new.
One warningAvoid using thin craft felt that flops — it kills the collar shape and makes the whole costume look like a school project.
2. Trash-Bag Ghost with Clear-Shoulder Float
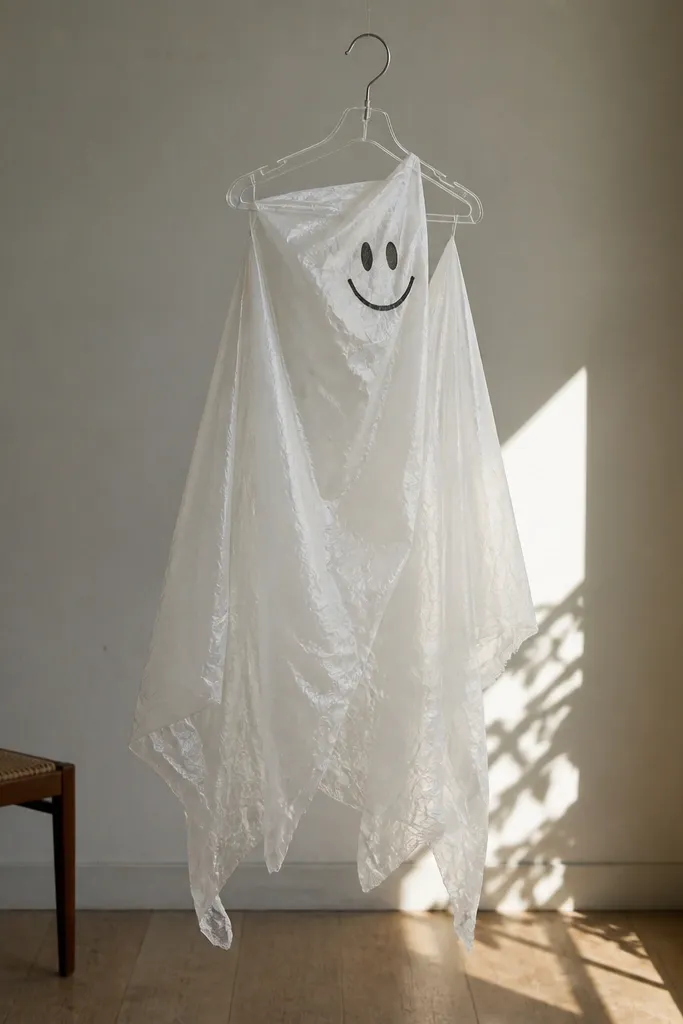
This ghost is airy, cheap, and funny in a way that reads instantly at a party. The semi-translucent trash bag catches flash and looks like a real “wisp,” especially if you create a slight shoulder lift. It works best on people who want something light and comfortable — you can move, dance, and stand in line without feeling weighed down. I like it on all skin tones because the bag stays neutral, and your face features do the contrast. If you’re tall, keep the bag length to shin level; if you’re shorter, stop at mid-calf so it doesn’t drag.
Cut a trash bag open into a large sheet, then fold it lengthwise and cut a head hole about 6 inches wide. Create a simple shoulder frame using a clear plastic hanger: cut off the hook, then bend the remaining wire into a U that sits above your shoulders. Tape the trash bag to the frame at the top edge so it stays lifted, then draw a face on the front fold using a black permanent marker. Finish by tying a thin white string around your waist over a white shirt so the bag stays centered while you walk.
Quick tipUse a second bag for the “arms” by cutting two long strips and attaching them to the shoulder frame with tape so they sway.
One warningDon’t skip the shoulder lift — a flat trash-bag body looks like a costume sack instead of a ghost.
3. Cereal-Box Robot Head with Fabric-Tab Neck
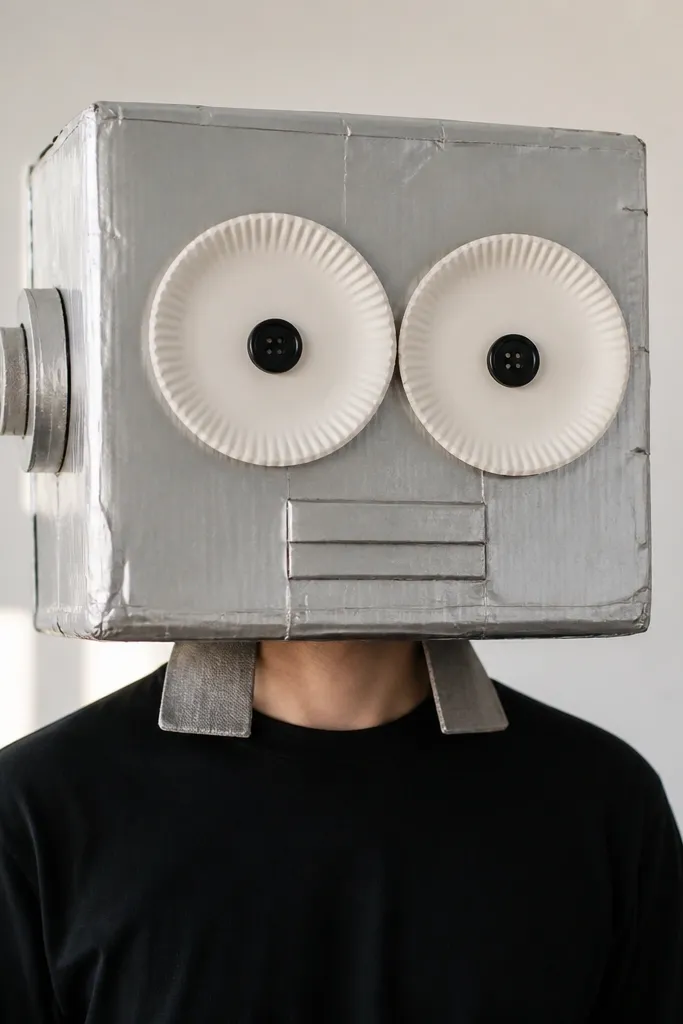
This robot head turns any plain outfit into a character fast. The cereal-box structure holds a clean cube shape, and the silver paint makes it look like a prop from a low-budget sci-fi movie. The neck tabs keep it stable without choking you, which matters if you’re wearing it for hours. It flatters people with smaller frames because the head is the focal point, and the black base outfit balances it. I’ve worn it with a black hoodie and it still looks sharp in motion.
Flatten and cut a cereal box into a square “helmet” panel set, then tape the edges and reinforce corners with extra tape strips. Paint the whole helmet silver (spray paint works best for coverage), then add eye circles from paper plates and glue them in place with hot glue. Mark a few small “button” dots using black paint or cut tiny circles from black craft foam. For the neck, cut two fabric tabs from an old T-shirt and glue them to the inside edges so they tuck behind your shirt collar and hold the helmet upright.
Quick tipAdd one small strip of colored tape like red or teal on the side panel so it reads as a “tech detail” in photos.
One warningAvoid leaving raw cardboard edges — they catch light and make the head look unfinished.
4. Thrift-Coat Skeleton in 15-Minute Bone Paint
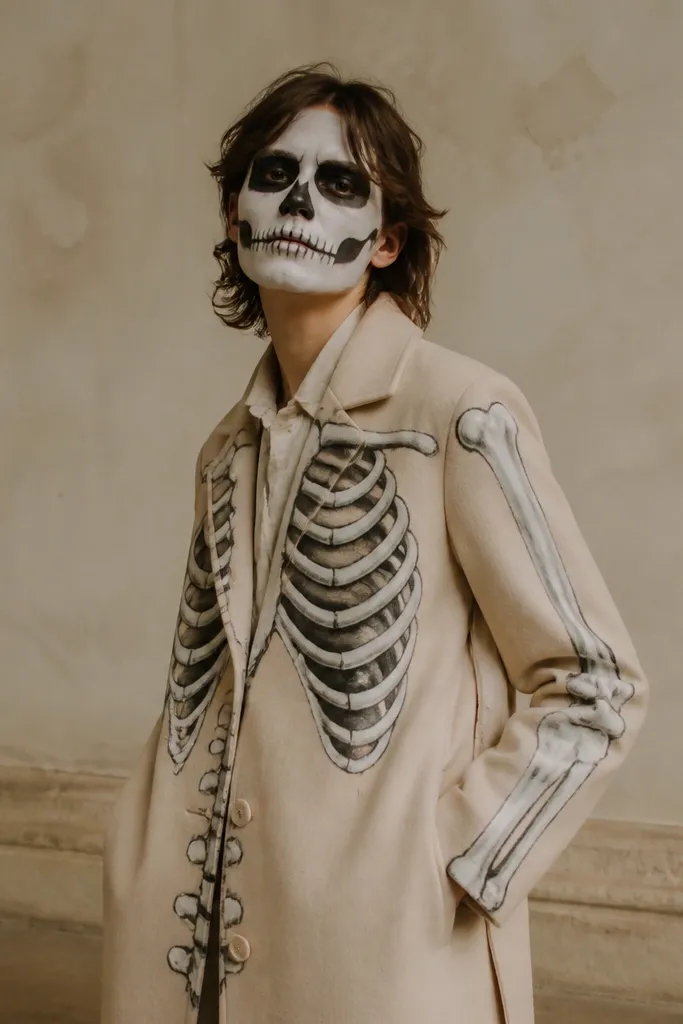
If you have a neutral coat already, this skeleton idea looks way more expensive than it costs. You paint bone lines with fabric paint or acrylic mixed with a little fabric medium, then shade with a gray wash so it has depth. The suit works well on anyone because coats drape nicely and hide uneven paint spots. It also helps you stay warm, so you’re not stuck in a thin costume. I like it on medium and darker skin tones because the white lines pop hard, especially under streetlights.
Lay the coat flat and map the skeleton lines with chalk: collarbones, ribs, spine down the center, and long arm lines from shoulder to wrist. Paint the main bones in white, then add gray shading along one side of each line using a sponge so it looks inset. Let it dry, then paint a simple rib cage arc across the upper torso. Wear it over black leggings or dark jeans so the coat stays the hero, and finish with a black belt to keep the shape crisp.
Quick tipUse a cheap makeup sponge for shading — it blends better than a brush and avoids hard streaks.
One warningDon’t paint thick outlines — thick white paint cracks faster and looks like Halloween store makeup.
5. Denim-Jacket Werewolf with Felt Tail and Ears
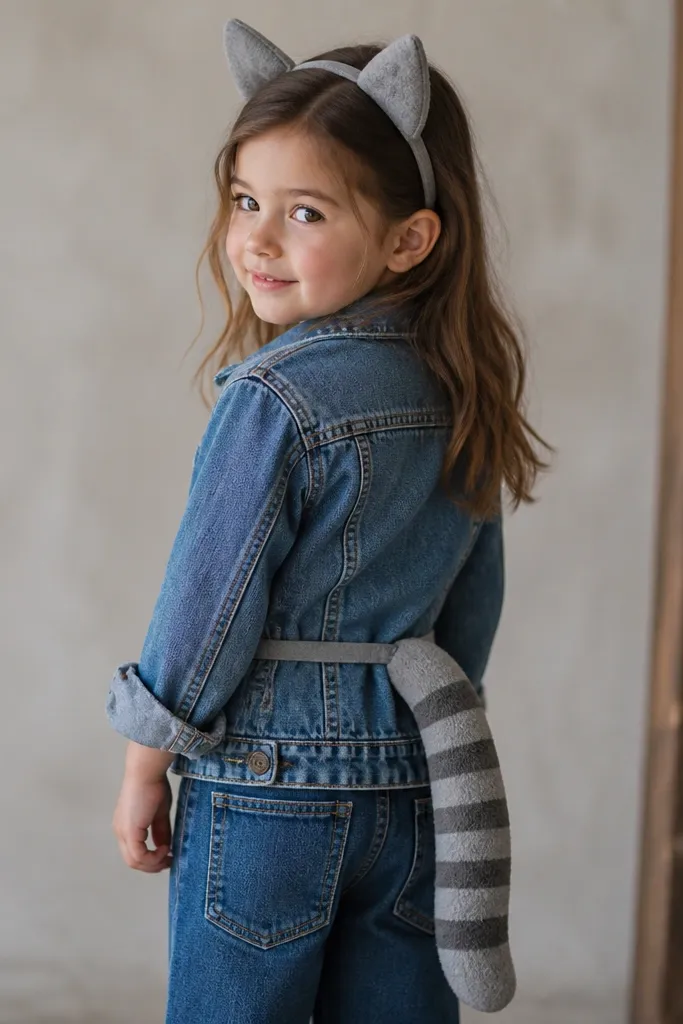
This werewolf build is wearable, not stiff. You keep your denim jacket as the base, then add felt ears and a tail that moves with you. The felt tail gives you that instant animal silhouette without needing a full bodysuit. It flatters athletic builds because the jacket shows your shoulders and the tail creates a fun back line. For curvier frames, it still works because the tail sits at the belt and doesn’t require tight fabric around the hips.
Cut two felt triangles for the ears, add darker felt stripes, and glue them onto a thin headband using hot glue at the base only. For the tail, cut a long felt strip and fold it to create a thicker shape, then sew or glue the seam along the inside. Attach the tail to a belt loop using a few fabric ties or glue tabs so it stays centered behind you. Finally, add two small claw marks by painting short black lines at the cuffs of the jacket sleeves.
Quick tipClip the ears low on your forehead so they read like a head shape, not a party hat.
One warningSkip shiny craft felt — it reflects light and makes the ears look plastic.
6. Cardboard Armor Chest Plate with Strap-On Fit
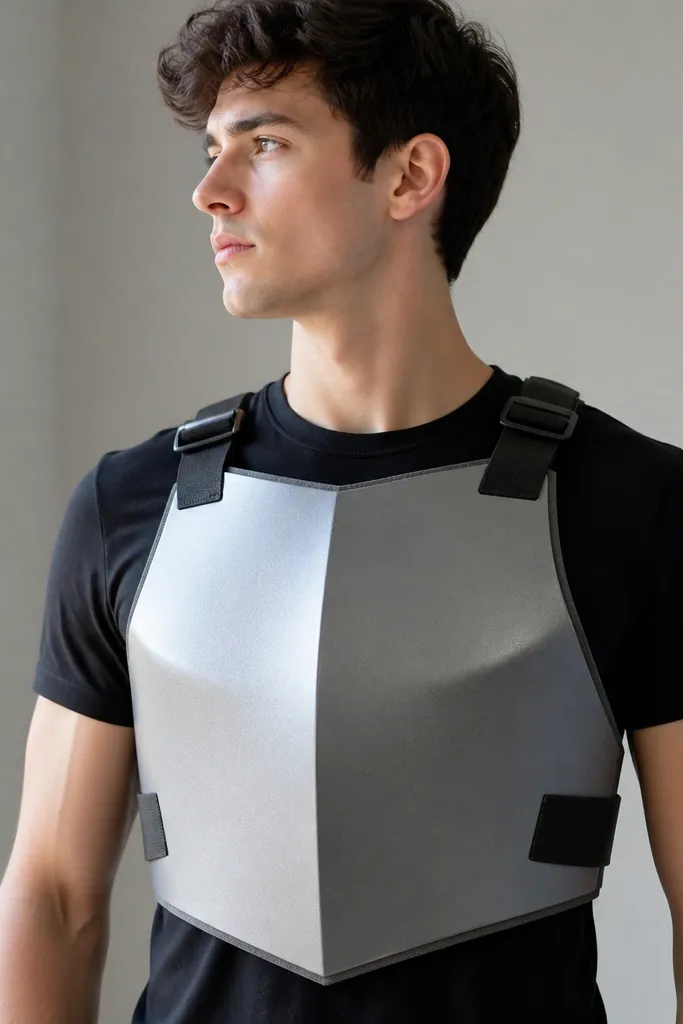
This is the armor look I build when I want a strong silhouette without buying a single costume store piece. Cardboard gives you structure, and foam edges make it look thicker and more “real.” The strap-on fit means you can adjust for comfort and it won’t slide when you sit. It works on most builds because the chest plate is centered and the straps pull tension into place. If you have broader shoulders, widen the shoulder strap spacing; if you’re narrower, keep straps closer so it doesn’t gape.
Trace your torso width on cardboard and cut a chest plate shape that covers from just below the collarbone to upper stomach. Glue thin craft foam strips along the edges, then paint the whole thing with metallic gray. Create straps from elastic or old tights: punch holes at the corners and thread the elastic through, tying securely at the back. Wear it over a black shirt, then add two small “rivets” using circle stickers or painted dots to break up the flat surface.
Quick tipBend the cardboard slightly by heating it with your hands before painting so it conforms to your chest.
One warningDon’t make the plate too big — a wide chest plate makes your proportions look off in photos.
7. Old Scarf Witch with Braided Rope Belt
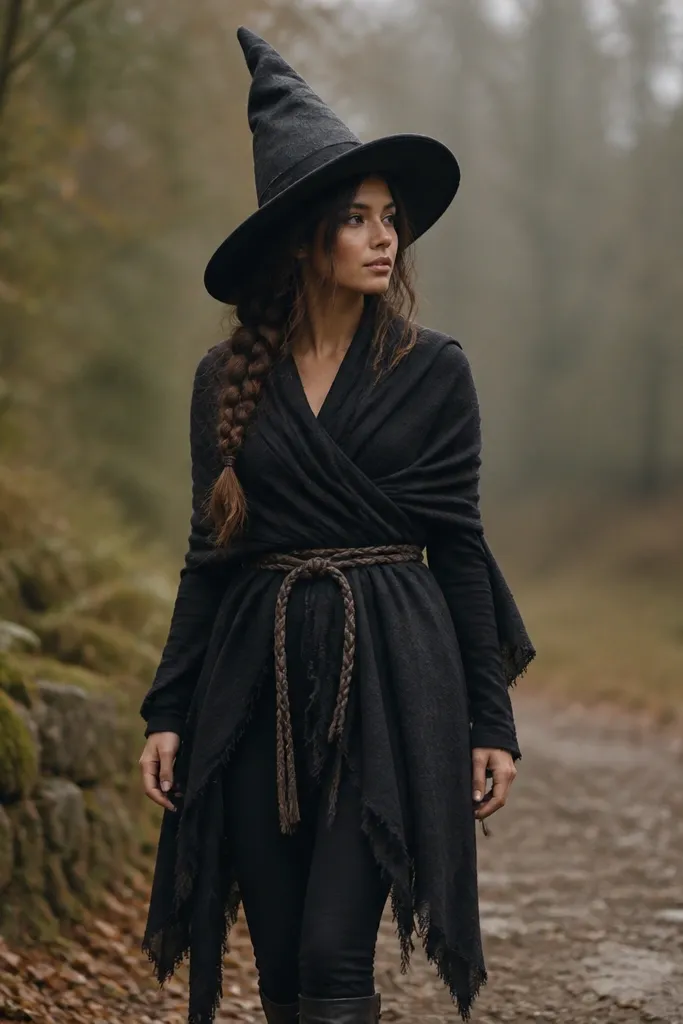
This witch is built from one scarf and looks intentional because the belt controls the shape. A long scarf drapes down like a dress, and the rope belt creates a defined waist so the silhouette doesn’t turn into a shapeless bundle. It flatters a wide range of body types since the scarf hangs from your shoulders and the belt does the fitting. I especially like it on people who want a softer look than a rigid costume — the fabric moves and looks natural. If your skin tone is warm, pair with deep green or black scarves to make the face pop.
Wrap a long dark scarf around your body like a poncho, then twist and fold the fabric at the front so it creates a gentle V. Tie the ends at the back of your neck or secure with a safety pin at the shoulder. Braid a rope belt from three cords and tie it around your waist over the scarf. Make a simple pointed hat from felt by rolling a rectangle into a cone and hot gluing the seam; attach it to a headband so it doesn’t fall.
Quick tipAdd one brooch made from a thrift earring or cheap pin to the chest fold — it reads as a “real garment detail.”
One warningAvoid a belt that’s too thin — it won’t define your waist and the scarf looks like a blanket.
8. Bubble Wrap Punk with Tape-Studed Shoulders
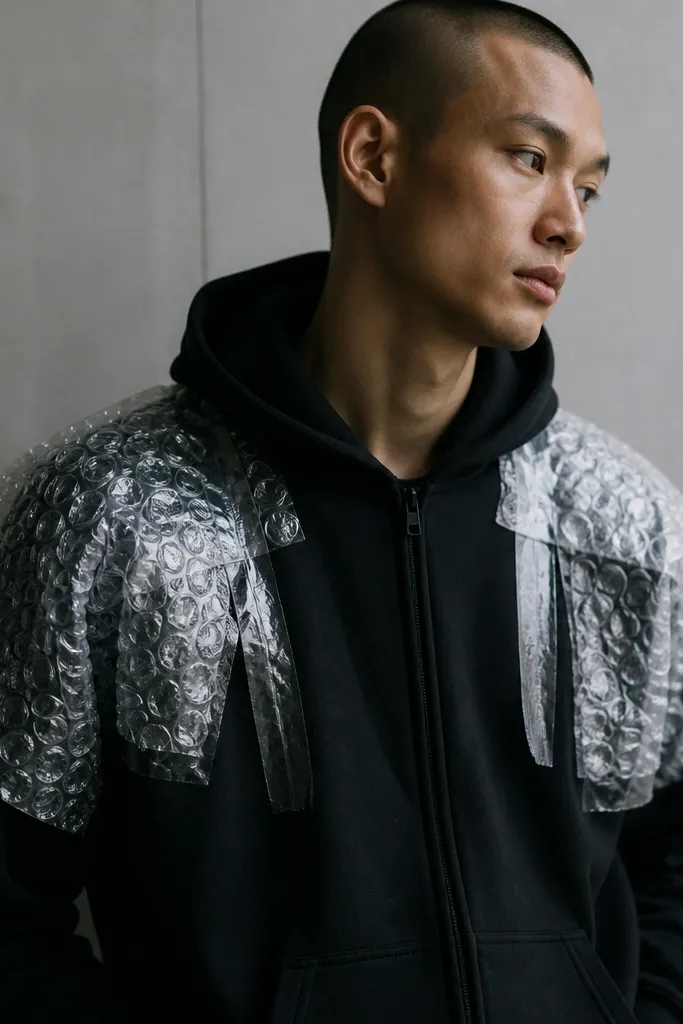
This costume looks punk, not crafty, because bubble wrap creates a textured surface that catches flash. I’ve worn it to indoor parties and it always gets comments because it looks like armor made of trash. It’s comfortable because it’s only on the shoulders, not the whole body. The effect is flattering for different body shapes because it adds volume at the top, balancing wider hips or defining a lean frame. Choose a hoodie color that matches your vibe — black for moody, gray for softer.
Cut bubble wrap into two shoulder panels that cover from collarbone to upper sleeve, then trim edges so it doesn’t hang awkwardly. Lay the panels on your hoodie and press clear tape strips around the edges, then add a few tape “studs” across the center bubbles. If you want more structure, add a second layer on top of the first with staggered seams. Wear with black jeans and chunky sneakers so the texture reads as a design choice, not a leftover craft sheet.
Quick tipUse a lint roller after taping — tape grabs fuzz and makes the hoodie look messy in photos.
One warningDon’t cover the whole torso — full bubble wrap gets itchy and makes the look feel cheap fast.
9. Lemonade-Stand Popstar from Upcycled Tulle Skirt
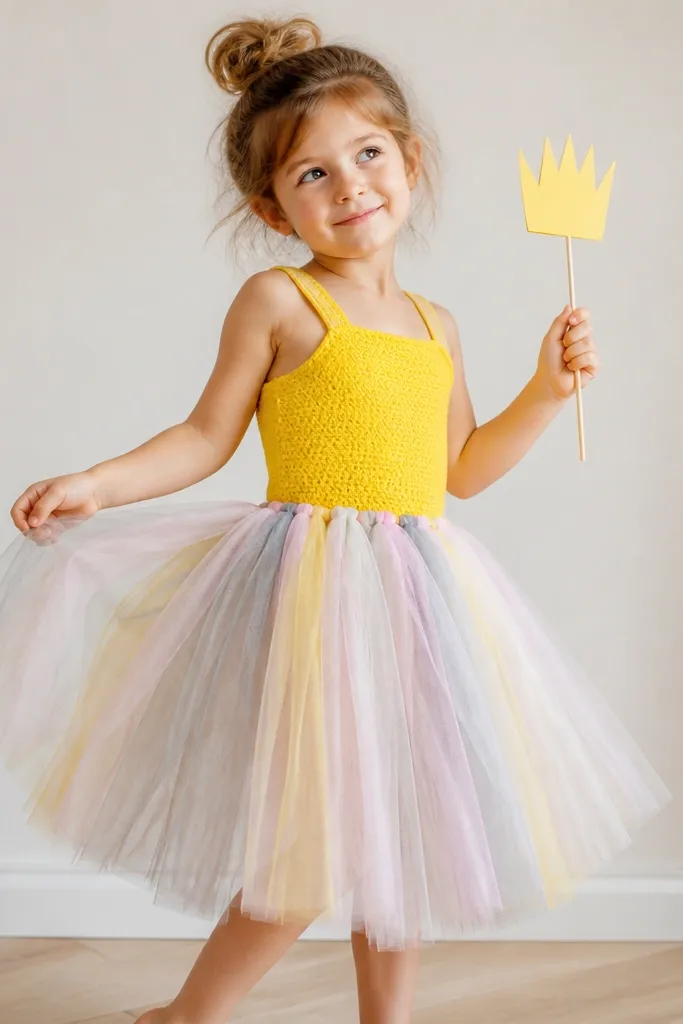
This is my favorite budget popstar because the skirt makes the outfit look like it cost way more. You tie tulle strips to an elastic waist, so it’s forgiving and it moves a lot when you walk. The bright yellow reads like a cartoon character without looking like a kid costume. It flatters almost everyone because the volume sits at the hips and you control it by how many tulle strips you tie. If you have a bigger bust, choose a fitted top with thin straps so the tulle doesn’t overwhelm your upper body.
Cut tulle into 12-16 inch strips, then stretch a piece of elastic around your waist and tie the first strip knot around it. Continue tying strips in rows until the waistband is fully covered, then trim the ends into a slightly uneven hem. Pair the skirt with a yellow tank or thrift top and add a simple paper “LEMONADE” sign on a stick. Finish with white sneakers and a ribbon choker made from satin ribbon and a dab of hot glue to hold the knot.
Quick tipTie a few longer tulle strips at the front so it swishes more when you turn.
One warningDon’t use thin, see-through tulle without lining — you’ll see your underwear seams in photos.
10. Cardboard Cat Ears with Elastic Hairband Fit
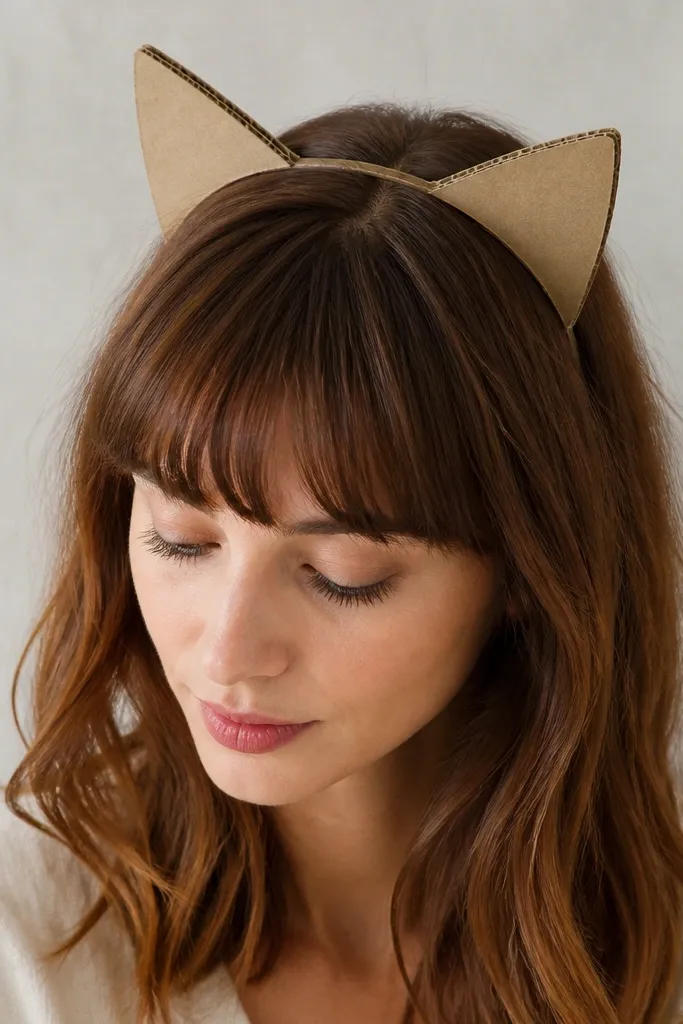
This cat ear headpiece is fast and it looks sharp because the shape is controlled. Cardboard holds a crisp triangle, and painting the inside pink adds depth that makes it look like real fur. It works for almost any outfit because it turns a basic black tee into a character instantly. It’s flattering because it draws attention to your face and eyes, and it works with both short and long hair. If you have bangs, the ears sit cleaner when you attach them slightly behind the hairline.
Cut two ear triangles from cardboard, then trace a smaller inner triangle for the pink lining. Paint the outer triangles black, paint the inner triangles pink, and glue them together with hot glue. Attach each ear to a black elastic hairband using two small tabs of cardboard that glue down on the inside. Test the fit on your head and bend the cardboard slightly so the ears curve outward like a cat’s.
Quick tipAdd a thin strip of felt around the base so the cardboard doesn’t rub your forehead.
One warningAvoid flat ears that don’t curve — they look like a Halloween headband from a box.
11. Foam Pumpkin Armor for a Sweat-Friendly Witch
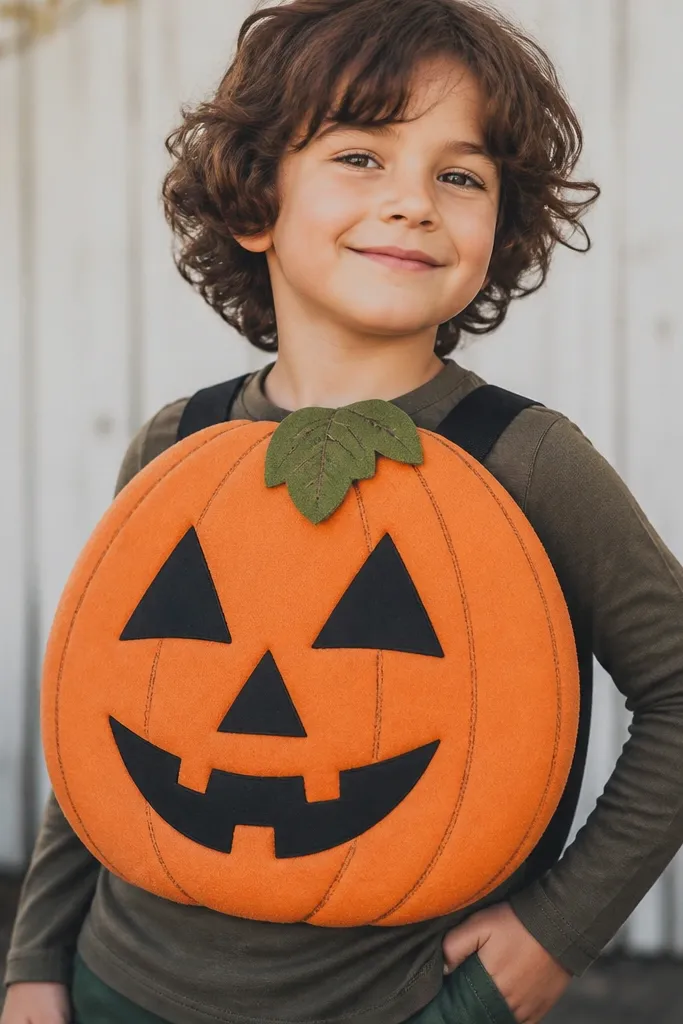
This is how you get a pumpkin character without wearing a heavy costume. The foam chest piece sits at the center of your torso, and elastic straps keep it comfortable even if you’re moving around. The carved lines are simple but read clearly under flash, so it looks like a real pumpkin prop. It flatters most builds because it creates a strong center focal point, and you keep your arms free. I like it for people who get overheated easily because the foam is only on the front.
Cut a pumpkin shape from craft foam about the size of your torso and add grooves by cutting shallow V lines, then paint the foam orange. Paint the face with black triangle shapes and a lighter orange highlight along the grooves. Hot glue a fake leaf made from green felt on top, then attach elastic straps at two points on each side of the pumpkin. Wear it over a black long-sleeve or dark sweater, and keep pants simple so the pumpkin stays the hero.
Use a fabric marker to refine the face lines after the paint dries so they look crisp.
Don’t use flimsy foam — it collapses and the pumpkin face looks blurry.
12. Thrift Suitcase Mummy Wrap with Velcro Closure
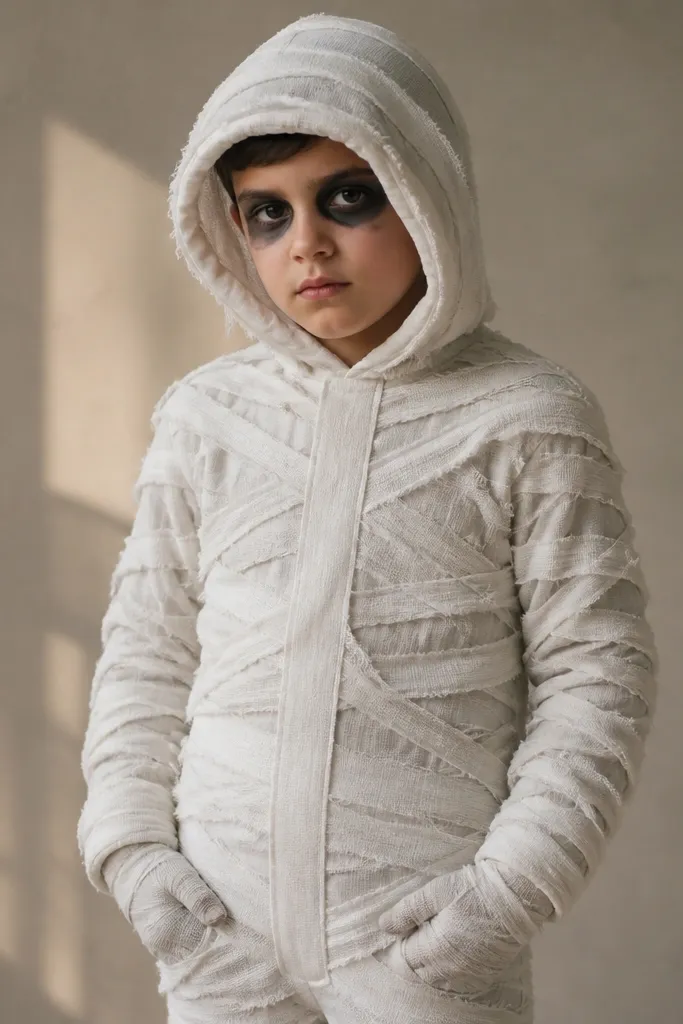
This mummy is comfortable and repeatable because the wrap has a closure. You start with a hoodie, wrap strips, then use Velcro at the front so you can get it on and off without redoing everything. It reads like a mummy in photos because the strips create lots of texture and shadow lines. It’s flattering because the hoodie base keeps your midsection smooth and hides lumps. If you’re plus size, the Velcro closure lets you adjust tightness instead of fighting fixed straps.
Cut white gauze or old bedsheet strips into long bands, then wrap them over a white hoodie in overlapping layers. Keep the wrap tighter at your shoulders and looser at the waist so you don’t look like a tube. Leave your hands and face open, then cover the front with an extra layer for a thicker chest look. Attach Velcro strips at the center front so the wrap closes neatly; finish with black eyeliner and a few gray lines on the cheekbones using makeup.
Quick tipSpray the gauze lightly with water before wrapping so it clings and creates natural wrinkles.
One warningAvoid wrapping too tight under the arms — you’ll feel it fast and the costume will bunch when you move.
13. No-Sew Leaf Crown with Vine Tieback
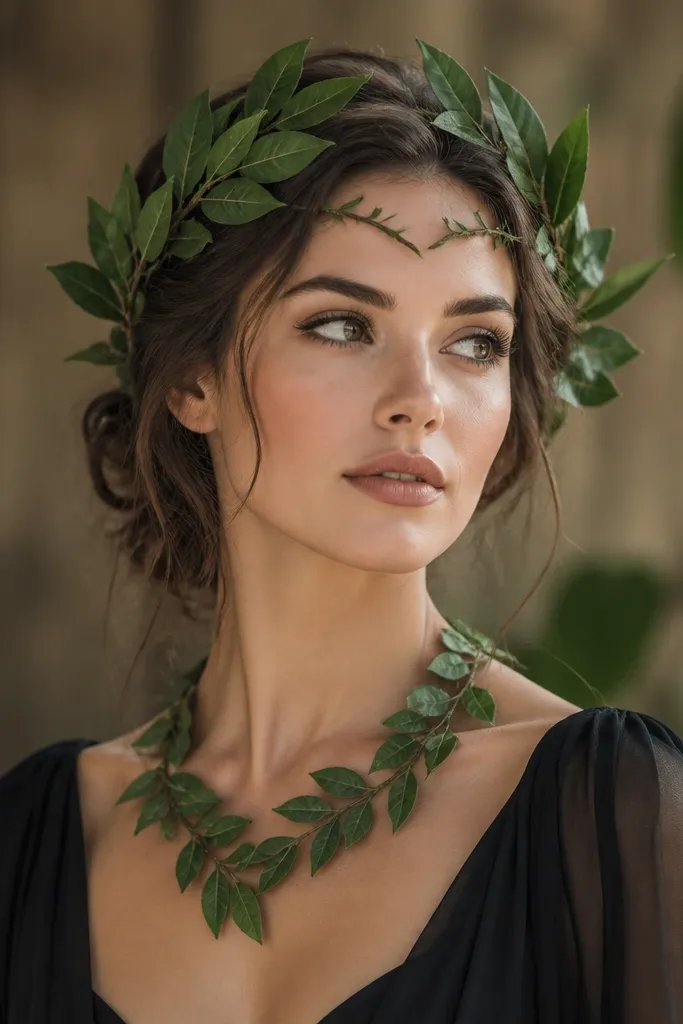
This one is for people who want a nature character without wearing a full costume. A leaf crown instantly changes your face framing, and the tieback keeps it from slipping when you dance. I’ve used faux leaves from craft stores because they hold shape and don’t shed like fresh ones. It flatters all hair lengths since the band sits around your head and your hairstyle can be messy underneath. If your outfit is black or cream, the green looks bold and clean in both daylight and flash.
Wrap a thin wire headband with floral tape so it grips the leaves, then tie faux leaves in small clusters around the front and sides. Use small floral wire to secure the clusters at the base, then twist the wire ends back into the band. Create a vine tieback from green craft cord or ribbon and attach it to the band with a few knots so it drapes slightly across your forehead. Pair with a simple dark dress or tunic and add a matching leaf necklace made from the same cluster style.
Quick tipAdd one leaf cluster in the center front higher than the rest so it creates a focal point for photos.
One warningDon’t make the crown too wide — it blocks your face and looks like a costume filter.
14. Upcycled Denim Raccoon Mask with Nose Patch
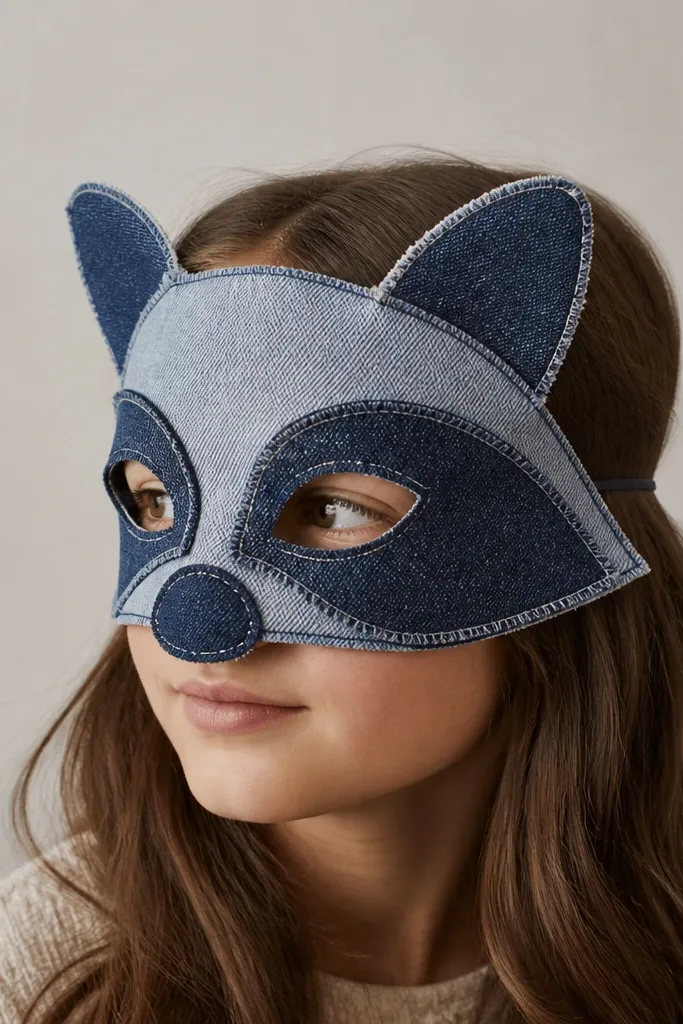
This mask makes a raccoon costume look real because denim has weight and texture. The dark patches around the eyes mimic raccoon markings and keep your face centered. Denim also holds its shape better than felt, so it looks crisp even when you’re talking and laughing. It flatters because the mask frames your cheekbones, and the nose patch gives you a clear character detail. I like it with a gray hoodie and black jeans for a clean, consistent animal palette.
Cut a mask base from a denim scrap that matches your face shape, then cut two eye patch sections from darker denim or black fabric. Sew or hot glue the eye patches onto the base, leaving a small gap for your natural eye area. Add a small gray nose patch with stitched lines using black thread or fabric paint. Attach two denim ear shapes to the top corners and secure the mask with elastic at the sides so it doesn’t slide.
Use fabric paint for the nose lines — it dries matte and looks more like fur markings than glossy glue.
Skip a flimsy mask base — thin fabric creases weirdly and makes the eyes look misaligned.
15. T-Shirt Zombie with Distressed Collar and Tear Strips
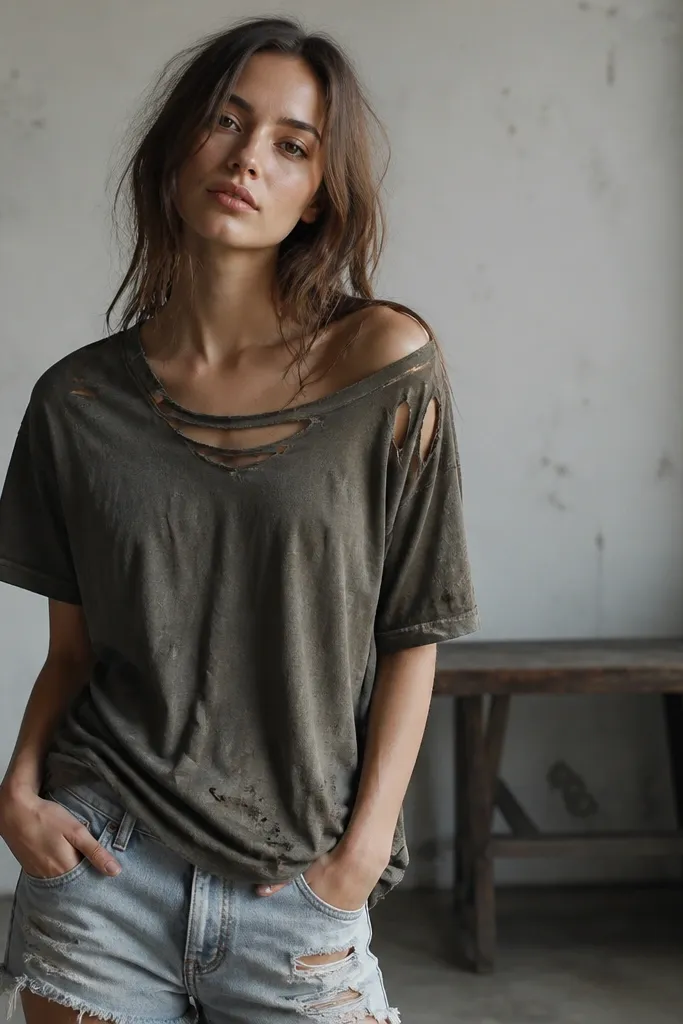
This zombie look is the quickest way I know to look spooky without buying makeup-heavy prosthetics. The distressed collar and tear strips create movement and texture, and the paint stains make it look like grime instead of bright green costume dye. It’s flattering because it keeps the body silhouette the same while adding visual chaos around the neckline and sleeves. If you have a broader frame, stick to smaller tears so you don’t create a huge open chest area in photos. For lighter skin tones, use gray-green stains for a more realistic undead look.
Start with a black or dark-gray T-shirt and cut a shallow V at the neckline for a ragged collar. Tear small strips along the sleeve seams and fray the edges by rubbing with sandpaper or a cheese grater lightly. Mix pale green fabric paint with a touch of gray and dab it in irregular patches on the collar and sleeves. Add a few thin streaks down the chest using a dry brush so it looks smeared rather than painted on. Wear with dark jeans and scuffed sneakers to finish the messy vibe.
Quick tipWash the shirt once after distressing if you used chalk or marker — it removes smudges that show under flash.
One warningDon’t use bright neon green — it reads as costume paint instead of zombie skin.
16. Upcycled Umbrella Witch Hat with Folded Edge
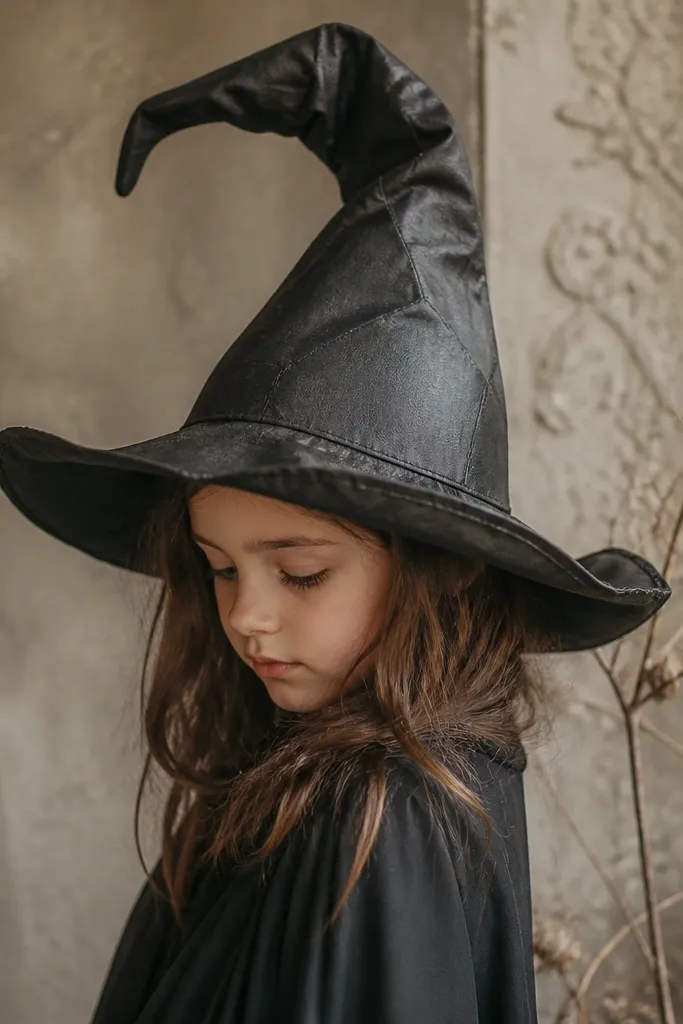
This hat looks special because umbrella fabric has a slight stiffness and a smooth outer sheen. The cone holds shape, and the brim comes out wider than you’d get from cheap felt. It makes any witch outfit look more “prop-like” without spending on a store hat. It flatters most face shapes because the brim spreads out and balances your features. I’ve worn it with a long cardigan and tights, and the hat is the first thing people notice.
Cut the umbrella canopy into a large circle for the brim and a wedge strip for the cone, then trim the cone edges to form a point. Fold the wedge into a cone shape and glue or sew the seam, then attach it to the center of the brim using hot glue and a few fabric stitches for strength. Add a ribbon band around the base and tie a small bow off-center. Wear it with hair pulled back so the hat sits clean on your forehead and doesn’t wobble.
Lightly steam the fabric and press the brim flat before gluing so it doesn’t ripple.
Don’t skip reinforcing the seam — umbrella fabric can separate at glue points if you move a lot.
17. Halloween Newspaper Crown with Faux Spikes
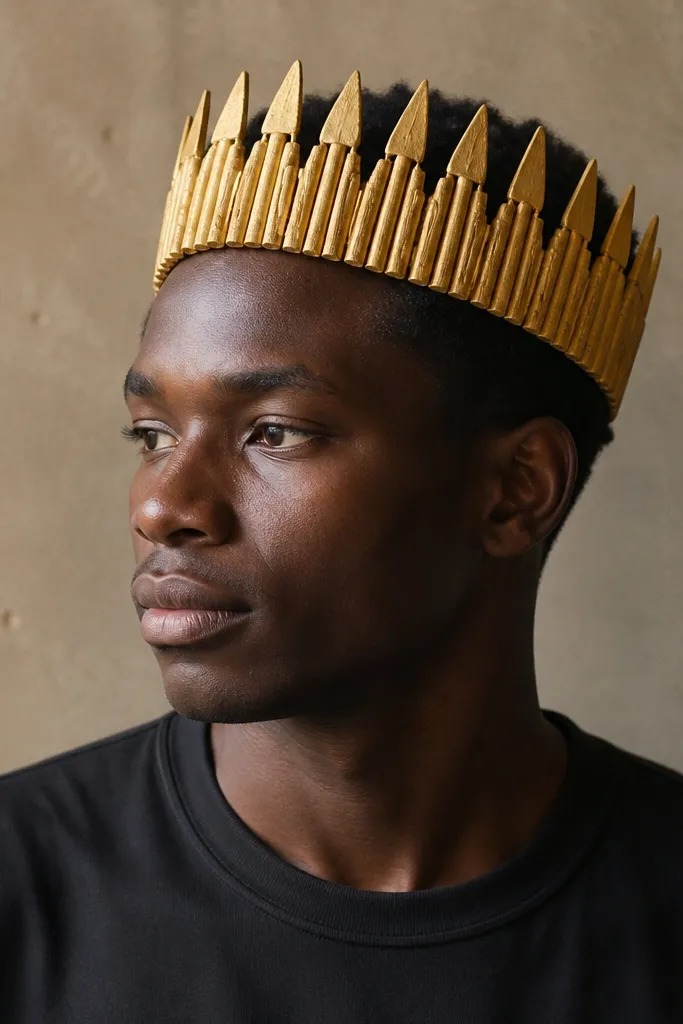
This crown is for the “I want to be dramatic but I’m on a budget” crowd. Newspaper is light, so the crown doesn’t feel heavy, and foam spikes add that villain energy you can’t get from paper alone. The gold paint makes it look like a throne prop in photos, especially under warm indoor lighting. It flatters because crowns pull attention upward and frame the face. It works whether you have short hair or long hair tied back — the crown sits on the head, not the hair.
Roll newspaper strips into tight cones, then tape the base to keep them from unrolling. Paint the strips gold, then arrange them into a circle crown shape and glue the bases together. Cut small triangles from craft foam, paint them silver or gold, and glue them along the top edge between the paper cones. Add an adjustable tie inside using elastic or ribbon so it fits snugly without sliding. Wear with a dark outfit and a simple statement earring so the crown reads as intentional.
Quick tipUse two layers of paint — newspaper soaks up color and one coat looks patchy.
One warningAvoid skipping the interior tie — a loose crown constantly shifts and ruins the look in photos.
18. Dollar-Store Tinsel Scarf Mermaid Tail Wrap

This is a mermaid costume that actually moves. The tinsel scarf gives you scale-like shine without sewing hundreds of scales, and it wraps tightly around leggings so it looks like a tail. It flatters because the shine draws a vertical line down your legs and the seafoam top softens your overall look. If you’re fair-skinned, go for teal and silver tinsel; if you’re deeper-toned, a mix of green and gold tinsel looks stunning. I’ve worn it to an indoor party and it photographed well even with overhead lighting.
Choose a seafoam or teal top and wear it with leggings you already own. Wrap a tinsel scarf around your hips and down to mid-calf, overlapping sections so there are no gaps. Secure the wrap at the waist with a hidden safety pin under the top and add two pins at the inner thigh to keep it from twisting. Make a quick shell headband using a foam shell or a thrift shell charm glued to a headband, then add one small ribbon tie at the side for a cute finish. Keep footwear simple — black or metallic flats — so the tail stays the focal point.
Quick tipTest the tinsel coverage in front of a mirror before pinning — overlap the spots that show skin when you walk.
One warningAvoid loose wrapping — loose tinsel looks like a scarf stuck to your legs instead of a tail.