1. Beer-Label Coaster Set From Old Bottles
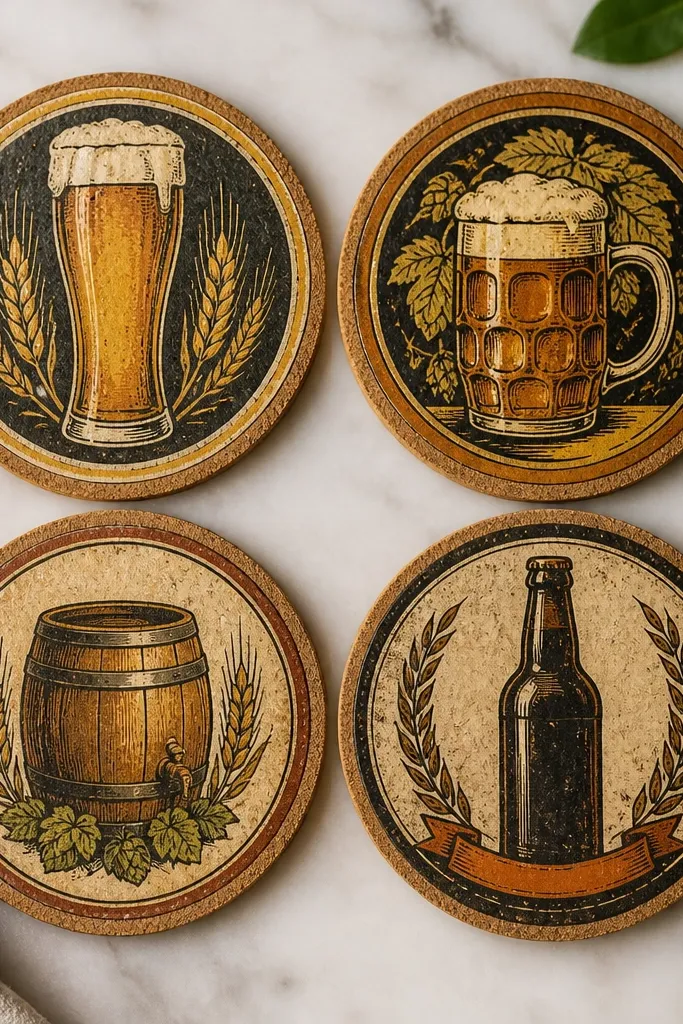
I love this because it turns “random bottles” into a set he can use right away. The labels already have bold graphics, so you don’t need fancy art skills. Cork keeps it warm to the touch and protects the table. The glossy top makes the labels look like they were printed onto the coaster.
Use 4 cork coasters (about 4 inches wide). Cut label pieces to fit within 1/16 inch of the edge. Seal with 2-3 coats of clear decoupage medium or water-based polyurethane; let each coat dry fully before the next.
Spray the final coat lightly instead of brushing if you want zero streaks.
Don’t soak the paper — it turns soft and wrinkles when you press it down.
2. Thrifted Frame Photo Window With Map Coordinates
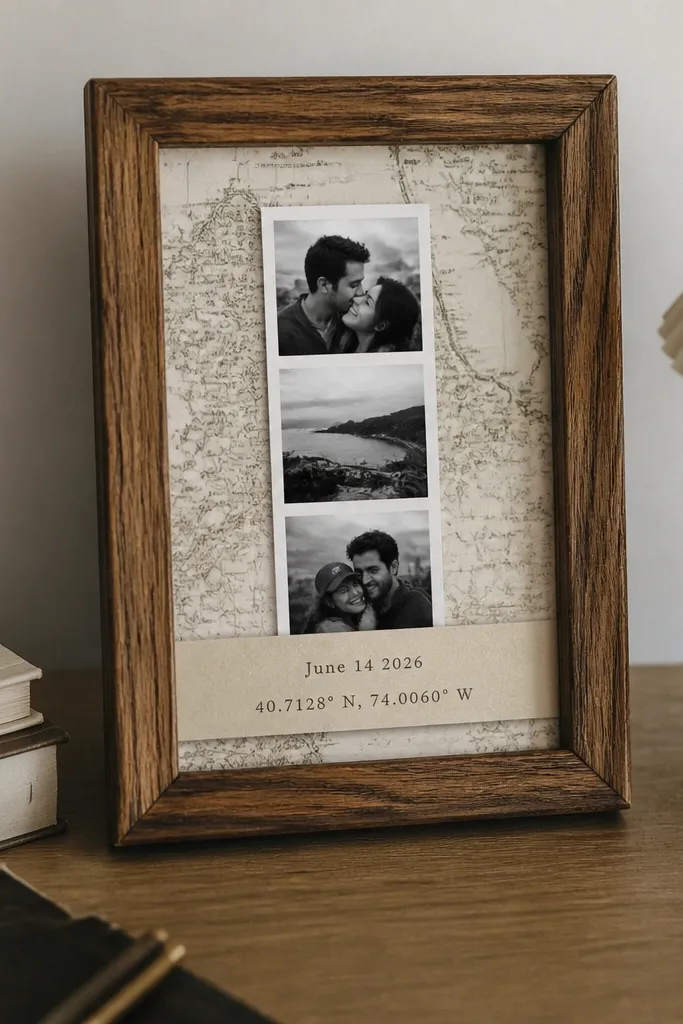
This gift looks expensive because the frame does the heavy lifting. The photo window gives him something personal, and the coordinates add that “how did you even know that?” feeling. I’ve made this with a map print from an old atlas page and it looks clean, not cluttered. The secret is keeping the text narrow and aligned.
Grab a frame with a flat back and a removable paper mat. Cut a cream matboard rectangle with a window for the photo strip. Print coordinates in a simple font, glue it to a thin band, and seal the map paper lightly with clear matte spray.
Quick tipUse a ruler and tape to align the coordinate strip before you glue.
One warningDon’t use busy background patterns behind the photo — one print is enough.
3. Upcycled Leather Keychain With Hidden Message Stitch
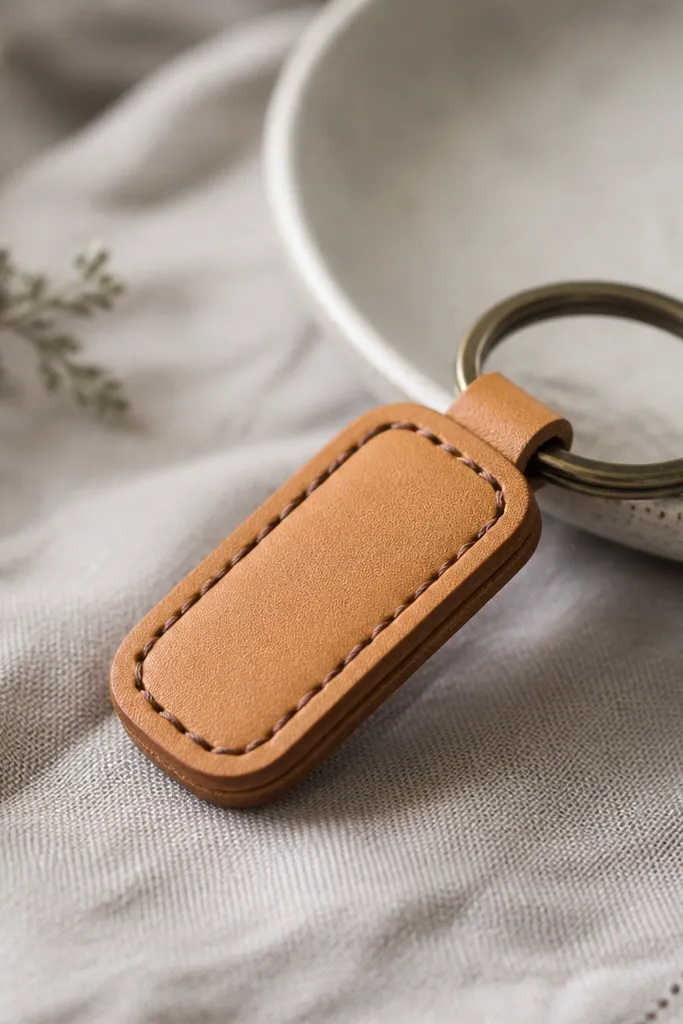
This one feels personal without needing a lot of tools. Leather scraps look better the moment you stitch them, and stitching hides uneven edges. The hidden message makes him smile when he flips it over. It’s also a gift he’ll use daily, so it won’t sit around.
Cut a 2.5 x 4 inch leather scrap. Punch two holes near the sides and stitch with waxed thread using a simple saddle stitch. If you want the message, add a second thin strip of faux leather inside and stitch over it so only the edges show.
Darken the thread holes with a black marker before stitching so they blend.
Don’t skip hole punching — tearing leather with scissors looks messy fast.
4. T-Shirt to Travel Bandana Wrap for His Watches
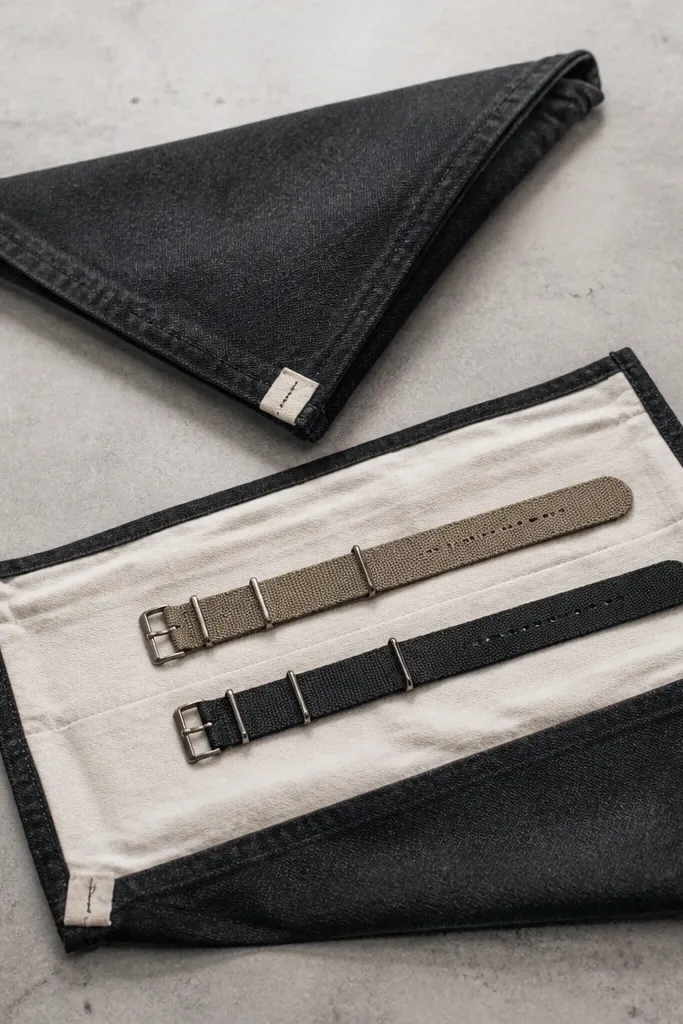
This is a practical anniversary gift that looks thoughtful. T-shirt fabric is soft, and when you hem it neatly, it feels intentional instead of improvised. The wrap keeps watch straps from tangling in a bag. I like adding a contrasting lining so the inside looks finished.
Cut a 12 x 16 inch rectangle from a T-shirt. Fold and hem the edges with a double fold (about 1/2 inch). Add a small 6 x 8 inch lining pocket using scrap cotton, then stitch a simple strap loop on one side with a button or tie.
Use a stretch needle and a zigzag stitch so the hem doesn’t pop.
Don’t leave raw edges — fabric frays and it looks like a craft project.
5. Wood Spoon Spice Label Set For His Kitchen
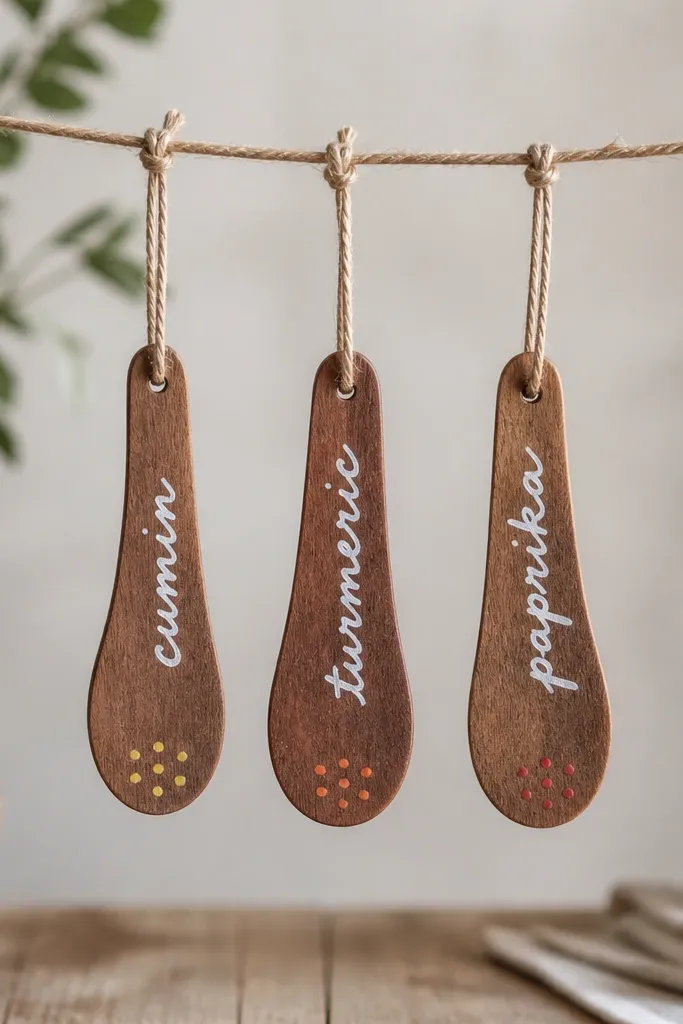
If he cooks, this feels like a custom set without buying anything fancy. Wooden spoon labels look charming and they’re easy to personalize. Writing on wood with a paint pen looks crisp and holds up better than marker. It also turns a gift into something he’ll reach for weekly.
Use thrifted wooden spoons or cut spoon shapes from a thin wood craft board. Sand lightly, wipe with alcohol, then paint names with a paint pen. Seal with clear matte spray and hang with twine through a small hole near the handle.
Quick tipDo a quick test on scrap wood first — paint pen thickness varies by brand.
One warningDon’t write on dusty wood — the ink smears when you press it.
6. Jar Lid Photo Memory Magnet Board
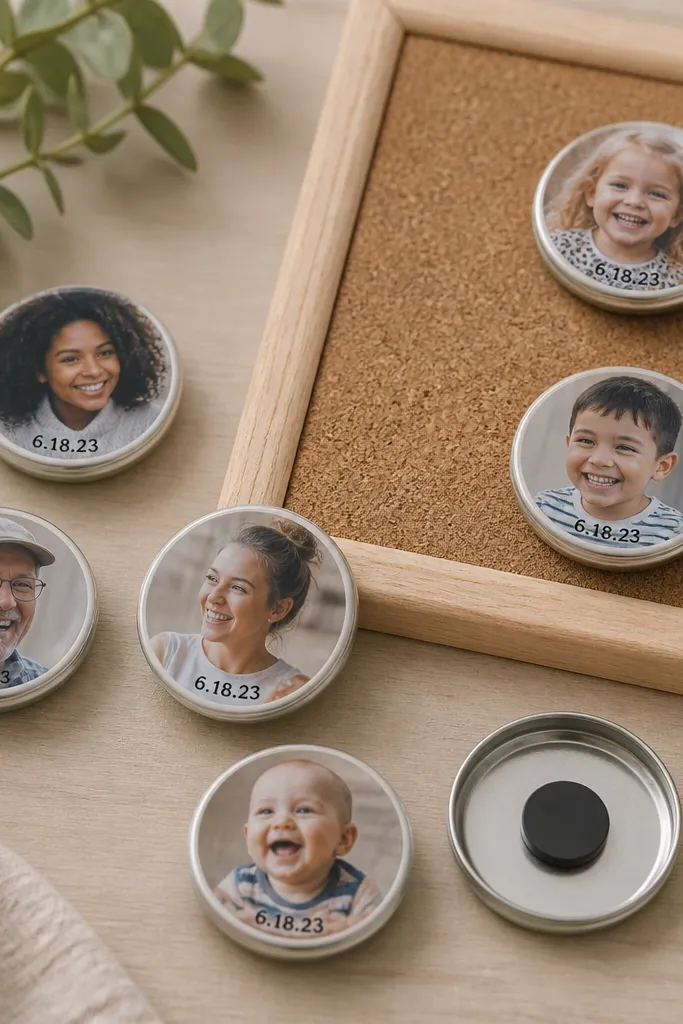
This is one of my favorite fast gifts because it turns photos into something he can use on his fridge or metal desk. Jar lids are perfectly sized and already durable. The cork background hides glue edges. Magnets make it interactive — he can move the memories around.
Start with a cork board about 6 x 8 inches. Glue jar lids (cleaned and sanded) onto the cork using strong craft adhesive. Attach magnets under each lid using hot glue after the photo is sealed with a clear topcoat.
Seal the photo first with a thin coat of glossy medium so it doesn’t fade or peel.
Don’t skip sanding the jar lid — smooth metal makes glue pop off later.
7. No-Sew Denim Pouch For Cables and Chargers
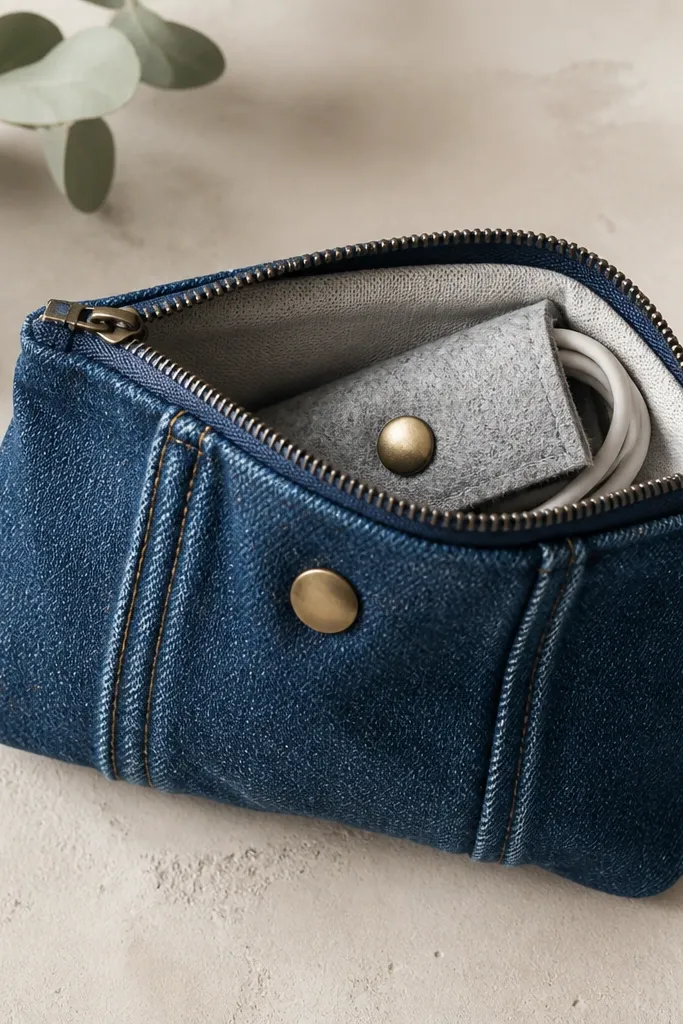
This is the gift that fixes his “cables everywhere” problem. Denim holds shape, and using a thrifted pocket makes it look styled instead of homemade. A zipper keeps chargers from falling out and gives it a finished edge. I’ve made three versions of this and the zipper makes it feel like a real product.
Cut a denim rectangle about 8 x 6 inches. Use a thrifted denim pocket as the front panel if you want a logo look. Add a zipper at the top and secure with fabric glue or a few hand stitches. Add an elastic loop inside for a charging cable.
Press the seams with a hot iron and a pressing cloth so the glue bonds cleanly.
Don’t use flimsy glue-only construction without a zipper — the pouch sags fast.
8. Map-Print Bookmark With Faux Leather Tabs
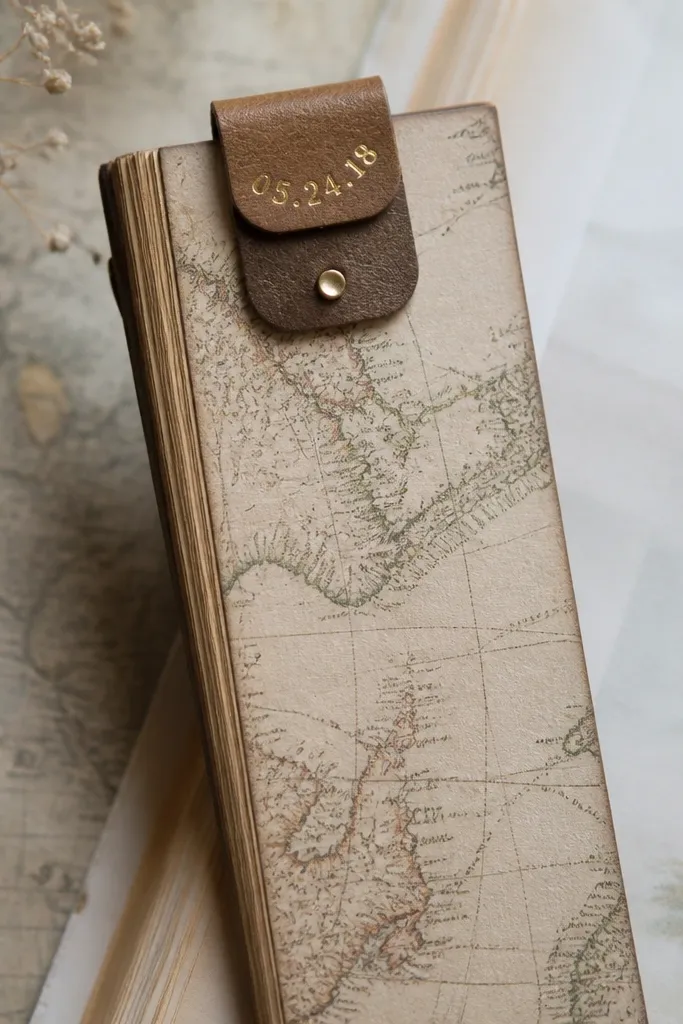
Bookmarks are small, cheap, and personal — and they feel special when they’re sturdy. Map print gives you texture without needing to be artistic. The faux leather tabs make the ends look deliberate and stop fraying. This is a great anniversary gift if he reads or studies.
Cut map paper or printed map sheet to 2 x 8 inches. Laminate it with clear adhesive film or cover both sides with packing tape for quick durability. Add faux leather tabs about 1 x 2 inches each, glued on top so they act like a clip.
Quick tipRound the corners with scissors to make it look store-bought.
One warningDon’t leave paper edges exposed — they curl after a few uses.
9. Resin-Look Keychain Using Clear Tape + Photo
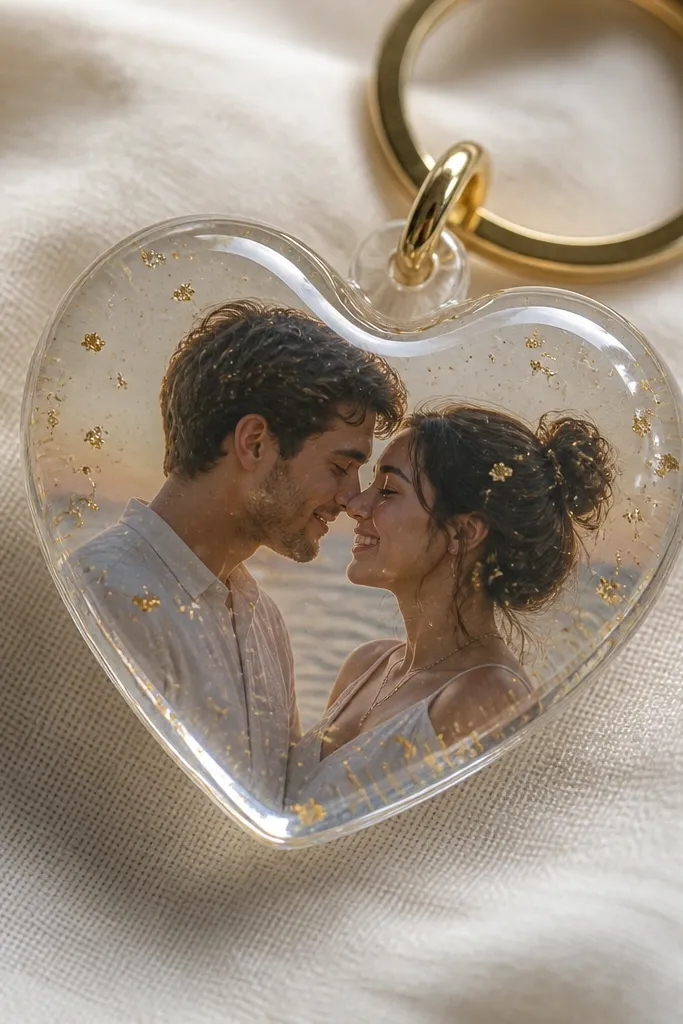
You get that resin-gloss look without resin. Clear tape layers build depth, and the photo becomes the focal point. It’s lightweight, and it’s perfect if you need a gift fast with minimal mess. I made these for a last-minute anniversary and they looked like they came from a shop.
Print a small photo to fit a 1.5 inch heart shape. Cut a heart template, then layer clear packing tape or clear craft tape around the photo edges. Add gold confetti between layers for sparkle, then seal the back with one more tape layer. Attach a keychain ring after the edges feel fully sealed.
Quick tipPress the tape down firmly with a credit card so air bubbles disappear.
One warningDon’t overfill with confetti — it makes the surface uneven.
10. Cutting Board Coaster With Burned Initials
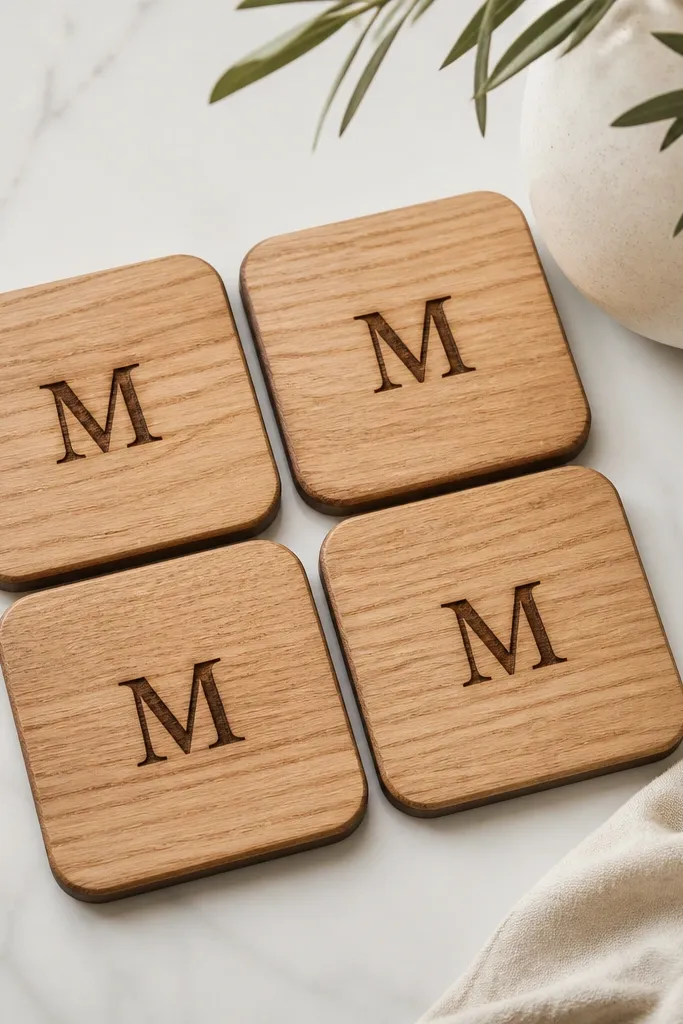
This looks like a custom woodworking piece even if you’re not a woodworker. Burning initials gives a warm, masculine feel that fits anniversaries. Sanded edges keep it from looking rough. The matte seal protects it from condensation and coffee rings.
Use a thin cutting board or scrap wood about 1/2 inch thick. Cut into 4 squares, sand edges, and burn initials with a wood burner set to low-medium heat. Wipe dust off and seal with matte food-safe finish or clear matte polyurethane once it cools.
Quick tipPractice on scrap first — wood burners vary by brand and wood type.
One warningDon’t seal before the burn is cool and dust-free — it traps soot.
11. Laundry-Tag Style Wallet Card From Old Leather Belt
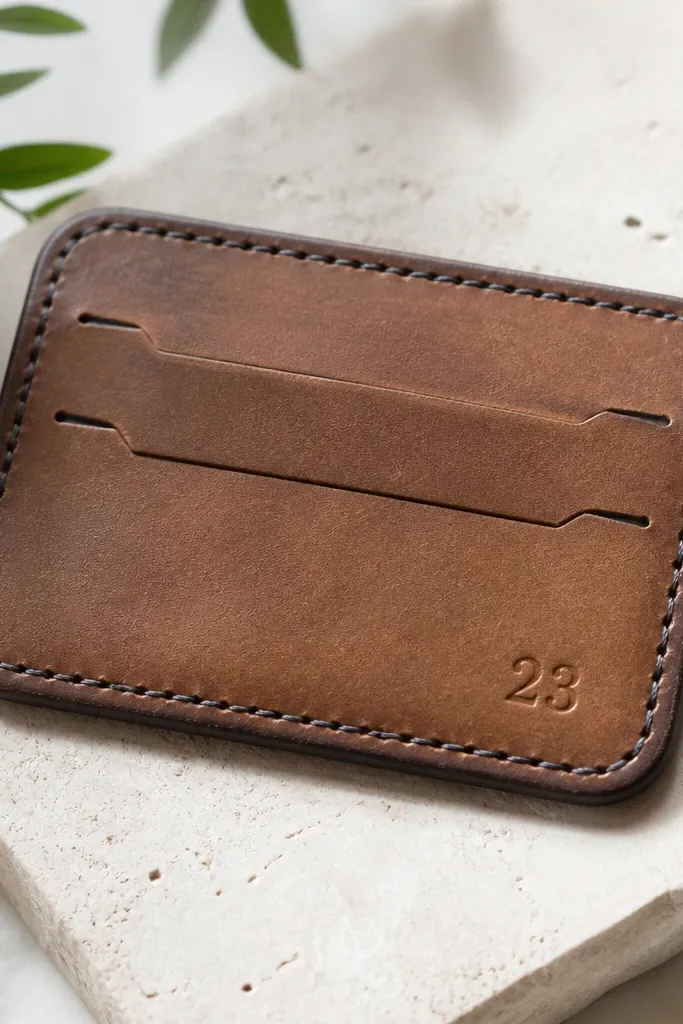
Leather belt upcycling turns into something he can actually carry. Wallet cards get used daily, so the gift doesn’t fade into a drawer. The stamped or punched details look real and rugged. This also takes color well — brown leather with tan stitching looks sharp.
Cut a rectangle about 2.25 x 3.75 inches from belt leather. Punch two holes near the top edge and stitch a thin folded strip inside to create a pocket. Add a stamped date or initials with a letter punch set, then burnish the edges with a little wax.
Use tan waxed thread so the stitching reads clearly on camera.
Don’t glue the pocket closed — stitching holds up better in a wallet.
12. Thrifted Tie Into Pocket Notebook Cover
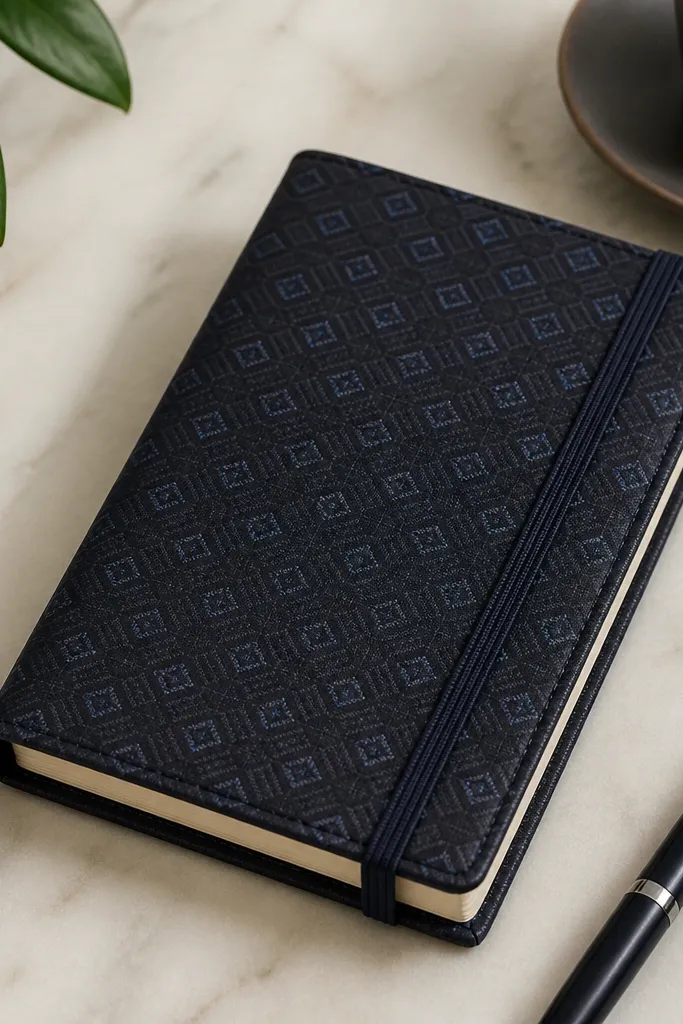
A tie is already designed to look like a gift. When you repurpose one into a notebook cover, you get clean lines and a fabric that drapes well. The lining makes the inside feel finished, not patchy. I’ve used this for anniversary gifts for guys who like journaling or planning.
Cut the tie fabric panel to fit the notebook front and back, leaving 1/2 inch extra for folding. Use the tie’s lining for a pocket that holds pens or a small card. Stitch or glue the edges, then add an elastic band across the spine.
Trim the tie seam bulk first so the cover lays flat.
Don’t keep the tie knot seam on the cover edge — it creates a thick bump.
13. Photo Strip Hanging Wall Organizer With Mini Clips
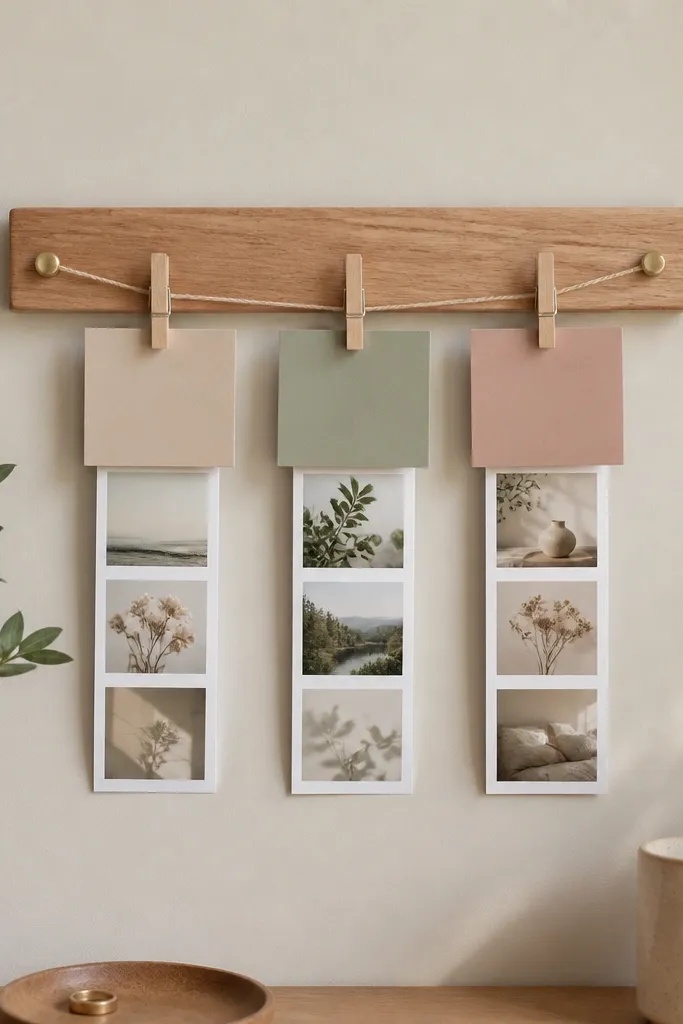
It’s part decor, part message board. The photos tie it to your relationship, and the clips let him swap notes. I like this for anniversary weeks because you can add one “reason I love you” card per day. The wooden strip keeps it grounded and not flimsy.
Use a 12-14 inch scrap wood board. Stain or leave it natural, then screw small hooks or eyelets on each end. Stretch twine across, add 3-5 mini clips, and place photo strips with a thin cardstock backing so they don’t curl.
Cut cards with a corner rounder so the edges look crisp.
Don’t use thick yarn — it sags and makes the photos look crooked.
14. Paint-Pen Coaster Set On Ceramic Tiles
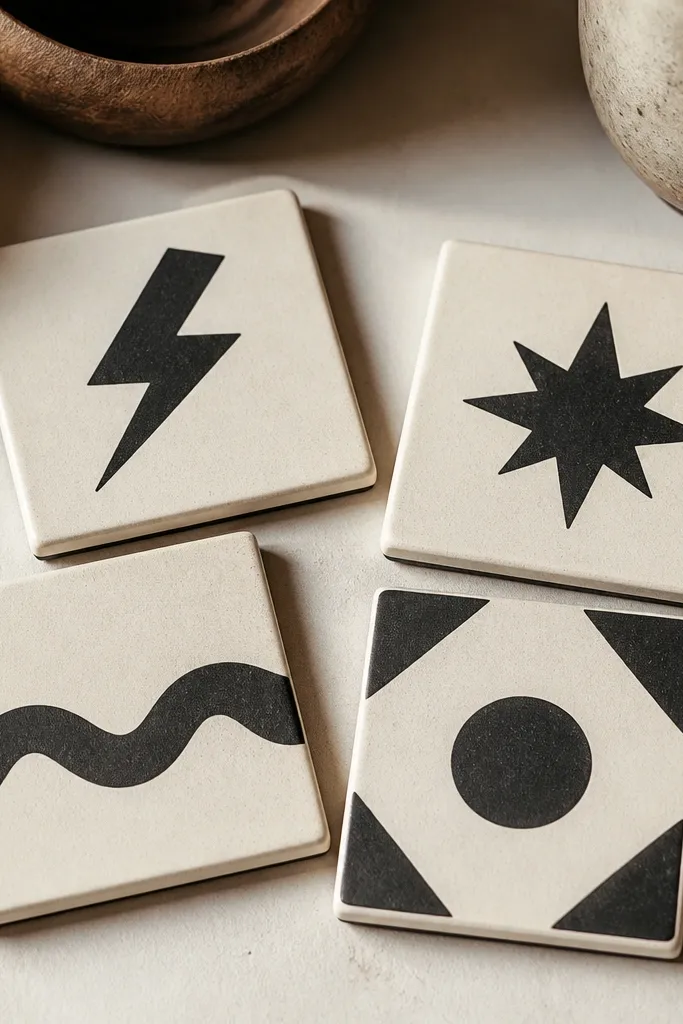
Ceramic tiles are flat and heavy, so they look “real” fast. Paint pen designs read sharp and masculine when you stick to simple shapes. Seal with a clear topcoat so the patterns don’t scratch off. This is great if he likes minimal style and doesn’t want a lot of clutter.
Buy plain ceramic tiles, cut to 4-inch squares if needed, or use smaller tiles. Clean with rubbing alcohol, then draw patterns with paint pens. Seal with 2 coats of clear acrylic spray; add cork pads to the bottom if you want extra slip resistance.
Use painter’s tape to mask lines so your geometry stays straight.
Don’t skip bottom cork pads — tiles slide on smooth tables.
15. Candle Jar Upgrade With His Favorite Label Theme
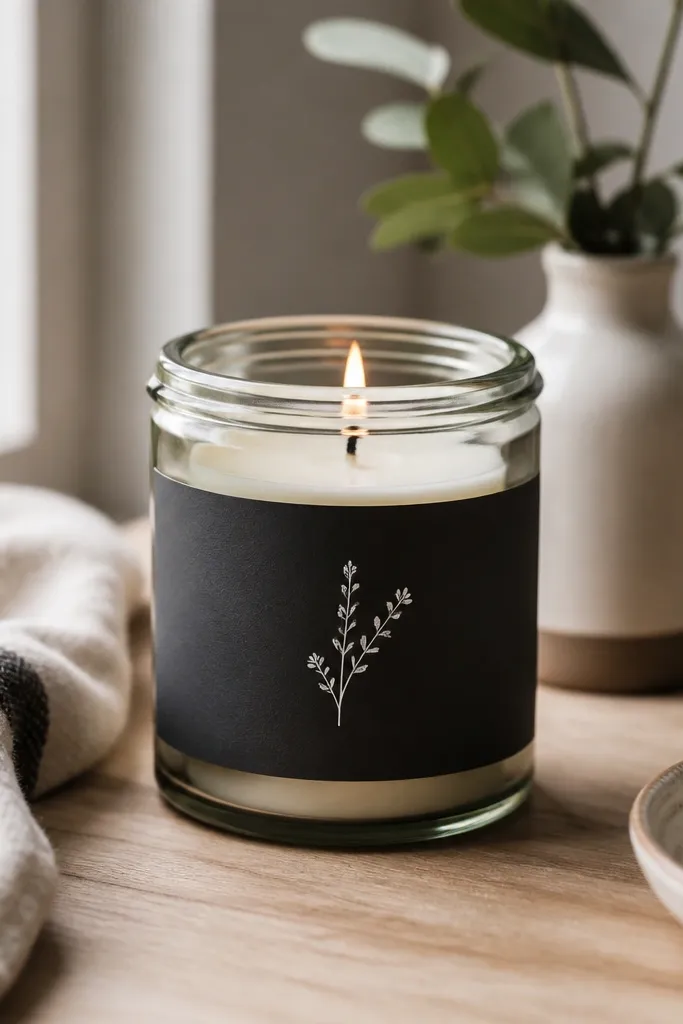
This is a gift that looks like you made a brand. The jar is already the right size, and the label gives you the personalized hit. I’ve done this with travel-themed icons, sports colors, and even a “we met here” street name. When you seal the label edges, it looks smooth instead of like paper stuck on glass.
Clean and dry the jar. Wrap a strip of cardstock around and mark the overlap, then glue or tape the seam behind the jar. Seal the label with a thin layer of clear matte medium or laminate film. If you’re reusing a candle, replace the wick and pour a new small soy candle or add battery tea lights.
Use a label template on plain paper first so the text lines up before you cut cardstock.
Don’t use regular glue on glass without sealing — labels peel when warmed by a candle.
16. Felt Thermos Cozy With Hidden Pocket for a Snack
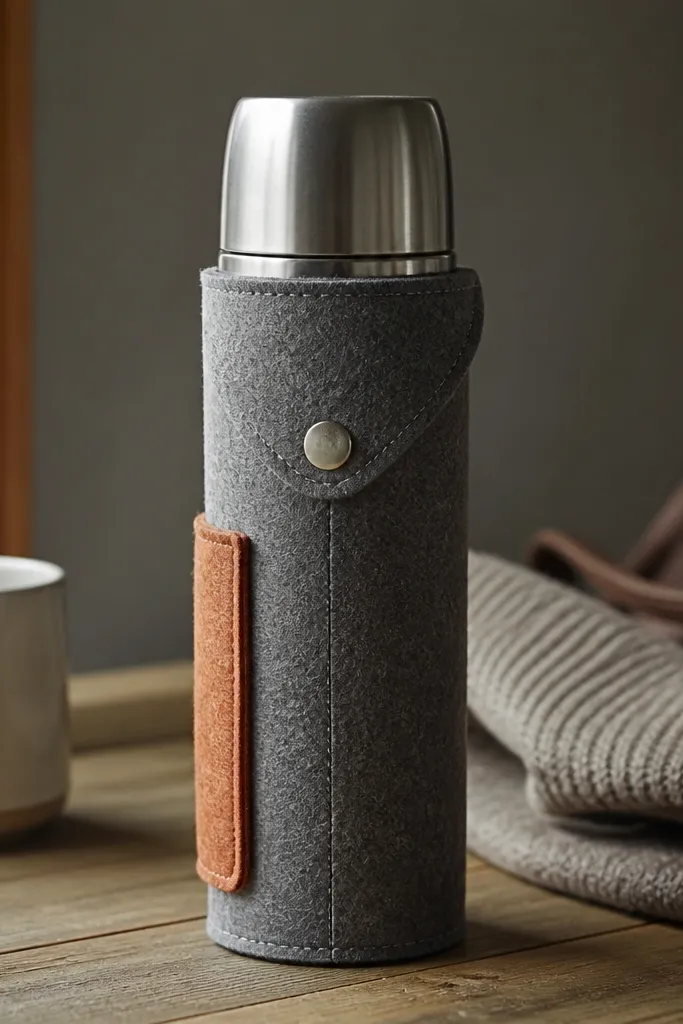
Felt is thick, forgiving, and it hides seams. A thermos cozy makes his everyday carry look personal. The hidden pocket is the part that gets a real reaction — he finds it and goes “oh this is for me.” It also keeps the thermos from sliding in his bag.
Measure his thermos height and circumference. Cut felt panels with 1 inch overlap for closure. Add a side pocket panel, then stitch or glue the pocket edges. Close the top with a snap and trim the edges so it wraps tight without bunching.
Quick tipUse two layers of felt for a sturdier fit that doesn’t sag.
One warningDon’t use thin felt — it collapses and looks like a costume.
17. Old Map T-Shirt Into Bow Tie Keychain
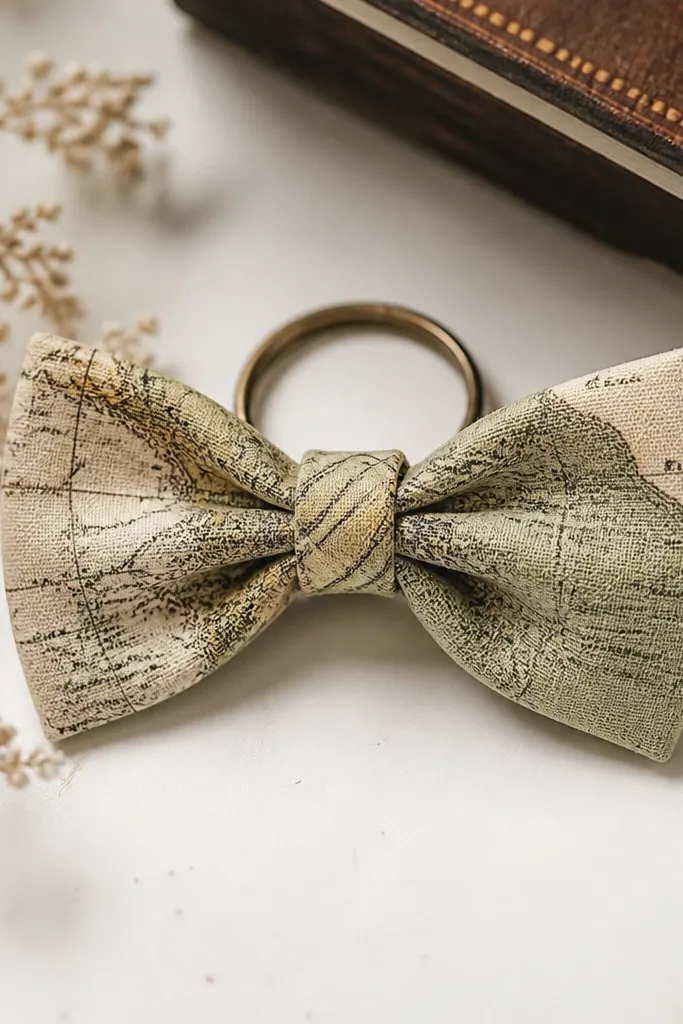
Bow ties look cute and grown-up at the same time, and a keychain version is genuinely fun. Using map print keeps it anniversary-themed without needing a photo. The texture reads special even up close. I like this for guys who dress up but still carry keys everywhere.
Cut two bow tie pieces from a map-printed fabric or repurposed T-shirt. Fold and stitch the center, then sandwich with a backing piece for structure. Attach a key ring to the back with a small fabric loop or a glued fabric tab reinforced with thread.
Quick tipPress with a hot iron on low before stitching so folds stay crisp.
One warningDon’t skip a backing piece — the bow tie looks floppy.
18. Mini Desk Organizer From Cardboard + Fabric Wrap
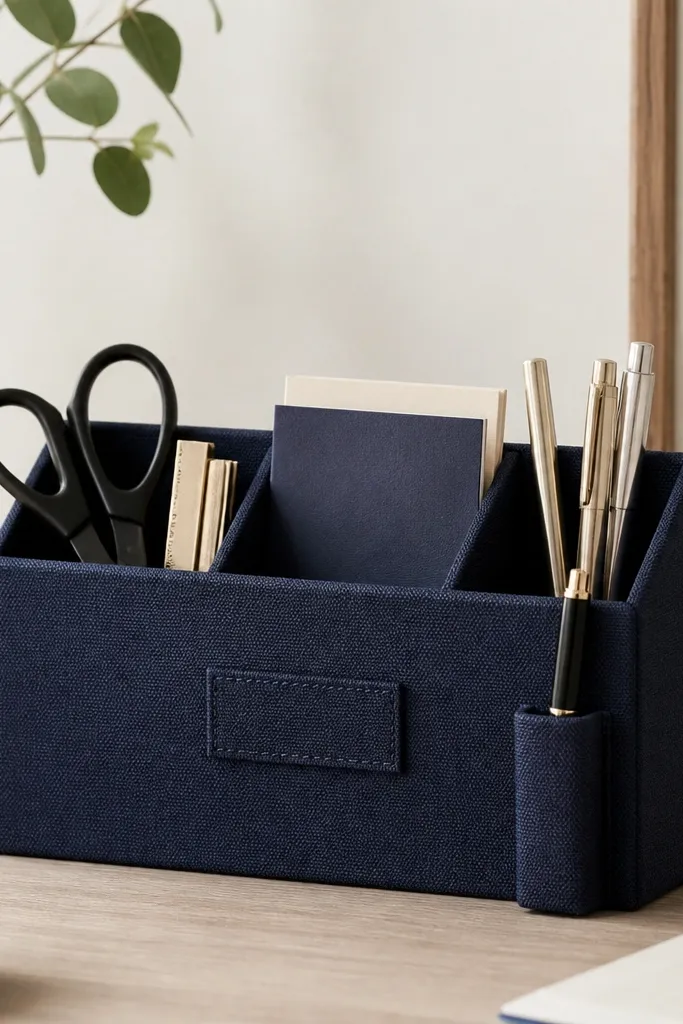
Cardboard is fast and cheap, but the fabric wrap is what makes it look like a real desk accessory. The compartments keep his everyday tools in one place. The stitched label makes it feel like a gift, not a recycling craft. I’ve used this for anniversary gifts when I needed something desk-friendly and tidy.
Build with thick cereal-box cardboard cut into a base and dividers. Wrap each piece with fabric using fabric glue, pulling fabric tight around edges. Add a front label strip and stitch it down by hand for a clean finish. Seal the inside seams with a thin brush of glue.
Let the fabric glue cure overnight so corners don’t lift.
Don’t use slippery fabric that frays — it lifts at corners and looks sloppy.
19. Cornhole-Style Bean Bag Keychain With Felt Patch
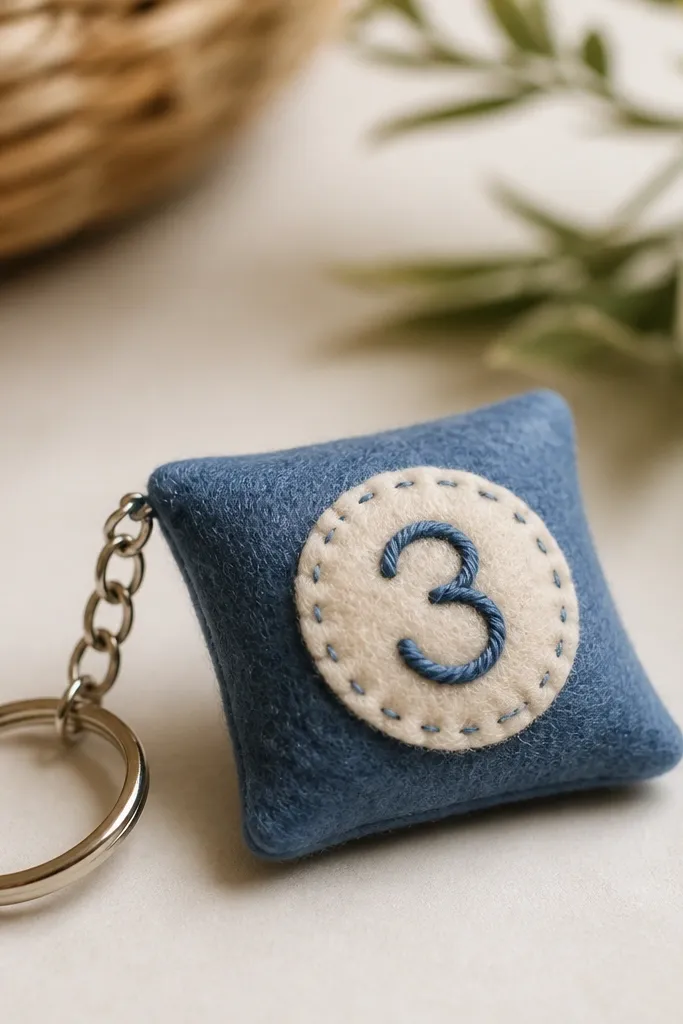
This is small, silly, and personal, and it fits the quick easy DIY gifts for boyfriend vibe perfectly. Felt holds its shape so it looks neat. A stitched patch gives it a clean “team logo” feel. It’s also a fun souvenir if he likes games or sports.
Cut two identical felt shapes (about 2.5 x 3 inches). Stitch around the edges leaving a small opening, then fill with a pinch of polyester stuffing and close. Add a felt patch on the front and stitch it with contrasting thread. Attach a small key ring through a loop stitched into the back seam.
Use embroidery floss for the patch so the thread looks bold.
Don’t overstuff — it bulges and the patch won’t sit flat.