1. Thrift Frame to Photo Tile Grid (3x3) with Your Handwritten Date
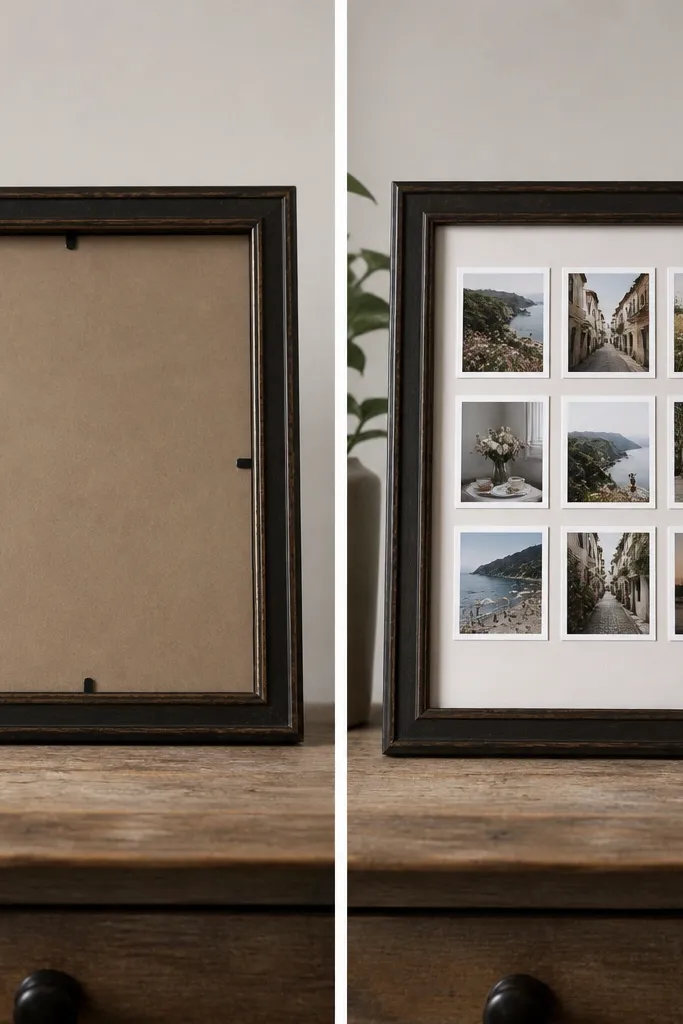
Start with a thrift frame that has a deep lip so the insert doesn’t rattle. I like dark wood or black frames because the light photo borders pop against them in daylight. For the after, print 9 photos in a consistent size (I use 2.5x2.5 inches) and mount them on white cardstock with 1/8-inch spacing so it looks crisp, not crowded. Add one handwritten date label in blue gel pen on a small strip of off-white paper — it looks like a real “you made this” touch, not a sticker. This gift flatters almost any home style because the photos do the work; it looks best when the room already has neutrals or warm wood tones.
First, sand the frame lightly (120 grit) and wipe dust off with a damp cloth, then dry fully. Paint the frame with two thin coats of matte acrylic in either warm white or black satin, letting it cure 24 hours before handling. Cut a foam board insert to the frame’s inside size, then tape a 3x3 photo layout using a straightedge so each tile lines up. Finally, secure each photo with photo corners or double-sided tape, add the handwritten date label at the top right, and seal the backing edge with clear packing tape so it stays flat in transit.
Write your date label on paper first, then tape it on — you’ll get the exact placement without smearing.
Skip glossy varnish on the frame if your boyfriend’s room has lamps — glare makes the photos look washed out.
2. Plain Hoodie to Custom "Long Distance Mail" Patch Shoulder Detail
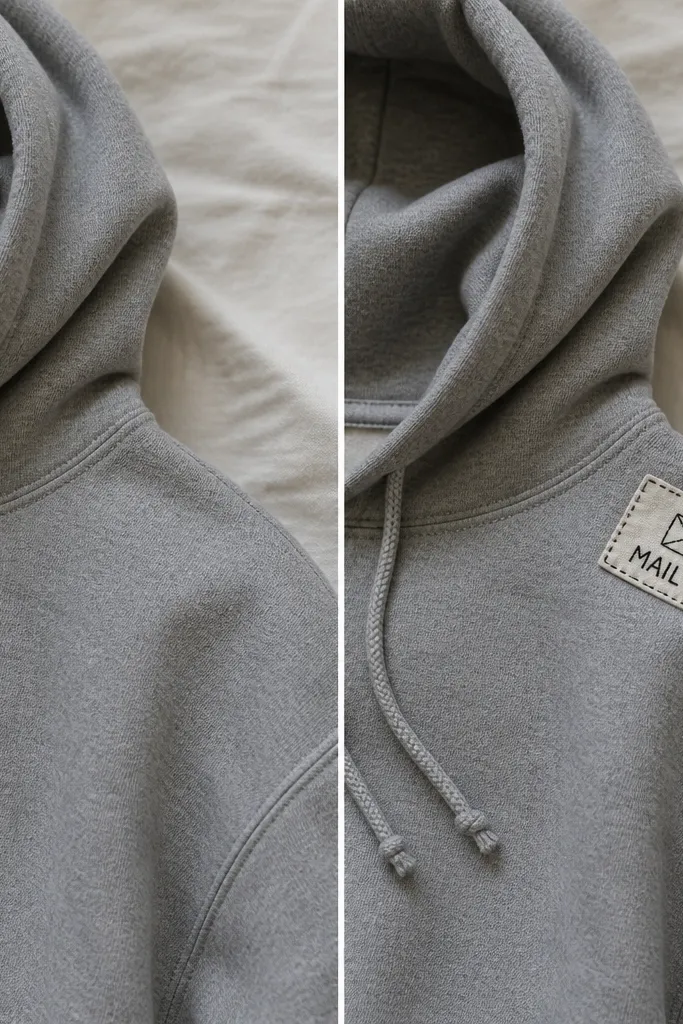
This one hits hard because it’s wearable and it still reads personal after weeks. I use a medium-weight hoodie in charcoal, navy, or heather gray because the patch stands out without needing loud colors. The patch is made from felt or cotton twill cut into a neat rectangle, then stitched on with contrasting thread so it doesn’t look like an iron-on accident. The envelope mini graphic looks great in black and off-white, and the small size keeps it from feeling costume-y. It flatters people with broad shoulders because the patch sits high and balances the neckline.
First, wash and dry the hoodie so the fabric stops shrinking after you stitch. Cut a 3.5x5 inch patch from off-white felt, then add a simple envelope outline using fabric marker or printed transfer paper. Place the patch on the right shoulder seam area, pin it, and stitch around the edges with a tight running stitch using black thread. Finally, reinforce the corners with two tiny backstitches and steam the hoodie from the inside so the patch lies flat.
Quick tipUse a needle size meant for denim or canvas (around size 90/14) so the stitch goes in cleanly without snagging.
One warningDon’t place the patch on the chest — it twists with the hoodie and looks crooked in photos.
3. Mason Jar to Letter Jar with Rolled Notes and a Cork Lid
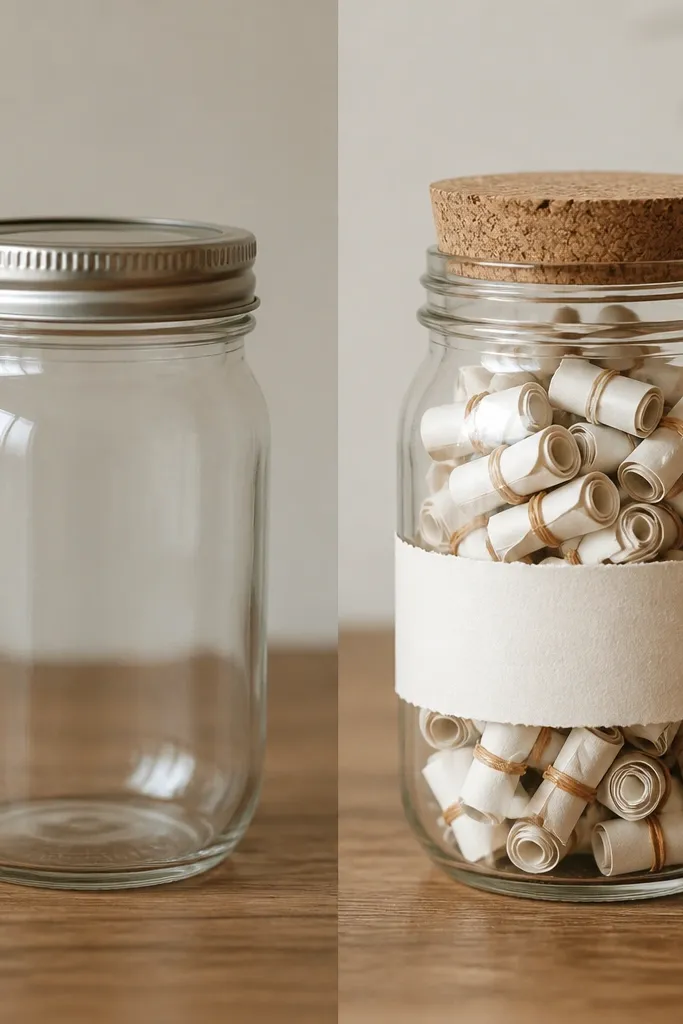
A letter jar works because it’s interactive. He can grab one note at night, and the gift keeps giving without you needing to ship anything else. I use rolled notes because they look tidy inside the jar, and they don’t crush as easily as folded stacks. The visual trick is the band around the jar: kraft paper or cream label paper with your handwriting in black, so it looks like a real keepsake. This suits boyfriends who like routines — it feels like a nightly ritual, not a one-time message.
First, clean the jar and dry it so adhesive sticks. Wrap kraft paper around the jar once and mark the overlap, then cut it and glue it with a thin layer of craft glue. Add a cork lid and tape the cork’s edge with a strip of clear tape so it doesn’t pop open in shipping. Write 30 mini notes on 2x3 inch cardstock strips, roll each tight, and tie with a 1/8-inch strip of twine or ribbon. Pack the jar upright in bubble wrap, then add paper padding at the top so the rolls don’t rattle.
Quick tipRoll the notes around a chopstick for consistent tight spirals.
One warningSkip glitter pens — they smear on the inside of the jar and look messy through the glass.
4. Old Map to Desk Mousepad with a Laminated Photo Corner
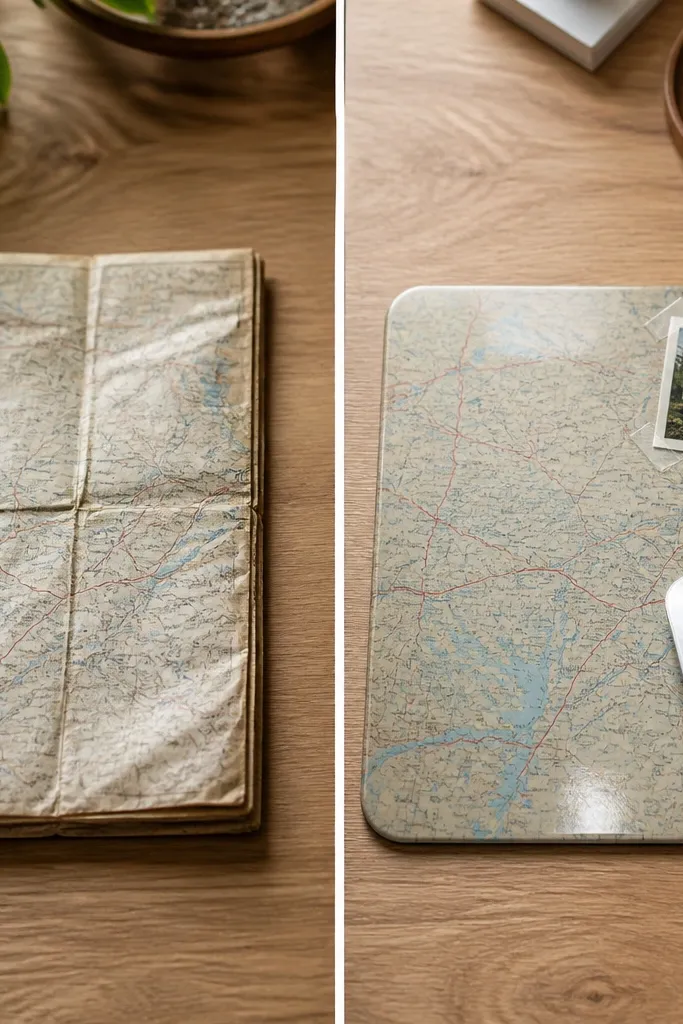
This gift is practical and it looks cool on camera because maps have natural texture. Choose a map page with bold city names or a coastline — the after looks intentional even if the rest is simple. I laminate the map so it survives desk spills and rubbing from the mouse. Add one laminated photo corner (a small 1.5x2 inch photo with a clear protective layer) so your “us” moment is visible without taking over the whole design. It flatters anyone who works at a desk with neutral gear because the map adds color without neon overload.
First, cut your map to mousepad size (I use about 9x7 inches) and round the corners. Brush the surface with a thin layer of Mod Podge or clear lamination film, then smooth carefully so no bubbles form. Place a small photo in the top right area and laminate over it so the edges are sealed. Let it cure flat under a stack of books for 24 hours. Pack it in a flat mailer with cardboard on both sides so it arrives unwarped.
Quick tipUse a clear acrylic sheet if you can — it gives the slickest mouse glide and the cleanest edges.
One warningDon’t leave raw paper edges exposed — they curl and look unfinished fast.
5. Scrap Leather to Keychain with Tiny Photo Window and Brass Eyelet
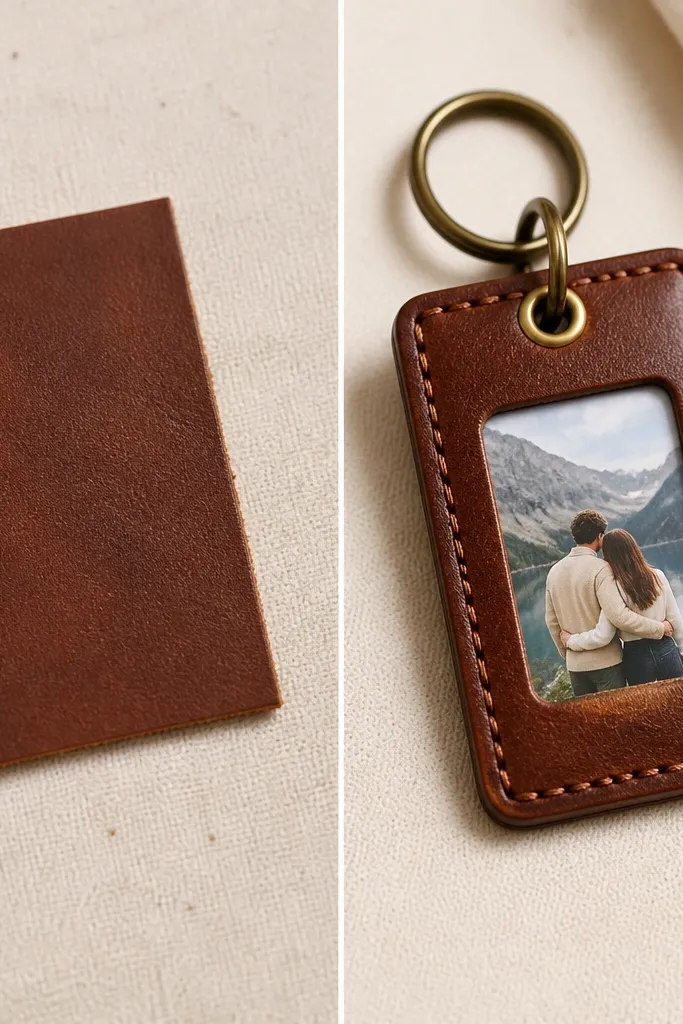
This is my go-to for long-distance because it travels everywhere and still feels personal. Leather scraps work because they already look “real,” and the small photo window makes it unmistakably yours. I keep the photo tiny (about 1x1 inch) so the keychain stays slim and doesn’t snag on pockets. Brass hardware adds warmth and makes it look more expensive than it is. This flatters guys who carry keys daily; the keychain becomes a small daily reminder instead of a drawer item.
First, cut leather into a 2.5x3.5 inch rectangle and punch a hole near the top center for a brass eyelet. Cut a matching piece and decide where your 1x1 inch photo goes, then trim a small clear plastic square (like from a photo protector sheet) as the window. Glue the window to the back piece, insert the photo, then align the two leather halves and stitch around the perimeter with waxed thread. Burnish the edges with a little beeswax or edge paint and attach a split ring through the eyelet.
If your leather is stiff, soften it by rubbing with a bit of leather conditioner the night before stitching.
Skip cheap glue-only closures — the photo can shift and the window looks cloudy.
6. Reclaimed Wood to Wall Hanging Message Board with Clothespins
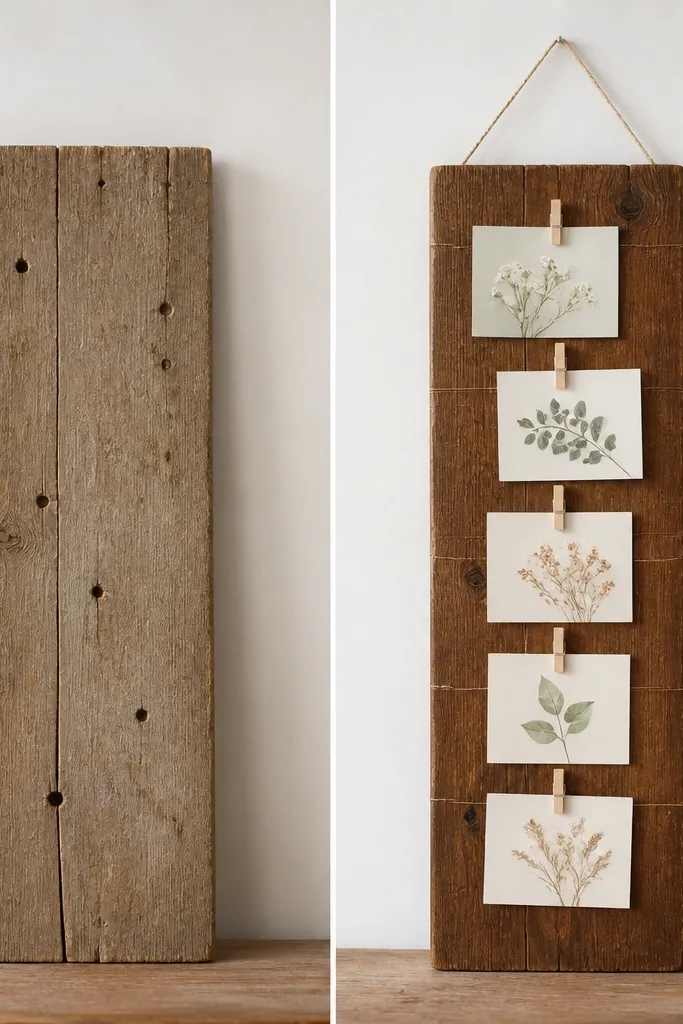
A clothespin message board feels like a shared routine. It works because it turns your notes into something he can look at during the day without opening an app. I stain reclaimed wood in warm walnut because it hides minor scratches and makes the clothespins stand out. Use a strip of linen or cotton fabric as the backing so notes don’t snag. This gift looks best in a hallway, office corner, or next to a desk where he already puts reminders.
First, sand the board until it feels smooth to the touch, then wipe with a tack cloth. Stain with one coat of walnut stain, wipe off excess, and let it dry fully. Cut fabric to fit the board’s back, then staple it around the edges or glue it with fabric glue. Attach a row of clothespins using small screws or strong glue blocks spaced evenly. Add a string loop at the top, then pack notes separately and include them clipped to the board in a zip bag so nothing slides out.
Pre-drill tiny pilot holes for clothespins so the wood doesn’t split.
Don’t use glossy stain if the clothespins catch overhead light — you’ll see glare instead of the cards.
7. Coffee Sleeve to Phone Stand with a Photo Strip Backing
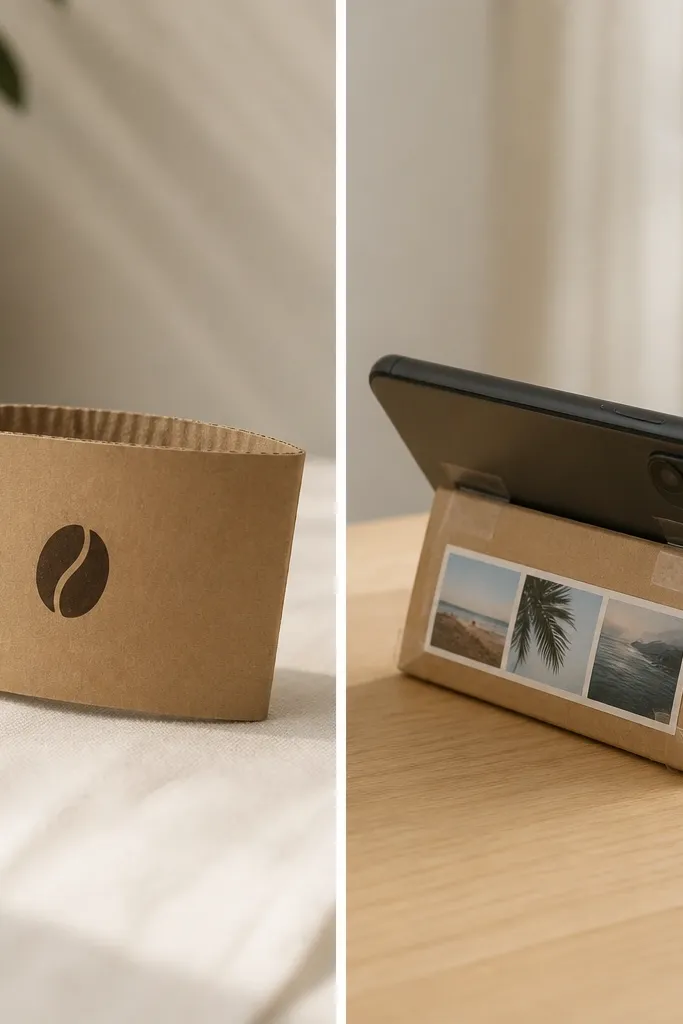
This is one of the fastest builds I’ve done, and it still looks thoughtful. Coffee sleeves have a built-in curve and texture, so they end up looking design-forward instead of homemade. I add a photo strip inside so the stand has a “story” moment when he sets the phone down. The stand works best for phones used on a desk because it holds at a comfortable viewing angle for messages and videos. It flatters smaller workspaces because it’s compact and doesn’t take up much space.
First, flatten the sleeve and mark where you want the fold so it creates a stable angle (I use about a 60-degree angle). Reinforce the fold lines with double-sided tape or clear packing tape on the inside so it doesn’t crease permanently in the wrong place. Cut a photo strip to the stand width, then glue it inside the back panel using a thin layer of glue stick. Fold into a V shape, press firmly, and let it set under a book. Pack it in a rigid mailer so the fold stays sharp and the sleeve doesn’t collapse.
Quick tipTest the angle with your phone before gluing the photo strip — tiny adjustments matter.
One warningSkip thick glue near the hinge — it makes the stand stick and it won’t fold cleanly.
8. Scrap Fabric to Braided Friendship-Style Bracelet with Map Coordinates Tag
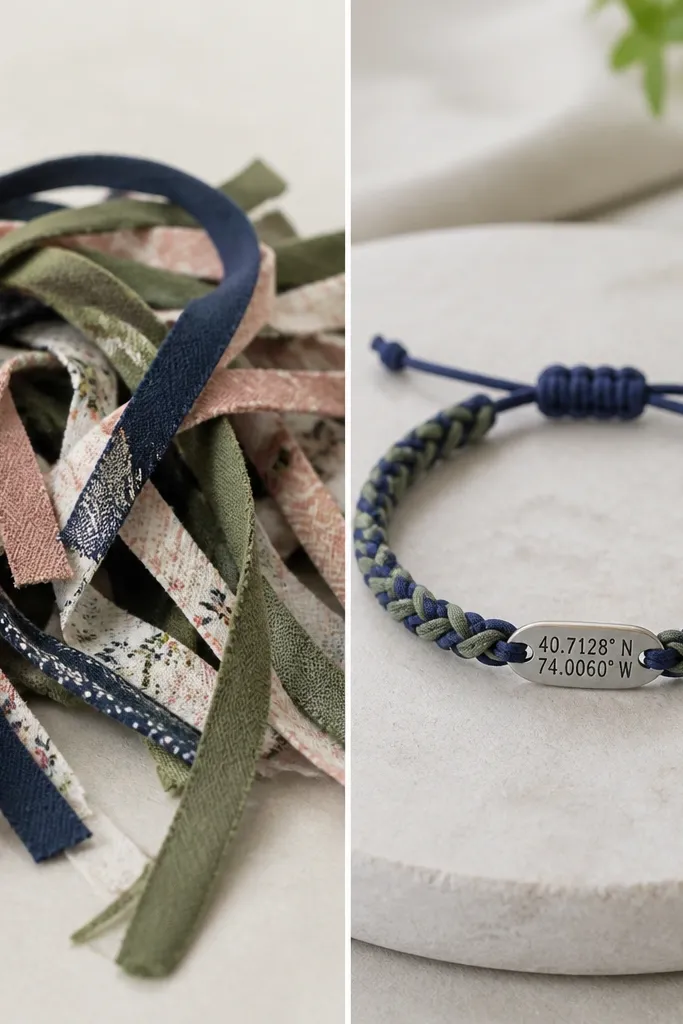
A braided bracelet is small, but it reads romantic because it’s worn close to the skin. I use two or three fabric strips in colors that match his everyday — think black with a muted green, or navy with cream. Add a map coordinates tag so the gift has a clear “we are here and there” meaning without a long explanation. The slider knot closure makes it fit even if you don’t know his exact wrist size. This works best for boyfriends who wear bracelets or watch bands because it looks natural next to other accessories.
First, cut strips about 1/2 inch wide and 12 inches long, then fuse the ends with a tiny bit of fabric glue so they won’t fray. Braid tightly using the three-strand method, keeping tension even the whole way. When you reach the desired length, tie off and trim ends, then seal frayed threads with a dot of clear fabric glue. Add a small coordinates tag (or a stamped tag you punch yourself) by threading it onto a thin waxed cord segment. Finally, create a slider knot closure by looping the cord through a small ring or bead and testing fit.
Quick tipChoose fabric that holds shape, like cotton twill or denim scraps, not stretchy knit scraps.
One warningDon’t use slippery satin — the braid loosens and looks loose after a week.
9. Thrift Sunglasses Case to Embroidered "US" Patch + Hidden Pocket
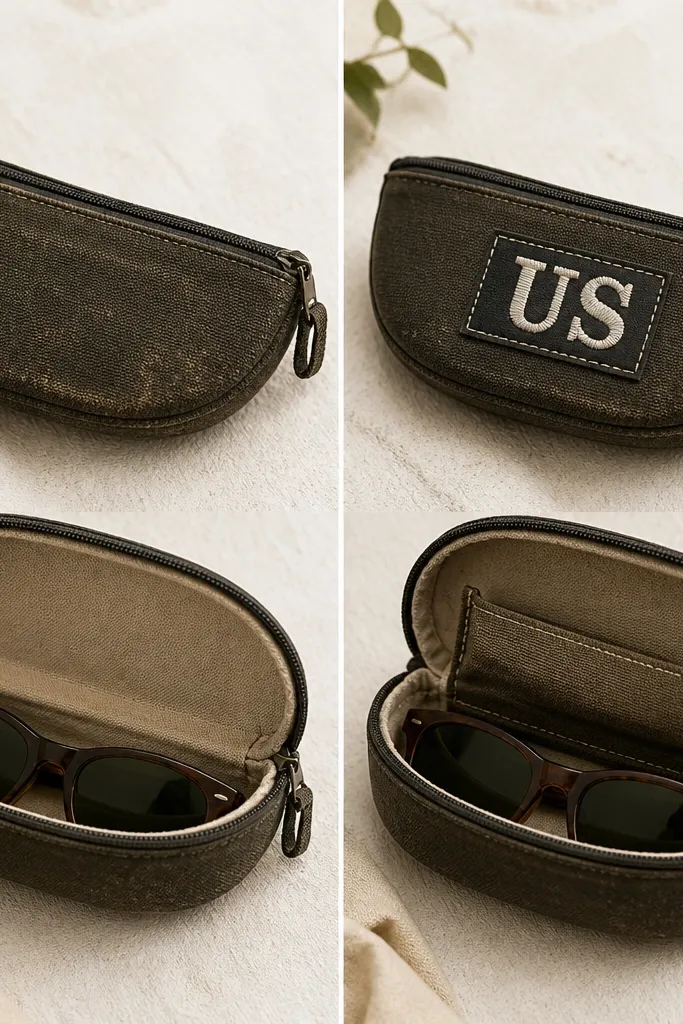
This one feels like a secret gift because you can tuck in a note, a tiny photo, or even a bus ticket stub. Sunglasses cases already have the right shape for long-distance shipping, and they protect whatever you hide inside. Embroidering “US” in a simple block stitch makes it look clean and intentional, not busy. I use a dark case with a lighter patch because it photographs well, and the hidden pocket keeps the surprise tucked away. It suits boyfriends who leave sunglasses in the car or use them daily.
First, clean the case surface with a damp cloth and let it dry completely. Cut a patch from sturdy felt or canvas and stitch it onto the front using a tight satin stitch. Make a small interior pocket by sewing a fabric rectangle onto the inside flap, leaving the top open for insertion. Add a small label on the inside edge with your handwriting so it feels like a set. Pack the case flat with a folded note inside, then wrap in bubble wrap and place in a mailer with no empty space.
Use embroidery thread slightly thicker than you think — it makes the patch pop from a distance.
Skip hand-sewing onto shiny fabric without stabilizer; the needle pulls and the patch looks puckered.
10. Plain Candle Jar to Photo-Backed Spotify-Style Label (No App Needed)
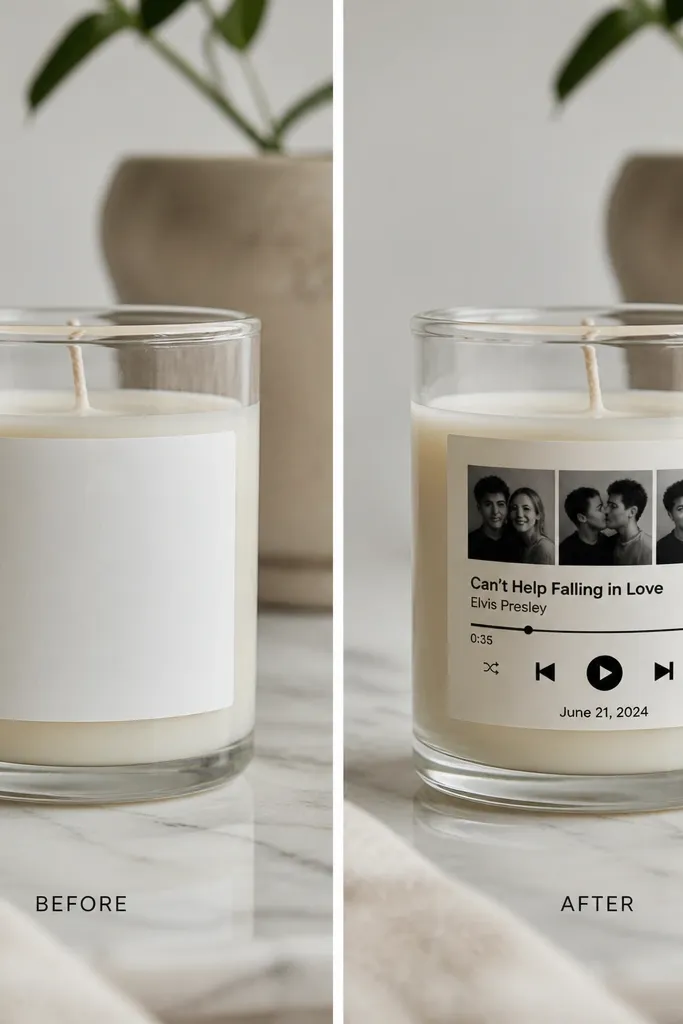
Candle jars are perfect for reusing because the glass makes the label look sharp. I make the label matte so it doesn’t glare, and I add a photo strip so he recognizes you instantly. The “Spotify-style” layout works even if you’re not using Spotify — it’s just a clean graphic format that looks familiar. This gift flatters people who like cozy evenings and desk candles, and it fits rooms with warm lighting because the glass glows. It also ships well since the jar is already built to hold heat and wax.
First, remove the old label using warm water and a plastic scraper, then dry the jar thoroughly. Print or hand-letter your label on matte sticker paper, then cut it to wrap around the jar. Glue the label around the circumference and seal the edges with a thin layer of clear packing tape. Add a small photo strip under the main text, then finish with a top band label so it looks aligned. For shipping, wrap the jar with foam or bubble wrap and put cardboard at both ends so the glass can’t move.
Quick tipUse matte sticker paper, not glossy — glossy labels glare under overhead lights.
One warningDon’t skip edge sealing; labels lift at the corners in transit and look messy.
11. Blank Keycap-Style Coaster Set Using Vinyl Stencils
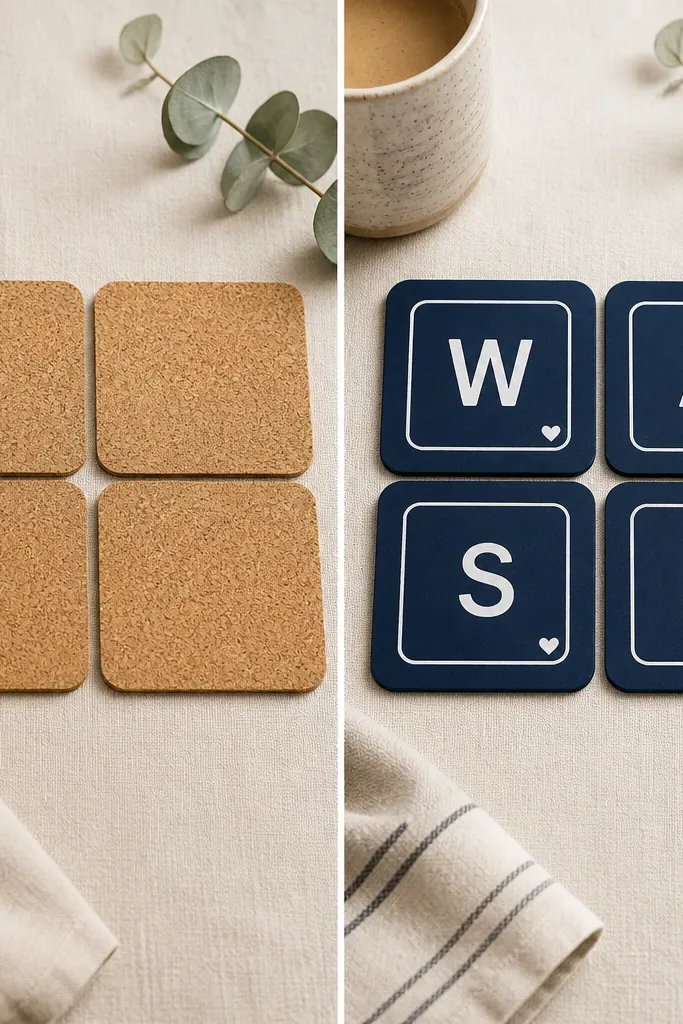
Coasters feel like a gift because they’re used constantly, and the set looks intentional when the design repeats. I start with cork coasters because they’re flat and forgiving — paint grabs without needing complicated prep. The keycap style is fun for boyfriends who game or type a lot, and the repeated letters make it look like a design set instead of random doodles. Use navy and white for a clean contrast, then add one tiny detail like a heart dot so it still feels personal. This works in most homes because coasters blend into existing tabletops while the design adds personality.
First, clean the cork surface and scuff lightly with fine sandpaper so paint holds. Prime with a thin coat of acrylic primer if your coasters soak unevenly, then paint two thin coats of deep navy. Cut vinyl stencils for each coaster letter or phrase, press firmly, and paint over the stencil with white acrylic. Remove vinyl while the paint is slightly tacky so edges stay crisp. Seal with a water-based clear coat and let cure overnight before packing in a flat box.
Do one test coaster first so you dial in paint thickness for sharp stencil edges.
Avoid thick paint layers; they bleed under vinyl and make letters fuzzy.
12. Thrift T-Shirt to Tie-Dye Style with Ombre Pocket and Stitched Initial
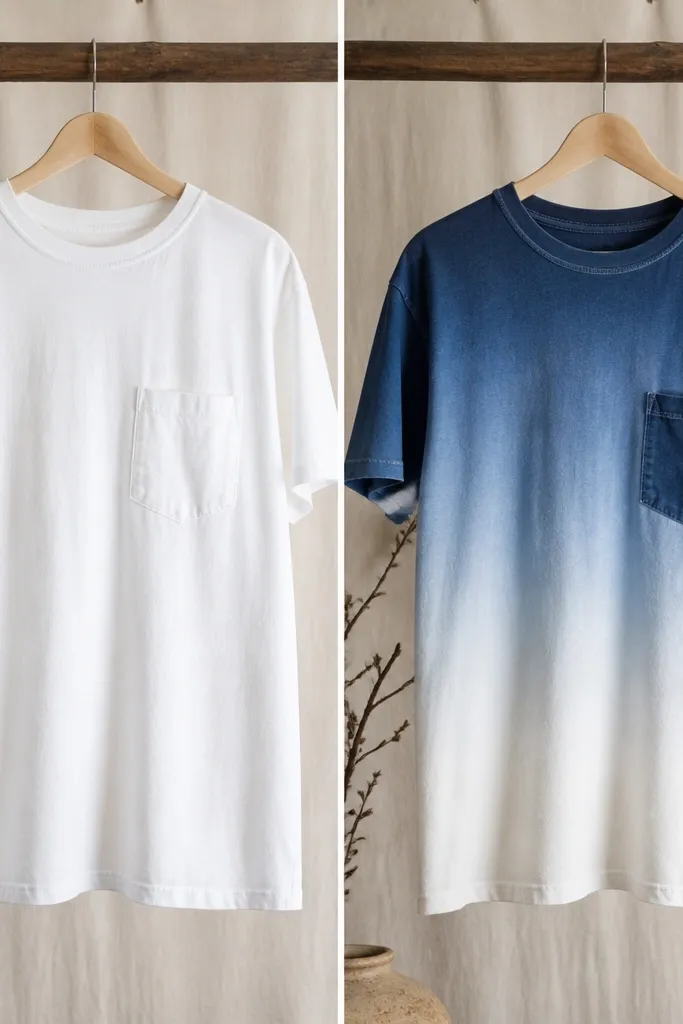
If your boyfriend likes casual clothes, this one looks like you bought it from a small brand. I keep the dye ombre subtle so it doesn’t look like a weekend craft — less saturation, more smooth fading. Add a pocket in a contrasting fabric like chambray or denim, then stitch his initial in white thread to make it feel tailored. The pocket also adds weight and structure, so the shirt looks better hanging. This flatters most body types because the pocket sits high and the ombre draws the eye toward the center.
First, pre-wash the shirt and soak it so the fabric absorbs dye evenly. Use a dye kit and create an ombre by dipping the bottom portion and gradually raising the fabric every 5-10 minutes to blend. Rinse until water runs clear, then dry fully. Cut a pocket piece from chambray, stitch it to the left chest with a double row of thread, and embroider his initial above the pocket opening. Steam the shirt flat, then fold with tissue between layers so the dyed areas don’t transfer.
Quick tipMark pocket placement with chalk and place a strip of tape on the inside — it prevents shifting while you stitch.
One warningSkip fabric softener during washing; it blocks dye and makes the ombre patchy.
13. Old Books to Hinged Photo Flipbook with Hidden Magnet Closure
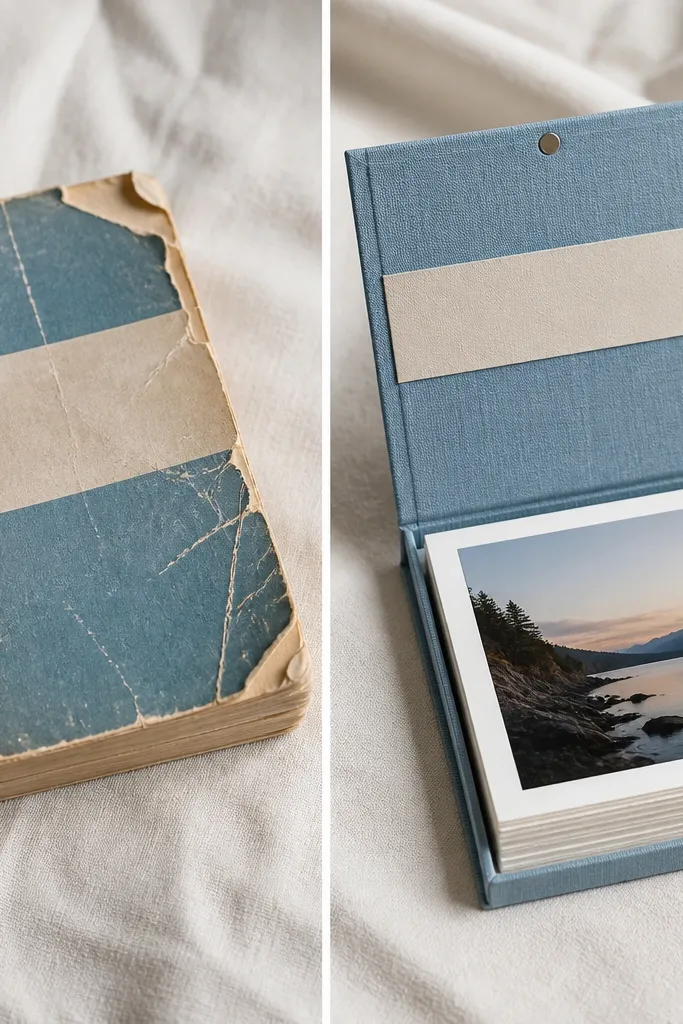
A flipbook feels like a date you can hold. I use old books because the spine already has character, and the “before” looks like junk until you restore it. The hinge style is better than a simple pamphlet because it opens flat and doesn’t fight the photos. I add a hidden magnet closure so it shuts cleanly and doesn’t rely on ribbon that gets tangled. This suits sentimental boyfriends who like physical photos and reading — it’s also great for small apartments where framed photos are too much.
First, remove the paperback cover and back pages carefully, keeping the spine hinge intact if possible. Cover the outside with bookcloth or cotton canvas using contact cement or bookbinding glue, then wrap edges tight. Print photos and mount them on cardstock pages, then glue or stitch them into the inside folds so they lie flat. Add a small magnet on the front cover and a matching metal strip on the inside so it snaps shut. Pack the flipbook in a rigid book mailer so corners don’t bend.
Quick tipUse a bone folder on every fold — crisp hinges make the photos look more professional.
One warningDon’t glue photos directly to the cloth — glue seeps and leaves dark spots.
14. Salt-Dyed Rope to Wall Hook for His Keys (With a Mini Map Pin)
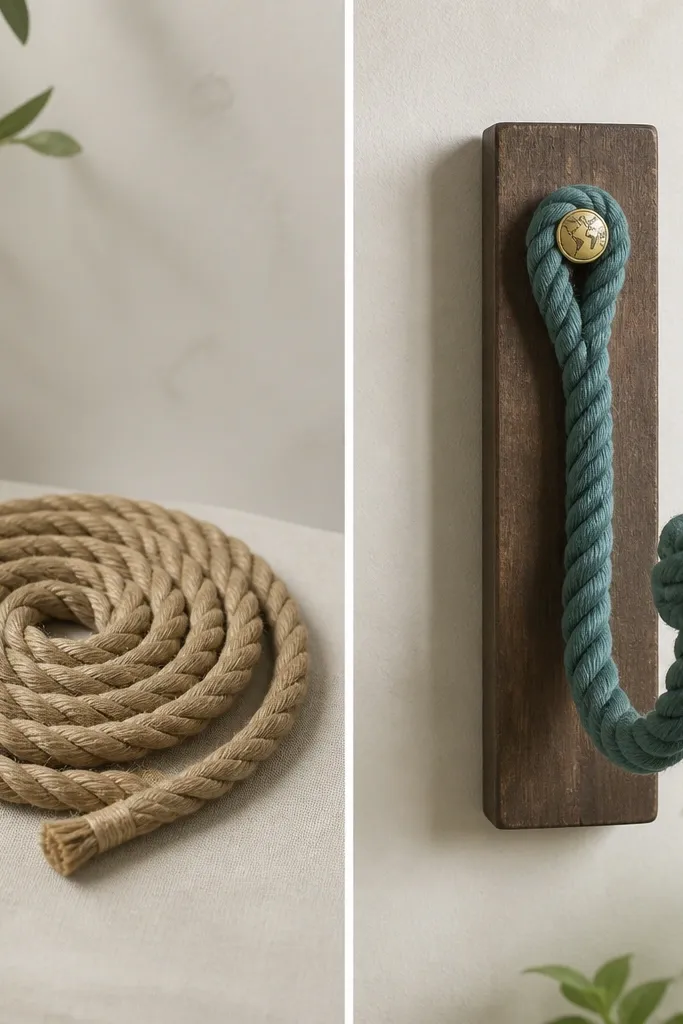
This is the gift version of “I thought about where you put your keys.” Rope hooks look casual and warm, and dyeing the rope gives it a soft color that doesn’t scream craft project. The mini map pin ties back to long distance without needing a big speech. I mount it on a small stained wood strip so it feels sturdy and not flimsy. This flatters homes with wood shelves and neutral walls because the rope adds texture without clashing.
First, cut a small wood strip and sand it smooth, then stain with a light walnut tone. Dye your rope in a muted teal using fabric dye diluted with water, then rinse and dry fully. Shape the rope into a hook loop and knot the end, then glue or stitch the rope to the wood strip. Screw a wall hook backing plate or small eyelet into the wood strip depending on wall type. Add the mini map pin with a drop of strong craft glue. Pack with a flat cardboard spacer so the rope doesn’t bend out of shape.
Quick tipLet the rope dye cure longer than you think — the color deepens after the first dry.
One warningSkip hot glue for load-bearing parts; use screws or stitch-glue combo so the hook doesn’t peel.
15. Before-and-After Glass Etching on a Reused Jar for Nightstand Trinkets
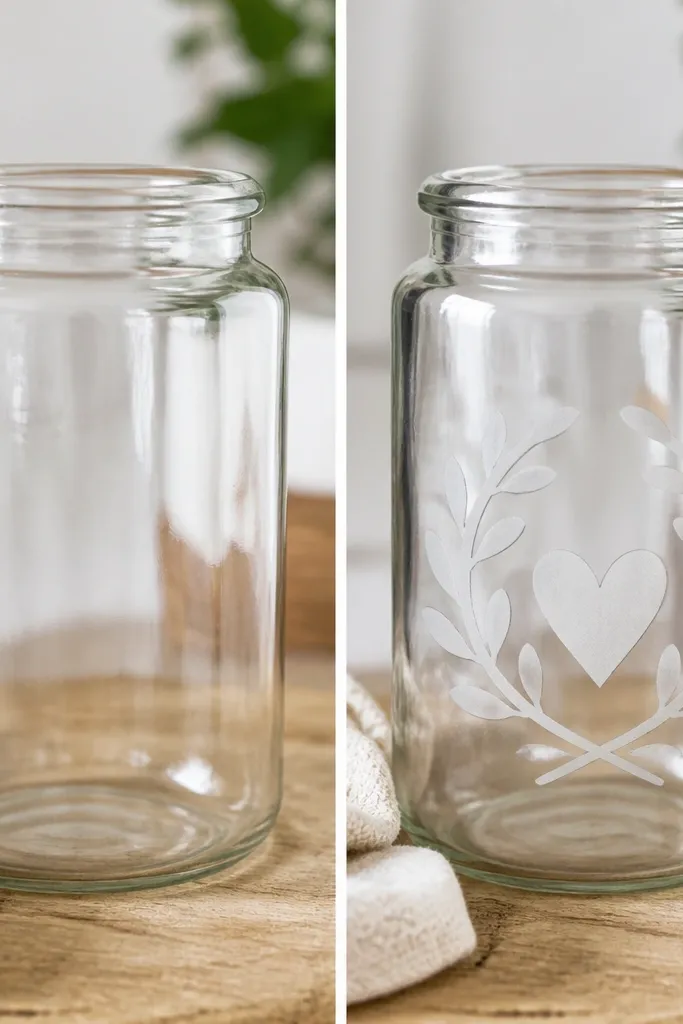
Etched glass looks expensive and reads personal because it’s permanent. The jar becomes a nightstand cup for rings, earbuds, or random coins, so he uses it every day. I pick jars with thick glass (like pasta sauce jars) because the etching looks cleaner on heavier glass. For design, I use a small frosted heart and one short phrase in block letters so it’s readable without being loud. This suits boyfriends who keep their essentials on the bedside and who like clean, minimal decor.
First, clean the jar with rubbing alcohol so etching cream sticks properly. Cut a vinyl stencil for your phrase and heart, then press it firmly onto the glass. Apply etching cream evenly using a foam brush, timing it carefully per the product instructions, then rinse thoroughly and remove the vinyl. Wash the jar again and dry completely. Seal the rim with a thin layer of clear tape or edge protector for shipping so the glass doesn’t chip.
Quick tipUse block letters in 1-2 lines — fine scripts look messy once etched.
One warningDon’t etch on dusty glass; you’ll get patchy frosts and uneven lettering.
16. Vintage Sheet Music to Bookmark Set with Floating Photo Corners
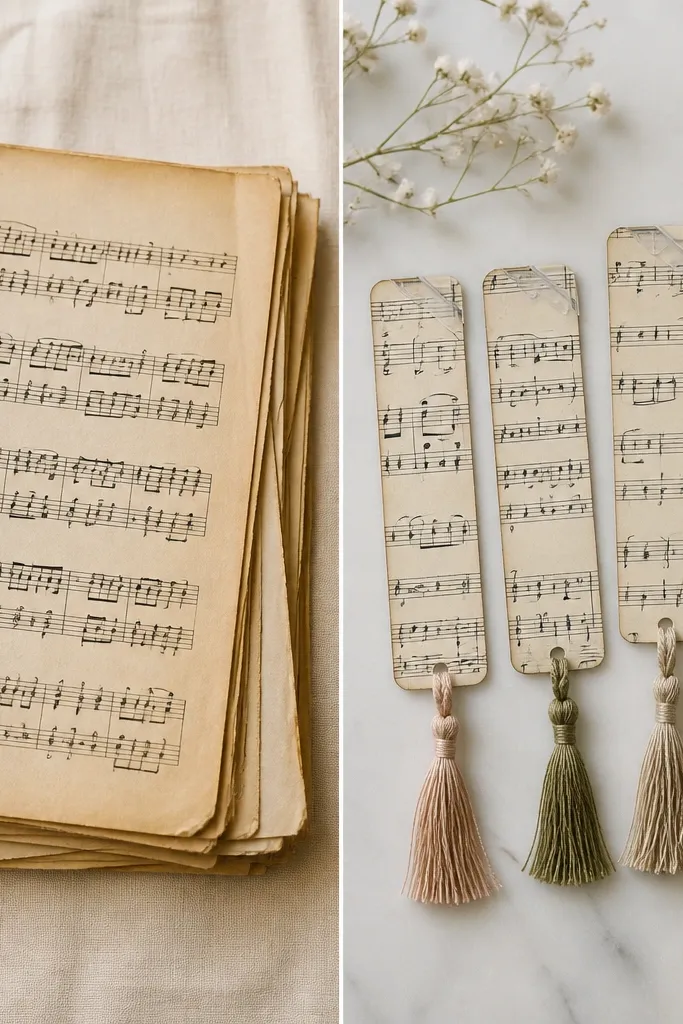
Bookmarks are an easy win because they’re light, cheap, and they get used immediately. Sheet music gives you texture and a “history” look without you needing to print anything fancy. I add a laminated photo corner because it gives a clear “before and after DIY gifts for boyfriend” moment when he flips pages. Tassels at the bottom make it feel handmade but neat. This suits boyfriends who read paper books, study, or keep novels in rotation.
First, cut sheet music into bookmarks about 2 inches wide and 7-8 inches tall, then round corners with scissors. Laminate or use clear adhesive film to protect the paper so it doesn’t soften in humidity. Place a tiny photo corner (about 1x1 inch) near the top, then laminate over it so the edges seal. Punch a hole for a tassel string, then add a simple thread tassel in a color that matches the photo. Pack flat in a rigid envelope so corners don’t bend.
Quick tipUse a single photo per bookmark, not a collage — the reader sees it instantly.
One warningSkip unsealed paper — bookmarks curl and look worn quickly.
17. Cardboard to Custom Phone Wallet with Photo Sleeve and Magnetic Flap
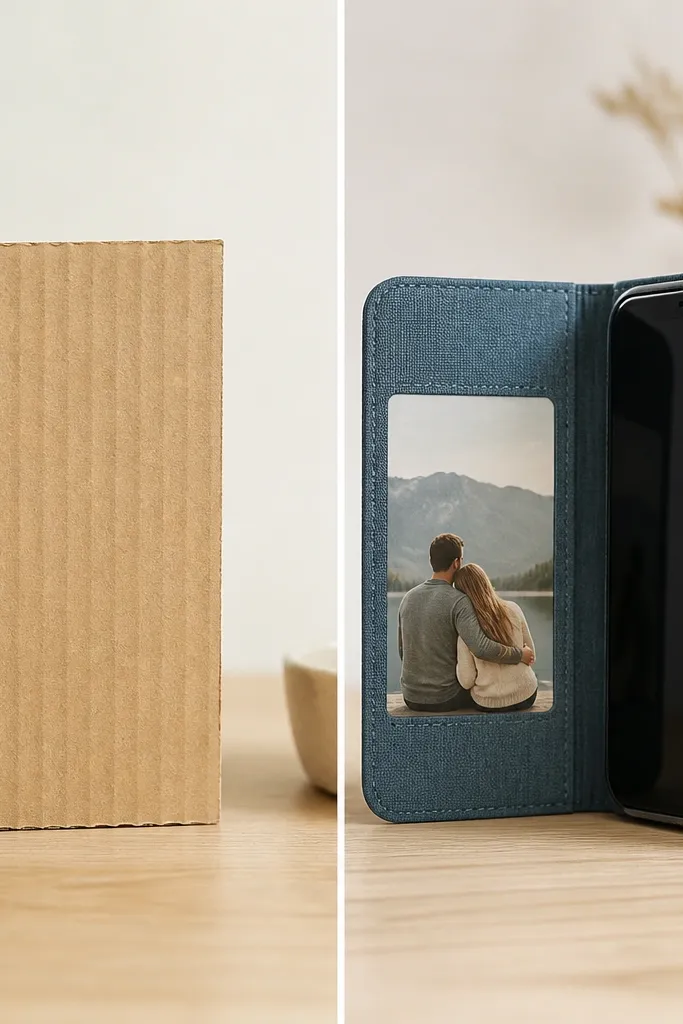
This is the “I made something engineering-level” gift without buying expensive materials. Cardboard is sturdy if you laminate it right, and covering it with fabric makes it look like a real product. The photo sleeve inside keeps your picture protected, and the magnetic flap makes the wallet feel secure for daily carry. I pick fabric in dark tones like black, olive, or deep brown because it hides wear and looks classy. This flatters phones that get carried in pockets because it adds grip and reduces screen-scratches from keys.
First, measure your boyfriend’s phone width and height, then cut layered cardboard pieces to match the case thickness (I use 5 layers for a firm feel). Glue the layers together with craft glue and let it set under weight. Cover the outside with fabric using contact cement or glue stick, then trim edges neatly. Create a photo sleeve by gluing a clear plastic window pocket on the inside panel, then stitch or tape the sides. Add a magnetic snap flap using a small magnetic clasp kit and test closure before shipping. Wrap in bubble wrap and pad so the flap doesn’t get bent.
Quick tipSand the edges after covering so it feels smooth in hand, not sharp.
One warningDon’t skip edge trimming; rough cardboard edges look cheap fast.
18. Before-and-After Custom Socks with Heat-Set Vinyl Coordinates and Tiny Heart Heel
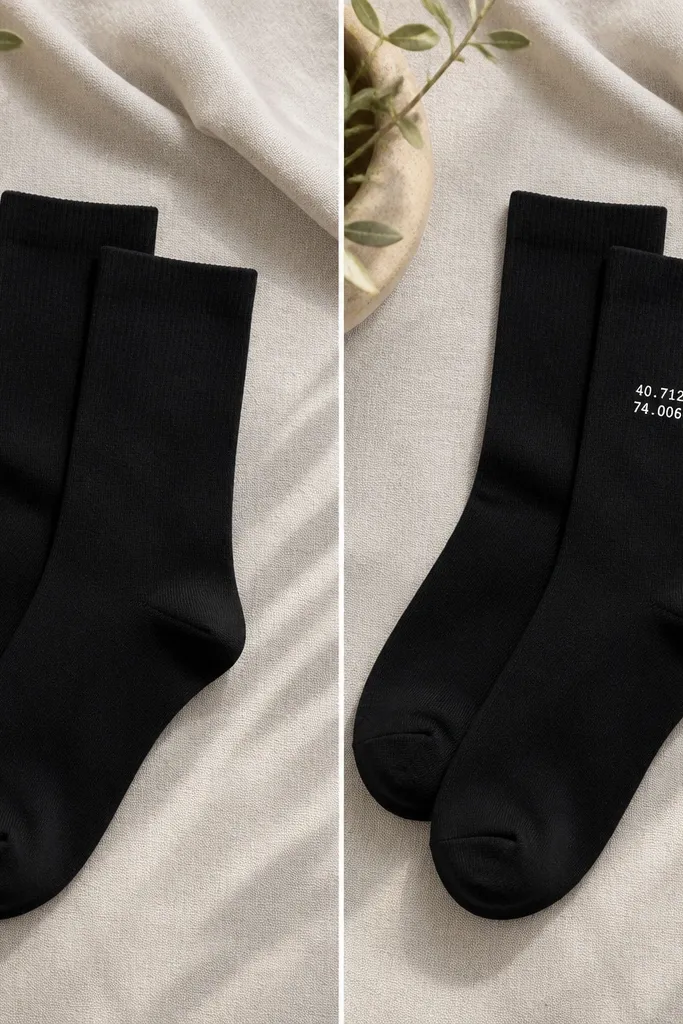
Socks are the kind of gift people actually wear, and the design looks great in everyday photos. I start with black or charcoal socks because the white vinyl pops and the red heart adds just enough personality. Coordinates give the long-distance meaning without a big graphic — it’s small, personal, and not cheesy. Heat-set vinyl stays put after washing if you press correctly and let it cool before moving the fabric. This flatters most foot sizes because socks stretch, and the design sits where he’ll see it when he’s sitting or standing.
First, wash and dry the socks so the fabric is clean and dry. Cut heat-set vinyl for coordinates in a simple font, then place it on the sock ankle area. Use a heat press or iron with parchment paper and apply steady pressure for the recommended time, then let it cool completely. Add a tiny heart heel detail on the outer side for a hidden-but-cute moment. Turn socks inside out for washing after the first wear and pack them in a flat shoe box with tissue so the vinyl doesn’t crease.
Quick tipPress longer at lower heat if your vinyl is thin — it prevents bubbling.
One warningAvoid placing vinyl too close to the seam; it cracks where the sock stretches.
19. Plain Notebook to Fake Polaroid Cover with Photo Strip Spine
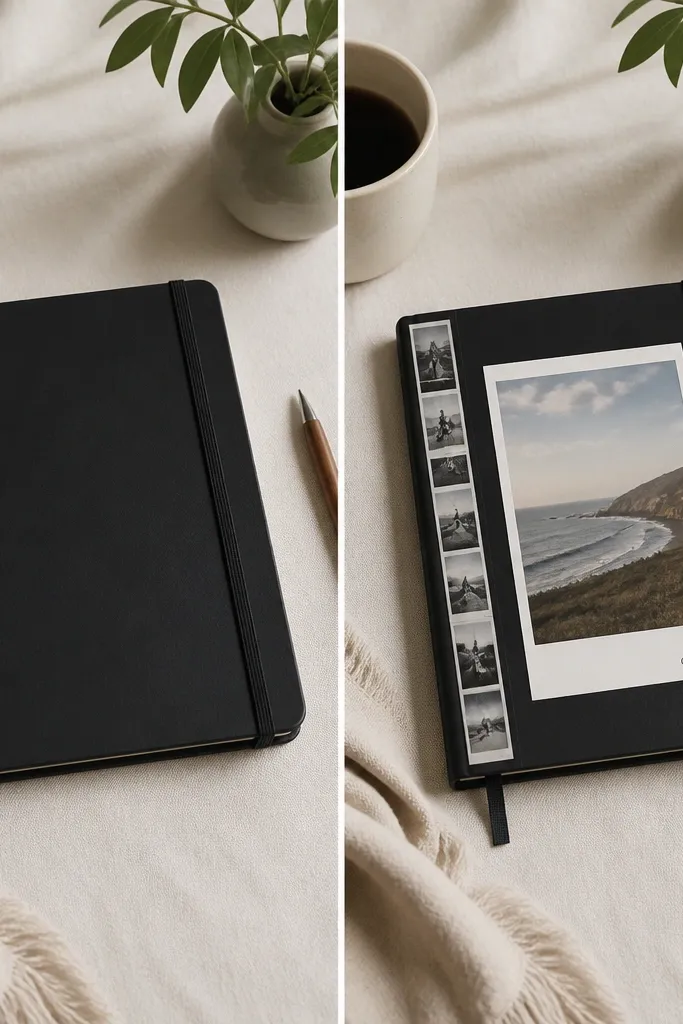
A notebook cover is one of the easiest ways to make “we did long distance” feel real. The polaroid-style layout looks playful, and the white border makes it feel like you designed a print. I use a matte photo finish so the cover doesn’t glare, and I keep the layout simple: one main photo, one date, and a narrow photo strip on the spine. This gift works for any boyfriend who writes lists, studies, sketches, or keeps a journal. It also flatters both minimal and colorful desks because the border gives it structure.
First, cover the notebook front with a piece of matte cardstock or photo paper sized to the cover, then wrap the edges so it fits tight. Print one main photo with a white border and add a date stamp text block, then glue it on top. Create a spine strip by cutting a thin photo strip and attaching it to the spine edge with a straight line. Seal the whole cover with a matte clear spray or Mod Podge matte so it resists scuffs. Pack flat in a rigid envelope so the cover stays crisp.
Quick tipUse a craft knife and a metal ruler for clean corners — it changes the whole look.
One warningDon’t use glossy spray — it creates glare and the photo border looks smeared.
20. Before-and-After "You + Me" Coasters from Scrapped Tiles with Stenciled Names
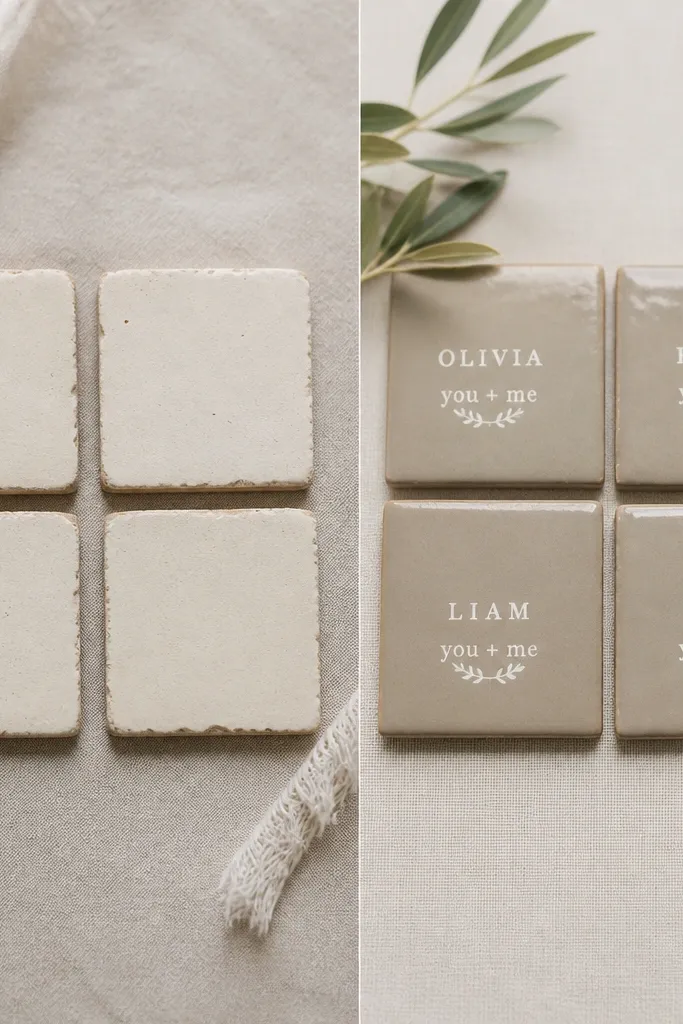
Tile coasters feel sturdy and they photograph well because the surface stays flat. I use scrapped ceramic tile because it’s cheap, and sealing makes it water-safe. The stenciled names let you personalize without printing a full graphic, and white paint looks clean on darker tiles. Add a simple “you + me” symbol once so it ties the set together. This gift fits boyfriends who hate flimsy coasters or who keep drinks near a laptop.
First, sand the tile edges lightly and wipe dust away, then seal the top surface lightly with a clear primer if needed. Place vinyl stencils for each name and press them tight to avoid paint bleeding. Paint with white acrylic in two thin coats, then remove the stencil carefully once paint is tacky. Seal with a water-resistant clear coat so the paint doesn’t get scuffed. Let everything cure fully, then pack in a box with bubble wrap around each coaster and cardboard dividers.
Quick tipPaint thin coats; thick paint chips at the edges when the coaster gets bumped.
One warningDon’t skip sealing — the first spill lifts paint and ruins the after look.