
1. Soccer Stitch Felt Cover with Black Bias Tape
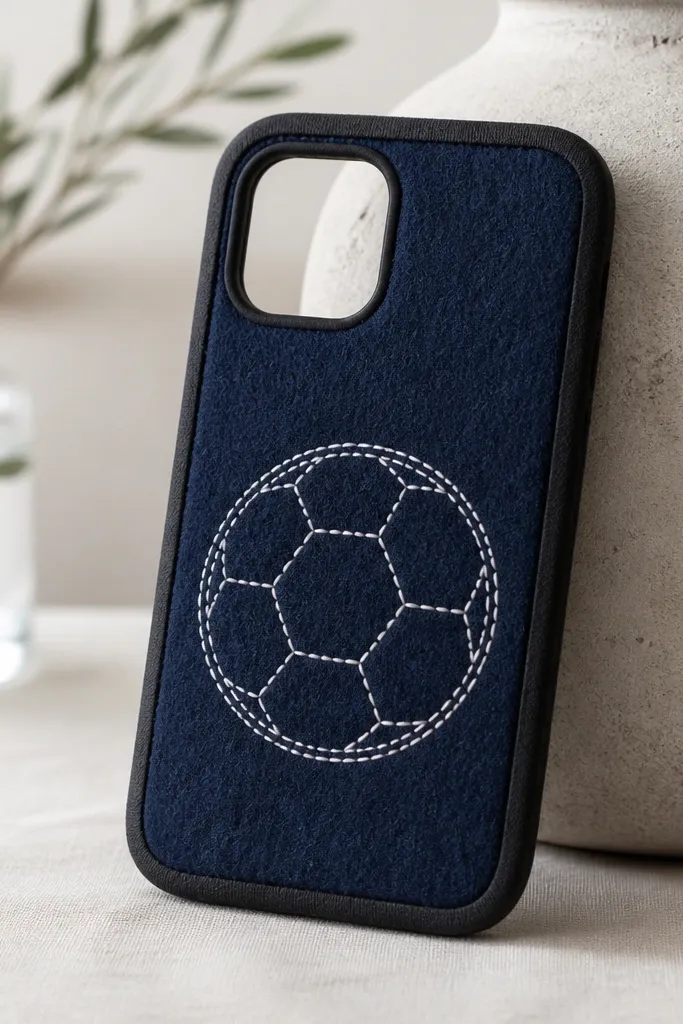
This one looks cool because it reads like a sports patch, not a random craft. Navy felt gives a deep, matte background, and the soccer ball in white thread pops without needing glitter. Black bias tape makes the edges look like clothing finishing, which is why it looks “real.” The cover also hides small dents because felt takes impact without cracking.
Quick tipUse a thick needle and pull the thread snug, then trim thread ends close so the stitches look even from across the room.
Cut felt to your phone back size plus 6 mm on each side. Use bias tape that’s about 10-12 mm wide and stitch it around the perimeter, leaving a window for the camera cluster. I rounded the bottom corners slightly so it slides into a pocket without catching.
One warningDon’t rely on hot glue alone for the edge — it lifts at corners after a few weeks of use.
2. Neon Grid Rubbery Case Cover with Sticky-Back Vinyl
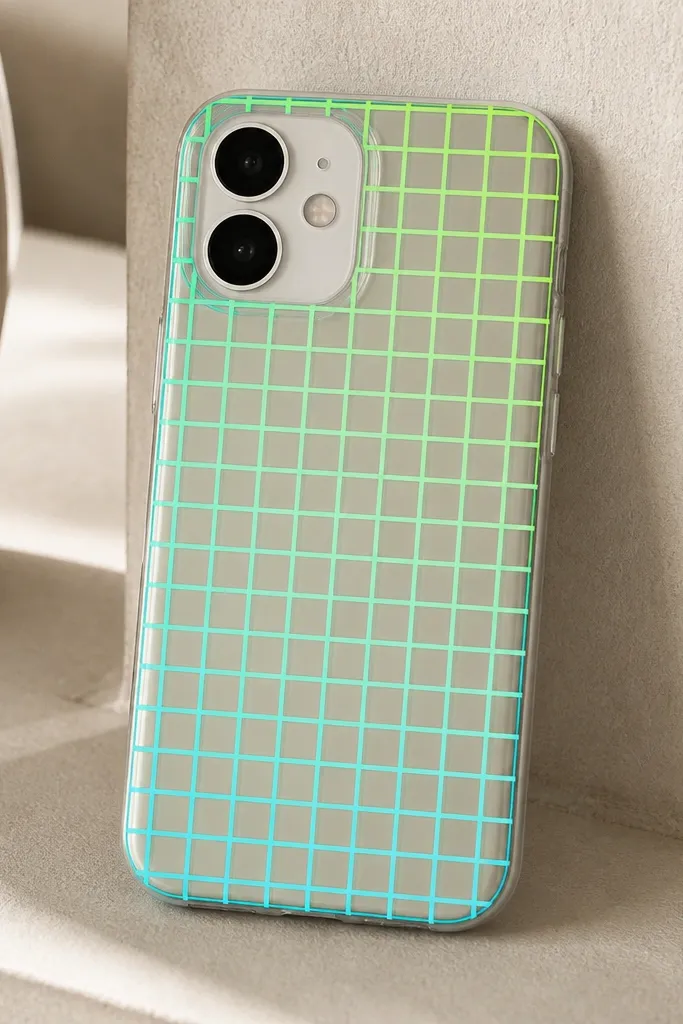
If you want bright, gamer-style energy, vinyl wrap on a clear case is the quickest route. The neon grid looks sharp in daylight and doesn’t feel bulky. The clear base keeps buttons easy to press, and the vinyl pattern stays smooth under a wipeable surface. This cover also hides minor scratches on the original case.
Quick tipWarm the vinyl under a hair dryer for 10-15 seconds before smoothing — it grabs better and avoids bubbles.
Buy a clear, flexible TPU phone case first. Cut sticky-back vinyl with a 3 mm margin around edges, then press it down in sections from the center outward. Use a craft knife to cut the camera hole after the vinyl is applied so the opening matches perfectly.
One warningAvoid cutting the camera opening before you apply the vinyl; misalignment makes it look sloppy.
3. Denim Pocket Phone Cover with Mini Tool Pouch
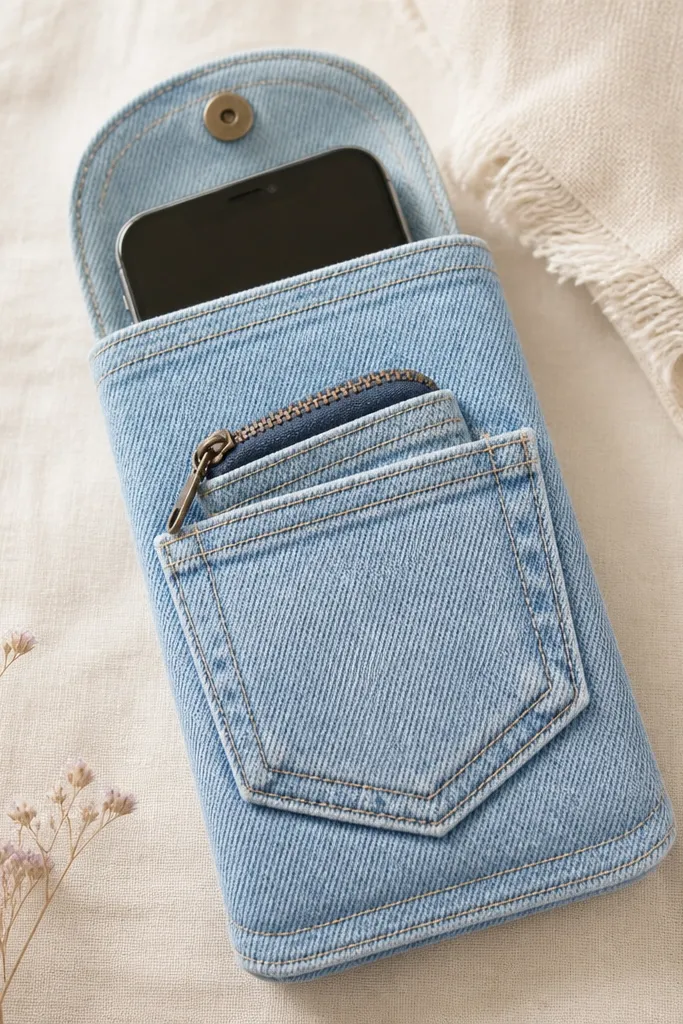
Denim looks tough and boy-friendly, and the pocket idea makes it practical. I like the light-wash denim because it shows contrast with darker stitching. The mini zip pouch on the side makes this feel like gear, not a plain cover. It also gives you a place for a tiny charging cable or earbuds tips.
Quick tipUse thick thread (like topstitching thread) and sew a second line 3-4 mm from the edge for that store-case look.
Cut two denim rectangles: one for the back panel and one for the flap. Add a 20-25 mm wide strip as a flap overlap, then sew the flap edges and attach a snap at the top corner. For the side pouch, stitch a small rectangle with a zipper and sew it onto the back panel before attaching the flap.
One warningSkip thin denim — it collapses and makes the pouch sag.
4. Camouflage Felt Cover with Safety-Orange Corner Guards
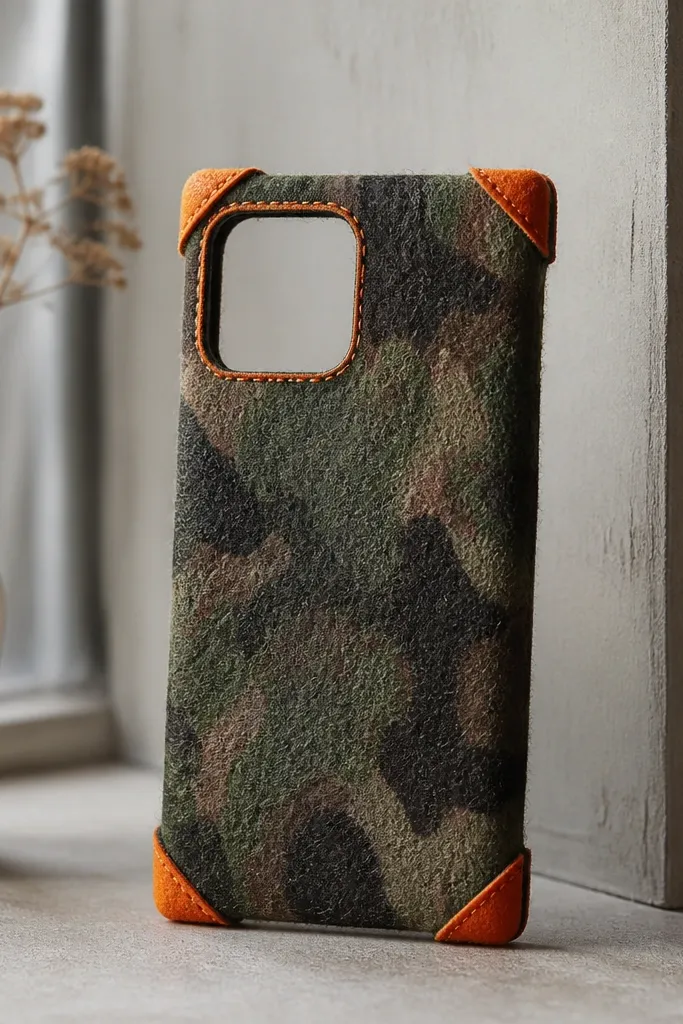
Camouflage is a hit for boys, but the trick is making it look intentional. The safety-orange corner guards make it pop and also add padding where drops happen. Orange around the camera area frames the cutout and hides uneven edges. Felt keeps it lightweight while still feeling protective.
Quick tipUse blanket stitch with a slightly thicker thread so the outline looks bold, not stringy.
Layer two felt pieces: camouflage for the main body and a brighter orange felt for corner tabs. Cut corner tabs about 20 mm square, fold them so they cover the phone corner area, and stitch them down. Outline the camera opening with a narrow orange blanket stitch.
One warningDon’t skip corner padding; that’s where felt folds and frays first.
5. Captain Lightning Bolt Cover from Faux Leather Strips
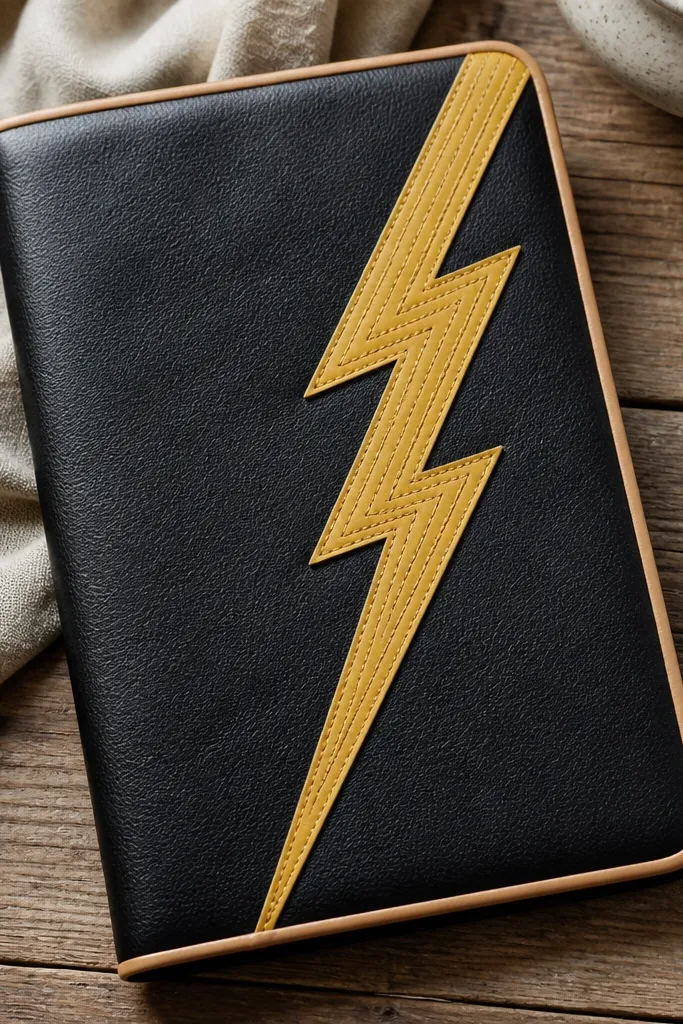
This looks like a cool graphic decal, but it’s stitched so it lasts. Faux leather has a smooth surface that wipes clean after school spills. Layered lightning bolt strips give a raised, dimensional look without needing paint. The tan edge trim makes it contrast cleanly with black.
Cut a lightning bolt shape from yellow faux leather, then cut a second smaller bolt and layer it on top using fabric glue. Stitch around the bolt edges with matching yellow thread. Finish the phone edges with tan bias strip and keep the bolt away from the camera opening by at least 10 mm.
Use a leather needle and press the seam flat with a heavy book for 20 minutes after gluing.
Avoid stretchy faux leather; it warps the bolt edges and makes the design look uneven.
6. Pastel-to-Dark Ombre Fabric Cover with Double-Layer Flap
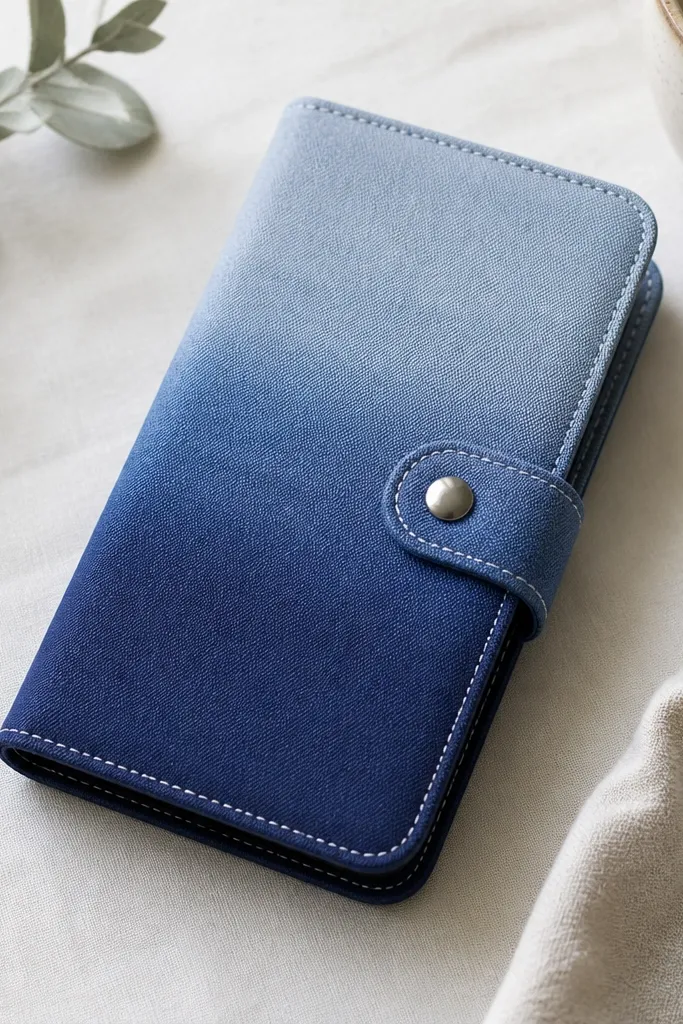
Ombre looks stylish without screaming “kid craft.” The double-layer flap helps it feel sturdy, especially around the top edge. I like using two shades of the same fabric family because it looks smooth and intentional. The snap closure keeps it from opening in a backpack.
Quick tipPress seams with a warm iron through parchment paper so the fabric doesn’t shine or stick.
Choose two coordinating fabrics (for example, light chambray and navy cotton). Cut the back panel as one piece, then sew a gradient effect by stitching a light panel to a darker panel with a straight seam down the center and pressing flat. Add a flap that overlaps by 25-30 mm and sew a second layer under it for thickness. Install a snap at about 15 mm from the top edge.
One warningDon’t use slippery satin for the flap — it shifts and makes the snap alignment off.
7. Lego-Style Technic Brick Cover with Foam Tiles
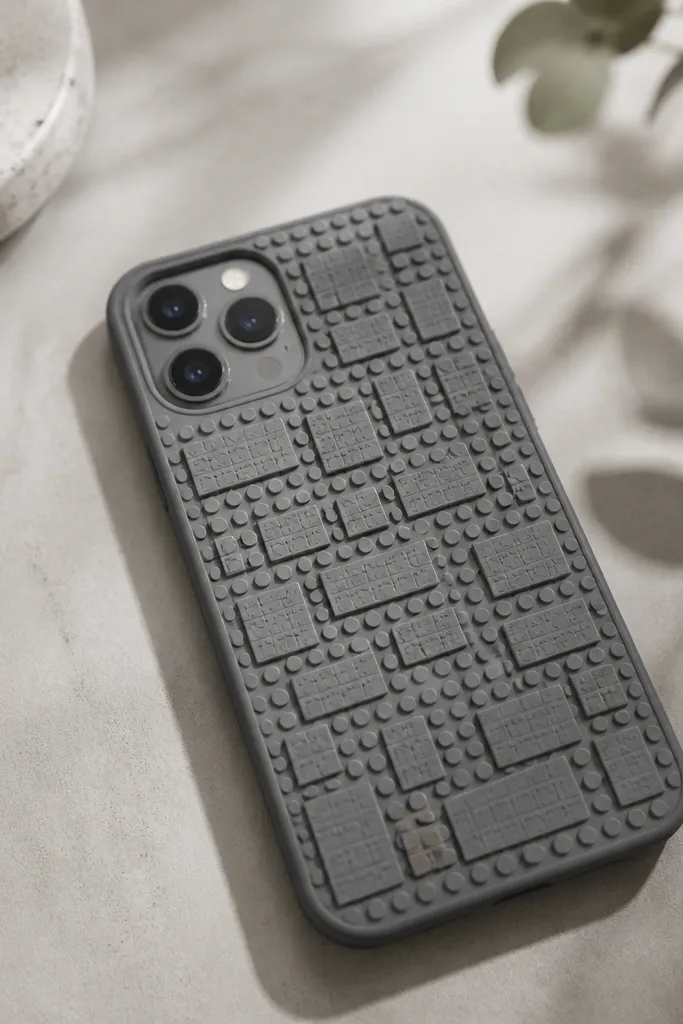
This is the one my kids' friends kept touching because it has real texture. Foam tiles create a block pattern that reads instantly from a distance. Gray base keeps it clean, and black accents look like plastic hardware. It also hides surface scuffs because foam dents instead of cracks.
Cut a base from EVA foam or thick craft foam and cover it with fabric or thin faux leather so it doesn’t feel chalky. Glue small foam rectangles (about 12x18 mm each) in a grid pattern, leaving 8-10 mm space around the camera opening. Seal the foam tiles by painting lightly with matte clear glue or covering with a thin fabric layer.
Keep the raised tiles under 3-4 mm so the cover still fits pockets and doesn’t snag.
Avoid making studs too tall; they wobble and tear fabric when bent.
8. Superhero Mask Stripes with Red Elastic Band
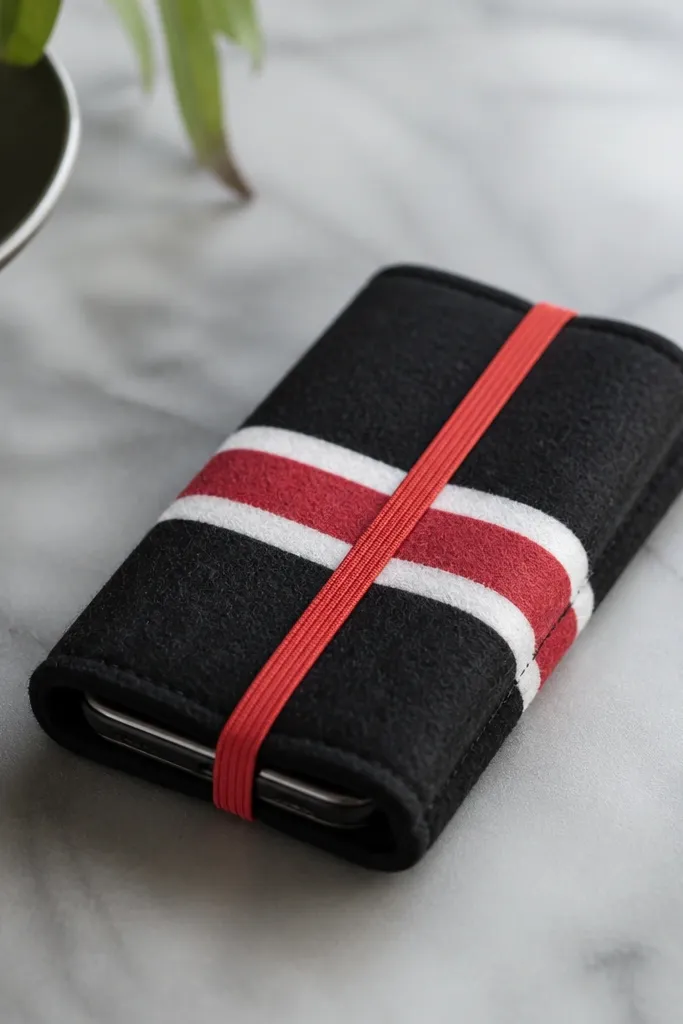
This one looks like a costume accessory, but it’s practical. The stripe placement gives a face-like graphic that boys love, and felt keeps it soft against skin. The elastic band is the key for fast on/off, especially for kids who don’t want snaps. It also keeps the cover flat when the phone gets tossed into a bag.
Quick tipStretch elastic slightly while stitching so it doesn’t loosen after a few weeks.
Cut felt to phone back size plus 6 mm each side. Add a front panel overlay with red felt stripes about 12 mm wide and a white stripe about 8 mm wide. Sew the stripes down first, then attach elastic bands at the sides — place them 40-50 mm from the top edge so the phone sits snug.
One warningDon’t put elastic too close to the bottom — it rubs the charging area and wears out.
9. Fishing Lure Theme Cover with Rope Handle Loop
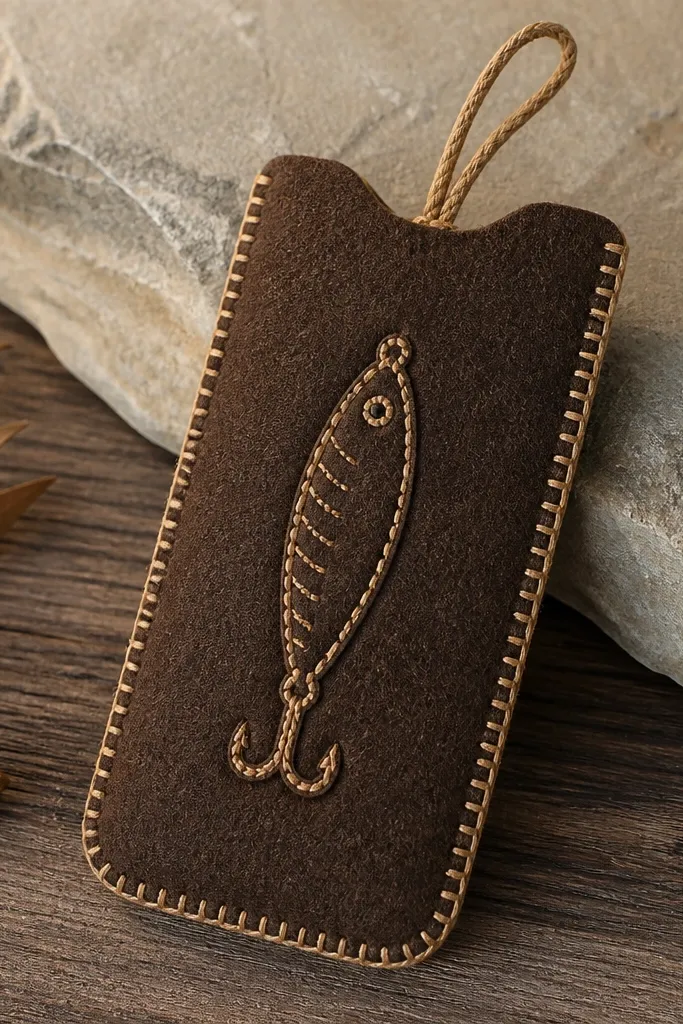
This feels outdoorsy without needing fancy paint. Brown felt gives a natural look, and tan thread looks like rope stitching. The rope handle loop makes it easy to carry when kids go to the lake or beach. The lure shape is simple but reads clearly as fishing gear.
Quick tipUse a back-and-forth stitch on the rope loop attachment so it doesn’t pull out.
Cut felt back and a front flap that overlaps 25 mm. Stitch a lure outline using a thick thread and add two small oval shapes for eyes with black felt. Build the rope loop using thin cotton rope or paracord — stitch it into the top seam so it can take weight. Leave the camera opening cut cleanly before assembly.
One warningAvoid slick synthetic rope — it slides and makes the flap loosen.
10. Space Helmet Clear Window Cover with Glow Tape
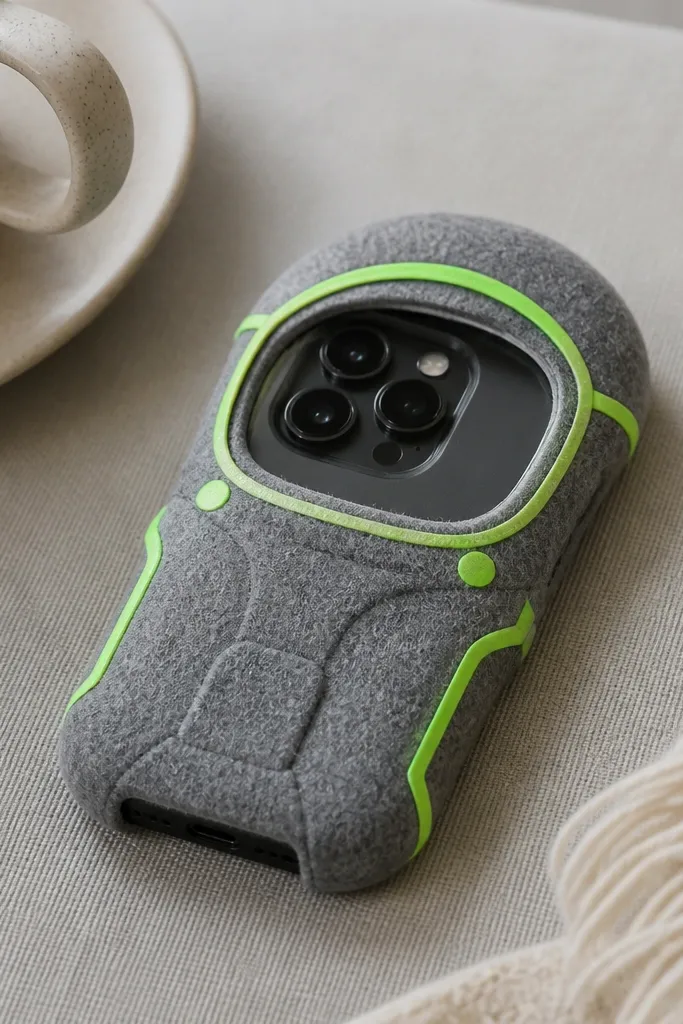
Glow tape looks awesome at night and still looks cool in daylight. The clear window over the camera area keeps photos easy while keeping the rest protected. Gray felt makes the “helmet” shape, and the tape outlines the design like a sci-fi suit. This cover also holds up because it’s mostly fabric, not paper.
Cut felt pieces to create helmet arcs around the top and sides of the phone. Use glow tape strips about 5-8 mm wide and apply them along the outline before final assembly. For the window, cut a piece of clear plastic (from a thin report cover sheet) and glue it over the camera area from the inside. Sew around the plastic to lock it in.
Test the glow tape under a flashlight for 30 seconds — you’ll see if the color is strong enough for your light level.
Don’t cover the entire front with plastic; it turns glare into a mess for screen use.
11. Track Team Number Cover with Reflective Thread Outline
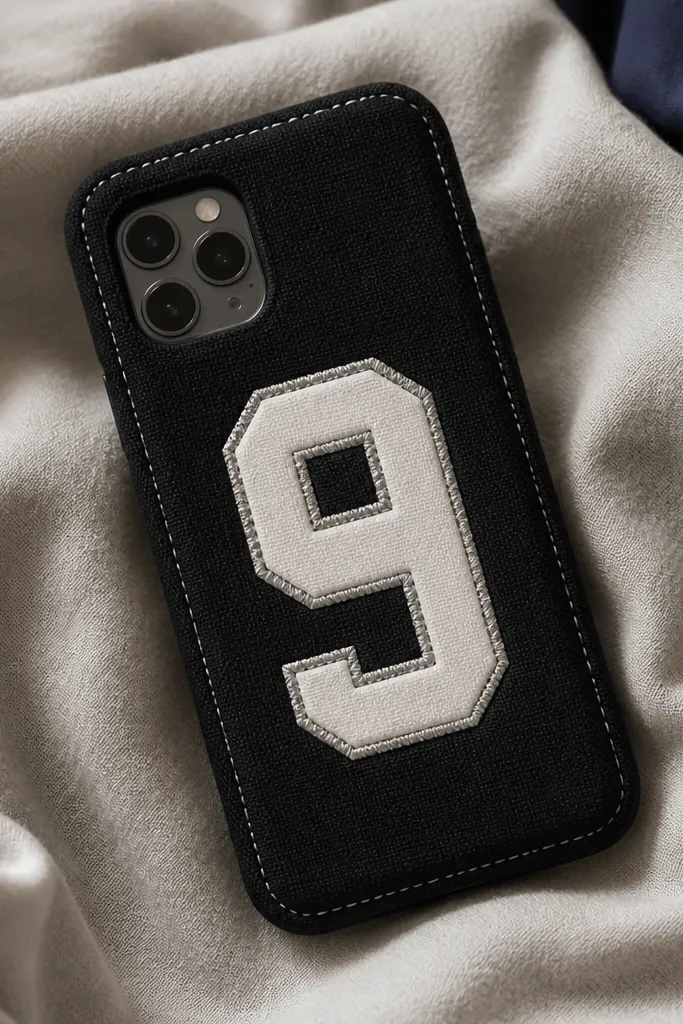
Reflective thread makes the number pop when kids walk to practice. The black base keeps it sharp, and the white number reads from across a gym. I like reflective thread because it looks like design, not decoration. It also hides minor unevenness around edges because the outline is what your eye grabs.
Cut fabric or felt for the back and add a front overlay panel. Use iron-on transfer paper for the number, then stitch over it with reflective thread for a raised look. Keep the number about 30-40 mm wide from top to bottom so it doesn’t interfere with the camera cutout. Finish edges with a simple folded hem about 8 mm.
Use a running stitch pattern around the number for a “track jersey” feel.
Skip glitter vinyl; it flakes off around corners after pocket friction.
12. Monster Mouth Cover with Tooth Grid Lining
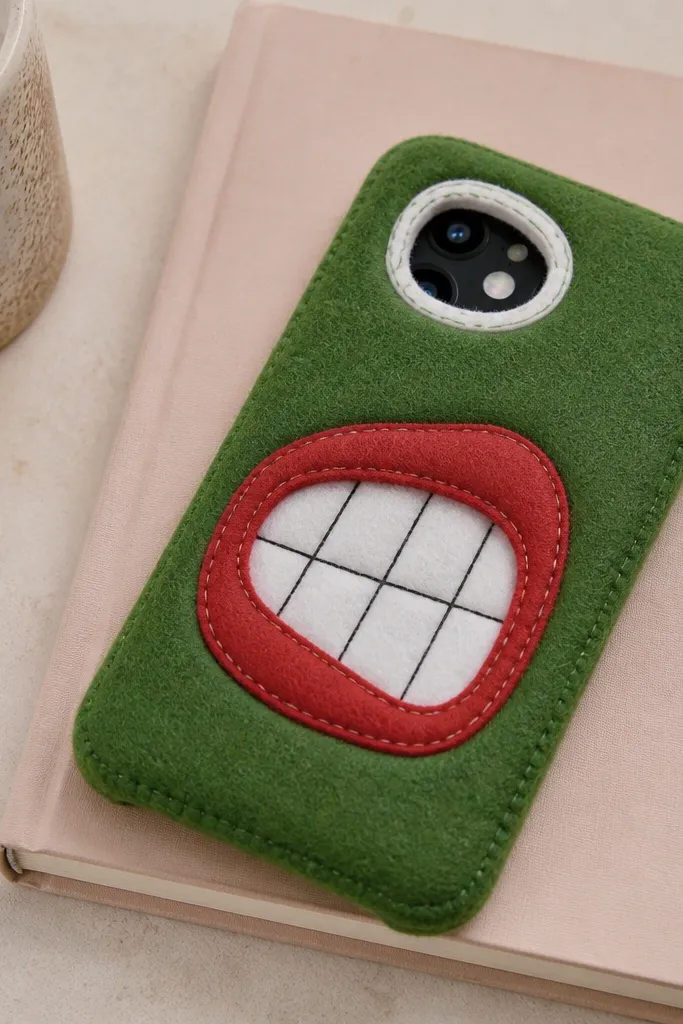
Kids love scary-cute, and a mouth graphic does that instantly. The tooth grid lining adds depth inside the opening so it looks like a real monster. Green felt hides fingerprints, and red stitching makes the mouth edge look clean. I also like that the design naturally frames the camera so the cutout feels like part of the art.
Cut the main cover from green felt. Make a mouth shape using red felt and stitch it down, then add a lining of white felt cut into small rectangles (about 6x10 mm) to form teeth. For the “eye,” frame the camera opening with a dark green ring stitched in place. Assemble with a folded lining so the felt edges stay hidden.
Cut teeth with a paper template first so they’re consistent and don’t look uneven.
Don’t make the mouth opening too close to the phone edges — it weakens the cover at stress points.
13. Camo + Orange Whistle Lanyard Side Cover
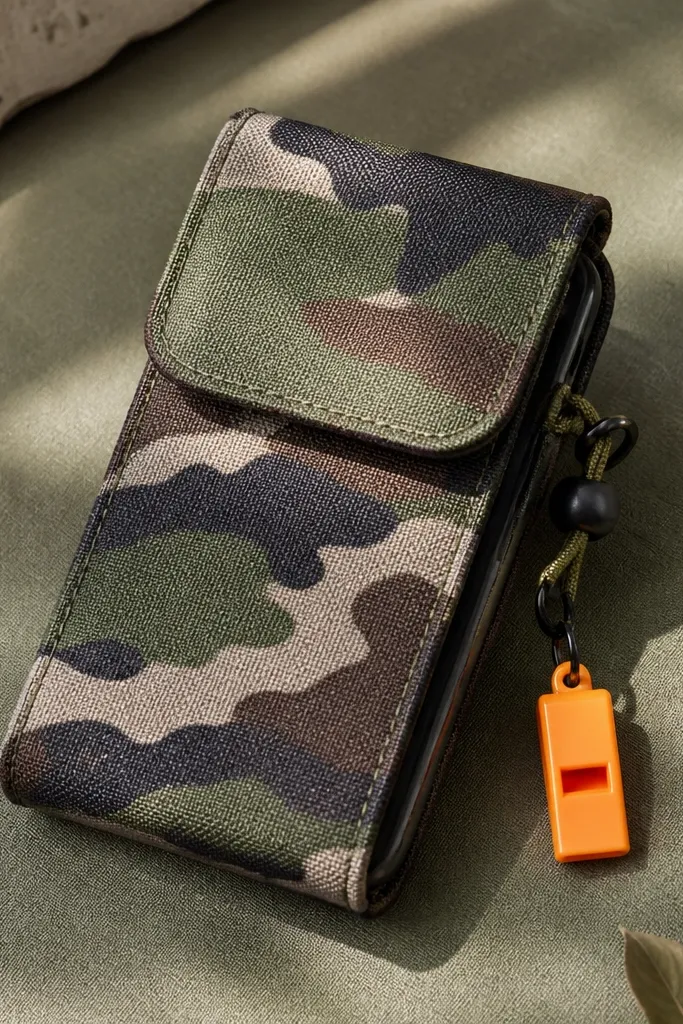
A side whistle charm gives a real outdoors vibe, and the lanyard makes it harder for kids to drop the phone. The camo fabric keeps it boyish, and orange accents make it easy to find in a backpack. Velcro flap is practical for kids who don’t want fiddly snaps. The charm also makes it fun without needing extra bulk.
Quick tipPlace velcro on the flap, not the phone back — it wears slower on the flap side.
Use camo fabric backed with thin interfacing so it holds shape. Make a flap that overlaps by 30 mm and sew hook-and-loop dots near the top so it closes tight. Attach a small strap to the side seam using webbing tape, then clip a whistle charm to the strap. Keep the camera cutout open and reinforce edges with a stitched binding strip.
One warningAvoid super-wide velcro; it creates a thick bump that rubs in pockets.
14. Tie-Dye Spiral Cover with Clear Coat Wipe Layer
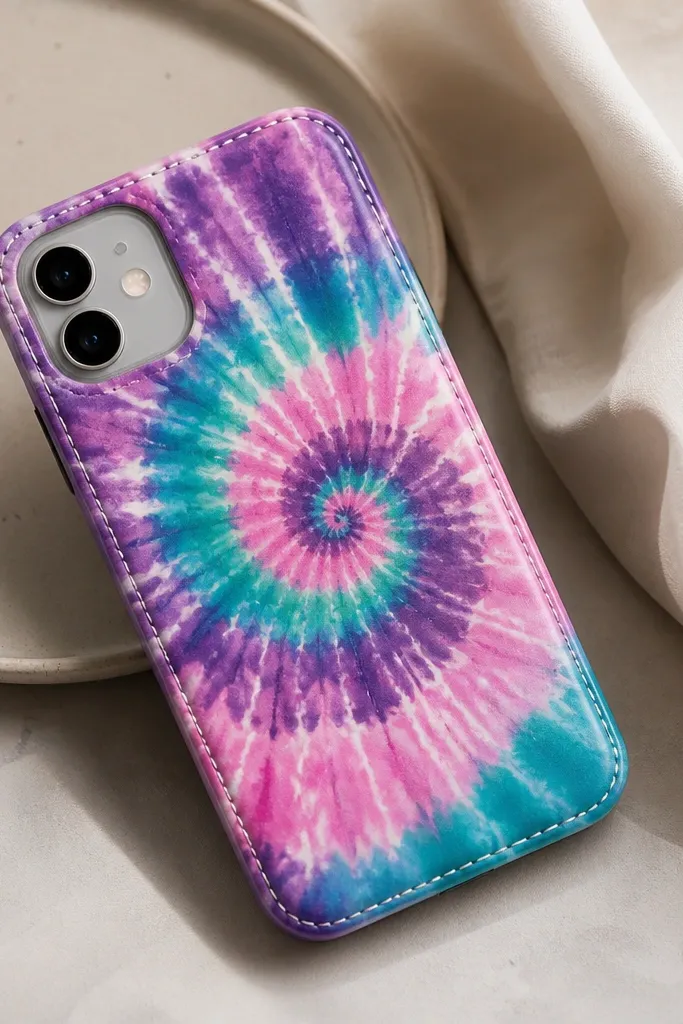
Tie-dye looks fun, but the trick is making it wipeable. A clear coat over fabric keeps colors from bleeding when a kid spills juice. The spiral pattern hides small stains better than solid colors. White stitching gives a crisp outline so the cover looks designed, not messy.
Use cotton fabric and cut it to phone back size plus 6 mm each side. Sew edges with a 6-8 mm seam allowance and add a folded lining so the inside looks clean. Brush a thin layer of water-based clear fabric medium or polyurethane designed for fabric, then let it dry fully (usually 24 hours). Keep the camera opening reinforced with an edge binding strip.
Test the clear coat on a scrap first — some fabrics darken after coating.
Skip cheap spray clear coat; it can get sticky and attract lint.
15. Minecraft-Style Pixel Creeper Cover with Felt Blocks
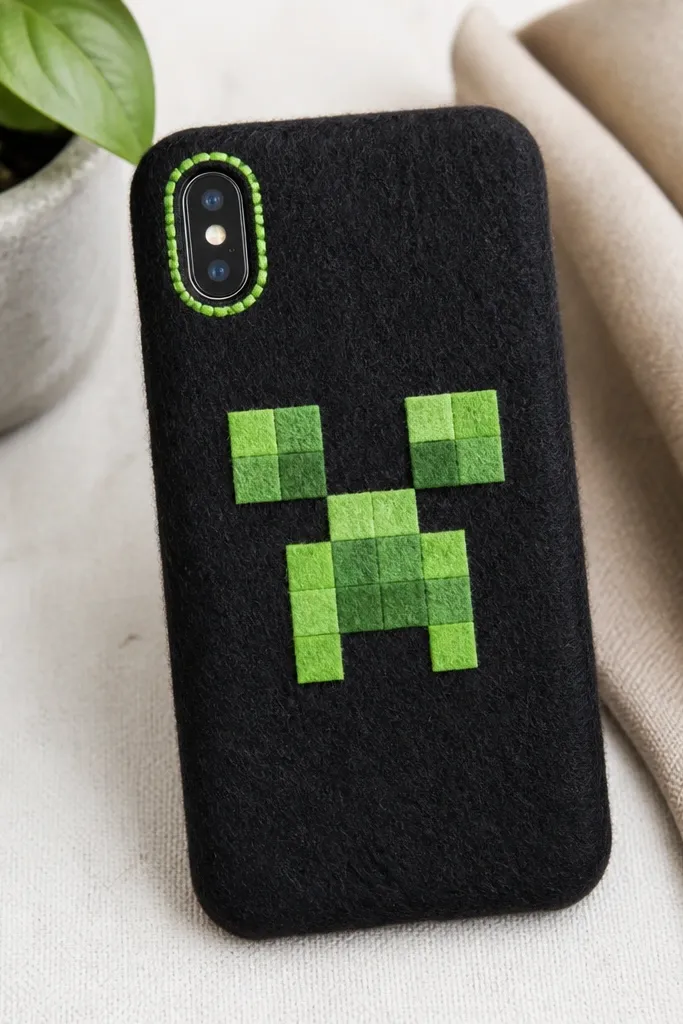
Pixel art feels perfect for DIY because felt squares look like blocks. The black base makes the green face pop, and the stitched squares look clean even if your cuts aren’t perfect. This works year-round because felt doesn’t peel like decals. The camera framing makes the cutout feel like part of the character.
Quick tipMark a pencil grid on the base first, then remove the marks after stitching.
Cut a grid of small felt squares: use 8-10 squares across for the face width so it fits the phone. Place squares on top of black felt and stitch each square lightly at the corners. Frame the camera opening with a ring of light green felt stitched down. Add a simple flap or strap depending on your preference.
One warningDon’t use tiny squares under 4 mm — they lift and look like crumbs.
16. BMX Black-and-White Stripe Cover with Reflective Tape Band
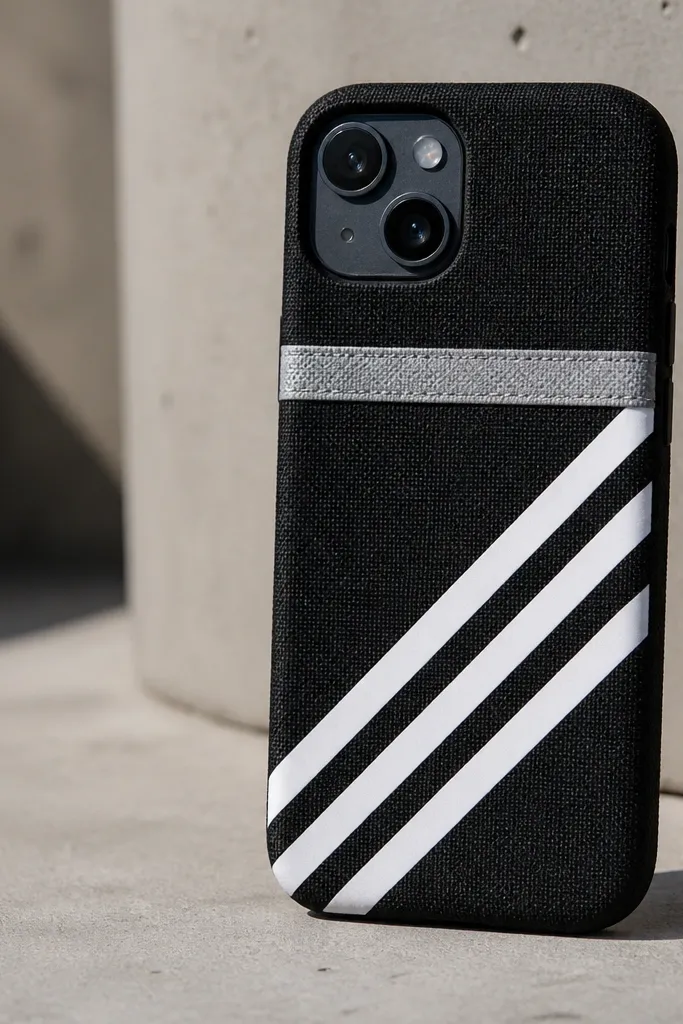
BMX style is all about contrast, and black-and-white stripes do it instantly. A reflective tape band adds motion energy and helps at dusk. Fabric keeps it light, and reflective tape gives a crisp finish that reads like bike gear. The diagonal stripes also hide minor alignment differences between phone and cover.
Sew a fabric backing with a thin stabilizer so stripes don’t ripple. Cut white stripe strips about 15-20 mm wide and stitch them diagonally across the front panel. Apply reflective tape as a single clean band near the top edge, then finish the perimeter with bias tape. Reinforce the camera cutout with a stitched binding strip.
Press stripes with a warm iron through cloth before sewing — it keeps edges sharp.
Avoid stretchy knit fabric for the base; stripes warp when the phone flexes.
17. Board Game Dice Cover with Leatherette Pocket Flap
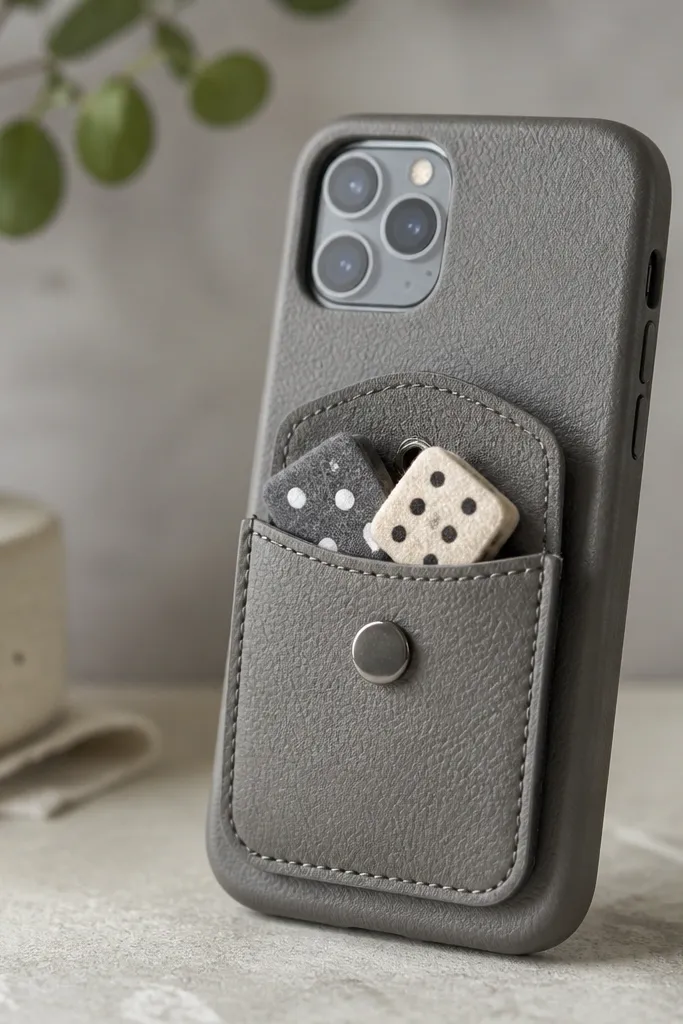
Dice art makes the cover feel like a board game piece, not a basic case. Leatherette gives a smooth wipeable surface, and the pocket flap adds function. I like gray because you can pair it with bright pips (red, blue, or white). The snap keeps everything tight for school days.
Make a leatherette back panel and a flap pocket front. Stitch a pocket about 50-60 mm wide that holds small felt “dice” squares (about 20x20 mm). Use a snap at the flap top corner and sew edges with a visible topstitch line about 3-4 mm from the perimeter. Cut the camera opening and line it with thin fabric so it doesn’t fray.
Use pearl cotton or thick embroidery thread for the pips so they look like printed dice marks.
Don’t leave raw leatherette edges exposed; they curl and look unfinished.
18. Arctic Winter Puff Cover with Quilted Stitch Lines
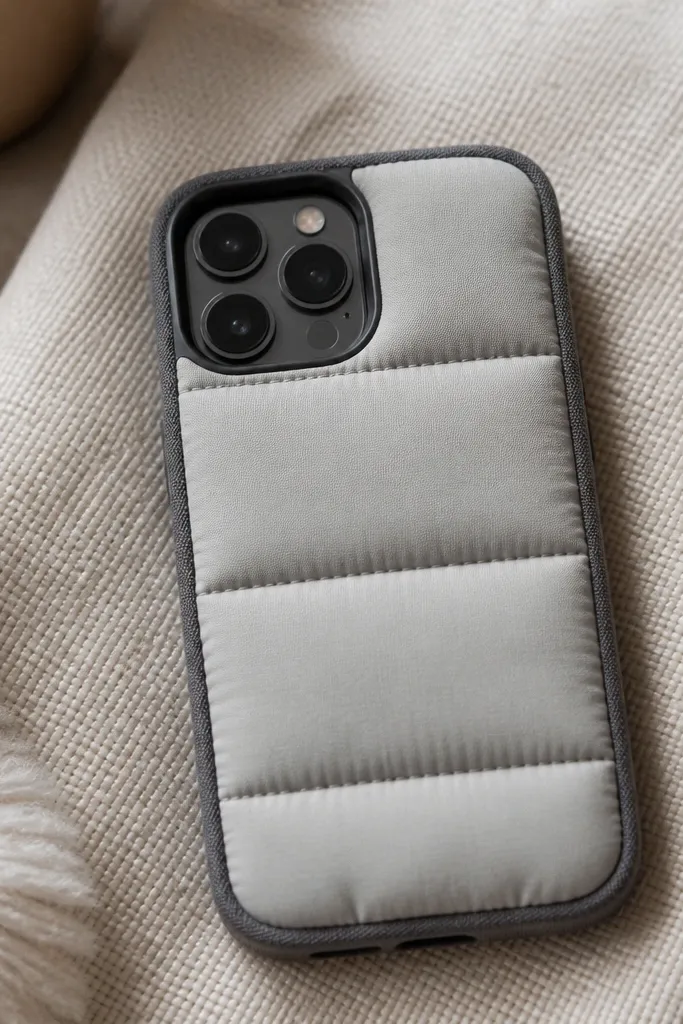
This cover looks cozy and protects against drops because it has real padding. Quilted stitch lines make it look expensive and keep the padding from shifting. Light gray gives a clean winter vibe, and dark binding makes the outline crisp. If your kid throws the phone into a backpack, the padding helps a lot.
Use a padded material like thin batting or foam sheet between two fabric layers. Cut the outer and inner fabric the same size, then quilt by sewing parallel lines across the panel before assembling the sides. Bind edges with fabric binding about 12 mm wide. Leave the camera opening and reinforce with a stitched facing so it stays neat.
Quilt with a walking foot if you have one; it prevents puckers in layered fabric.
Avoid single-layer fabric; it looks flat and offers less drop protection.
19. Hockey Rink Cover with White Dashed Lines
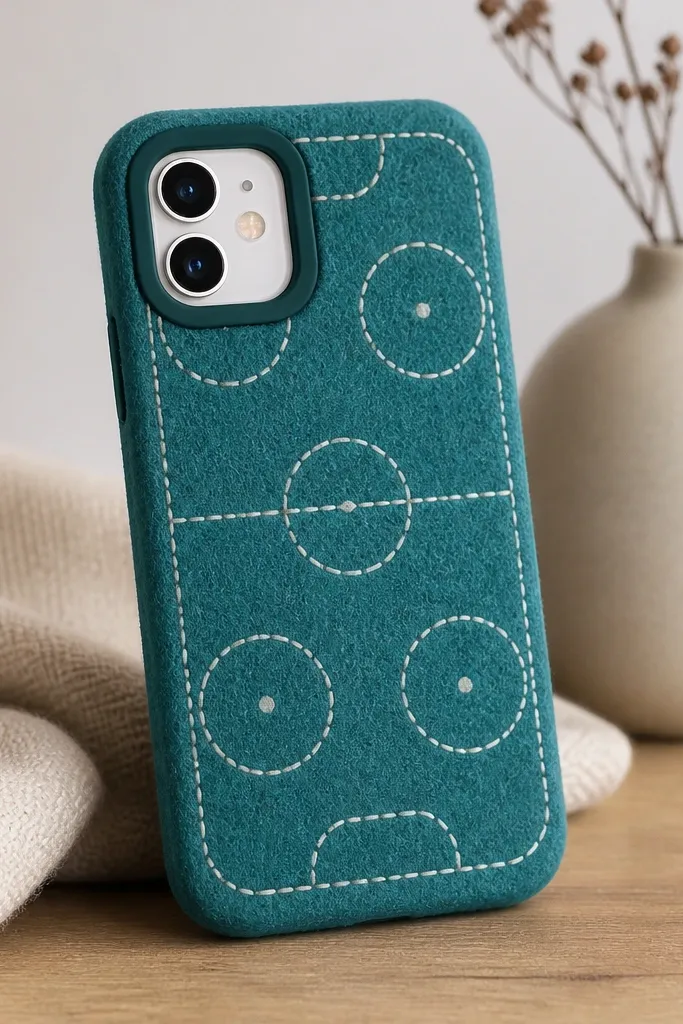
Hockey lines are recognizable, and dashed white lines make the design feel like a real rink. Teal felt looks like ice color, and the matte surface hides smudges. The camera frame looks like a goal box if you outline it with darker teal. This is one of those covers kids ask for again and again because it’s instantly readable.
Quick tipUse a ruler and mask tape to keep the dashed lines straight while you stitch.
Cut a teal felt base. Add dashed lines using white felt strips cut into short segments, then stitch them down in a straight row. Frame the camera cutout with a dark teal ring and stitch it to the base so the edge looks intentional. Finish perimeter with matching teal bias tape.
One warningDon’t freehand the dashes; wonky lines make it look like a school project.
20. Jungle Leaf Cover with Green Vein Embroidery
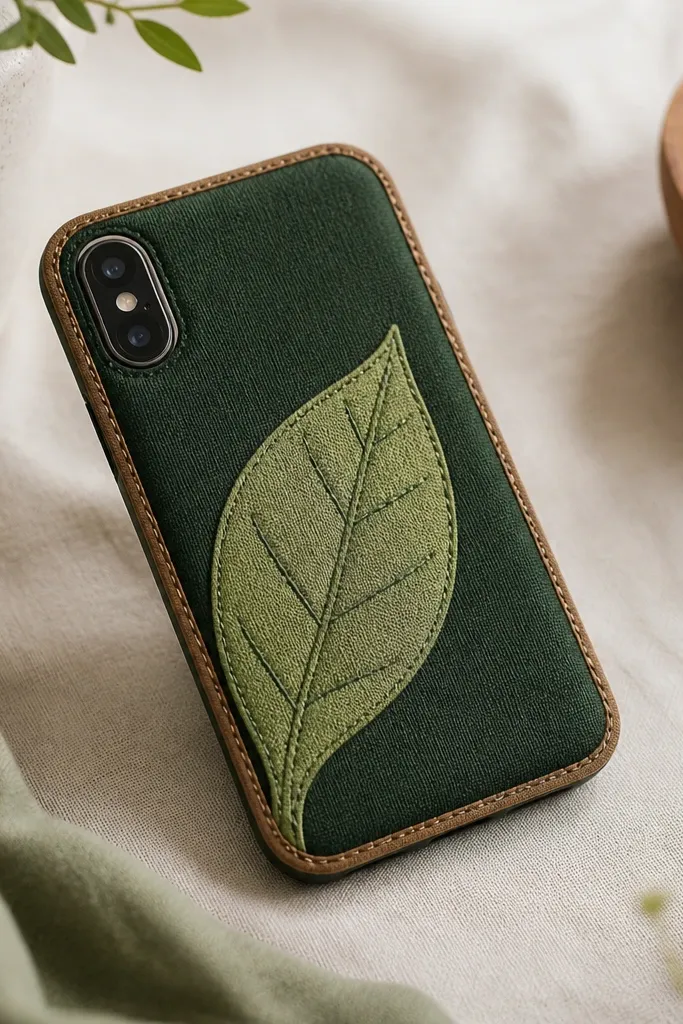
Leaf embroidery looks classy without being complicated. The dark base makes the lighter leaf stand out, and stitched veins give texture that feels handmade in a good way. Tan edge binding keeps the whole thing from looking too monochrome. This one works for boys who like nature themes but still want something that looks tough.
Quick tipUse embroidery floss doubled for veins; it looks bold on felt.
Cut a leaf shape from lighter green felt and stitch it onto the dark base. Use a simple backstitch or straight stitch for veins — 3-4 lines from the center to the edges is enough. Bind the perimeter with tan fabric binding and add a folded lining so the inside edges look clean. Keep the leaf design away from the camera opening by at least 10 mm.
One warningSkip thin thread — it disappears and makes the leaf look flat.



