
1. Bias-Tape Window Cover with Felt Frame
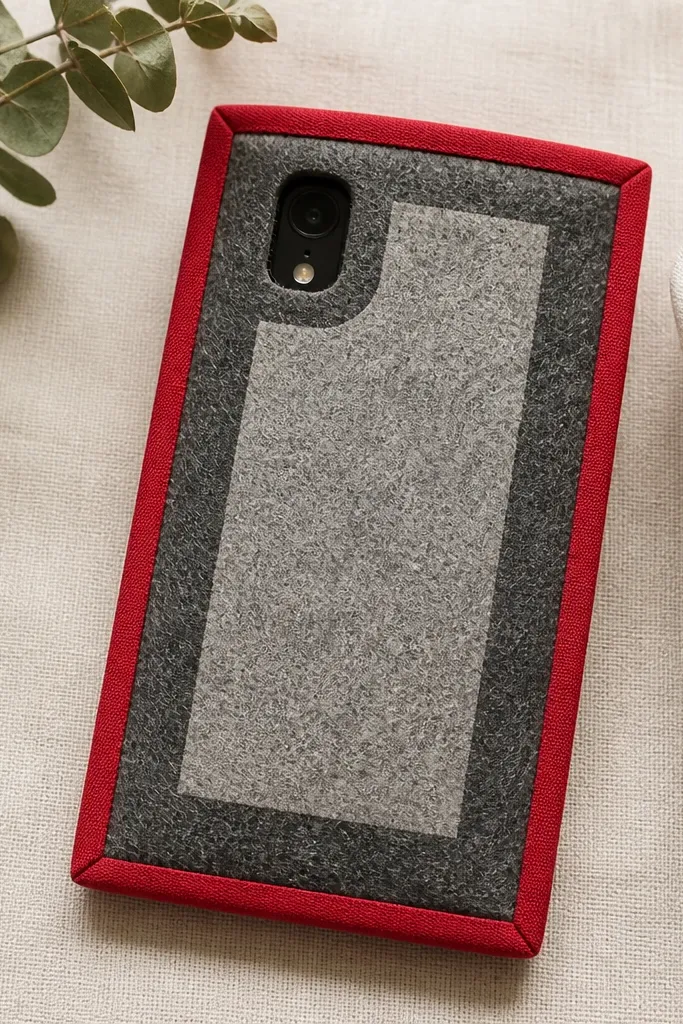
This one looks crisp because the bias tape makes a finished border over every raw edge. I use a felt rectangle as the outer shell, then cut a second felt “window” so the phone looks like it’s framed. The contrast — like teal outer felt with a cream window — makes it pop without needing glitter. The felt also grips slightly, so it stays put when you slide it onto the phone.
Cut two identical outer felt pieces for thickness or use one piece plus a thin EVA sheet behind it. Make the window opening about 1 cm smaller than the phone’s camera area so nothing presses. Wrap bias tape around the perimeter, miter the corners, and keep the fold tight with clips while the glue sets. Works best for phones with flat backs and minimal curvature.
Press the bias tape fold with a warm iron through a pressing cloth before gluing so it stays sharp around corners.
Don’t glue bias tape only at the ends — it lifts and wrinkles after a few days in a bag.
2. No-Sew Denim Pocket Phone Cover
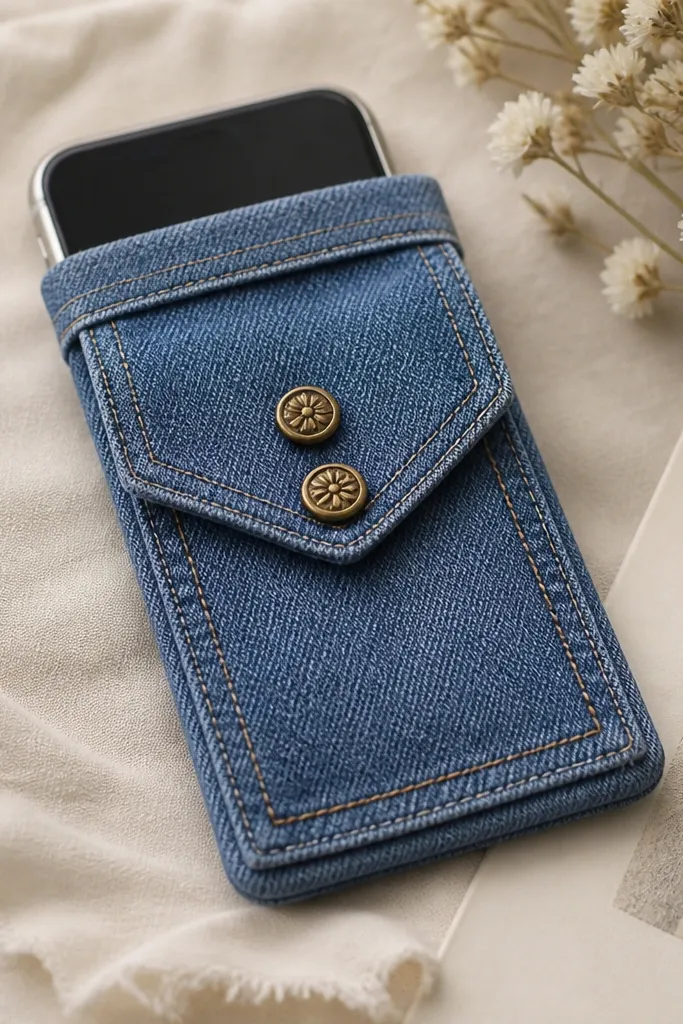
This feels creative because it’s basically a miniature pocket, not a flat sleeve. Denim is tough, so the cover survives rough handling, and the pocket flap hides the phone edges. I like using iron-on hem tape to mimic a sewn seam without dragging a machine out. The flap gives you a place to add a button or a snap so it doesn’t slide open.
Cut denim to cover the phone front and back with a flap that’s about 2 cm longer than the phone height. Use iron-on hem tape along the folded top seam and press with a hot iron for the time on the tape package. Add a small pocket opening for the phone edge, or glue a strip of felt inside to prevent scratches. Keep the flap angle shallow so it closes flat in a pocket.
Add a strip of craft felt inside the flap where it touches the screen — it stops scuffs when the flap rubs.
Avoid stretchy denim — it warps and makes the pocket flap uneven.
3. Crochet-Granny-Stripe Sleeve (Felt Backed)
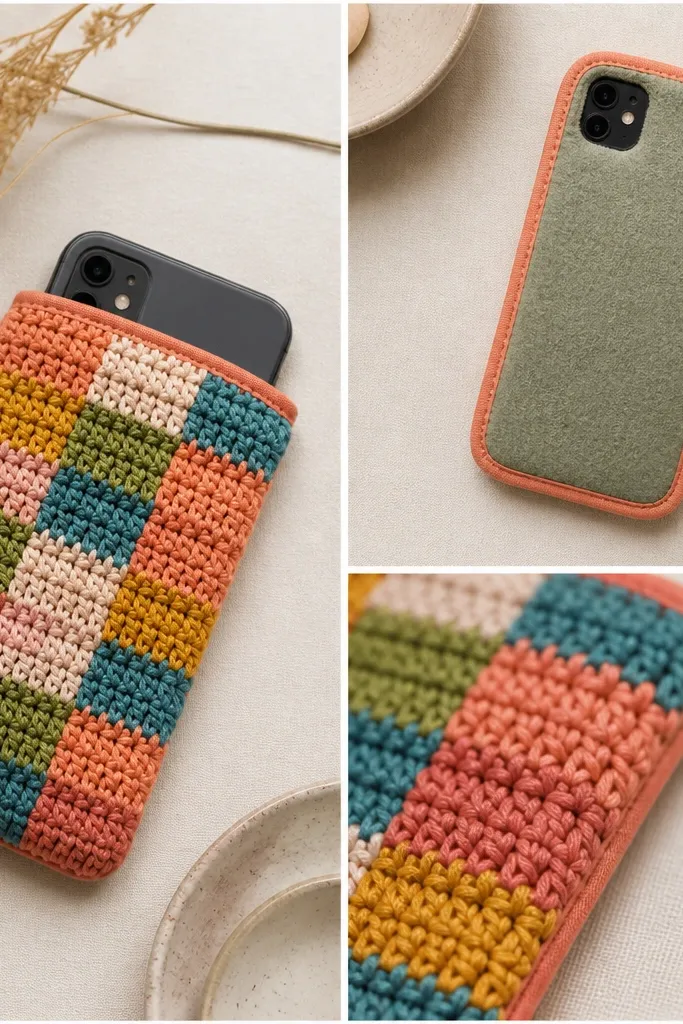
Crochet looks adorable, but it can stretch, so I always back it with felt. The granny stripe pattern gives a handmade look without needing complicated shapes. Choose three colors that you can repeat in a rhythm: mustard, cream, and navy, for example. The felt backing keeps the crochet snug and prevents the phone from shifting.
Crochet a rectangle slightly larger than your phone dimensions — about 1 cm extra on each side. Sew or glue a felt rectangle behind it, then trim around the camera bump. Bind the opening with fabric strip or bias tape so the crochet loops don’t snag. This works great for kids because the felt layer helps absorb drops.
If your crochet stitches look loose, tighten the hook one size down for the final row so the sleeve holds shape.
Don’t skip the felt backing — a pure crochet sleeve stretches and the phone slides out.
4. T-Shirt Fabric Wrap with Magnetic Snap
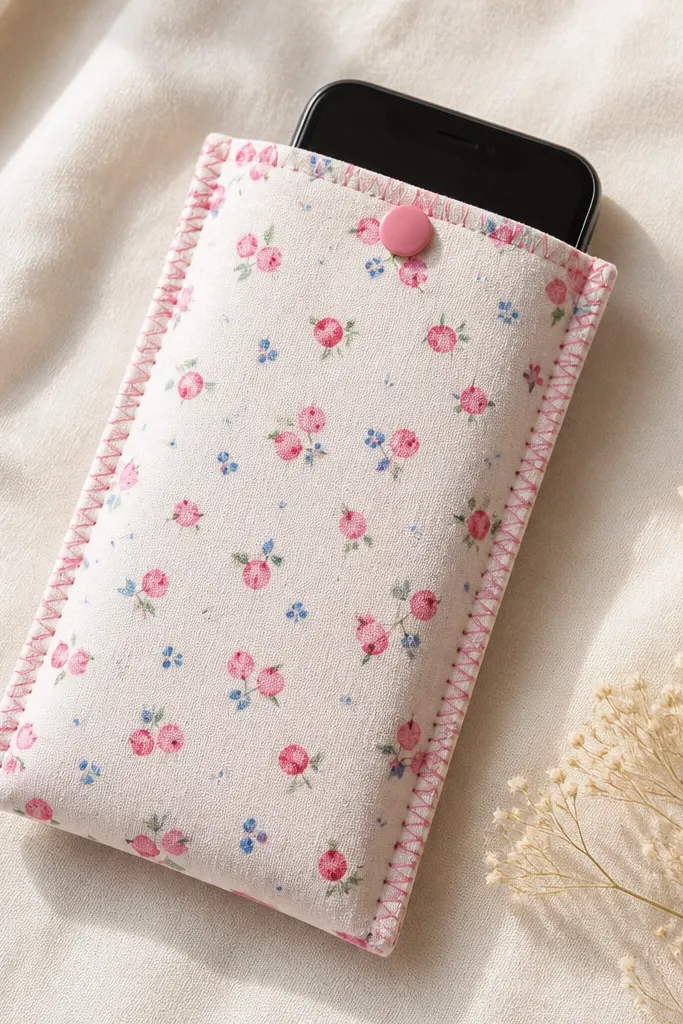
This is my go-to when I want a soft cover that still looks neat. Cotton knit from a T-shirt drapes well, and the magnetic snap keeps it closed without bulky hardware. The fabric pattern (like tiny stars or stripes) makes it feel personal fast. It also feels good in your hand — no stiff corners.
Cut fabric strips for the wrap: one piece for the back and sides, and a front flap sized to overlap by about 1.5 cm. Add a thin craft felt layer behind the flap so the snap doesn’t pull through. Attach a small magnet snap set, then topstitch or glue the fabric edges down. Make a camera notch so the cover doesn’t press on the lens.
Use a scrap of stabilizer under the snap area so the knit doesn’t stretch around the magnet.
Don’t rely on fabric glue alone for the snap — it peels when the flap flexes.
5. Felt Critter Face Cover with 3D Ears
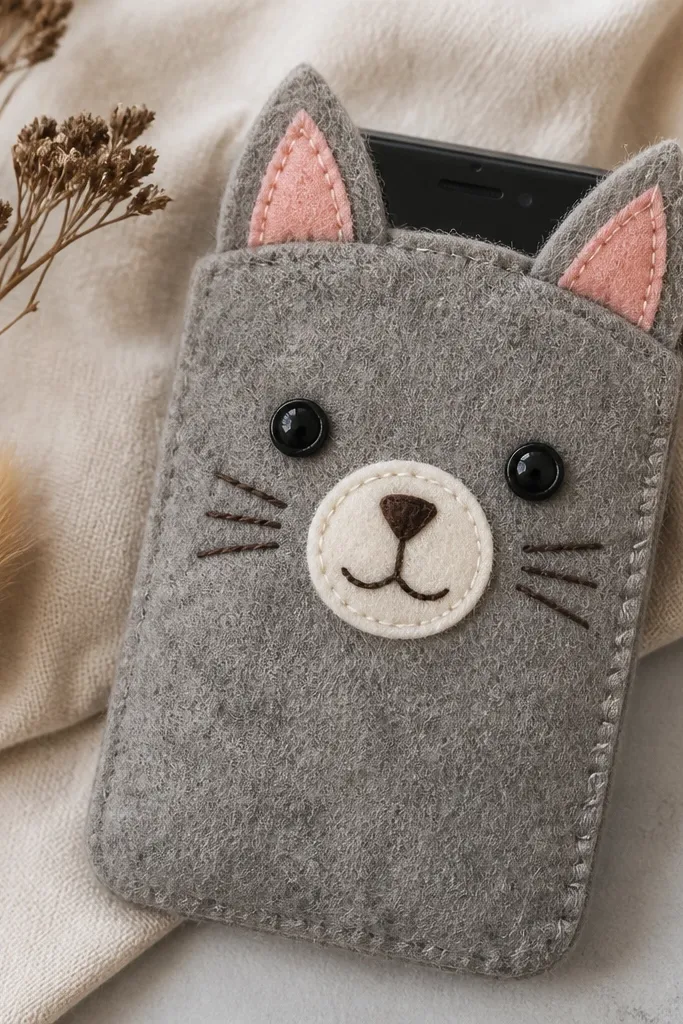
This is the “kid backpack winner” because it’s instantly recognizable and very forgiving if your cuts aren’t perfect. The 3D ears hide small mistakes where the felt layers meet. I use two shades for depth: a base color plus a lighter muzzle patch. The eyes can be felt or tiny buttons, but felt looks cleaner and won’t snag.
Cut a base felt rectangle around the phone with extra allowance for thickness. Layer a muzzle patch in a lighter felt and glue it first, then add ear pieces by cutting two triangles and stacking them with a small felt spacer. Stitch the mouth with embroidery thread or glue a pre-cut felt curve. Leave a camera cutout gap so the cover doesn’t lift from the bump.
When gluing felt eyes, tack the edges with a few short stitches so they stay put after drops.
Avoid loose button shanks — they catch on fabric inside bags.
6. Laminated Craft Paper Inside Sleeve (Clean Look)
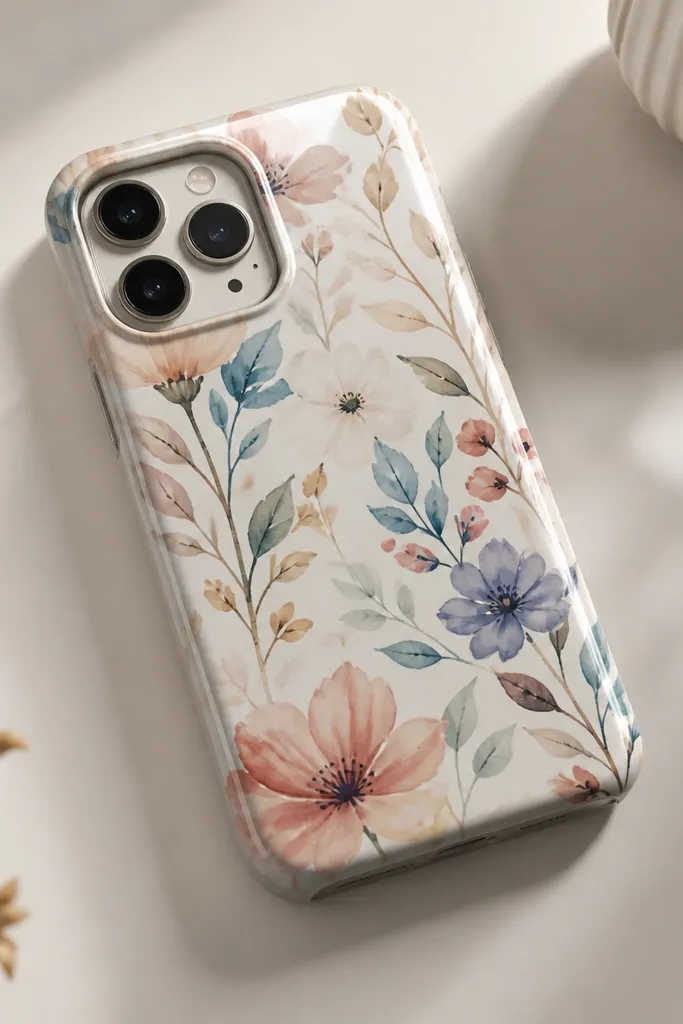
If you like graphic designs, this one makes photos and prints look sharp. I laminate craft paper with clear adhesive film or a laminating sheet so the surface wipes clean. The cover looks “designed,” not handmade, because the finish is smooth and even. It also works well for kids who stain covers with marker.
Print or draw a pattern on craft paper, then laminate it. Cut a backing layer from felt or thin EVA so it stays structured. Wrap the laminated front around the phone edges, then seal with fabric tape or glued binding along the perimeter. Cut the camera opening before sealing so the edge stays tidy.
Quick tipUse a ruler and craft knife for the camera notch, then burnish the edge with a scrap of felt to prevent lifting.
One warningDon’t laminate over messy cut lines — the film telegraphs every bump.
7. Ribbon Bow Side Cover with Micro-Tab Closure
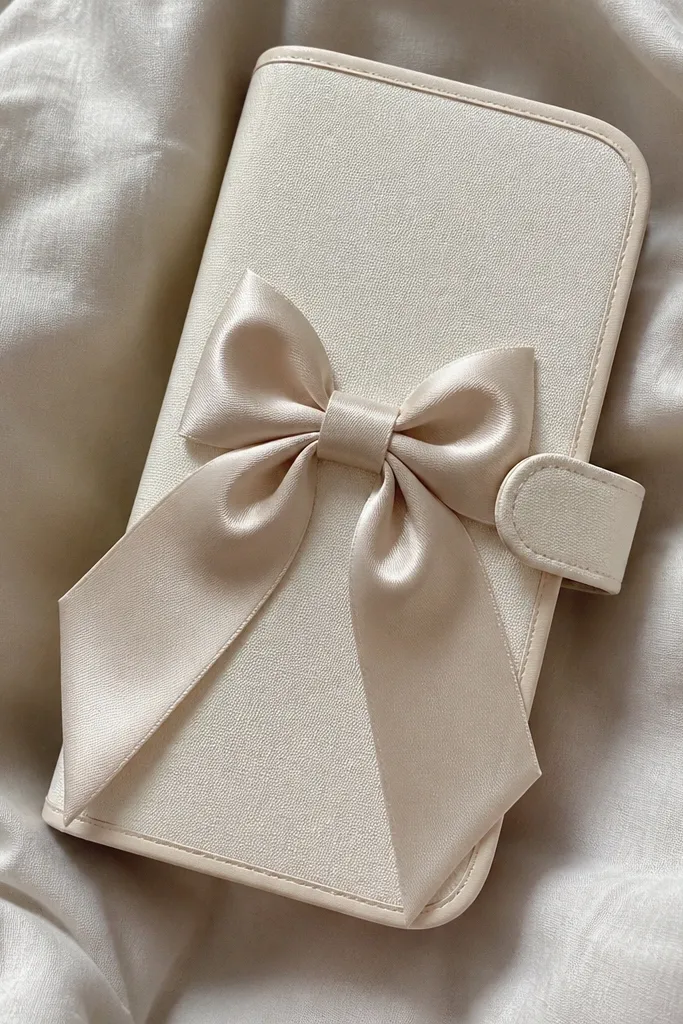
This looks fancy because the bow adds a focal point while the cover stays simple. The micro-tab closure keeps it closed without a bulky flap that ruins pocket space. I use satin or grosgrain ribbon because it holds shape and doesn’t fray easily. The rest of the cover can be felt, cotton, or even faux leather scraps.
Cut the base from felt, then add a tab that’s about 2.5 cm wide and long enough to wrap. Finish the perimeter with thin bias tape. Make the bow separately from two ribbon loops and one small center strip, then glue it on top of the base. Use a snap or Velcro dot on the tab to close.
Glue the bow with hot glue, then press with a flat object for 10 seconds so it bonds without strings.
Avoid thick ribbon with uneven edges — it makes the cover bulge and the bow shifts.
8. Washi Tape + Felt Frame Cover (No Cutting Panic)
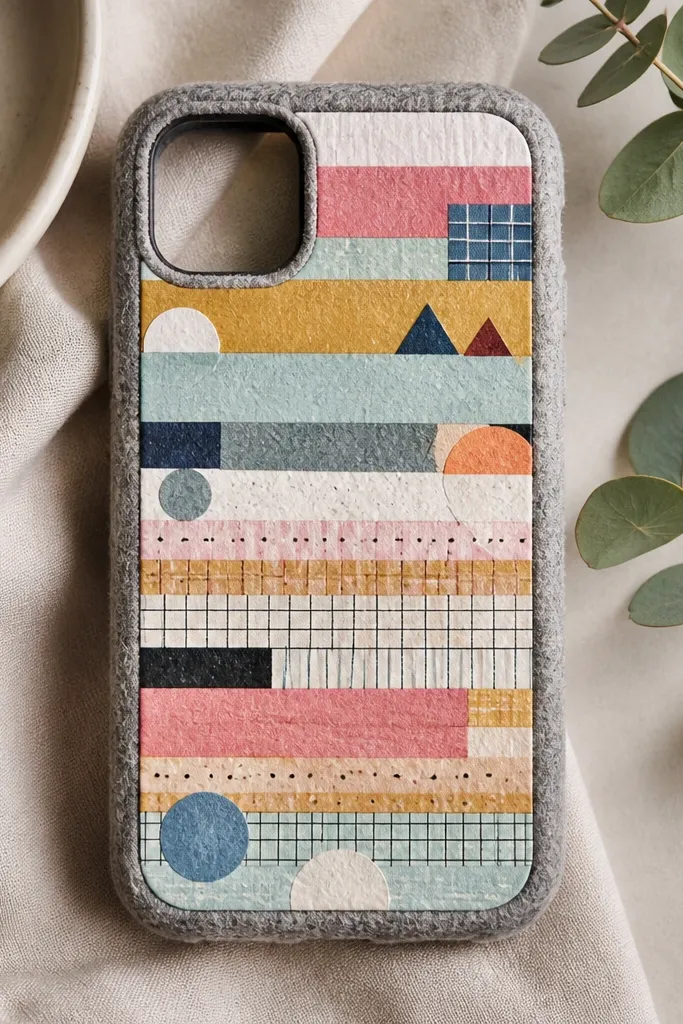
This is the easiest way to get a graphic look without precise sewing. The felt frame hides raw edges and gives the washi tape a boundary. I like using three tape patterns max: one stripe, one dot, one solid color. The tape sticks well to smooth felt and looks neat when the layers overlap in the same direction.
Cut a felt frame that’s slightly larger than your phone, then mark and cut the camera notch. Apply washi tape to the center area only, overlapping strips by about 2-3 mm. Seal the tape with a thin layer of clear matte tape or a craft sealant spray if you have it. Finish the perimeter with a second thin strip of felt or bias tape.
Quick tipPress each tape strip down with a credit card so edges don’t lift.
One warningDon’t cover the camera bump — the tape edge will peel when it contacts the lens area.
9. Faux Leather Keychain Lanyard Cover
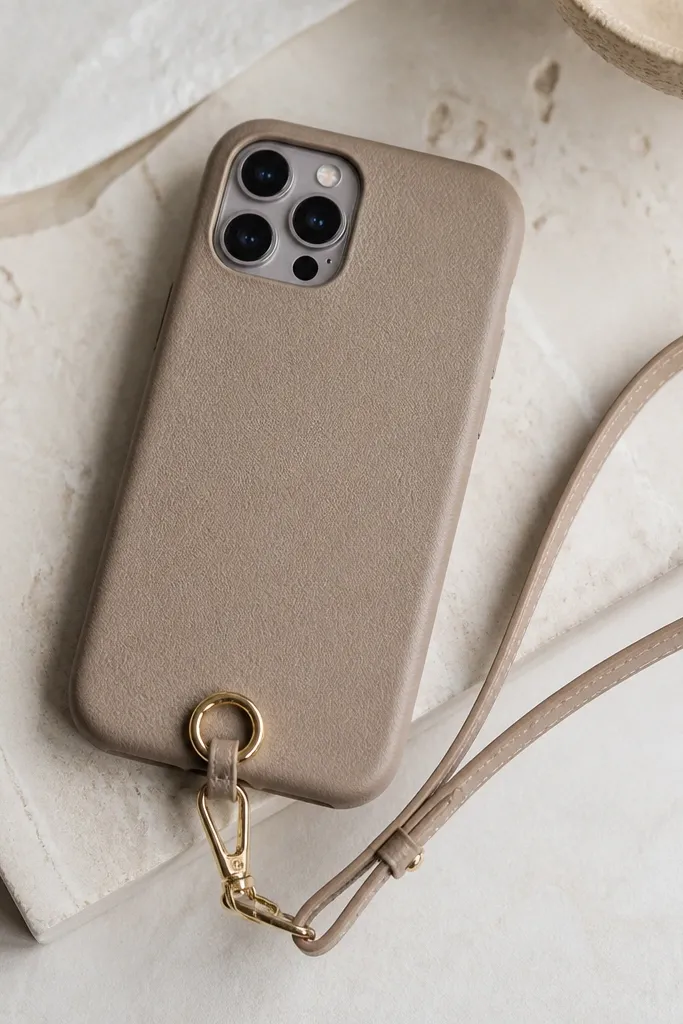
This one solves the “phone falls out of pockets” problem. Faux leather looks clean and holds its shape, and the lanyard attachment gives you a secure grip when you’re carrying kids or groceries. I use a simple strap loop, not a whole crossbody bag, so it stays light. The look is minimal but still handmade because you can choose the leather color and thread color.
Cut faux leather panels: a back piece and a front flap about 1 cm shorter so it doesn’t rub the screen. Add a backing layer of craft felt for scratch protection. Use a snap or magnetic closure and attach a small metal ring with reinforced glue or rivets if you have them. Cut the camera opening with a sharp blade and finish edges with fabric glue to stop fraying.
Match thread color to leather shade — even if you skip stitching, the color match makes the cover look intentional.
Don’t use super-thin leather — it wrinkles at the fold and looks cheap fast.
10. Pom-Pom Confetti Cover with EVA Backing
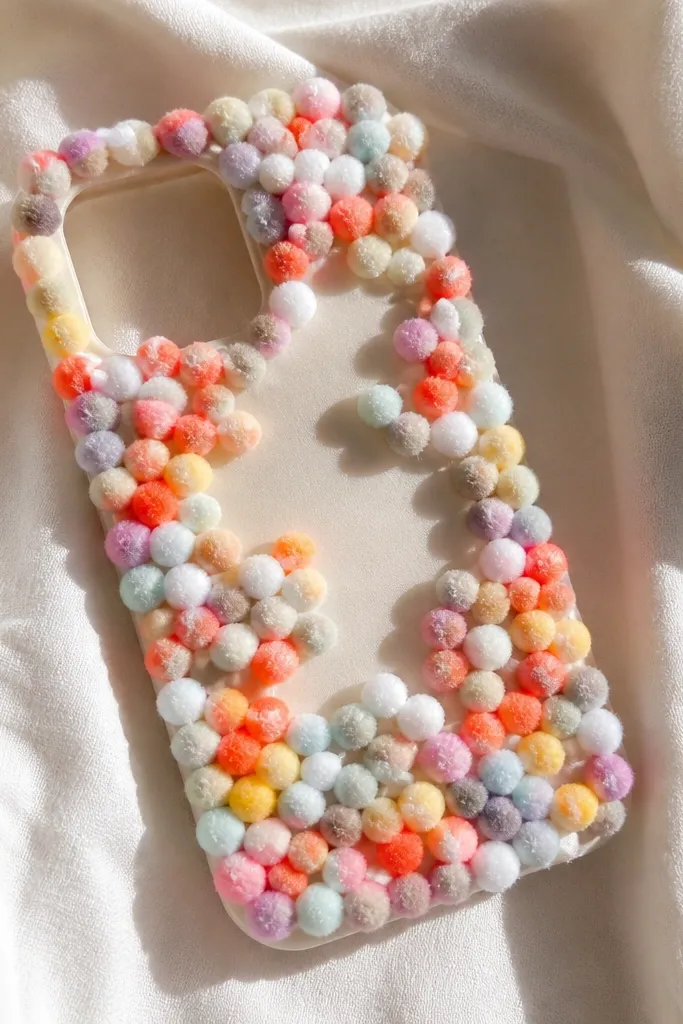
Pom-poms sound messy, but if you use EVA backing and glue in clusters, it looks playful instead of chaotic. I place pom-poms around the border and a few “constellation” spots so the phone doesn’t feel like a fuzzy block. EVA keeps the cover sturdy so pom-poms don’t sag. This is great for birthdays and kid crafts because it feels fun to touch.
Cut EVA to phone size, then cover the front with felt or fabric to protect the phone from scratching. Glue pom-poms with hot glue in small groups, leaving a 5 mm gap around the camera area. Add a smooth fabric binding at the perimeter so the pom-poms don’t shed. Keep pom-poms small, around 8-10 mm, for a neater look.
After gluing, lightly tap the cover on your work surface to knock off loose pom-poms before it dries fully.
Don’t use tiny loose glitter glue — it falls off and makes the cover look worn quickly.
11. Embroidery Hoop Scrap Panel Phone Cover
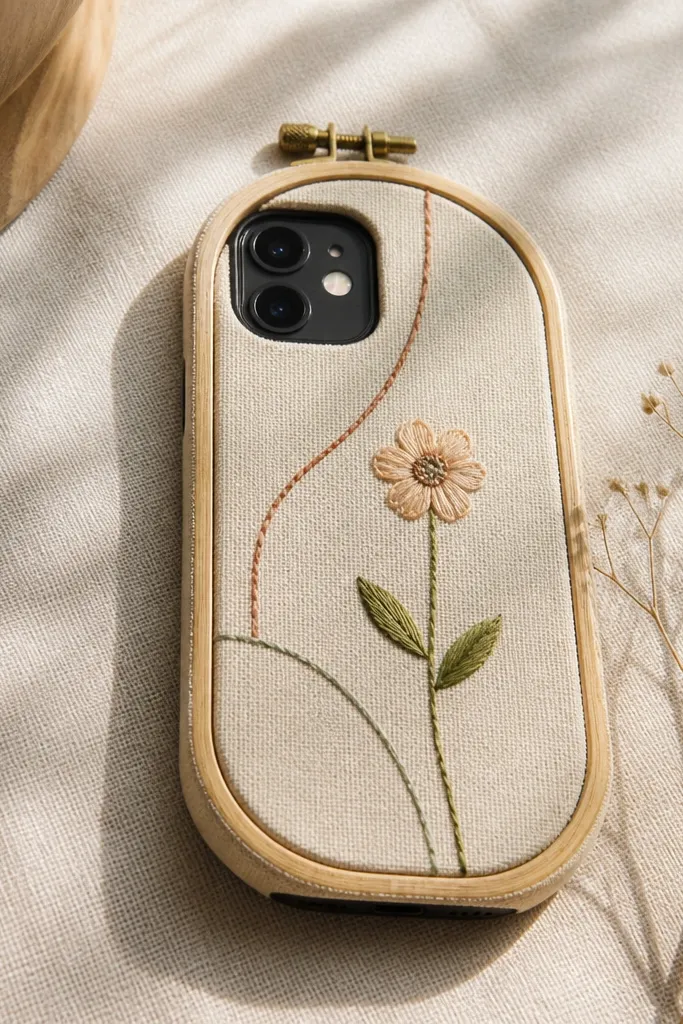
This looks artsy because you get real thread texture, not just printed fabric. I use an embroidery-style layout: one small stitched motif and a few straight stitch lines, so it doesn’t become busy. The cover is based on a fabric panel stretched over felt so it stays flat. You can reuse scrap cotton and embroidery floss, which is perfect for small-space crafting.
Wrap scrap cotton around a stiff felt backing and glue the edges on the inside. Stitch your design directly onto the fabric — I like backstitch for outlines and straight stitch for simple lines. Keep your phone camera cutout open by marking the bump and trimming after stitching. Finish the perimeter with bias tape or folded binding strip.
Quick tipUse a running stitch test on scrap first so you pick a thread tension that lays flat, not puckered.
One warningDon’t stretch stretchy knit fabric for embroidery — it warps and the stitches look uneven.
12. Felt + Chenille Stem Flower Appliqué
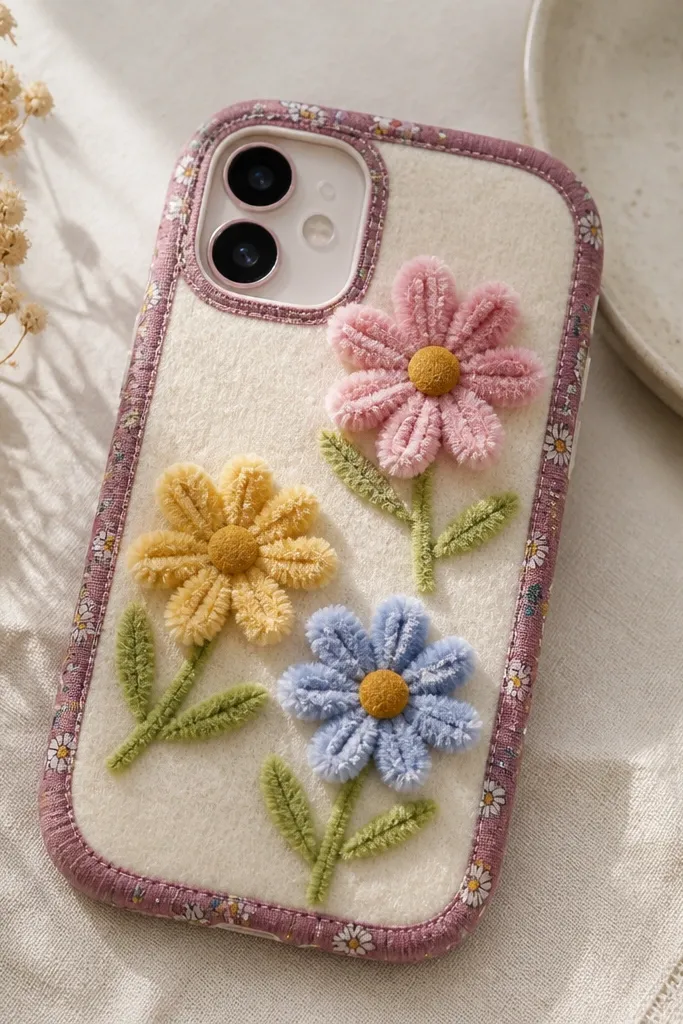
Chenille stems add a tactile, handmade pop without needing a ton of materials. The fuzzy petals catch light and look cute against smooth felt. I build flowers in layers: felt base petals, then chenille stem petals glued on top for height. It’s a fun project for kids because the stems are easy to shape into curves.
Cut a felt base for the phone cover and add a felt backing if you want extra protection. Shape chenille stems into petal curves, then glue them onto the felt petals. Leave a clear area around the camera bump so the raised parts don’t press. Bind the edges with a fabric strip to keep the cover from fraying and to hide raw felt cuts.
Cut chenille stem ends clean with wire cutters and tuck them under a felt cap before gluing.
Avoid placing raised flowers near the corners — they rub and the glue loosens.
13. Heat-Transfer Vinyl Mini Names on Felt Sleeve
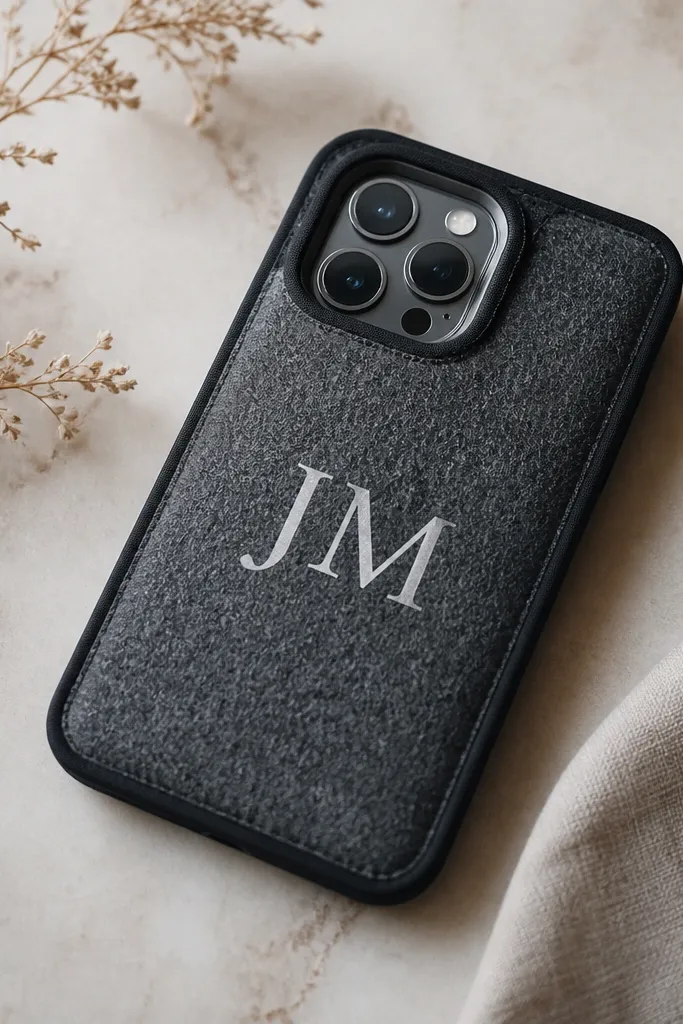
This one is for people who want cute but not cartoonish. Heat-transfer vinyl on felt looks sharp because the felt surface is matte and the letters stay crisp. I keep the layout small: one name or nickname plus a tiny icon like a star. It also holds up better than glitter because there’s no loose sparkle.
Cut a felt sleeve with enough room for the phone to slide in. Press heat-transfer vinyl onto the felt using the exact temperature and time for the vinyl brand. Trim the camera opening carefully after pressing so you don’t crack the vinyl. Finish edges with bias tape and add a small tab if you want it to open/close easily.
Do a scrap test press first — felt can scorch faster than cotton, and you need the right time.
Don’t use glossy vinyl on fuzzy felt — the texture makes letters look dull and uneven.
14. Macramé Knot Corner Cover with Cotton Cord
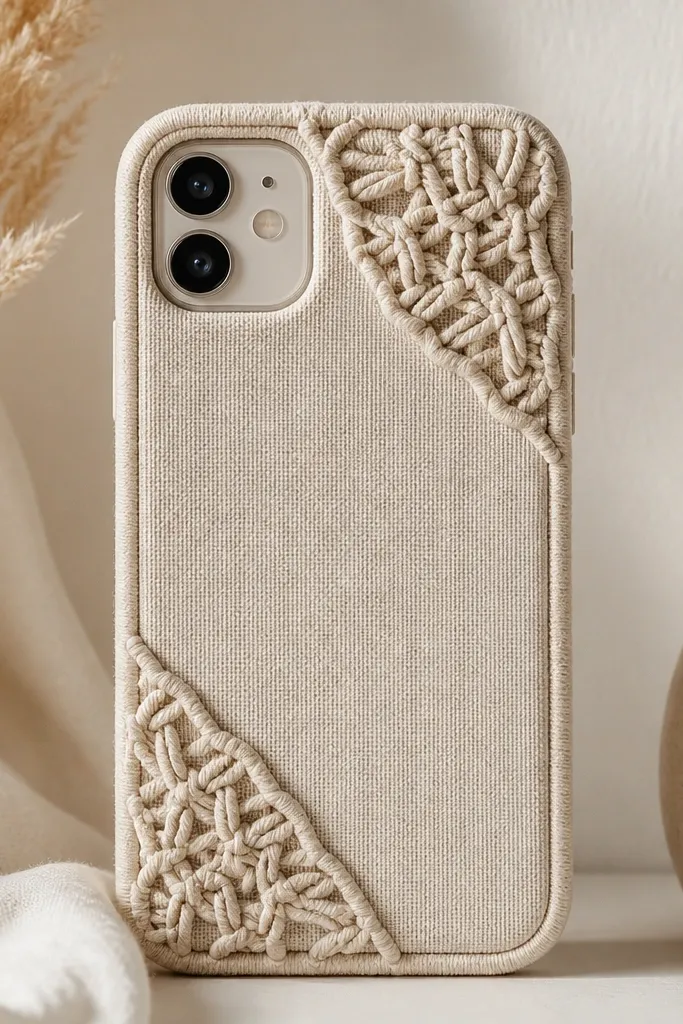
Macramé looks intricate, but you can keep it simple by putting knots only in the corners. That gives a boho look without covering the whole phone with thick cord. I use cotton cord so it doesn’t stretch as much as rope fibers. The smooth center fabric makes it comfortable in your hand and keeps the phone from snagging.
Create a base from felt or cotton fabric with a stiff backing. Tie cord into small square knots and glue the ends to the backing at each corner, leaving the center flat. Make sure the knots sit at least 8 mm away from the camera cutout. Bind the edges with fabric tape so cord ends never show.
Quick tipSoak the cotton cord ends briefly in fabric glue, then let dry — it prevents fraying before you glue them down.
One warningDon’t put knots over the camera area — the cord rubs and the cover lifts.
15. Paper-Doily Overlay with Spray Seal Backing
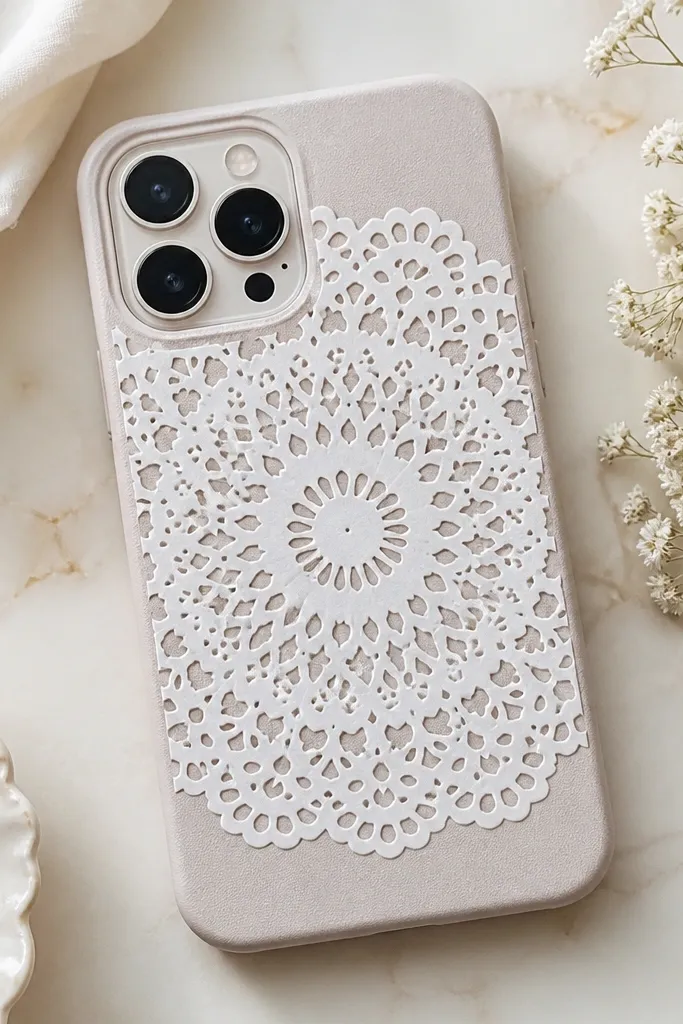
Doilies make phone covers look like you bought them, because the pattern is already beautiful. The issue is paper fragility — so I seal it and back it with felt to keep it from tearing. You get a vintage lace look without painting or complicated stitching. Keep the doily centered and leave a border of solid felt so it stays strong.
Cut a doily to fit your phone front panel, then seal it with a thin coat of matte clear spray. Back it with felt using spray adhesive or careful glue dots around edges. Trim the camera opening after sealing so the edges are clean. Finish the perimeter with a felt border or bias tape so the doily never shows raw paper cut lines.
Use matte spray, not glossy — glossy makes paper look wet and cheap fast.
Avoid thick glue floods over the doily — it soaks in and wrinkles the pattern.