
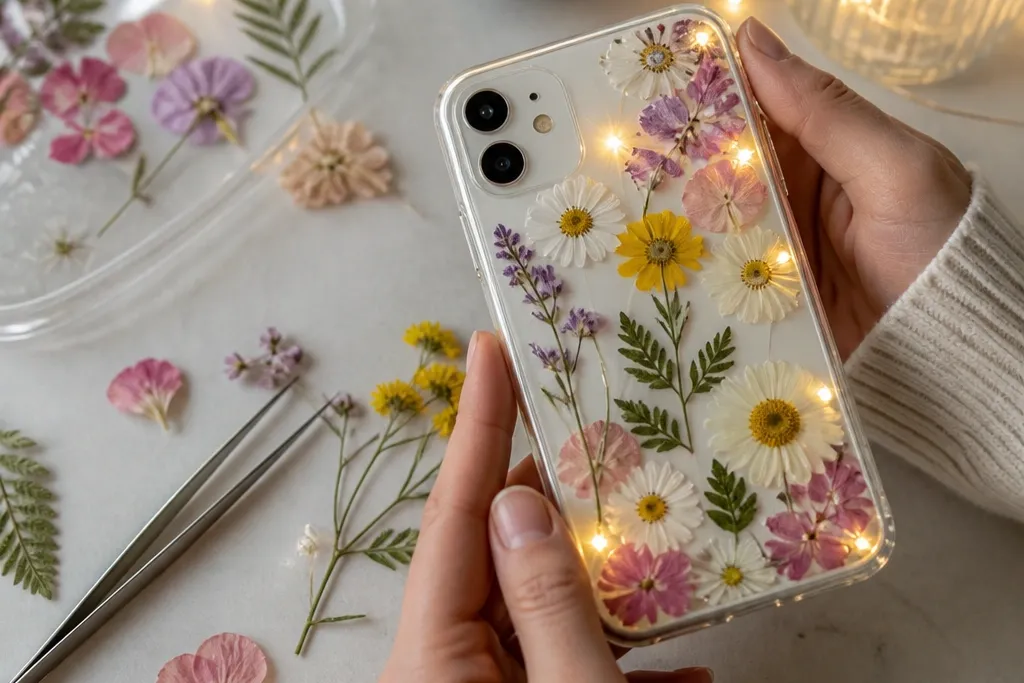
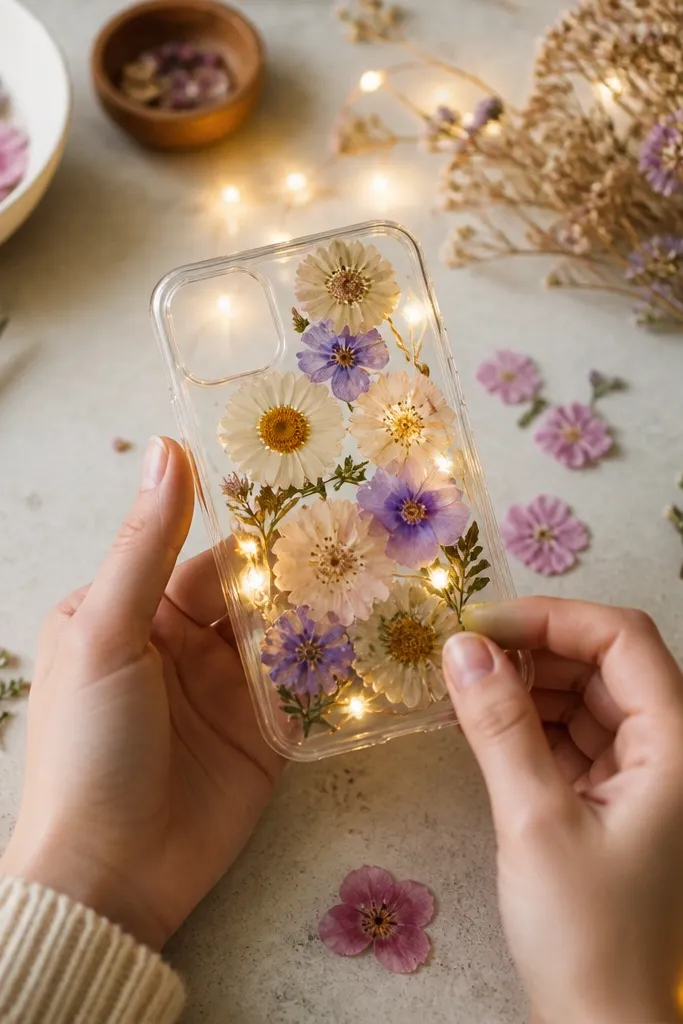
1. Starry Clear TPU Glow with White Felt Backing
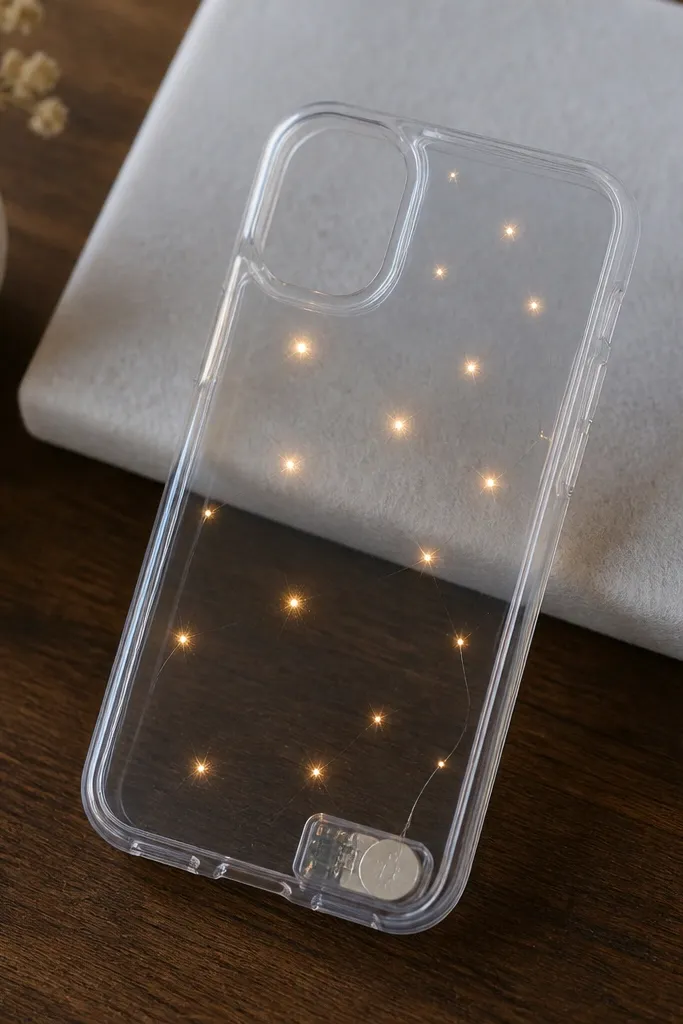
Start by removing the phone from the case and tracing the case outline onto white felt. Cut the felt to fit, then place it behind the clear TPU so it sits flat. Lay micro LED lights on top of the felt in a loose scatter pattern, taping each wire segment down with painter’s tape. Make shallow marks for where the battery pack will sit, then route the wire into a shallow channel at the bottom edge and cover it with felt scraps. Finally, press the case back together and check the glow with the lights on before trimming any tape.
This one looks like a night sky because the light passes through a clear TPU bumper and bounces off white felt behind it. I like it for smaller hands and kids because the glow spreads evenly instead of showing wire lines. Use a white felt backing that’s slightly smaller than the case so the edges stay crisp. The stars look best when the bulbs are spaced about 1 to 1.5 inches apart, so you don’t get bright clusters.
One warningDon’t let the felt hang past the case edges; it catches light and makes the edges look messy.
Quick tipIf the glow looks uneven, add a second thin layer of white felt, not thicker — thicker makes it dim.
2. Rainbow Strip LED Case with Heat-Bent Corners
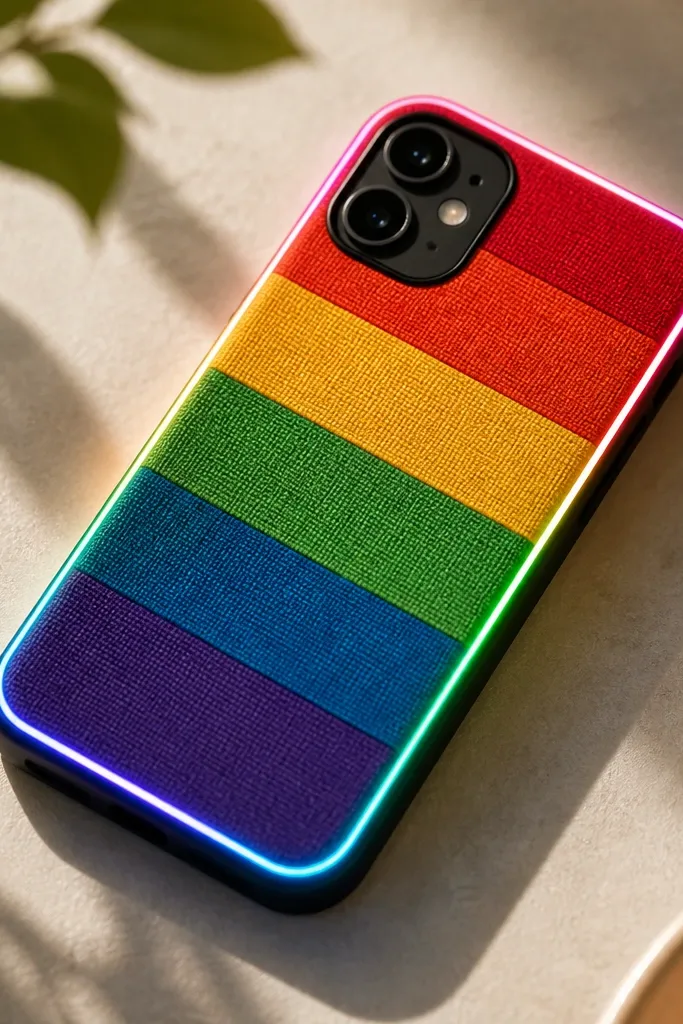
This is a bold look that reads instantly, even in daylight, because a strip LED along the border creates a frame effect. The rainbow fabric makes the light look warmer and more playful, which fits kids and teens. It’s also flattering for “busy” tastes because the frame guides attention to the phone edges. I recommend using fabric with a slight sheen or a tight weave so the light doesn’t look muddy.
Start with a hard phone case skin or a blank plastic back. Cover it with rainbow-striped fabric using a thin layer of fabric glue, smoothing from center outward to prevent bubbles. Cut a narrow channel along the top and side edges for the LED strip, leaving the bottom edge clear for the battery pack. Heat the LED strip gently with a hair dryer for 5-8 seconds at the bend points, then route it around corners and secure with clear tape. Place the battery holder in the lower corner channel and test the lights before you seal the last edge.
Use a strip LED with a diffuser cover if you want the border to look like a soft neon line.
Don’t force the strip to bend sharply — sharp corners create hot spots and the strip starts to lift.
3. Heart Cutout LED Case on Black Fabric
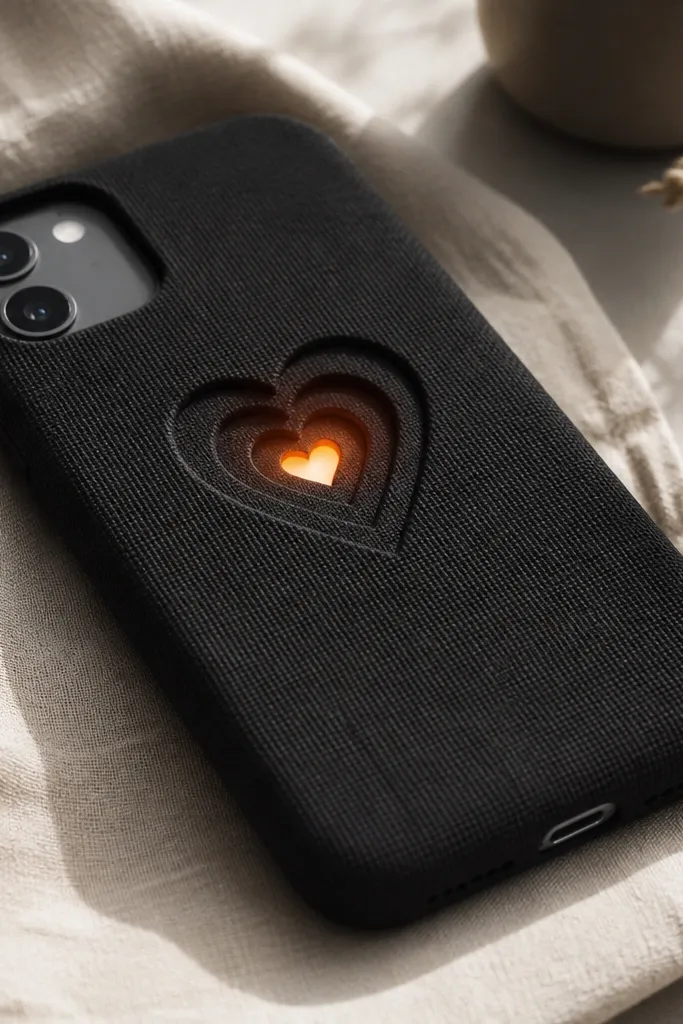
Start by covering the case back with black felt or velour, pressing down firmly along all edges. Cut three heart shapes from white cardstock, then glue the hearts onto the black felt so they overlap slightly. Position a battery LED set behind the center heart first, then add two more LEDs behind the top and bottom hearts. Route the wires to the lower corner with a shallow channel and cover it with a thin strip of felt. Test the lights, then trim any felt that peeks out and seal the cardstock edges with a thin coat of clear glue.
Black fabric makes LEDs look dramatic, and layered hearts add depth without needing fancy tools. I like this for kids who love Valentine themes or for birthdays because it feels personal. The glow is soft around the heart edges if you use a thin black felt and a lighter inner layer. If you have a phone with a slightly raised camera bump, keep the heart shapes away from the camera so the design stays clean.
One warningDon’t use thick poster board; it blocks light and makes the hearts look flat.
Quick tipUse cardstock for the inner hearts and thin craft foam for the outer hearts; foam gives a softer glow edge.
4. Ocean Waves Light Panel with Blue Gel Sheets
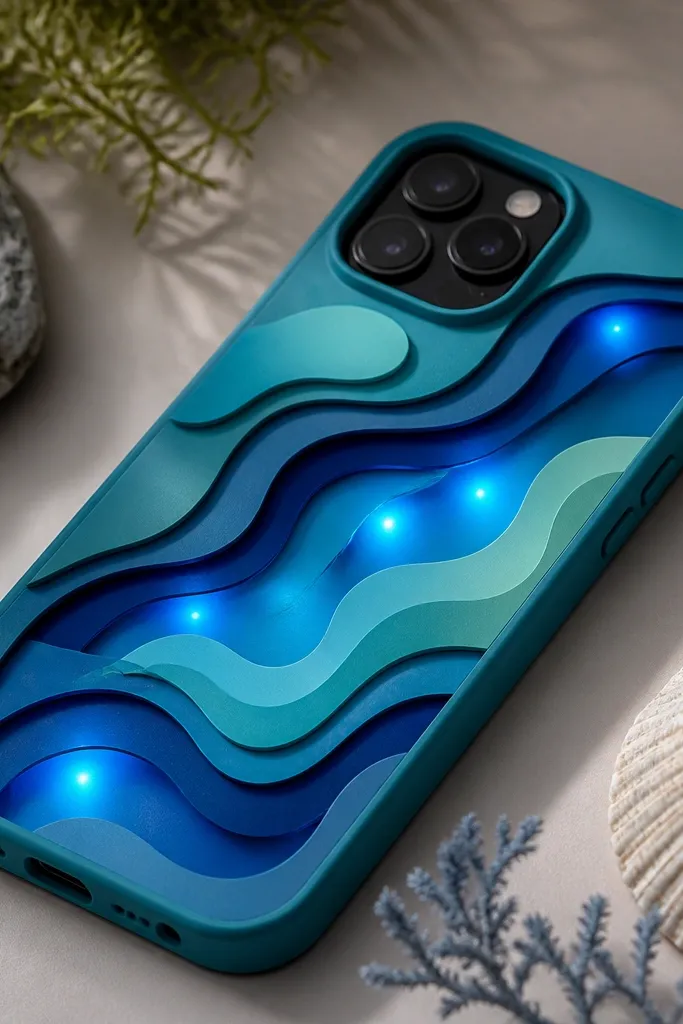
Start by cutting wave shapes from semi-transparent blue gel sheets, sized slightly smaller than the phone back. Cover the case back with a matte teal fabric or felt, then glue the gel waves on top using fabric glue. Add a strip of micro LEDs behind the wave area, taping them down lightly so the wiring stays flat. Route the wire to the bottom corner channel and hide it under a small rectangle of matching fabric. Test with the phone off first, then turn it on and adjust the LED spacing so waves glow evenly.
This one looks like underwater light because the LEDs shine through blue gel sheets shaped like waves. It’s calm, and the glow looks smooth instead of pointy. I made this for my nephew’s summer vacation phone and it held up because the gel layer is glued flat and sealed. It also flatters most skin tones when kids take selfies — the blue glow looks good on everyone.
One warningDon’t glue gel sheets with hot glue; it can warp the gel and create uneven light patches.
Quick tipIf the glow looks too bright, add a thin layer of white paper behind the gel sheets to diffuse it.
5. Floral Dots with Fairy Lights and Clear Coaster Diffuser
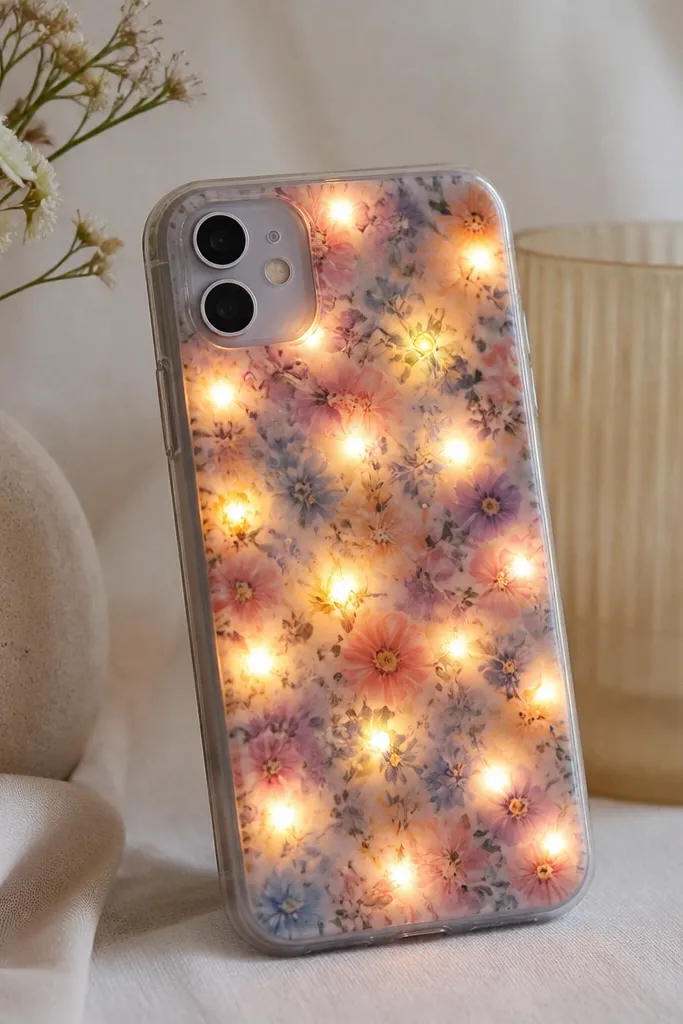
Start by printing or cutting a small floral panel that fits your case back. Glue the floral panel onto the case using a thin layer of Mod Podge or clear craft glue. Cut a piece of clear plastic from a cheap coaster or packaging sheet, sized just under the case edges, and glue it behind or over the floral panel depending on your case type. Place micro LEDs behind the floral area in a grid-like pattern, then run the wire to the bottom corner and secure with painter’s tape. Seal the edges with a thin clear coat so the diffuser doesn’t lift.
This design uses a clear diffuser so the LEDs look misty instead of sharp dots. The floral pattern feels sweet, and the light softens it so it doesn’t look like a print sticker. It’s great for girls and for anyone who wants cute without going full “themed.” The clear diffuser is the secret: it spreads the light across the printed area.
One warningDon’t skip edge sealing; lifted plastic catches on pockets and makes the case peel.
Quick tipTest the glow with your lights off and again with a lamp on; you’ll see if the diffuser needs a white backing.
6. Monogram Glow with Craft Foam Letters
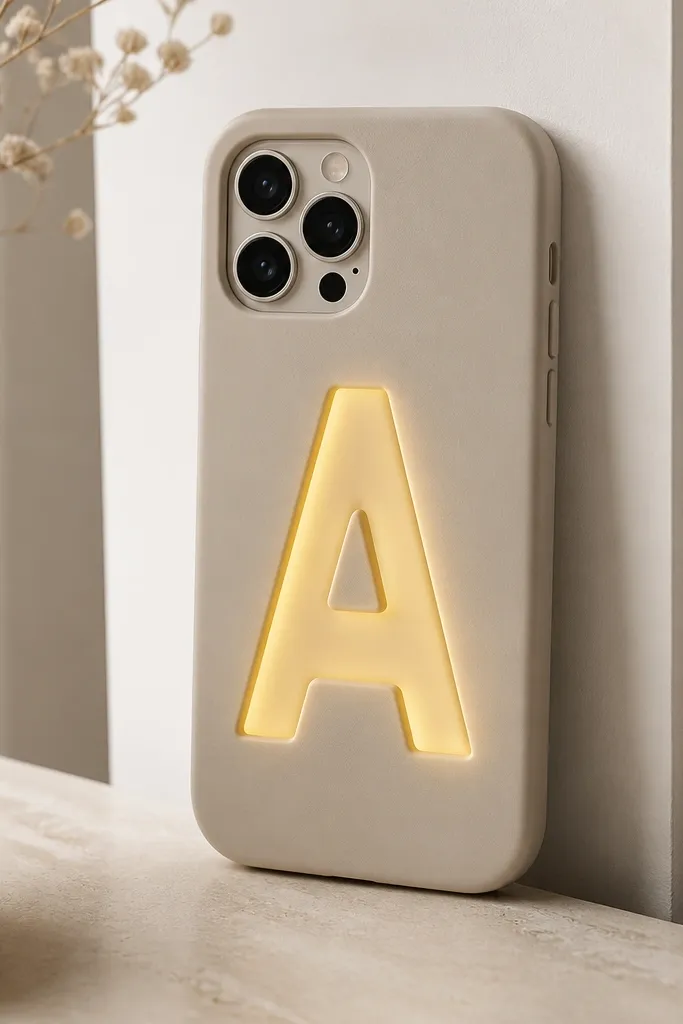
Start by choosing a phone case base in beige, cream, or light gray. Cut a foam letter (like “M” or “S”) so it sits about 1/4 inch away from the case edges. Glue the foam letter onto the case back, then place a small LED behind the open center of the letter. Route the wire to the bottom edge channel and hide the battery pack under a small foam flap or a fabric patch. Turn the lights on and adjust the LED position until the glow looks centered in the letter.
A single monogram looks grown-up even when it’s made for a kid. Craft foam letters create a hollow center that frames the light, so the glow stays inside the shape. I like using one big letter because it looks clean in photos and doesn’t cover the whole phone. Beige and cream bases keep the light warm and flattering in indoor lighting.
One warningDon’t use thin paper letters; they crumple and the light leaks out the sides.
Quick tipSand the foam edges lightly with fine sandpaper so the letter looks smoother under the light.
7. Panda Face LEDs on Black-and-White Felt
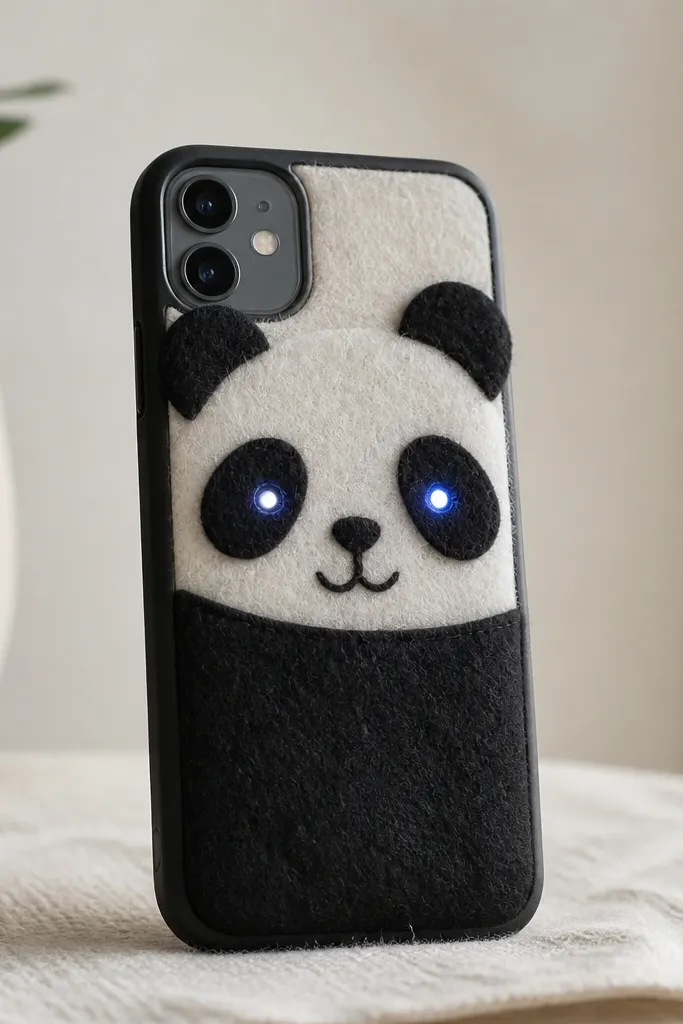
Start by cutting felt pieces for the panda face: a white oval base, two black ear shapes, and two black eye patches. Glue the background pieces first, then add the eye patches last. Place a small battery LED behind each eye patch so the glow sits centered in the eye cutout area. Route the wires to the bottom corner and cover with an extra felt rectangle glued over the channel. Press everything down and let it dry flat so the phone case doesn’t warp.
This is a kid-pleaser that still looks neat because the felt shapes give clear boundaries. The LEDs in the eyes make it look animated, and black-and-white is high contrast in photos. I made one for a classroom craft day and the kids loved that it stayed readable even when the lights were off. Use soft white felt for the face and thicker black felt for the ears and eye patches.
One warningDon’t put the LEDs too close to the edge of the eye patch; the glow will spill and look cheap.
Quick tipAdd tiny white felt circles inside the eye glow to make them look like sparkling pupils.
8. Geode Slice Glow with UV Resin and LED Points
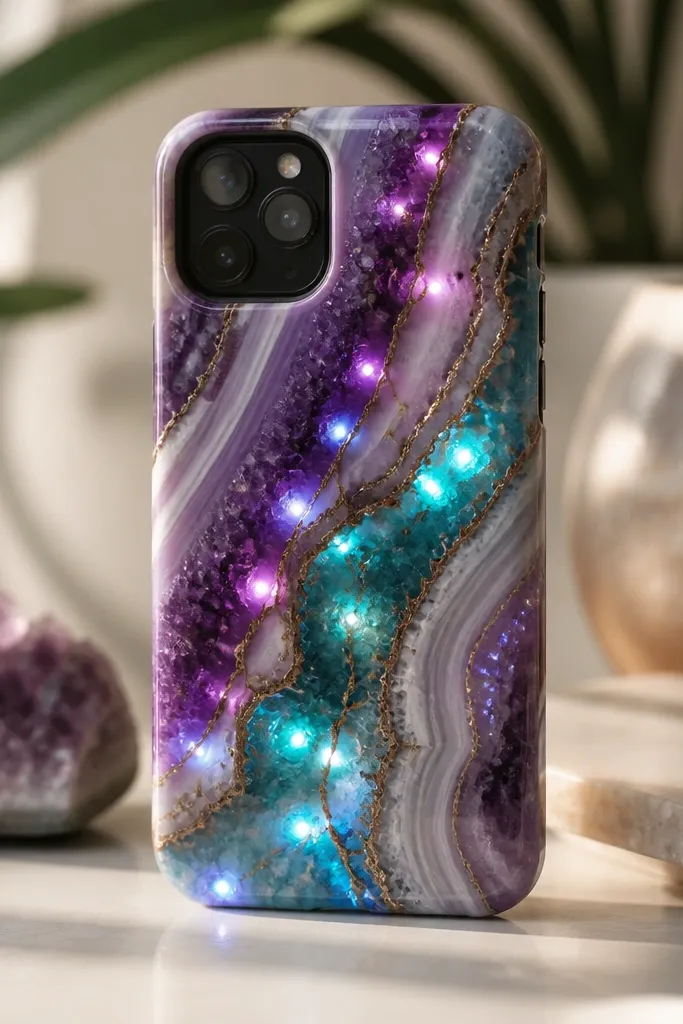
Start by painting the case back with a base coat of dark purple acrylic. Draw thin geode vein lines with a light teal paint, then let it dry. Place pin LEDs behind the case in a random cluster, then pour a thin layer of UV resin over the top, keeping the resin smooth over the LEDs. Cure with a UV lamp in short bursts so you don’t overheat the phone case. After curing, add one more ultra-thin resin pass over the brightest spots and cure again.
Geode designs look expensive when the light hits the resin veins. UV resin makes the cracks look glassy, and LEDs make the whole slice feel like it’s lit from within. This one is great for older kids and teens because it’s more “aesthetic” than cartoon. If you like purple, this is the combo: amethyst purple base with teal accents, both under the LEDs.
One warningDon’t overpour resin; thick resin blocks light and makes the geode look cloudy.
Quick tipUse alcohol to wipe the case before painting; resin sticks better to clean plastic.
9. Candy Striped Ribbon Case with Micro LED Trail
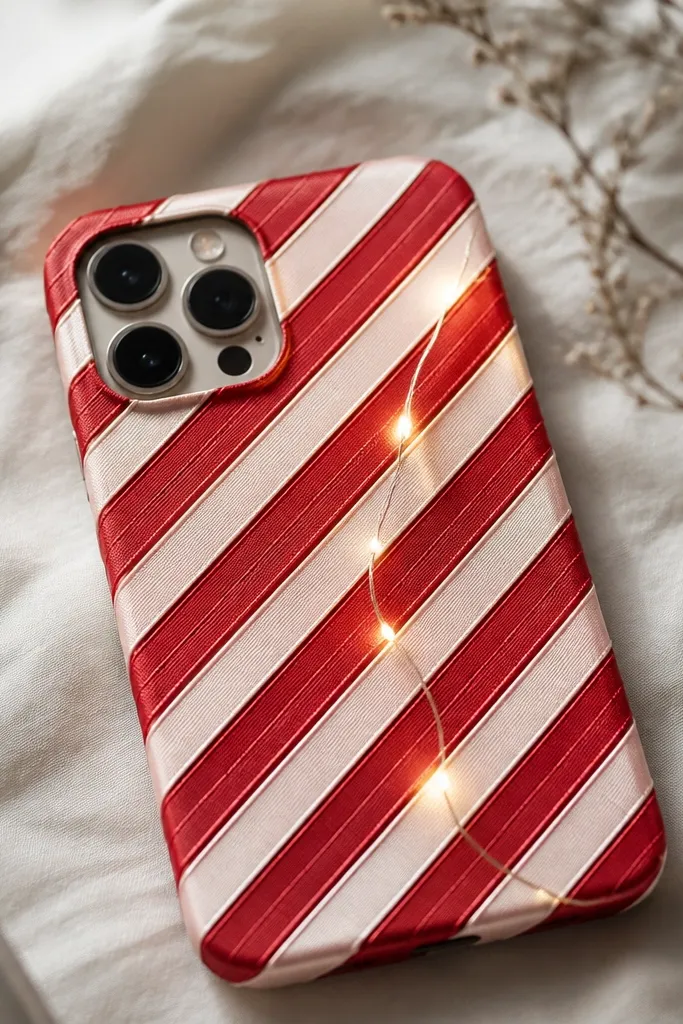
Ribbon wraps look fun, and a diagonal light trail adds motion without clutter. The candy stripes make the glow look playful, especially when you use warm white LEDs. I like this for kids because it feels like a wearable craft instead of a “project” that sits on a shelf. It also looks good on phones with a curved back, because the diagonal line follows the shape.
Start by measuring the phone case back and cutting ribbon strips that overlap about 1/2 inch. Wrap the case with the ribbon, gluing each overlap with a thin line of craft glue so it doesn’t squeeze out. Mark a diagonal route from top-left to bottom-right and tape the micro LEDs along that line with painter’s tape. Route the wire to the bottom corner and cover it with a small ribbon patch glued over the channel. Turn the lights on and adjust the LED spacing until the trail looks evenly bright.
Use warm white LEDs with candy stripes; cool white makes the colors look washed out.
Don’t stack ribbon layers too thick; thick ribbon creates a bulky edge that catches on sleeves.
10. Galaxy Constellation with Perforated Paper Stars
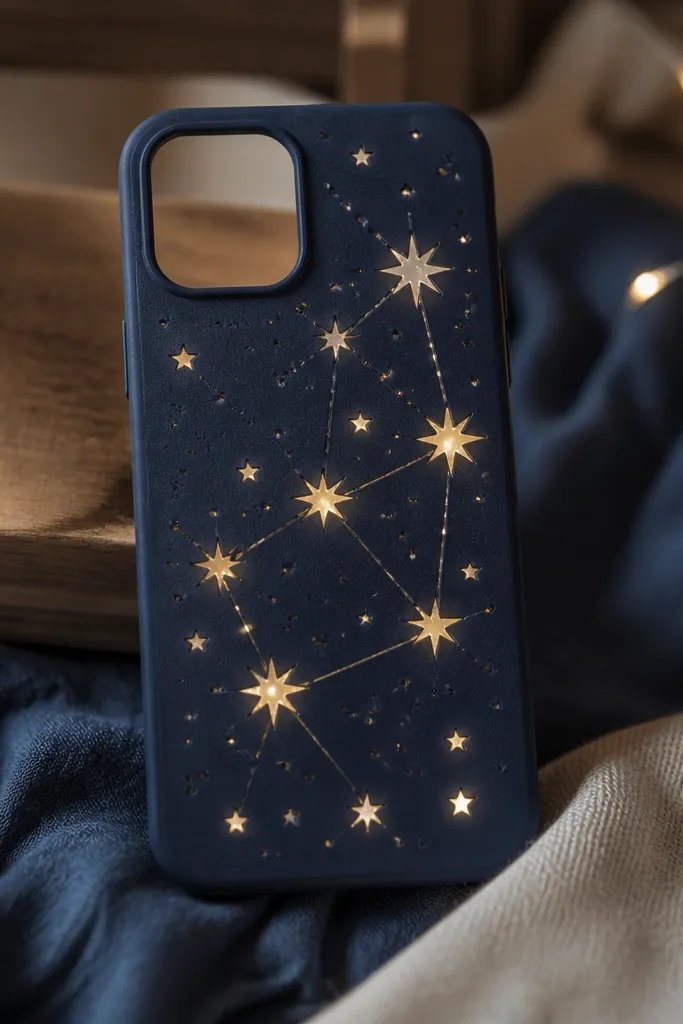
Start with a navy fabric or felt-covered case back. Cut a thin paper panel sized to the back and punch tiny star holes using a small hole punch or a needle. Glue the paper panel onto the case, then place micro LEDs behind the star area so each hole lines up with a light point. Use silver thread to connect a few stars, then glue thread ends down with a tiny dot of clear glue. Route the wire to the bottom corner channel and test before sealing the paper edges.
Perforated paper gives you a star effect without needing fancy sticker sheets. I like navy because it makes the light look like it’s coming from space, not just a bright blob. Silver thread connects the constellations and makes it look intentional. This design works well for kids who like space but hate anything too “girly.”
One warningDon’t glue paper directly over the LED bulbs; it can create hot spots and make the light look uneven.
Quick tipPunch star holes at different sizes (3mm and 5mm) so the constellation has depth.
11. Bow Tie LEDs on Satin with Gold Thread Edge
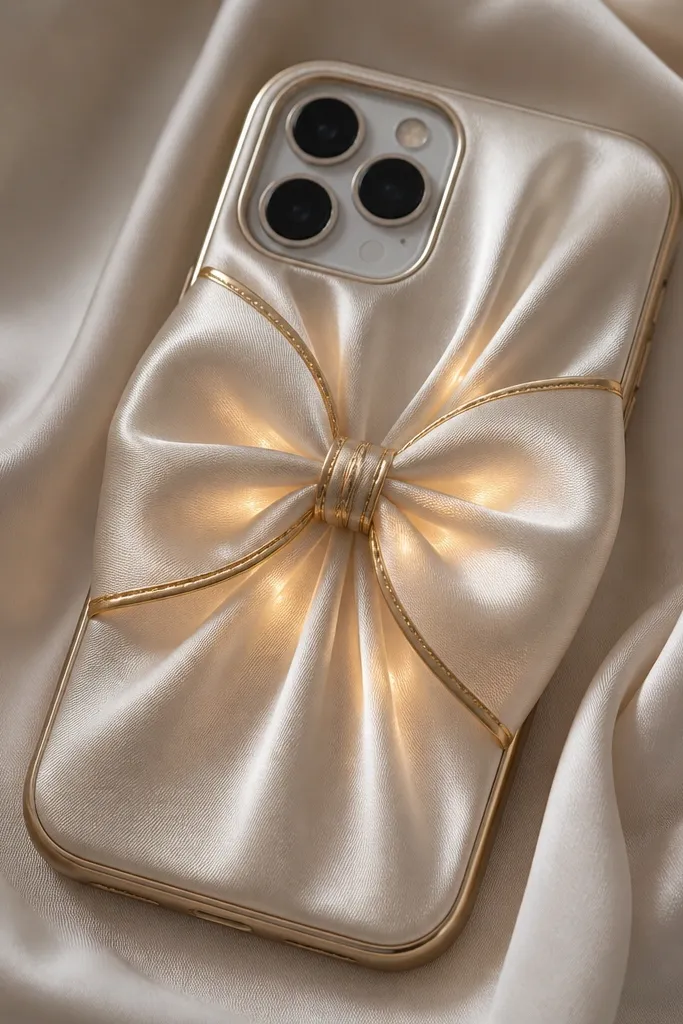
Cover the case back with dark satin fabric and glue edges down carefully. Cut a bow shape from satin and glue it centered on the case, leaving a small hollow in the middle. Place a small warm LED behind the bow center and secure it with a bit of clear tape. Add a strip of gold thread around the bow edge and glue it down in short segments so it doesn’t sag. Route the wire to the bottom and hide it under a satin patch that matches the case back.
Satin bows look fancy fast, and the LEDs make the folds glow like stage lights. I like this for school events and birthdays because it photographs well and stays cute without being childish. Use a satin fabric that’s dark enough to hide wiring but reflective enough to catch light. Gold thread along the edge makes it look intentional and frames the glow.
One warningDon’t use slippery satin without pinning while glue dries; it shifts and the bow ends up crooked.
Quick tipIf the satin frays, seal cut edges with a thin coat of clear glue before assembly.
12. Lemon Slice Case with Backlit Edges
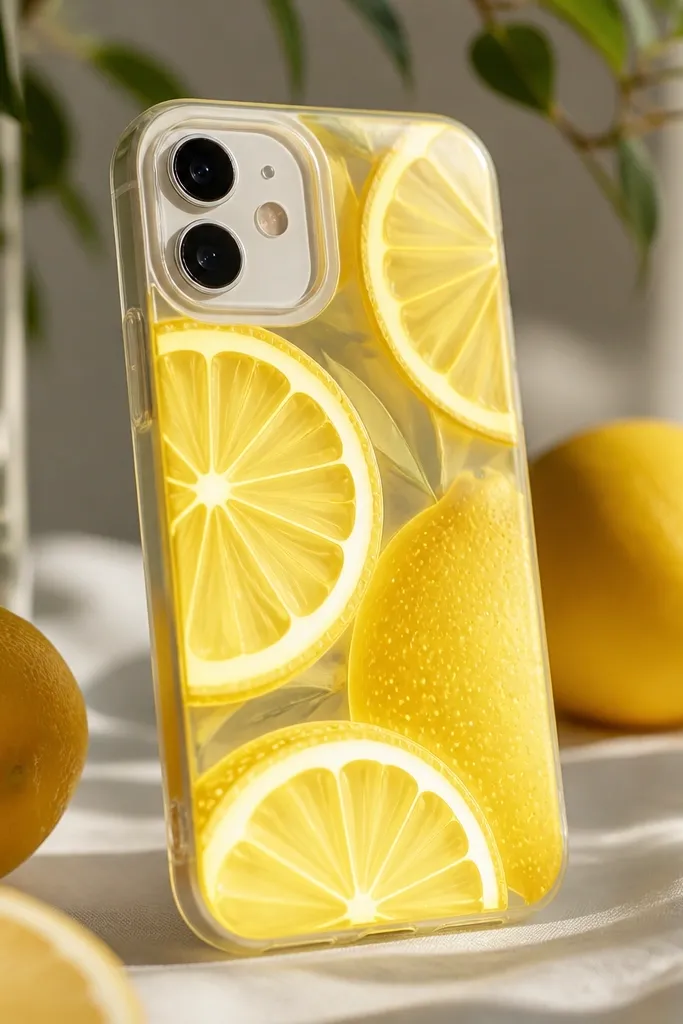
Lemon designs look cheerful and the LEDs make the rind glow like a slice of candy. This is a great pick for kids who want sunny colors without dark themes. Use semi-transparent yellow film for the rind and white paper for the interior so the light stays bright. The glow looks best when the LEDs sit right behind the thicker rind lines.
Start by covering the case back with white felt or white vinyl. Cut lemon rind shapes from semi-transparent yellow film or thin plastic packaging and glue them onto the white backing. Add a small cluster of LEDs behind the rind area, taping them in place so they line up with the rind thickness. For seeds, punch tiny holes or cut seed shapes from black paper and glue them on top, then test the glow. Route the wire to the bottom corner channel and seal the film edges so they don’t lift.
Use two layers of rind film only where the glow should be brightest; keep the edges thinner.
Don’t paint directly onto glossy plastic; the paint chips and the glow looks spotty.
13. Pink Marble with LED Veins
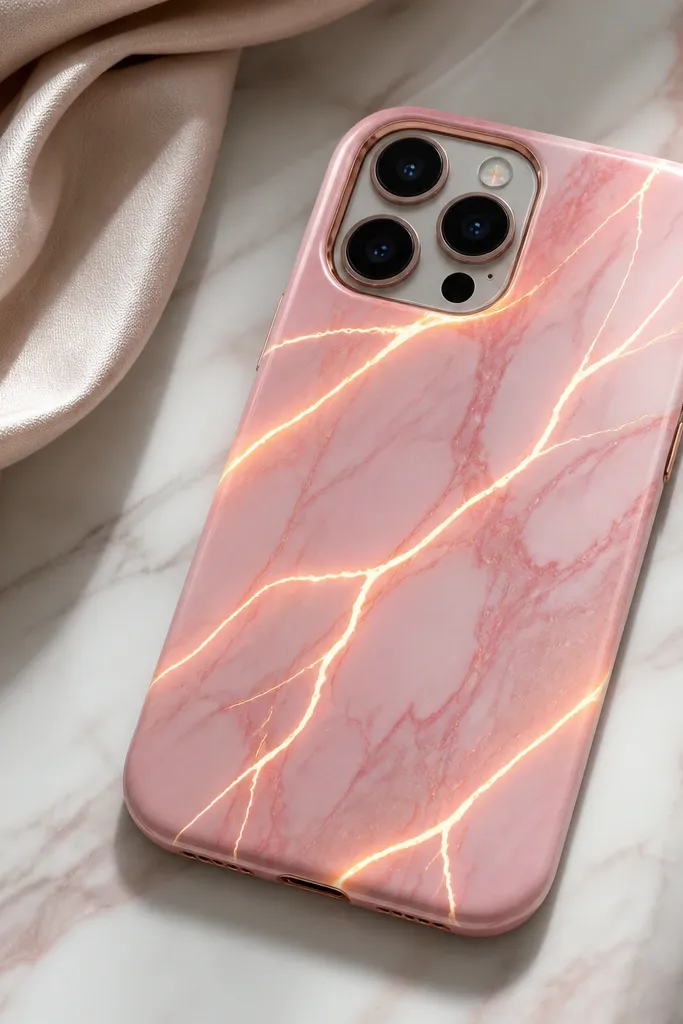
Start by painting the case back with a base pink acrylic. Swirl in white and a tiny bit of purple with a sponge so you get marble movement. Draw vein paths with a pencil, then carve a shallow channel along those lines. Lay micro LEDs into the channel so the light sits just under the surface, then cover with a thin coat of clear craft glue or a thin resin layer. Route the wires to the bottom corner and press everything flat while it dries.
Marble looks expensive because the pattern hides small imperfections, and LED veins make it feel like it’s lit from inside. I like pink marble for kids because it’s not too loud but still clearly “cute.” The trick is keeping the LED line thin and following drawn vein shapes. This looks good on both light and dark phone cases because the veins guide the eye.
One warningDon’t cover LEDs with thick layers; thicker glue blocks light and flattens the vein effect.
Quick tipUse a toothpick to spread glue over the LED channel so you don’t smear the marble pattern.
14. Candy Galaxy with Glow-in-the-Dark Powder and LEDs
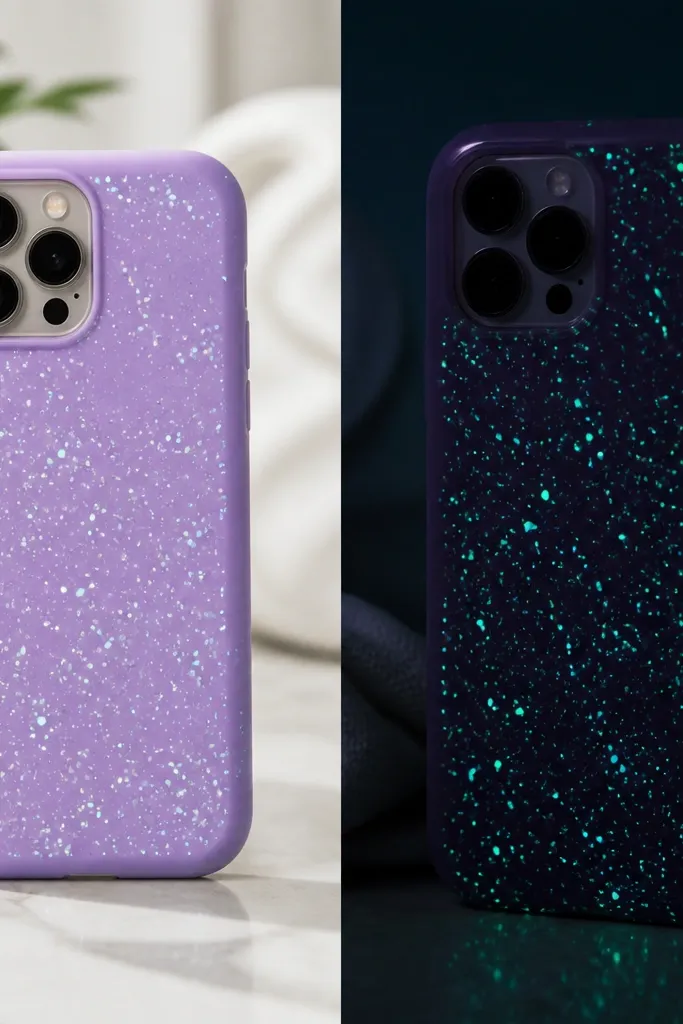
Start with a deep purple or black base paint and let it dry fully. Mix a small amount of glow-in-the-dark powder with clear craft glue and dab it on with a sponge or cotton swab in random star clusters. Place micro LEDs behind the densest cluster areas and tape them down flat. Route wires to the bottom corner, then seal over the powder lightly so it doesn’t rub off. Turn the LEDs on, then turn them off and check how the powder fades.
This one has two kinds of glow: bright LED points and a longer “afterglow” from glow-in-the-dark powder. The combo makes it feel magical in a way kids notice right away. It looks best on dark backgrounds — black or deep purple — because the powder contrast shows up. I made this for a sleepover gift and the kids kept checking it after the LED battery turned off.
One warningDon’t use powder on the phone screen area; it gets into ports and looks gross fast.
Quick tipDust the powder on in thin layers; thick glue-powder mixes flake later.
15. Traffic Light LEDs with Switchable Modes
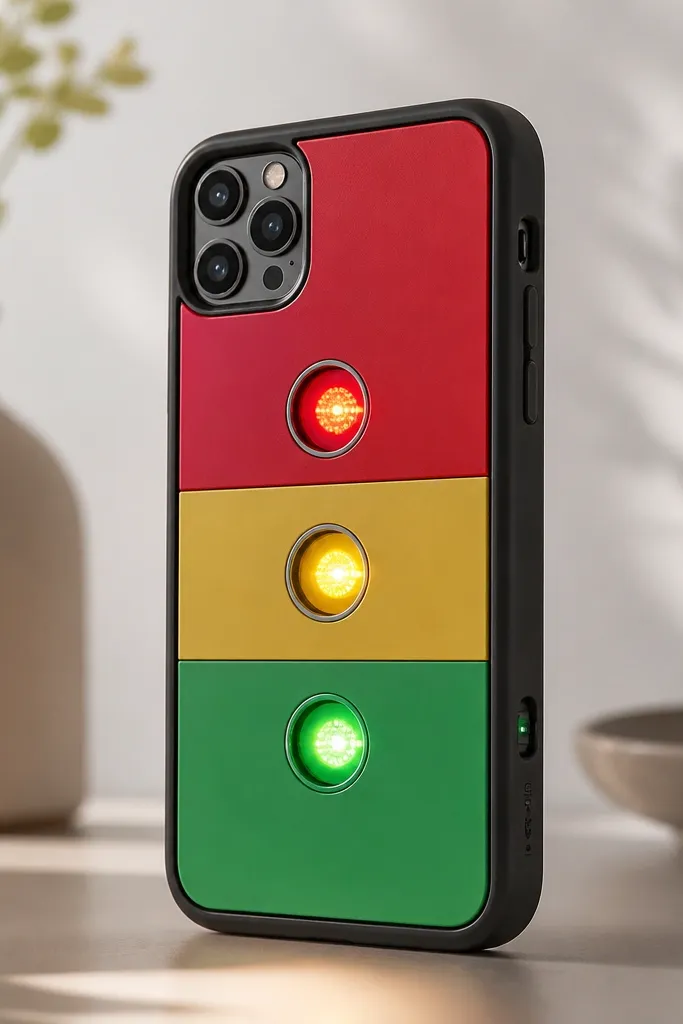
This is the most “fun practical” design on the list because it’s readable and it teaches kids sequences. The glow is strong since each LED sits behind a round window, and the switchable mode makes it feel like a gadget. I like it for kids because the theme is instantly understandable. Use matte colored film or felt around the windows so the light doesn’t bleed onto the rest of the case.
Start with a case back covered in dark fabric or matte black vinyl. Cut three circles for the windows and back each one with colored film: red, yellow, and green. Install three LEDs behind the circles, then connect them to a battery LED set that has multiple settings if you can find one. Hide the battery pack in a corner and route wires through a shallow channel covered by a matching patch. Add a tiny switch if your kit includes one, then test through the phone case before gluing down permanently.
Use translucent colored film for the windows — it gives crisp color without turning the whole case tinted.
Don’t use glossy plastic film; it creates glare that ruins the clean dot look.
16. Butterfly Wings with Layered Organza Diffusers
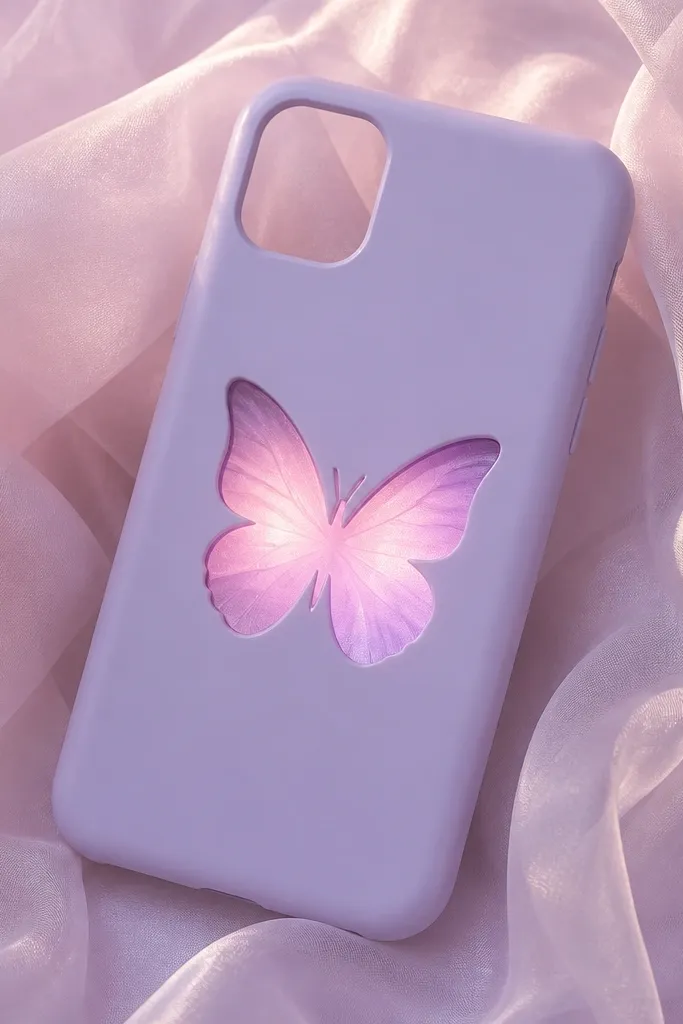
Organza makes LED light look airy, like it’s floating. This design is flattering on lighter phone colors and looks great in selfies because the glow spreads across the wings. I like it for girls but also for anyone who wants soft, not loud. Pastel pink and lavender look best because LEDs don’t overpower them.
Start by covering the case back with a light neutral base, like pale cream felt. Cut a butterfly wing shape from cardstock, then cut two organza wing layers slightly bigger. Glue the organza layers behind the cardstock so the edges puff out. Place LEDs behind the wing center area and tape them down so the light hits the organza evenly. Route the wires to the bottom corner channel and cover with a small fabric flap; seal all edges so organza doesn’t fray.
Steam the organza very lightly before gluing so it lays flat and doesn’t look wrinkled.
Don’t use heavy satin for the wings; it blocks light and makes the glow look dull.
17. Lego Brick Pattern with Brick-Top LED Dots
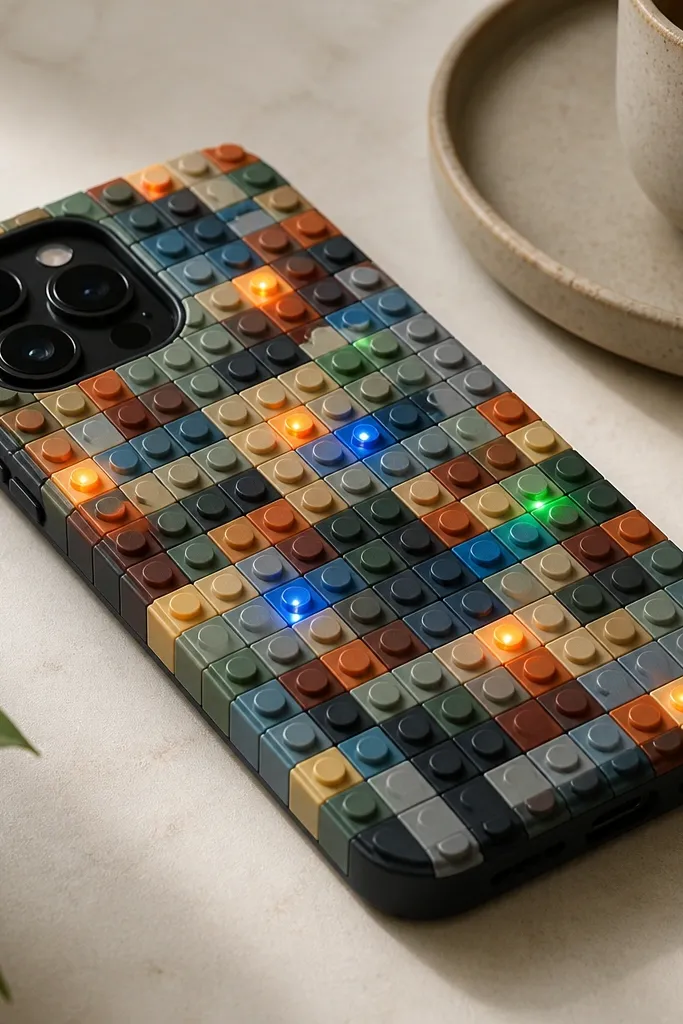
Start by covering the case back with a brick-pattern sheet or by gluing small square foam tiles in a grid. Leave a few squares empty for LEDs. Place micro LEDs behind those empty squares, taping the wires flat underneath. Mark the square positions and poke holes through the top layer so the light shows through. Route the wire to a bottom corner channel and cover it with a matching brick square patch.
This looks like a toy because it uses square “brick” shapes and a few bright LED dots. It’s perfect for kids because it’s playful and the pattern hides minor wiring imperfections. I recommend using only a handful of glowing squares so it reads clean instead of chaotic. Bright colors like lime green and bright blue make the LEDs pop.
One warningDon’t light every square; too many bulbs makes the case look like a cheap keychain.
Quick tipUse warm white LEDs if you want the “toy light” look; cool white feels more techy.
18. Checkerboard Glow with Alternating Light Squares
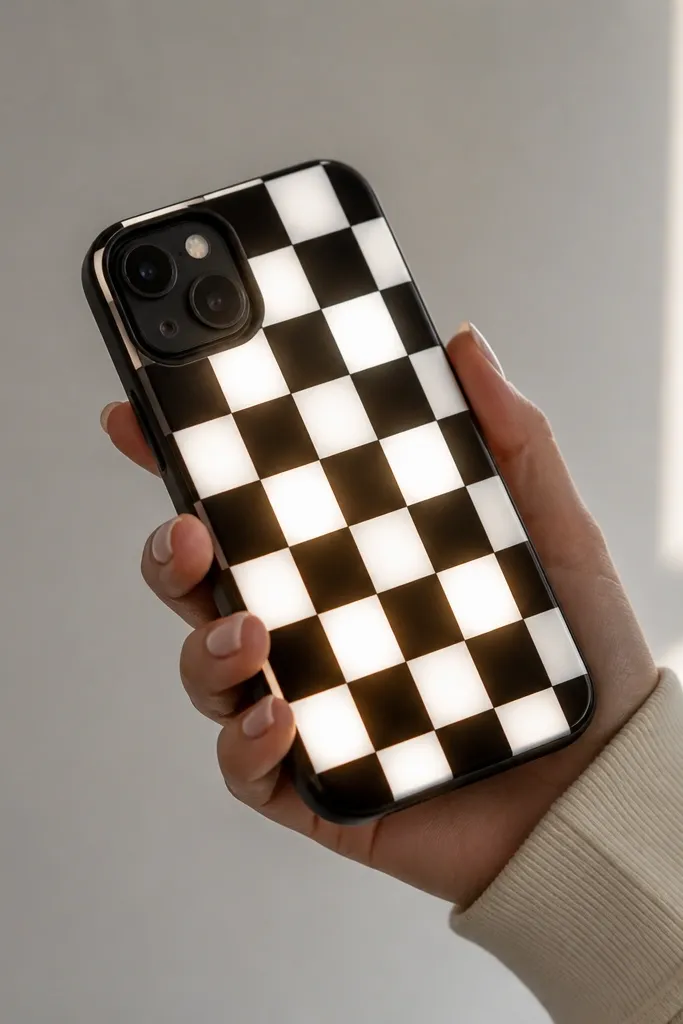
Start by covering the case back with black-and-white felt squares or vinyl. Choose a grid size that fits your case — for most phones, 1 inch squares look right. Decide which squares will be lit and leave those areas open or backed with translucent white. Place LEDs behind the lit squares and poke small holes so the light passes through. Route wiring to the bottom corner and cover it with an extra felt rectangle trimmed to fit.
Checkerboard patterns look sharp and graphic, and alternating glowing squares make the effect feel designed. I like it for both kids and adults because it’s not overly childish. The black-and-white contrast keeps the LED effect clean and readable. If you use cool white LEDs, the checkerboard looks crisp; warm white makes it look cozy.
One warningDon’t use fabric that stretches; stretched checker squares make the pattern look sloppy.
Quick tipUse a ruler and cut squares evenly; the glow highlights crooked edges fast.
19. Flamingo Blush with LED Beak Shine
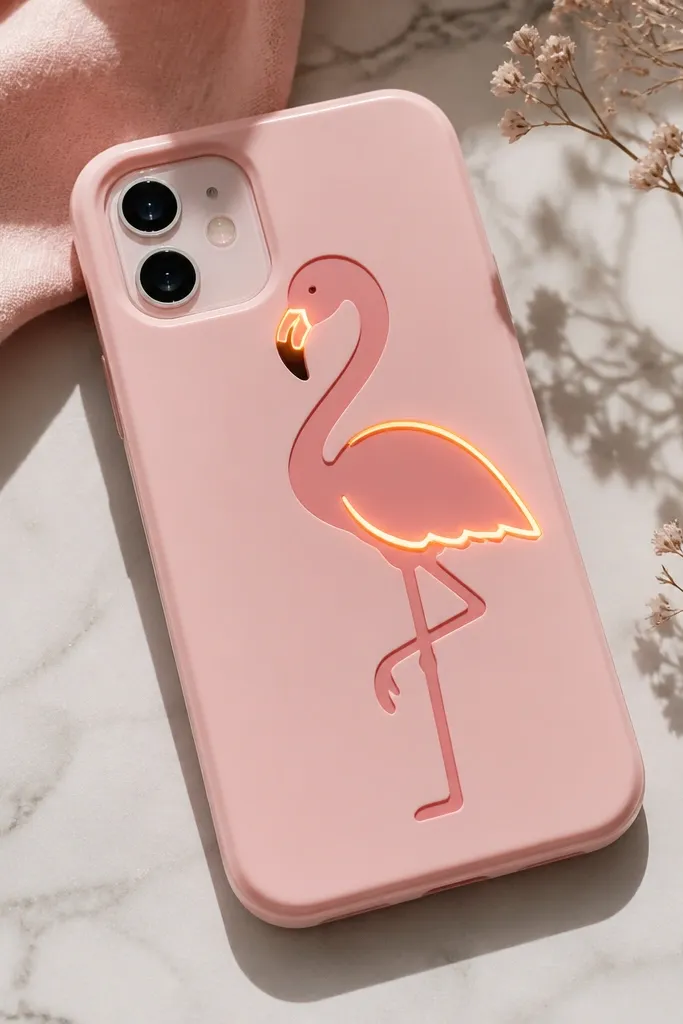
Start with a blush pink case base, then cut a flamingo silhouette from white felt or light pink felt. Glue the silhouette onto the case back. Cut a tiny window in the beak area and place a small LED behind it, securing with clear tape so it stays centered. Add one more tiny LED near the wing outline if you want a subtle glow, then route all wires to the bottom corner channel. Cover the wire path with a thin blush felt strip and seal edges.
A flamingo silhouette looks cute without covering the whole case, and lighting just the beak feels playful. This design is great for kids because it’s easy to understand and doesn’t require lots of wiring. The blush base makes the glow look warm, which is more flattering than bright neon colors. Keep the LED cluster small so the flamingo stays crisp.
One warningDon’t place LEDs under the phone camera area; it can reflect and ruin photos.
Quick tipIf the beak glow looks too bright, add a thin layer of translucent pink film over the LED window.
20. Tropical Palm Leaves with Green Light Veins
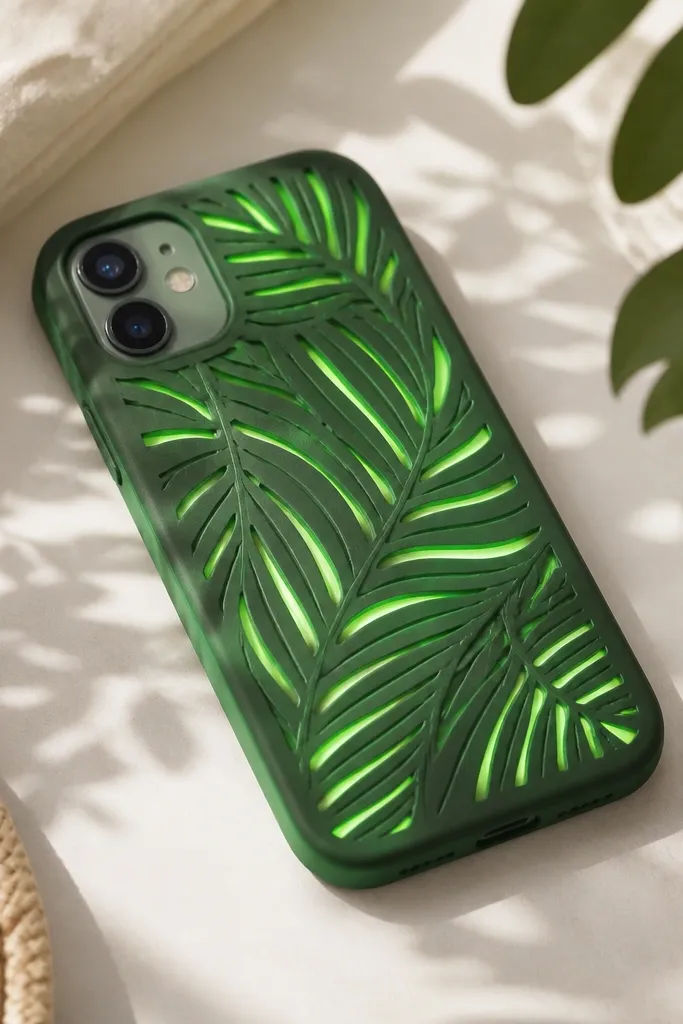
Start by covering the case back with deep green felt or vinyl. Cut palm leaf shapes from semi-transparent green film and glue them on top of a lighter green backing layer. Draw vein lines on the leaf area and carve shallow channels along those lines. Place micro LEDs along the carved veins and secure with tape so the LEDs sit just below the surface. Route wiring to the bottom corner and cover with a small leaf-shaped patch that matches the design.
Palm leaves look layered and fun, and LED veins make them feel like a tropical night garden. This works because leaves have natural lines that guide where the light should go. I like this for kids who want “nature” themes and for anyone who likes green tones. Use different greens: deep green outside and lighter green inside for a real light effect.
One warningDon’t use one single green tone; flat color makes the glow look like a sticker.
Quick tipAdd a thin white layer behind the leaf film if the glow looks too dark.
21. Snowflake Window LEDs with Frosted Acrylic Backing
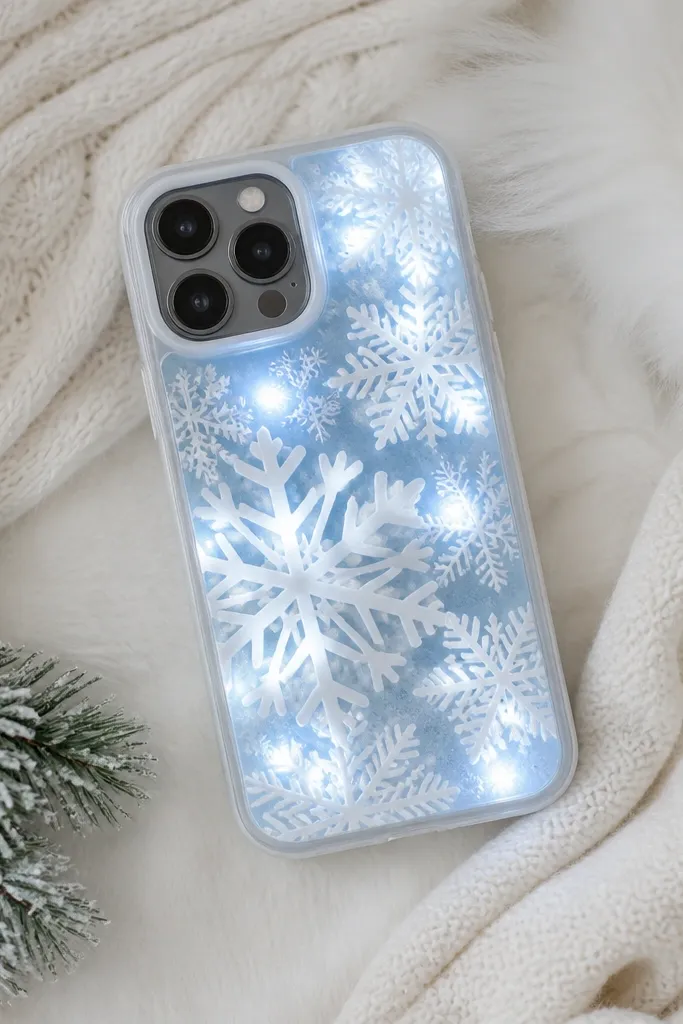
Start with a white or pale gray case back. Cut a snowflake stencil and trace it onto frosted plastic, then cut out the snowflake shape. Glue the frosted snowflake panel onto the case, covering it smoothly. Place LEDs behind the snowflake area in a small cluster, taping wires flat so they don’t show through edges. Route the wire to the bottom corner channel and cover it with a thin strip of matching fabric or felt.
Snowflakes look clean and wintery when the light is diffused through frosted material. I’ve made versions for holiday crafts where the kids loved that it looked “icy” even from far away. This design is flattering on light-skinned hands because the white glow is bright and neutral. Use frosted acrylic or frosted plastic packaging — it turns points of light into soft smears.
One warningDon’t use clear plastic; it makes the LEDs look like tiny bare bulbs.
Quick tipIf you don’t have frosted acrylic, rub a clear plastic sheet with fine sandpaper for a DIY frosted effect.
22. Pumpkin Jack-O-Lantern with Orange Gel Glow
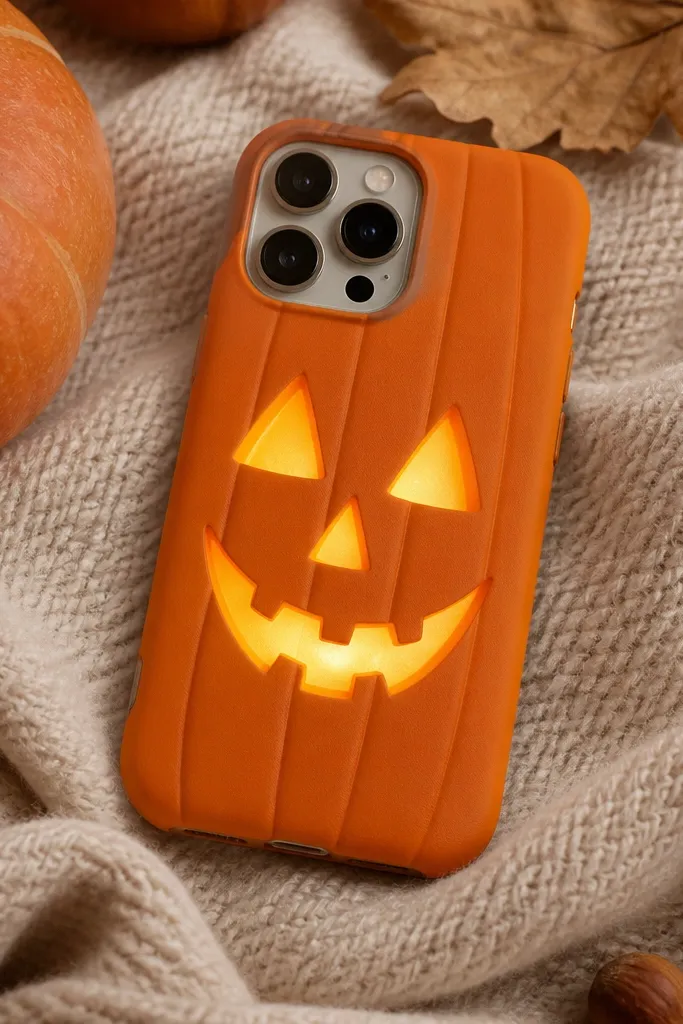
Start by painting the case back orange or covering it with orange felt. Cut the pumpkin face shapes from orange gel sheet and glue them onto the base, leaving hollow areas where eyes and mouth will glow through. Place warm white LEDs behind the face cutouts and secure them so they sit directly under the hollow shapes. Route the wires to a bottom corner channel and cover with a small orange felt patch. Test the glow, then seal the gel edges with thin clear glue so they don’t peel.
Jack-o-lantern cases look best when the glow is warm and the cutouts are crisp. Orange gel sheet turns a harsh LED point into a candle-like glow. This works well for Halloween parties, trick-or-treat nights, and classroom events because it’s obviously themed in seconds. Keep the face simple: two eyes and a triangle nose reads best on small screens.
One warningDon’t overcomplicate the face; tiny details disappear and make the case look messy.
Quick tipUse warm white LEDs and a slightly translucent orange layer; cool white makes pumpkins look sickly.
23. Cute Cat Ears with LED Bowtie Node
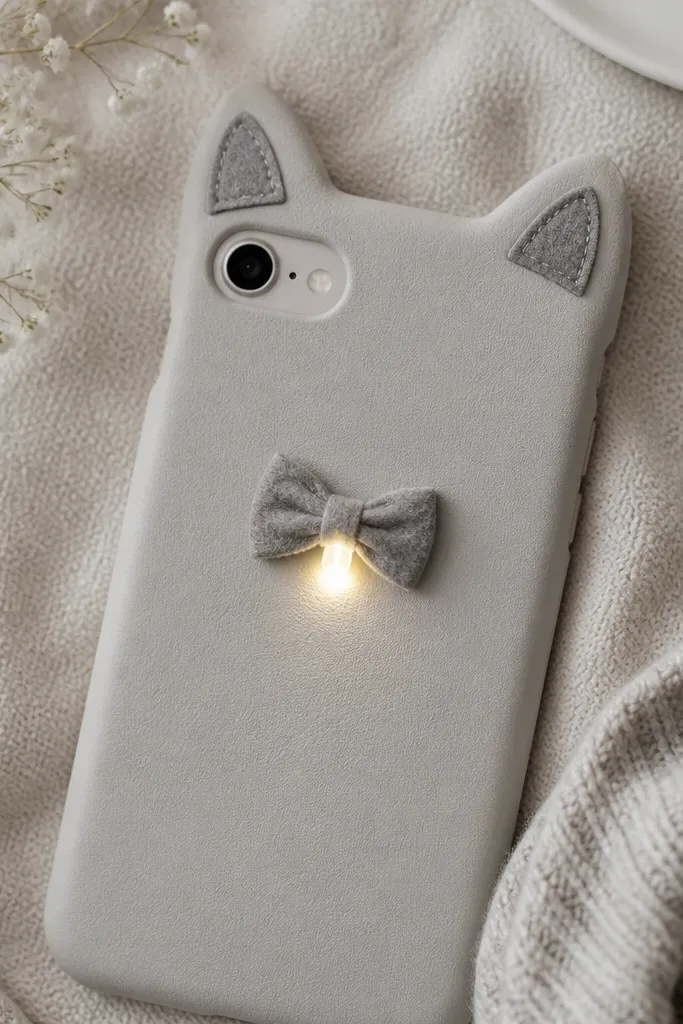
Cat ears are an easy win for kids because they add charm without covering the whole phone. The bowtie node gives you a single bright focal point, so the design looks intentional. Light gray and cream bases keep the glow gentle and avoid harsh shadows. I like this for kids who prefer cute over flashy because it’s subtle until the lights turn on.
Start by covering the case back with light gray felt. Cut two cat ear triangles and glue them near the top corners. Cut a small bowtie shape and glue it centered, leaving a small hollow space under the knot area. Place a single LED behind the bowtie knot and route the wire to the bottom corner channel. Cover the wire with a small felt patch and press everything flat while glue dries.
Add a tiny dab of clear glue to hold the LED in place, then cover it with felt so it can’t rattle.
Don’t glue the LED directly to fabric; it can shift and the glow will drift.
24. Teddy Bear Stitch Lights with Soft Brown Felt
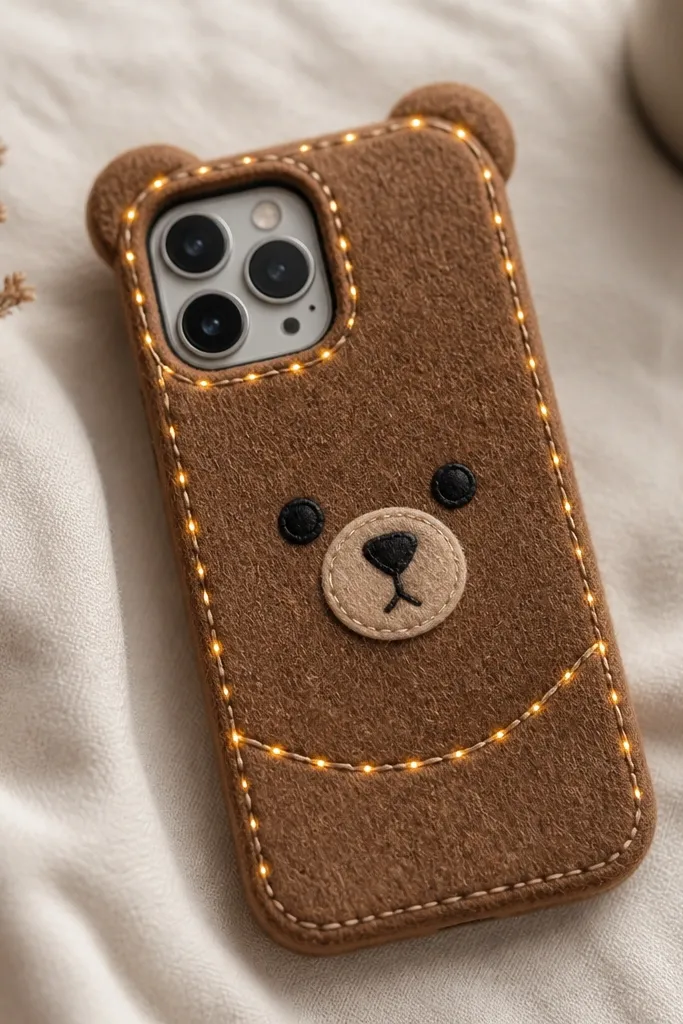
Start by covering the case back with soft brown felt. Draw stitch lines with a fabric marker: a vertical line down the center and two short lines near the top. Cut shallow channels along those stitch lines and place micro LEDs inside, taping them down lightly. Cover over the channels with thin felt strips that match the base. Route all wires to a bottom corner channel and seal the seam strips so nothing lifts.
This one feels cozy because the case uses soft brown felt and warm LEDs that glow like tiny seams. It’s a great option for kids who like plush toys, and it looks good on darker phone colors too. The “stitch” look hides wiring because seams are natural places to run channels. Keep the LED placement along the vertical seam so the pattern reads in photos.
One warningDon’t stretch felt while gluing; stretched felt makes seams look wavy.
Quick tipUse warm white LEDs and add a thin layer of translucent parchment paper over the LED channels for extra softness.
25. Rainbow Unicorn Horn with LED Tip
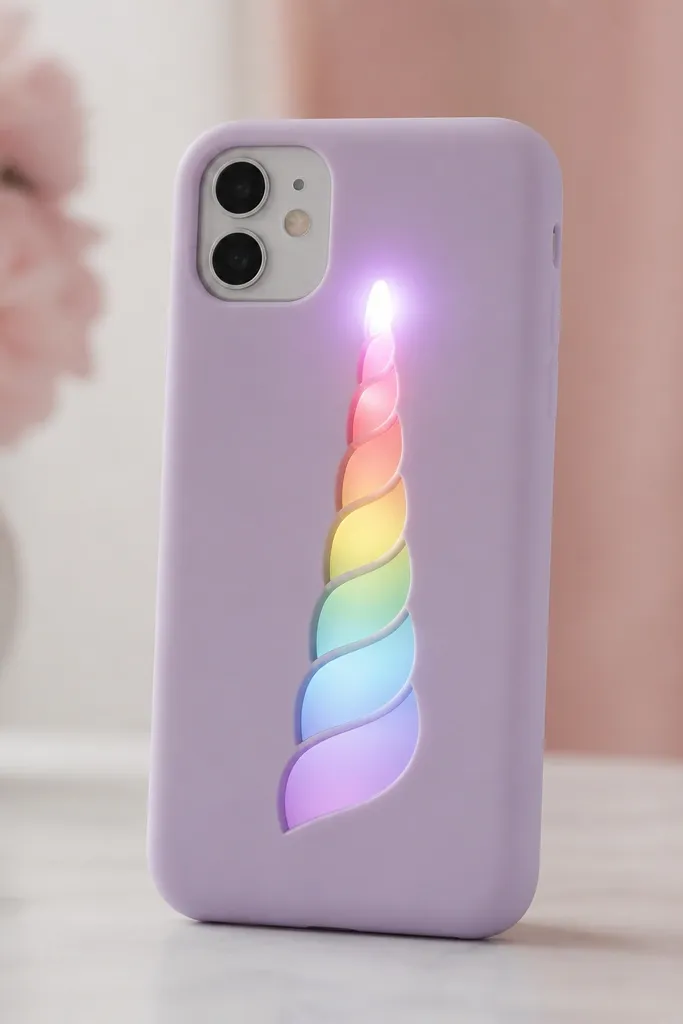
Start with a pastel case base, like light lavender. Cut a unicorn horn from translucent rainbow film and back it with a thin white paper layer for diffusion. Glue the horn centered near the top and leave the base edges flat. Place a small LED behind the horn tip and secure it with tape so it doesn’t shift. Route the wire to the bottom corner channel and cover it with a matching pastel fabric patch.
A unicorn horn with a glowing tip looks magical and stays simple. The tip is the only bright spot, so kids instantly understand what’s happening and adults see it as a clean design. I like pastel phone bases for this because the rainbow horn pops without looking harsh. Use translucent horn material or thin film so the LED light spreads through the horn tip.
One warningDon’t use opaque cardstock for the horn; it blocks the light and kills the glow effect.
Quick tipTrim the horn tip to a slight point; a rounded tip looks like a random bulb instead of a horn.



