
1. Felt Wallet Flip Cover with a Tuck Tab
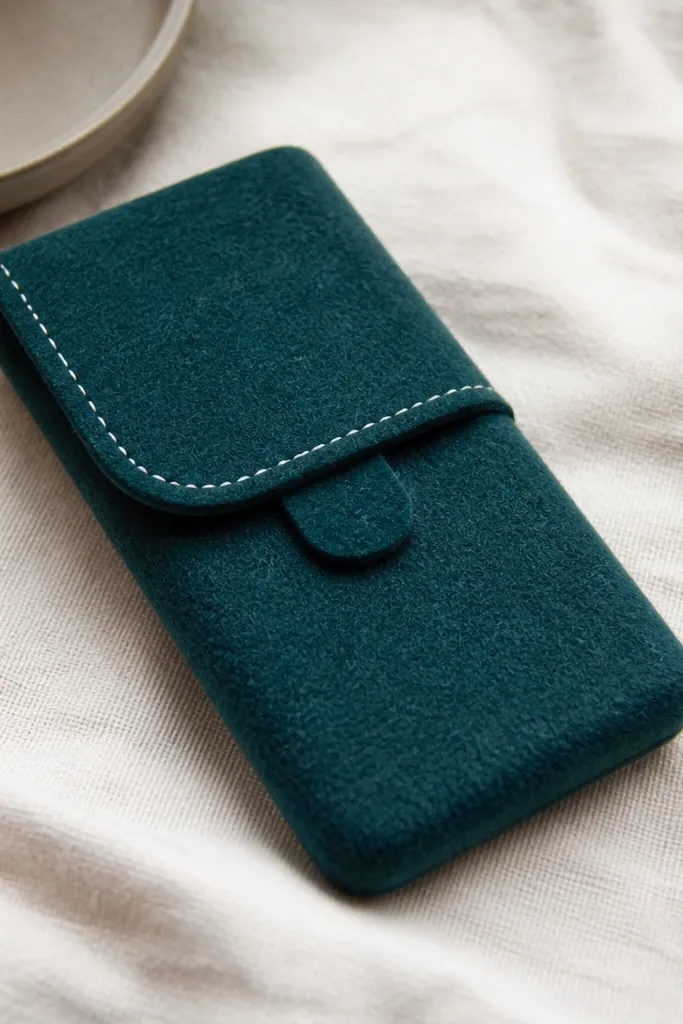
This one is my go-to for kids because felt grips the phone lightly and doesn’t feel scratchy. I use dark teal or charcoal felt (at least 3 mm thick) and cut a flip piece that covers the screen when closed. The tuck tab sits at the bottom edge so the cover stays shut when the phone slides into a backpack. It looks neat with minimal lines, like a faux stitch made from white fabric paint or a fine marker. For styling, pair it with gold accessories — a small keychain charm or a gold elastic band — because the warm metal tone pops against teal.
Start by tracing your phone onto felt and cutting two shapes: one for the back panel and one for the front flap. Add 2-3 mm all around for the wrap, then cut a small tab on the flap side so it can tuck under the back panel bottom. Glue the back panel edges only, leaving the phone window opening free and flat; press for 30 seconds. Flip it down, test the tuck, then add a tiny dab of glue on the tab area so it holds the closed position. Finish by drawing one straight “stitch” line 4-5 mm from the flap edge using a white fabric marker.
If your kid hates bulk, make the flap 1 cm shorter than the phone height so it folds without catching on pockets.
Avoid using thin felt that stretches — it makes the flap sag and look uneven fast.
2. Clear Vinyl Phone Sleeve with Duct-Tape Border
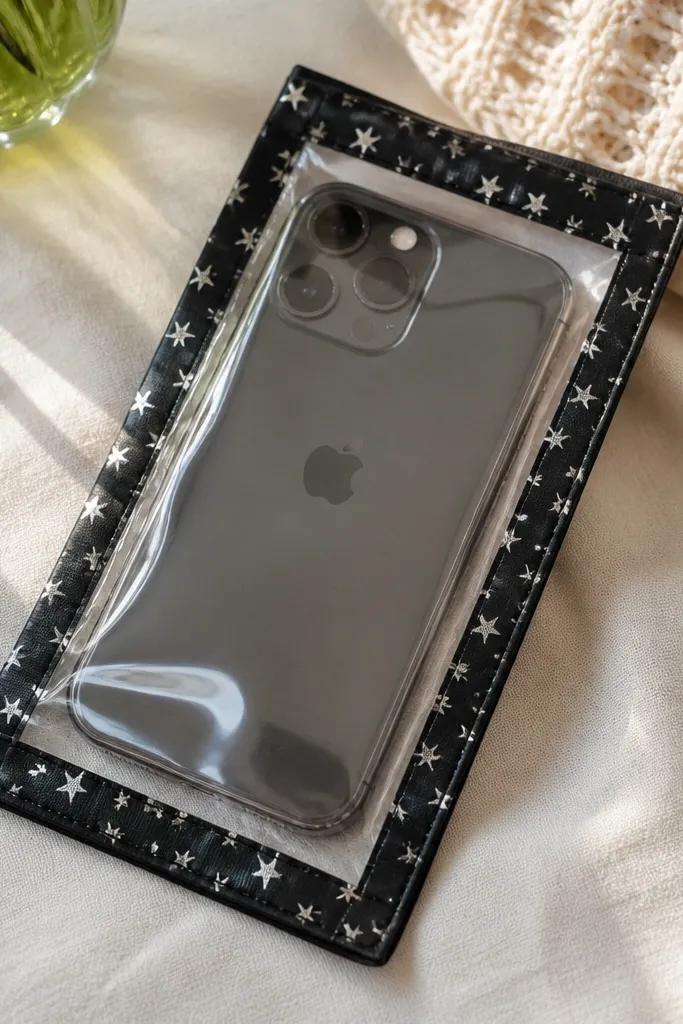
This cover looks clean because the phone shows through while the border protects the edges. I use clear vinyl (like the kind from binder covers) plus duct tape around the perimeter. The tape makes the cover look intentional, and it’s also the shield where bags rub the most. It’s great for kids because vinyl wipes with a damp cloth and duct tape hides minor scuffs. Style it with a border pattern that matches their backpack — stars, stripes, or a favorite color.
Cut a rectangle of clear vinyl that’s wider than the phone by 2 cm and taller by 2.5 cm. Place the phone face-down on the vinyl and fold the vinyl edges around the sides, then mark where the camera bump sits. Trim the vinyl so the camera area clears, then wrap the vinyl back to test fit. Apply duct tape strips along the folded edges, pressing flat and smoothing the tape into corners. Finally, trim the excess vinyl at the corners with small scissors so the border stays crisp.
Quick tipUse a craft knife for the camera cut-out — it gives a cleaner hole than scissors.
One warningDon’t tape directly onto a wrinkled vinyl fold; wrinkles show and the border looks messy.
3. Craft Foam Bumper Cover with Hot-Glue Corner Shell
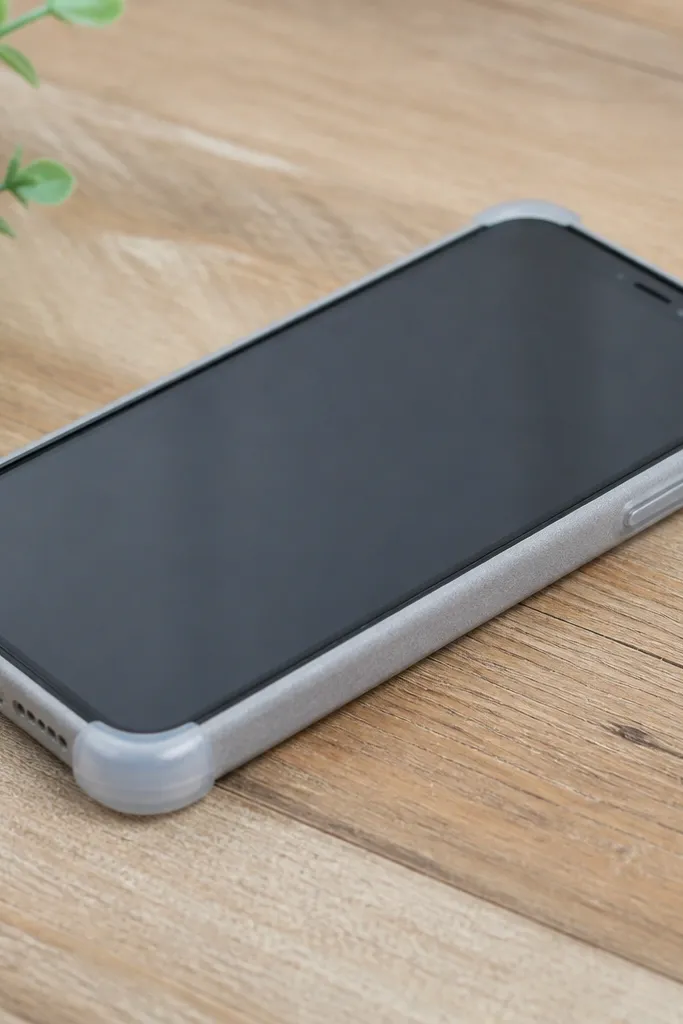
This is the “my kid drops it all the time” option. Instead of covering the whole phone face, you build a bumper that protects the corners and edges, which is where impact hits. I use a thin craft foam strip for the side wrap, then add corner shells with a thin hot-glue layer for grip and protection. The look is minimal — gray or navy foam with glossy corner bumps. It works for kids because it’s forgiving when the phone gets tossed around, and it keeps the phone light enough for everyday use.
Measure the phone’s circumference around the sides and cut a foam strip that matches, with a 1 cm overlap. Wrap the strip around the phone and hot-glue the overlap edge, then let it cool for 30-45 seconds. Next, press small dots of hot glue into each corner gap — not a blob, just a thin shell that hugs the corner. Smooth the glue with a scrap piece of plastic so it doesn’t look lumpy. Let it set fully, then trim any sharp glue edges with nail scissors.
If your foam is too soft, stack two thin strips instead of one thick strip.
Avoid covering the screen area with foam — it makes the cover bulky and makes button access awkward.
4. Magnetic Felt Cover with a Button Closure
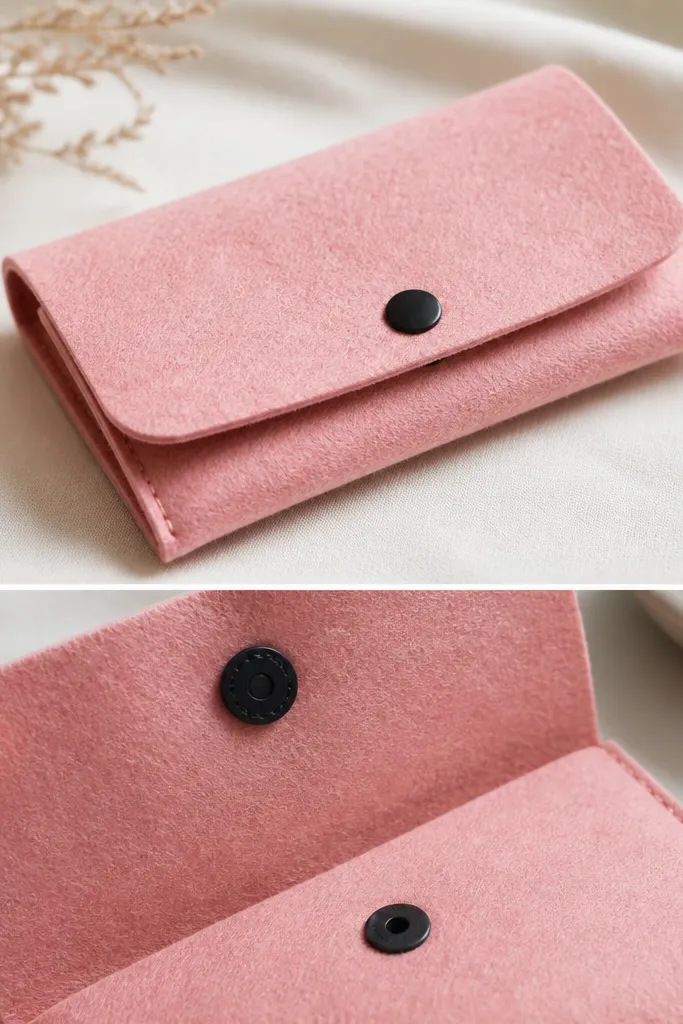
A button closure makes a quick cover feel grown-up, even when it’s kid-friendly felt. I use medium pink felt and pair it with a black button plus a small magnetic craft sheet dot. The felt grips the phone, and the magnet keeps the flap aligned so the corners don’t peel open. This looks great for kids with bright backpacks because the color pops, and the black button gives it a graphic, simple look. It’s also easy on small hands because they can line up the flap and press once.
Cut a back felt panel and a front flap panel, then tape them to the phone temporarily to check alignment around the camera. Glue the back panel edges only, leaving the flap free. Hot-glue or fabric-glue a small magnet dot onto the inside of the flap near the center. Then glue the button on the outside of the flap so it lines up with the magnet spot on the back panel. Test close, then add one extra glue dot at the button shank edge to keep it from wobbling.
Use two magnets if the flap is heavy — one magnet makes the flap drift.
5. Ribbon Bow Case Cover with Clear Tape Seal
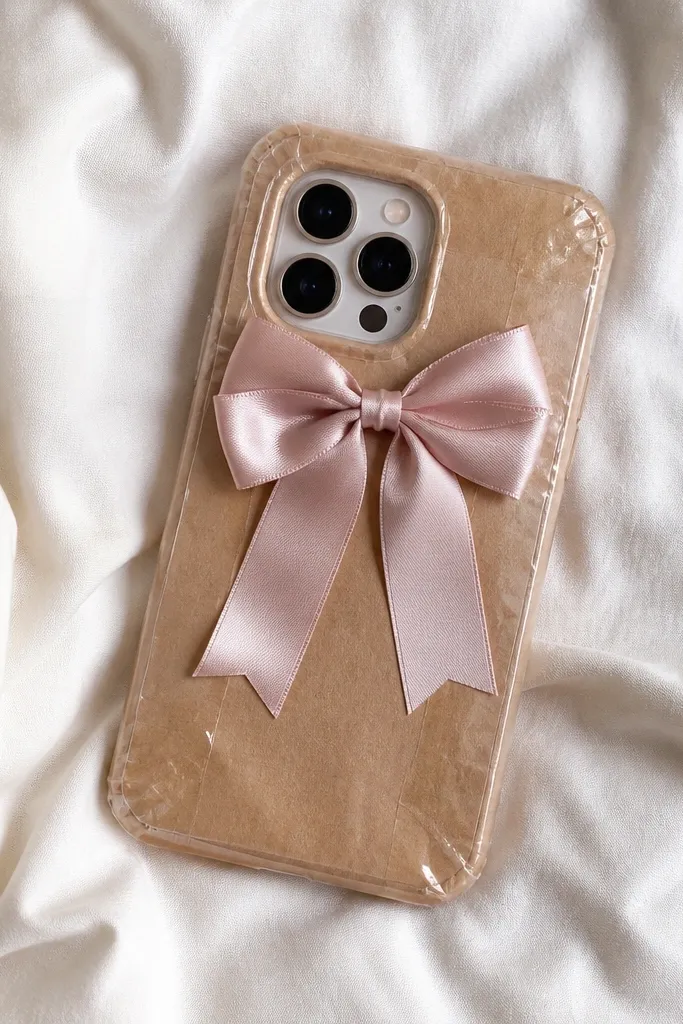
This is the cutest “event day” cover because it looks like gift wrap. I build the base from kraft paper or thin cardstock and seal it with clear tape, then add a ribbon bow on top. The paper gives a smooth, matte look, and the clear tape makes it water-resistant for quick spills. It’s best for kids who want their phone to match their outfit — ballet pink, mint, or lavender ribbon looks especially good. The bow makes it feel special, but the tape seal is what keeps it from tearing in a backpack.
Cut kraft paper to your phone’s back size and wrap it around the sides, adding 2 mm for overlap. Tape the overlap with clear packing tape so it holds flat. Cut a second piece for the front edge wrap if you want extra protection around buttons, then tape it down too. Place a small ribbon bow centered above the camera area and tape the ribbon tails flat on the back. Seal over the ribbon with two small clear tape strips so it doesn’t snag on fabric.
If the paper curls, iron it on low with a sheet of parchment on top for 10 seconds.
Skip thick ribbon — it lifts off the tape seal and frays fast.
6. Sticker Popper Cover with Laminating Pouch Topcoat
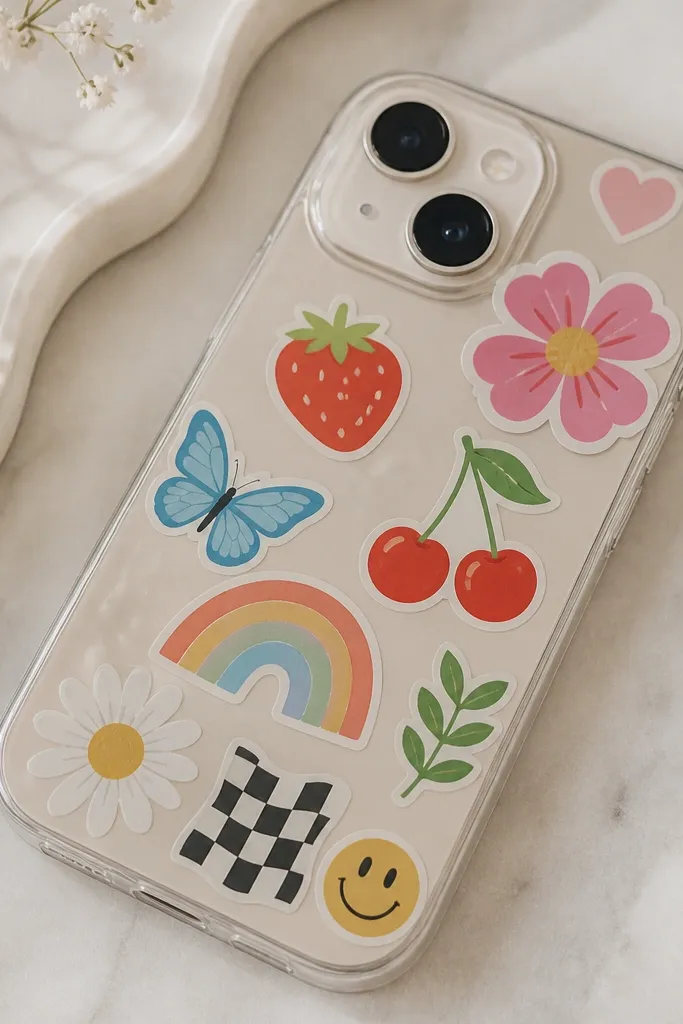
If you want a cover that looks like your kid’s personality exploded in a good way, this is it. I use a plain matte base (felt or thin foam), stick on vinyl stickers, then topcoat with a clear laminating pouch layer. The pouch makes stickers look protected and glossy, not scratched up. This is great for kids because they can pick stickers, and the topcoat keeps fingerprints from dulling the colors. For styling, keep the base solid — cream, black, or navy — so the sticker colors pop.
Cut a base panel to the back of the phone and wrap 1-2 mm around the sides if you can. Press stickers on first, starting with the biggest one near the camera area so everything else can tuck around it. Trim a laminating pouch piece slightly larger than the back panel and place it over the stickers. Heat according to your laminator settings or use a household iron through parchment if you don’t have one. Trim excess at the edges and press corners with a credit card so it seals tight.
Use vinyl stickers only — paper stickers wrinkle under heat.
7. Mini Pom-Pom Side Stripes on a Foam Wrap
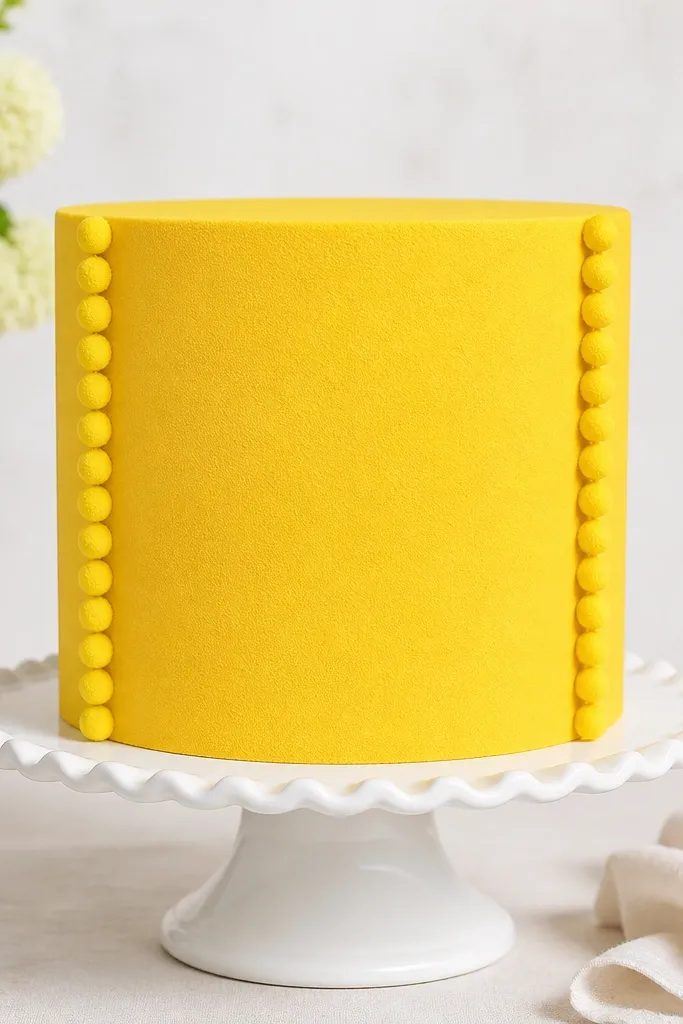
Pom-poms look playful on kids' phones without needing full coverage. I wrap only the sides with craft foam and glue tiny pom-pom strings along two vertical stripes. The foam protects the edges, and the pom-poms add texture you can feel — not just see. This works best on phones with a dark or neutral back because the yellow or mint foam makes the stripes stand out. It also suits slim kids' hands since you’re not covering the whole front.
Measure the phone side height and cut two narrow foam strips for the stripe areas, plus a wider strip for the side wrap if needed. Glue pom-pom strings to the foam strips using hot glue in small dots, then let them cool. Wrap the foam around the phone sides, overlapping at the back edge, and glue the overlap. Press the pom-pom stripe foam onto the phone sides so the pom-poms sit near the corners. Trim around buttons and the camera area so nothing blocks ports.
Quick tipCut pom-pom strings to stop them from hanging near the charging port.
One warningDon’t glue pom-poms directly onto the phone back — they snag on sleeves and pull stickers off.
8. Fabric Scraps Patchwork Cover with Edge Binding
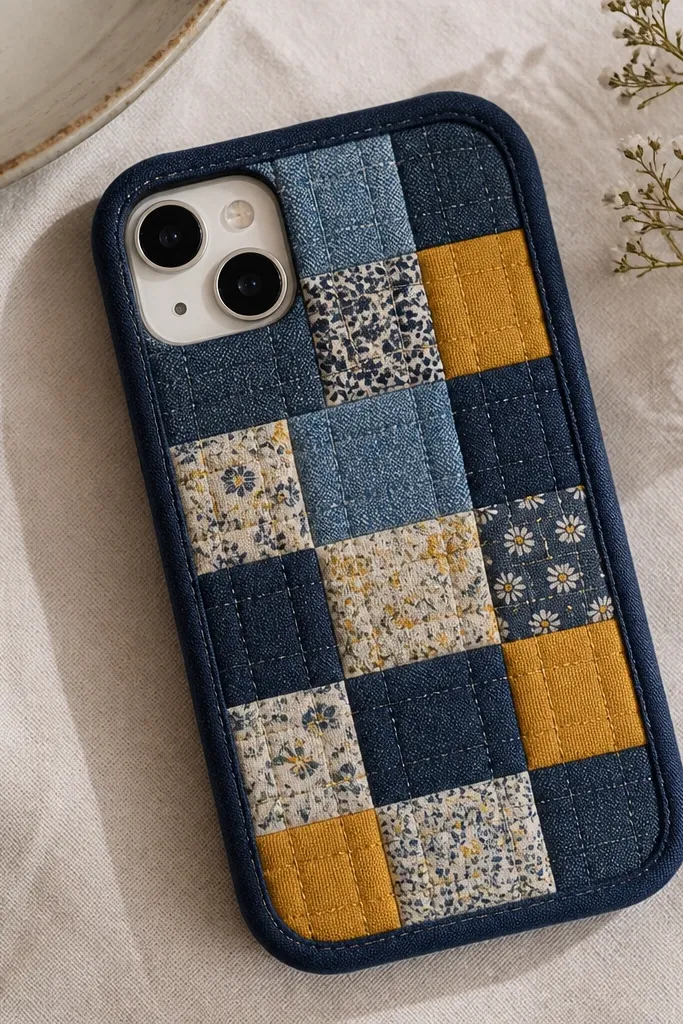
This cover looks like a tiny quilt, but it’s still quick. I use small fabric scraps for the back panel and bind the edges with bias tape so the seams don’t fray. The fabric choice matters: denim scraps and cotton look best because they hold shape without stretching. Kids love it because it feels soft and looks different every time. For styling, pick one “main” color like navy, then add two accent patterns max so it stays readable and not chaotic.
Cut your back panel from craft foam or felt first so you have a stable base. Cut fabric scraps into rectangles that fit the back panel and glue them down in a patchwork layout. Leave 5 mm seams between pieces so you can bind over them. Apply bias tape around the edges, folding it neatly at corners and gluing it down. Finish by trimming any fabric that overhangs ports or the camera opening.
Quick tipUse a glue stick on fabric pieces first, then go over with fabric glue at the edges for speed.
One warningAvoid stretchy jersey scraps — they ripple under bias tape and look uneven.
9. Paper Cutout Landscape Cover with Clear Contact Film
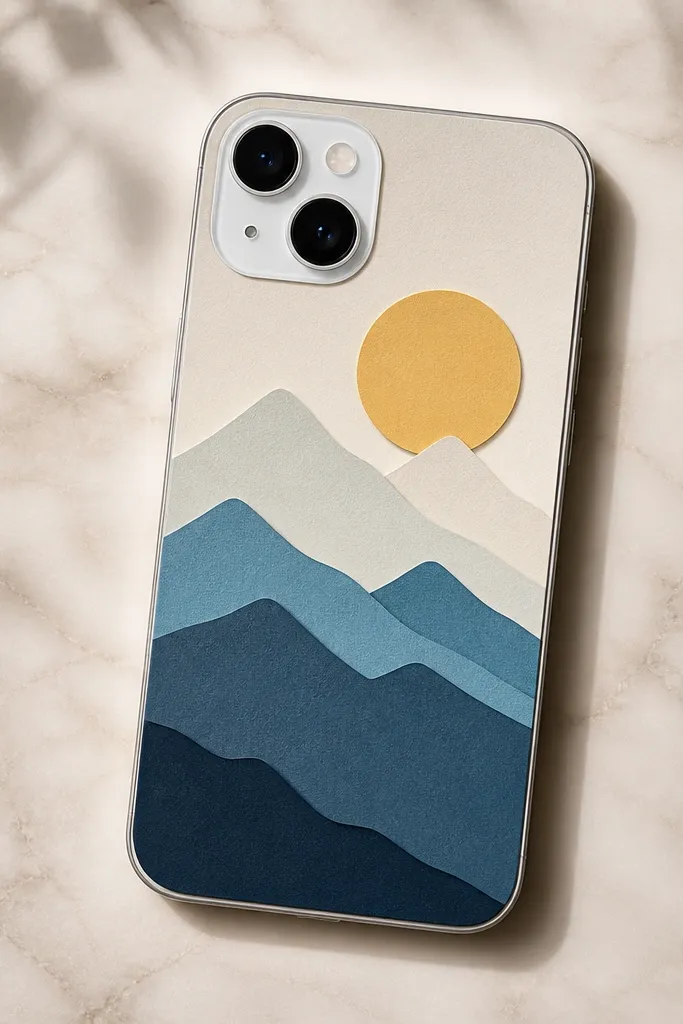
Layered paper cutouts look surprisingly polished, especially when sealed under contact film. I do simple shapes: a sun circle, a mountain triangle, and a small cloud made from torn paper. The contact film gives a glassy finish and protects the paper from scuffs. This is a good fit for kids because paper cutouts are cheap, and they can help choose shapes. It also looks great with neutral phone colors since the art is the focus.
Cut a base panel from thin cardstock and wrap it around the back edge by 2 mm. Layer your cutouts on top using glue dots or small glue sticks, keeping the thickest layer closest to the center so edges stay flat. Seal with clear contact film by laying the film over the back panel and smoothing from the center outward with a card. Trim the film at the edges and press corners firmly. Punch a clean opening for the camera area by cutting a small X and trimming back.
Use a craft punch for circles — sun shapes look better when they’re perfectly round.
10. Neoprene Scarf Tie Cover with Velcro Tabs
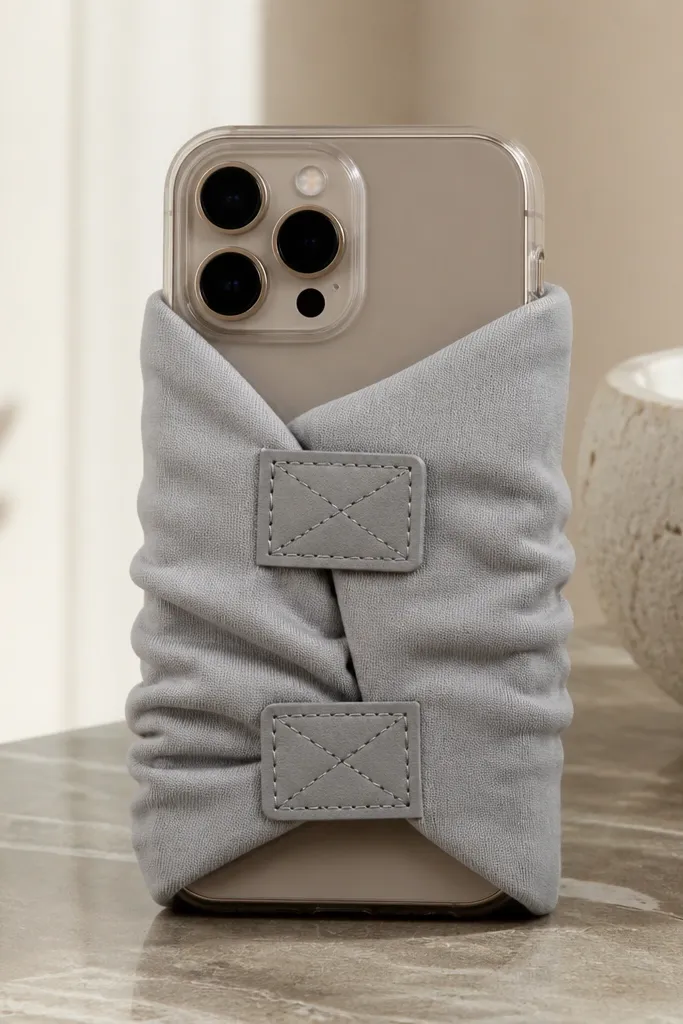
Neoprene is the one material that feels like it was made for phone covers. It grips without sticking, so the phone doesn’t slide around. This style wraps like a scarf and closes with tiny Velcro tabs, which means you can open and close it daily. It looks sporty with gray, black, or navy neoprene, and you can match it to school uniforms. For kids who drop their phone in the car, neoprene protects edges and reduces that “clack” sound.
Cut a strip of neoprene wide enough to wrap around the phone sides and overlap on the back by about 1 cm. Cut a second strip if you want a fuller wrap around the corners, then glue or stitch the ends lightly. Attach small Velcro hook pieces to the overlap areas and matching loop pieces to the other side. Wrap the phone and press the Velcro closed, then test button access. Trim the overlap so it doesn’t create a bump near the camera lens.
Cut Velcro tabs narrower than you think so they don’t snag on fabric inside bags.
Avoid thick neoprene — it makes the wrap bulky and harder for kids to close.
11. Satin Bow Butterfly Cover with Mini Felt Wings
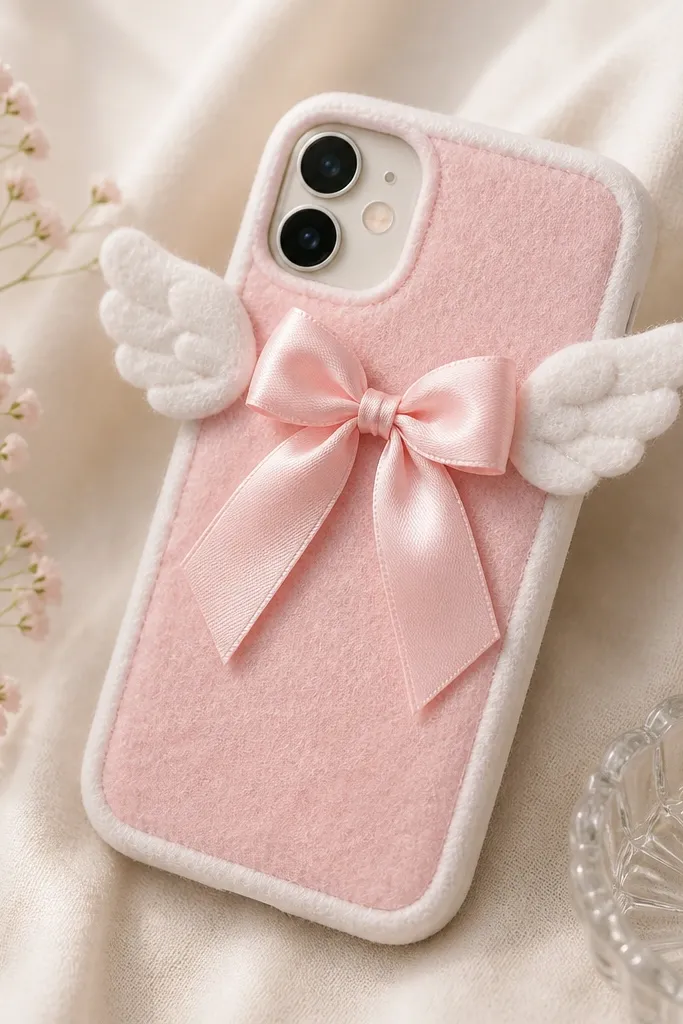
This one is for the “pretty but still protected” crowd. The base is felt for grip, and the decoration is layered: satin bow on top for shine, plus mini felt wings that don’t flop. I place the bow near the top edge so it doesn’t cover the camera, and the wings sit on either side like a frame. It looks great on lighter phones because the pink base makes everything look softer. Styling-wise, keep the rest simple — one bow, two wings, one clean border line.
Cut a felt back panel and a front cover flap, then glue the back edges. Bind the edges with thin white felt tape or a strip of felt glued flat so corners look finished. Cut two small wing shapes from a slightly lighter felt and glue them near the top corners of the back panel. Add the satin bow in the center above the camera area, then secure the bow tails with tiny glue dots on the back. Let everything set, then press the flap shut and check for any lifted corners.
Use a matte felt for wings and a satin bow for contrast — shiny on shiny makes it look messy.
12. Rubber Band Pull-Through Cover with Corner Loops
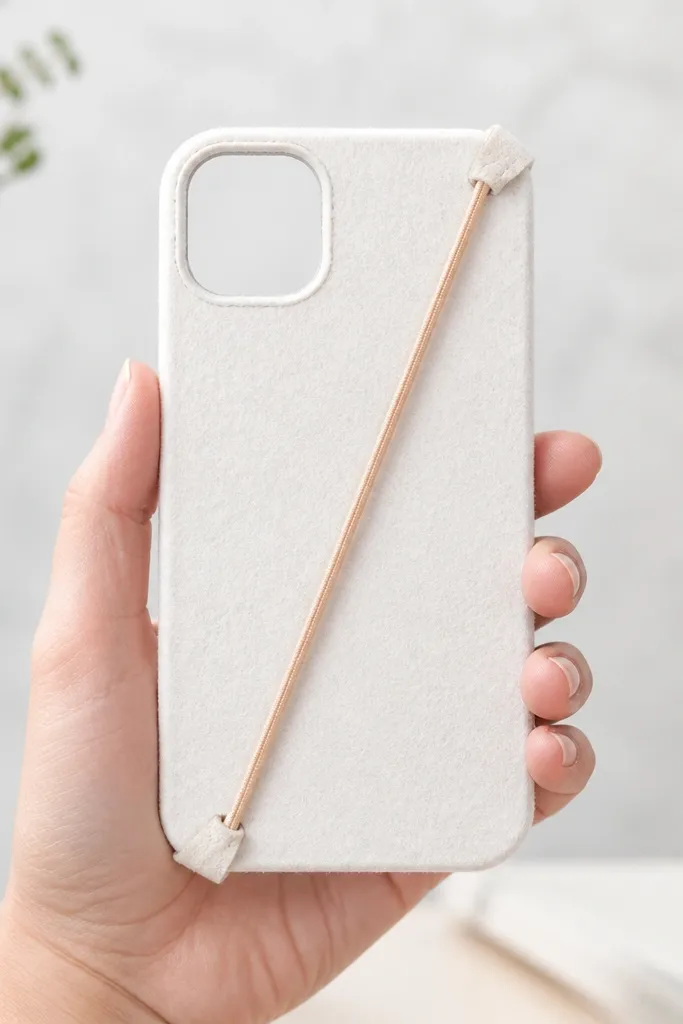
This is the cover for kids who hate flaps. Instead of a hinge, you use corner loops to hold the phone snugly. I use felt or thin craft foam for the base and attach elastic loops at the corners so the rubber band pulls it flat. The result looks sporty and stays secure during rough handling. It works for any phone color because the base can be bright — lime, sky blue, or coral. If your kid’s phone keeps slipping in a pocket, this fixes that immediately.
Cut a felt back piece the size of the phone back and wrap 2 mm around the sides. Glue it down at the edges, leaving the center flat. Make two small elastic loops by tying elastic thread or elastic cord into tight loops and glue one loop at each top corner. Stretch a rubber band across the top loops and hook it to matching loops on the bottom corners. Tighten until the cover feels snug, then trim the elastic ends and glue them down so they don’t poke.
Quick tipUse clear elastic for a cleaner look — black elastic can look bulky on light bases.
13. Crayon-Resist Wax Paper Cover with Watercolor Sprinkles
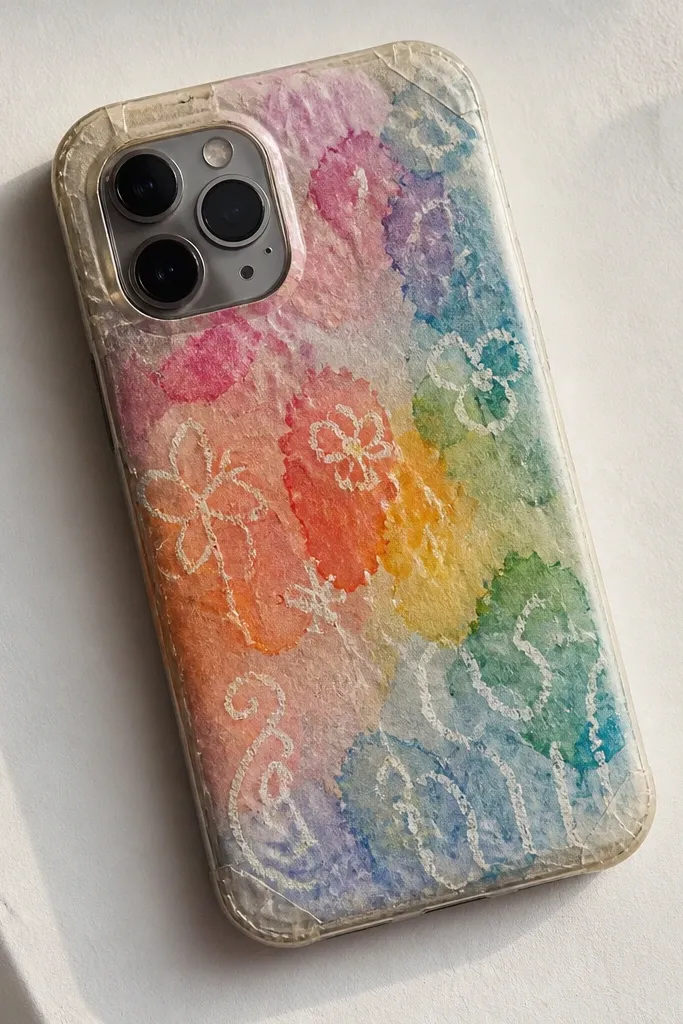
This looks artsy and handmade, and it’s surprisingly fast. I use wax paper or baking paper with crayon doodles, then watercolor over it so the crayon lines resist the paint. When sealed under clear tape or contact film, it becomes a smudge-resistant art panel. Kids love it because they can draw first and paint second, and the results are unpredictable in a good way. Choose a simple theme like stars or hearts so it reads nicely from a distance.
Draw crayon lines on wax paper, then lightly watercolor over the sheet. Let it dry for 2-3 minutes with a fan or by setting it in sun. Cut the dried art panel to the phone back size with 2 mm extra edges. Tape the panel onto the phone back with clear packing tape, smoothing the tape so it doesn’t wrinkle. Seal the edges with one more thin layer of tape and cut a clean camera opening using a craft knife.
Quick tipUse a dry brush technique for watercolor so it doesn’t soak too deep into the paper.
14. Crochet-Style Look Cover with Fabric Tape Checker Pattern
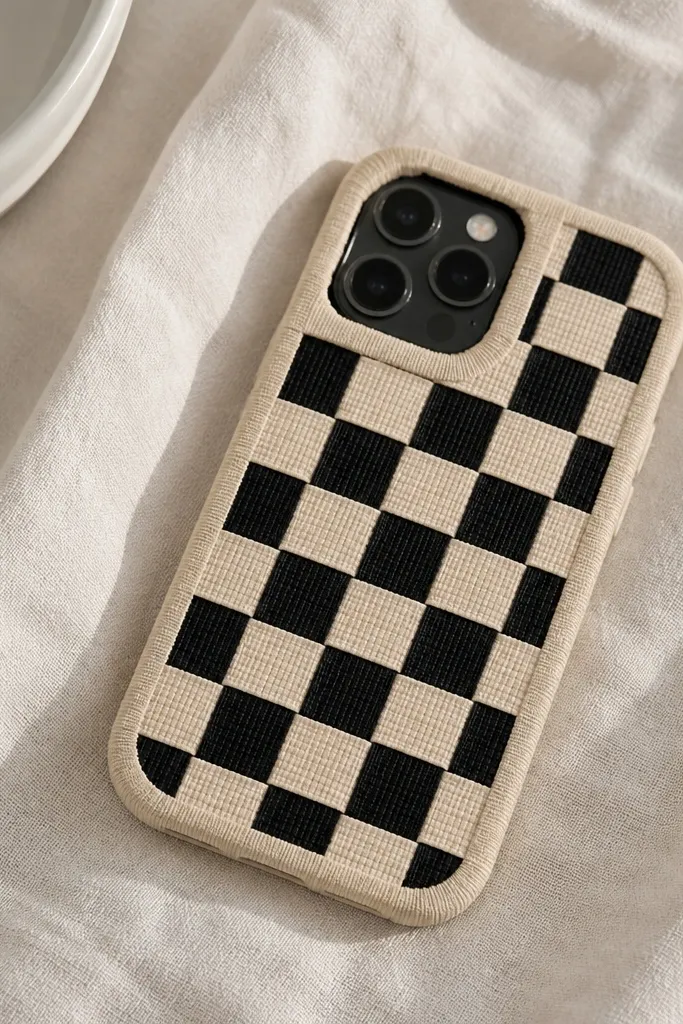
This one mimics crochet without the bulk or time. I use thin fabric tape strips (or washi tape if you want it lighter) and lay them in a checker pattern on a base felt panel. The texture look is what makes it feel handmade, and the tape is easy to adjust until it lines up. It’s a strong choice for kids because the cover stays flexible and doesn’t peel if you seal the tape edges with a tiny amount of clear glue. Styling-wise, black and cream is the cleanest combo — it looks good even when kids add stickers later.
Cut a felt base panel to the back of the phone and wrap 2 mm around the sides. Mark a grid lightly with pencil every 1 cm. Lay tape strips horizontally first, then vertically to form a checker. Press each intersection down firmly with your fingernail. Seal the tape edges with a thin brush coat of clear fabric glue, then let it set for 10 minutes before decorating further.
Use a ruler and press each tape strip with a flat card so the pattern stays straight.
15. Origami Corner Protector Cover with Folded Paper Flaps
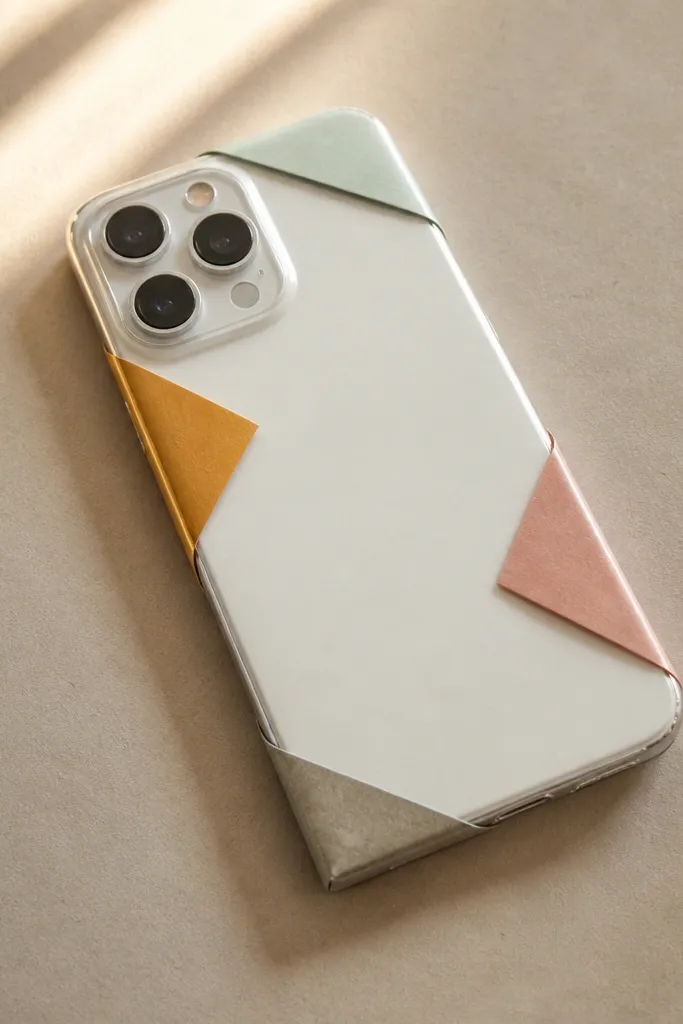
Folded corner flaps give the protection where it counts, and they look clever. I use thin cardstock for the corner flaps and seal them under contact film so they don’t soften or peel. The cover stays slim because only the corners get thickness. This style is great for kids who like “cool” details but still need a phone they can throw in a backpack. Keep the paper color bold — red, teal, or black — so the folded corners show up clearly.
Cut a cardstock back panel to your phone size and wrap it with 2 mm around the edges. Cut four small square pieces for corner flaps, each about 3 cm by 3 cm, then fold them into triangles that can sit over the phone corners. Position a flap on each corner and trace where it lands, then glue each flap on the inside edge only so it can fold cleanly. Seal the entire back panel under contact film, smoothing from center outward. Trim contact film at the camera opening and press corners so they seal tightly.
Quick tipMake the flap triangles slightly smaller than the corner so they don’t lift when the phone slides into pockets.



