
1. Black felt "pocket" cover with a removable charm tab
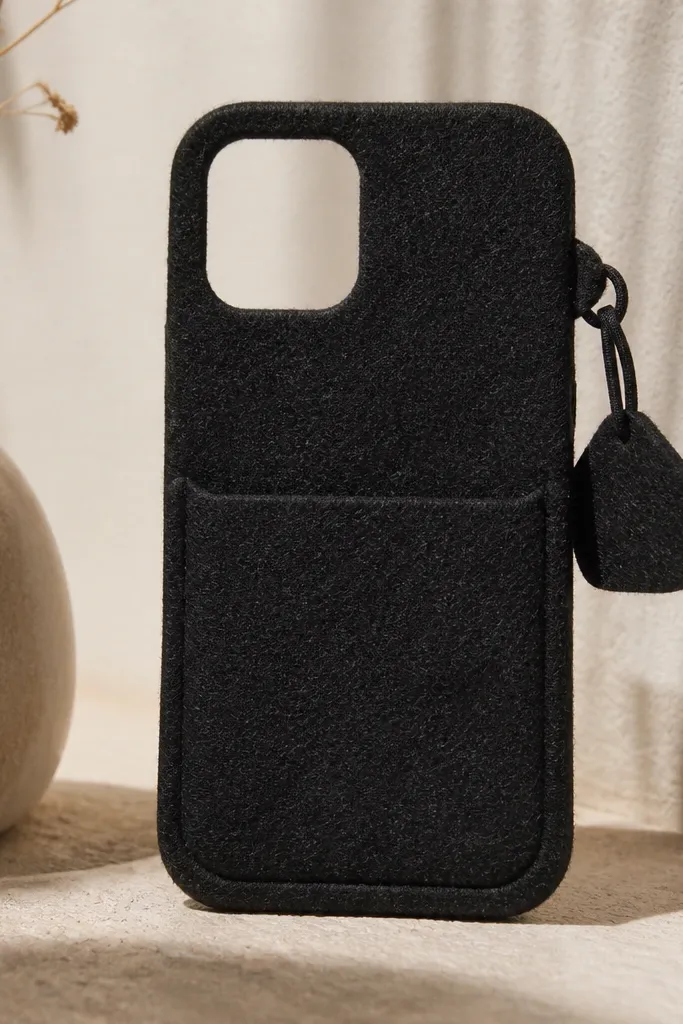
This one looks like a tiny wallet, and I like it because the felt hides pocket fuzz that would show on clear cases. I use 3mm black craft felt so it has enough body to keep the front from looking flat or floppy. The charm tab is removable, so you can swap it for a different keychain or school-day theme without rebuilding the whole cover. It flatters smaller hands because the “pocket” gives your thumb a place to land, and it also looks good on fair to medium skin tones because the black has a strong contrast. For kids, it feels soft and safer than hard plastic charms.
Start with a phone case you already own, then trace the outline on felt with a 6-8mm margin so it wraps the edges without snagging. Cut the felt and do a quick dry fit; trim around the camera opening so it’s at least 2mm away from the lens ring. Next, glue the felt to the case using small hot-glue dots along the edges — focus on corners and sides, not the middle. Finally, make the charm tab by gluing a small felt rectangle to an elastic loop that goes around the case edge; test pull it once so it doesn’t slide.
Quick tipSeal the felt seam with a thin line of clear glue stick or fabric glue so it doesn’t fray after a few weeks in a backpack.
One warningDon’t glue felt across the entire back — the cover warps and looks lumpy when the case flexes.
2. Black faux leather braided grip wrap (no bulk, no holes)
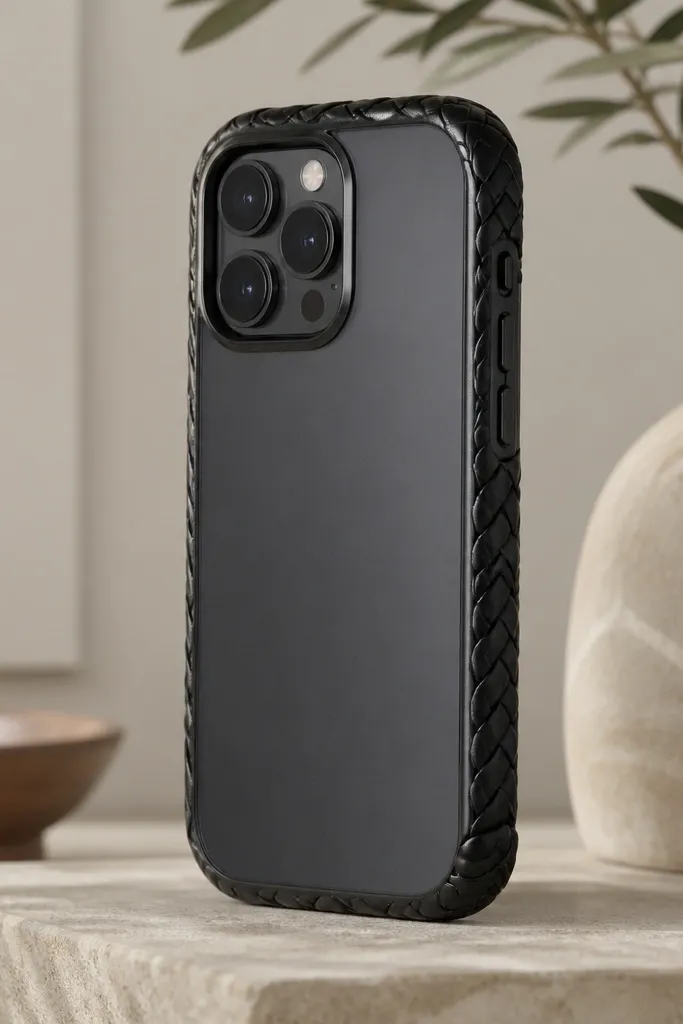
This is my go-to when someone wants a better grip but hates pop sockets. The braided wrap looks intentional and clean because the braid has structure, and it hides scratches better than glossy clear cases. I use black faux leather with a matte finish and cut three strips about 8mm wide each, so the braid stays thick enough to grip without adding a chunky edge. It looks good on any phone color because the black braid frames the device. I’ve worn this style with jeans and a jacket sleeve combo, and it doesn’t snag like smooth vinyl does.
Measure the phone case circumference around the sides where you want grip, then cut three equal faux leather strips 8mm wide by that length plus 2cm. Braid the strips tight, then test the braid around the case before gluing. Glue only the braid ends to the case edges using contact adhesive or hot glue — hold each end for 30-60 seconds so it bonds. If you want it extra secure, add one small hidden glue dot under the braid at the back so the braid doesn’t rotate.
Lightly rough up the case surface with fine sandpaper (220 grit) where you glue so the adhesive grips instead of sliding.
Skip thick contact cement blobs — they cure into hard bumps you’ll feel in your palm.
3. Black matte vinyl hex overlay with a sealed edge border
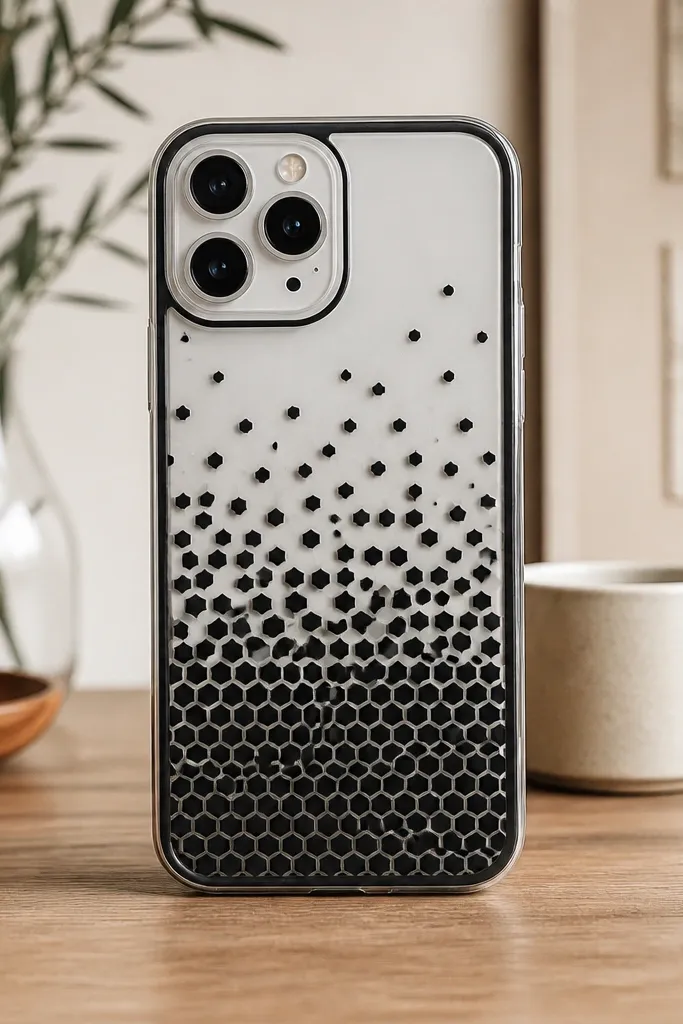
If you like a clean, graphic look, this is the one. Matte vinyl looks sharper than fabric when you’re taking selfies or using your flash, because it doesn’t glare like glossy stickers. I build it with small hexes (about 12-15mm each) so the pattern reads as intentional instead of random. The sealed edge border keeps the vinyl from lifting where pockets rub. It flatters people who like a minimal style and want their phone to look “designed” even from across a room.
Start by cleaning your clear case with rubbing alcohol and letting it fully dry. Lay out a simple hex grid on the back — I start at the top-left and work diagonally so it feels balanced. Cut hex shapes from matte black vinyl and press them on with a craft scraper or an old gift card, one at a time. After the whole pattern is on, add a thin border strip along the sides and seal the edges with clear packing tape or clear contact film, trimmed close to the bezel.
Trim vinyl with a sharp craft knife and a metal ruler — uneven edges are what make it look cheap fast.
Don’t cover the camera ring or flash area — vinyl can block light and make photos look dull.
4. Clear case with layered vinyl stripes under a clear film top coat
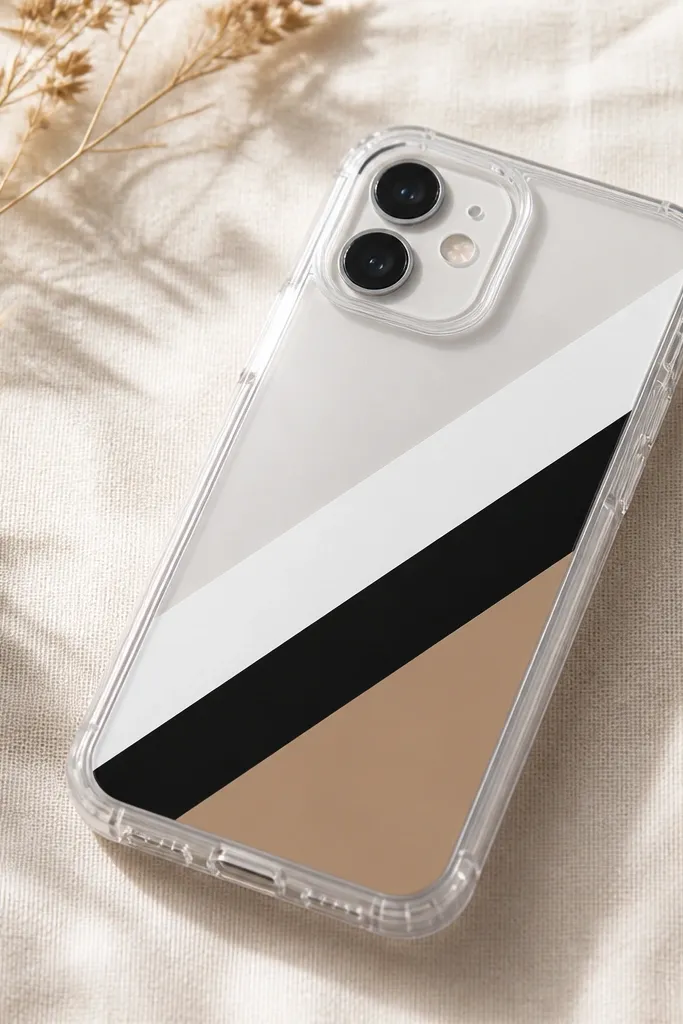
This looks “expensive” because the stripes appear to float inside the case. I use a clear film top coat (the kind you’d use for craft laminating) so the vinyl doesn’t scuff from pocket friction. The color combo is the trick: white + black makes it bold, and a muted tan adds warmth without turning it into a loud pattern. It flatters most outfits because you’re basically matching neutrals. If your phone gets tossed in a bag with keys, the film is what keeps the design looking new instead of scratched.
Cut your vinyl stripes first: try 6mm, 10mm, and 14mm widths for a clean hierarchy. Clean the clear case, then place the vinyl on the outside surface where you want it, pressing firmly with a scraper. Cut a clear film sheet slightly larger than the back panel, then lay it down from one edge so you avoid bubbles; press outward as you go. Trim the film around the camera cutout last, using a knife and stopping 1-2mm before the lens ring for a tidy finish.
If you see a bubble, poke it with a pin and press the film down flat.
Don’t use glossy vinyl without a top coat — it shows every scratch and smudge.
5. Clear case photo strip with lamination film and a slider tab
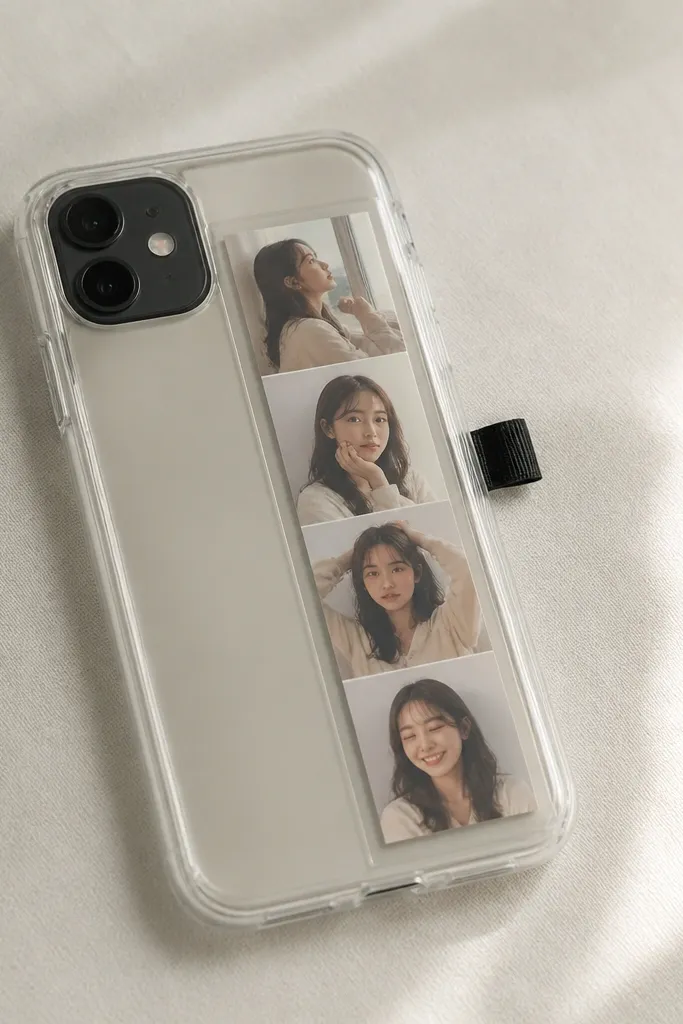
This is the easiest “kid-friendly” design I’ve done because you can rotate what’s inside every few days. Instead of gluing photos straight onto a case, you sandwich them between film layers so they don’t tear or fade from handling. I keep the layout simple: a 2cm-wide strip, centered, with a small black border around the photo so it looks intentional. It flatters kids and teens because it feels like a mini collectible slot, and it also works for adults who like personal touches without glitter. The slider tab makes swapping faster than peeling tape or rebuilding the whole cover.
Print or cut a photo strip to about 2cm wide by 8-10cm tall, and add a thin black border with marker or a black paper frame. Clean the clear case, then place the photo where you want it and cover it with lamination film — press edges first, then smooth the middle. For the slider tab, glue a small strip of black tape to the top edge of the film so it forms a pull tab, and leave the bottom edge slightly freer for grip. Test removal once with gentle pulling; if it sticks, trim the film edges so it doesn’t catch on the case lip.
Use matte photo paper for less glare when the phone camera flash hits.
Don’t use plain printer paper — it wrinkles under film and looks wavy.
6. Clear case with pressed leaves but only on the corners
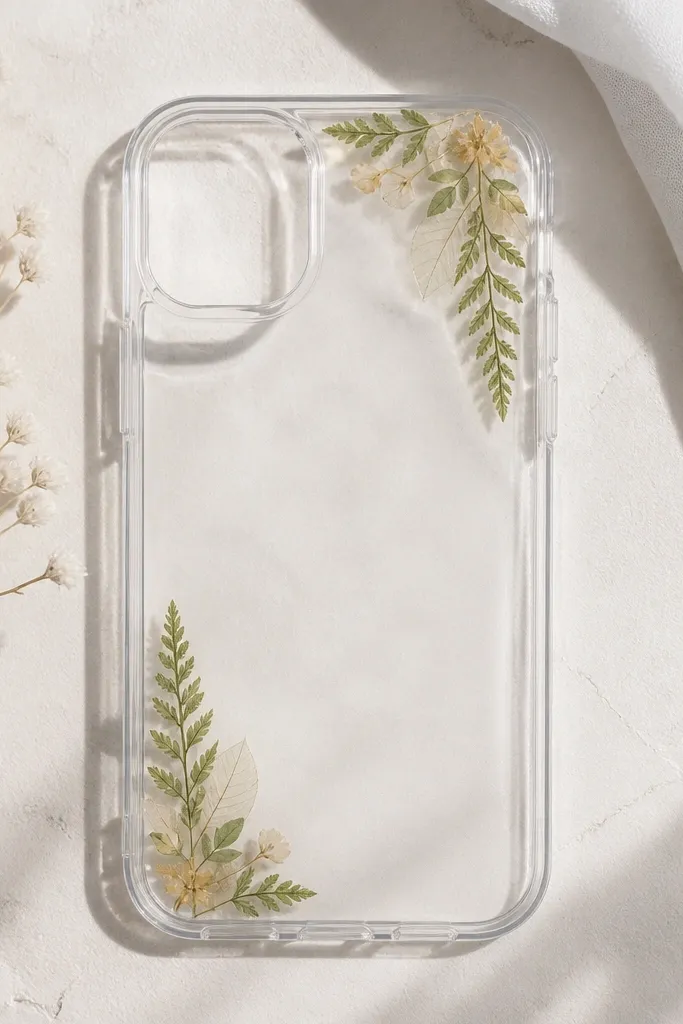
Pressed leaves are gorgeous, but full-back coverage gets messy fast. I place leaves only in the corners so the phone stays readable and the leaves don’t get crushed by pocket pressure in the middle. I pick thin leaves that press flat — think small herb scraps or tiny fall leaves — and I keep them small, like 8-12mm pieces. This look flatters people who like nature vibes without going full “boho” — the corners feel subtle. It also works well for lighter phone colors because the leaves show up more clearly through the clear case.
Press leaves ahead of time between paper and books for at least 5-7 days so they dry flat. Clean the case, then place the leaves on the corners and test the spacing without adhesive. Once you like the layout, seal them with a clear film layer: cut film to cover only the back area, then trim close to edges and around the camera cutout. Press hard around the leaf edges so the film grips and prevents lifting.
Quick tipSeal the leaf edges with a tiny brush of clear craft glue before the film if your leaves are fragile.
One warningDon’t use wet or thick leaves — they turn brown and cloud the clear film.
7. Black elastic loop charm frame for school keys and fidgets
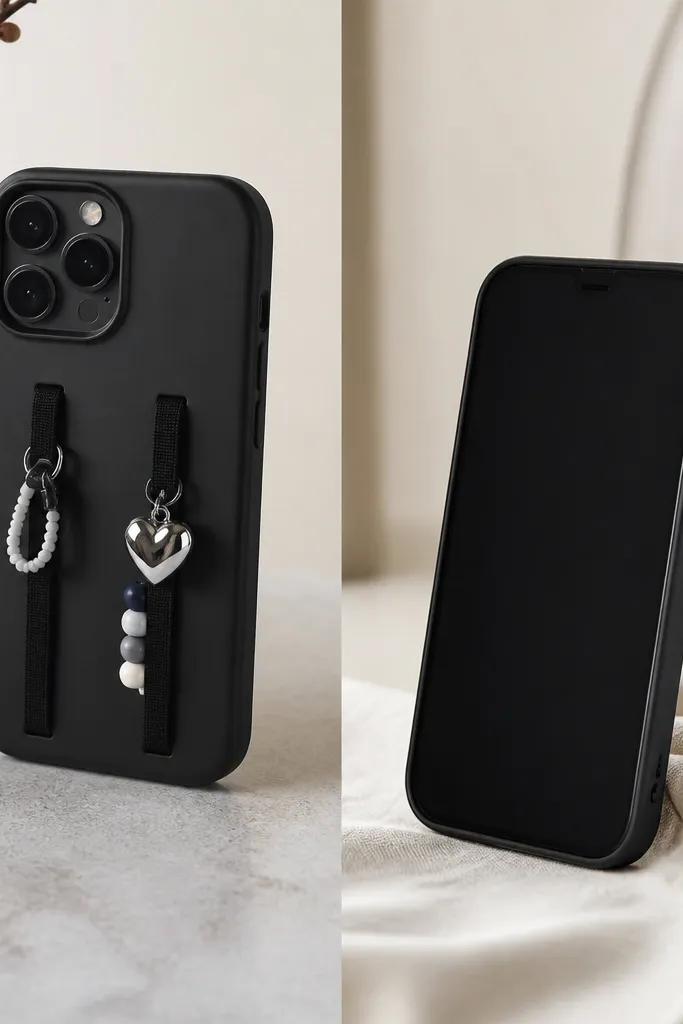
This is the “functional cute” option. Instead of gluing charms directly onto the case (which can crack and peel), you attach them to elastic loops that flex with the case. I use black elastic cord or elastic band strips and keep charms small — a bead, mini tassel, or a fabric tag — so they don’t swing and scratch. It flatters kids and busy hands because it gives them a place to clip fidgets without dropping them. For renters, it’s also easy to remove: swap charms and loops without changing the phone cover.
Mark two spots on the back of your case where you want loops — I keep them 1cm away from the camera area. Cut two elastic loops long enough to wrap around the case edge and hold tension, usually 5-7cm each for a standard phone. Glue the loop ends to the case with hot glue, then reinforce with a second small glue dot after it cools. Attach charms with split rings or small lobster clasps, and do a quick tug test so everything holds under movement.
Quick tipUse split rings instead of trying to glue charms — rings let you swap without damage.
One warningDon’t glue elastics across the center back — they stretch and distort the case surface.
8. Clear case with tiny 3D charm dots placed only on the bumper edge
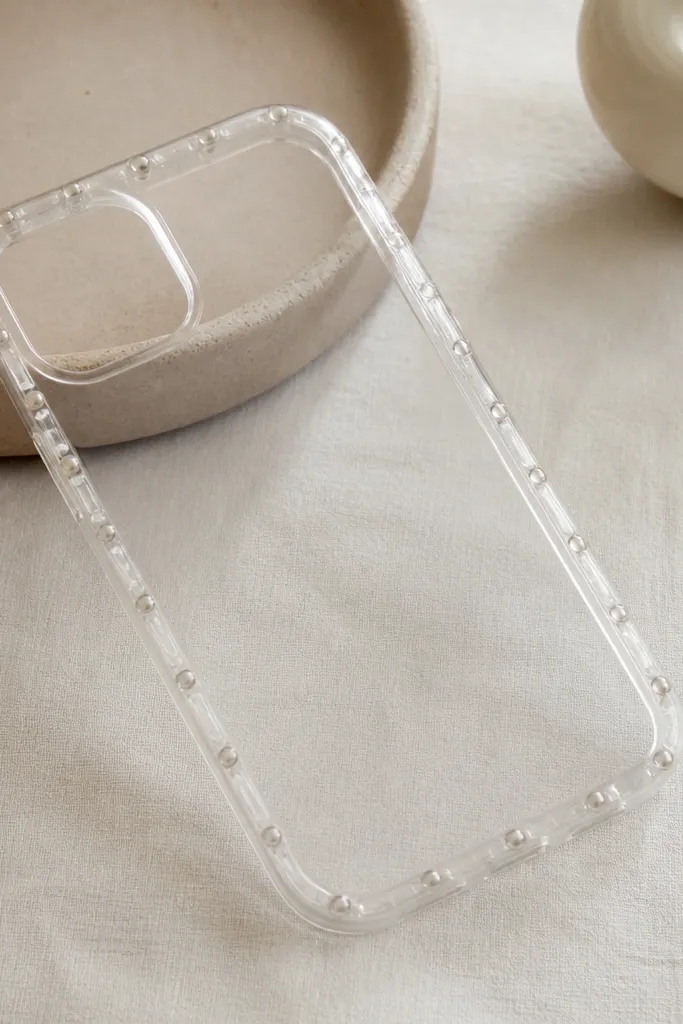
This is for when you want a little personality but hate clutter. By placing 3D charm dots on the bumper edge only, you avoid covering the flat back where pocket friction is worst. I use tiny resin dots, mini metal studs, or acrylic charm pieces — all small enough to feel like texture instead of weight. It looks good with clear cases because the light passes through and makes the charms pop. This one flatters anyone who likes subtle sparkle, especially if your phone is a darker color but you want a clean, modern look.
Choose charm pieces that are under 6mm so they don’t make the phone uncomfortable in your hand. Clean the bumper edge with alcohol and dry it completely. Apply a tiny amount of contact adhesive to each charm base, place them around the edge in a pattern (I like a line or a triangle on each side), and press for 30-60 seconds. Leave the case flat for 24 hours so the adhesive fully cures before you carry it in a pocket.
Quick tipLay down a strip of painter’s tape on the edge as a “spacing guide” so your charm dots line up.
One warningDon’t place charms on the back panel — they scratch and lift when the case rubs fabric.
9. Black fabric sleeve style cover with a magnetic snap-less closure (elastic flap)
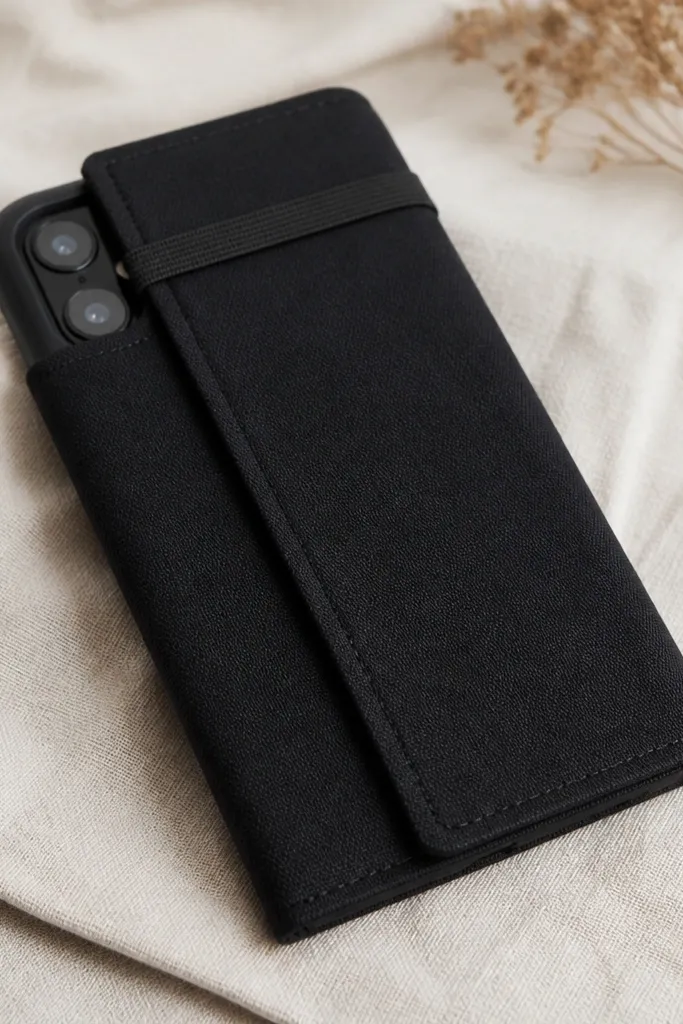
A sleeve cover is the fastest way to get a “new phone” look without touching the walls or drilling anything. I use black cotton canvas or denim for structure, then line it with a thin soft fabric so it slides into a bag without snagging. The elastic flap closure keeps it secure without magnets or snaps, which is handy if you’re making this for kids. It flatters hands because the sleeve smooths the phone’s corners, and the black fabric hides lint. If you’re constantly switching bags, this cover style also holds up because it’s designed for friction from the outside.
Measure your phone case width and height, then add 8-10mm to each side for a snug sleeve. Cut outer fabric and lining fabric, then stitch around the edges leaving a small gap for turning if you’re lining. Turn it right-side out, press the seams, and top-stitch if you want a crisp look. Cut the camera opening cleanly, then add an elastic band that crosses the flap — glue or stitch the elastic ends to the inside so it stays hidden.
Quick tipUse a roller presser or just a firm iron to flatten seams — it stops the sleeve from looking wavy.
One warningDon’t make the sleeve too loose — loose fabric bunches and shows as wrinkles after a few days.



