
1. Iridescent Foil Wings on Black TPU
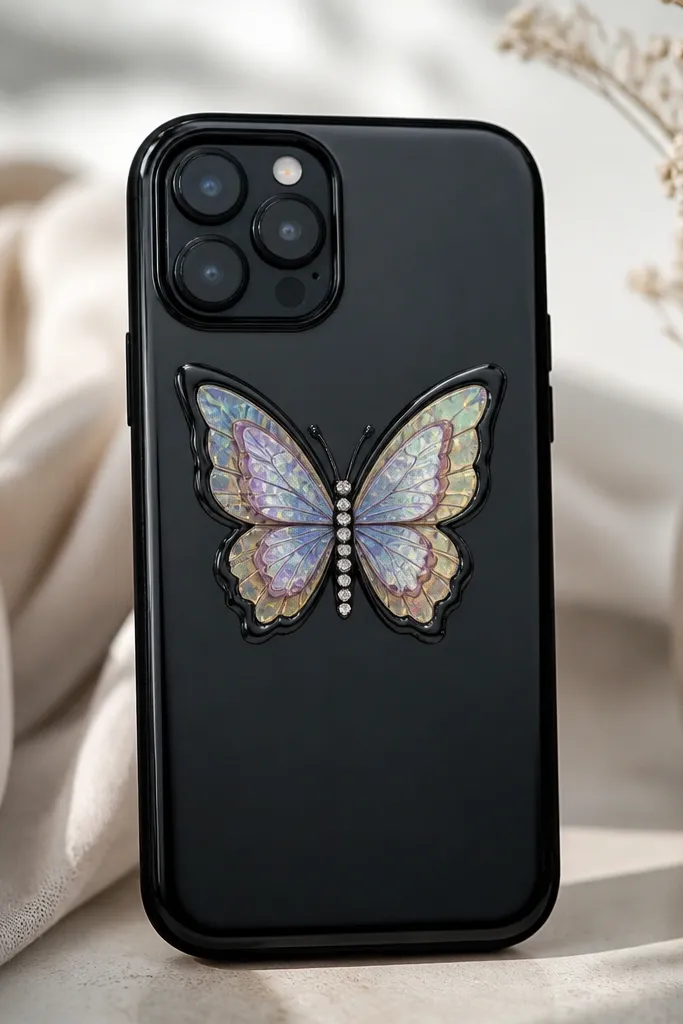
Start with a black TPU case because it makes foil look like it’s lit from within. Cut two wing pairs from iridescent craft foil sheets and one thinner pair from metallic paper for the back layer. The butterfly body is a narrow strip of black felt rolled into a tube or topped with a small pre-made bead. This style looks best on people with warm or neutral skin tones because the foil reads golden-pink under indoor light and doesn’t clash with most jewelry colors. For a high-end look, keep the body matte and let only the wings sparkle.
First, mark your placement by putting a strip of masking tape across the case where you want the butterfly to sit, keeping it clear of the camera cutout. Then glue the back wings using a thin layer of craft glue, press for 30 seconds, and let them set for 5-10 minutes. Next, add the front wings slightly offset so the edges peek out like a real layered wing. Finally, seal with 2 thin coats of clear topcoat, waiting about 20 minutes between coats so the surface stays smooth.
Quick tipUse a craft blade to trim the foil edges cleanly; foil tears when you force it.
One warningSkip thick glue under the foil, or it will wrinkle the wings and ruin the crisp outline.
2. Candlelight Velvet Butterfly with Gold Thread Body
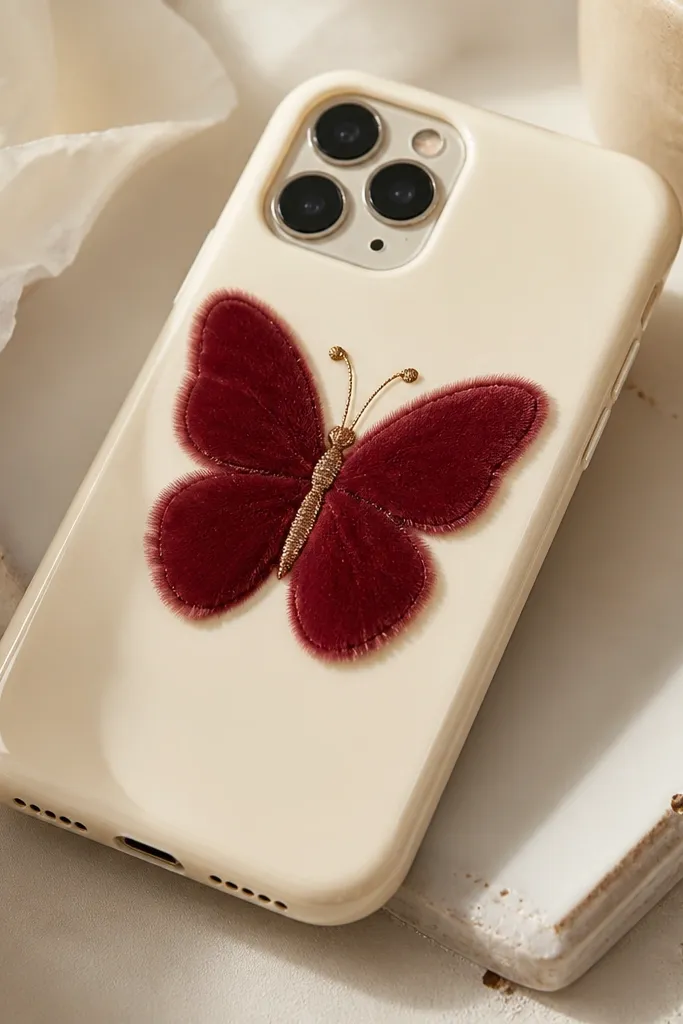
Velvet fabric gives you luxury because the surface catches light differently than felt. Pick burgundy velvet for the wings and a darker brown or black fabric for the body so the center looks grounded. I like this on cream or beige phone cases because the contrast makes the butterfly look like it’s framed. This design is flattering if your style leans warm — think gold rings and brown-toned bags — because burgundy reads rich without looking harsh. Keep the wing size medium so the fuzz doesn’t swallow the phone screen area.
Start by cutting wings from velvet with a template you trace on paper first. Glue the back wings with a tiny amount of fabric glue, then press with a flat tool so the nap stays smooth. Stitch the body using gold embroidery thread through a narrow strip of brown felt, then glue the stitched strip onto the wing center. Finish by brushing a thin layer of clear topcoat only over the glued areas, not piling it on the fuzzy edges.
Let the glue dry fully before topcoat, or the velvet nap can flatten.
Don’t use super glue on velvet; it soaks in and leaves shiny hard spots.
3. 3D Felt Butterfly with Micro-Bead Veins
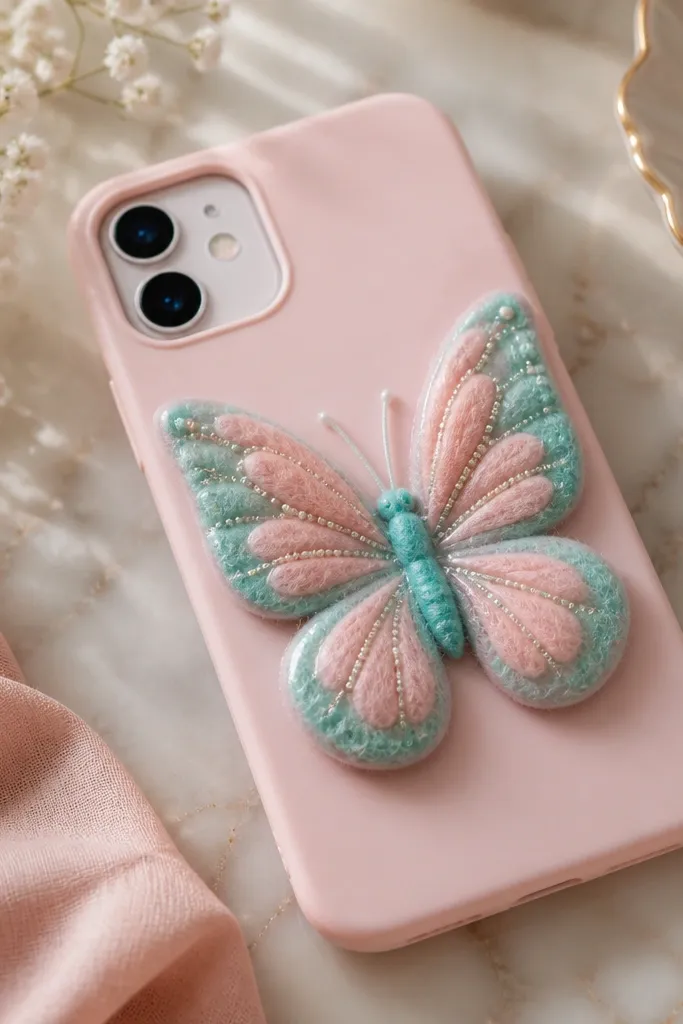
This is the butterfly that looks expensive up close because the veins are tiny and textured. Use two felt shades: teal for the top wing layer and pale pink for the underlayer. For the veins, use micro-beads (seed beads under 2mm) glued in short lines that follow the wing curves. The raised wings work great on slim phone cases because the wing height creates a “floating” effect that looks like boutique nail art. It flatters cool-toned outfits too, especially if you wear silver jewelry.
First, cut your wings in three pieces: two identical wing pairs for the front (teal), and one smaller pair for the back (pale pink). Glue the back pair to the case, then add the front wings with thin foam tape or 1mm foam squares under the center only. Next, dot micro-beads along the felt veins using a toothpick to place glue and beads. Finish with a glossy clear gel topcoat in one direction strokes so it levels without streaks.
Use a toothpick with glue on the tip; it keeps glue from bleeding into felt fibers.
Don’t flood the bead lines with glue; it makes the beads sink and look messy.
4. Fabric Scrap Butterfly in Denim Wash Colors
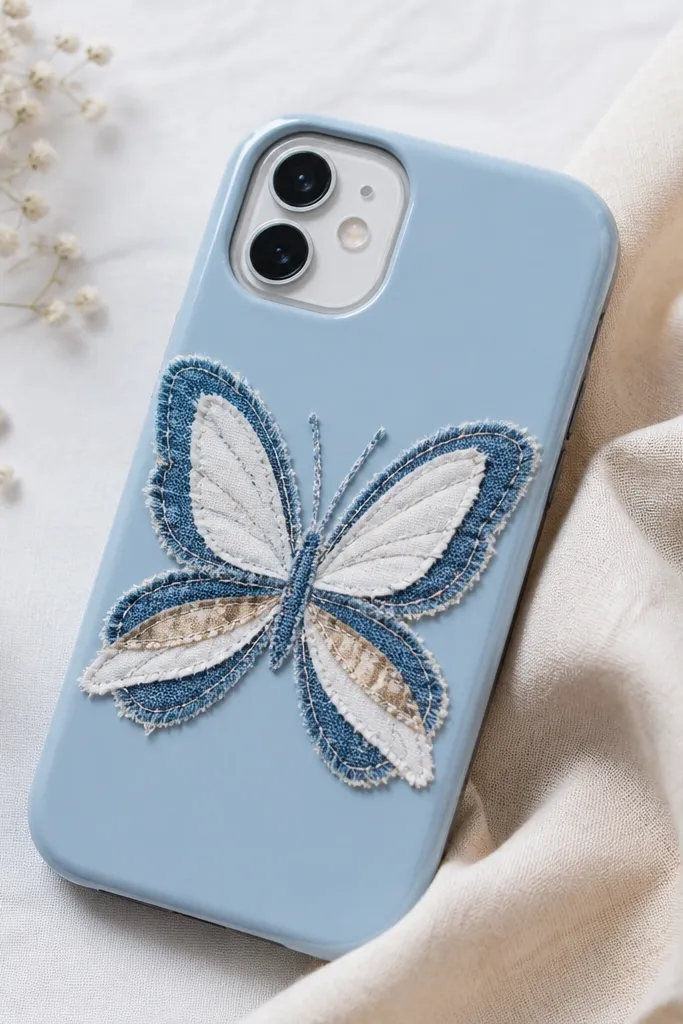
Denim-wash color combos look high-end because they look intentional, not random. Use scraps from jeans, chambray, and a small accent fabric like tan canvas or a tiny floral print. The secret is to keep the wing edges slightly irregular like fabric naturally frays, then seal the whole thing. This design looks great on kids because denim is durable, and it also works for adults who like a casual luxury vibe. Choose one main wing color and one accent — too many scraps makes the butterfly look like a craft pile.
Start by ironing your scraps flat so the wings don’t warp after glue. Cut wings in two layers: a larger denim layer and a smaller accent layer with a slightly different shape. Glue the denim first, then add the accent wings on top with a little offset so you see the border. Seal with clear topcoat in two thin layers, letting the first layer soak for 10 minutes before the second.
Quick tipIf the fabric frays, trim only the outermost edge and let the inner edge stay soft.
One warningAvoid thick layers of fabric — they make the butterfly lift at the corners when the phone bends.
5. Pearl Lace Butterfly with Sheer Wing Overlay
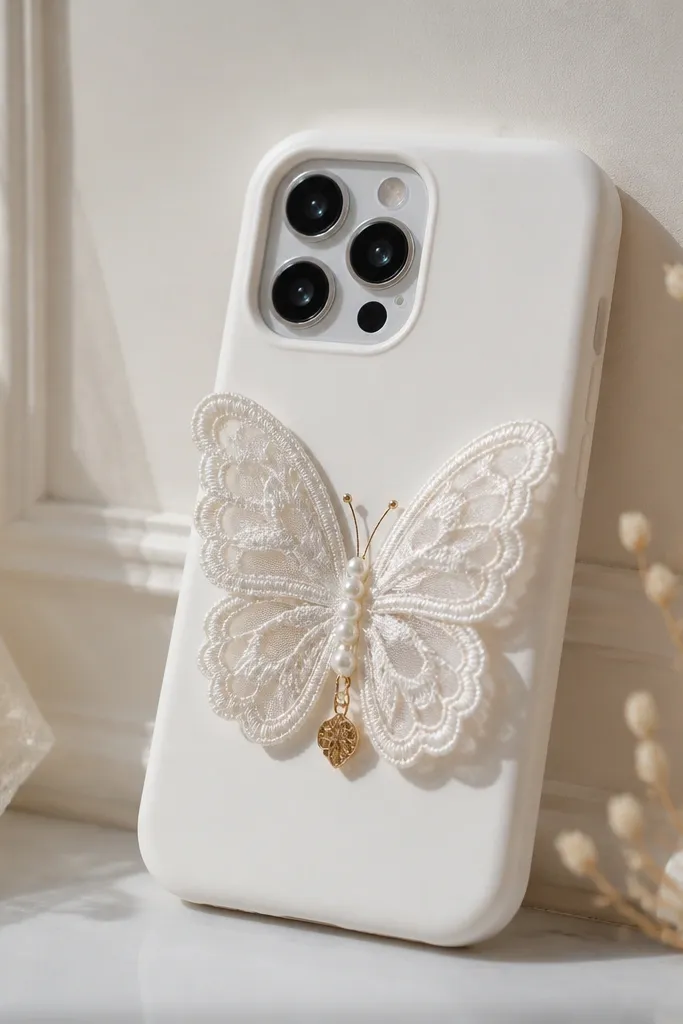
Lace reads luxury when you keep it clean and place it flat. Use white lace for the main wings and add a sheer organza overlay only on the top wing halves so the butterfly looks like it has stained-glass light. The body can be a strip of satin ribbon folded and glued, then topped with pearl beads. This style looks best on light phone cases, but it also pops on nude pink. It’s flattering for anyone who likes soft outfits, because the pearls and sheer layer give a gentle glow.
First, cut lace wings slightly smaller than your desired butterfly outline so you don’t see raw fabric edges. Glue the lace wings directly onto the case, then add organza overlays on top using small glue dots near the center. Build the body by folding a satin strip into a narrow loop, securing it with glue, then add 4-6 pearl beads across the top. Finish with a light clear topcoat only over the lace and body so the organza stays airy.
Quick tipPress lace flat under a book for 10 minutes before cutting; it stops curling.
One warningDon’t cover lace completely in thick topcoat; it turns lace stiff and dull.
6. Pressed Flower Butterfly with Resin Dome
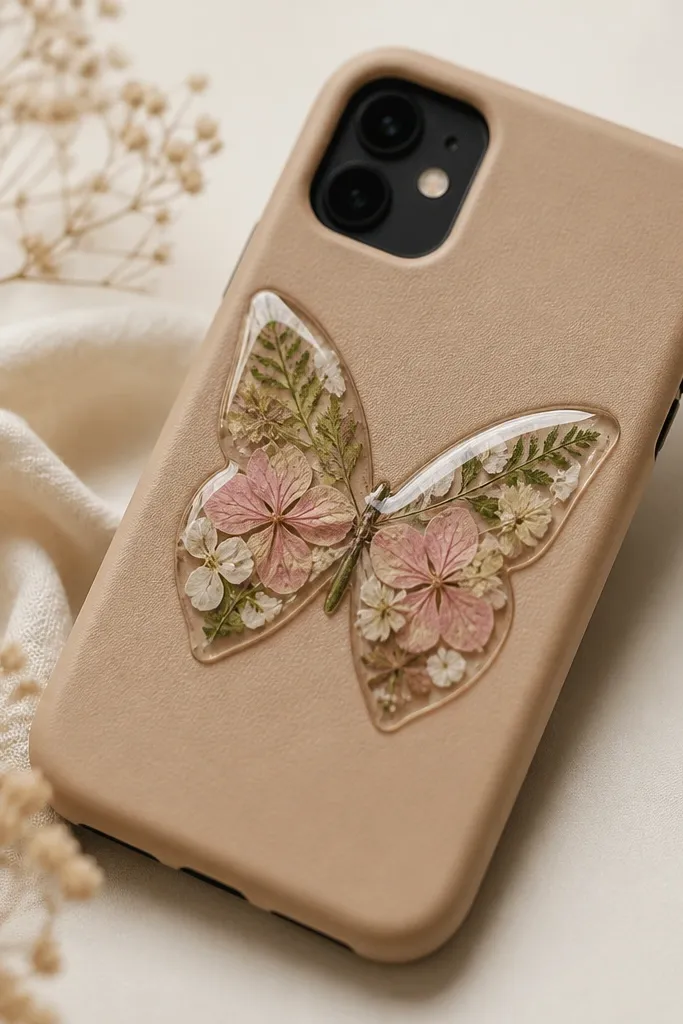
Pressed flowers inside a resin dome look like high-end pressed-flower jewelry, and it photographs beautifully. Use a butterfly stencil and fill the wings with small petals cut to fit. Choose a tan or beige case so the petals read warm instead of washed out. This is a gorgeous option for adults making a “gift that looks expensive.” It flatters warm neutrals and works well if you like gold earrings — the resin sheen mimics jewelry glass.
Start by pressing flowers for at least 24-48 hours so they’re flat. Place a butterfly outline under a clear tape layer on the case, then glue petals into the wings with a tiny amount of clear craft glue. Let it dry completely, and check for gaps — fill gaps with smaller petal bits. Mix resin carefully and pour a thin dome over the butterfly, then pop bubbles with a toothpick tip. Let it cure fully as directed before using the phone.
Quick tipSeal the edges of petals with a micro-thin glue layer first so resin doesn’t seep into the case surface.
One warningDon’t rush resin; partial cure makes it cloudy and prone to scratches.
7. Glitter Gel Butterfly with Heat-Set Edges
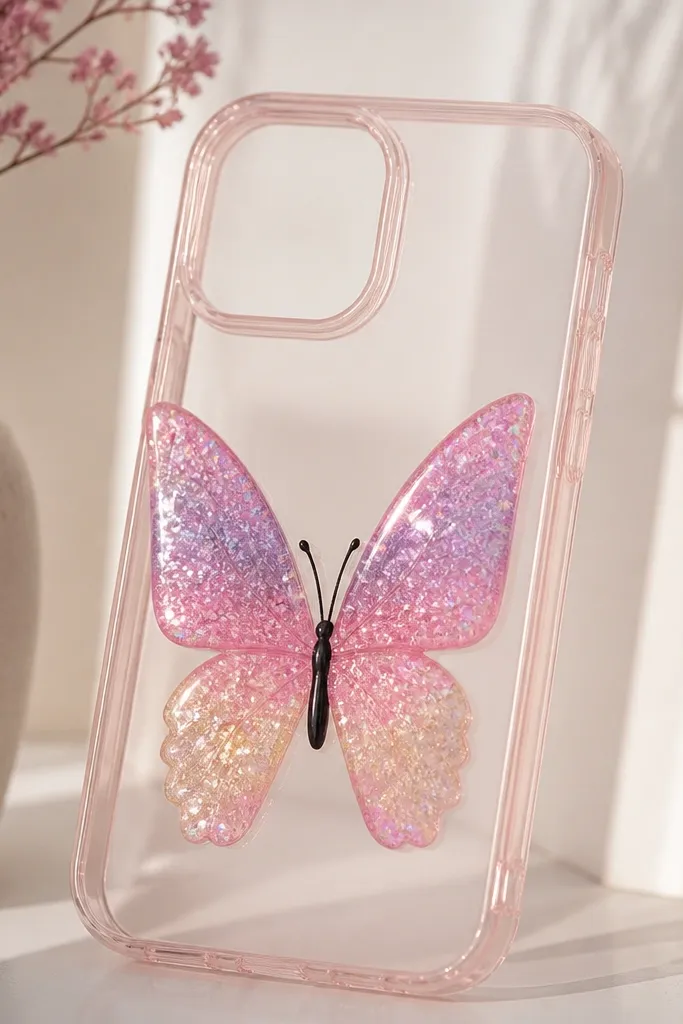
If you want maximum sparkle without messy loose glitter, use glitter gel paint. The look is luxe because the gel makes a smooth, even shimmer layer that doesn’t shed. Use a gradient approach: teal glitter gel on the upper wing center fading to pale aqua at the edges. Keep the body matte black with a small felt strip so the sparkle stays the star. This style is flattering on cool-toned outfits and looks extra good on phones with nude or clear cases because the gel sits on top of the base color.
First, tape a butterfly stencil to the case so it doesn’t shift when you spread gel. Apply glitter gel with a sponge brush, starting with the center and dragging outward for a gradient. For crisp edges, let the first layer set 10-15 minutes, then carefully remove the stencil before adding a second thin gel coat. After curing, seal the whole butterfly area with a clear glossy topcoat in two thin passes.
Quick tipUse a sponge brush instead of a flat brush; it keeps glitter gel from streaking.
One warningAvoid loose glitter sprinkled directly on glue; it sheds and looks uneven after a week.
8. Matte Butterfly Vinyl with Raised Outline Tape
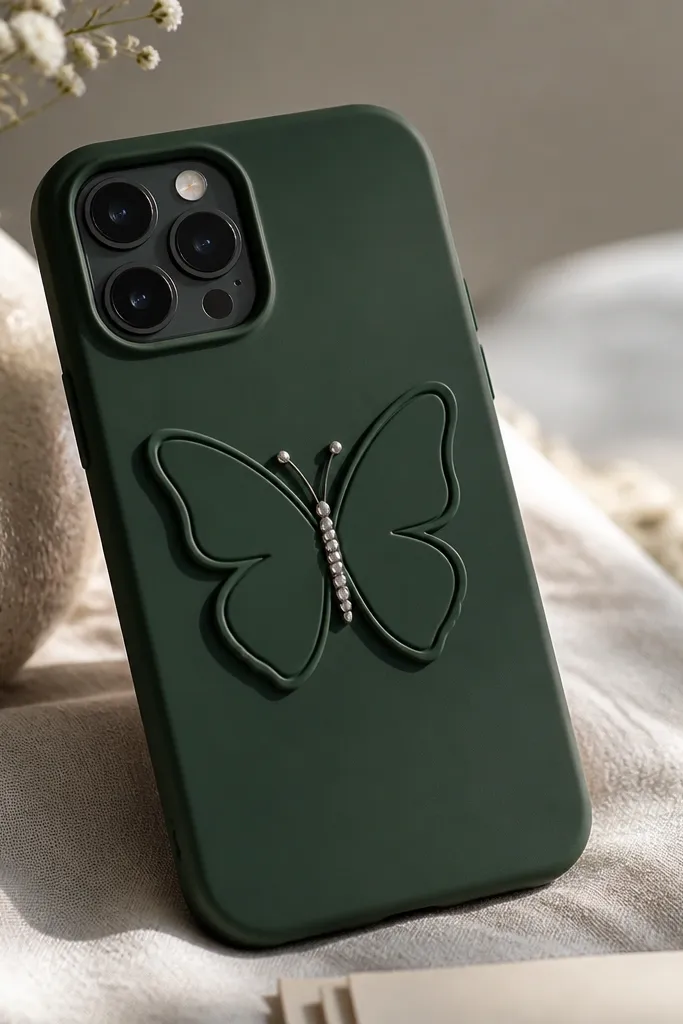
Matte vinyl makes everything look more expensive because it kills that “craft sticker” shine. Use matte black or matte charcoal vinyl for the body, then add colored matte vinyl wings in sage or deep green. The raised outline comes from thin craft foam tape or 1mm outline tape placed around the wing edges. This design flatters people who wear minimal jewelry because the matte finish looks calm and intentional. It also photographs well without glare.
First, cut a butterfly shape from matte vinyl using a sharp craft knife on a cutting mat. Place thin foam tape around the wing perimeter on the case, then press the vinyl wings onto the tape so the outline looks raised. Add a matte vinyl body strip and small silver dot gems at the center. Seal with a thin matte-to-gloss clear coat only over the wings edges so the vinyl doesn’t lift but stays smooth.
Quick tipPress vinyl with a rubber brayer or the back of a spoon to avoid air bubbles.
One warningDon’t skip the raised outline; flat vinyl reads cheap fast.
9. Satin Ribbon Wings with Button-Center Spark
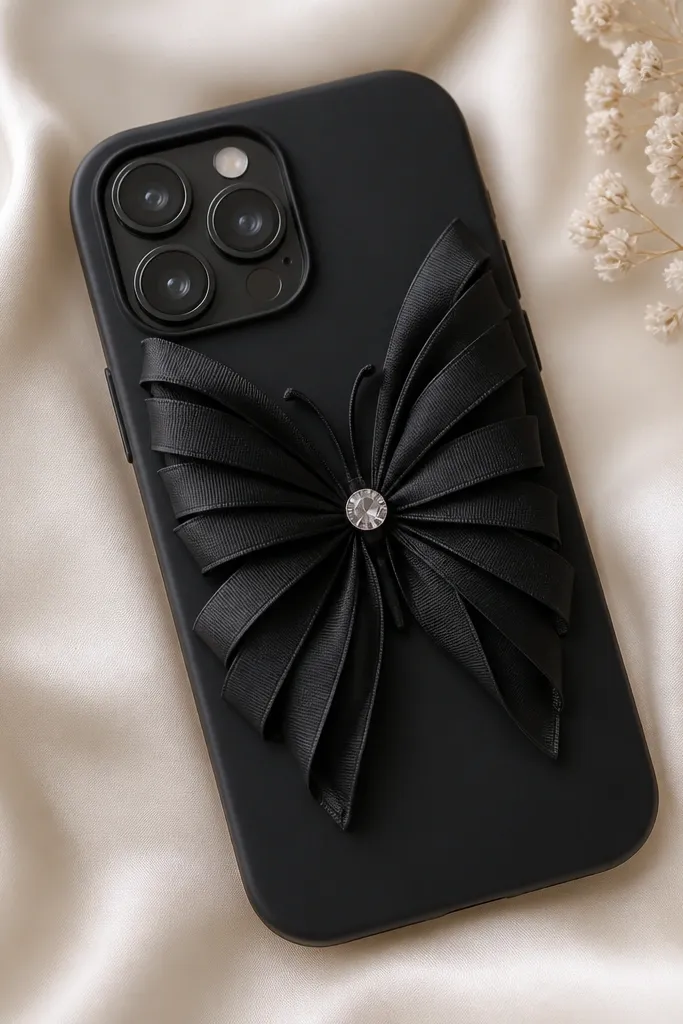
Satin ribbon gives wing folds that look like real butterfly texture. Use two ribbon widths: 6mm for inner wing folds and 10-12mm for outer wings. The center looks luxe with a small rhinestone button or a flat-back crystal. This style looks best on black, navy, or deep plum cases because satin shines without needing glitter. It flatters people with cooler complexions because the highlights look crisp.
First, cut ribbon into wing-shaped pieces and singe the cut edges lightly with a candle flame held safely away to prevent fraying. Glue the larger outer ribbon wings to the case, then layer smaller inner folds on top with slight overlap. Add the body as a narrow ribbon strip folded into a V shape under the center. Finish by securing a rhinestone button at the center and sealing everything with clear topcoat.
Quick tipSinge edges quickly — 1-2 seconds — or the ribbon will darken too much.
One warningAvoid thick knotting of ribbon; lumps show through the topcoat.
10. Foam Butterfly with Metallic Edge Rub
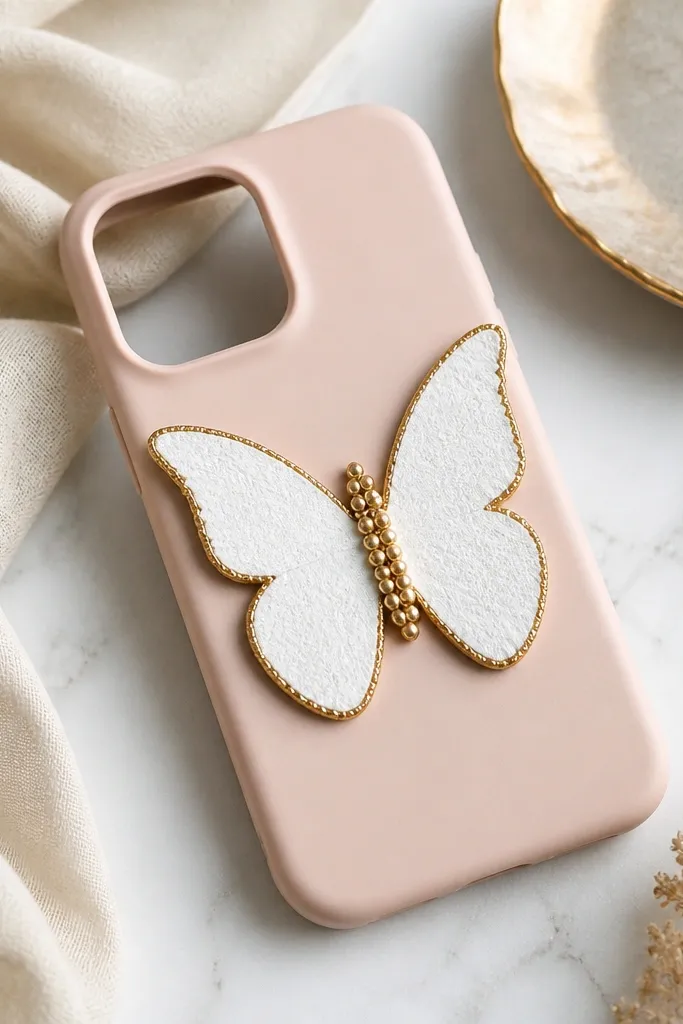
Foam is the easiest way to get height, and the metallic edge rub makes it look like a designer accessory. Cut wings from white craft foam, then rub the edges with metallic gold pigment or metallic acrylic paint using a makeup sponge. The body can be covered with gold micro-beads for a jewelry-like center. This design looks gorgeous on nude, blush, or clear cases because the foam color stays bright and the gold edges do the work. It flatters both warm and cool outfits because gold bridges everything.
First, trace and cut your butterfly wings from 2-3mm foam. Next, rough the foam top with 220 grit lightly so paint grips, then rub metallic pigment along the wing edges only. Add glue to the center body area, then press micro-beads into it. Seal with glossy clear coat — two light coats — so the foam edges don’t look chalky.
Rub metallic pigment with a dabbing motion so you don’t fill the whole wing flat.
Don’t paint the entire wing gold; it kills the layered “wing” look.
11. Monogram-Style Butterfly with Clear Sticker Frame
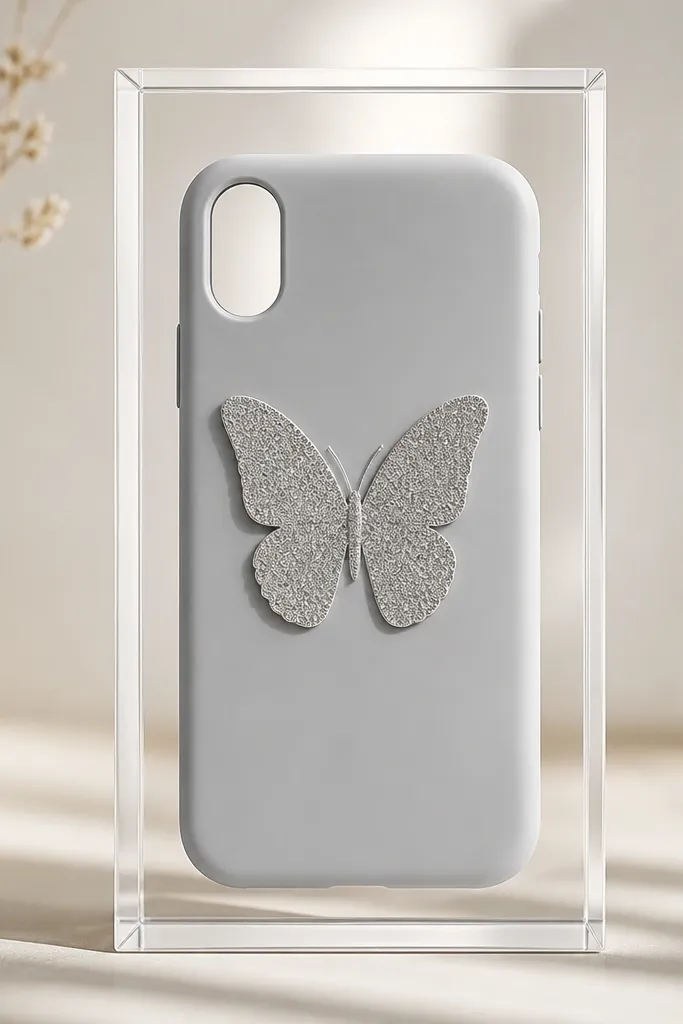
This one looks high-end because the butterfly sits in a controlled “label” frame. Use thin glitter paper for the butterfly wings and cut a clear frame using transparency film or a leftover clear packaging sheet. The contrast makes the wings look like they’re printed on luxury stationery. This style flatters people who like clean minimal aesthetics because it doesn’t rely on lots of texture. It also looks great for kids who want something that stays neat.
First, cut the butterfly from thin glitter paper and keep it flat. Then cut a frame rectangle with rounded corners from clear plastic sheet, making sure it doesn’t cover the camera opening. Glue the butterfly to the center of the frame, then glue the frame to the case using a thin bead of clear adhesive. Seal the edges of the frame with clear topcoat so it doesn’t lift at corners.
Quick tipUse a corner hole punch to get perfect rounded corners in the frame cut.
One warningAvoid a frame that’s too large; oversized frames look like cheap stickers.
12. Hand-Painted Butterfly with Pearlescent Background Wash
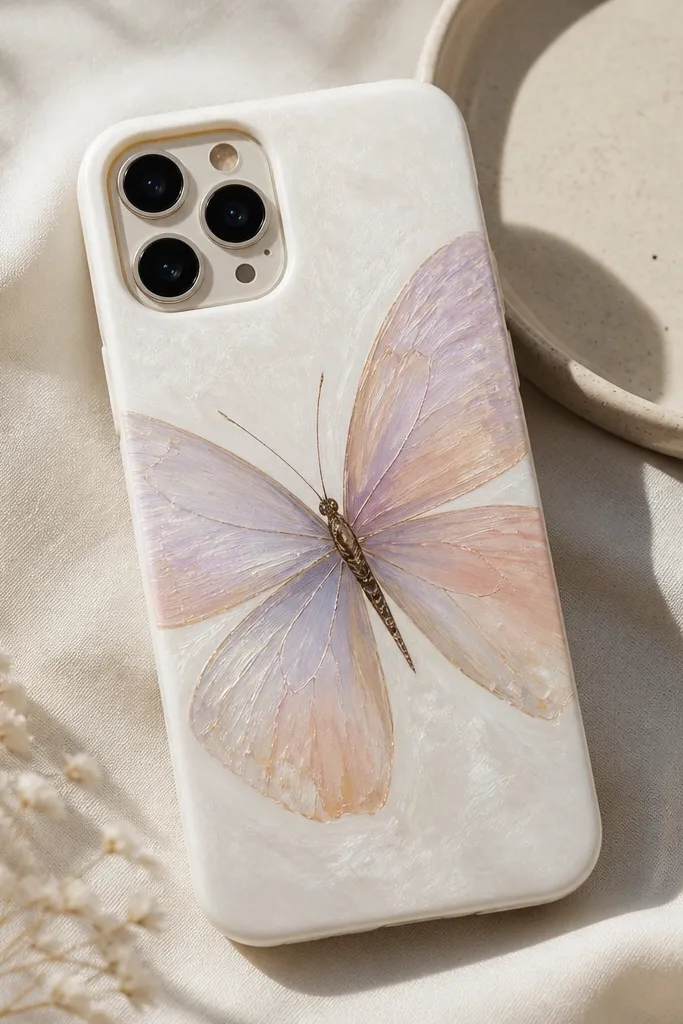
Painted butterflies look luxurious when the background wash is pearlescent and the lines are clean. Use pearlescent acrylic paint diluted with water to create a soft glow behind the butterfly wings. Then paint wings in two tones: lavender on the top wing and peach on the bottom wing. The body should be fine-lined with a dark brown liner so it looks delicate, not chunky. This style flatters neutral outfits and looks especially good on white cases because the wash stays airy.
First, wipe the case with rubbing alcohol and let it dry. Tape a small border around the butterfly area so your wash stays contained. Paint a thin pearlescent wash, then let it dry fully before adding butterfly wing shapes. Use a fine liner brush for the veins and body, then seal with two thin coats of clear topcoat.
Quick tipMake your first wing layer pale; the second layer is where you build color depth.
One warningAvoid painting the whole case — keep the wash behind the butterfly so it looks intentional.
13. 3-Layer Lace Wings with Tiny Pearl Drop Cluster
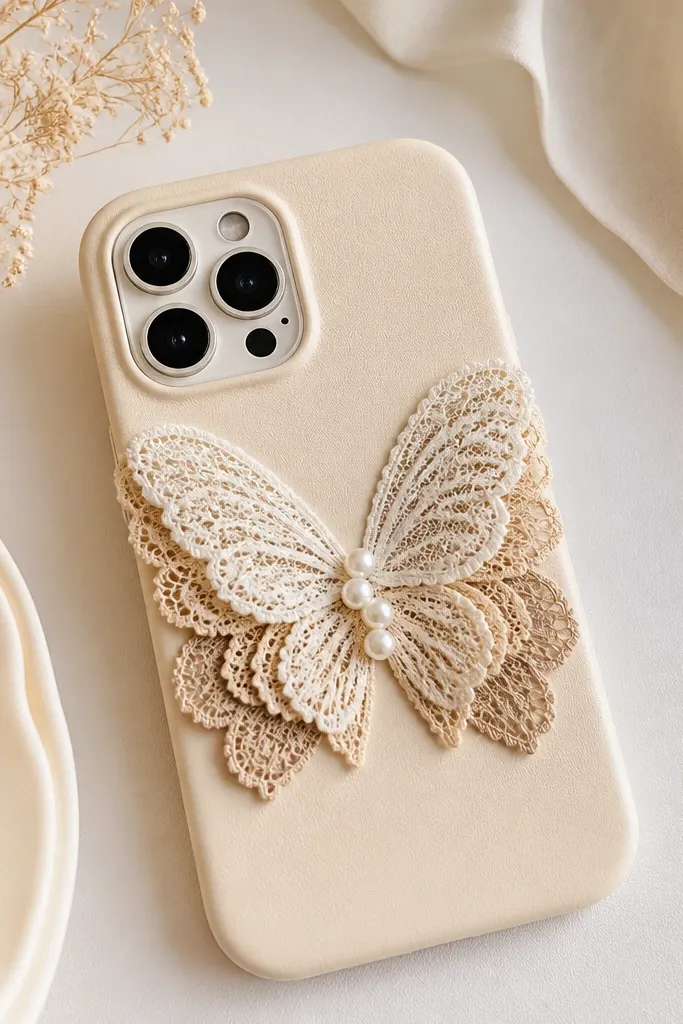
This is a “soft luxury” butterfly. Three lace layers create shadow and depth without adding bulky foam, so it sits flat enough for daily use. Use off-white for the top layer, champagne for the middle, and beige for the bottom edge so the wings look dimensional. The center gets a tiny pearl drop cluster — 6-10 small pearls — so it looks like a jewelry clasp. It flatters warm skin tones because champagne and beige look harmonious. This design also looks classy on kids' phone cases because lace is still light and easy to handle.
First, cut three wing layers from lace, each slightly smaller than the previous. Glue the bottom beige layer first, then the champagne layer, then off-white on top, keeping the wing tips aligned. Build the body with a small strip of satin and glue the pearl cluster at the center. Seal with a glossy topcoat, but keep it thinner around the wing edges so lace texture stays visible.
Quick tipIf lace frays, trim with zigzag scissors so the edges look intentional, not damaged.
One warningDon’t use only one lace layer; it looks flat and reads like a sticker.
14. Black-and-White Butterfly with Faux Resin Outline
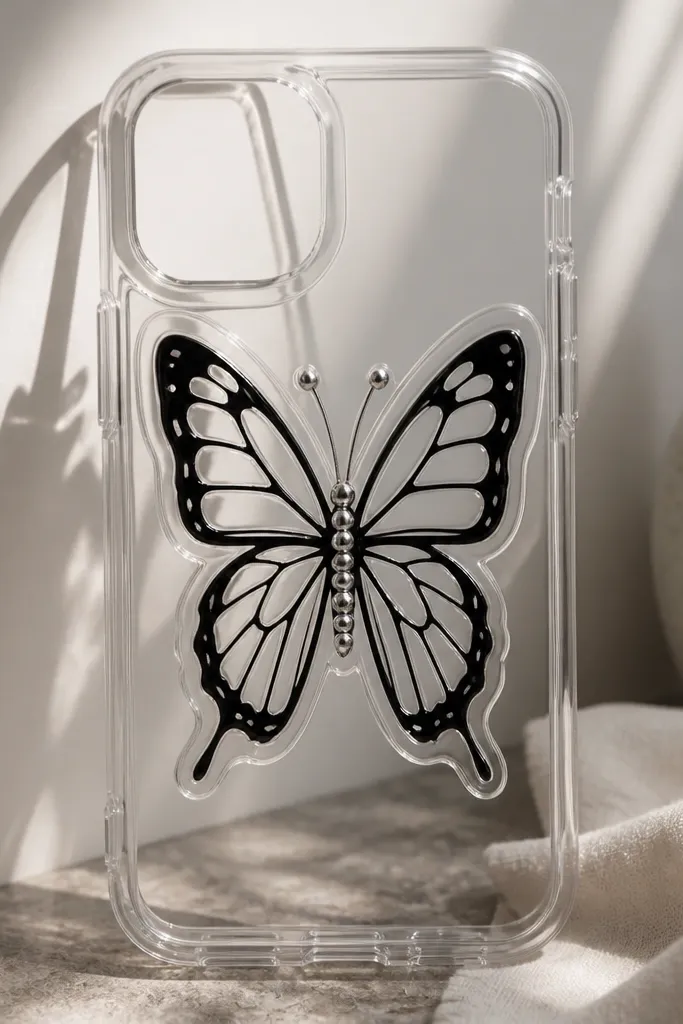
High-end contrast is the whole point here. Use a black-and-white butterfly cutout (you can print and then laminate or use scrapbook paper) and outline the wings with a glossy clear gel or faux resin product. The thick outline makes the butterfly look encased, like those luxury charms you see on designer phone accessories. This style flatters monochrome wardrobes and looks sharp on people who wear silver or white gold jewelry. It also works on clear TPU cases because the background stays clean and the outline does the drama.
First, create your butterfly silhouette from black-and-white paper and glue it flat onto the center of the case. Then outline the wings with clear gel — squeeze a controlled bead and pull it along the wing edges using a toothpick to shape. Let it level for a few minutes, then add a second thin outline pass so it looks like a dome. Finish with a light overall topcoat so the gel outline doesn’t snag on fabric.
Quick tipPractice on a scrap first — the outline needs a steady squeeze to avoid wobbly edges.
One warningAvoid thin outline only; it looks like accidental glue instead of a charm.
15. Pastel Butterfly on Glossy Acrylic Paint Background
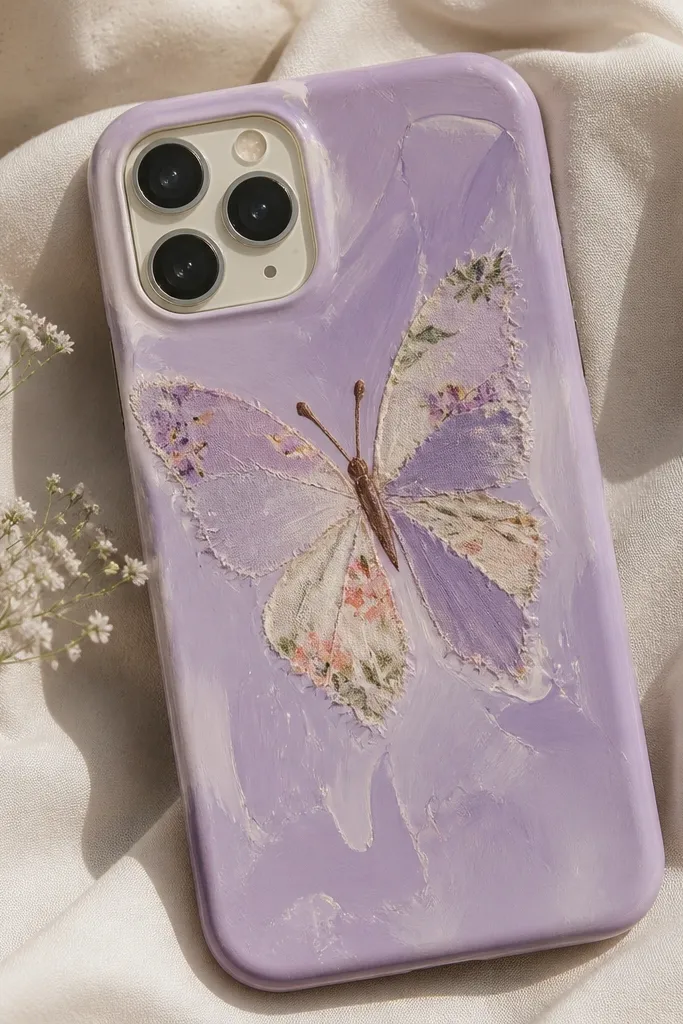
This one looks like a designer mural because the background is glossy and the butterfly sits on top like a sticker that’s been professionally sealed. Use a pastel acrylic paint wash in lavender or mint, then add a butterfly made from tiny fabric pieces in coordinated shades. The fabric pieces should be small and layered so the butterfly looks like it has a pattern, not solid blocks. This style flatters people who wear pastel nails and light makeup because the whole look stays soft and clean. It’s also great for kids because the background hides small imperfections.
First, paint a thin glossy wash on the case using acrylic paint mixed with a drop of clear gloss medium. Let it dry until tacky, then cut butterfly wings from fabric scraps and glue them down. Use a slightly darker fabric for the top wing and a lighter one for the underlayer so you get contrast. Seal the entire butterfly area with two glossy topcoat layers, keeping the edges smooth so it doesn’t peel.
Quick tipUse a foam brush for the background; it keeps the wash from streaking.
One warningAvoid matte paint under the butterfly; it makes the sealed butterfly look pasted on.



