
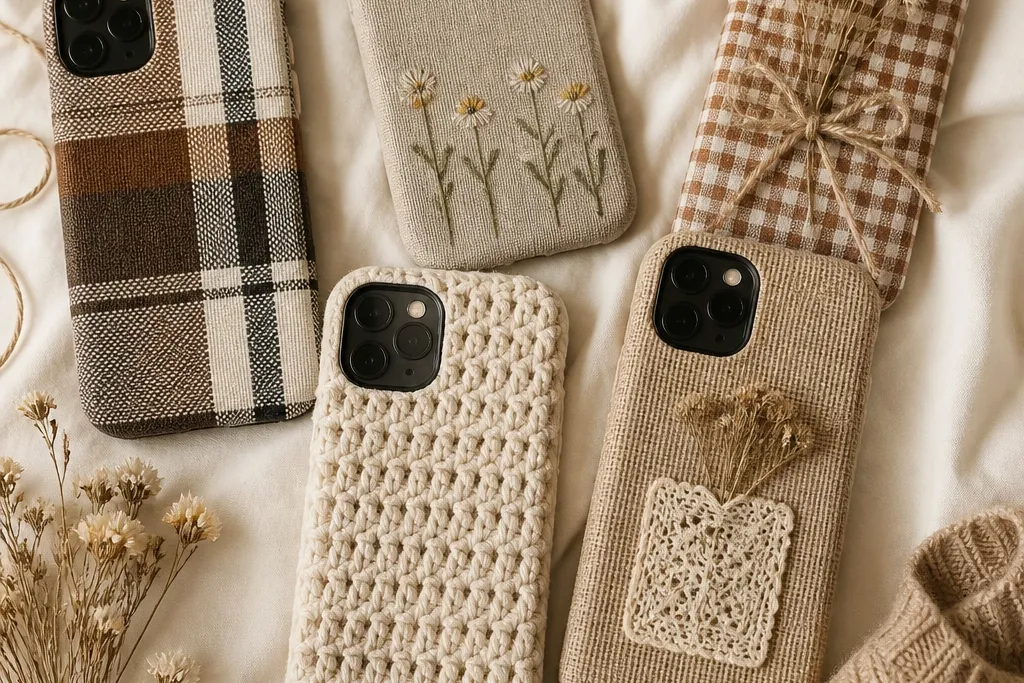
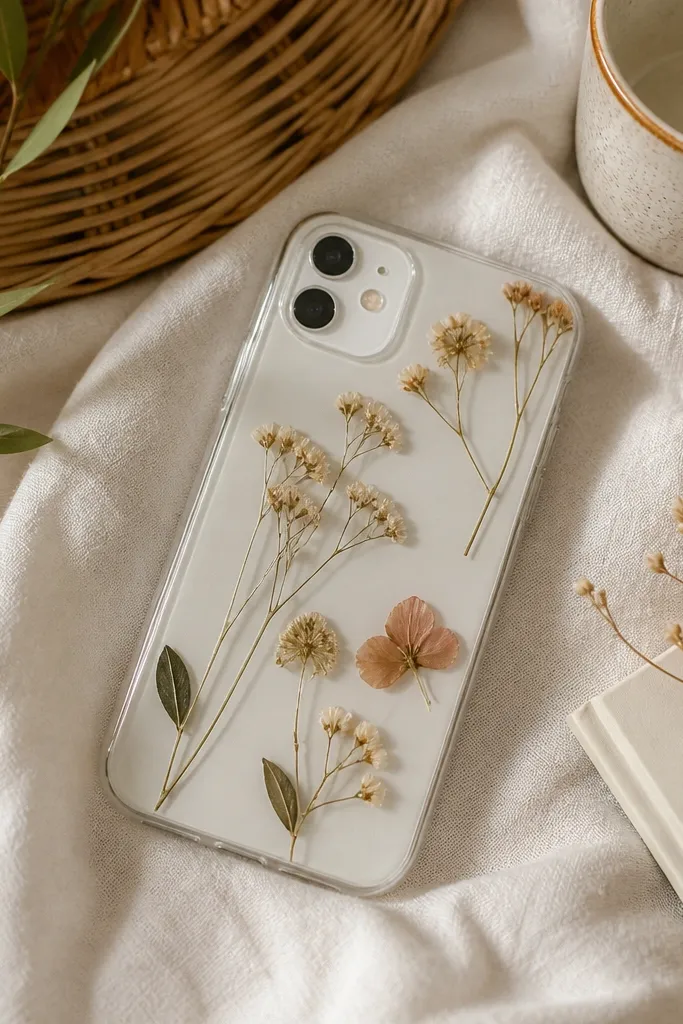
1. Oatmeal Cloud Felt Panels with Stitch Lines
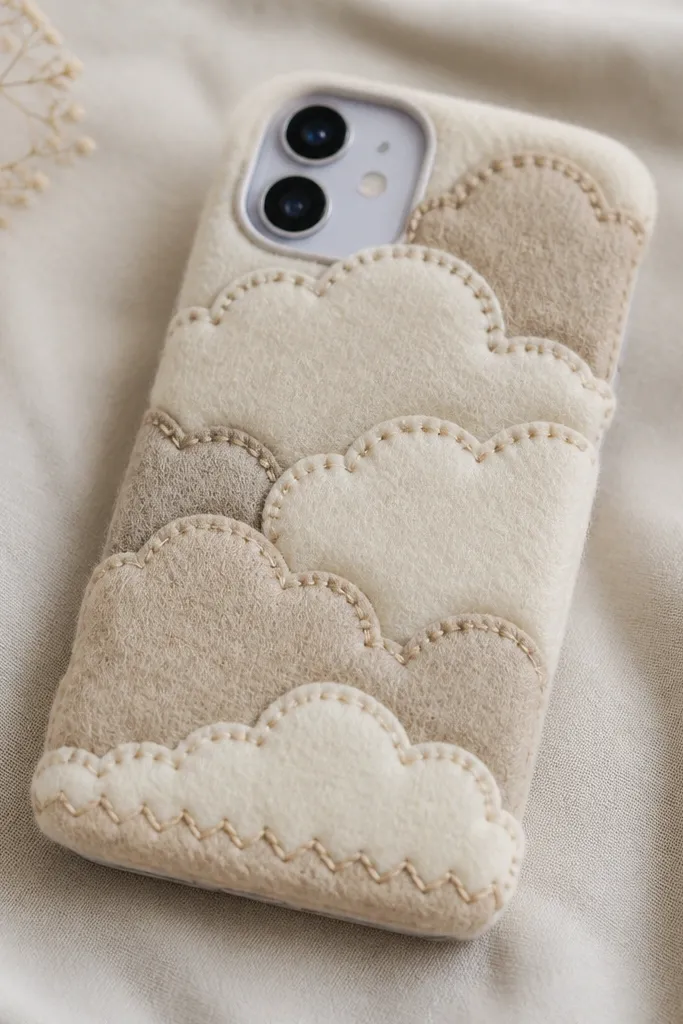
I like this one because the clouds catch light like fabric, not ink. I use two shades of felt — cream on top and oatmeal underneath — then stitch along the cloud outlines so the edges don’t lift. The warm aesthetic comes from the color temperature plus the fuzzy wool texture. It reads cozy even in harsh overhead light because the felt surface is matte and soft.
Start with a slim TPU case. Cut 3 cloud layers: one large center cloud (about 70% of the phone width), and two smaller side clouds. Glue felt with fabric glue, then run a simple whip stitch around each edge using 6-strand embroidery floss. Seal any raw felt edges with a tiny brush of glue so it doesn’t shed.
Quick tipUse a paper template for the cloud shape so both sides match when you glue.
One warningDon’t glue right up to the TPU edge — leave a 1 mm gap for flex so corners don’t peel.
2. Caramel Cable Knit Stripe with Fleece Backing
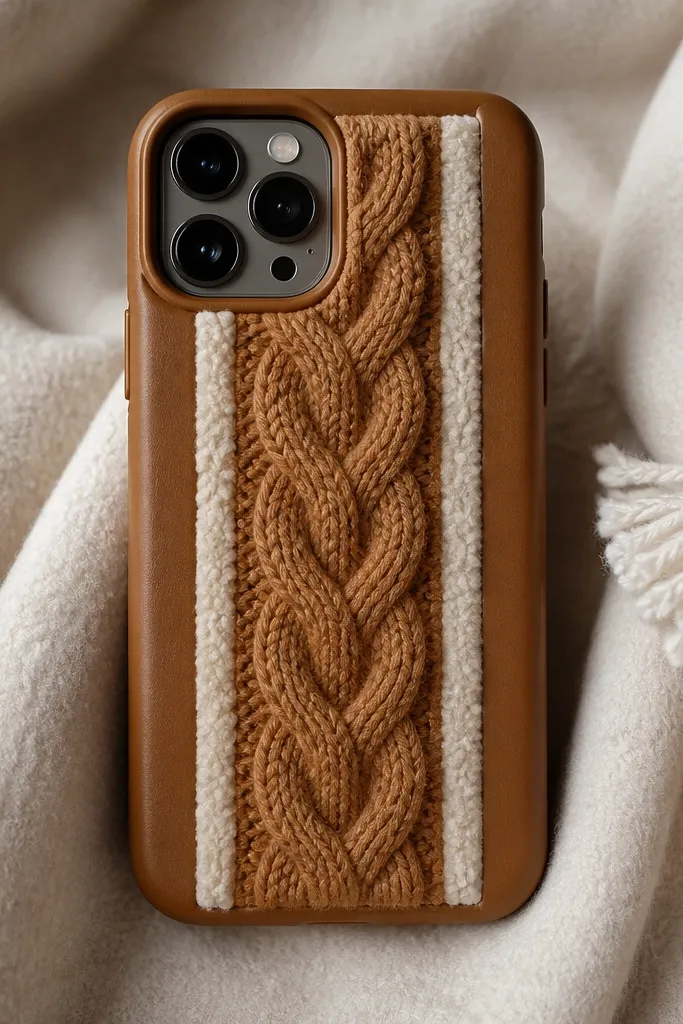
This gives you that “wrapped in a sweater” look without making the whole case thick. The trick is backing the knit with fleece so it stays flat and doesn’t stretch out of shape. I use a single vertical stripe — it looks intentional instead of patchy. Warm aesthetic comes from caramel brown plus the slight fuzz of fleece.
Cut a knit strip 10-12 mm wider than the area you want (usually the phone’s center panel), then trim it so it sits flat behind the camera cutout. Glue fleece underneath first, then glue the knit on top. Keep the stripe thickness under 3 mm total by compressing the knit when you glue and trimming bulk from the backing.
Stitch the top and bottom edges of the stripe with matching thread so it never shifts in pockets.
Skip stretchy knit edges that you don’t stabilize — they curl and look wavy fast.
3. Dusty Rose Scalloped Felt Border
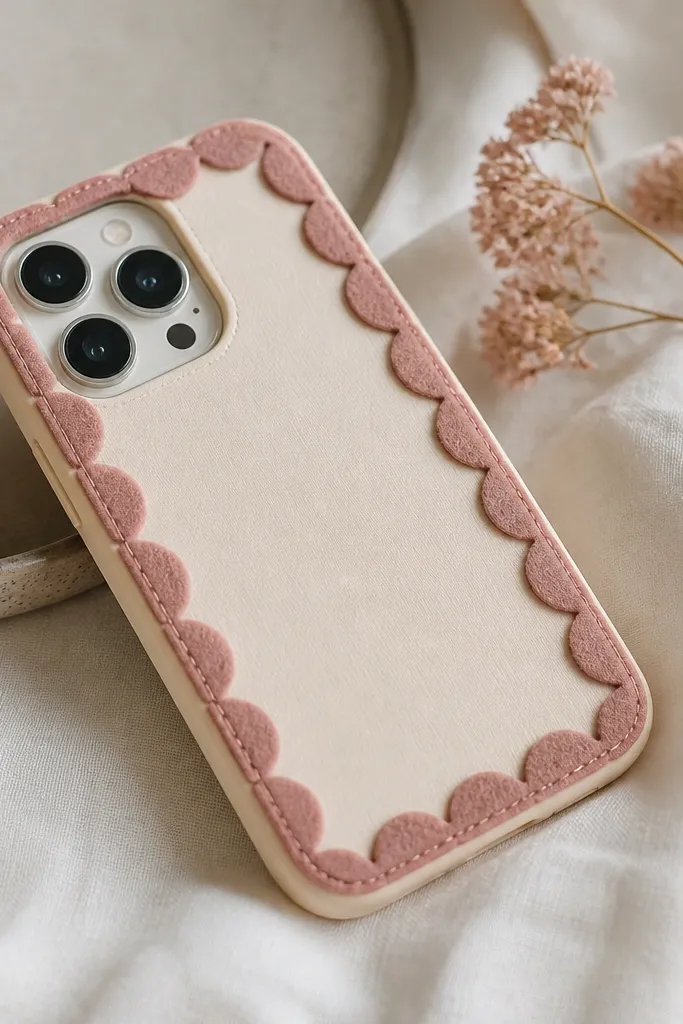
Scallops look cozy because they create repeated soft curves, the kind your hand naturally associates with blankets. I keep the border thin and raised, so it protects the screen and also frames the phone like a miniature quilt. Dusty rose warms up cream without going bright. The matte felt texture reads cozy up close.
Cut scallops from 2 mm wool felt using a circle template (I use a 12 mm circle for small scallops). Glue around the perimeter in a single ring. Build height only at the top lip: add an extra felt strip under the top scallops to raise the edge about 1.5-2 mm.
Press the glued scallops with a clean ruler wrapped in cloth for 30 seconds each section so they bond flat.
Don’t make scallops too big — large pieces create gaps and make the case look handmade in a messy way.
4. Chocolate Bunny Ear Keychain Patch
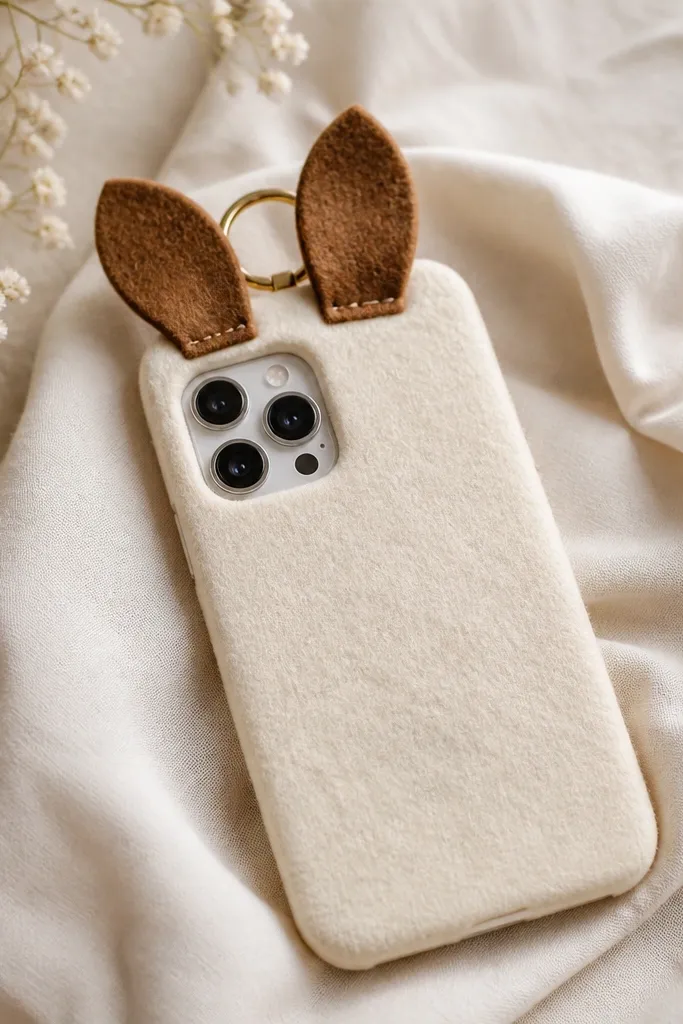
This is cozy and kid-friendly because it’s playful but anchored. Felt bunny ears give that warm “winter animal” vibe without adding heavy bulk. I stitch the base down so the ears don’t flop. Chocolate + cream looks warm in photos and real life.
Use a cream felt full-cover panel over a TPU base, leaving camera and flash openings. Cut two ear shapes from chocolate felt, 32 mm tall each, then stitch the base to the panel before gluing. Attach a small keychain ring or loop behind the base only if you want it — keep it short so it doesn’t snag.
Quick tipAdd two tiny embroidered dots for eyes using backstitch so it looks like a printed face even though it’s stitched.
One warningAvoid glue-only ears; they lift when a kid tugs at them.
5. Oat + Rust Pocket Mittens
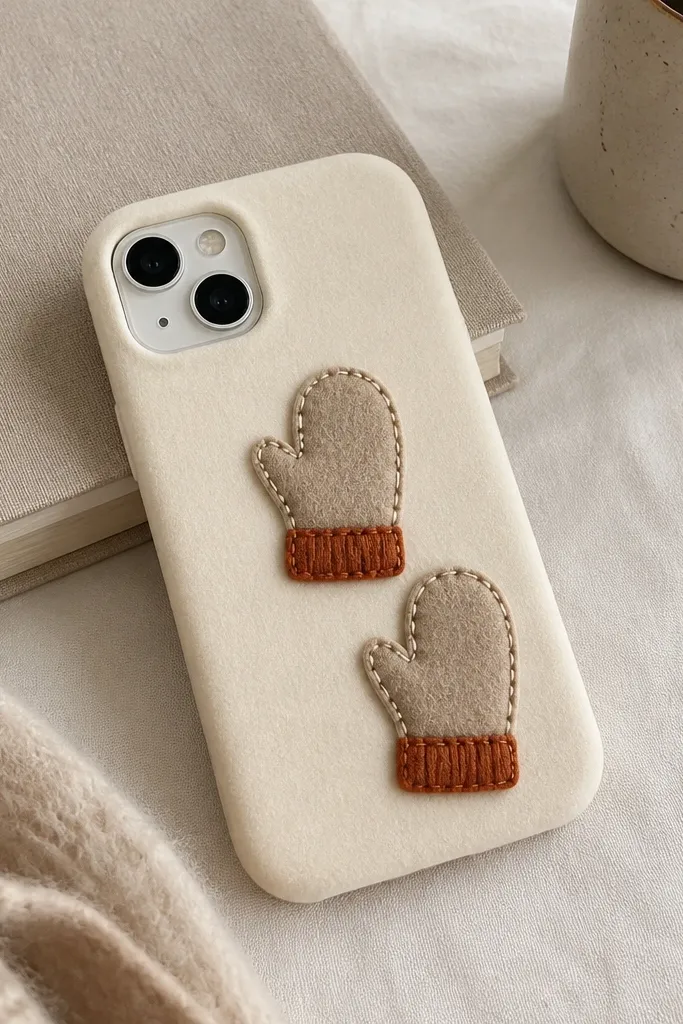
Pocket mittens are cozy because they read like actual clothing pieces. The oat felt is soft and warm, and the rust cuff adds that autumn color pop. I place the mittens low enough that fingers don’t rub them constantly. The stitched edge gives it a “made by hand” look that still feels neat.
Cut two mitten pieces from 2-3 mm felt: oat for the main part, rust for cuffs (cuff height about 8-10 mm). Glue cuffs first, then glue mittens. Use running stitch or blanket stitch with tan thread around the full outline. Keep the stitches tight and skip gluing under the stitch line so the felt stays flexible.
If you’re making these for kids, keep mitten size under 45 mm wide so it doesn’t catch on pockets.
Don’t add thick batting behind the mittens; it makes them wobble and peel.
6. Soft Tan Faux-Waffle Wrap with Corner Tabs
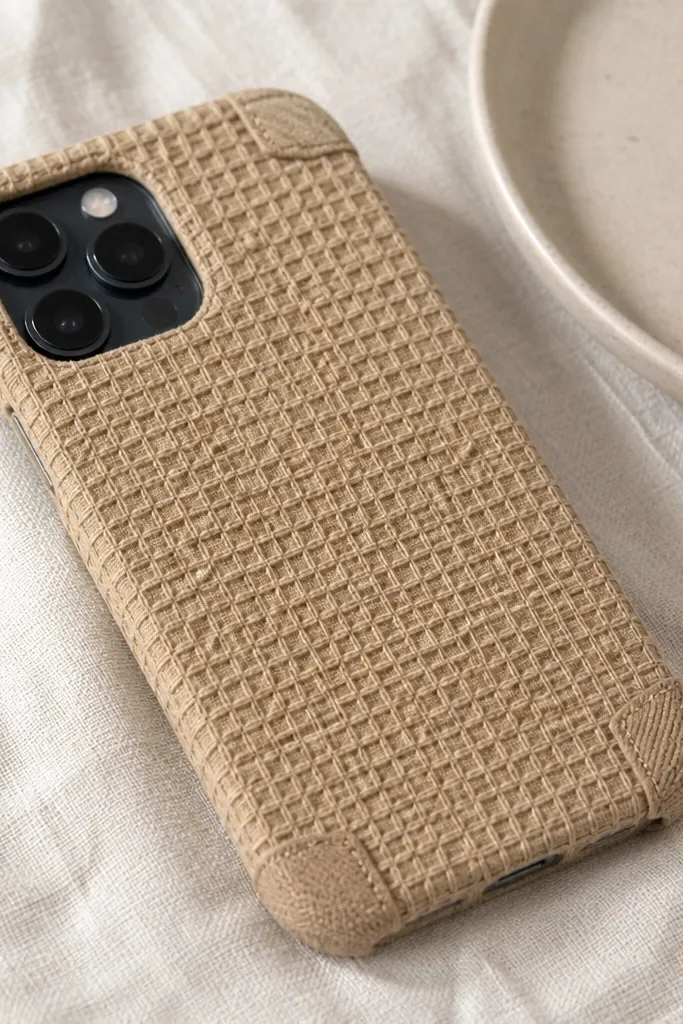
Waffle texture reads cozy fast because it creates tiny shadows across the surface. I like this wrap style because it looks store-bought but you control the warm tone. Corner tabs stop the biggest DIY failure — the fabric lifting at corners. Tan is forgiving and hides minor scuffs.
Cut fabric strips to cover front and back panels separately. Use a fabric with a tight weave (cotton waffle or waffle fleece). Seal the cut edges with fabric glue, then fold corner tabs over the TPU edge. Stitch the tabs with thick thread (button thread works) so they stay locked even when the phone flexes.
Quick tipTrim fabric openings for camera with a sharp craft knife after you glue a test patch first.
One warningDon’t stretch the fabric while gluing — it will distort the camera cutout and look uneven.
7. Cream Pom-Pom Trim Around the Back Edge
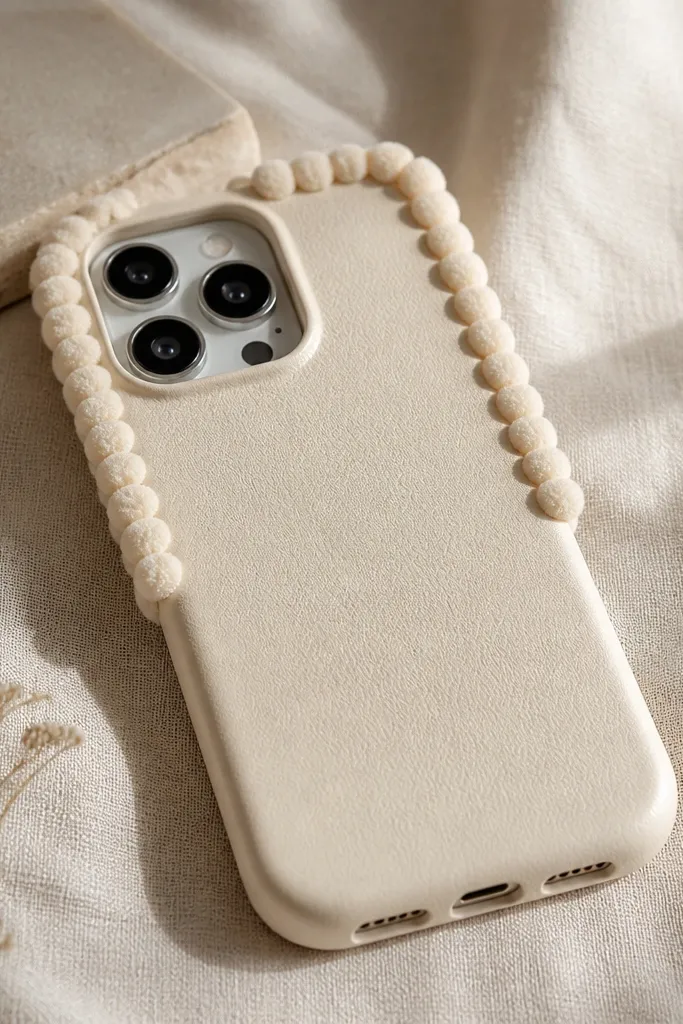
Pom-poms create real warmth because they add fuzzy highlights that look cozy even without color changes. Keep the trim only on the back edge, not across the whole phone, so it doesn’t get snagged. Cream + a single warm accent color looks cohesive. I use tan thread to stitch the trim onto a felt-backed panel so it feels sturdy.
Glue a thin cream felt strip to the TPU back edge first. Then stitch pom-pom trim onto the felt strip along the top and sides, leaving the bottom open. Use small stitches through the felt and trim backing, not just the pom tops. If your trim is too tall, trim the pom length with scissors before stitching.
Add a tiny dot of glue under each pom base before stitching to stop shifting.
Don’t run trim all the way around — bottom pom-poms catch lint and wear down first.
8. Warm Window Scene with Felt Hills and Vinyl Sun
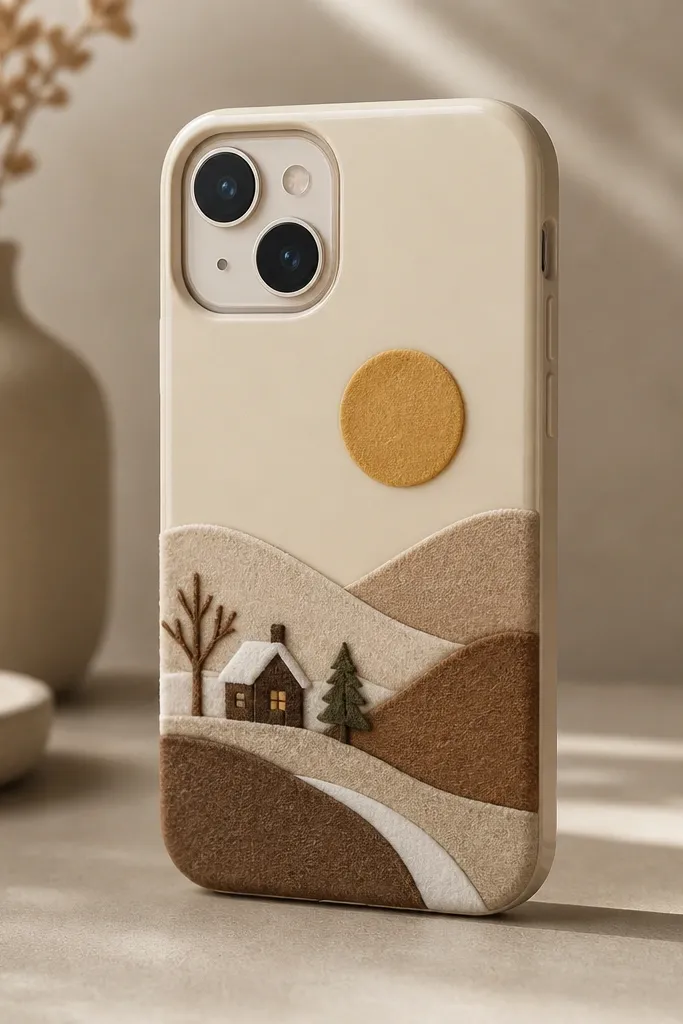
This one looks cozy because it’s layered like a diorama. Felt hills give depth and texture; heat-transfer vinyl adds a clean sun shape that doesn’t fray. Warm aesthetic comes from cocoa + oat + butter yellow. It also stands up to daily handling because the scene sits flat under a protective layer.
Cut three felt hill layers and glue them from front to back, with the back hill about 8-10 mm taller. Cut the sun from heat-transfer vinyl (I use a 35-40 mm circle). Press the vinyl on a small scrap first to dial in time and pressure, then apply to the case. Finish with a thin clear protective film over the scene area if you want extra durability, especially for kids.
Use a toothpick to spread glue under felt layers so you don’t squeeze glue out and create shiny spots.
Avoid placing the scene where the case bends — vinyl cracks if it gets flexed repeatedly.
9. Rust Bow Tie Accent on a Cream Felt Base
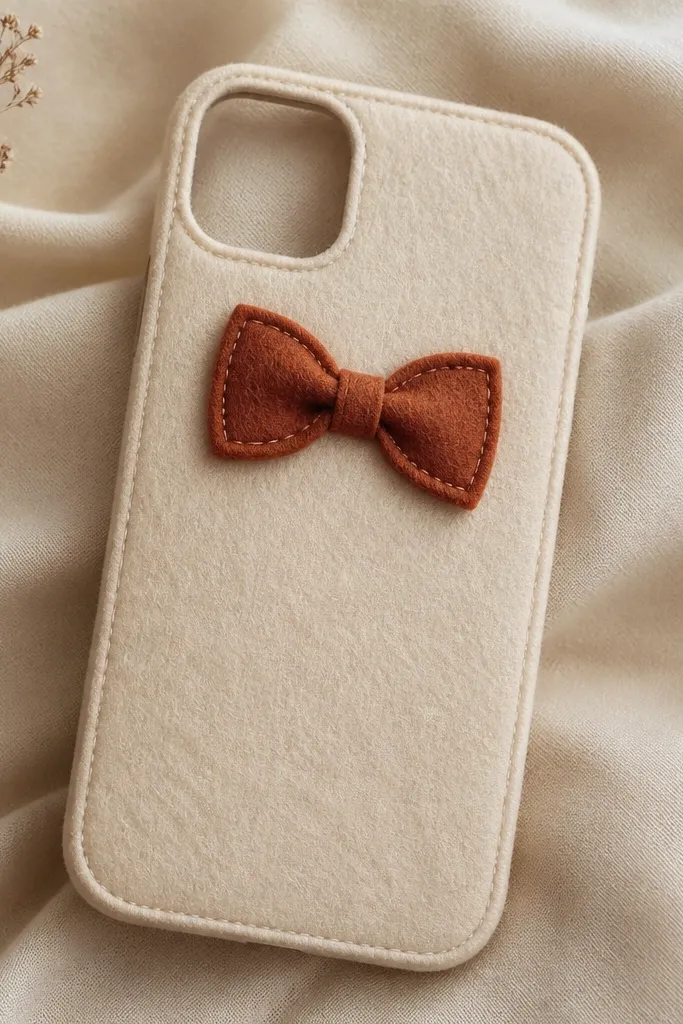
A bow looks cozy when it’s made from felt and stitched, not when it’s printed. The warm aesthetic is the rust color against cream, plus the soft matte felt texture. I keep the bow small and flat so it doesn’t snag on sleeves. It’s also easy to swap by making multiple bows in different colors.
Cover the back with cream felt over TPU. Cut a bow template: two loops about 28 mm wide each, and a center knot about 12 mm wide. Stitch around the edges with rust or tan thread. Glue the bow only at the back center so the loops stay slightly raised.
Make the bow slightly off-center — it looks more natural and less like a sticker.
Don’t use hot glue directly on felt edges; it can soak through and leave hard bumps.



