
1. Neon Tape Grid With Black Base
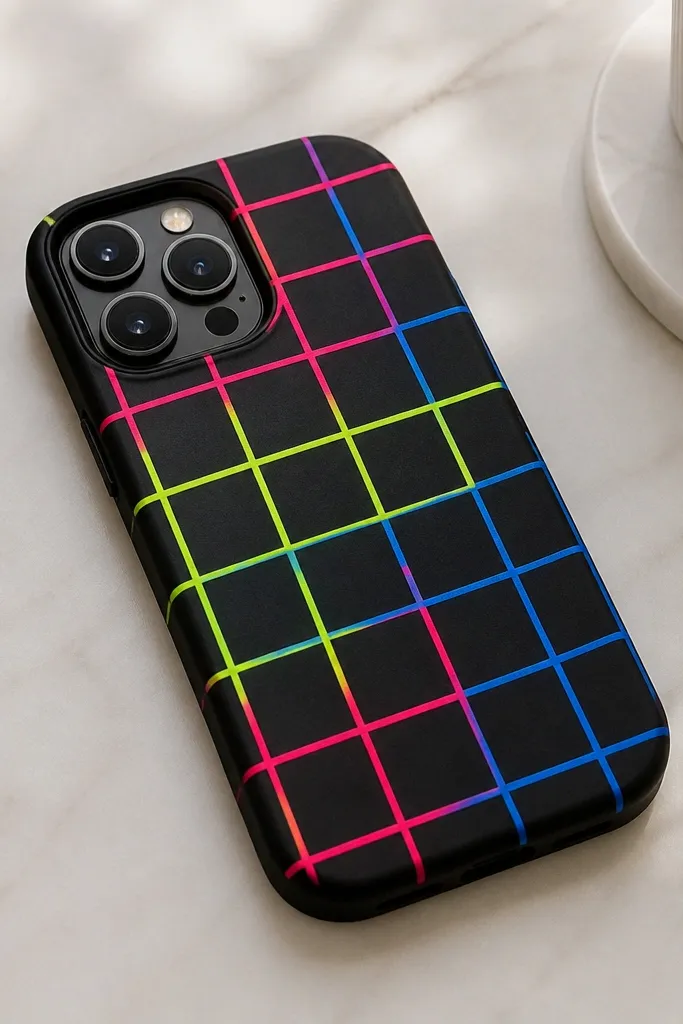
This one looks graphic and modern because the lines stay razor-sharp. The black base makes neon colors pop, and tape creates straight boundaries without a ruler obsession. I paint over tape lightly, peel when the paint is still just tacky, and the edges stay crisp instead of jagged. It looks especially good on matte black cases because the neon doesn’t reflect too much.
Quick tipPress the tape down with a fingernail so paint can’t creep under it. If you have a hair dryer, warm the tape for 10 seconds before peeling for cleaner edges.
Use a hard-shell case, sand it lightly with 320 grit, then wipe with rubbing alcohol. Stick painter’s tape in a grid, leaving 2-4 mm gaps where you want color. Paint each section with neon acrylic, 2 thin coats, then peel tape carefully after the second coat is touch-dry. Leave the camera cutout area unpainted so the camera ring stays clean.
One warningDon’t peel tape after the paint fully cures or you’ll pull up chunks along the edges.
2. Pastel Galaxy Swirl Clouds
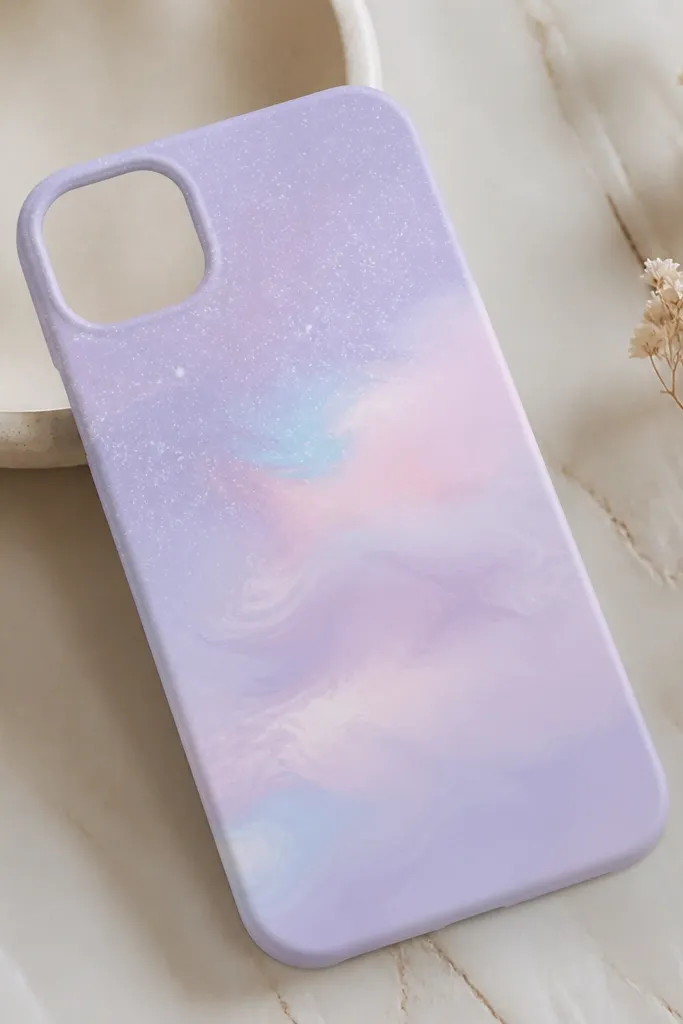
Pastel galaxies look dreamy without looking messy, and they hide small brush mistakes. The swirl effect comes from layering watered-down paint in curved strokes, then blending with a dry sponge. Tiny white speckles make it feel like stars without needing glitter. This style also works well for kids because you can use big curves instead of fine lines.
Quick tipPractice your swirl motion on a paper towel first so your curves stay smooth.
Start with a white or very pale lavender base. Sponge on baby blue and pale pink in broad arcs, then drag a damp brush through the middle to blend. Add speckles with a toothbrush flicked over the case from 6-8 inches away. Seal with 2-3 light clear coats so the pastel doesn’t get dull.
One warningDon’t overwork the wet paint or the colors turn muddy.
3. Gold Leaf Look Using Metallic Acrylic and Foam
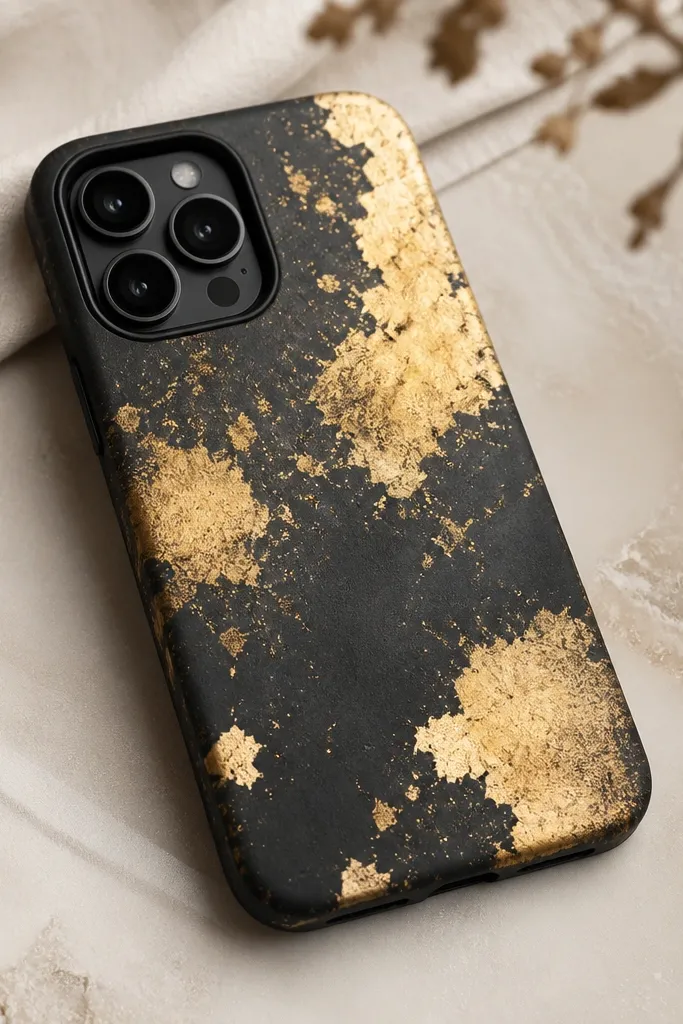
You get a luxury feel without real gold leaf. Metallic acrylic lays down in textured chunks when you dab it on with foam, so it looks like torn leaf pieces. The dark base keeps the gold warm and expensive-looking. I like this for winter outfits and evening bags because it catches light in small areas.
Quick tipUse a paper towel to blot the sponge first so you get speckled edges instead of thick streaks.
Sand the case lightly and wipe clean. Dab metallic gold acrylic using a small foam sponge, working in random shapes about 1-2 cm wide. Leave some charcoal showing so it doesn’t turn into a uniform gold blob. When dry, add a second layer only on the highest spots, then seal.
One warningDon’t brush metallic paint hard — it creates visible lines.
4. Botanical Line Art With Black Ink Pen Over Paint
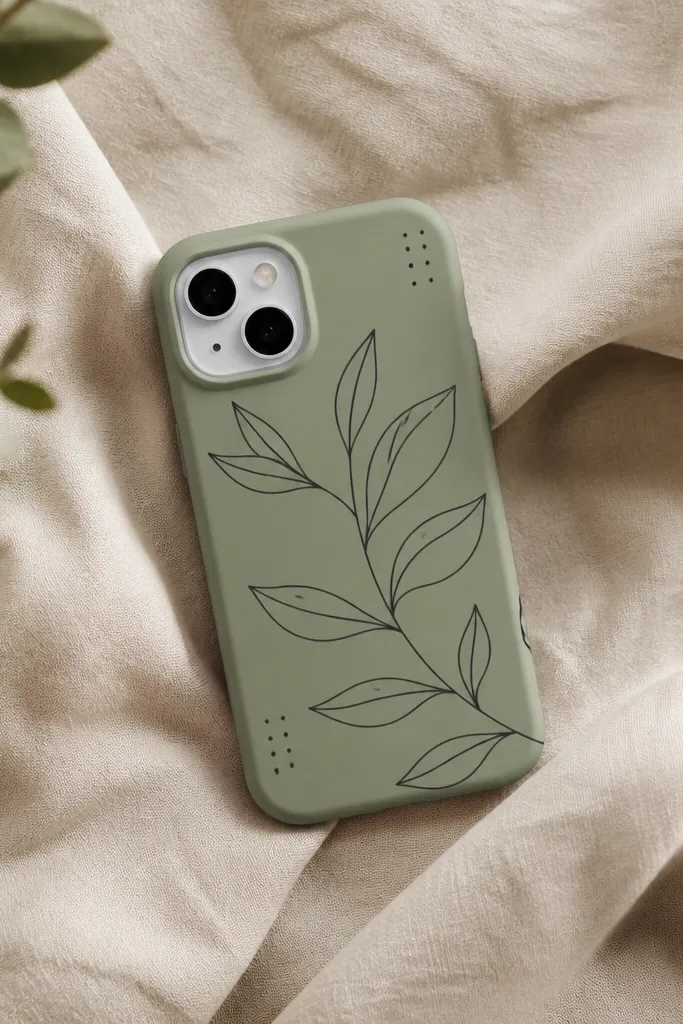
Fine line botanicals look clean and grown-up, and the contrast is what sells it. The sage base makes black ink feel crisp, not harsh. I paint the background first, then draw the line art with a waterproof black pen so it doesn’t bleed. This style also works for small phones because the design can be centered and simple.
Quick tipIf the pen smears, wait 10-15 minutes longer and test on the underside of the case edge.
Paint the case sage using acrylic, 2 thin coats. Let it dry fully, then use a waterproof fine liner (like 0.3-0.5 tip) to draw stems and leaf shapes. Add a few dot accents to balance the composition. Seal with clear coat in light passes to lock the ink down.
One warningDon’t draw on wet paint — ink lines will feather.
5. Color-Block Checkerboard With Two-Tone Contrast
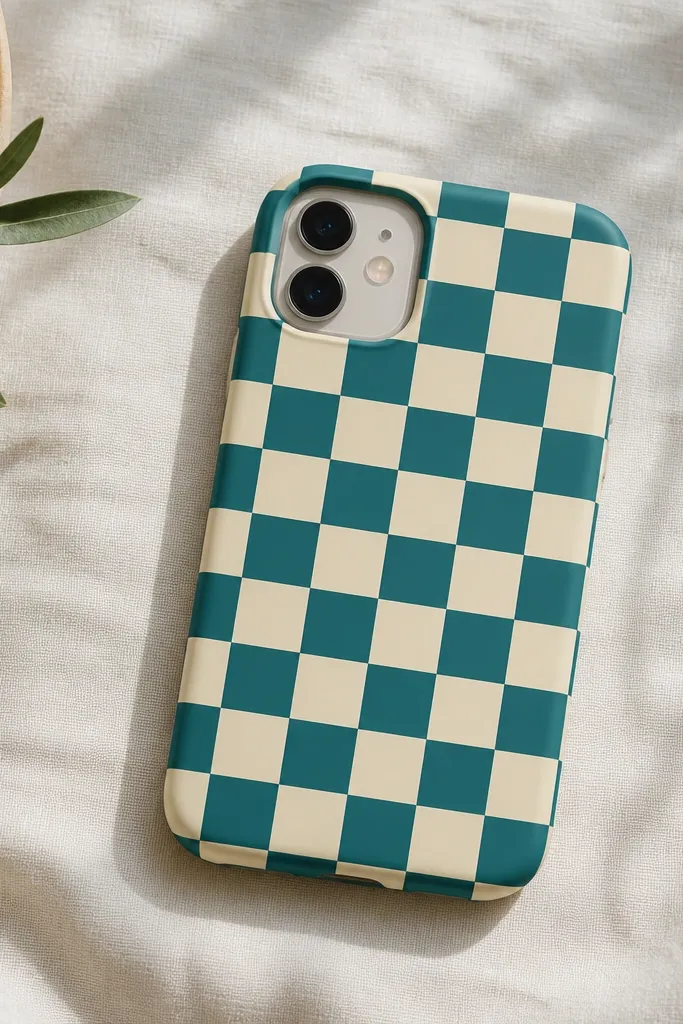
Checkerboards look polished when the squares are the same size, and color-blocking keeps it bold. Teal and cream feel fresh without needing neon. I use painter’s tape for the grid so the pattern doesn’t drift. The case looks like it came from a design shop because the edges stay straight.
Pick two colors with strong contrast. Sand and wipe, then mark the grid lightly with a pencil on the back of the case. Use tape strips to create rows, paint one color, peel, then repeat for the other color. Keep square sizes around 6-10 mm so it fits the case without distortion. Seal after everything dries.
Measure one square width and stick to it — don’t “eyeball” the rest.
Don’t use thick paint for small squares or you’ll lose the sharp edges.
6. Whipped Cream Marble Using Rubbing Alcohol
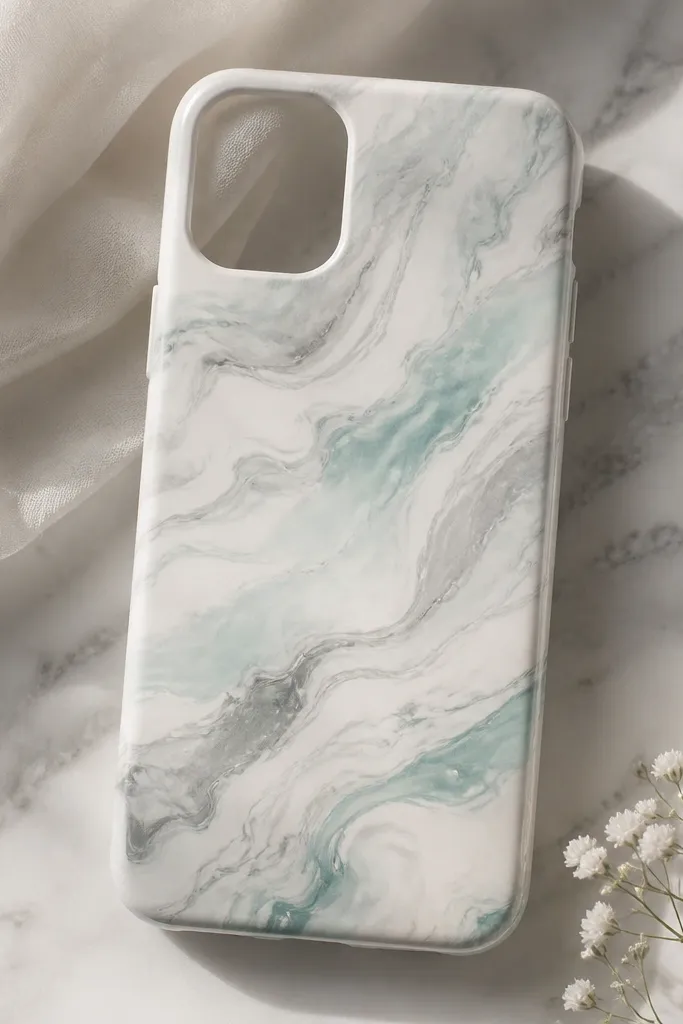
Marble looks hard, but the technique is simple once you’ve done it once. Rubbing alcohol reacts with wet paint and pulls it into thin veins so you get that natural marble look. The “whipped cream” color palette stays light and cute, and it hides fingerprints better than bright pastels. This one has a satisfying organic pattern — every case ends up slightly different.
Quick tipUse small paint drops, not big puddles, or the marble turns into one blob.
Paint a solid white base first. Drop diluted gray and pale mint paint onto the surface while it’s still wet. Mist lightly with rubbing alcohol using a spray bottle and watch the paint move; don’t flood it. Let it dry, then seal with clear coat in thin layers.
One warningDon’t shake the alcohol bottle hard — you’ll splash and smear the whole design.
7. Soft Ombre With Sponge Layers
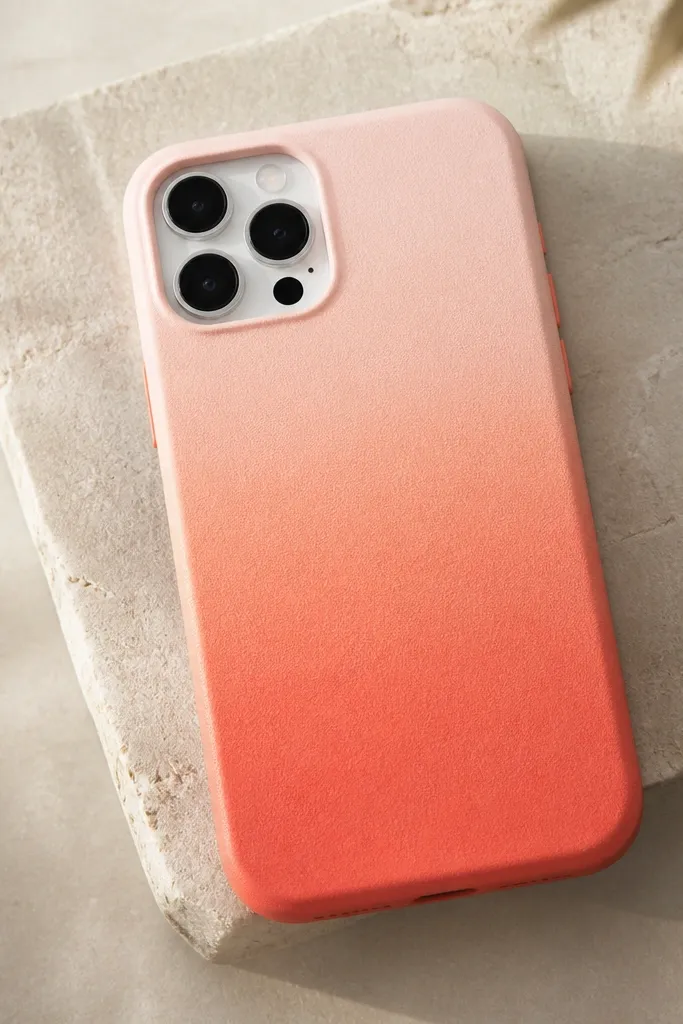
Ombre looks clean when you build it with sponge layers instead of trying to blend with a brush. The texture hides brush marks, so it’s forgiving for beginners. Coral to peach gives a warm, summer vibe that still looks classy. I like this on clear or light cases because the fade looks brighter.
Quick tipWork from dry to wet: start with lighter colors on top and add darker layers below.
Start with a pale base if your case is dark; if it’s light, you can start directly. Dab coral acrylic near the bottom, then sponge peach above it, then pale pink at the top. Use a dry sponge to soften the boundary lines. Seal with multiple light coats so the finish stays smooth.
One warningDon’t keep re-blending the same spot — you’ll lift paint and get patchy areas.
8. Strawberry Jam Dots Over White
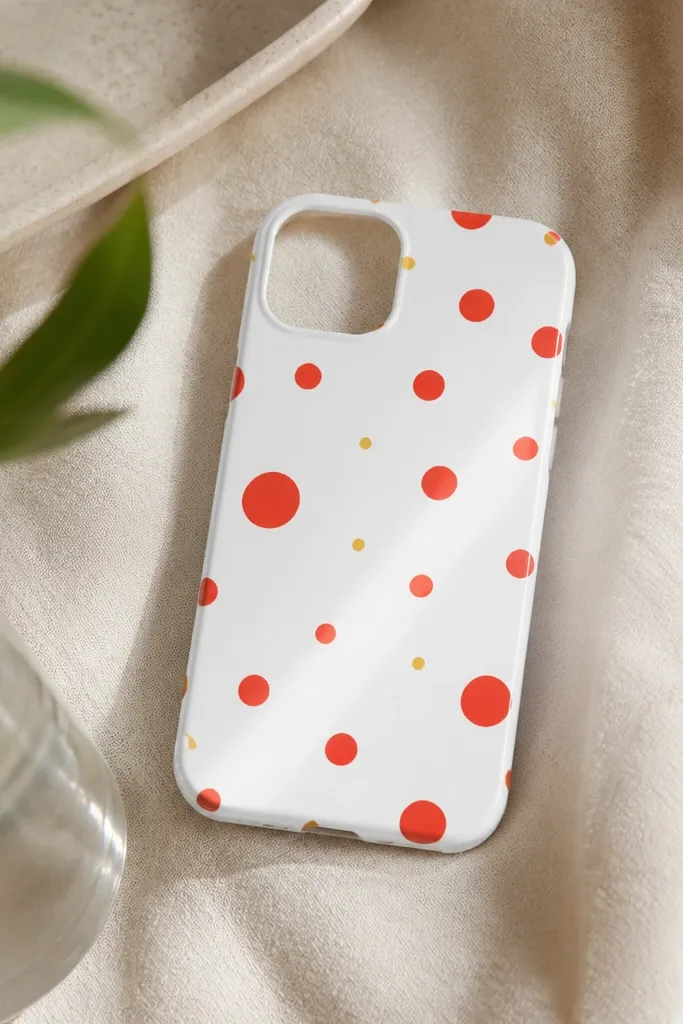
This is the fastest cute cover I’ve made for friends because it’s just dots and it still looks intentional. The varied dot sizes keep it from looking like a sticker sheet. Add a few tiny yellow seed dots and it instantly reads as strawberry jam. It also looks great with a clear case border because the design feels airy.
Quick tipMake a quick dot layout on paper first so your spacing looks balanced.
Use white acrylic as the base. Dab strawberry red dots with the end of a cotton swab, alternating sizes. Add tiny yellow dots for seeds and a small translucent red “smudge” in one corner for depth. Seal with clear coat so the dots don’t dull.
One warningDon’t use one-size dots all over or it looks flat and cheap.
9. Kitty Face Sticker Style Paint
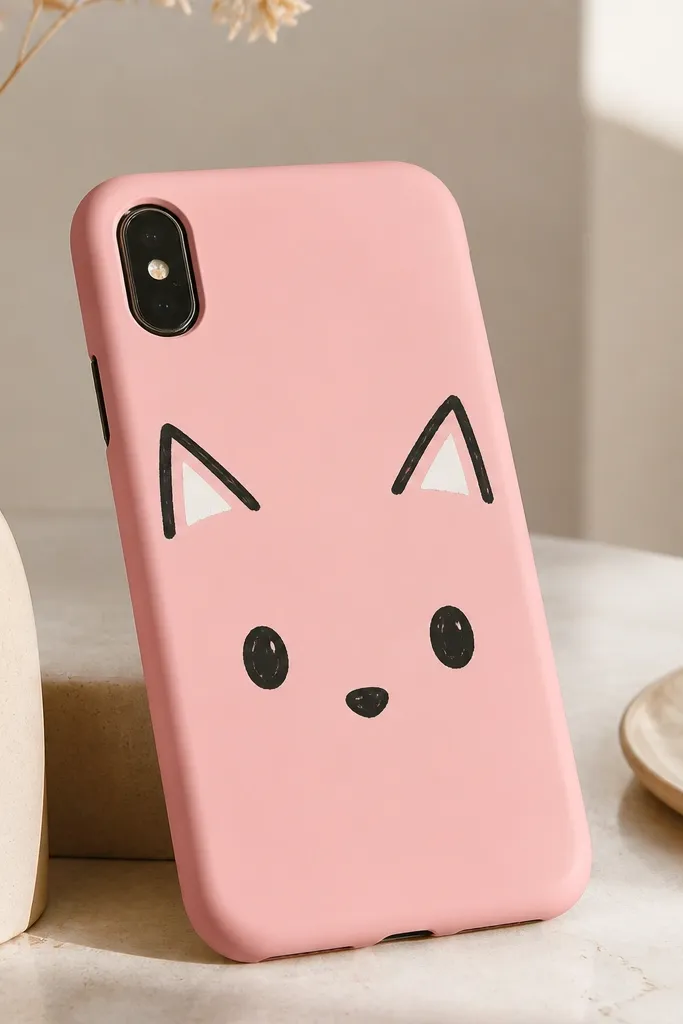
This one gives the sticker vibe without needing a real sticker. Blush base makes it soft, and black outlines keep the features readable. I paint the face in layers: shapes first, then eyes, then a tiny nose. The result looks cute in photos and still holds up in daily use.
Quick tipUse a toothpick for whiskers — it makes thinner lines than most brushes.
Paint the case blush pink and let it dry. Sketch the cat face lightly with pencil, then outline ears and head with black acrylic. Fill eyes with white then add smaller pupils. Finish with a small pink triangle nose and whisker lines. Seal carefully around the edges so the outline stays crisp.
One warningDon’t over-thicken the outline or it will look like a marker doodle.
10. Sunflower Center With Yellow Gel Pen
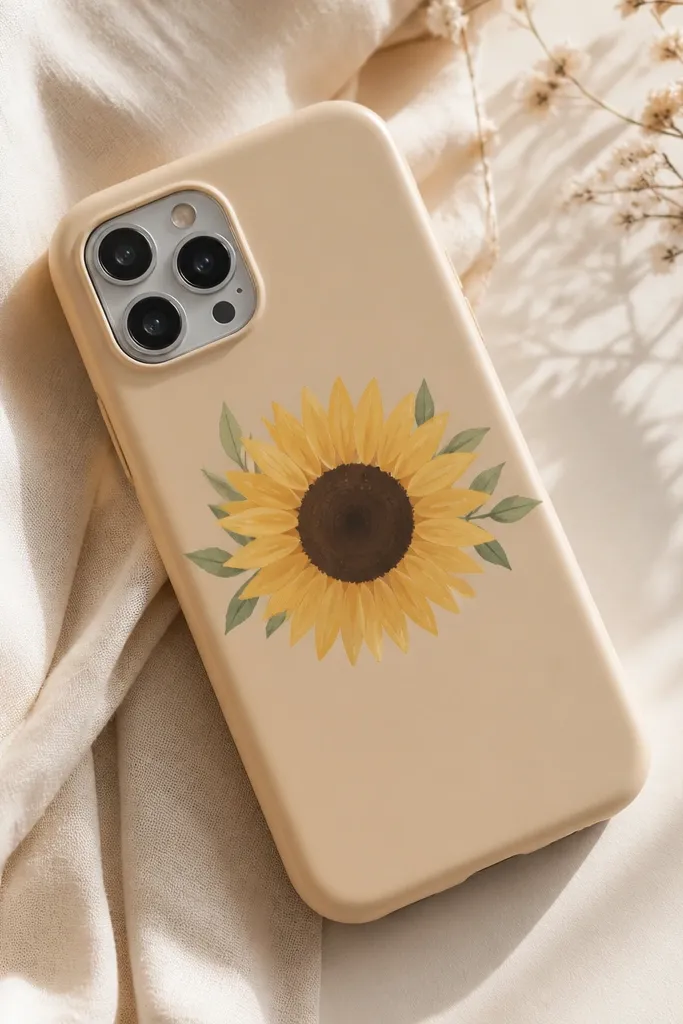
Sunflower centers are forgiving because the eye reads the whole flower even if petals vary. I use paint for the big shapes, then gel pen highlights to make the petals look slightly glossy. Beige background keeps it warm, like paper craft. This cover holds up well because the main design sits flat and doesn’t rely on tiny text.
Paint a beige base. Use a dark brown circle in the center, then paint yellow petals around it with short curved strokes. Add two small green leaves on the sides. After everything dries, trace a couple petal veins with a yellow gel pen. Seal with clear coat.
If your gel pen smears, let the paint cure longer and test on a scrap case first.
Don’t add gel pen details before the paint fully dries.
11. Candy Stripe Vertical Bands
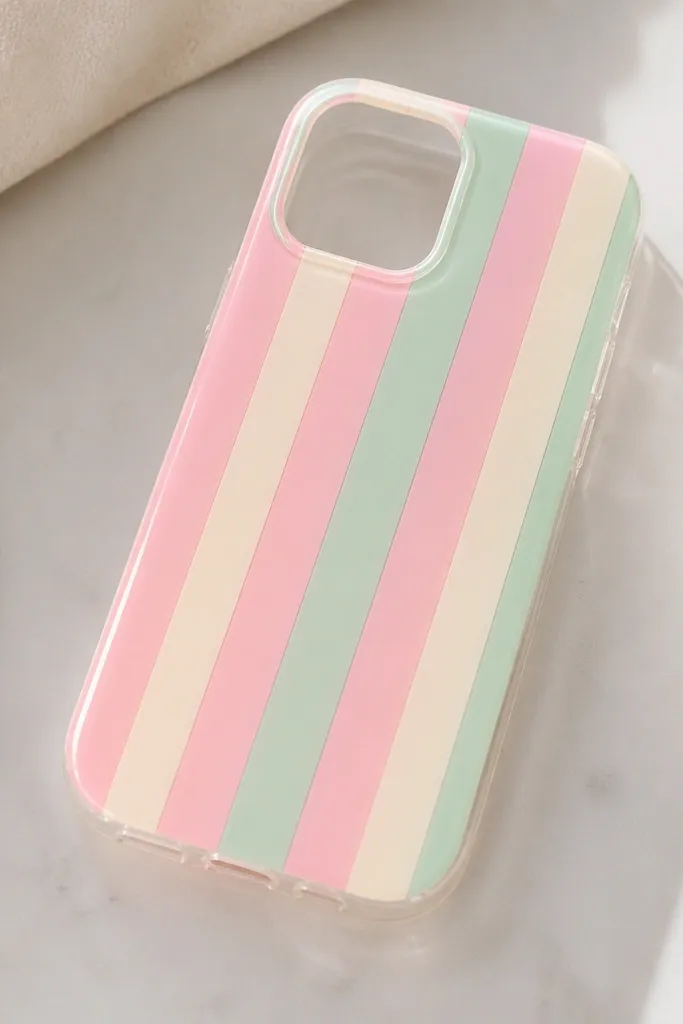
Vertical stripes make your phone look taller and the colors feel playful. Tape stripes keep the lines straight, and the pastel palette looks modern instead of childish. I like this for kids because it’s easy to follow and the stripes hide small uneven brush spots. The gloss top coat makes the stripes look like candy.
Quick tipIf you want a smoother look, use 2 thinner coats instead of one thicker coat on each color.
Sand and wipe the case. Stick painter’s tape down in evenly spaced vertical strips and paint between them with thin coats. Use pink, mint, and cream alternating so it doesn’t look like a flag. Peel tape after the paint is tacky. Seal with 2-4 light clear coats.
One warningDon’t paint under tape more than once — repeated passes can seep and blur the stripe edge.
12. Monogram Sticker Effect Using Acrylic Stencil
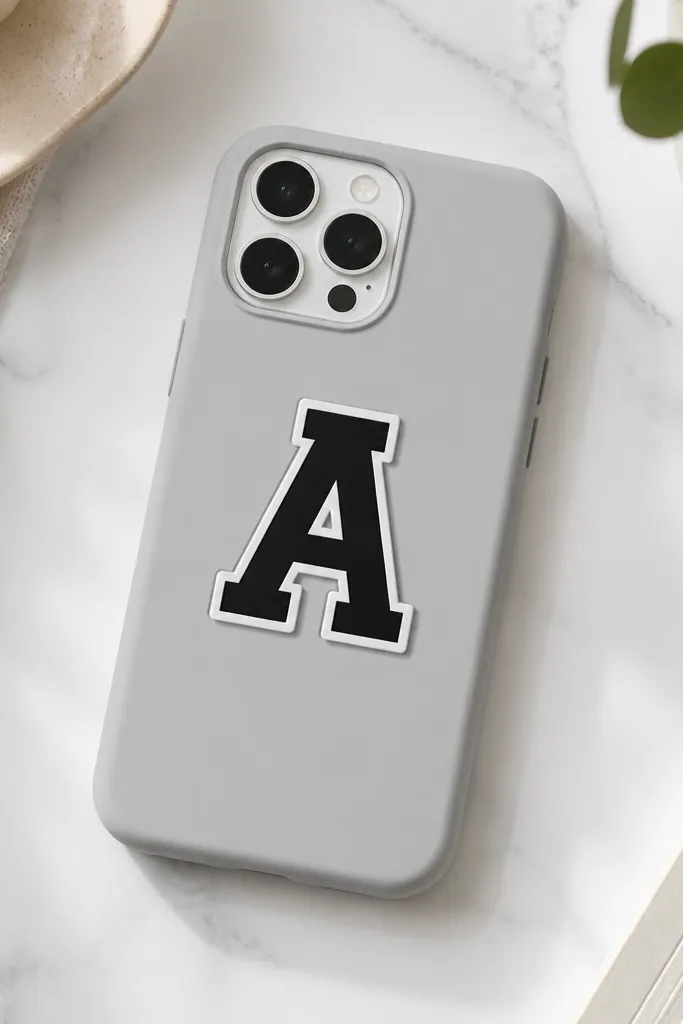
Monograms look classy fast, and the stencil method keeps the letter edges sharp. The trick is building a clean border so it reads like a sticker, even though it’s paint. I use a stencil cut from craft plastic or a stencil sheet and paint over it. This also works for kids who want their initial on everything.
Quick tipHold the stencil flat with painter’s tape at all corners so paint doesn’t creep.
Choose a stencil with thick letter strokes. Paint the base color first, then place stencil and tape it down. Use black acrylic and dab or brush lightly within the stencil, 2 thin coats. Add a white outline by painting just inside the outer edge of the stencil. Seal after drying.
One warningDon’t use watery paint in a stencil — it spreads under the stencil and ruins the edges.
13. Sea Glass Look With Speckled Paint
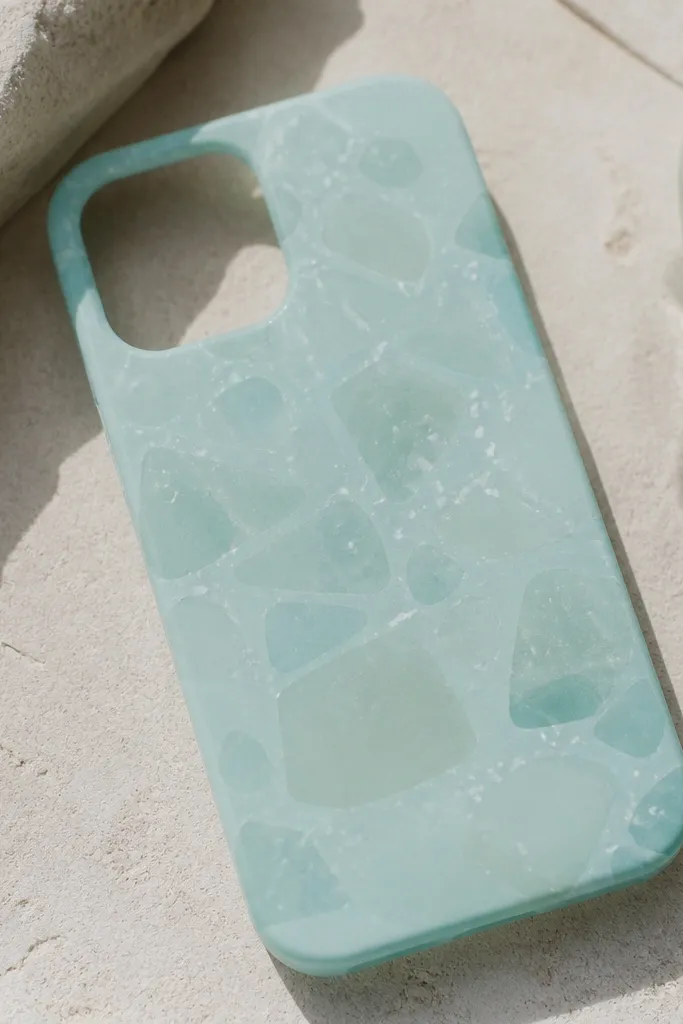
Sea glass patterns are pretty because they look worn and soft, not sharp. The translucent patches come from thinning paint and layering it, and the speckles add realism. Pale aqua and off-white keep it calming. This one hides wear because the texture matches everyday scuffs.
Paint a pale aqua base. Mix aqua acrylic with water (about 1:2) and dab irregular patches with a sponge. Add white speckles with a toothbrush flick. Let it dry, then seal with a clear top coat that doesn’t turn yellow.
Keep your patches uneven — sea glass doesn’t look symmetrical.
Don’t over-saturate the case with thick paint or it loses the translucent look.
14. Cartoon Waves With Toothbrush Texture
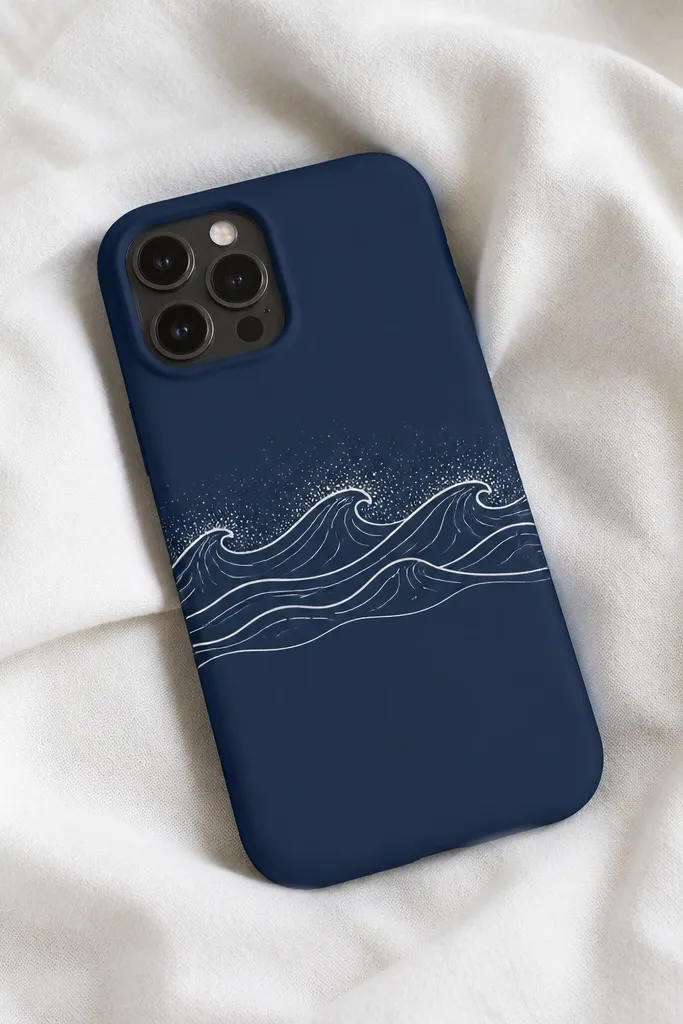
Toothbrush wave texture looks like foam without complicated tools. The dark navy base makes the white lines pop, and the simple wave shapes keep it fun. I paint the wave curves first, then add foam speckles with a flick. It reads clearly in photos and looks great on kids' cases because it’s bold.
Quick tipHold the toothbrush at a consistent distance so the foam dots are the same size.
Sand and wipe. Paint a navy base if needed, then draw 3-5 wave arcs in white. Use a toothbrush with white paint to flick tiny dots above the waves. Add a few light gray dots for depth. Seal with clear coat.
One warningDon’t flick too close or you’ll get big splats.
15. Retro Color Wheel With Hand-Drawn Arcs
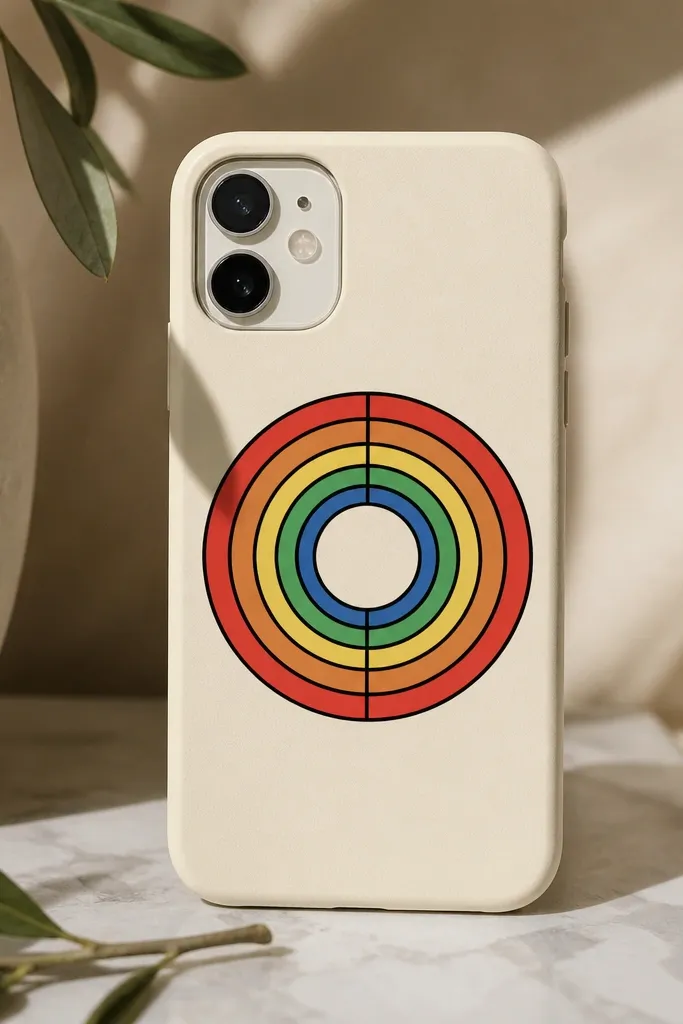
A retro wheel looks playful and organized at the same time. Thick arcs in bright colors feel like 80s packaging, and black outlines keep it clean. I draw arcs with a compass or a bottle cap template, then fill with paint. This cover looks best when the design is centered and the arcs don’t reach the camera cutout.
Paint a cream base. Use a round object to lightly trace a circle center guide. Draw 6-8 arc sections with black pencil, then outline with black acrylic. Fill each arc with a different bright acrylic color, 2 thin coats. Seal carefully around the edges of the wheel.
If arcs look wobbly, outline with black first, then fill — it hides small unevenness.
Don’t let black outlines dry fully before filling — you’ll see harsh gaps.
16. Spa Marble With Pink and Tan Veins
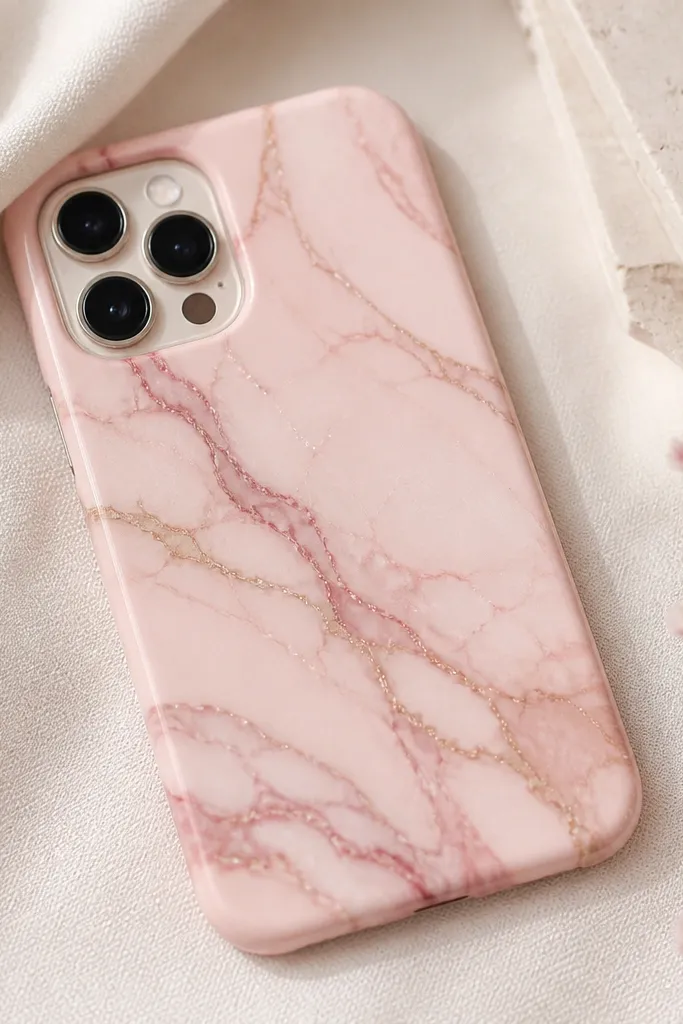
This marble palette looks clean and calm, like a bathroom tile sample book. Veins look best when they’re thin, so the alcohol technique works well here too. The pink base keeps it feminine, while tan veins add warmth. It’s also forgiving because marble naturally hides small imperfections.
Start with a pale pink base. Drop diluted tan and darker rose paint streaks on top while wet. Mist with rubbing alcohol in short bursts so the veins pull and stretch. Add a couple tiny white highlights with a dot brush. Seal after complete drying.
Use a fan brush or small dry brush to pull a couple veins longer for extra movement.
Don’t overdo the veins — too many lines make it look chaotic.
17. Minimal Dots Border Frame
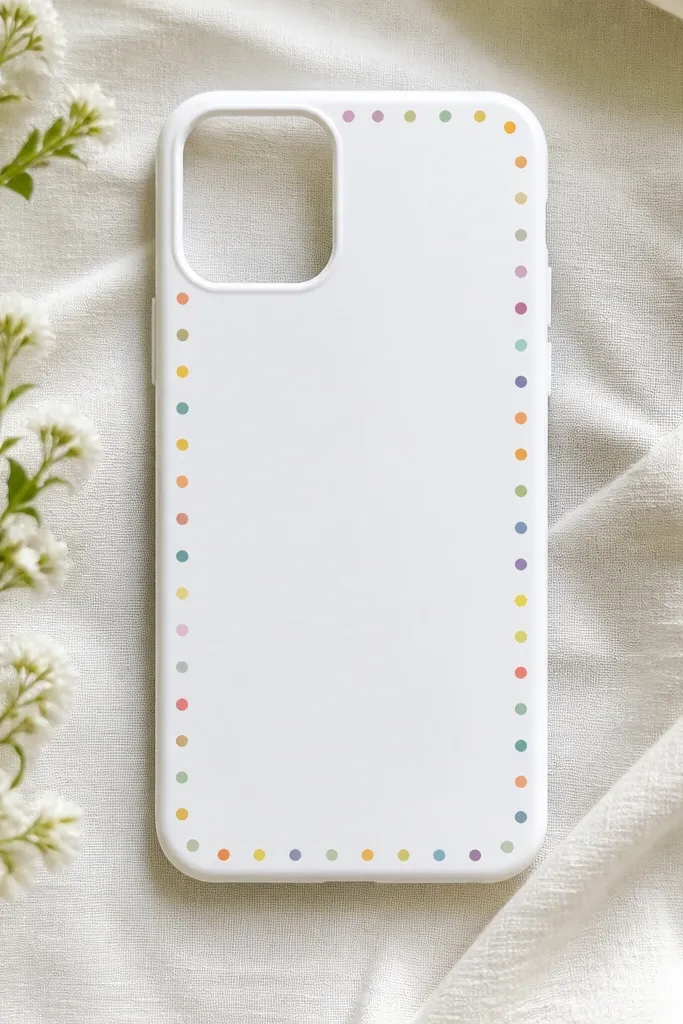
A dot border gives a clean, minimal look without covering the whole case. The center stays simple, so the phone still looks sleek. I use two accent colors max so it doesn’t look like a craft explosion. This style is also quick for kids because it’s basically counting dots.
Paint the case white or a light neutral. Use a dotting tool or the back of a small paintbrush to place dots along the edge. Make the border 8-12 mm wide so it frames the phone without interfering with buttons. Choose two colors and alternate every other dot. Seal with clear coat.
Tape the edge lightly before dotting if your dots need a straight line.
Don’t crowd the dots — leave breathing space or it looks messy.
18. Rainbow Heart in Two Layers
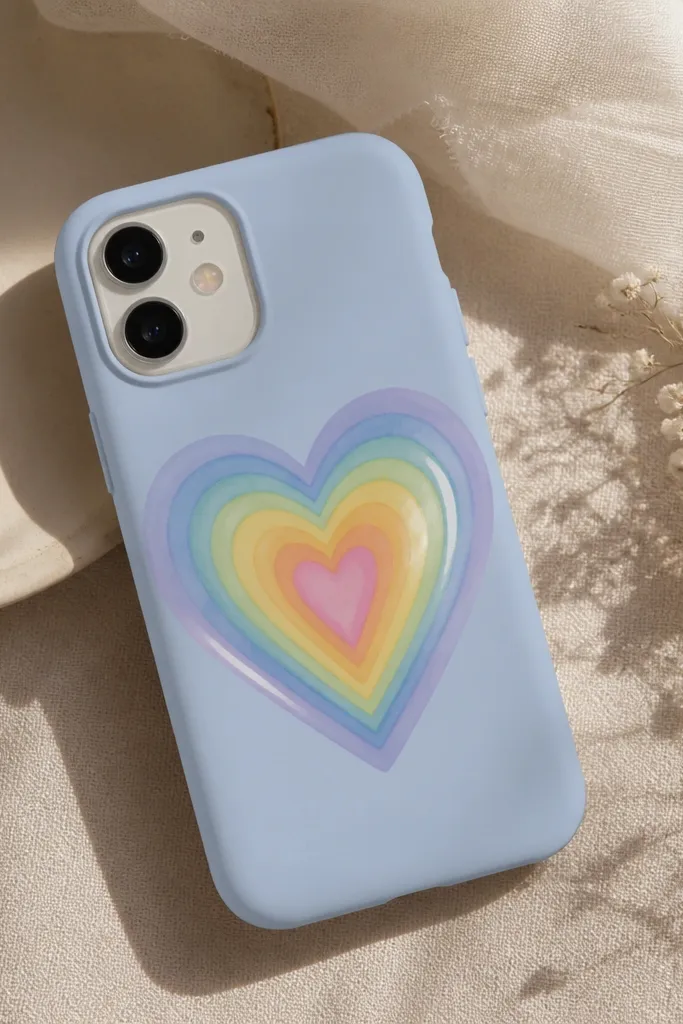
Hearts look cute, but this version looks intentional because it uses layered bands. The two-layer approach gives depth: one base heart, then a rainbow heart on top. Watercolor-style paint keeps the edges soft and forgiving. It’s perfect for birthdays or Valentine weeks.
Paint a pastel blue base. Sketch a heart with pencil and paint it in one solid color first. Once dry, stencil or freehand a rainbow heart inside the first, using red-orange-yellow-green-blue bands. Add a small white highlight stroke on the top right of the heart. Seal with clear coat.
Use a sponge for the rainbow bands so they blend without muddying.
Don’t use super-thick paint on the heart edges or it will chip first.
19. Checkered Corners and Camera Guard
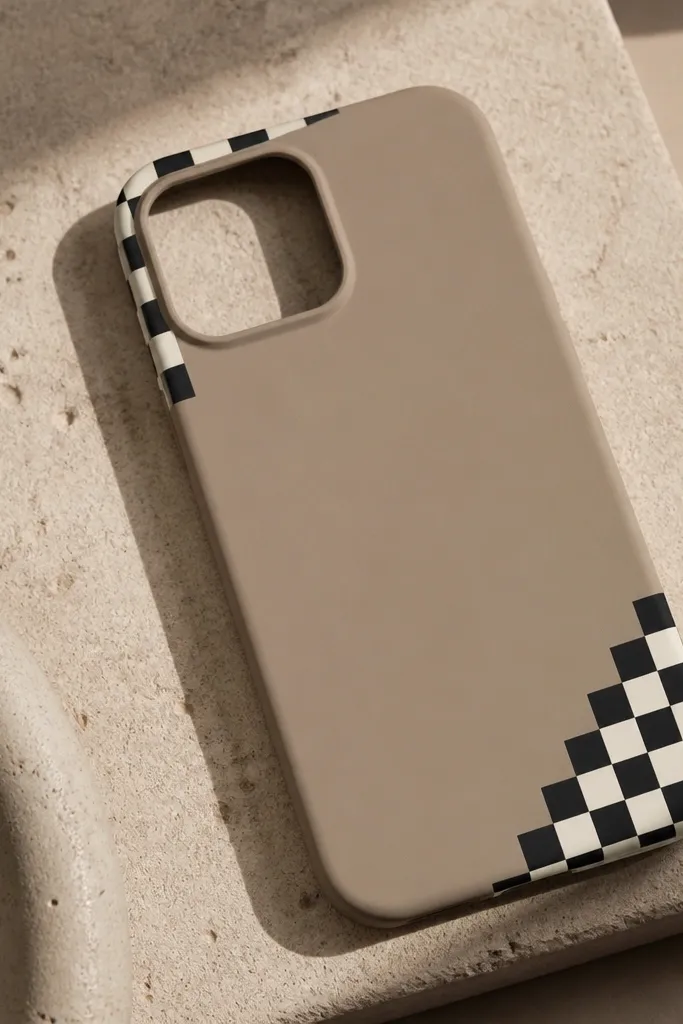
Corner designs look stylish because they keep negative space, and that makes the case feel more adult. Leaving the camera area plain helps the design stay sharp and prevents paint around the lens from getting scuffed. I like the black-and-white check for contrast against warm taupe. The pattern also hides tiny scratches because the checks blend them in.
Paint the case taupe first. Tape off a small corner area about 2-3 cm square and create a mini checkerboard with painter’s tape. Paint alternating squares in black and white, peel tape while slightly tacky, then remove tape edges cleanly. Keep the camera bump area uncovered. Seal with multiple light coats.
Plan your pattern so it stops at least 5 mm away from buttons and lens cutouts.
Don’t extend paint into button grooves — it wears off fast.
20. Glitter Edges With Tape Mask
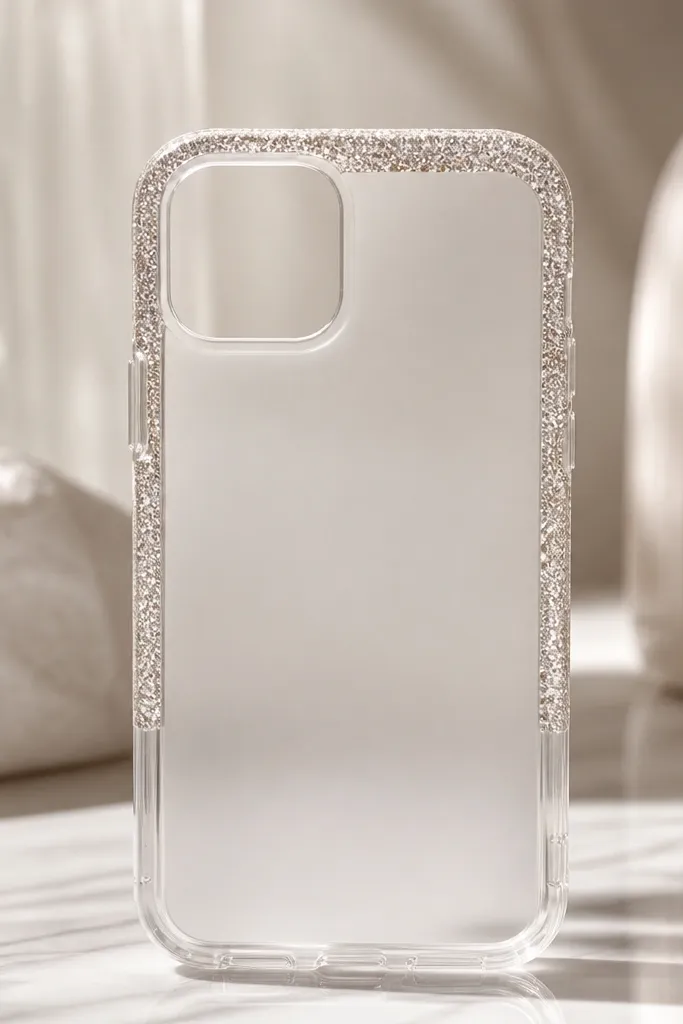
Edge glitter looks fun but stays classy when you keep it limited. Tape masking gives you a straight glitter border instead of messy sparkle everywhere. I mix fine craft glitter into a thin layer of clear acrylic so it settles evenly. The center stays matte or plain, so the shimmer reads intentional.
Sand and wipe the case. Tape off a border strip 5-10 mm wide around the top and sides. Mix fine glitter with clear acrylic medium and apply with a flat brush in thin layers. Remove tape when it’s still tacky so the border edge stays crisp. Seal over it with clear coat for wipeability.
Press glitter into the border lightly with the brush tip so it doesn’t shed.
Don’t skip sealing — loose glitter will transfer to pockets.
21. Sticker-Like Frame With Washi Tape Resist
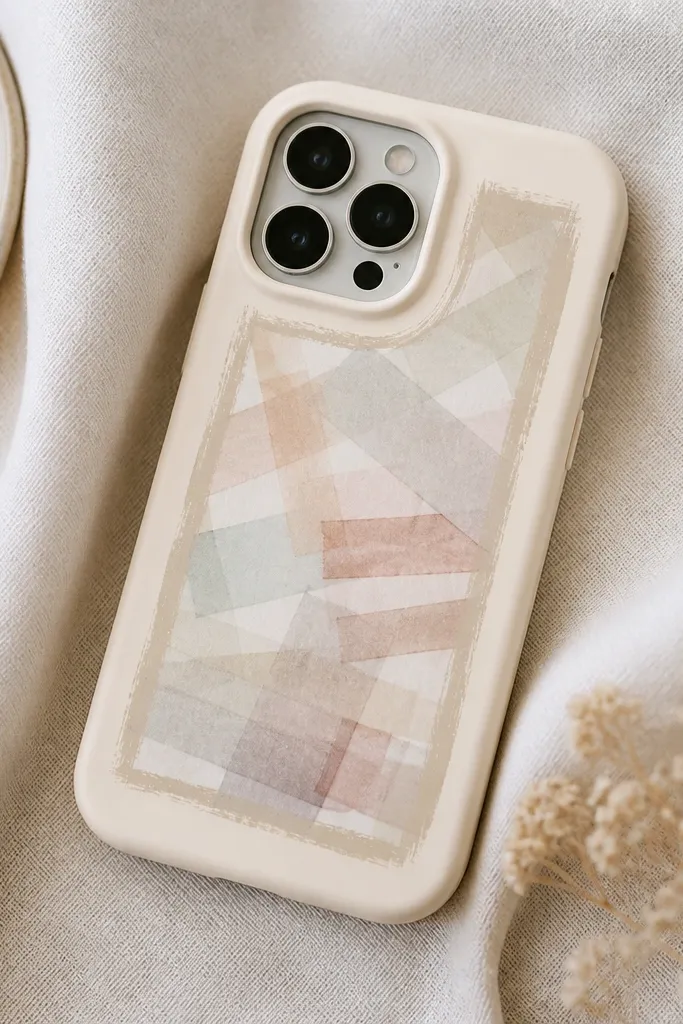
Washi tape resist is the easiest way to get a frame look without a stencil. You paint over a taped-off area, then peel tape to reveal clean shapes. The inside pattern feels like stationery, and the frame makes it look like a designed label. I use thin washi so the lines stay crisp and the paint doesn’t bleed.
Quick tipUse a hair dryer on the washi for 5-10 seconds before peeling to reduce tearing.
Paint a base color, then lay washi tape in a rectangle frame and a couple internal diagonal strips. Paint a contrasting color over the whole surface, 2 thin coats. Peel washi while the paint is tacky. Add a tiny dot cluster near one corner with a fine brush, then seal.
One warningDon’t use thick paper washi — it can lift and leave ragged edges.
22. Cat Whiskers Minimal Face Corner
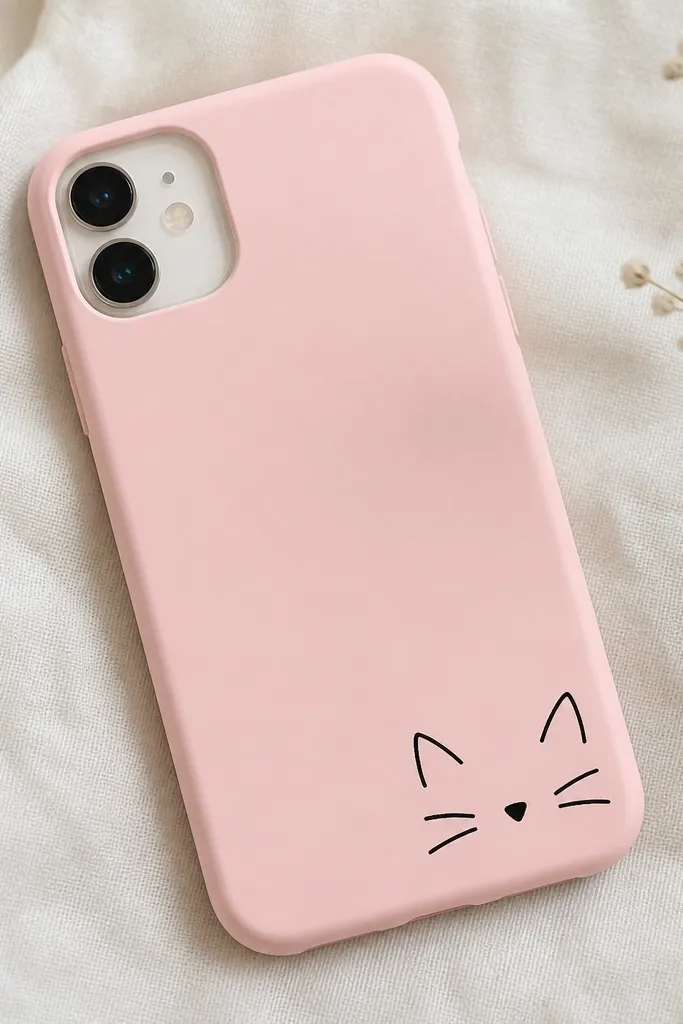
Micro designs look expensive because they don’t fight for attention. The bottom-right placement makes it feel like a secret detail you notice slowly. Black outlines keep it clean, and the small size makes it hard to mess up. I’ve used this on kids' cases because it’s quick and still looks cute even if the lines aren’t perfect.
Quick tipMark the corner placement with a pencil dot first so the face doesn’t drift.
Paint the case your base color. Draw a small cat face about 2-2.5 cm across in the bottom-right corner. Use black acrylic for outline and a tiny pink nose. Add three whisker lines with a toothpick or liner brush. Seal with clear coat.
One warningDon’t make whiskers too thick — they look cartoonish in a bad way.
23. Butterfly Wing Gradient With Sponge Cutouts
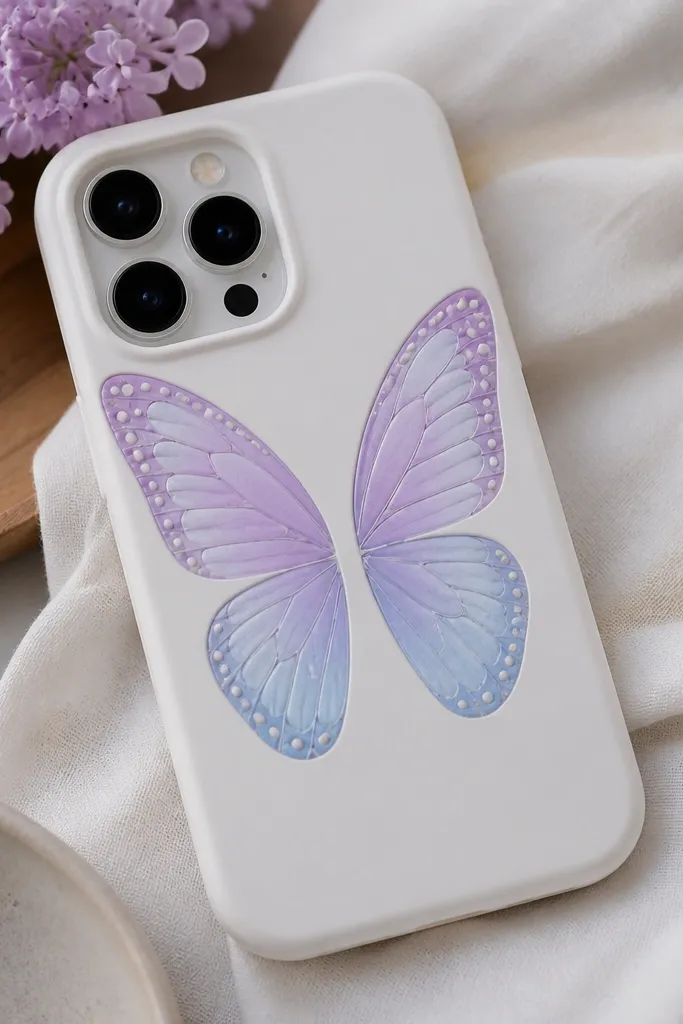
Butterfly wings look detailed, but the sponge cutout method makes them manageable. Gradients create the wing feel, and dots along the edge mimic wing texture. This style looks gorgeous in daylight because the gradients shift slightly with the angle. It also makes your case look more like wearable art than a plain cover.
Paint a clean white or light gray base. Cut two small wing shapes from craft foam or use a sponge wedge to dab lilac, then blend into blue toward the outer edge. Add a darker outline with a thin brush. Put tiny dot accents in a lighter shade near the top of each wing. Seal after everything dries.
Blend the wing boundary with a nearly dry sponge instead of a wet brush for a smooth fade.
Don’t outline first — you’ll trap uneven sponge texture under the line.
24. Ramen Bowl With Steam Swirls
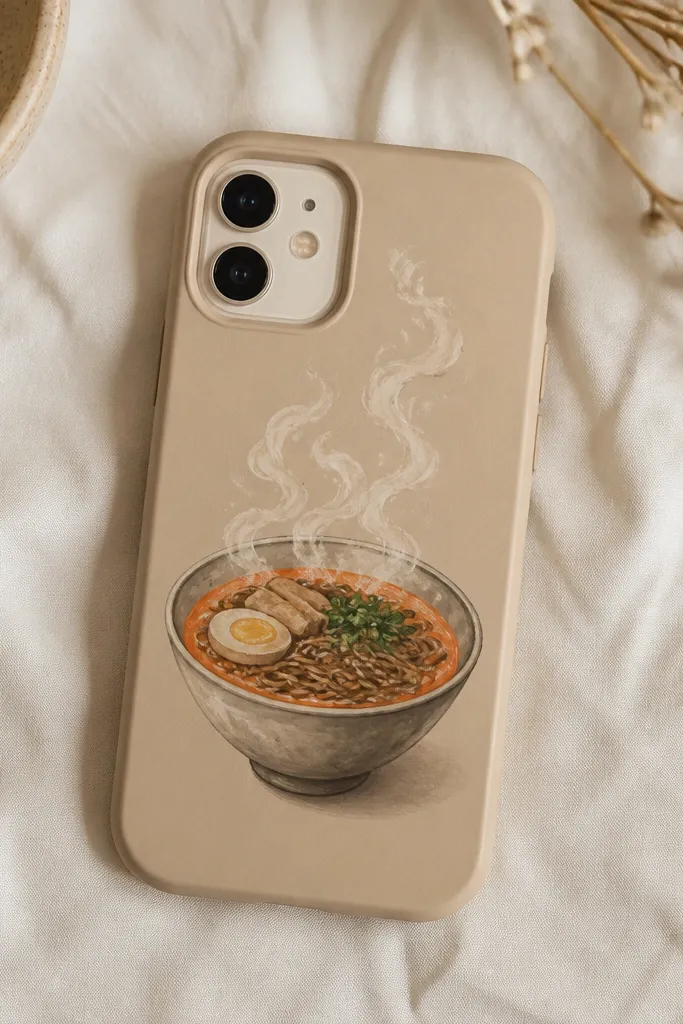
Food art is always a hit, and ramen looks extra cute because you can use simple shapes. The broth color gives warmth, and steam swirls add movement. I paint the bowl first, then noodles, then steam — the order keeps the steam from smearing into the bowl. This is a fun one for kids and teens because it feels like a sticker but lasts.
Quick tipUse watered-down paint for steam so it looks airy instead of opaque.
Paint the base beige or light tan. Draw a bowl shape and fill with orange-tan broth. Add noodle lines with a thin brush, then add a few green toppings as tiny dots or short strokes. Paint white steam swirls above the bowl and add a couple small highlights. Seal with clear coat so it stays wipeable.
One warningDon’t pile too many toppings — it turns into clutter on a small case.
25. Seafoam Stripes With Tiny Shell Dots
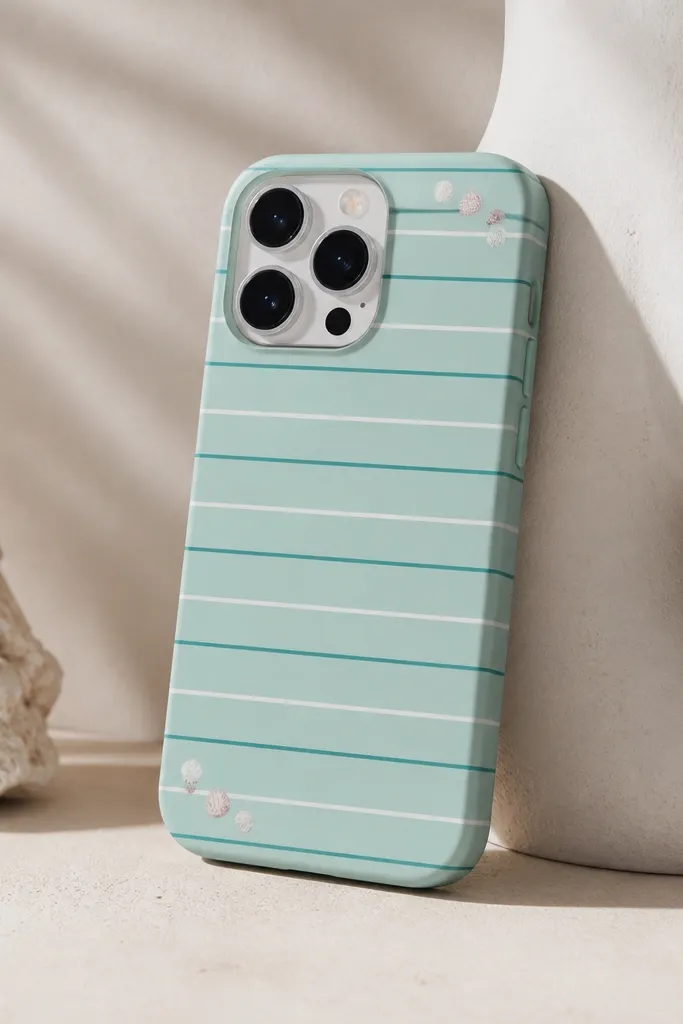
Horizontal stripes make the case look calm and coastal, and seafoam colors stay flattering on skin. The shell dots add a cute detail without needing realistic shell shapes. This one is also forgiving for beginners because you can keep the dots tiny and spaced. When sealed glossy, it looks like a fun summer accessory.
Quick tipUse a ruler under the tape to keep the stripe spacing consistent.
Sand and wipe your case. Tape horizontal lines about 3-6 mm apart and paint alternating mint and white stripes. For shell dots, use a fine brush to paint tiny teardrops or spiral dots near two corners. Add a tiny darker teal shadow dot next to each shell dot. Seal with clear coat.
One warningDon’t pull tape off too late — it can tear the stripe edge.



