
1. Chalkboard Pantry Line with Mini Shaker Jars
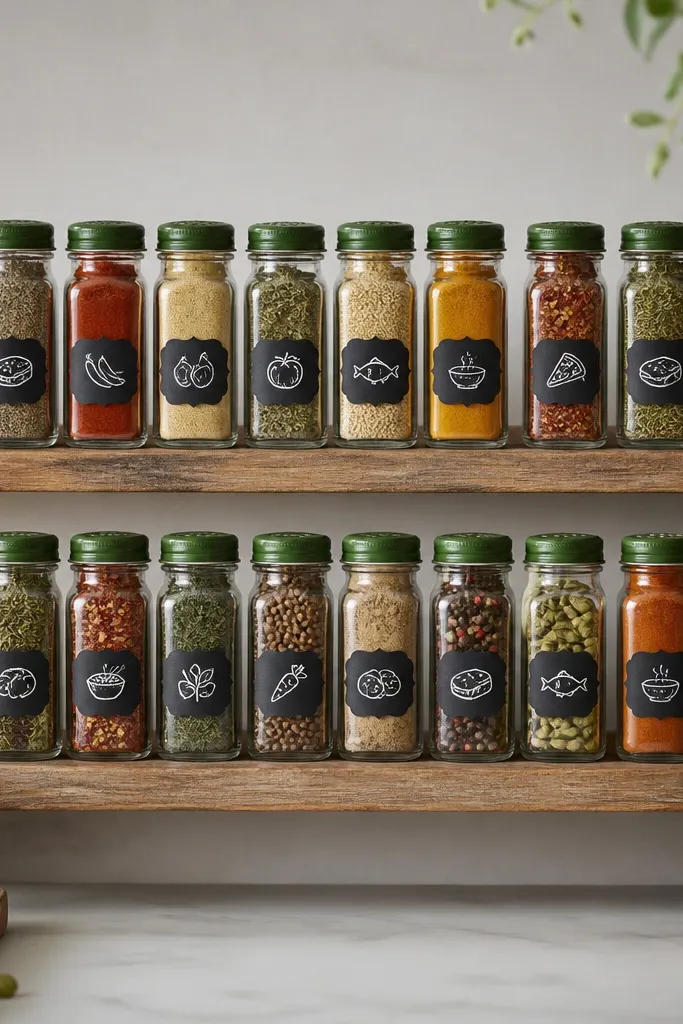
This look is clean and kid-friendly because the label surface invites changes later. I used mini clear jars so the spice color shows through, then stuck to one top color (green) to keep the set cohesive. The matte black labels make red paprika, bright turmeric, and dark cumin stand out without fighting each other. It looks like a pantry shelf, not a craft table.
Use 2 oz jars with shaker lids and keep the fill level consistent — about 1 cm below the rim. Cut chalkboard label stickers to the same size, then write the spice name in white chalk marker. Arrange jars in a tight line on a shallow tray so each jar faces forward.
Quick tipBefore filling, write all labels and number them lightly on the back so you can match each jar fast.
One warningSkip glossy label paper on top of chalkboard — it smears when you handle the jars.
2. Rustic Kraft Tray with Twine Bow Tags
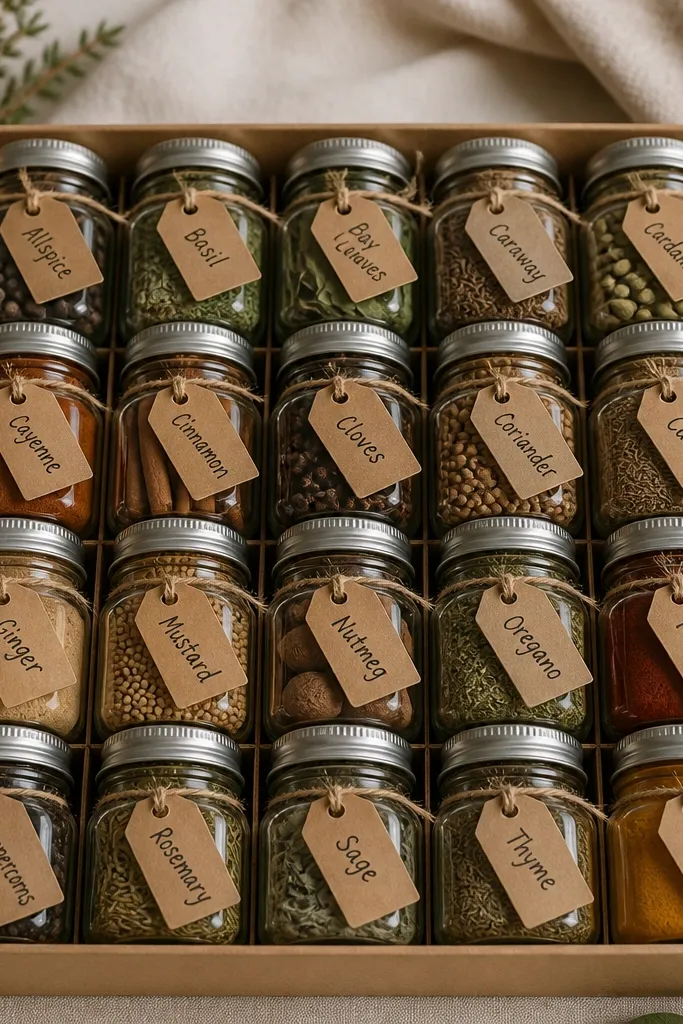
Kraft paper makes spices look warmer and more handmade, especially when the jars are clear and the spice colors are visible. I like tying tags because you can add a use hint without printing a whole label sheet. The twine bow gives that tactile finish that reads “gift” even if the jars are simple. This is the one I pull out when I’m gifting to neighbors or teachers.
Pick jars that fit the tray holes snugly, ideally 2 to 3 oz. Cut tags from 110 lb kraft cardstock, about 2.5 by 4 inches, and punch two holes at the top. Tie twine around the jar neck once, then knot and trim ends even.
Quick tipAdd one tiny accent dot of matching color paint to each tag (like a red dot for paprika) so the set looks coordinated.
One warningDon’t overstuff the tray so jars touch — the tags get crushed and the handwriting smears.
3. Pastel Heat Map Labels on White Labeled Jars
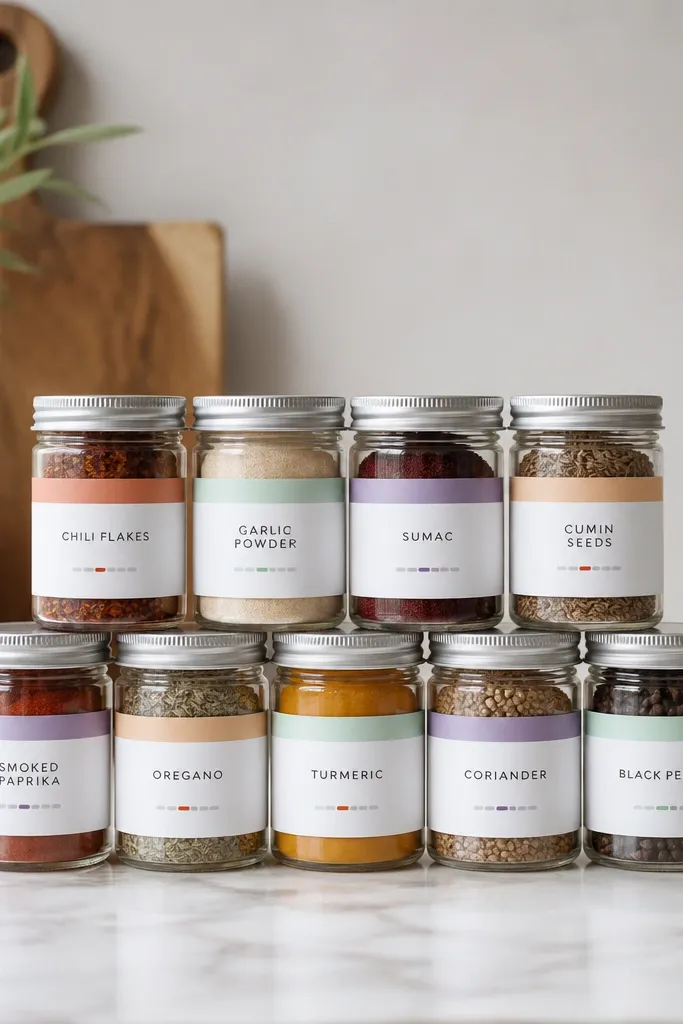
This one is for foodies who love structure. I used a “heat map” idea on labels: calm colors for mild spices and warmer colors for hot blends. Because the spice color is different in each jar, the pastel label bands keep everything from looking random. It also makes the set feel like a mini menu.
Use identical white labels (or white sticker paper) and print or hand-letter spice names in dark gray. Add a heat level bar with 3 segments using colored markers: mild (peach), medium (orange), hot (red). Keep jar lids the same color across all 20 jars.
Write the use line in smaller font under the name, like “sprinkle on eggs” or “finish on popcorn.”
Avoid using only one font weight — thin letters disappear on dark spice colors.
4. Olive Branch Theme with Green Ribbon and Linen Labels
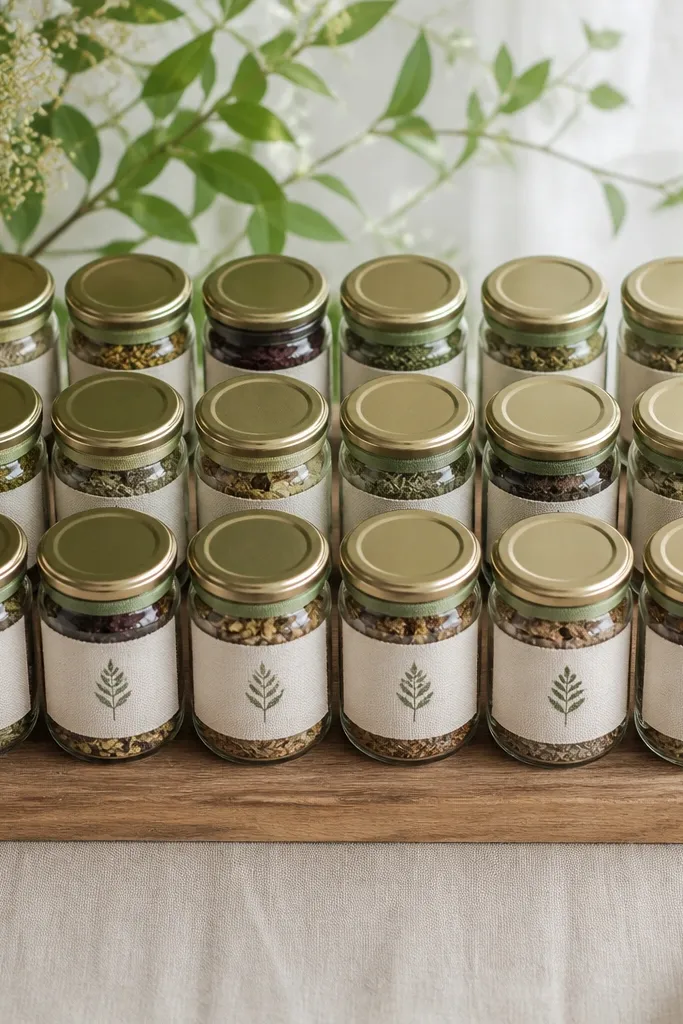
The olive-green look makes your spice set feel Mediterranean even if the spices are basic store-bought. Linen-texture label paper hides smudges and looks expensive next to clear jars. Ribbon ties add height and softness, and the pressed-leaf icon makes it feel custom. This is a great choice for gifts tied to cooking nights or housewarming.
Use 3 oz jars with metal lids painted or coated in a muted green tone. Cut linen labels to about 2 by 3 inches and leave a 1/4 inch margin for clean edges. Tie ribbon around the lid seam once, then tuck the ends under slightly so they sit flat.
Quick tipUse a fine-tip paint pen to add leaf icons — the small detail reads “handmade” fast.
One warningDon’t use glossy ribbon — it reflects glare and makes the labels look washed out.
5. Vintage Spice Book Look with Aged Paper Labels
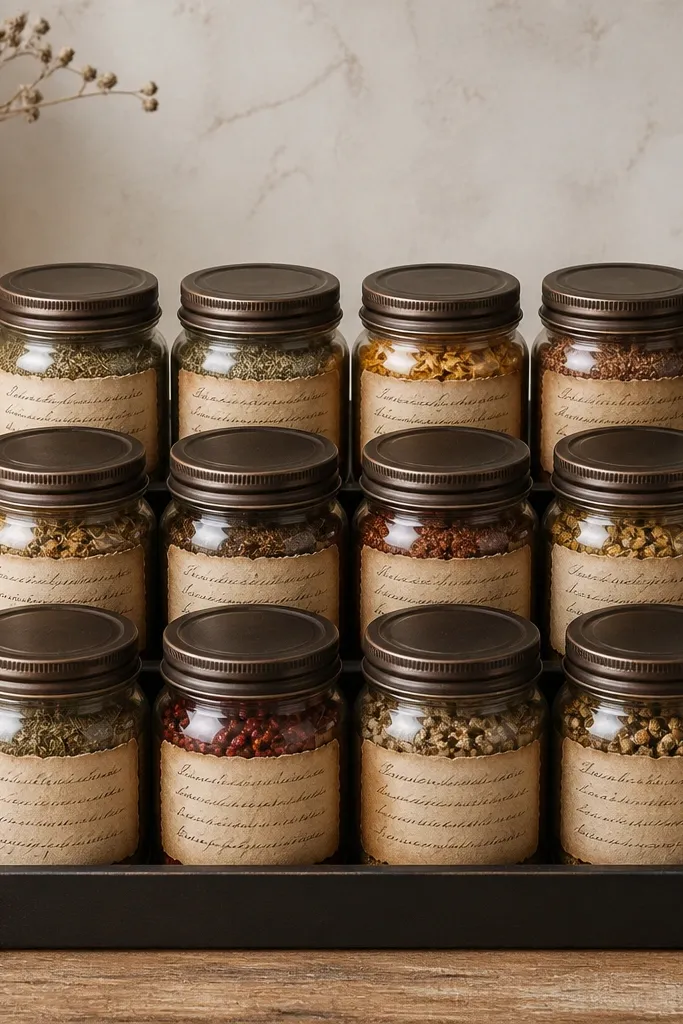
Aged paper labels make even cheap spices look like they came from a family recipe box. I used sepia ink and slightly uneven label edges to mimic old paper. The trick is keeping jar styles consistent so the vintage theme doesn’t look like random scrapbook clutter. This look works especially well for winter gifting.
Print or write labels on tea-stained cardstock (or buy pre-aged label paper). Wrap labels around jar fronts with a small strip of clear tape at the back seam. Arrange jars in a 4 by 5 grid on a dark tray so the sepia tones pop.
Quick tipWrite the “use” line like an instruction: “stir into butter,” “season rice,” or “top salads.”
One warningSkip metallic ink — it looks great in photos but smears when you handle the jars.
6. Color-Coded Alphabet Set with Numbered Grid
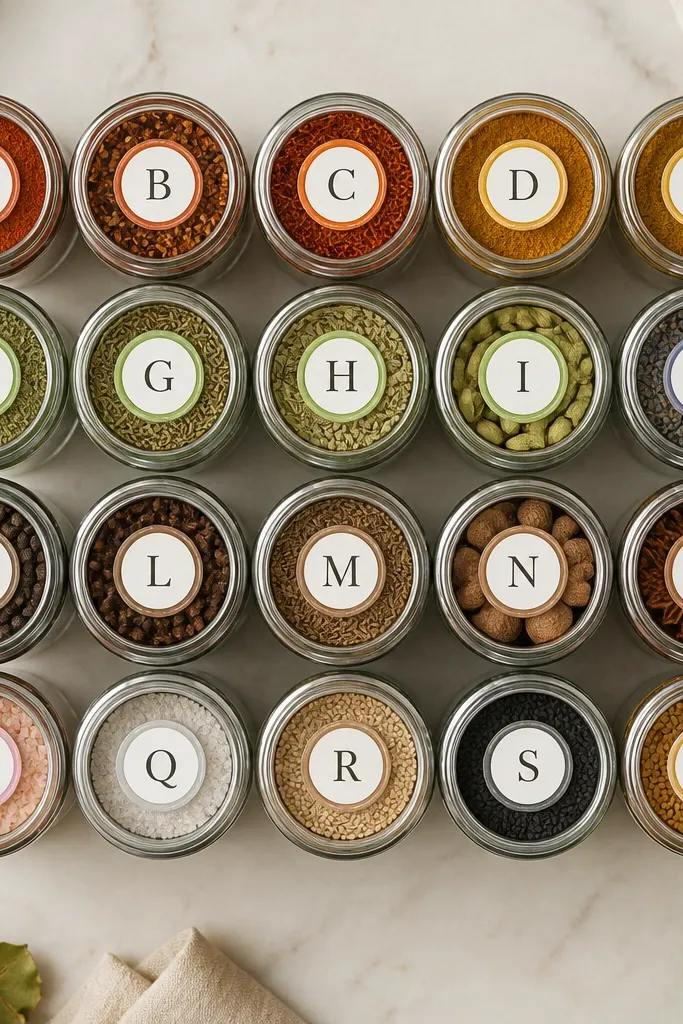
This is my go-to for kids and classroom gifts because it turns spices into a game. Lettered labels reduce confusion, and a numbered grid makes it easy to keep the set complete. I group spices by flavor family and reflect that with label borders — warm reds and browns, cool greens and yellows, deep purples and blacks. The set feels like a “starter kit” instead of a pile of jars.
Create a 4 by 5 grid on poster board with faint pencil numbers 1-20, then place jars into those exact spots. Label jars with letters A through T plus the spice name. Use a colored border stripe 1/4 inch wide around the label edges.
Add a small “best with” line after the spice name to make it usable during cooking activities.
Don’t shuffle jar positions after labeling — it breaks the grid rhythm and looks messy.
7. Monochrome Black-Gold Labels on Clear Jars
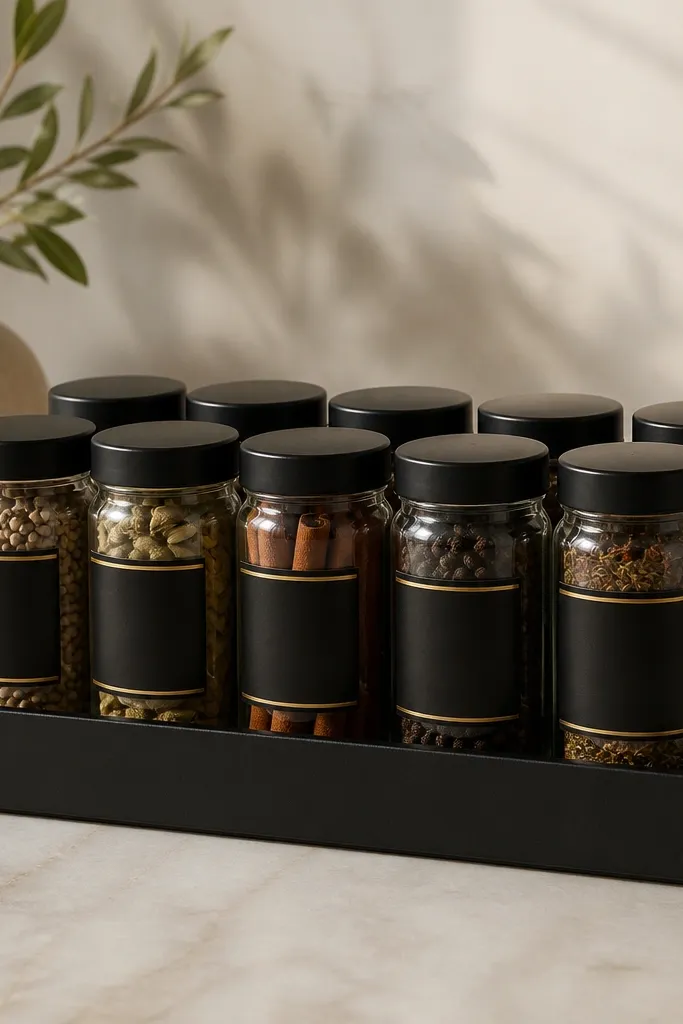
Black and gold makes spices look like boutique pantry goods. The gold lines make the label edges crisp, and the clear jars show the spice colors without adding extra design clutter. I like this for adult foodies because it reads modern and clean. Even if the spices are basic, the label style changes the whole perception.
Use black sticker paper and add gold lettering with a gold paint pen or gold leaf sticker. Keep label sizes identical and align them at the same height on every jar. Place jars in a tray with a solid backing so the gold lettering stays legible.
Use a ruler when you draw the gold lines — straight lines are what make it look intentional.
Avoid gold ink that’s too thick — it chips when lids rub.
8. Cinnamon Stick Border Box with Layered Tissue Inserts
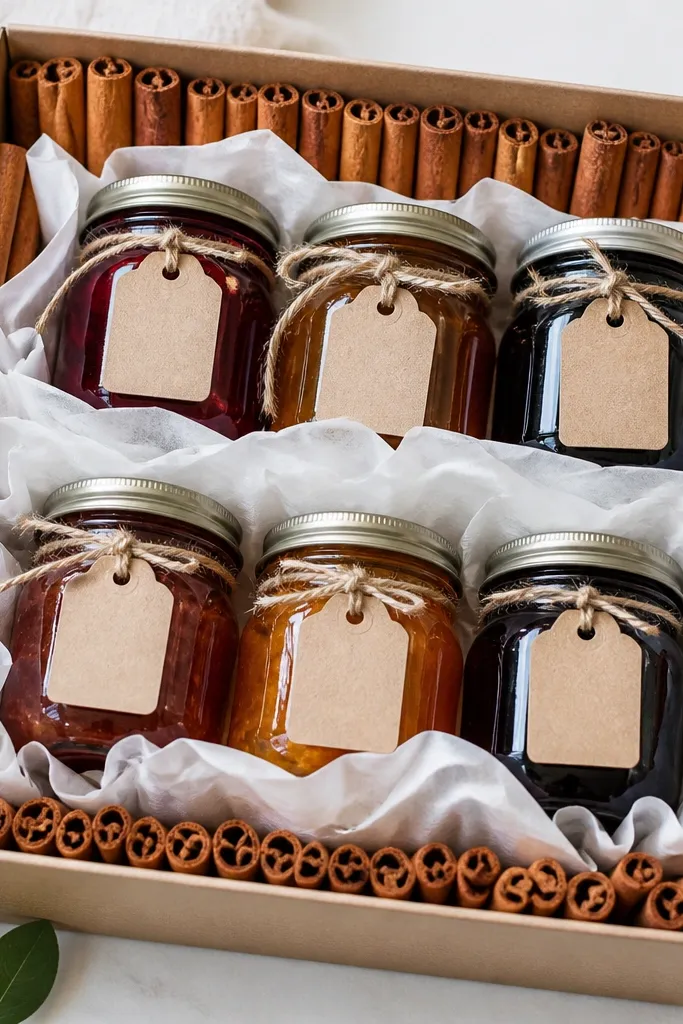
This look uses smell as part of the design. Cinnamon sticks act like a border and give a warm scent the recipient notices before they even open the jars. The tissue layers keep jars from clinking and protect labels during shipping. It’s a good option when you want the set to feel like a boxed “experience.”
Use a sturdy shoe-box-sized gift box and line it with cardboard so jars sit stable. Add cinnamon sticks around the interior corners, then place jars on a foam sheet or thick cardboard cutout. Tie each label with thin string so it stays straight against tissue.
Quick tipLeave a small gap between cinnamon sticks so the box doesn’t warp from moisture.
One warningDon’t pack too tight — tissue pulls labels off when you remove jars.
9. Bamboo Skewer Handle Tags for a Grab-and-Go Set
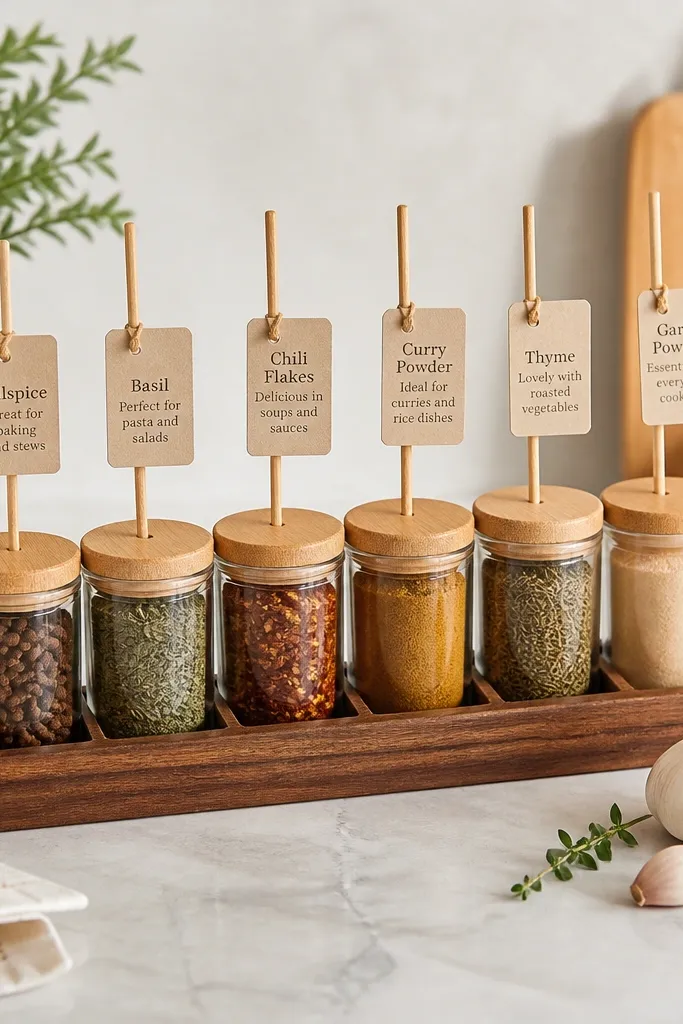
Skewer tags make the labels easy to read without wrapping paper around lids. You can also remove a jar without tearing a label. This is one of the most practical styles I’ve built because the label sits above the jar opening. It looks playful, but it stays neat.
Use 2 to 4 oz jars and insert bamboo skewers through a small hole in the tag top. Tie or glue the tag to the skewer with a short loop of twine. Keep skewers the same length so the tag tops form a uniform line.
Quick tipWrite the spice name in thick marker so it reads from 2 feet away.
One warningAvoid tags that are too small — the ink gets cramped and looks sloppy.
10. Map Grid Tray with Compass Rose Label Style
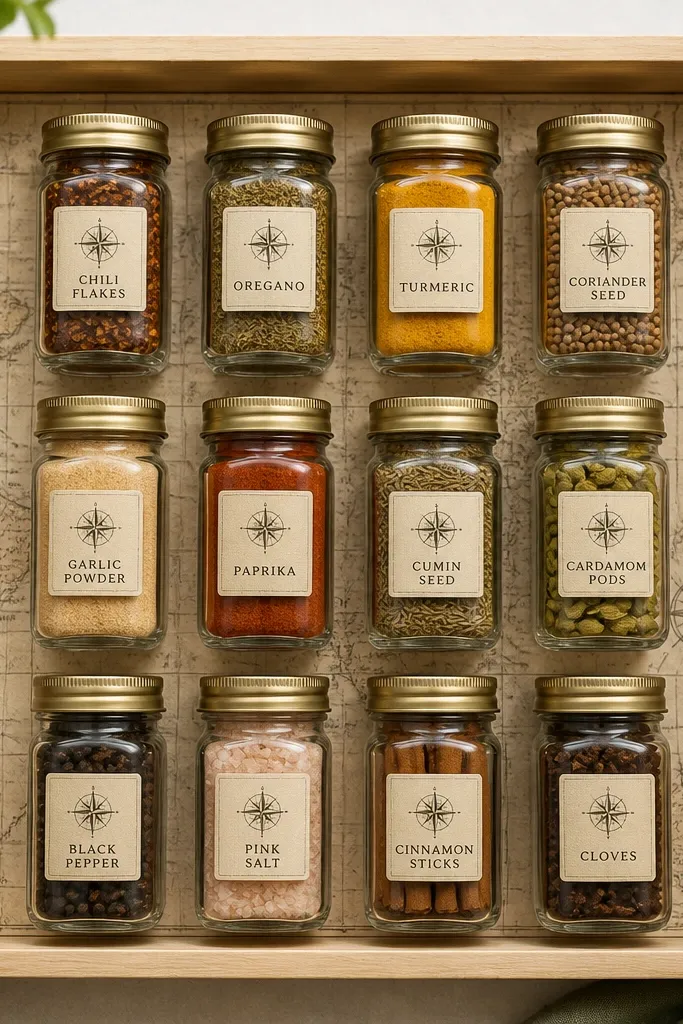
This look turns a spice set into a theme about travel to flavors. I used a map-pattern backing so the jar colors pop against a busy but controlled background. Compass icons add a consistent motif across all 20 jars. It’s fun for adults and kids who like cooking challenges.
Print a map pattern on paper and glue it to a tray base, then seal with clear matte spray. Add compass rose icons on each label using a small stamp or drawn SVG print. Arrange jars in a grid and number them lightly on the base.
Use matte spray on the base only — don’t spray labels or the ink will smear.
Avoid shiny tray backings — they reflect light and make the labels harder to read.
11. Fabric Wrap Labels with Heat-Set Iron-On Look
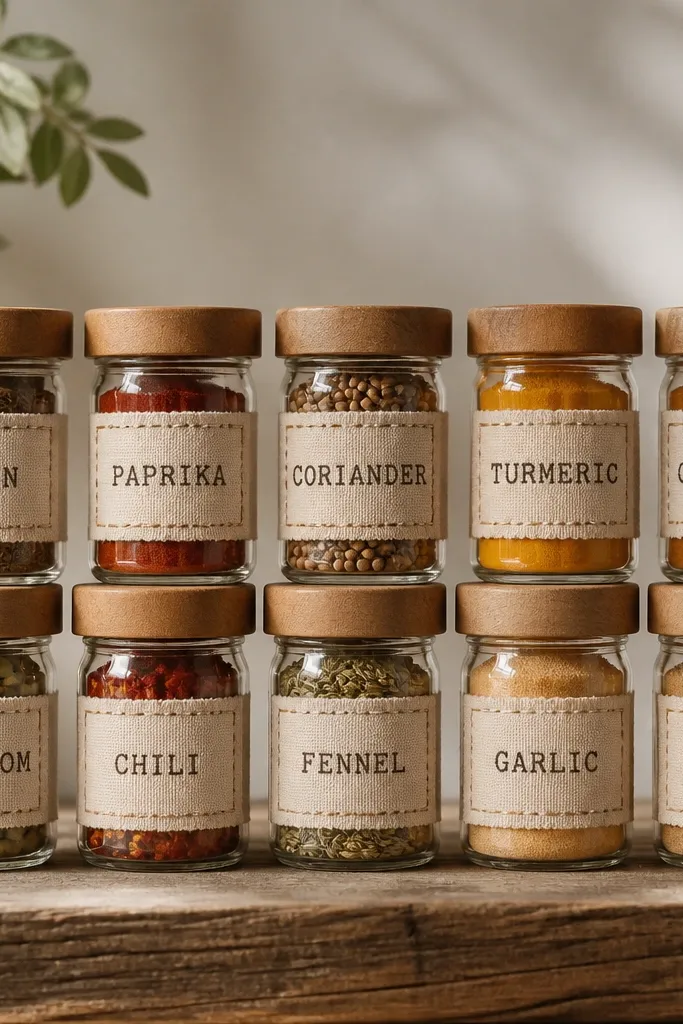
Fabric labels make the set feel soft and handmade, even if you’re using store-bought spices. I used cotton fabric with a simple stamped font so it stays readable. The texture hides small imperfections in handwriting and makes the jars look like part of a textile craft. It’s an aesthetic win without needing fancy tools.
Cut cotton squares about 2.5 by 2.5 inches and add a stitched border using a straight stitch on a sewing machine. Press on a thin iron-on backing if you want them removable, then wrap around jar bodies and secure with fabric tape on the back. Keep jar sizes the same so the wraps look even.
Quick tipStamp the spice name first on scrap fabric, then test ink color against the cotton before doing all 20.
One warningSkip stretchy fabric — it twists and the label ends look uneven.
12. Clear Cellophane Sleeve with Ribbon Closure
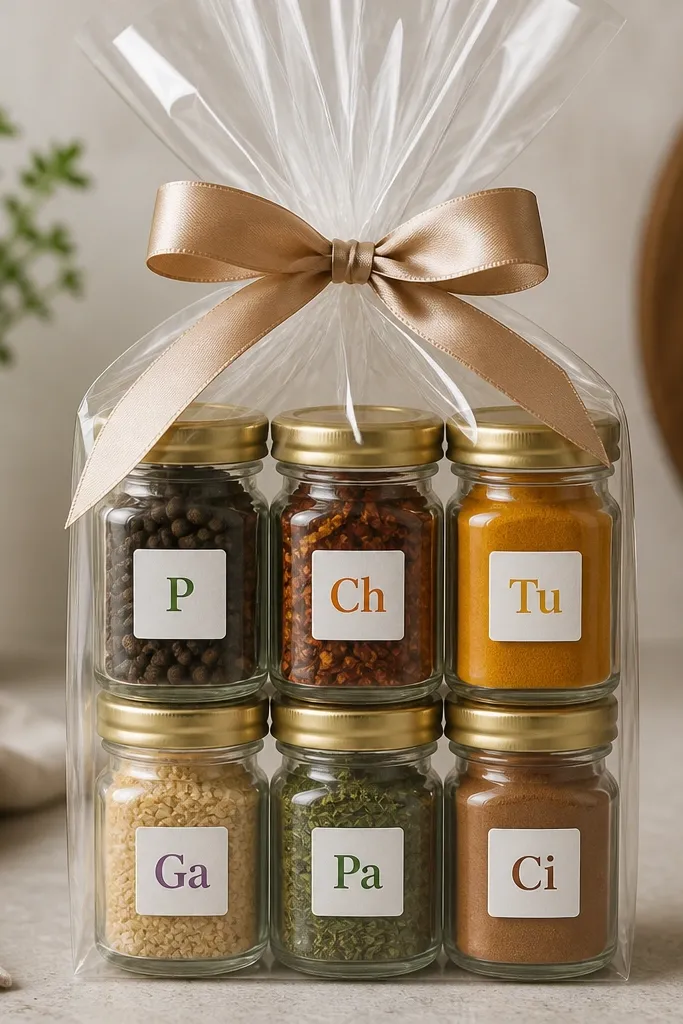
The cellophane sleeve is the easiest way to make the set look gift-ready in minutes. It also protects labels from fingerprints and keeps dust off if it’s sitting on a counter. The ribbon closure makes it feel intentional, not like a craft bag. I’ve used this for quick holiday drops and it always photographs well.
Arrange jars in two rows on a stiff cardboard insert so they don’t shift inside the sleeve. Slide the insert into clear cellophane wrap, then gather and tie ribbon around the top. Use white labels with colored initials so each jar has a quick visual cue.
Use a small hole punch to add a ribbon loop through the insert — it keeps the tie centered.
Don’t skip the cardboard insert — cellophane alone lets jars slide and smash labels.
13. Canning Jar Set with Color Caps and Printed Uses
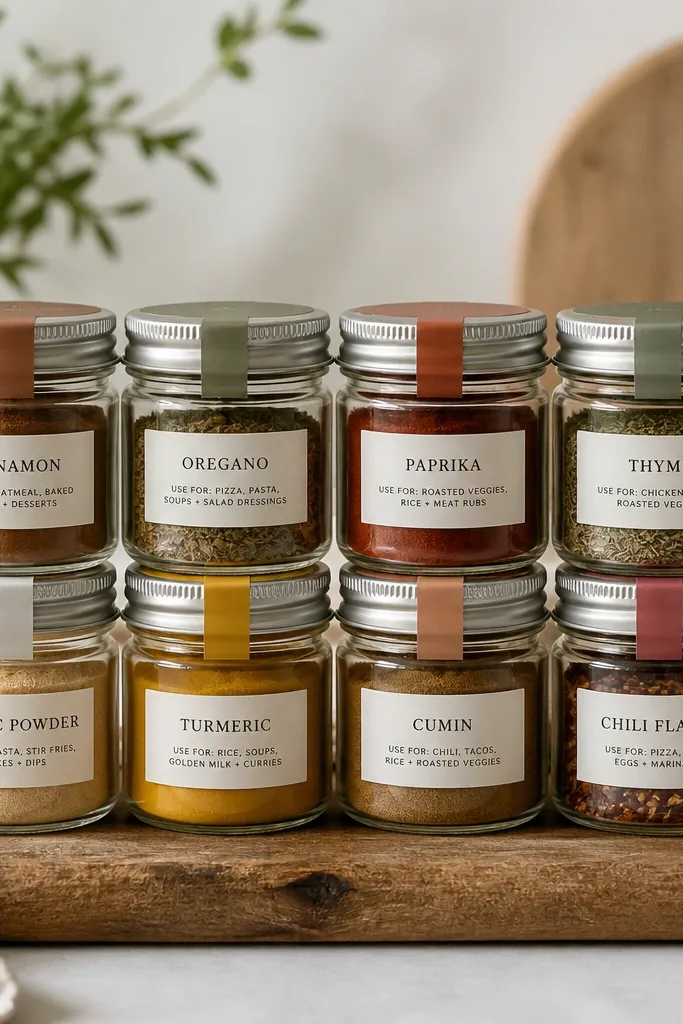
Canning jars look instantly polished because the glass shape is familiar. I added color caps so the set feels playful while still looking tidy. Printed labels are clean and consistent for all 20 jars. This is a great option if you want the set to look like it came from a local market.
Use consistent jar size, like 4 oz canning jars, and paint or wrap lid bands in 4-5 coordinated colors. Print labels on matte sticker paper and cut into uniform rectangles. Stick labels centered on the jar front, then place jars on a board with a slight border like a raised frame.
Seal the label with a tiny layer of matte clear coat so it wipes clean.
Avoid random lid colors — pick a palette and stick to it.
14. Greenhouse Herb Box with Seed Packet Inserts
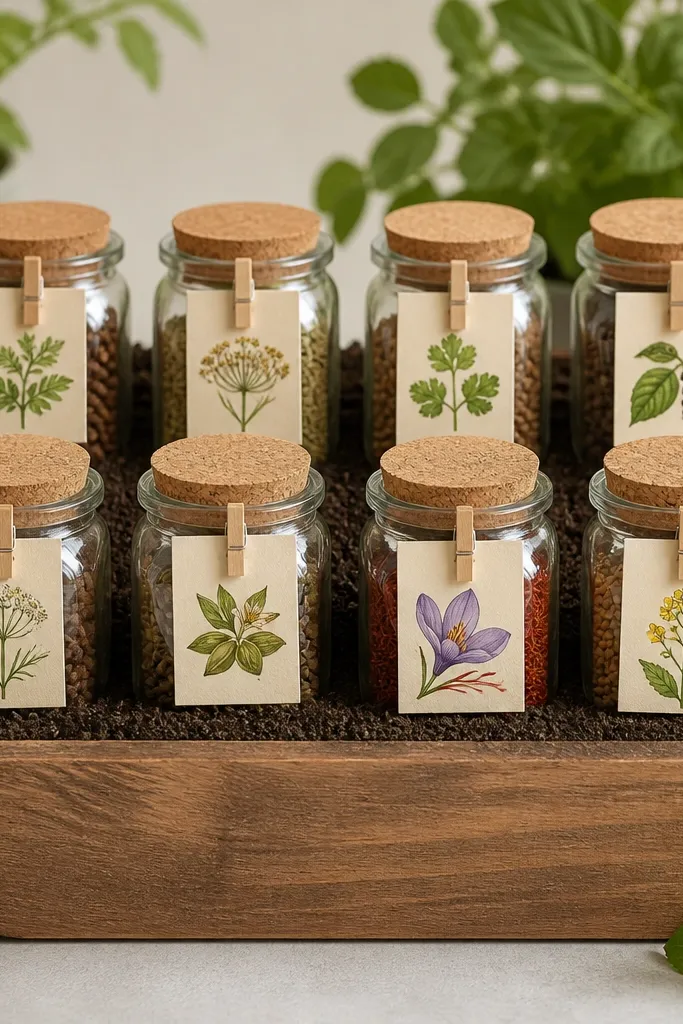
Seed packet inserts make the gift feel like a growing project, even though it’s spices. I used small seed packets clipped with binder clips so they stay attached and don’t get lost. The box base looks like soil, which makes green herbs and earthy spices feel related. It’s a sweet choice for gardeners and kids.
Line the box base with brown craft paper, crumple it slightly, then flatten for texture. Clip a seed packet to each jar with a small binder clip at the jar front. Keep jars in a grid so the seed packets align and the box looks organized.
Quick tipUse a consistent “planting instruction” style on the packets, like “sprinkle and stir,” even for non-herb spices.
One warningSkip flimsy packets — they flop and make the front look messy.
15. White Enamel Tray with Red and Yellow Label Dots
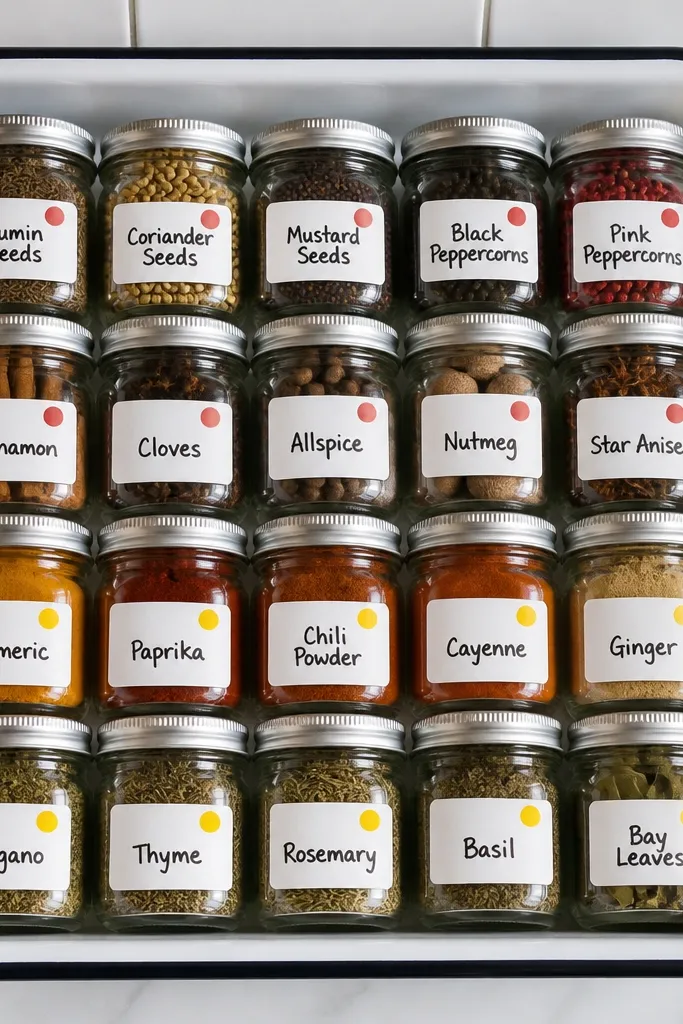
Enamel trays make everything look kitchen-ready. The white background keeps the jars bright, and the small dot markers help the recipient sort by flavor without reading every line. I use red dots for smoky and hot blends and yellow dots for sweet-leaning or citrusy blends. It feels playful but still organized.
Arrange jars inside the tray so there’s 1-2 cm spacing between each. Use white label stickers and add a dot in the top corner, then write the spice name beneath. Keep jar lids consistent in color to match the enamel vibe.
Quick tipAdd one “best for” line under the spice name in smaller handwriting.
One warningAvoid overcrowding the tray — jars bump and knock labels off.
16. Recycled Glass Jar Set with Hand-Punched Tagging
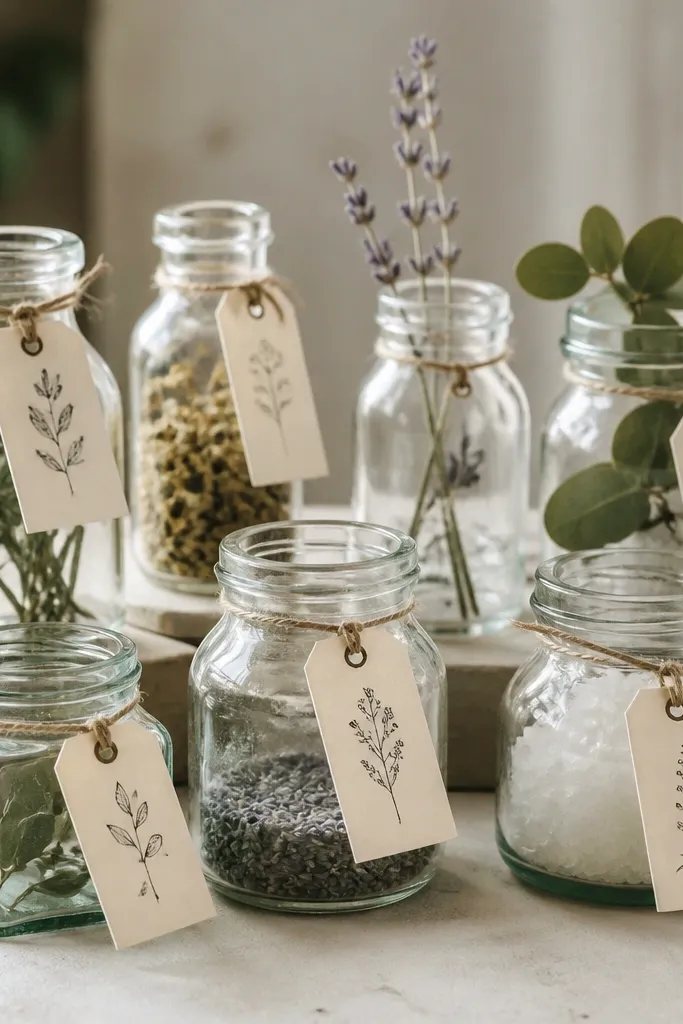
This is the budget version that still looks intentional. Recycled jars work when you pick a narrow range of shapes and keep labels consistent. Hand-punched tags look handmade and hide slight differences between jar sizes. It’s perfect when you’re building the set slowly over a few weeks.
Collect jars that are close in height and width, then sort them into groups of similar size. Punch tags from thick paper using one consistent hole size, then tie tags with cotton string around the jar neck. Use one label style for all 20 so the differences in jar shape don’t matter.
Quick tipFill jars at the same level every time — that uniform fill height makes mismatched jars look coordinated.
One warningDon’t mix super different lid colors — it makes the set look random.
17. Macaron Palette Labels on Clear Shaker Bottles
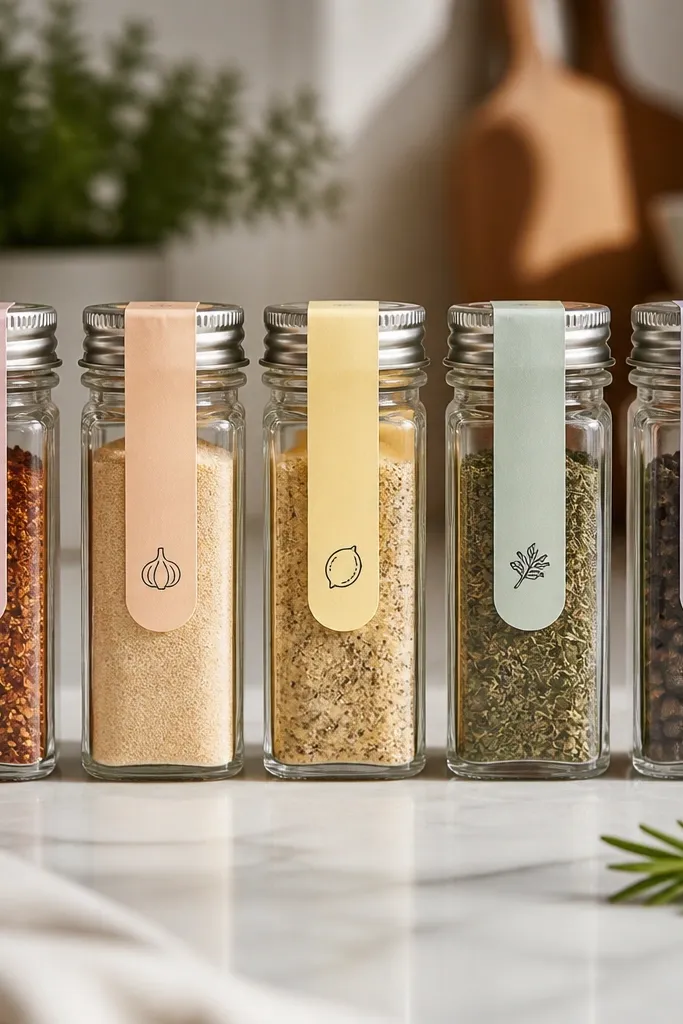
Pastel labels make spices feel fun and giftable. I used macaron palette strips so each jar looks like part of a series. Because the bottles are clear, the label colors don’t compete with the spice color; they frame it. This works well for birthdays and for kids who want to help assemble the set.
Use clear shaker bottles with consistent neck sizes. Cut label strips about 1 inch wide by 2.5 inches tall, then round the corners. Add a tiny icon next to the spice name using a stamp or stencil, then place bottles in a tray with pastel tissue paper underneath.
Use the same pastel color for all jars in one flavor family to train the eye.
Avoid neon markers — they overpower the spice colors and look harsh.
18. Desk Organizer Drawer with Dividers and Folder Cards
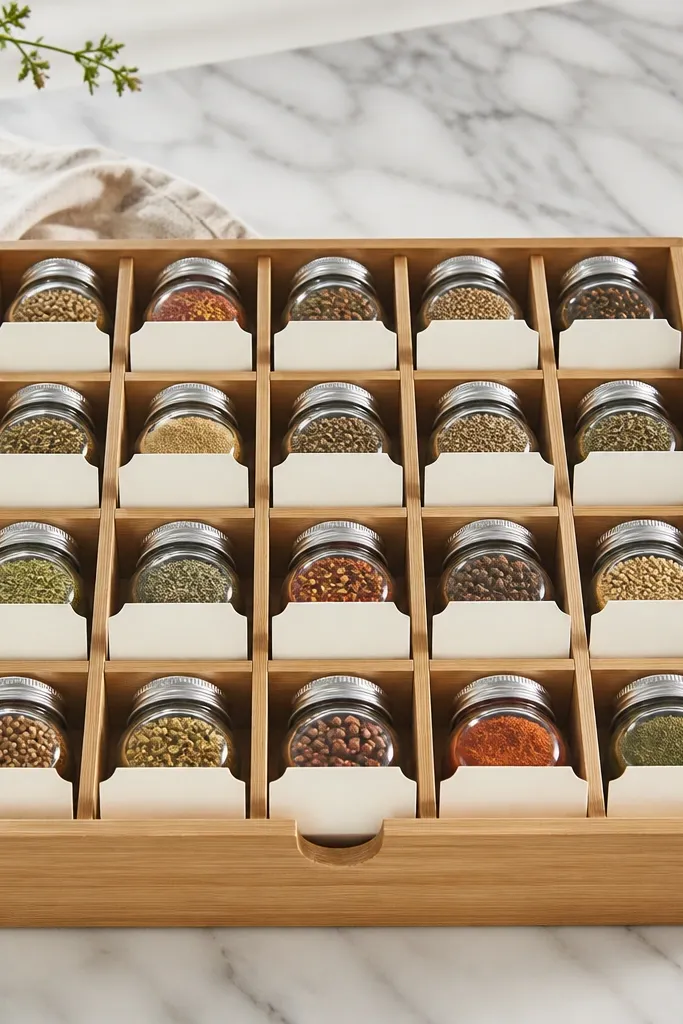
A drawer organizer makes the set feel like a cooking tool, not a craft. The dividers keep jars from tipping and keep labels aligned. Folder-style cards let you swap or correct labels without starting over. This is my pick when I’m making a set for someone who actually cooks weekly.
Use a small plastic organizer drawer with removable dividers, then trim dividers so jar spacing is even. Make folder cards from cardstock with a pocket cut so the card slides in. Label the card front with spice name and use line, then slide into the pocket.
Write a matching “recipe starter” card for the back of the set with 5 quick uses.
Skip loose dividers — jars shift and the grid breaks.
19. Gold Foil Sticker Labels on Brown Paper Wrap
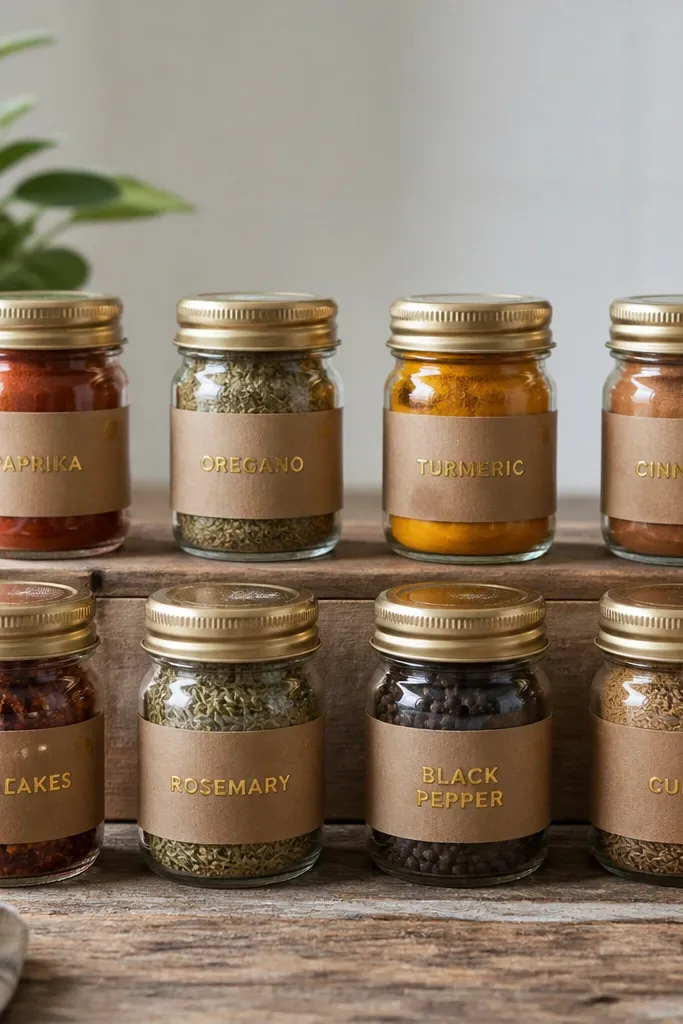
Brown paper plus gold foil is a simple combo that looks expensive fast. The gold letters catch light, and the brown wrap hides any jar label residue. It also makes the set look cohesive even if your jar brands differ slightly. This one works when you want a gift that feels more grown-up than kid-themed.
Cut brown paper strips about 1.25 inches wide and long enough to wrap once around the jar. Secure with a small piece of clear tape on the back seam. Place gold foil sticker labels centered on the front and add the use line in black marker below it.
Leave the paper seam slightly off-center — tiny asymmetry makes it look handmade, not factory.
Avoid thick ribbon under the label — it creates bumps and wrinkles the paper.
20. Spice Color Ombre Backing on a Black Tray
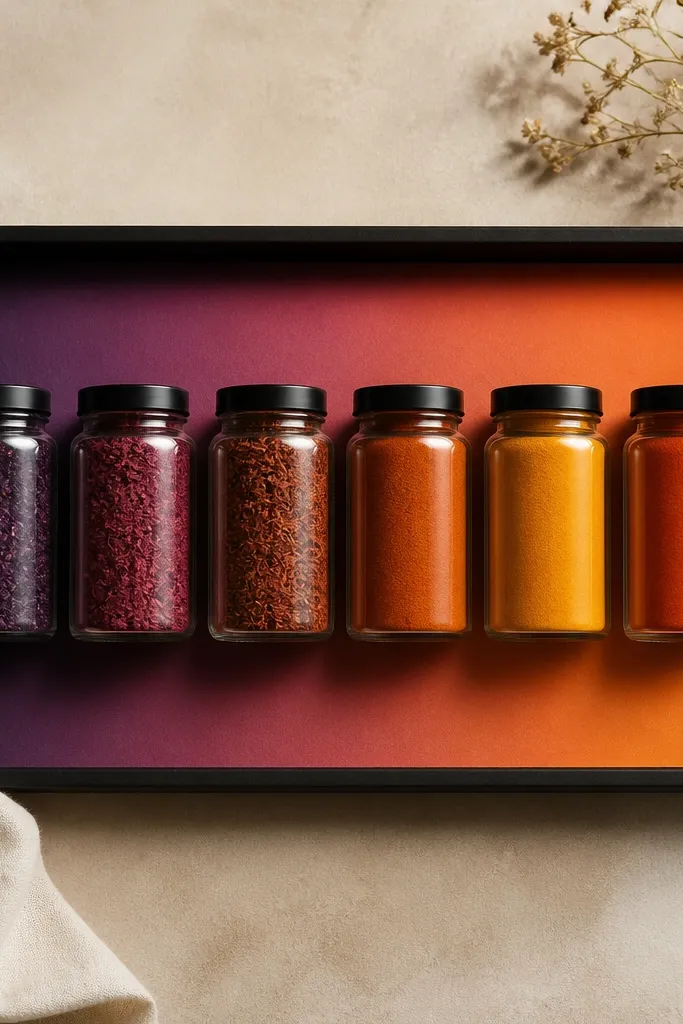
Ombre backing makes the whole set feel designed. I matched each jar’s spice color family to a section of the gradient so the tray looks like a smooth flow rather than random placement. Black tray base makes lighter spices like turmeric look brighter. This is the aesthetic I use when I want the gift to look like it came from a small design studio.
Create an ombre backing using craft paper or printed gradient paper, then glue to the tray bottom and seal with matte spray. Place jars in order from cool to warm tones, keeping labels aligned. Use one label size and one font style so it looks consistent against the gradient.
Quick tipNumber the back of the tray 1-20 so you can reorder jars later without guessing.
One warningSkip glossy ombre paper — reflections flatten the spice colors.



