
1. Galaxy Pocket Folder Set with Star Labels
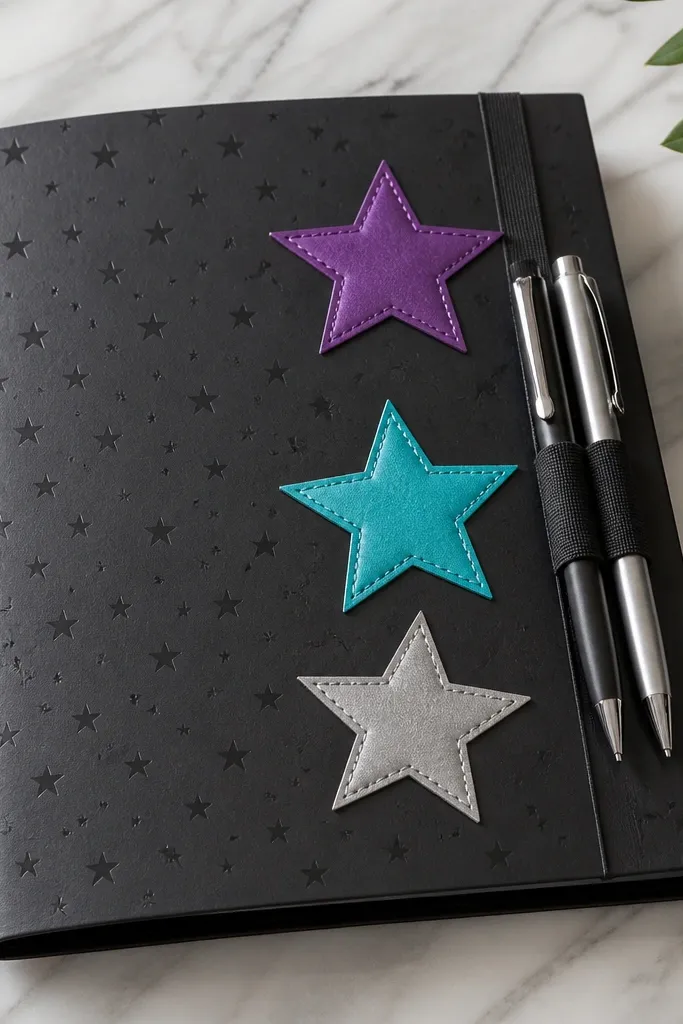
Cut a folder from 2mm craft foam or 250 gsm cardstock, then wrap it with matte black patterned paper. Make two interior pockets from 200 gsm cardstock, each about 5.5 x 8 inches, and glue with a thin line along the sides. Add a front elastic band sized for two pens (about 1 cm wide).
This set looks creative because the folder is the hero piece — it’s dark and matte, so the neon label colors pop. I use cyan and purple star accents so the set reads as one theme instead of random crafts. The elastic band keeps pens from sliding, and the inside pockets hold a mini notebook and a sticker sheet. It feels “gift-ready” because nothing leaks out or gets bent.
One warningAvoid glossy paper — it reflects light and makes handwriting look washed-out.
Quick tipPrint star labels on sticker paper, then seal them with a quick coat of matte spray so they don’t peel when kids handle them.
2. Pastel Ribbon Notebook Sleeve with Button Closure
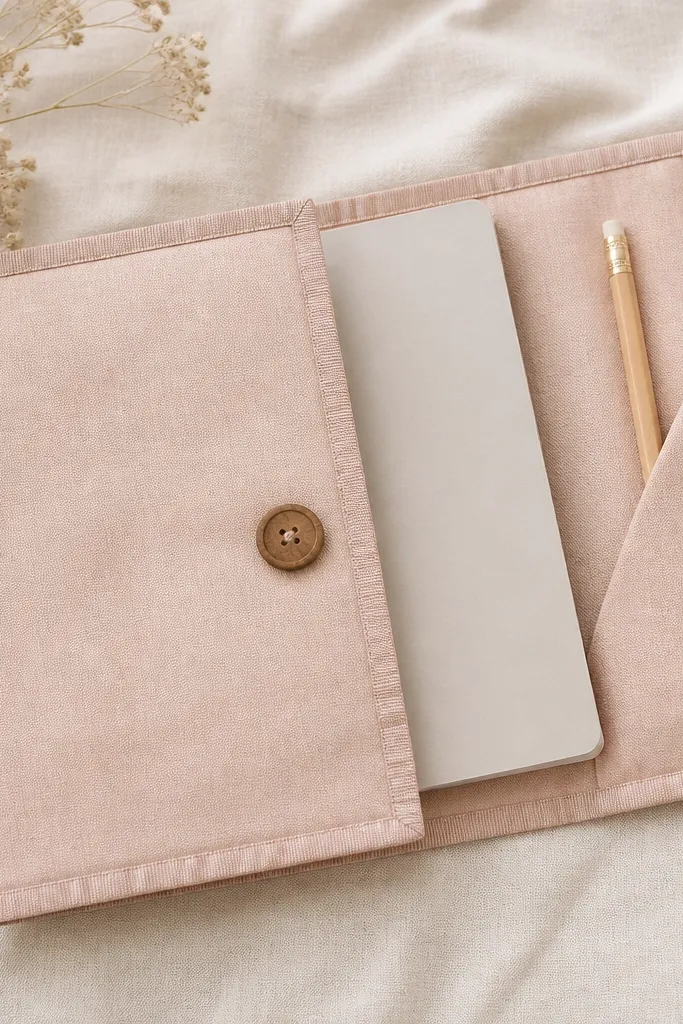
Use felt or cotton fabric (not stretchy knit) cut to wrap a standard 5 x 7 inch notebook. Add a 1/2 inch seam allowance and leave the back open for slipping the notebook in. Stitch a ribbon along the front edge, then attach a wooden button and a fabric loop with thread.
This one feels creative because the sleeve is fabric-soft and the closure is tactile. The button closure makes it look intentional and it keeps the notebook from sliding around. I use blush plus one accent color like mint or pale yellow so the whole set looks calm and put-together. The inside pocket also means the pencil always has a home.
One warningDon’t use hot glue on fabric edges — it makes bumps that snag kids' fingers.
Quick tipBurnish the fold lines with a bone folder before sewing so the edges look straight.
3. Crayon-Box Mini Organizer with Hinged Lid
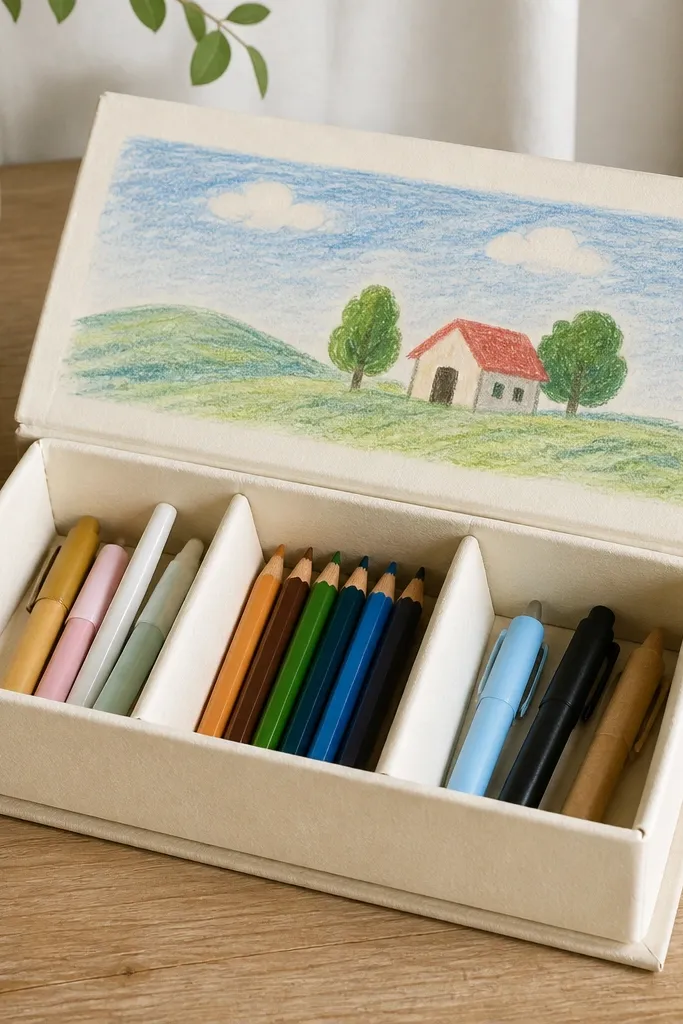
This set feels creative because it’s functional storage disguised as art. A hinged lid makes the items easy to access and keeps crayons/markers from rolling out. The folded tube holders are simple but they prevent the “everything mixed together” chaos. Paint + one clean graphic keeps it looking like a real product.
Cut a recycled box to about 7 x 4 x 2 inches. Cover with acrylic paint (cream base) and let it dry fully. Make three paper tubes (about 1 inch diameter) and glue them inside as holders, then cover the lid with a crayon-themed print or hand-drawn icon.
Use a scrap piece of cardboard as a spacer while gluing tubes so they sit evenly.
Skip loose tubes — if they wobble, the set looks homemade in a bad way.
4. Watercolor Wash Bookmark + Matching Mini Notes Set
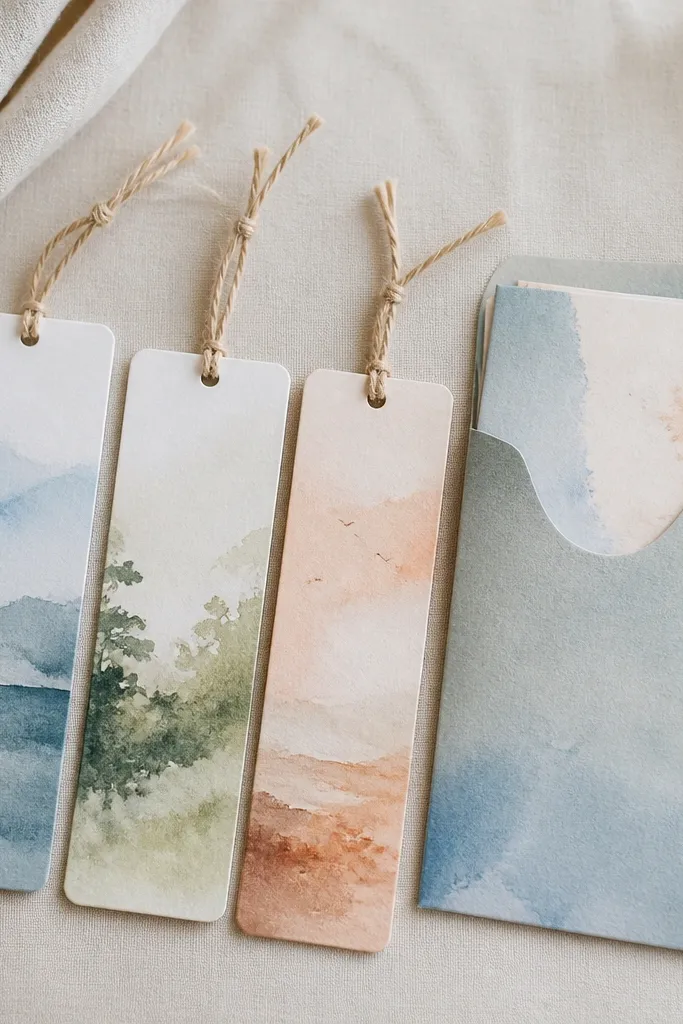
This idea works because it pairs a useful item (bookmark) with quick writing prompts. The watercolor wash gives a hand-made look without needing fancy drawing. Twine ties keep the notes from sliding and add a neat, gift-like finish. When the bookmark colors match the envelope sleeve, the whole set looks cohesive.
Cut bookmarks from 200 gsm watercolor paper into 2 x 6 inch strips with rounded corners. Paint washes with 2-3 colors maximum, then seal with a light matte spray. Make mini note cards (3 x 4 inches) from 120 gsm paper and tuck them into an envelope made from the same watercolor paper.
Use a ruler to keep bookmark widths identical — tiny differences are what make DIY sets look messy.
Don’t over-saturate the paper — heavy paint can warp note cards so they won’t stack flat.
5. Sticker-Sheet + Prompt Cards in a Clear Accordion Sleeve
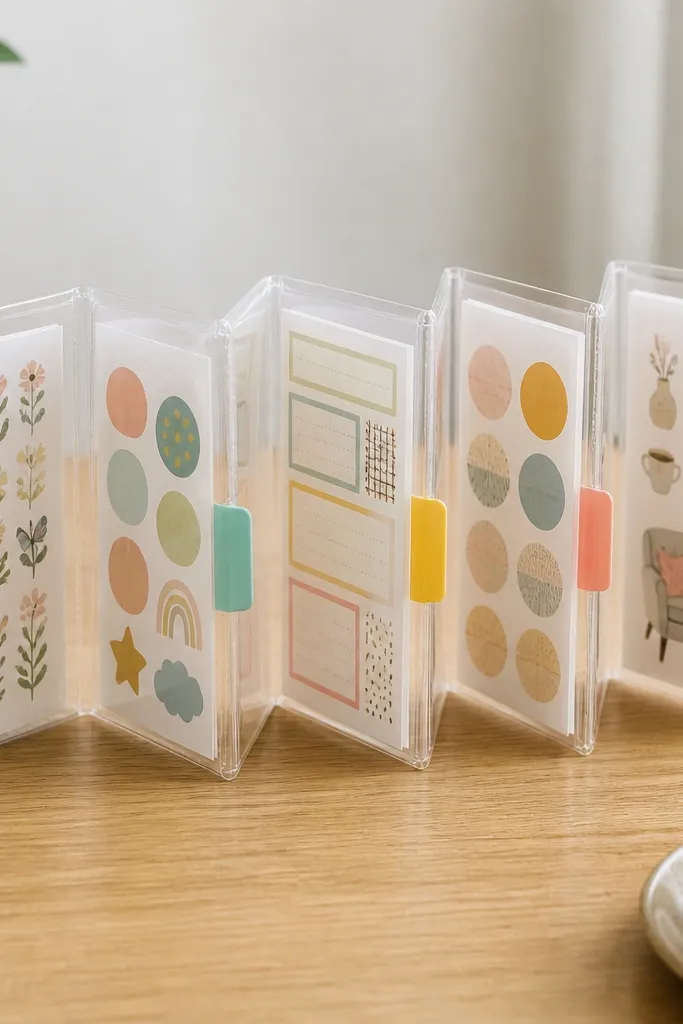
Use an accordion folder or make one from thick acetate or clear plastic with 1-inch folds. Add five panels, each holding one item sized for the panel (about 4 x 6 inches). Create tab labels from cardstock in one color set and attach them with small glue dots.
Kids love this because they flip it like a mini collection. The clear accordion sleeve keeps everything visible, which reduces the “where is my stuff” problem. Prompt cards make the set self-using: kids can write a grocery list, draw a mood, or answer a question. The tabs make it easy for small hands to pick the right panel.
One warningAvoid bulky embellishments inside — they create uneven thickness and the sleeve won’t close cleanly.
Quick tipTrim sticker sheets to match the panel height so nothing sticks out and bends.
6. Duct Tape Pencil Wrap with Patterned Spine
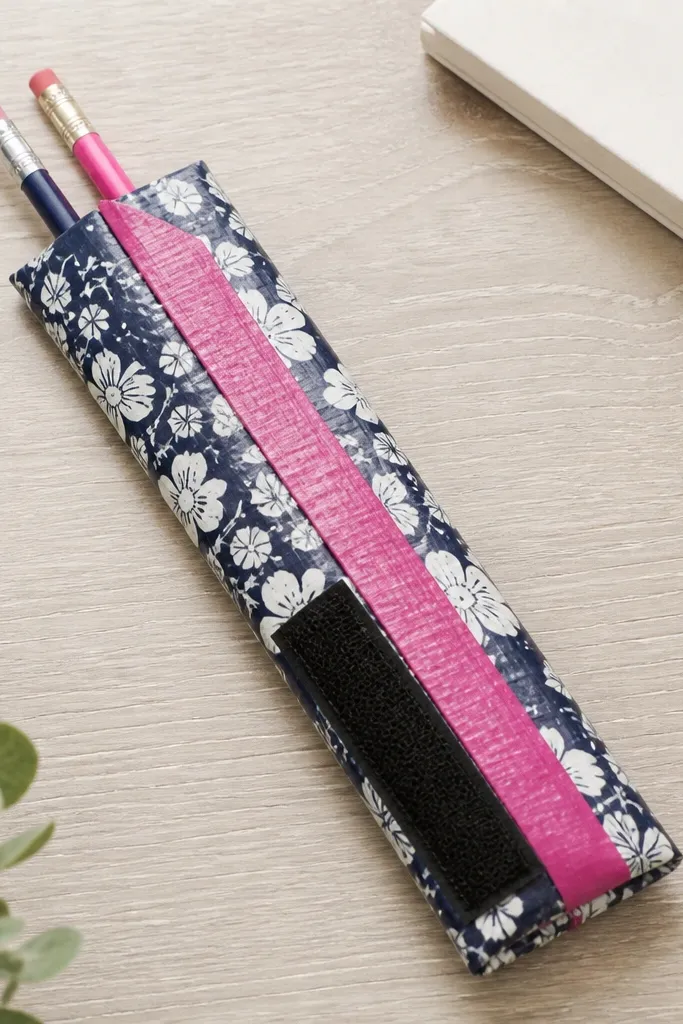
Cut two long strips of duct tape, patterned and solid, and overlap them on the sticky side to make a flat sheet. Wrap around pencils (about 7.5 inches long) and fold the ends under. Add a small Velcro strip on the outside so it closes without tying.
Duct tape is the reason this looks polished. It’s smooth, it doesn’t fray like paper, and it holds shape in a backpack. The wrap also teaches a useful skill: rolling and storing pens neatly. I like using one pattern for the wrap and one solid stripe for the spine so it reads clean from a distance.
One warningDon’t use too many patterns — it turns into visual noise and looks cheap fast.
Quick tipPress the duct tape firmly with your palm and then smooth with a credit card so edges lay flat.
7. Felt Desk Organizer with 3 Pockets and Name Tag
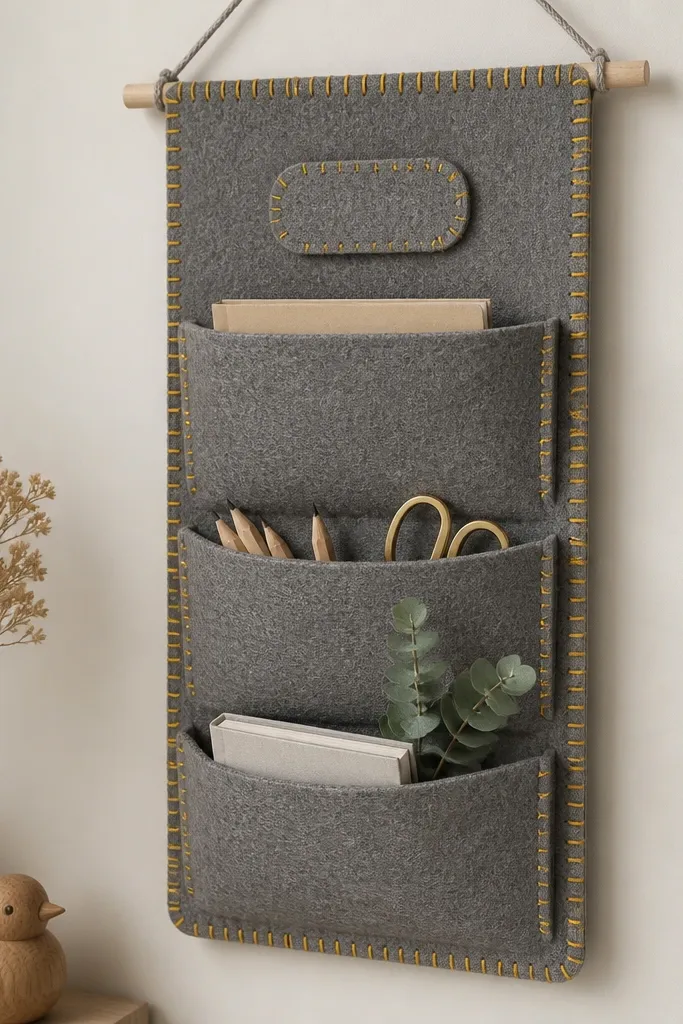
Cut felt sheets about 10 x 12 inches for the base and 3 pockets at roughly 4 x 4.5 inches each. Use contrasting thread for the stitch lines. Glue or stitch the name tag using felt cut to 2.5 x 1.5 inches, then add a simple hanging loop behind.
This is one of my go-to gift sets because it turns stationery into a system. The felt pockets hold tiny notebooks, erasers, and a small pad without slipping. Stitching the pockets makes it look crafted, not glued. The name tag makes it feel personal even if the rest is generic.
One warningAvoid thin craft felt — it sags and makes the pockets look sloppy.
Quick tipUse a fabric marker to plan the stitch lines first, then stitch straight — it looks store-bought.
8. Mini Memo Clipboard with Clothespin Clip
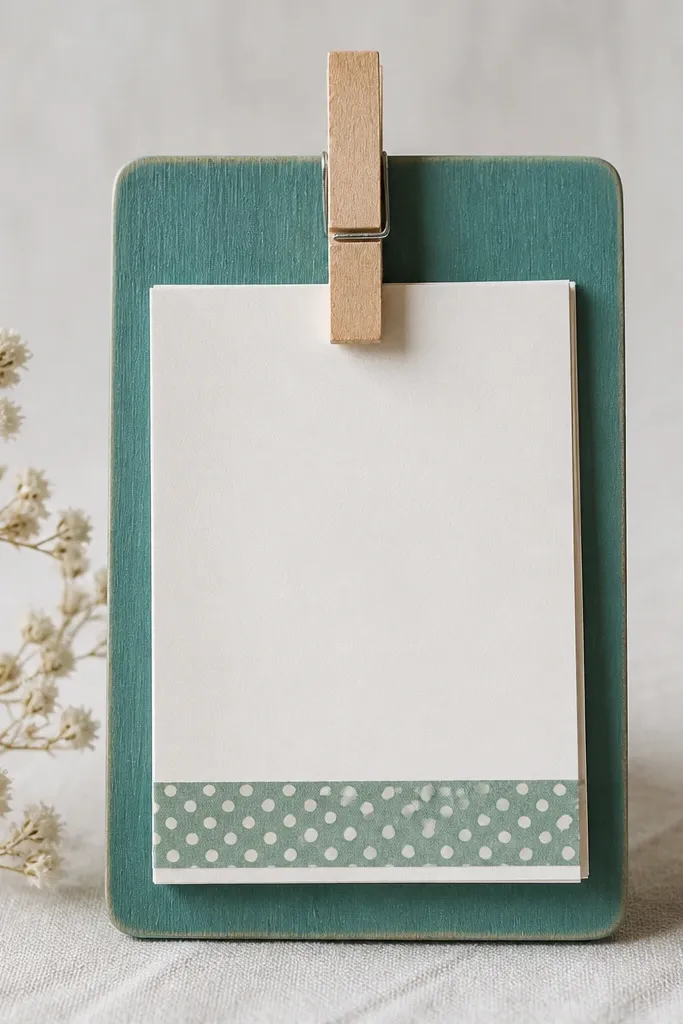
Use a small wooden board (about 4 x 6 inches). Paint it teal, then glue a strip of washi tape along one edge. Attach a clothespin with a small hinge or two screws so it opens and closes. Add 10-15 memo sheets clipped under the pin.
A clipboard gives the set instant usefulness. The clothespin clip is simple, but it looks charming and it holds papers without sliding. Teal paint plus a single washi border keeps it clean and not cluttered. It’s a great gift when you want something that gets used the same day.
One warningSkip cheap paper — flimsy memo sheets curl and ruin the look.
Quick tipSand the wood edges before painting so the paint looks smooth instead of chalky.
9. Origami Paper Crane Pen Holder with Mini Notebook
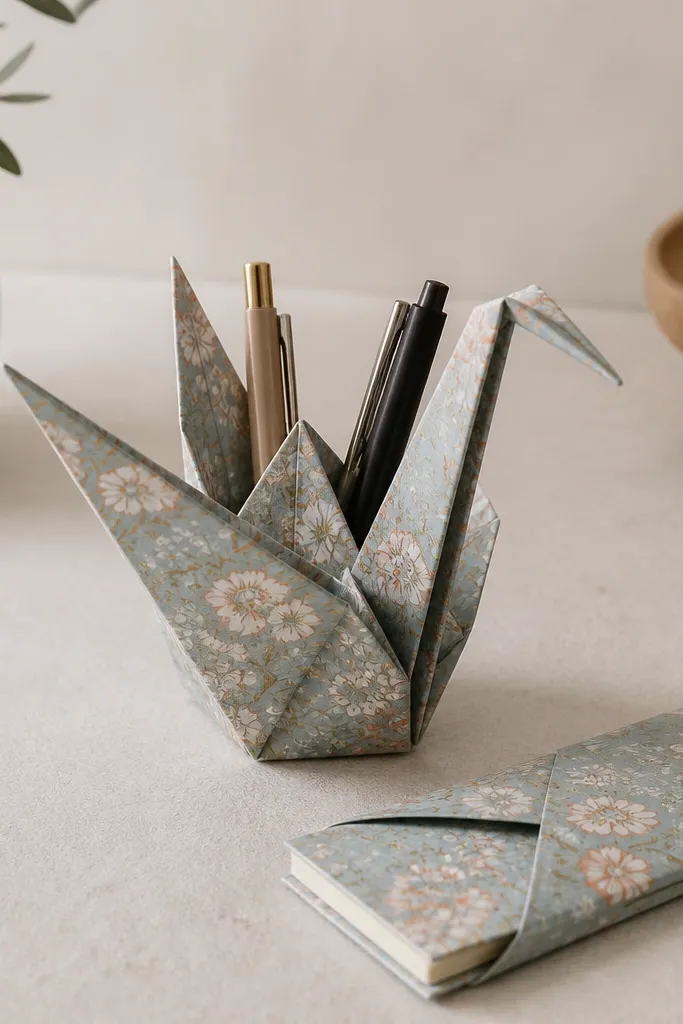
Fold the crane from 6 x 6 inch patterned origami paper, then reinforce the base with a thin layer of clear tape on the inside. Make a mini notebook from folded 120 gsm paper signatures, about 3 x 5 inches. Wrap the notebook sleeve with matching paper and add a belly-band closure using a thin elastic.
This set feels creative because the pen holder is sculptural. The crane shape makes kids want to put pens there instead of tossing them. Pairing it with a mini notebook in the same paper pattern makes the theme click. The crane also works as decor when it’s not being used.
One warningAvoid glossy origami paper — it looks slippery and the crane base won’t sit as firmly.
Quick tipUse a matte clear tape inside the crane so it doesn’t look shiny.
10. Cookie-Cutter Stamp Set with Ink Pad and Note Cards
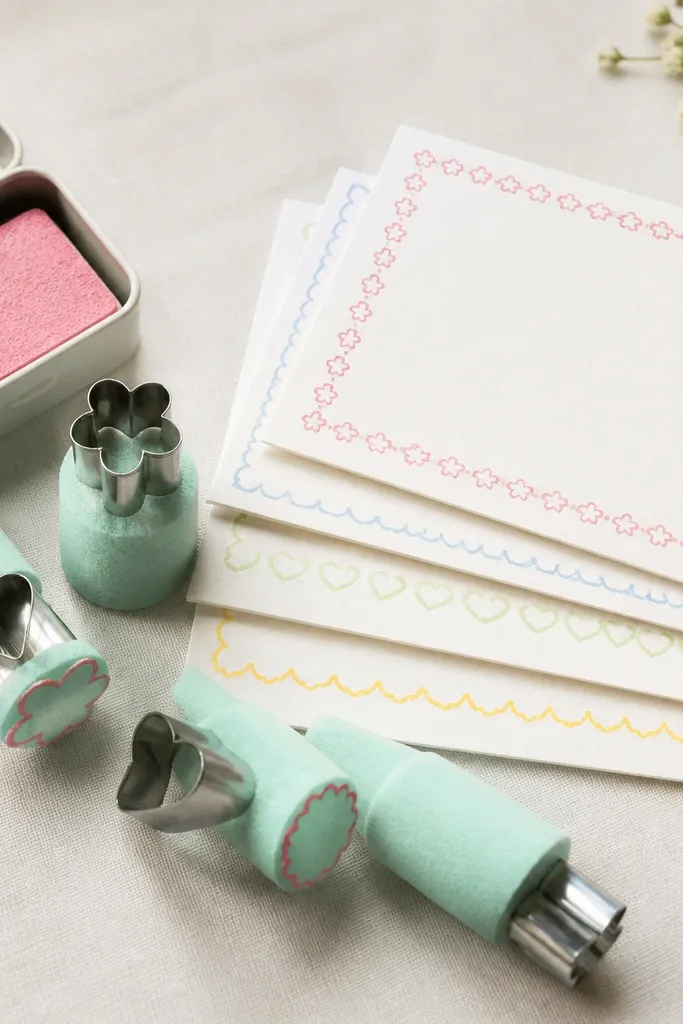
Glue cookie cutters to foam handles (about 1 inch thick) and let them cure overnight. Use non-toxic craft ink or stamp pads in two colors: one light and one darker. Cut note cards to 4 x 6 inches from 120 gsm paper, then stamp a border on the top half.
Stamps are the quickest way to make writing feel fun. Cookie-cutter shapes give consistent designs, so kids get nice results even if they press unevenly. I pair one ink pad with pre-cut note cards so they can stamp borders before they write. The set looks creative because the stamped frames make every page look like a theme.
One warningDon’t use paint that’s too watery — it smears and makes cards look messy.
Quick tipWipe the stamp with a damp cloth after use so ink doesn’t build up and blur lines.
11. Laminated Checklist Sheets in a Mini Binder Clip Folder
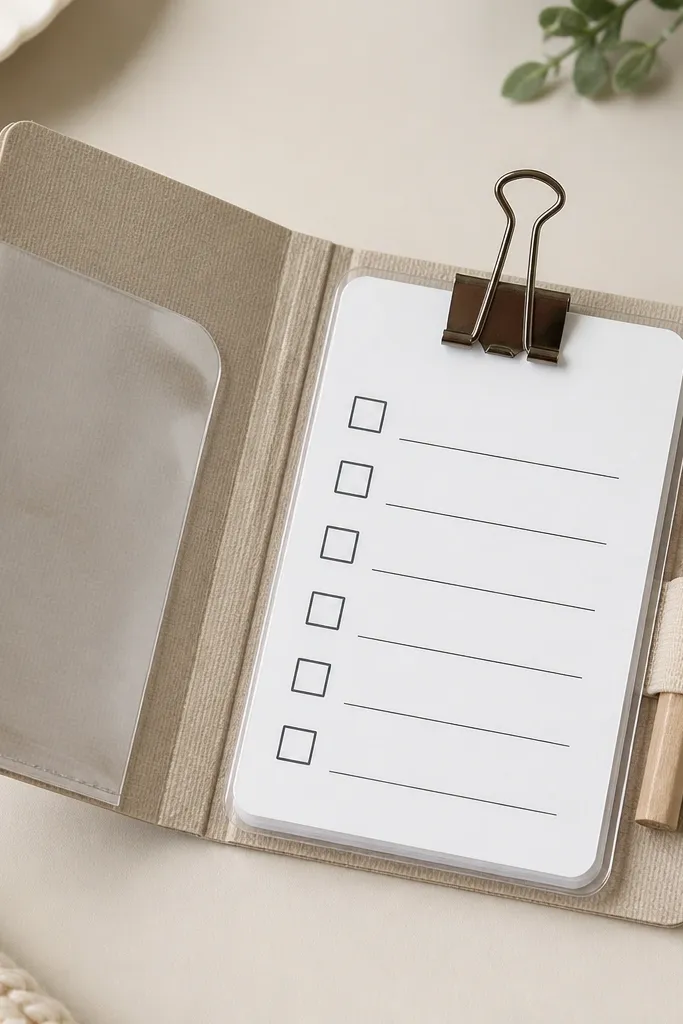
Make a folder base from 250 gsm cardstock, size about 8 x 10 inches, with a pocket for the laminated sheets. Cut laminated checklist sheets to about 3 x 5 inches. Add a pencil loop from elastic strip (about 1 cm wide) glued inside with strong tape.
Laminated sheets make the set usable again and again. Kids can write with dry-erase markers, wipe off, and redo. The mini binder clip folder keeps everything together without a complicated binding. I like thick black-and-white checklists because they look crisp and don’t distract from the handwriting.
One warningAvoid thin laminate — it wrinkles and the writing looks crooked.
Quick tipUse a dry-erase marker on a test sheet first — some laminates smear more than others.
12. Color-Block Envelope Set with Wax-Seal Style Stickers
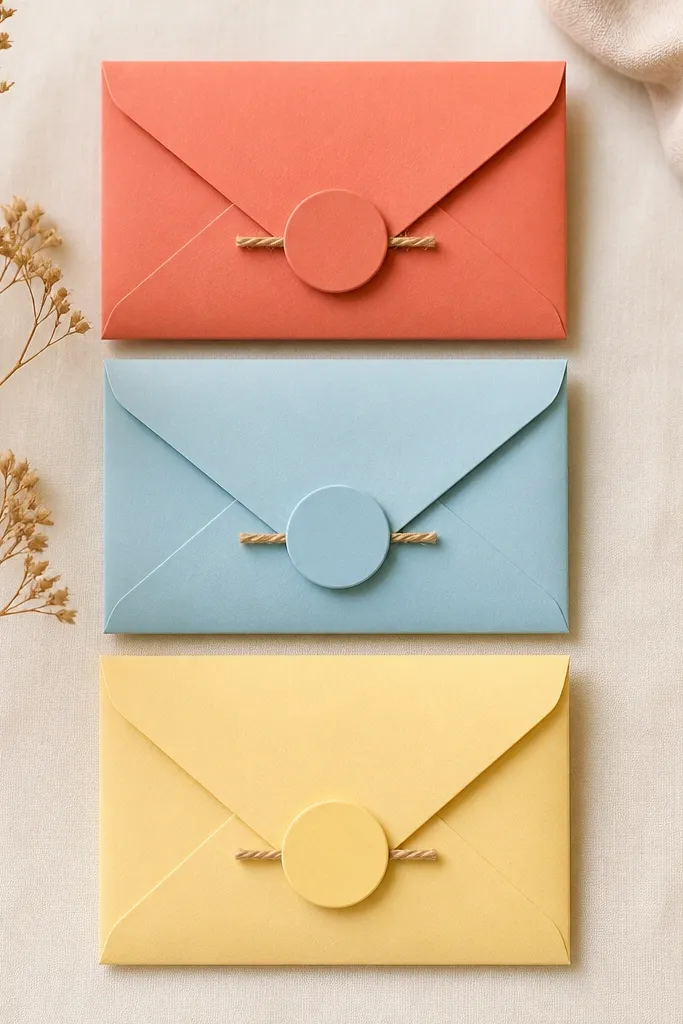
This set looks creative because it’s built for quick letters and inside notes. Color-block envelopes are easy to assemble and they look intentional. Wax-seal style stickers create that “gift mail” feeling without needing real wax. The twine keeps everything neat when kids carry the set.
Cut envelopes from 200 gsm cardstock using a simple template, then glue the sides and fold flaps. Add round seal stickers on the flap center. Include one mini notebook or note pad inside each envelope so each color has a complete mini set.
Use the same font style on all seals or labels — consistency makes it look designed.
Don’t use random colors with no pattern — mismatched sets look like leftover paper.
13. Tie-Dye Paper Bag Stationery Kit with Washi Roll
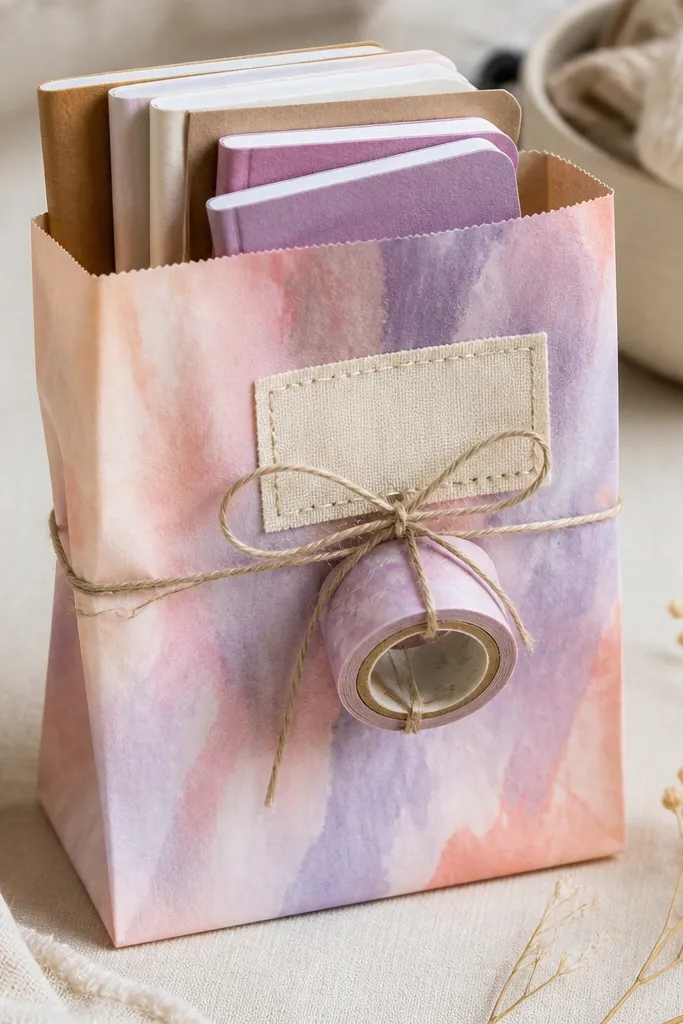
Use kraft paper bags, dye with watered-down fabric dye in pastel colors, and let them dry flat overnight. Pack a mini notebook, eraser, and a small pencil stub inside. Wrap a washi roll around a cardboard spool and tie with string.
Tie-dye paper bags feel playful and they make the stationery look like part of a craft day. The bag shape is sturdy enough for pencils and small notebooks. A washi roll tied on the outside is a clever extra because kids can decorate their own covers. The stitched label makes it look curated without being fancy.
One warningAvoid dark tie-dye with light labels — the contrast looks muddy.
Quick tipAdd a plastic liner inside the bag if you use marker-heavy items to prevent bleed on kraft paper.
14. Beaded Bookmark Set with Elastic Loop and Charm
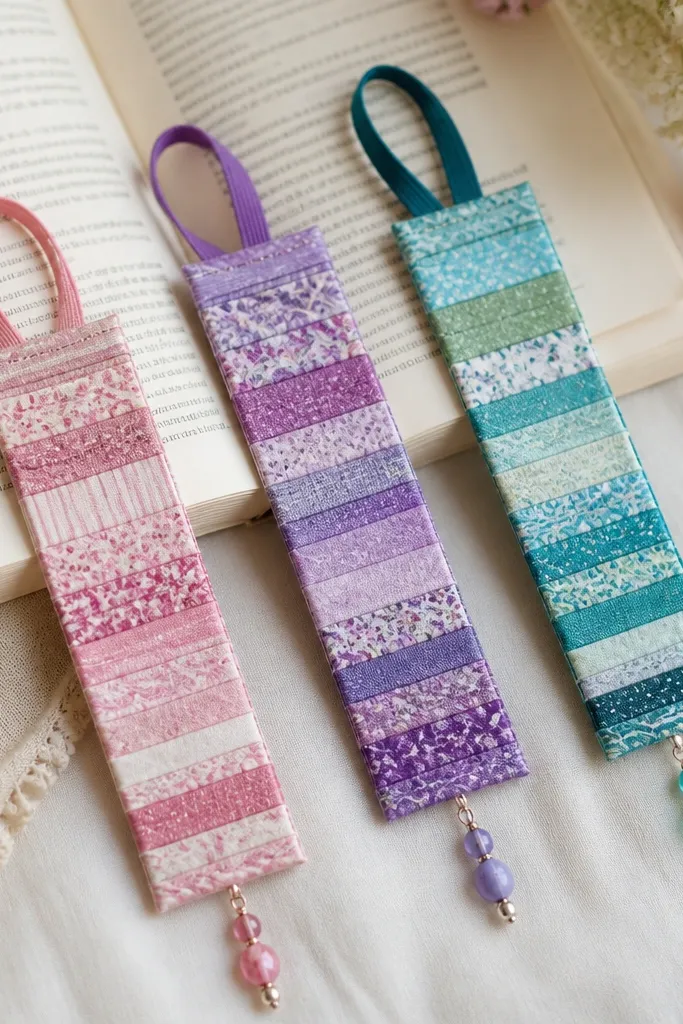
Cut fabric strips 1 x 6 inches, fold and sew along the edge, then thread a small bead charm into the bottom using a needle thread. Add an elastic loop at the top by stitching elastic into the fold. Pair with a mini notebook or a small pad in matching colors.
Bookmarks are small gifts that kids actually keep. The bead charm adds weight so the bookmark hangs nicely and it looks special without being fragile. I use elastic loops so it grips the page without tearing it. Matching charms across the set makes it feel like one set, not three singles.
One warningDon’t use sharp bead edges — they snag paper and can scratch skin.
Quick tipKeep charms light (single small bead or two beads) so the bookmark doesn’t fall out of books.
15. Comic Speech Bubble Notepad Set with Blackout Border
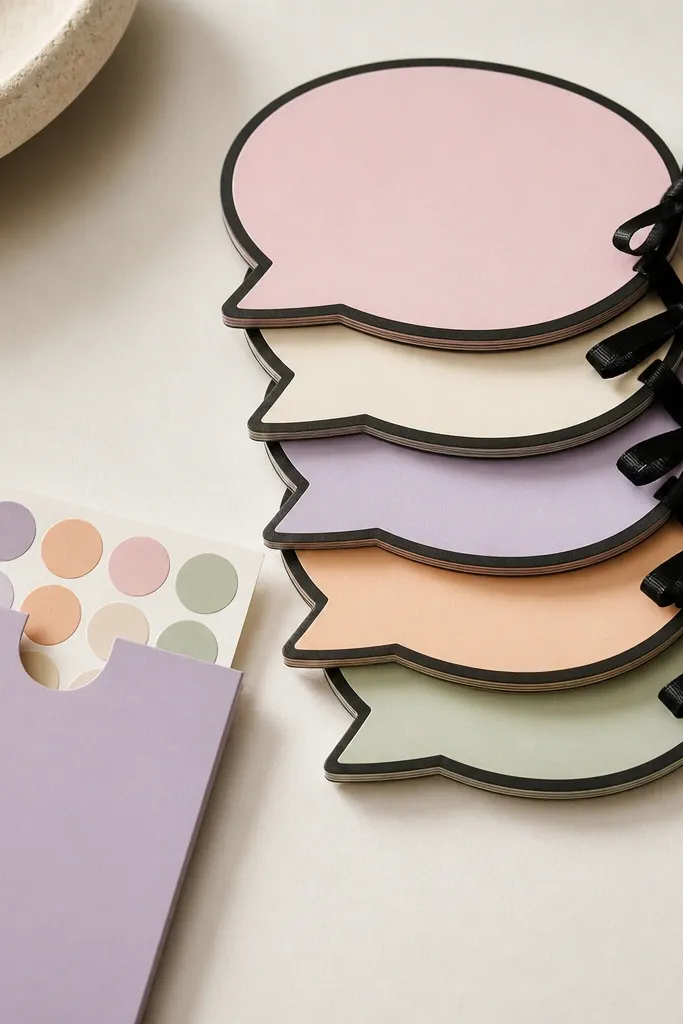
Speech bubbles make writing feel like a game. The black outline is what gives it that comic look instantly, and it also hides minor miscuts. Tying the stack with ribbon keeps the pads flat and gift-ready. The matching sticker sheet adds a fun finishing touch kids can use right away.
Cut notepad covers from 200 gsm cardstock in speech-bubble shapes, then staple or glue 20-30 sheets of 120 gsm paper inside. Make a sleeve from cardstock, then glue it around the notepad stack with a ribbon tie closure. Add a small sticker sheet panel inside the sleeve.
Use a thick black marker to reinforce outlines after cutting for cleaner edges.
Avoid thin outlines — they blur and look like a low-print sticker.
16. Pressed Leaf Stationery in a Glassine Sleeve
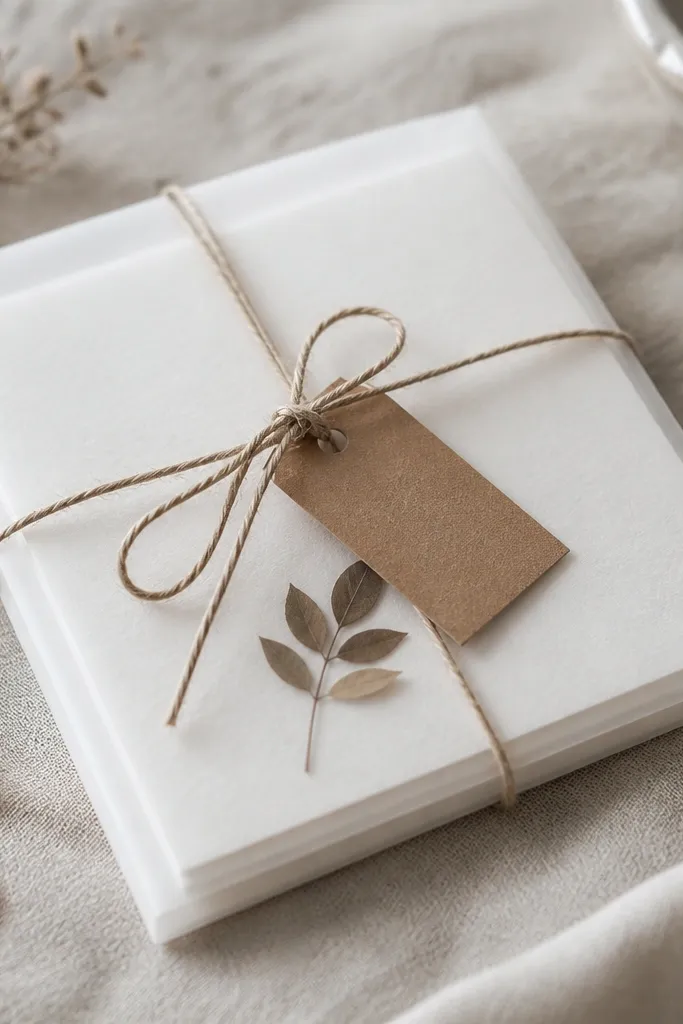
Press leaves between books for 1-2 weeks, then place tiny pieces (about 1 cm wide) on note cards. Seal with a clear matte medium or thin clear tape over the leaf area. Put cards into a glassine sleeve and tie with twine.
This looks creative because it’s real texture under the surface. Pressed leaves create a delicate, natural pattern that makes even blank cards feel special. I keep the leaves small and sealed so they don’t crumble. The glassine sleeve keeps everything protected and gives that old-school botanical gift vibe.
One warningAvoid large leaves — they lift edges and the cards feel uneven.
Quick tipChoose flat, thin leaves like clover or small herb leaves for the cleanest results.
17. Lego-Stud Crayon Holder with Mini Label Strip
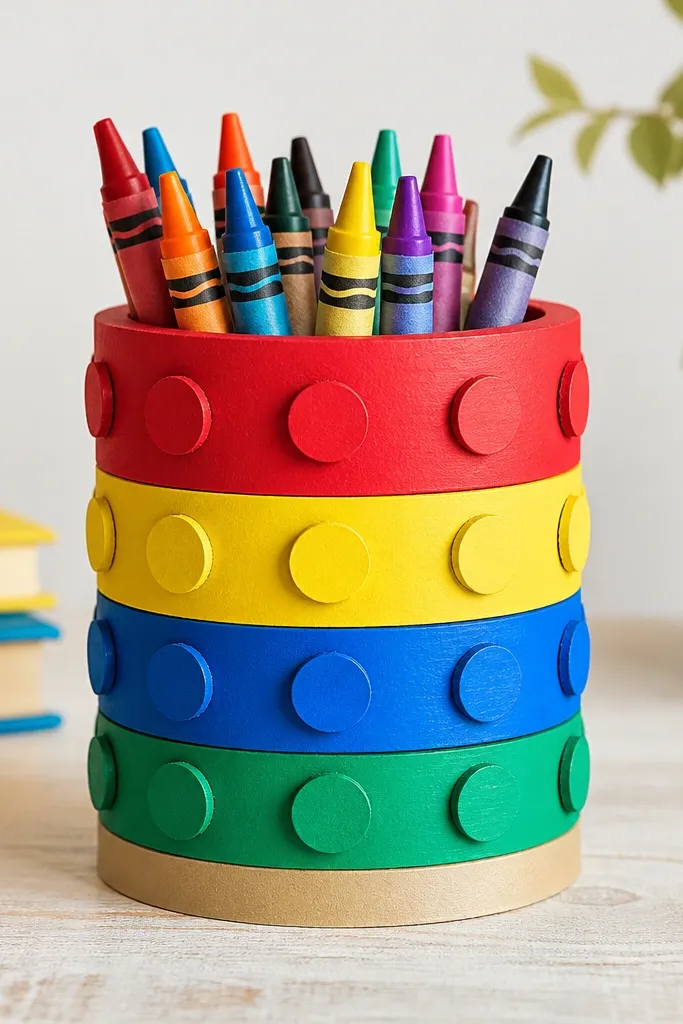
Crayons always disappear, so a stud-like holder solves that in a fun way. The cylinder shape keeps crayons visible, and the raised dots give the set a playful LEGO feel. I use primary colors because it looks bright without extra decoration. The label strip makes it feel like it has a theme and a purpose.
Build the cylinder from rolled cardstock or thin foam, about 3.5 inches tall and 2.5 inches wide. Create stud dots with small circles cut from craft foam or layered paper circles, then paint them. Wrap a label strip around the base and use a marker to add a kid-friendly name and crayon count.
Measure the crayon length first and leave 1 inch extra above the top so they’re easy to pull.
Skip wobbly bases — if it tilts, kids will drop it.
18. Tote-Style Washi Paper Roll Holder with Hidden Pocket
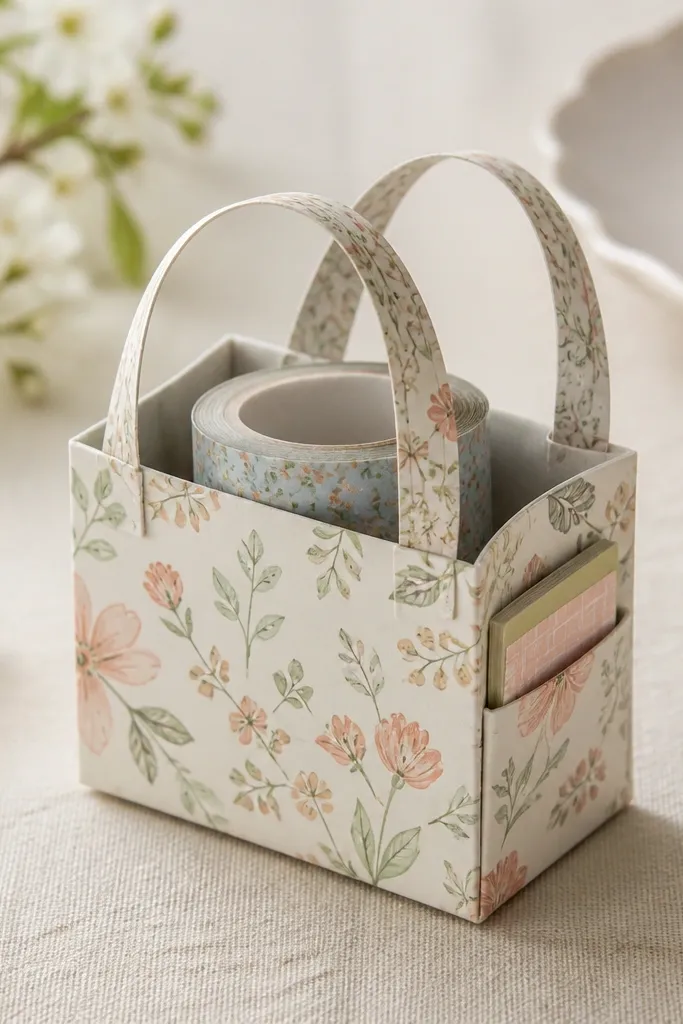
Cut tote panels from 200-250 gsm cardstock, assemble with glue and reinforce corners with tape. Make a pocket flap on the side using a fold-over tab about 2 inches wide. Insert a washi roll (or wrap washi around a small cardboard tube) and add a small mini sticky note pad into the hidden pocket.
This set feels creative because the washi roll is displayed like a gift item, not tucked away. The tote shape is easy to recognize and it encourages kids to keep tape in one spot. A hidden side pocket adds surprise — sticky notes appear when you pull the flap. Matching paper handles and pocket lining make it look intentional.
One warningDon’t make handles too thin — they tear when kids carry it.
Quick tipUse a single patterned paper for the whole tote and keep the pocket lining plain for contrast.
19. Geometry Pencil Case with Zipper and Color-Coded Compartments
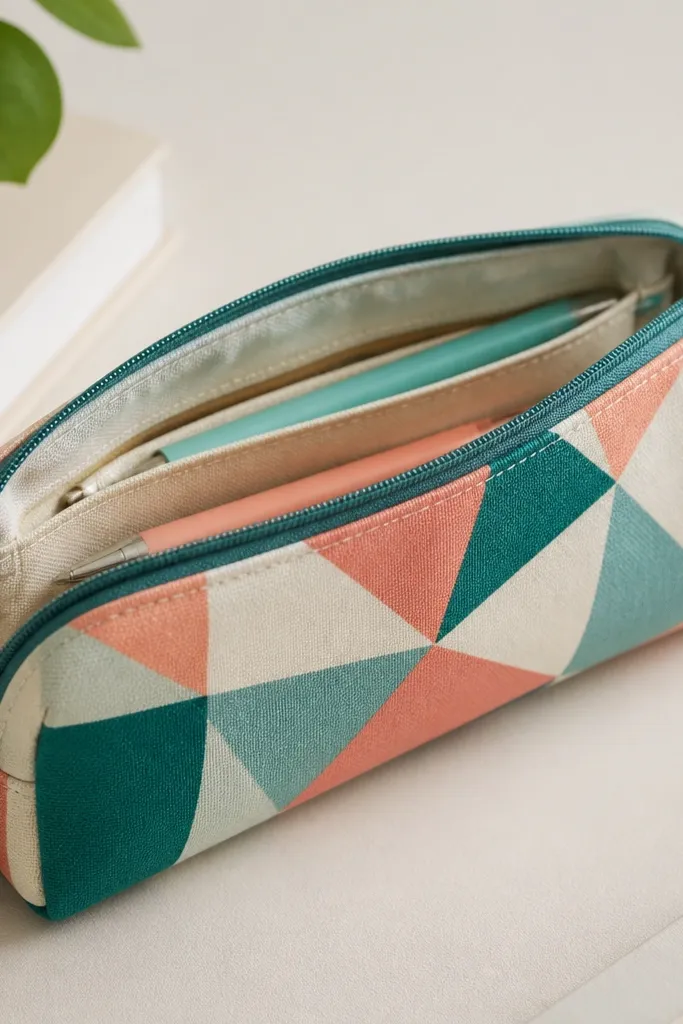
Use a simple zippered pouch pattern from sturdy fabric or faux leather (wipeable). Add two dividers from thin interfacing so compartments stay flat. Choose one base color and two accent shapes, then apply fabric paint or iron-on patches for the geometry.
A zipper case makes a stationery gift set feel complete. Color-coded compartments teach organization without you nagging, and kids can see where each pencil goes. The geometric print hides small scuffs and keeps the case looking crisp. This is the one I make when a kid is switching to a new grade and needs a fresh system.
One warningAvoid flimsy fabric — it collapses and the compartments look uneven.
Quick tipTest the zipper pull length against the case size so it doesn’t catch the lining.
20. Pop-Up Card Set Inside a Book-Themed Box
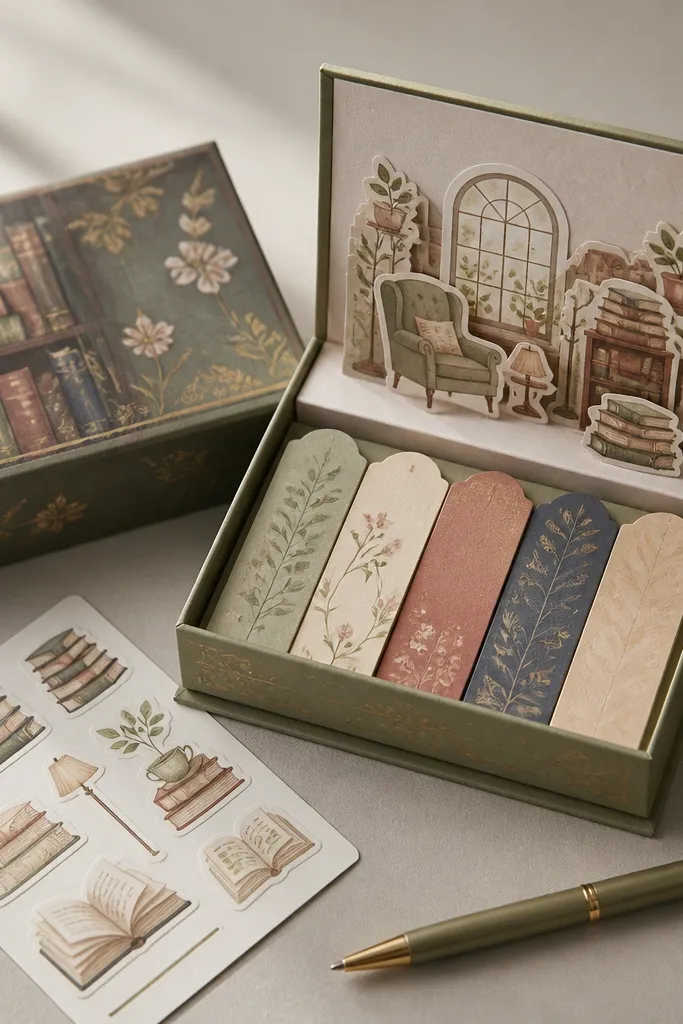
Make a shallow box from thick cardstock or a shoebox cut down to about 8 x 6 x 3 inches. Create a pop-up card by folding a center panel and attaching two tabs that stand when opened. Add a mini pen in a pocket and tuck a sticker sheet on the top layer.
Pop-up cards make the stationery feel like a craft project, not just supplies. The box makes everything feel like a set you open and use. I build a simple pop-up mechanism with folded cardstock tabs so it stands up reliably. When the inside card includes small writing prompts, the kit gets used immediately.
One warningDon’t overbuild — too many layers make the box hard to close.
Quick tipScore folds with a metal ruler so the pop-up edges stay sharp and don’t tear.



