
1. Pastel Cloud Starter Set in Mini Gift Boxes
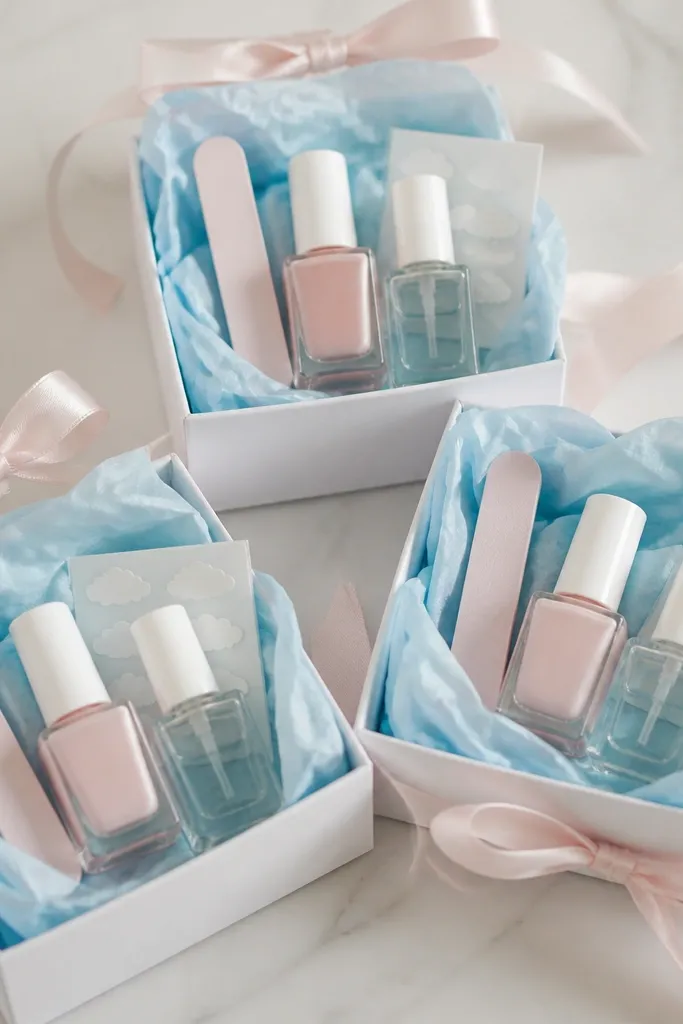
I like this look for ages 6 to 12 because it feels soft and “birthday ready” without looking loud. The color combo is sheer pink (like a clean lip tint) plus pastel blue accents, which flatter most skin tones because neither shade is too harsh. The gift reads stylish because the packaging is matte white with a smooth satin ribbon, and the decals are small-scale so they don’t look childish. Keep the nails simple: one coat sheer pink, then a tiny cloud decal on the ring fingers so the set feels intentional, not random.
Start by wrapping each item separately in tissue paper so polish bottles don’t rub together. Place the mini nail file on the bottom of the box, then add the sheer pink polish bottle upright in the center. Lay the cloud decal sheet flat on top, and tuck the glossy top coat in the corner so it doesn’t bump the polish cap. Close the box, then tie a 3/8-inch pale pink satin ribbon around the lid with a double knot, leaving a 6-inch tail for photos.
Quick tipPrint labels on matte sticker paper and write the shade name by hand in dark gray pen for a “real gift” feel.
One warningAvoid mixing glossy and matte packaging finishes in the same box — it makes the set look mismatched.
2. Berry Pop Set with Hot Pink Ribbon and Foil Accent
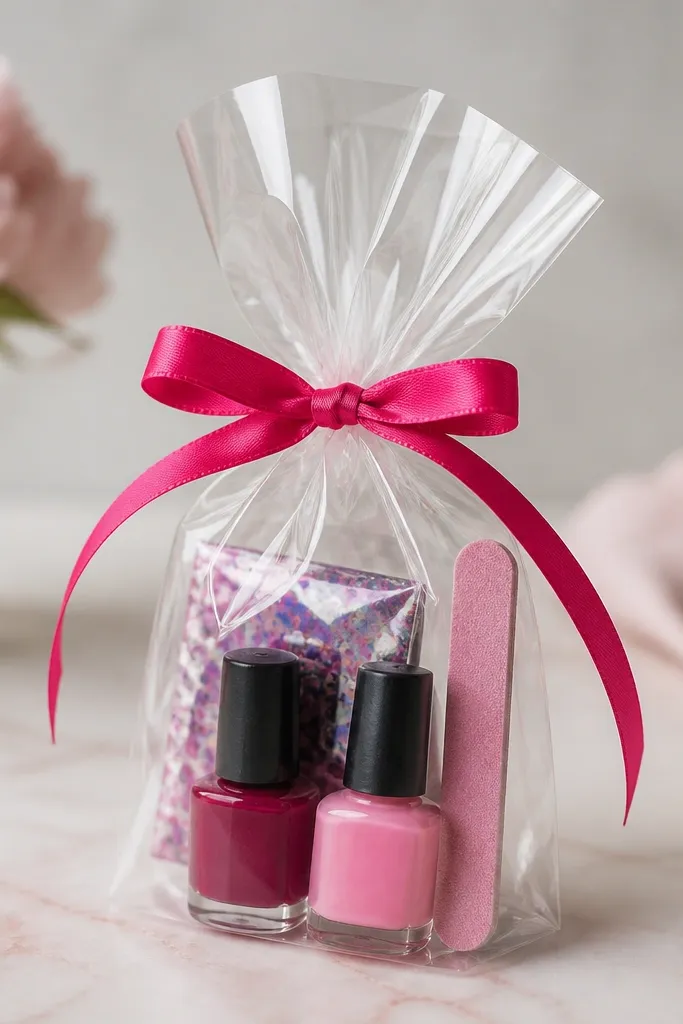
This one is for people who love bold color but still want it to look neat. Deep berry (almost plum) looks flattering on warm and cool undertones because it has both red and purple in it. The cream pink balances the drama, so the set doesn’t feel like one long dark swipe. The foil accent makes it stylish because it adds a controlled “spark” that you place only on one nail or a single stripe.
Start by lining a small clear bag with a folded piece of tissue in cream pink so the polishes pop. Put the deep berry mini polish in first, then add the cream pink polish beside it. Add the foil sheet folded once so it stays crisp, and place the foam file last at the top. Tie hot pink ribbon around the bag twice, then cut the ends at a diagonal and press them against the ribbon with your fingers so the ends look sharp.
Quick tipUse foil on only one nail per hand; that’s what keeps it from looking messy for a gift set.
One warningAvoid putting foil loose without folding — it creases and looks wrinkled in photos.
3. Nude Gloss Gift Set for "First Manicure" Confidence
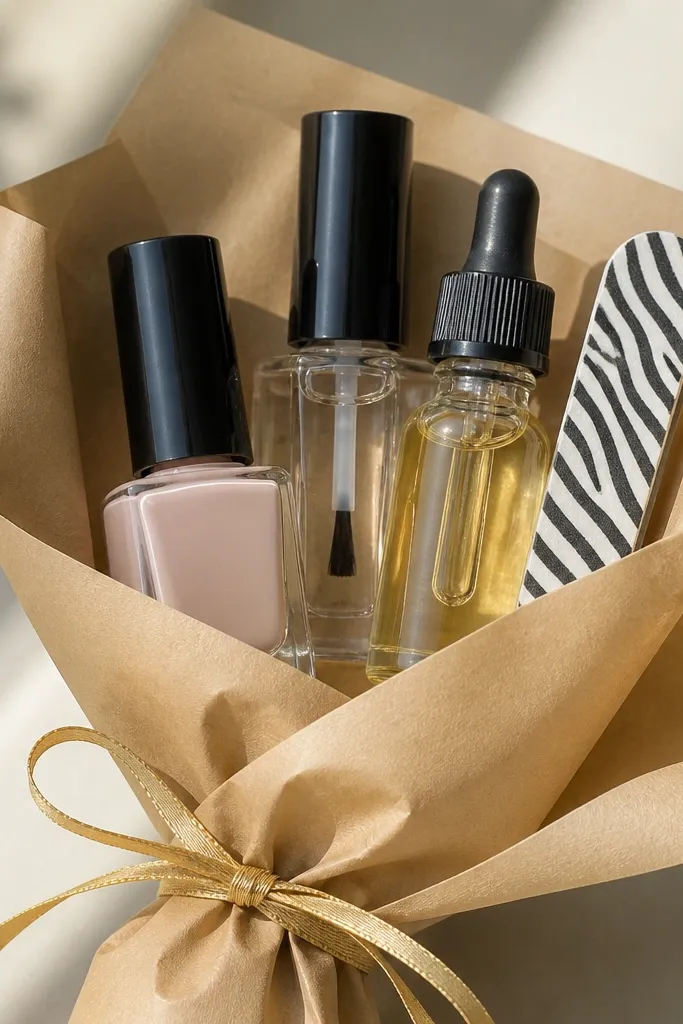
This is the set I reach for when the recipient is nervous about color. Nude sheer polish is forgiving and flatters almost every skin tone because it mimics a clean nail bed shade rather than fighting for attention. A glossy top coat makes the nails look freshly done even with one simple coat. Cuticle oil makes the hands look cared for, which reads more “stylish” than adding another random tool.
Start by wrapping the items in a kraft paper sheet and placing a thin gold ribbon across the center like a sash. Put the clear top coat on one side, then the nude polish upright on the other so caps don’t smear. Add cuticle oil in the corner with a small piece of tissue wrapped around the dropper tip. Finish by tying the ribbon into a bow on top and adding a small gold star sticker to the kraft paper where the knot sits.
Quick tipChoose a nude that looks slightly pink on your skin, not beige — beige can wash out hands in indoor light.
One warningAvoid skipping cuticle oil — without it, nude nails look flat instead of glossy.
4. Ocean Teal Mermaid Set with Iridescent Labels
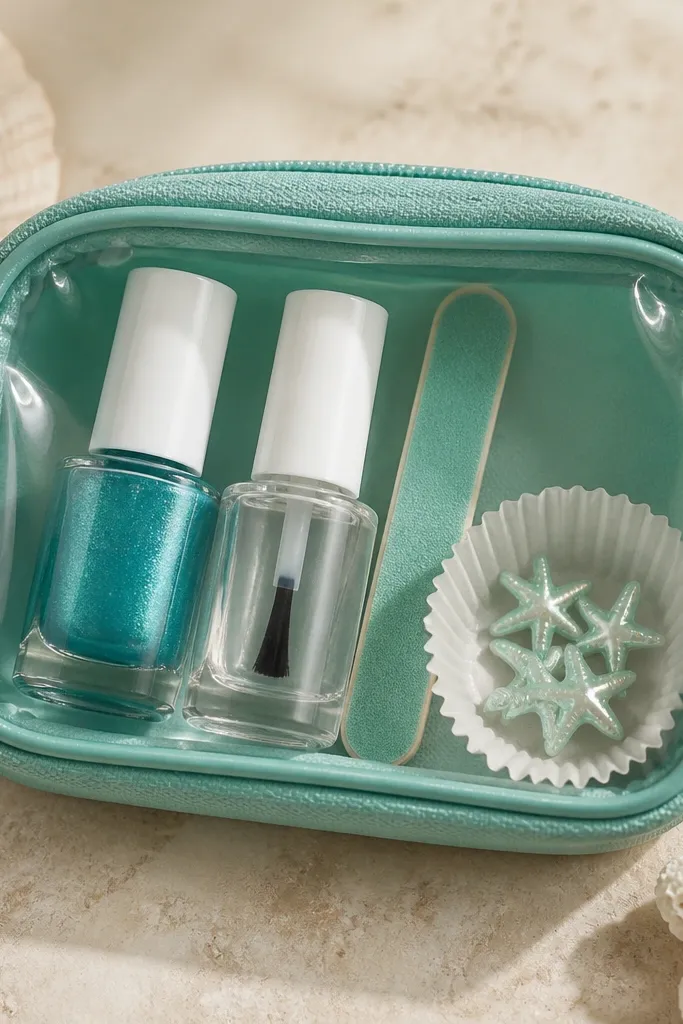
Teal shimmer is the fastest way to make a manicure gift look “special” because it changes with the light. I use it for kids and teens because it feels playful, and it also flatters deeper and light skin tones since teal sits nicely against both warm and cool undertones. The iridescent labels make the whole set look coordinated even before you open anything. Starfish charms are a fun detail, but you only place them on one accent nail so the look stays clean.
Start by choosing a reusable teal pouch so the gift feels like a keepsake. Put the mini nail file in first, then place the teal shimmer polish upright with cap facing up. Add the clear top coat next, and put the starfish charms in a small paper cup or folded paper square so they don’t scatter. Seal the pouch with a zipper, then stick iridescent label stickers on the front in a neat line across the zipper area.
Quick tipIf you use nail charms, glue them with a dot of clear polish and cap the edge with top coat to lock them down.
One warningAvoid packing charms loose in the pouch — they end up stuck to tape and smear on everything.
5. Monochrome Black-and-White Chic Set with Glossy Finish
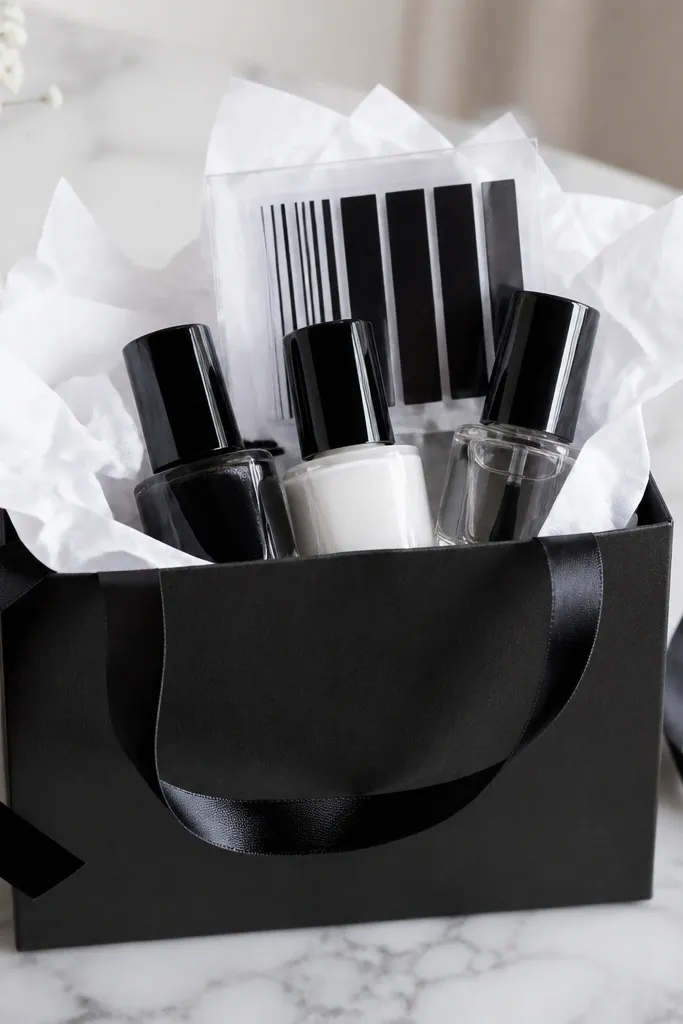
Monochrome gifts look stylish because they look intentional, not because they’re fancy. Black polish is bold and pairs well with a bright white accent, and both shades read crisp on most skin tones. The vinyl stripes make it easy to create clean lines without shaky freehand. This set works for teens and adults who like nail art but hate complicated steps.
Start by filling the bag with white tissue paper so the black items show contrast. Put the black mini polish in one side, the white polish in the other, and tuck the vinyl stripes flat between them. Add the glossy top coat on top so it’s visible. Tie a thin black ribbon around the bag and finish with a small white label sticker that says “stripe + shine” in neat handwriting.
Press vinyl stripes down firmly for 10 seconds before painting so edges don’t bleed.
Avoid using matte top coat in this set — it kills the crisp “high-contrast” look.
6. Sunflower Yellow Cheer Set with Clear Jelly Topcoat
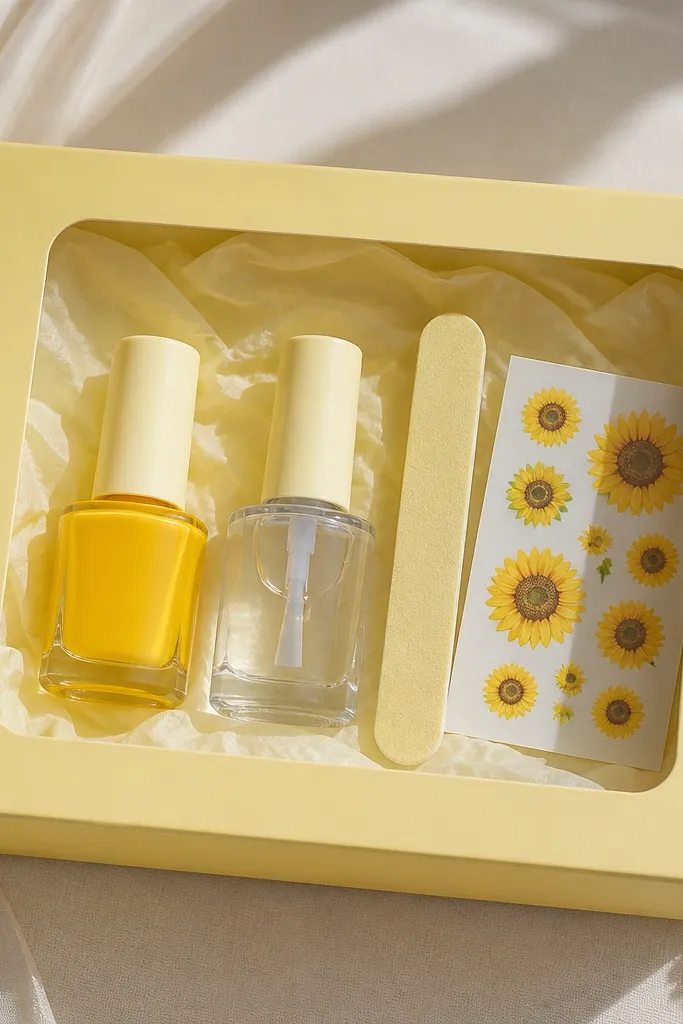
Yellow is the hardest color to make look good, but jelly finishes solve that. A sunflower yellow jelly polish looks smoother and less streaky than opaque yellow because it levels on the nail. It flatters warm undertones and also brightens cool undertones when paired with clear top coat. Sunflower stickers keep it cute for kids, and the clear jelly top coat gives it that glossy “fresh manicure” look.
Start by choosing a box with a clear acetate window so the yellow color reads from outside. Put the mini nail file on the bottom, then place the sunflower yellow jelly polish upright. Add the clear jelly top coat next, and keep sticker sheets in a flat pocket so they don’t curl. Close the box and tape the acetate window edges with clear tape for a clean finish, then add a tiny green leaf sticker near the window corner.
Do two thin coats of jelly yellow instead of one thick coat; it prevents streaks.
Avoid thick yellow coats — they dry lumpy and look cheap fast.
7. Rose Gold Glimmer Set with Metallic Accent Nail Tabs
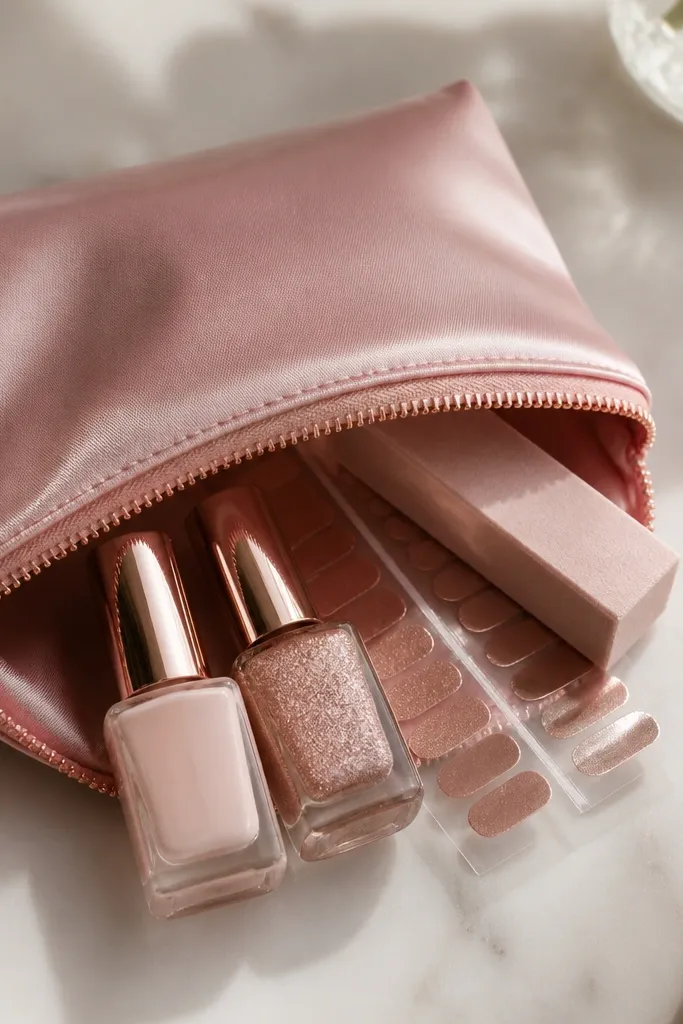
This is the set I make when I want “fancy” without complicated tools. Sheer blush polish flatters a wide range of skin tones because it looks like a healthy nail bed. The rose gold glimmer topper adds a metallic effect that looks expensive in daylight. Metallic nail tabs are quick because you place them like stickers, then seal with top coat so they hold up.
Start with a satin pouch in dusty pink so the rose gold feels intentional. Place the mini buffer first so it sits flat, then add the sheer blush polish bottle. Put the rose gold glimmer topper in next, and tuck metallic nail tabs in a separate folded paper sleeve. Seal the pouch, then attach a small rose gold heart tag using thin ribbon tied through the zipper pull.
Quick tipSeal metallic tabs with one extra layer of top coat only on the free edge so they don’t lift.
One warningAvoid placing tabs loose in the pouch without a sleeve — they get creased and won’t align.
8. Lavender Calm Set with Water-Marbled Look Using Sponge
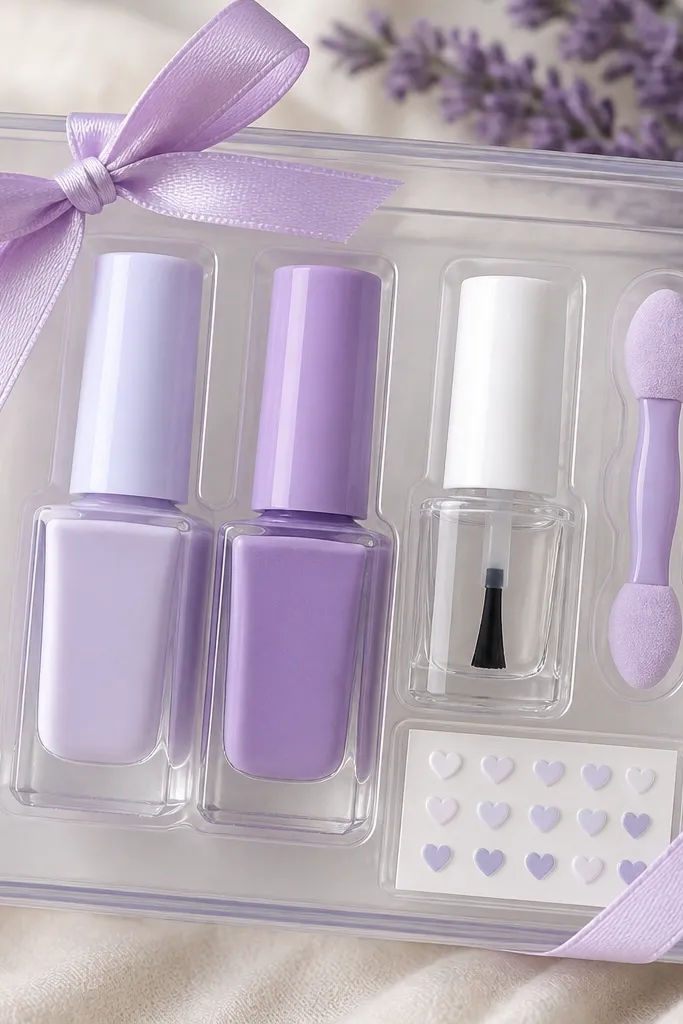
Lavender looks soft and stylish, and it hides minor nail shape differences better than bright neons. I like pairing a light lavender with a slightly deeper lavender so the marbled effect looks intentional, not random. This set flatters cool undertones and also makes warm undertones look more “cool-toned” in a good way. The heart decals keep it sweet for kids without turning it into a cartoon theme.
Start by arranging items in a clear box with a lavender paper backing. Put the light lavender polish in the center, then place the mid lavender beside it. Add a small sponge applicator (the kind used for makeup) flat on top of the polishes, then tuck the top coat in the corner. Finish with heart decals in a folded strip so the recipient can use them on the accent nail after the marble sponge layer dries.
Quick tipFor sponge marbling, dab the sponge on a paper towel first so the lavender transfers lightly.
One warningAvoid dragging the sponge across the nail — it smears and looks like a stain.
9. Chocolate Brown and Cream Set with Glossy French Tips
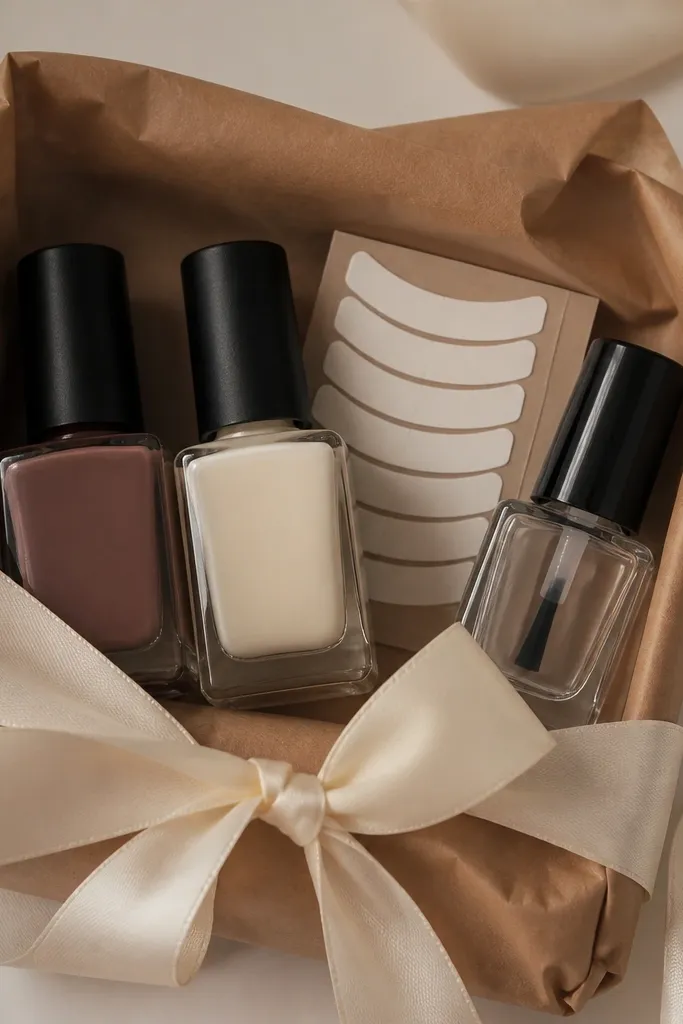
This set looks classy because brown and cream read like a coffee shop latte color combo. Chocolate brown is flattering on medium to deep skin tones, while cream brings brightness and keeps the hands from looking too dark. French tip guides make the look neat even for beginners who can’t paint a straight line yet. The glossy top coat is where it turns from craft-project to stylish manicure.
Start by wrapping a small box in brown paper and tying cream ribbon around the center. Place the French tip guides flat on top of the box so they’re easy to find. Put the cream polish on one side and chocolate brown polish on the other, then add the glossy top coat upright in the back corner. Close the box and add a small “tip guides inside” sticker to the lid.
Quick tipWhen you apply French guides, press the edge along the nail curve, not flat — it prevents gaps.
One warningAvoid skipping top coat after tips — unsealed tips chip at the edges fast.
10. Mint Green Spa Set with Cuticle Balm and Star Stickers
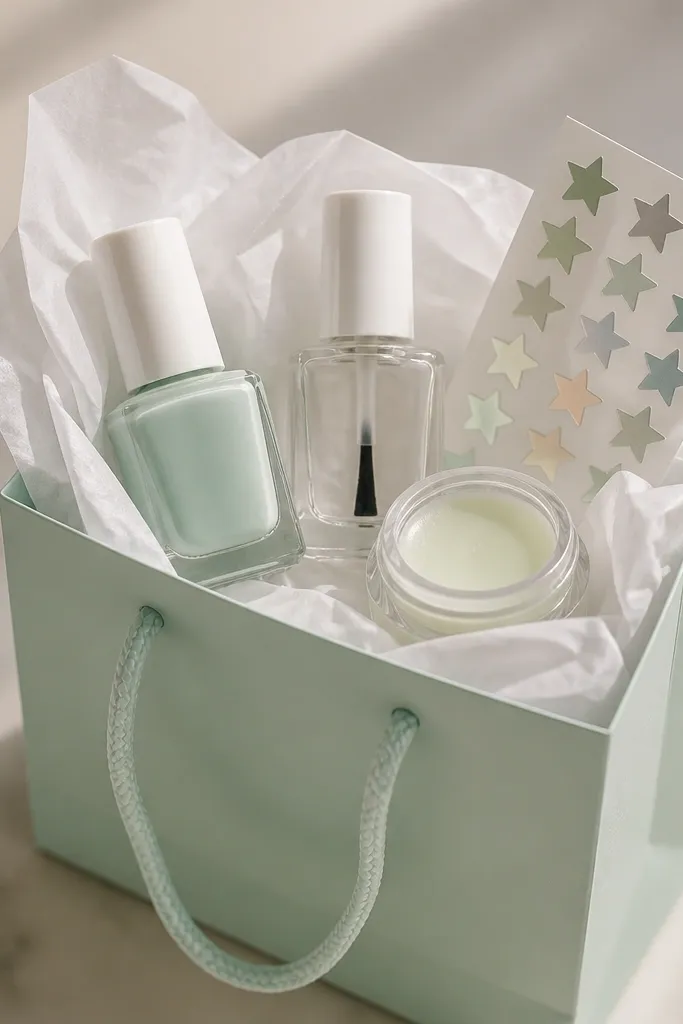
Mint green gives “fresh and clean” vibes, and it looks especially good on short nails. It flatters fair skin because it adds color without going neon, and it also brightens deeper skin tones. This set is styled like a mini spa: polish plus cuticle balm plus small star stickers for a gentle theme. The star stickers are tiny enough to look grown-up, not toddlerish.
Start by lining a mint gift bag with white tissue so the colors pop. Put the cuticle balm in first, then place the mint polish beside it with the cap secured. Add the clear top coat and tuck star stickers flat along the bag wall. Close the bag and tie a white ribbon around the handles with a bow that sits above the tissue line.
Quick tipUse cuticle balm at night and polish the next day so the nails look smooth instead of oily.
One warningAvoid putting balm on top of polish bottles — oils can leak and stain labels.
11. Garnet Red Party Set with Glitter Top Coat in a Tight Sleeve
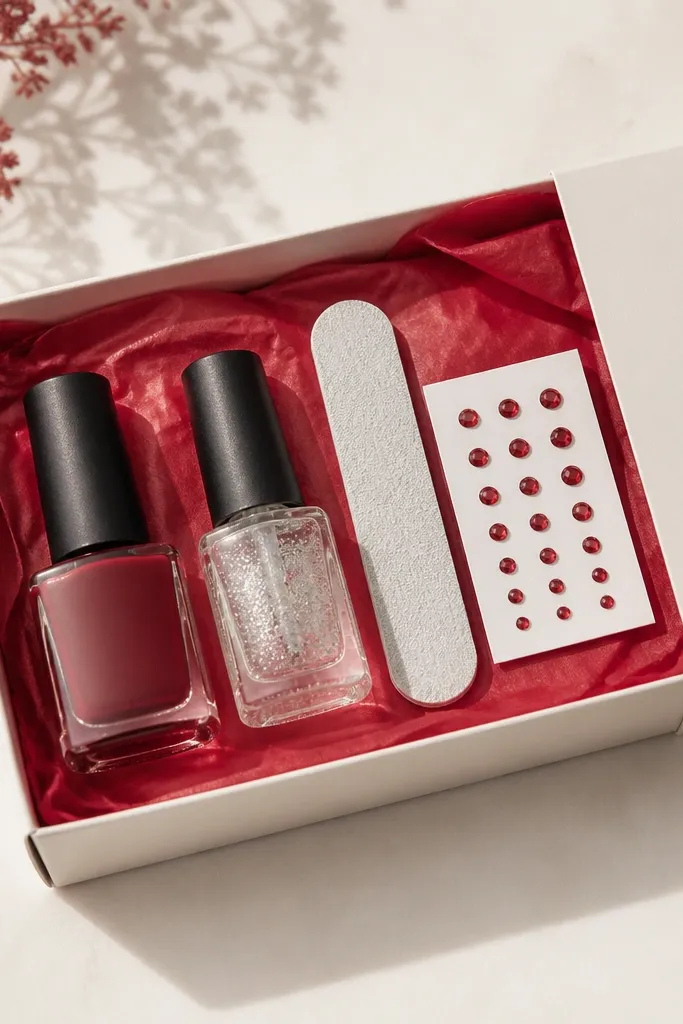
Garnet red is one of those shades that looks expensive fast, especially with a controlled glitter topper. It flatters warm undertones and looks strong on cool undertones too because the red has depth. The glitter top coat is the stylish part, but it has to be packaged correctly so it doesn’t smear or leak. Rhinestone decals add shine without messy loose gems.
Start by placing red tissue in a slim gift sleeve so it frames the bottles. Put the garnet red polish in the sleeve first, then slide the clear glitter top coat in next with a small folded paper barrier between them. Add the nail file last so it doesn’t rub glitter onto the cap. Finish by sealing the sleeve with a strip of clear tape and attaching a small red “party nails” label sticker to the front.
Quick tipShake glitter top coat for 30 seconds and wipe the lip of the bottle before capping to prevent thick globs.
One warningAvoid loose rhinestones in a bag — they shift and look chaotic in a gift.
12. Coral Summer Set with Nail Vinyl Hearts
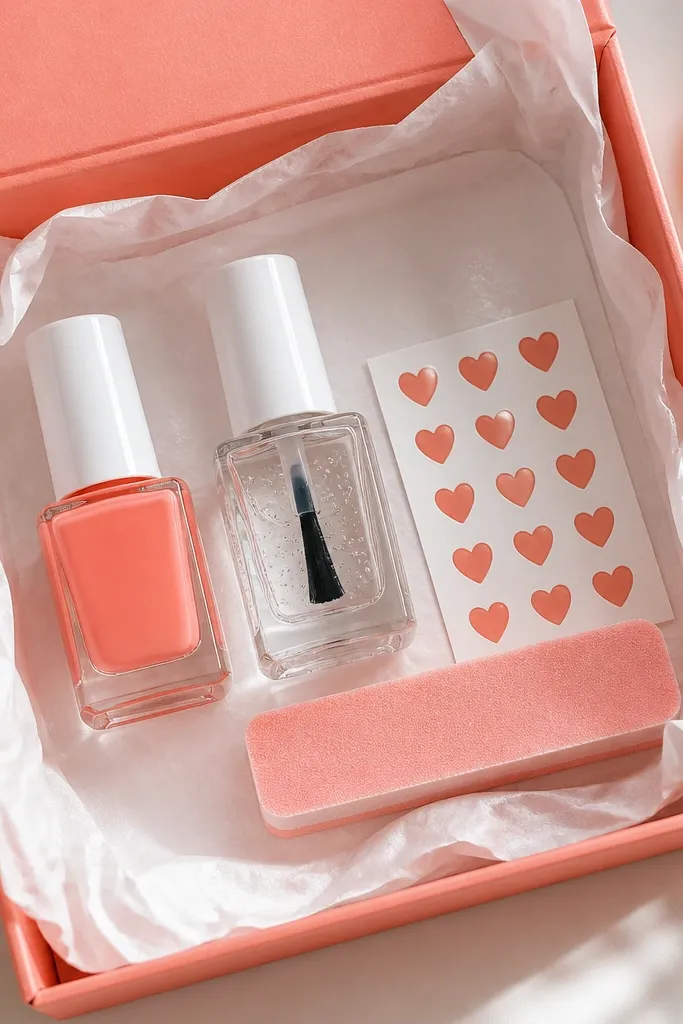
Coral reads bright and cheerful without screaming neon, and it works for most skin tones because it sits between pink and orange. I like it for kids and adults because it looks like a “real manicure” even with one accent. Heart vinyl stickers make the design clean, so it looks stylish instead of handmade. A small foam buffer helps smooth ridges so the polish applies evenly.
Start by putting white tissue in the box so the coral looks saturated. Place the foam buffer on the bottom, then add coral polish upright in the center. Lay the heart vinyl stickers flat on top and tuck the clear top coat in the corner. Close the box and add a small white label with a heart icon drawn by hand in marker.
Quick tipApply vinyl hearts after the base color is fully dry, then seal immediately with top coat.
One warningAvoid placing vinyl stickers on tacky polish — edges lift and bleed.
13. Neutral Gray Minimal Set with Matte Labeling
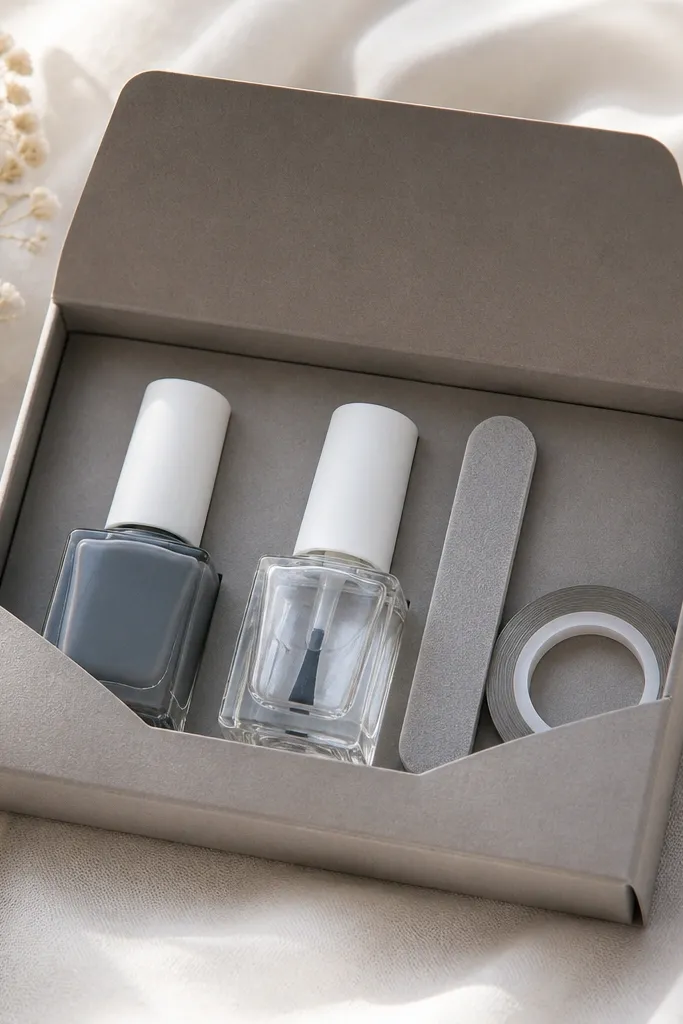
Minimal sets look stylish because everything lines up and nothing fights for attention. Soft gray is flattering on fair to medium skin tones and looks sharp against warm undertones when paired with a clean clear top coat. Thin nail art tape gives you straight lines without shaky brush work. This is a good gift when you want the recipient to feel “grown-up,” even if you’re making it budget-friendly.
Start by using a gray kraft box and apply matte white label stickers in a simple grid. Put the mini file in first, then place the soft gray polish upright. Add the thin nail art tape folded accordion-style, and tuck the clear top coat on the side so it doesn’t roll. Seal the box with a strip of clear tape on the seam, then finish with one small black ribbon tie.
Quick tipPress tape down with a fingernail to activate the adhesive edge before painting.
One warningAvoid adding too many colors — gray sets look best with one accent line only.
14. Teal and Gold Luxe Set with Foil + Short French Guide
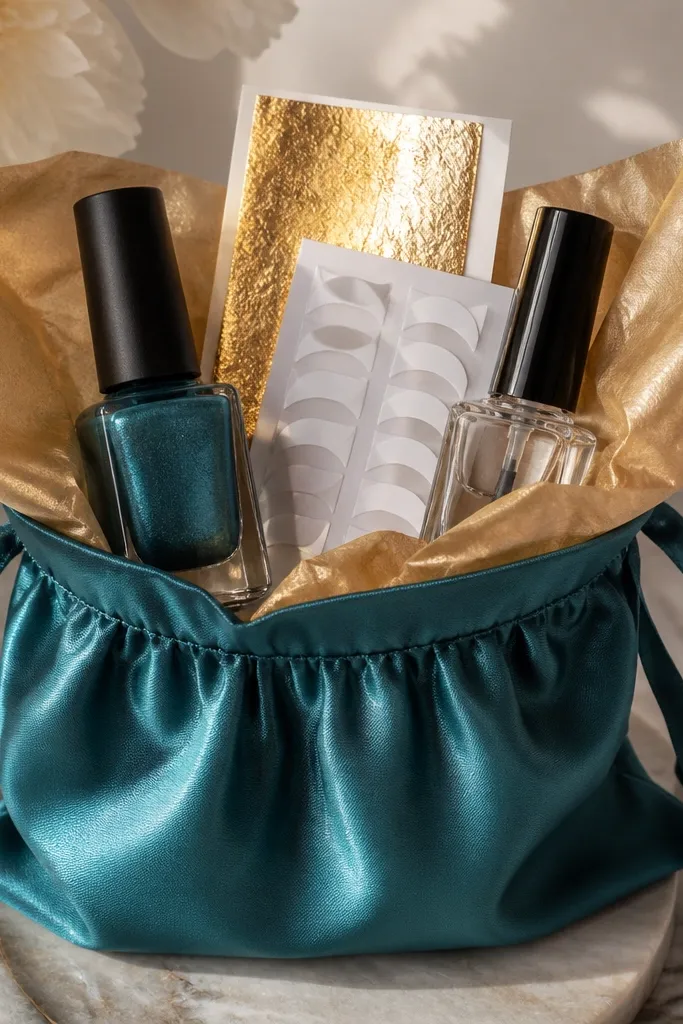
This set feels luxe because teal shimmer and gold foil create strong contrast without needing dark colors. Teal flatters both light and deep skin tones, and gold looks warm next to it, so the whole look reads expensive. French tip guides keep the design neat, especially on short nails. The style is “controlled glam” — foil goes on the tip or a single accent nail, never all over.
Start by lining the pouch with gold tissue so the foil has a warm background. Put teal shimmer polish in upright, then add the short French tip guides flat on top. Fold gold foil into a small square and place it in a paper sleeve so it doesn’t crease. Add glossy top coat last, then close the pouch and tie a small gold ribbon around it like a gift-wrapped present.
Quick tipUse a thin brush to apply a tiny amount of clear polish only where the foil touches.
One warningAvoid oversaturating the tip area with foil glue — it spreads and looks messy.
15. Pink Marble Gift Set with Two Polishes and One Sponge
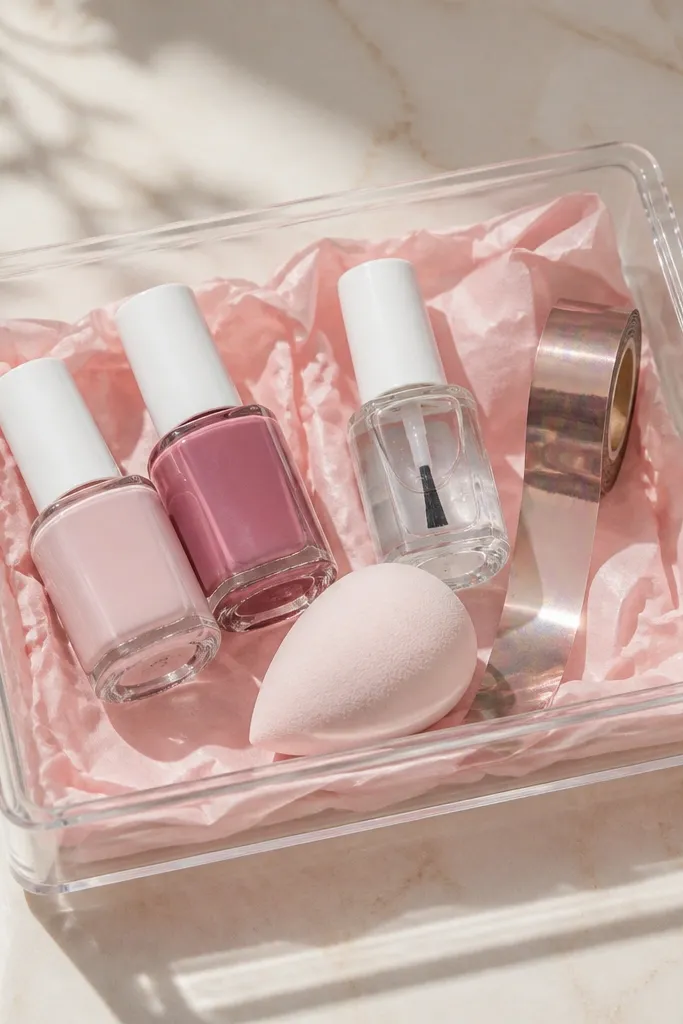
Pink marble is stylish because it looks complex but it’s actually repeatable. I use light pink plus rose pink so the marble lines show without getting muddy. This combo flatters most skin tones because the colors sit in the same family, and the top coat makes it look glossy. A small foil tape strip is a fun optional step for the recipient who wants extra shine on the ring finger only.
Start by packing the two polishes upright in a clear tray with pink tissue under them. Place the makeup sponge in a sealed mini bag so it stays clean and doesn’t smear polish on other items. Add the top coat on the opposite side so the bottle caps don’t touch. Finally, tuck the foil tape strip in a folded paper sleeve and label the sleeve “ring finger shine” with a tiny sticker.
Quick tipFor marble, dab the sponge lightly and stop early — you want wispy lines, not full coverage.
One warningAvoid using too much polish on the sponge — it turns the nail into one flat pink smear.
16. Indigo Night Set with Starry Nail Decals and Deep Gloss
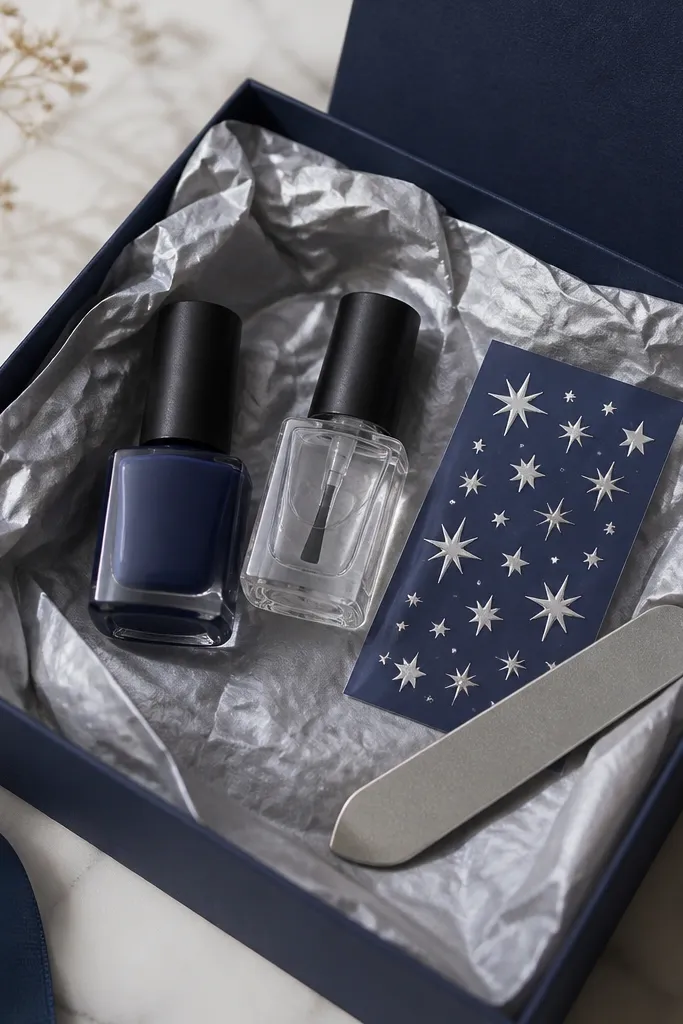
Indigo looks like night sky on the nail, and it’s one of the easiest “wow” colors to gift. It flatters darker skin tones beautifully and also looks dramatic on fair skin without turning chalky. Star decals make the theme obvious, but using silver-gray stars keeps it from looking childish. The deep-gloss top coat is what makes the whole thing look like you did a full manicure session.
Start by lining the box with silver tissue and placing the indigo polish upright in the center. Add the metal-free nail file on the left and the star decals flat on the right. Put the deep-gloss top coat on top so it’s easy to grab first. Close the box and seal the lid seam with a strip of silver washi tape for a clean, photo-friendly finish.
Quick tipApply decals on the last step after base color dries, then cap the decal edges with top coat.
One warningAvoid using thick decals on wide nails — they wrinkle at the sides.
17. Peach Cream Set with Soft Buffer and Micro-Glitter Top Coat
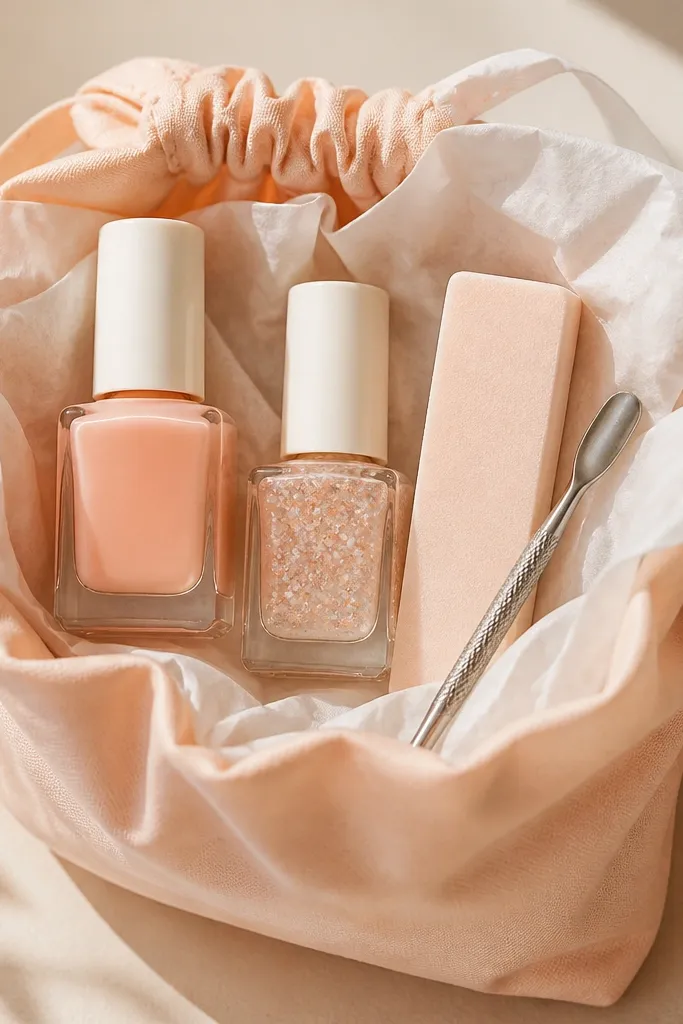
Peach cream is flattering because it looks like healthy warmth on the nail bed. It works for kids because it’s not too dark, and it works for adults because it reads clean and polished. A micro-glitter topper looks stylish because it adds sparkle without looking like craft glitter. The soft buffer helps the polish grip, so the manicure looks smoother and lasts longer.
Start by putting the cuticle pusher in first inside a small folded tissue wrap so it doesn’t scratch the buffer. Add the soft buffer next, then place peach cream polish upright. Put micro-glitter topper on the top layer so it’s visible and easy to use as the finishing step. Close the pouch and tie with a thin white ribbon, then add a tiny “shine finish” sticker to the knot.
Buff gently — one light pass is enough. Too much buffing makes polish peel early.
Avoid using coarse glitter — it catches on hair and looks messy fast.
18. Burgundy Velvet Set with Velvet-Feel Ribbon Wrap
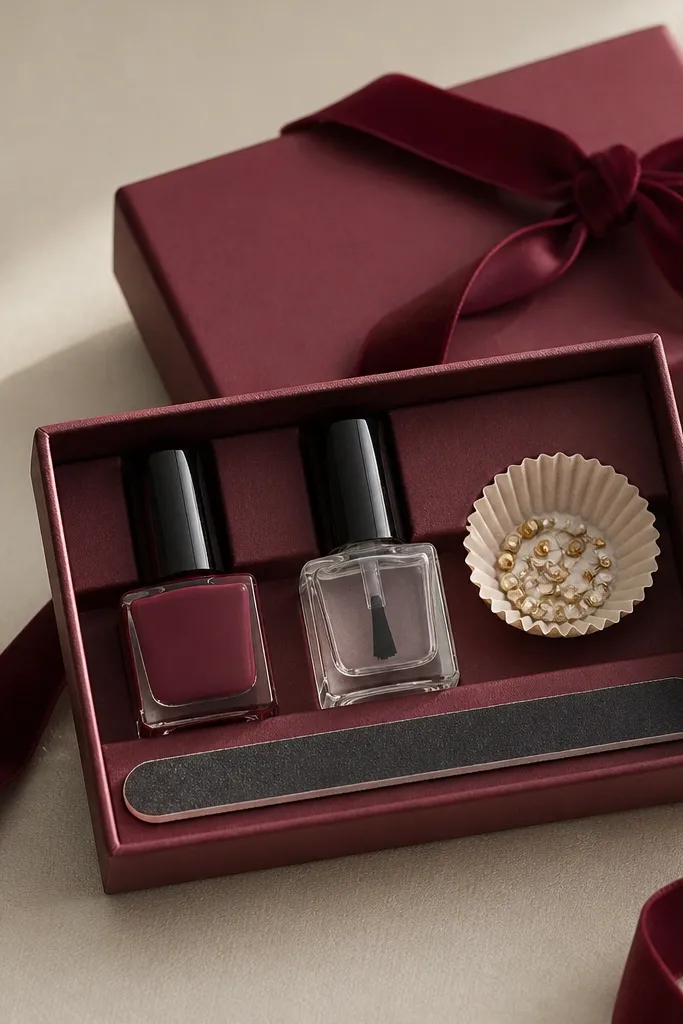
Burgundy looks like velvet when paired with a glossy top coat, and it’s a flattering shade for a lot of skin tones. I like it for teens and adults because it feels more “grown-up” than bright pink. Nail studs add texture, but the trick is using only a few so the manicure still looks clean. The velvet-feel ribbon makes the gift look luxe without changing the nail colors.
Start by wrapping a small box with burgundy velvet-feel ribbon and tying a neat bow on the front. Place the foam file on the bottom, then put burgundy polish upright in the center. Add the clear top coat in the back corner and tuck the nail studs in a paper cup against the side. Close the box and press the ribbon ends so they sit flat, then add one small silver dot sticker near the bow.
Use a toothpick to place studs so they sit straight and don’t smear polish.
Avoid adding studs on every nail — it turns into a draggy, uneven look.
19. Mint Chocolate Chip Set with Split-Color Labeling
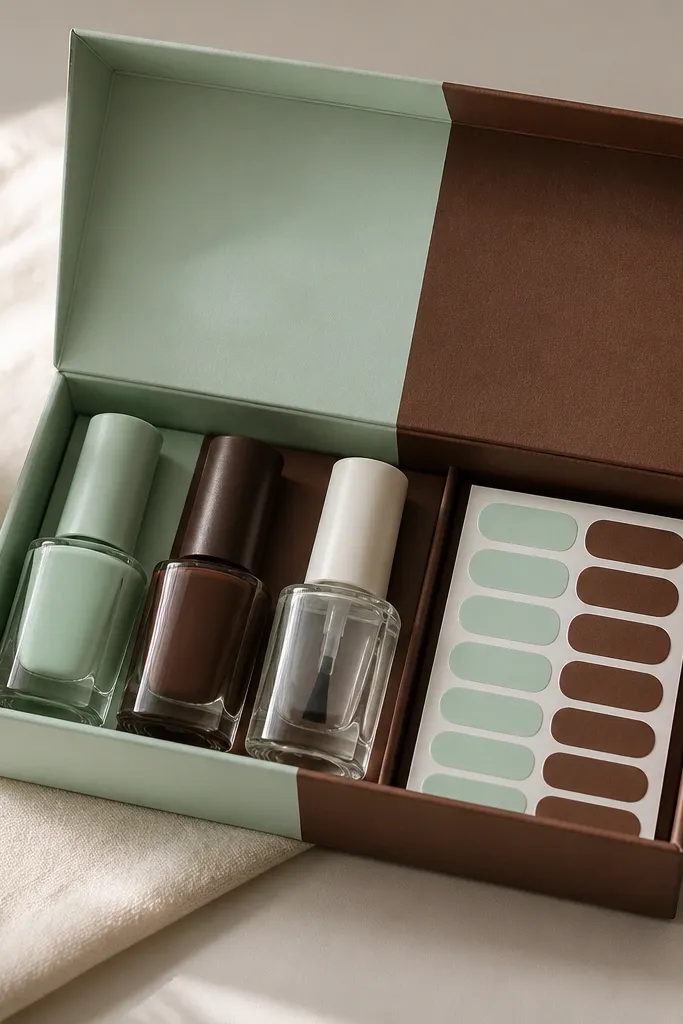
This set looks playful and stylish because it pairs mint with chocolate brown like an ice cream theme, but keeps the execution clean. Mint polish flatters fair to medium skin tones, while chocolate brown adds depth and works especially well on warm undertones. The split-color labeling makes the set feel designed, even if you only use two polishes. The look is best when the recipient paints one hand mint and the other hand chocolate, then seals both with the same top coat.
Start by choosing a box where you can split the inside with two tissue colors — mint on one side, chocolate brown on the other. Place the mint polish upright in the mint side and the chocolate polish upright in the brown side. Add the top coat in the middle so it bridges both sides, and tuck label stickers that match each tissue color. Close the box and add a single strip of clear tape across the center seam so it looks tidy and secure.
Quick tipPaint one coat, wait 2-3 minutes, then do the second coat. It prevents streaking with darker brown.
One warningAvoid mixing the colors on the same nail — it looks messy unless you plan a marble step.
20. Strawberry Shortcake Set with Strawberry Decals and Gloss
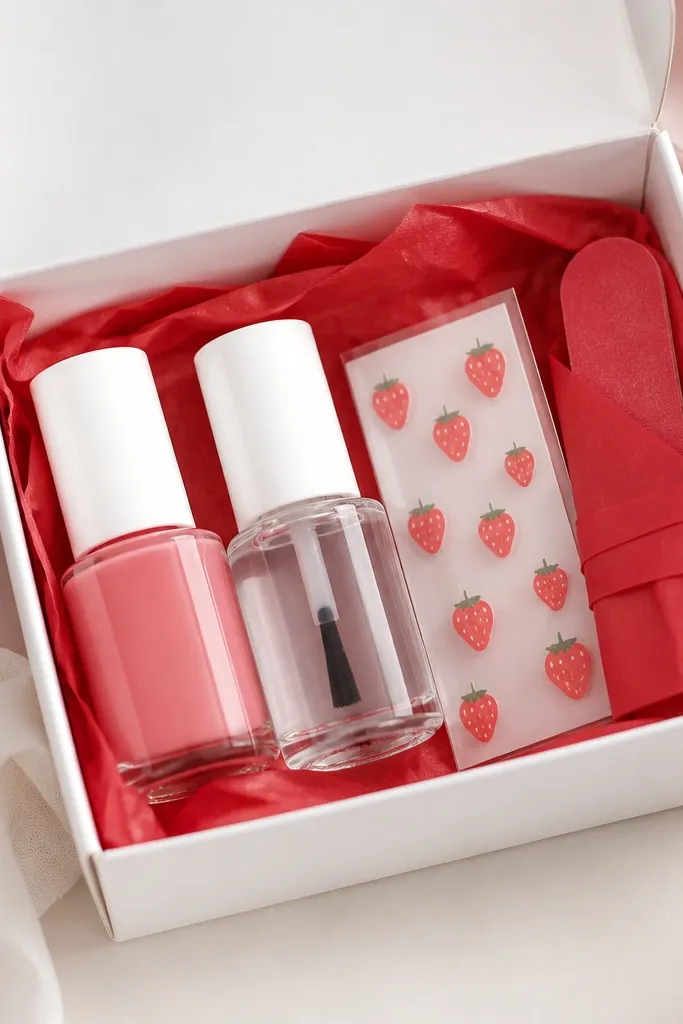
This set is cute without being childish because it uses a clean strawberry pink base and keeps the decals small. Strawberry pink flatters most skin tones because it’s not too orange and not too purple. The clear glossy top coat makes the nails look fresh and smooth, which is what makes decals look high-quality. For kids, it feels fun. For adults, it reads as playful rather than theme-y.
Start by lining a white box with red tissue so the strawberry theme shows through the lid. Put the mini nail file in a red paper wrap so it looks like a deliberate component. Place strawberry pink polish upright in the center and add clear top coat on top or in a corner. Fold the strawberry decals into a small stack and slip them into a pocket made from clear tape on the inside of the lid.
Quick tipUse decals on the ring finger and maybe one thumbnail only. That’s the sweet spot for a gift set look.
One warningAvoid using big chunky decals — they lift at the edges and look cheap after a day.



