
1. Vinyl Monogram Bowls + Kraft Tag Bundle
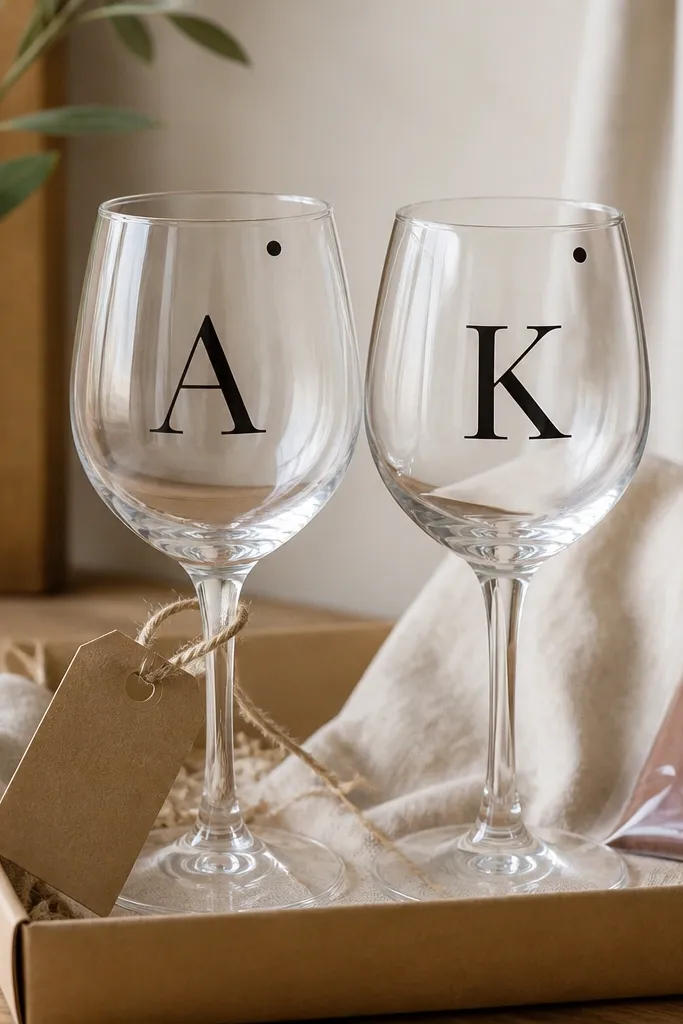
Start by wiping the glass bowls with rubbing alcohol and letting them dry completely. Measure the bowl height, then place the vinyl letter so it sits centered with about 1.5 inches of space above the widest part of the bowl. Press the vinyl down firmly with a plastic squeegee, especially around sharp corners. After application, I seal the edge with a thin clear topcoat made for glass (you apply a light layer only where the vinyl meets glass, not over the whole design if you want matte). Wrap the set in kraft paper and tie a twine bow to a tag that repeats the same letter in small print on the back.
This is my go-to “looks store-bought” set because the monogram sits right where the eye lands when someone lifts the glass. I use matte black permanent vinyl on the bowl, then add a small matching dot near the rim so the design feels intentional instead of lonely. It looks best on people who like clean, minimal kitchen styles — think black-and-white decor, white walls, and stainless appliances. On skin tone, it photographs well with warm lighting because matte vinyl doesn’t glare. For recipients with rounder faces or softer features, a single bold letter looks classy without shouting.
One warningDon’t apply vinyl to dusty glass — the letters lift at the edges after a few washes.
Quick tipIf you want extra durability, seal only the vinyl edges. Full glossy coating can make matte vinyl look shiny and “off” in photos.
2. Painted "House Stripe" Around the Bowl
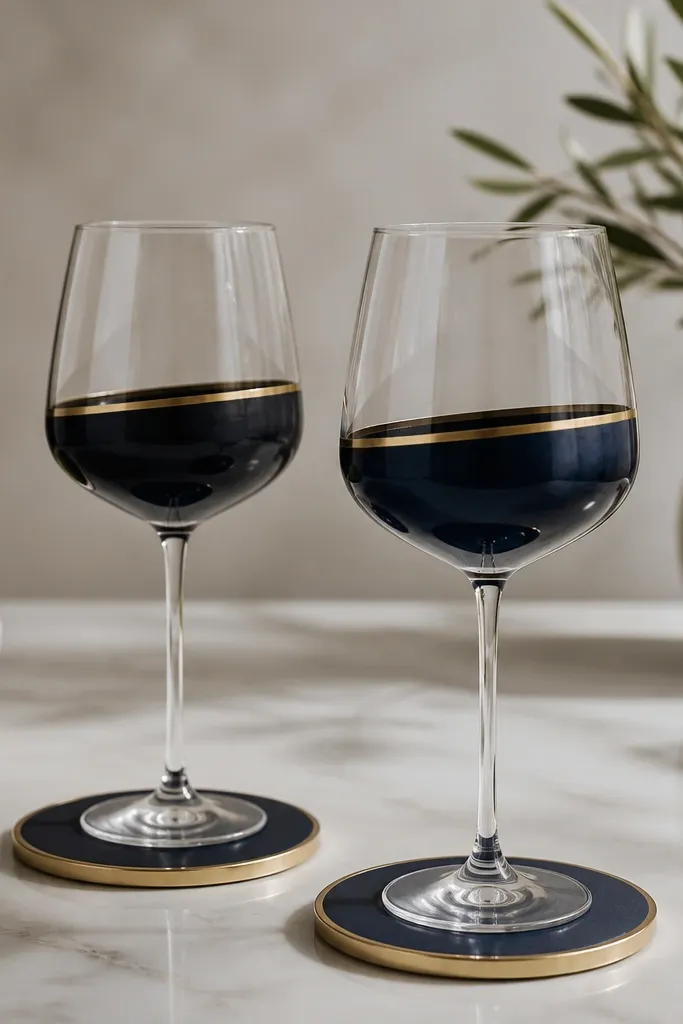
Start by masking a straight band with painter’s tape. I mark the tape line so it sits about 1 inch above the base of the bowl, then wrap tape around evenly — press down hard so paint won’t bleed. Paint with glass enamel in navy, using a small foam brush to avoid streaks, and let it dry per the label. Add a thin gold line after the navy sets enough that it won’t smear. Finally, cure the glasses fully (longer than the “dry to touch” time) and hand-wash only after you’ve confirmed cure.
A single stripe looks polished because it’s graphic and consistent across both glasses. I like navy with a thin gold accent because it reads “gift set” even if you keep everything else simple. This design flatters almost any kitchen color — it matches white, cream, and even sage-green spaces without fighting the room. For people who like traditional decor, the gold line gives a warm finish. For people who love modern looks, the stripe stays clean and doesn’t feel busy.
One warningDon’t rush curing. If the paint isn’t fully cured, it scuffs when you wash the glass.
Quick tipMake the stripe width the same on both glasses by measuring the tape band with a ruler before you paint.
3. Frosted Look via Vinyl Stencil + Etch-Style Finish
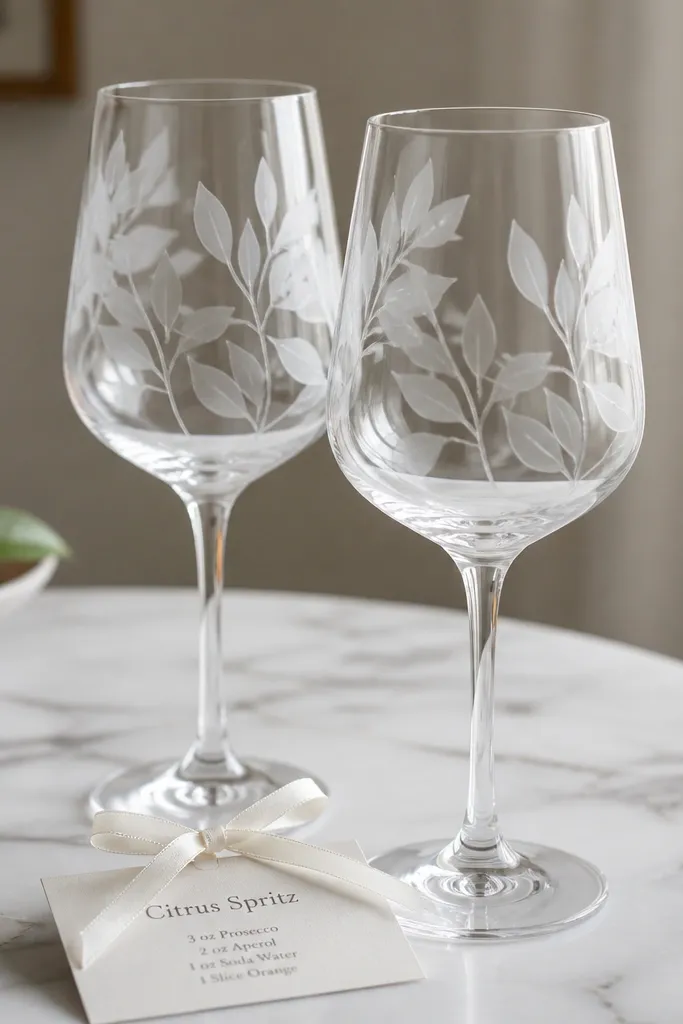
Start by cleaning the glass with alcohol and drying thoroughly. Place the vinyl stencil so the leaf cluster sits on the lower third of the bowl, not centered — lower placement looks more natural when the glass is held. Apply the etch-style product only in the exposed areas using a foam applicator, then follow the exact wait time on the bottle. Rinse off and remove vinyl while the glass is still slightly damp so edges release cleanly. Wash gently, dry, and add a white ribbon around the stem with a recipe card that matches the theme.
This gives that expensive etched-glass vibe without paying etched-glass prices. I use a leaf stencil design cut from vinyl, then apply an etch-style finish that creates a frosted texture where the vinyl is removed. It’s best for recipients who like softer designs — the leaves feel gentle and not too bold. The frosted areas hide smudges, so the set still looks good after a few uses. It also photographs beautifully because the frosted pattern catches light without glare.
One warningDon’t let the etch product dry on the stencil — it can create patchy edges.
Quick tipUse leaf clusters, not single leaves. Clusters look intentional and hide minor placement differences.
4. Kids Help Set: Sticker Names + Mini Coaster Stack
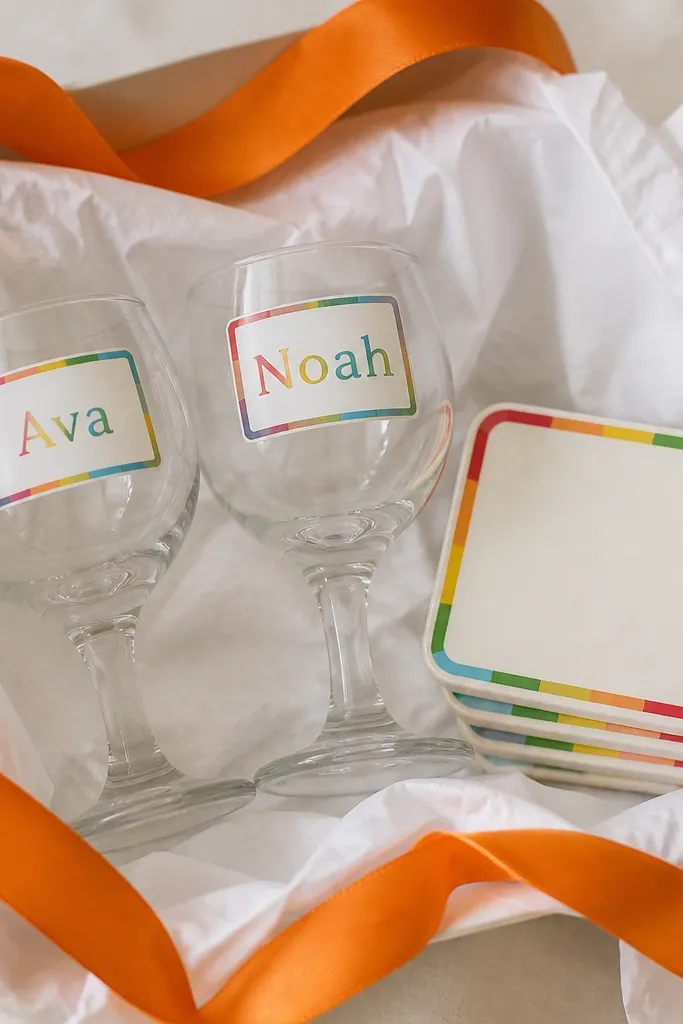
This is the easiest family-friendly option when you want kids involved without messing up glass painting. I use waterproof name stickers or vinyl-on-paper labels that go on the bowl temporarily or permanently depending on the sticker type. The look is playful, and it works best for kids' parties, grandparents' birthdays, and “first-time host” gifts. It also flatters the glasses because the label is large and readable — people can tell whose is whose. The rainbow border makes it feel celebratory even if the glasses are plain.
Start by choosing sticker sizes that cover about a quarter of the bowl height so the name is readable from across the table. Clean the bowl with alcohol and let it dry, then apply stickers straight — press from the center outward. Make matching coasters by cutting felt or cork squares and adding the same border sticker around the edge. Assemble by stacking the coasters in a small cellophane bag and tie it to the ribbon. Finish with a tag that lists a simple “what to fill it with” suggestion like lemonade or cocoa.
Keep the design to one element per glass. Too many stickers make it look cluttered fast.
Don’t use random craft stickers that dissolve with hand-washing — test one on a spare glass first.
5. Chocolate Spoon + Striped Glass Wrap Band
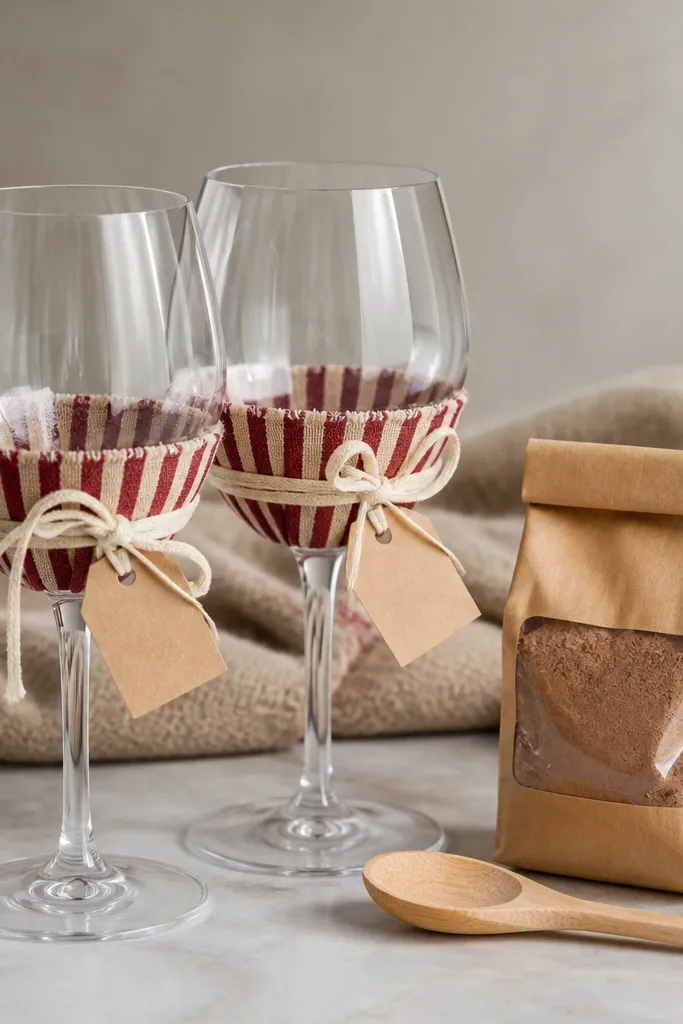
This set feels like a gift even before the glasses are used because you can see the “fill-me” component right away. The striped fabric band hides small imperfections and makes the glasses look styled, not bare. I pick red-and-cream because it matches a lot of seasonal wrapping colors and looks warm under kitchen lights. It’s also great for people who don’t want permanent decoration on their glassware. The fabric wrap is gentle, and it’s easy to remove if the recipient wants plain glasses later.
Start by cutting a strip of cotton fabric about 2 inches tall and long enough to wrap the lower third of the bowl with a slight overlap. Secure it with clear double-sided tape or a tiny strip of fabric glue at the overlap only. Add a matching tag with a short message and a small icon like a cocoa cup. Make a wooden spoon by painting the top 1 inch with the same stripe colors and letting it dry fully. Tie the spoon and cocoa bag into the ribbon bundle so it all hangs together as one unit.
Use cotton fabric, not stretchy knit. Cotton wraps flatter and stays smooth on curved glass.
Don’t glue fabric directly all over the glass — it leaves residue when it’s time to remove.
6. Tea Pair Gift Set with Chalkboard Labels
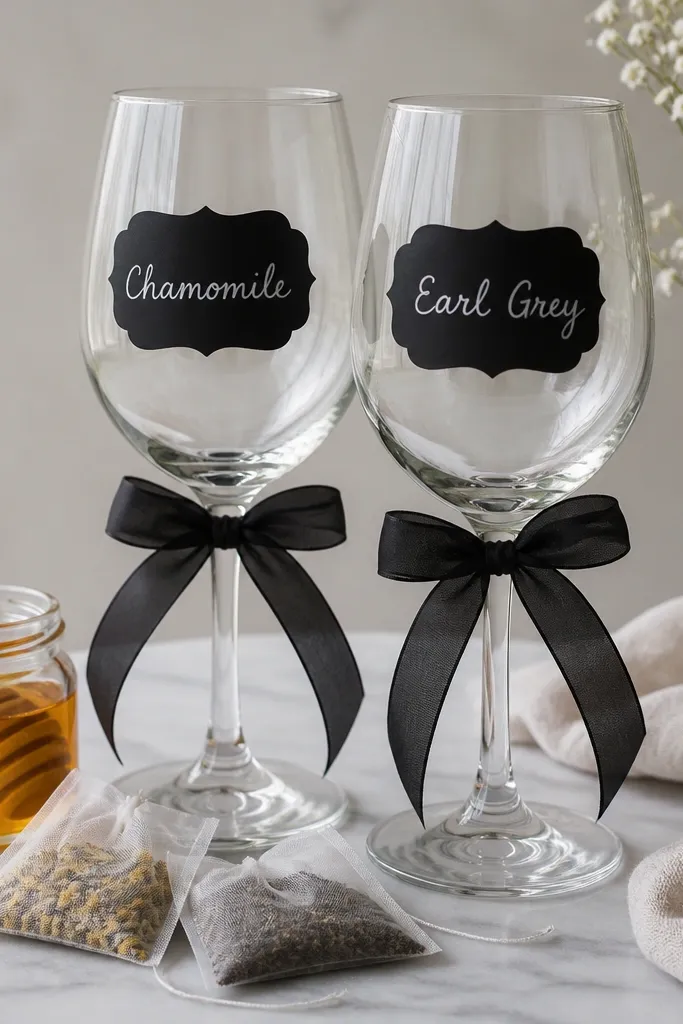
Start by choosing chalkboard label stickers that stick to glass (or cut small chalkboard label paper and seal it with a thin clear tape edge). Clean the bowl with alcohol, then apply the labels at the center so they’re level. Write the tea names in white paint pen or chalk marker and let it set. Add a mini jar of honey or a small packet of sugar and tuck it into tissue inside a gift box. Finish by tying a black ribbon around the stems and adding a small card with steeping time in plain numbers like “5 min at 200F”.
This one works when you’re gifting to someone who hosts morning gatherings or prefers non-alcoholic drinks. Chalkboard-style labels look cozy and hand-done, and the labels give the glasses a clear purpose. I’ve used it for teacher gifts where the recipient will actually use the tea right away. The black labels contrast nicely on clear glass and don’t compete with the drink color inside. It also keeps the glass itself simple, which is a win for people who hate permanent decoration.
One warningDon’t rely on regular paper labels — they peel when the glass gets condensation.
Quick tipWrite the names in bigger letters than you think you need. Wine glasses sit farther from people than mugs.
7. Photo Transfer on Glass Bowl + Clear Topcoat
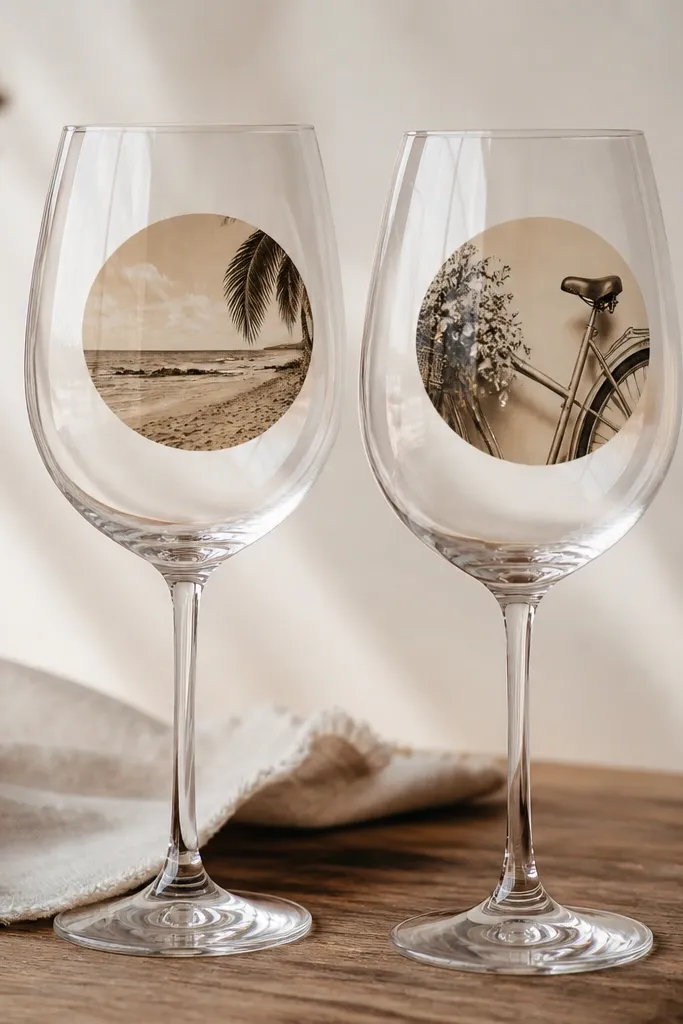
If you want the gift to feel personal fast, photo transfer is the strongest move I’ve done. The photo sits on the bowl where it’s visible when the glass is held up, and the sepia look feels warm and forgiving. This flatters recipients who like sentimental gifts — weddings, anniversaries, and “I miss you” notes. It also hides minor print imperfections because the glass adds a natural sheen. I’ve used it on both clear and slightly tinted glass, and the transfer looks best on clear glass because the photo colors stay true.
Start by printing the photo on the correct transfer paper for glass (you need the transfer type that releases with water or heat — match the paper instructions). Clean the bowl with alcohol and mark where you want the photo circle, usually centered on the bowl. Apply the transfer so there are no bubbles, then soak and rub off the backing exactly per the paper directions. Let the photo cure, then apply a clear topcoat designed for glass and allow full drying time. Wrap the glasses with tissue paper that matches the photo tones and add a small card with the date and a short note.
Use images with clear subject contrast. Faces and strong silhouettes transfer cleaner than busy landscapes.
Don’t skip the topcoat — photo transfer that isn’t sealed scuffs fast.
8. Glitter Rim + Matte Body Contrast
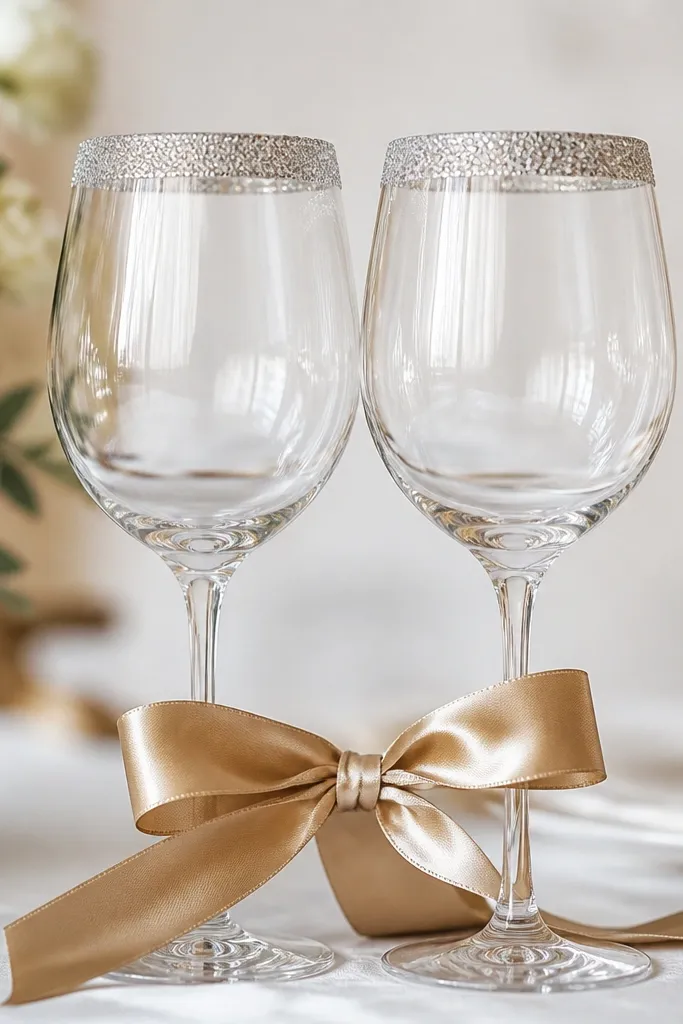
Start by masking the bowl so glitter only hits the top rim area. Use tape to cover everything below the rim line and press the edge tight so glitter doesn’t fall down. Apply a thin layer of glass-safe adhesive around the rim with a small brush. Sprinkle fine glitter and shake off excess after a minute so you don’t get thick clumps. Let it dry fully, remove tape carefully, then wrap with champagne-gold ribbon and add a small “sip + sparkle” tag.
Glitter rim decoration looks fancy because it frames the drink without turning the whole glass into craft sparkle. I like doing only the rim because it stays classy and doesn’t scratch as easily as full-glitter coverage. This looks best for holiday gifts and “party” people — the silver rim pops under warm string lights. It also flatters hands and wrists because the glitter reflects movement when someone lifts the glass. If the recipient has a lot of metallic decor, this will match without extra effort.
One warningDon’t let glitter touch the drinking lip — keep it confined to the outside rim.
Quick tipUse fine glitter, not chunky craft glitter. Fine glitter looks sharp and doesn’t feel gritty.
9. Cork Coaster Mat + Matching Glass Side Decal
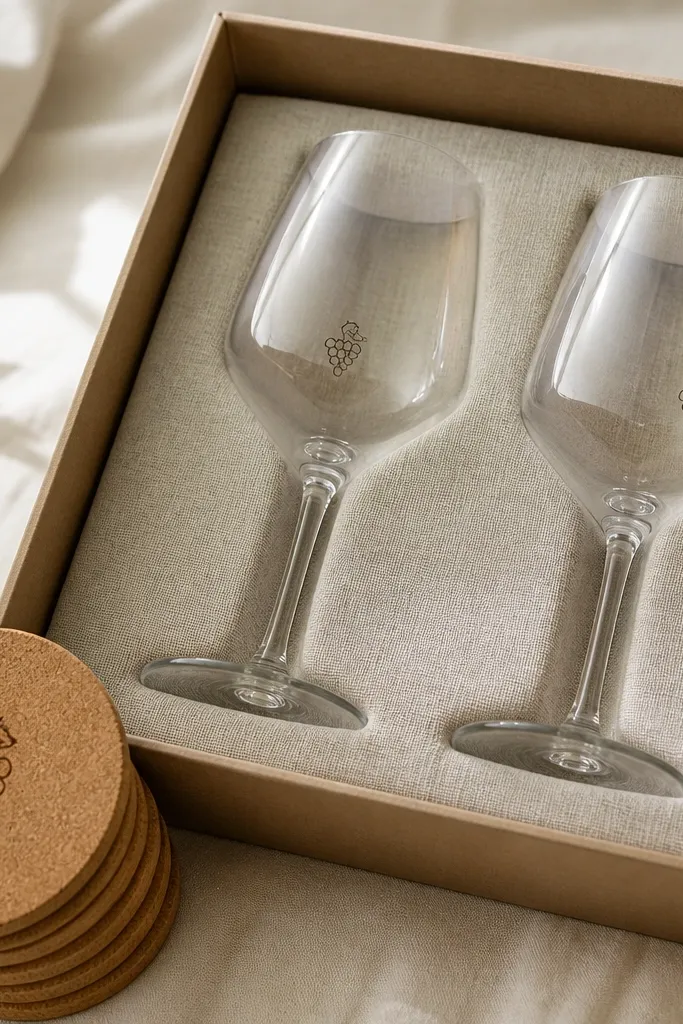
Start by making coasters from cork sheets or buying plain cork coasters and adding the icon with a stencil. If you burn the icon, use a low heat and do a couple light passes rather than one heavy pass. For the glass, clean with alcohol and apply a small permanent vinyl icon near the lower bowl, angled slightly toward the front so it reads when the glass is held. Seal the vinyl edges with a thin clear topcoat if you want extra durability. Assemble in a gift box with linen paper so the cork texture shows through, then tie a ribbon around the box handle.
This is a set-builder idea, not just “decorate the glass.” A matching cork coaster set makes the glasses feel like part of a system, and it’s the detail people reach for first when they sit down. I use a small line icon on the glass because it stays neat and doesn’t block the view of the drink. Cork also hides scratches, so the gift looks good after use. It’s a great fit for recipients who like rustic textures — farmhouse kitchens, wood cutting boards, and warm beige decor.
One warningDon’t place the decal too high — it gets lost in reflections and looks like an afterthought.
Quick tipKeep the icon small, about the size of a quarter. Bigger icons look busy on curved glass.
10. Personalized "Date Night" Labels with Reusable Glass Markers
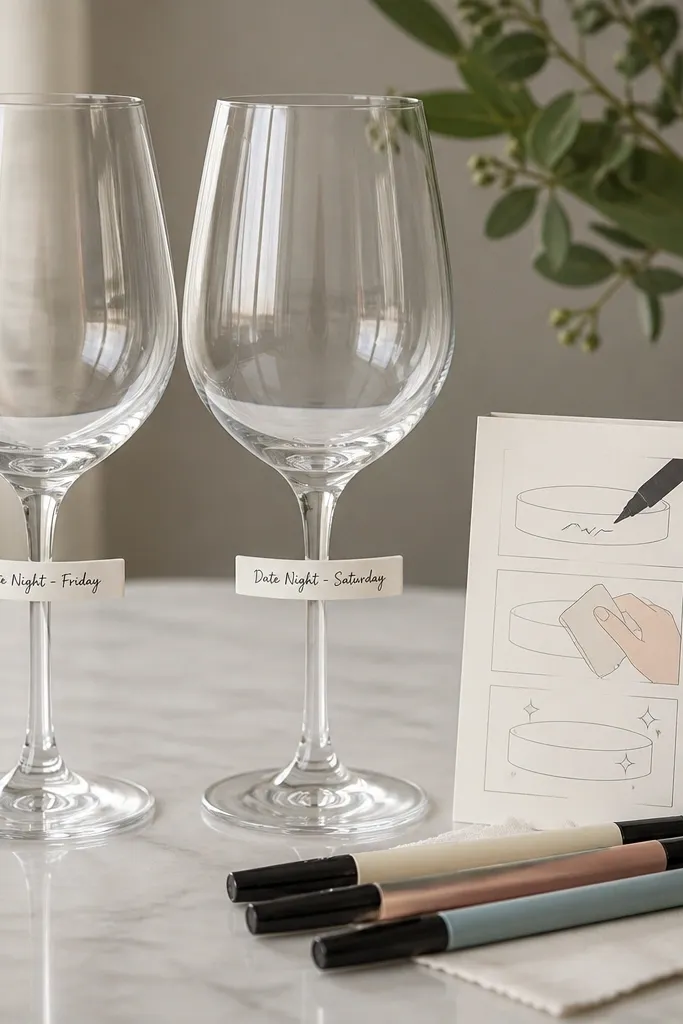
This idea is for couples and anyone who hates permanent glass decoration. The glasses stay clean, but the gift still feels themed because the labels and marker set make the “date night” concept usable right away. I’ve done this for housewarming gifts and it lands well because it turns into a tradition. The labels are bright enough to read, but they’re placed where they won’t interfere with the drink. For recipients with busy kitchens, removable labels look tidy and easy to refresh.
Start by cutting label strips from waterproof label paper or using dry-erase label sheets made for glass. Place the strips on the lower stem or just below the bowl where they won’t get wet from condensation. Write the dates with a white paint pen or a marker that wipes clean depending on your label type. Add a small pouch with reusable glass markers and include a card that says how to wipe off with rubbing alcohol. Wrap the whole set with matching ribbon and tuck the marker pouch in a side pocket of a small box.
Write the first “starter date” on the card too, not just the label. It makes the gift feel ready-to-use.
Don’t put labels on the drinking bowl where they scrape when people pour.
11. Fabric Sleeve + Button Closure for a "Picnic Wine" Set
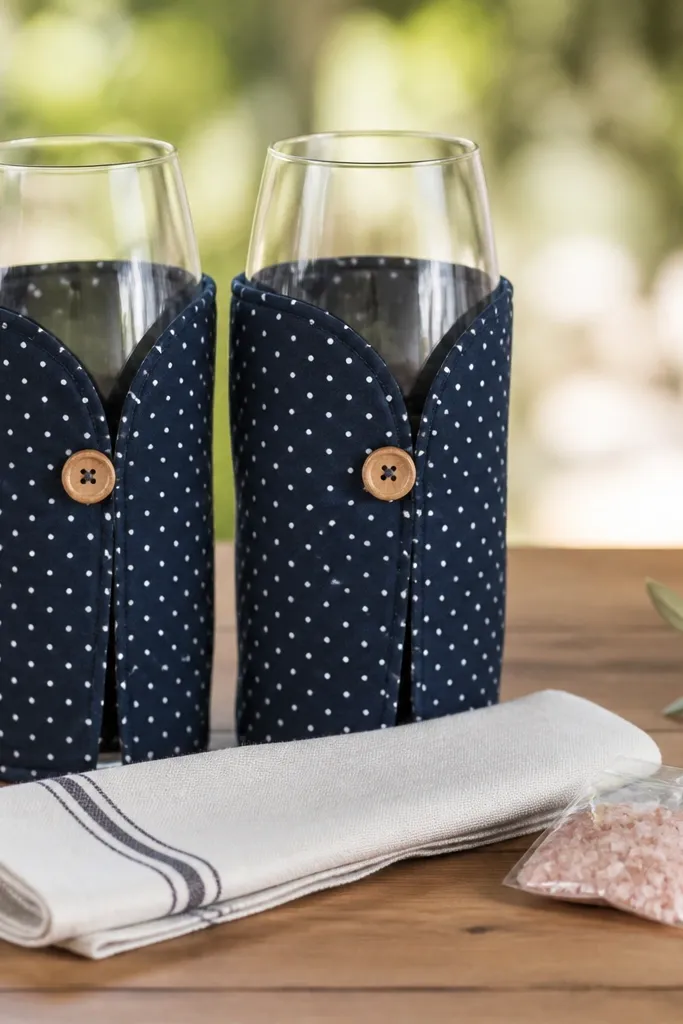
Start by cutting fabric panels about 9 inches tall and wide enough to wrap the bowl and stem together with overlap. Sew or glue the sides, then add a button closure at the front so the sleeve can close snugly. Create a matching mini napkin by folding a square of cotton and tying it with twine. Add a packet of flavored salt or a small cocoa mix and place it in a small cellophane bag taped to the inside of the gift box. Put each glass in its sleeve, then bundle both with ribbon and a tag that says what the packet is for.
This is my favorite when you’re gifting to someone who actually goes places with their drinks. The fabric sleeve protects the glass from knocks in a tote bag and looks cute in photos — like a picnic prop. It also makes the set feel more “gift” than “glassware,” because the sleeve is the styling anchor. I choose navy with tiny white dots because it looks crisp and hides small wrinkles from wrapping. It’s also forgiving for kids' gifts because the sleeve takes the visual spotlight instead of the glass itself.
One warningDon’t make the sleeve too tight around the bowl — it should slide out without forcing.
Quick tipUse medium-weight cotton with a tight weave. It holds shape and doesn’t look flimsy next to glass.
12. Stamped Wax Seal Look on Ribbon Tags
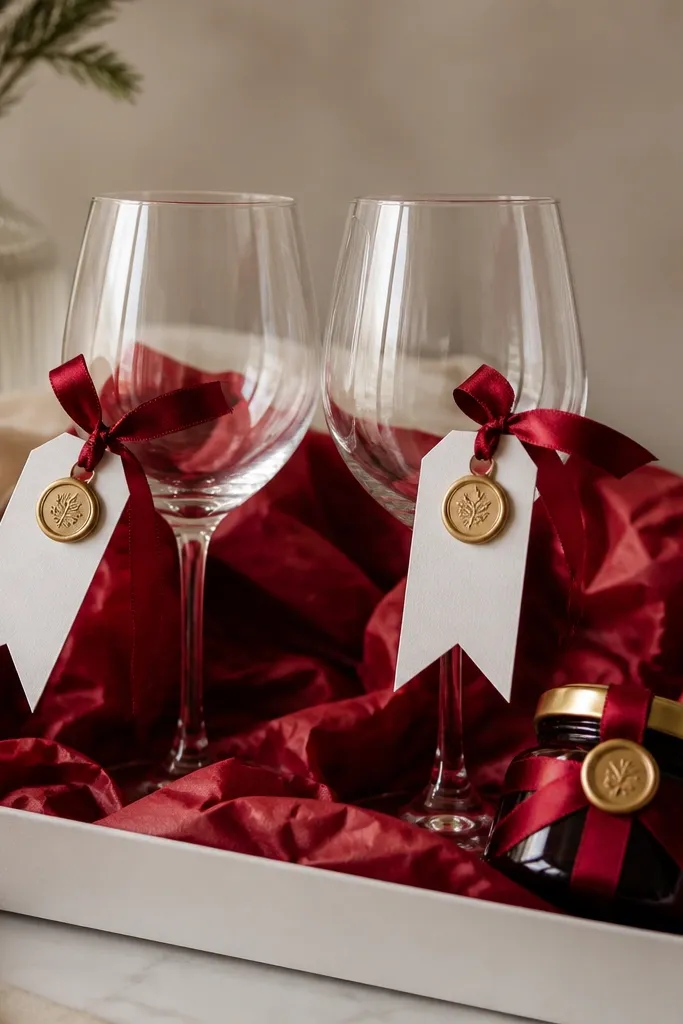
If you want the gift to look expensive without touching the glass, this is the move. Wax-seal style tags create instant “formal letter” energy, and people remember the tag because it feels tactile. I do this when I’m short on time or when the recipient prefers no permanent marks on their glassware. It works across skin tones and decor styles because the red wax and gold accent read warm. The glasses stay simple, but the overall set looks intentional because the tag design matches the ribbon and wrapping.
Start by getting wax-seal sticker sheets or small pre-made seal stickers in gold and red. Attach each seal to a thick cardstock tag and punch a hole for the ribbon. Tie the ribbon around the stem area so the tag hangs on the front side. Add a small matching item like jam, honey, or mini cocoa — something the recipient can use with drinks. Place everything in a box with tissue paper and keep the glass clean and unmarked so it’s easy to wash.
Use heavy cardstock for tags. Thin tags bend and look cheap fast when tied with ribbon.
Don’t let ribbon twist — if the tag spins, the seal looks crooked.
13. Marbled Cupcake-Style Paint Swirl on Glass Base
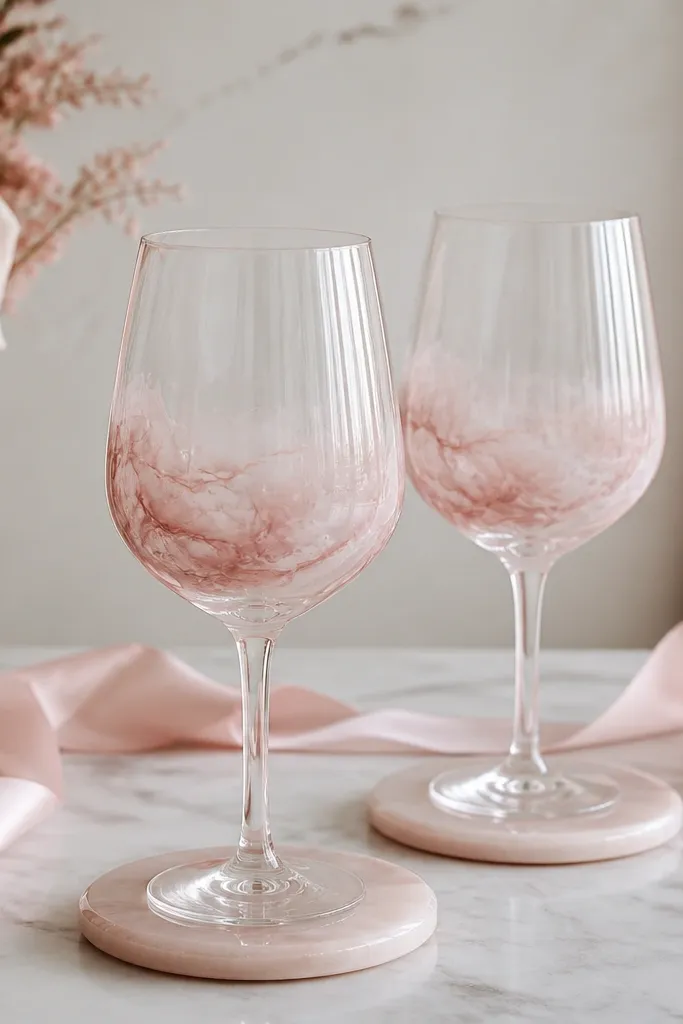
Start by protecting the top of the glass with tape or a cardboard shield so paint doesn’t creep up to the rim. Mix glass paint in 2-3 blush shades and use a small sponge to dab them, then swirl lightly with a toothpick or thin skewer for the marble effect. Keep the swirl confined to the lower third of the bowl, about 2 inches tall. Let it dry longer than the label says for dry-to-touch, then cure fully. Pair with coasters in the same blush family and wrap with a blush ribbon tied in a simple knot.
Marbled swirls make plain glass feel like a designed product, and the soft fade hides any tiny paint mistakes. I like blush tones because they look good in daylight and under warm indoor lighting, and they flatter people who like gentle, not loud, colors. This works well for baby showers, bridal events, and “new apartment” gifts. It also looks good when the recipient has neutral decor because the blush becomes the color pop. The swirl on the lower bowl also keeps the rim clean so it doesn’t look messy.
One warningDon’t use wet paint too thick — it will pool and create uneven blobs.
Quick tipPractice on one spare glass first. Marbling is easier when you see how your specific paint behaves.



