
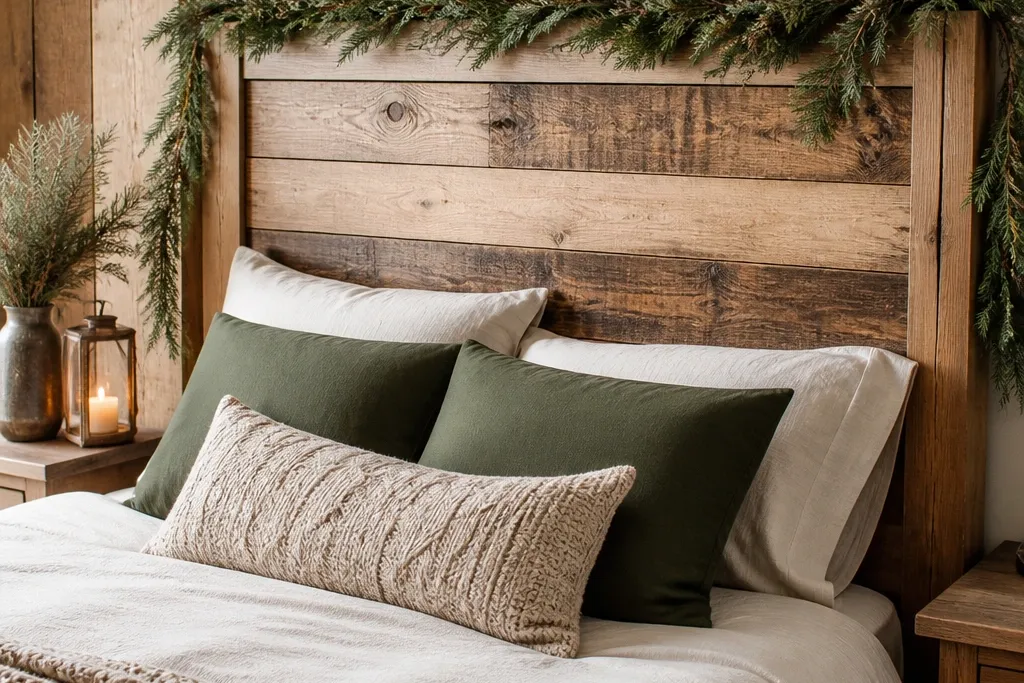
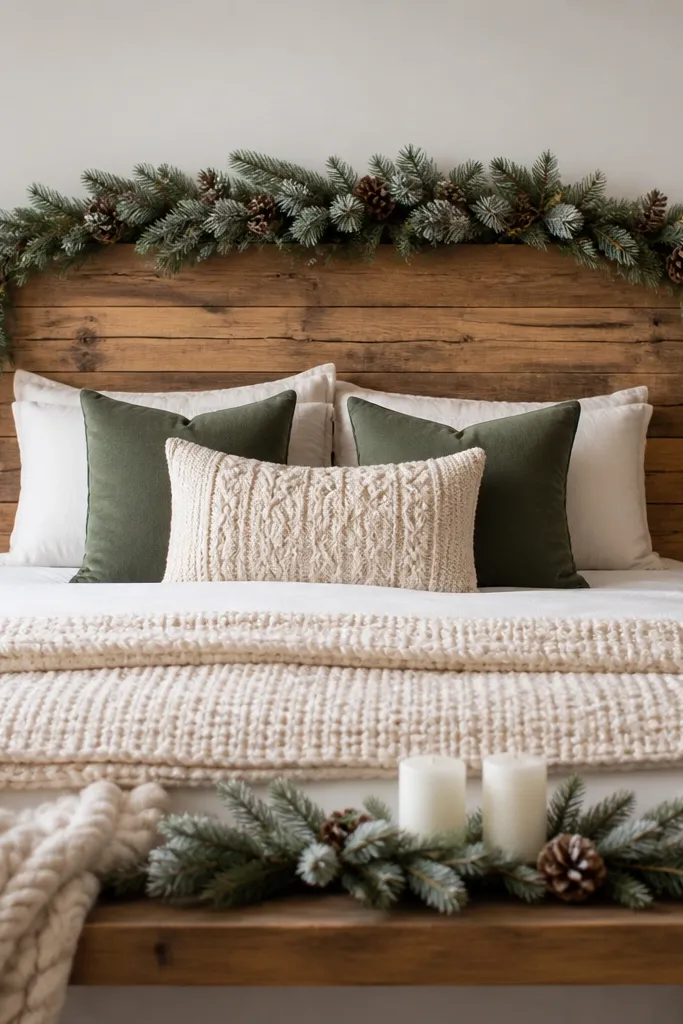
1. Reclaimed Barn Board Frame With Centered Vertical Slats
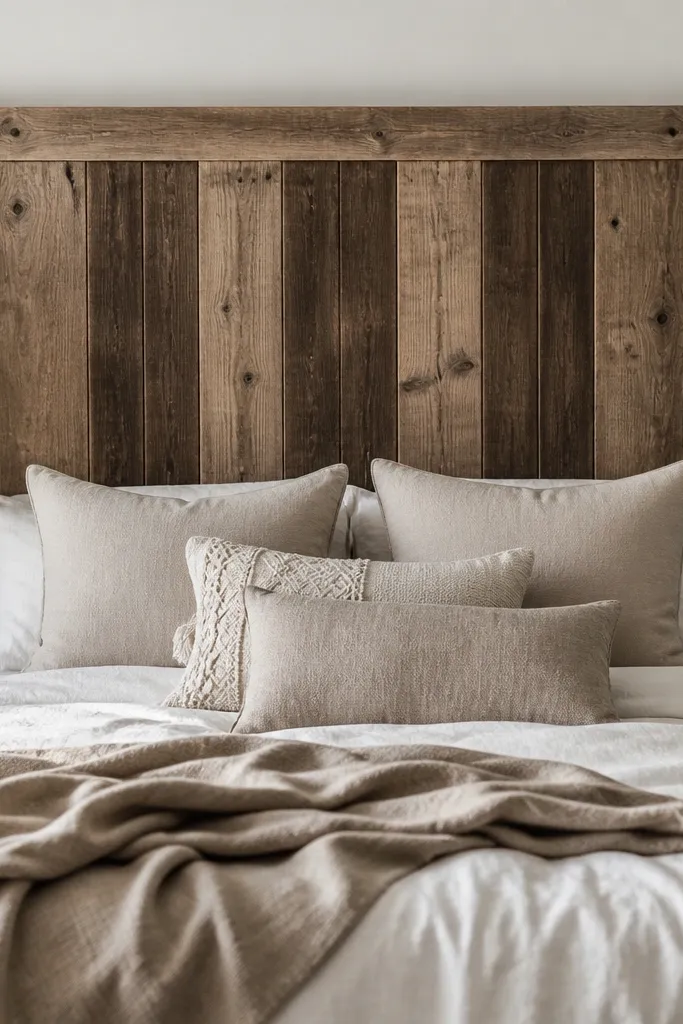
This build gives you the rustic look from real age marks, but keeps it clean by using a framed rectangle instead of loose boards. The vertical slats in the middle add “height” and draw the eye up, which makes the bed feel larger without adding bulk. A warm brown matte finish keeps the grain visible and hides minor surface flaws that show up on glossy coats.
Use two side rails made from 1x4 or 1x3 boards cut to your mattress width, then add a top and bottom rail. Fill the center with three vertical slats using 1x2 boards spaced 1/2 inch apart. Seal nail holes and knots with a knot-blocking primer before staining, then topcoat with matte water-based polyurethane.
If your reclaimed boards vary a lot in thickness, sand the high ones down to match so your slats sit flat without rocking.
Avoid skipping knot sealer — blotchy spots make the whole headboard look unfinished.
2. Pallet Slat Headboard With Offset Chevron Top Border
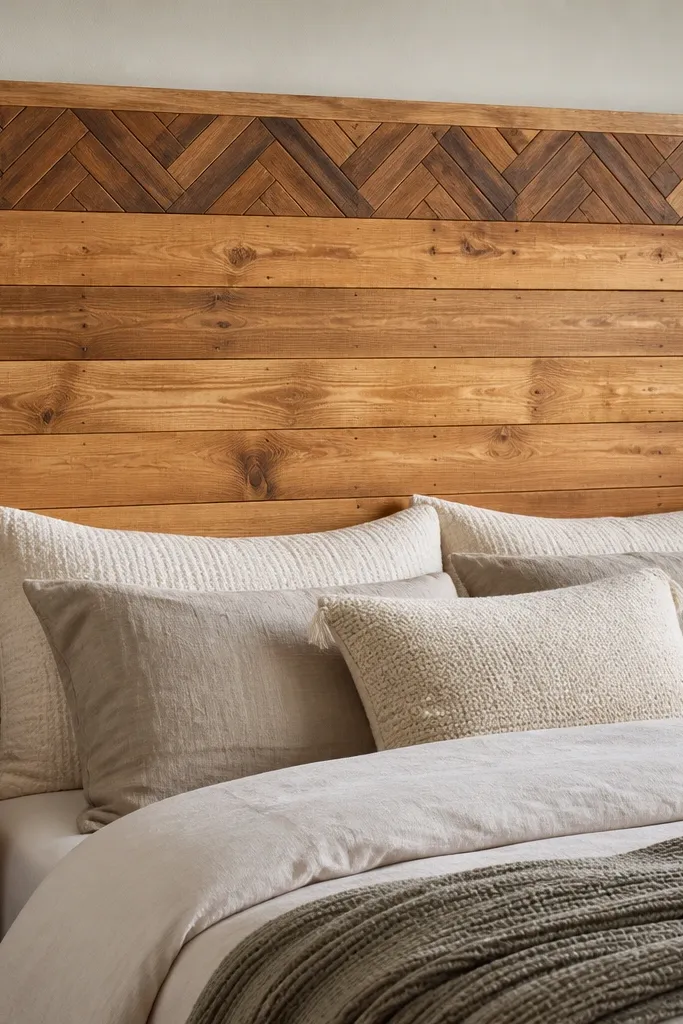
Horizontal slats read rustic and calm, while a chevron border adds just enough pattern to feel designed. I like keeping the chevron strip only 4 to 5 inches tall so it doesn’t compete with bedding. The offset layout — not perfectly centered — makes it look handmade rather than stamped.
Break down a pallet and sort boards by thickness, aiming for 3/4 inch consistent pieces. Build a back frame from 1x3 lumber, then attach slats horizontally with 1 inch spacing between slat centers (or tighter if your boards are narrow). Make the chevron strip from 1x2 pieces, cut so the V points align every 6 inches across the width.
Stain the whole board one color, then apply a second darker stain only to the chevron border for contrast.
Avoid leaving pallet nails exposed or skipping sanding; rough edges snag bedding.
3. Live-Edge Slab Look Using Laminated Pine Boards
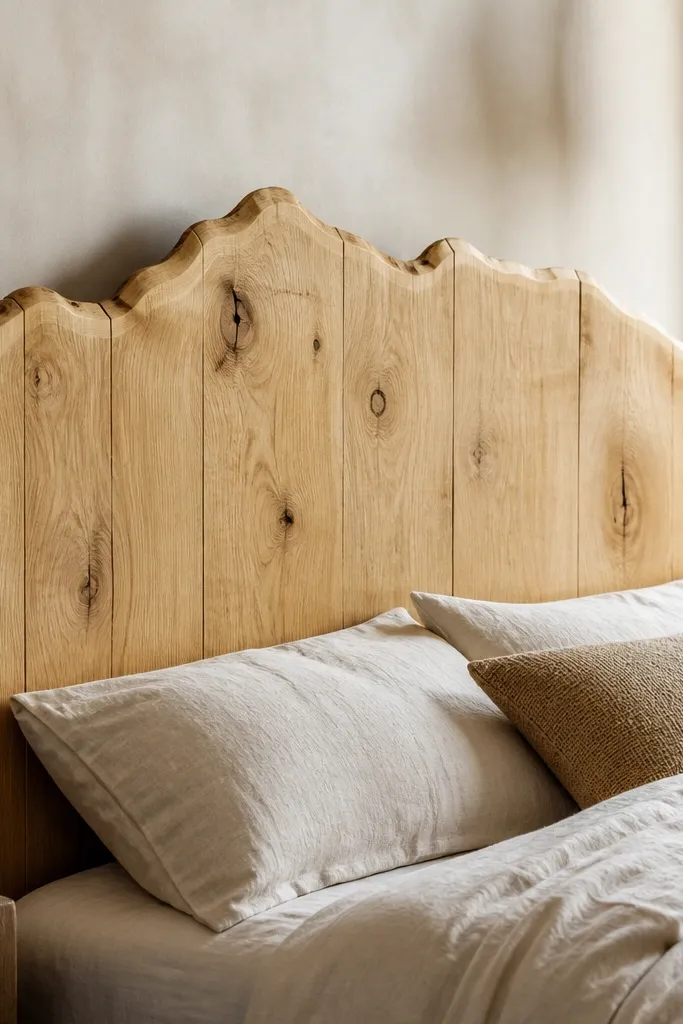
You get that organic slab outline without paying for a real slab. The trick is laminating straight pine boards and then shaping the top edge into an irregular contour using a jigsaw and sanding block. The lighter stain keeps it airy and “evergreen” for the seasons — it won’t look too dark in winter lighting.
Quick tipHold a flexible tape to your bed frame and mark the headboard curve against the room, not just on the wood.
Laminate 1x4 pine boards into a thicker panel by gluing and clamping, then trim the top edge into a natural-looking curve. Add side supports behind so it stays rigid (use 1x3 rails screwed into the back). Sand to 120 grit, stain with a light oak tone, and seal with matte topcoat.
One warningAvoid going too dark on this style — the irregular edge can turn heavy under warm bulbs.
4. Shiplap-Style Wood Headboard With Darkened Window Trim
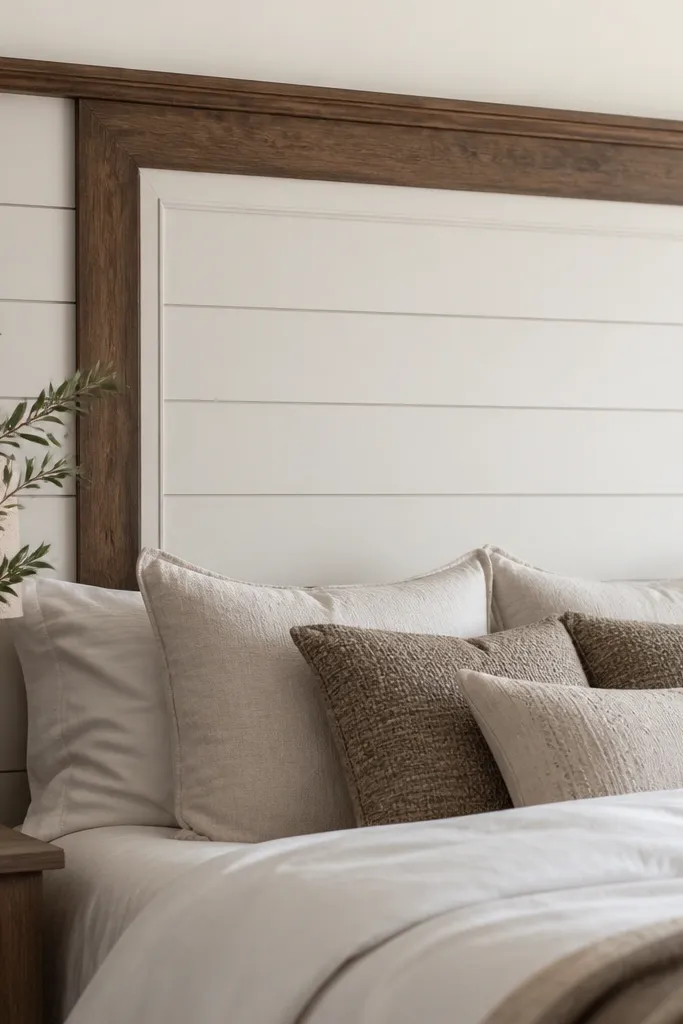
Shiplap texture gives you the rustic surface, and the dark trim adds a “frame within a frame” look that feels finished. I’ve used this when the rest of the room is neutral because it brings structure without turning the bed into a single-color block. The contrast also makes seasonal decor pop — greenery, plaid throws, and warm candles all read better against the dark lines.
Quick tipUse painter’s tape to mask the trim edges before stain so you get crisp lines instead of bleed.
Use 1x6 boards cut to your width and space them with a 1/8 inch gap for consistent shiplap shadow. Build a back frame from 2x2 or 1x3 rails so the shiplap boards don’t flex. Paint the shiplap warm off-white (like a creamy ivory), then stain the trim pieces dark walnut and finish with matte poly.
One warningAvoid thin paint coats on shiplap; you want full coverage so the knots don’t show through unevenly.
5. Rustic Ladder Headboard With Two Side Rails and Five rungs
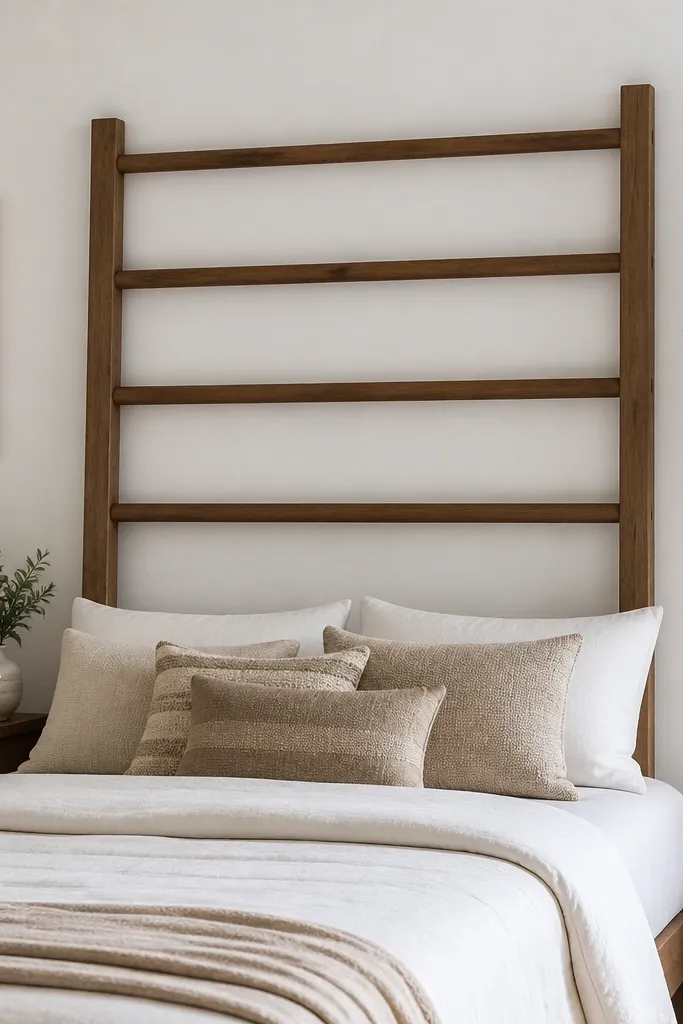
This one is my go-to when you want rustic without covering the whole wall. The open spacing makes the room feel lighter, and the rung count creates a rhythm that looks intentional. It also works great with seasonal decor because you can hang small wreaths or garlands on the rungs without attaching to the wall.
Use 2x2 side rails cut to 54 inches tall. Space five rungs using 1/2 inch thick boards, placing the bottom rung about 10 inches above the top of the mattress. Secure rungs with pocket holes or angle brackets from the back. Stain medium walnut and topcoat with satin (not glossy) to reduce glare.
Measure rung spacing against your pillow height so the top rung lands right under where your pillows rest.
Avoid wide rung spacing; it makes the ladder look like a chair back instead of a headboard.
6. Wood Palisade Headboard With Square Peg Accents
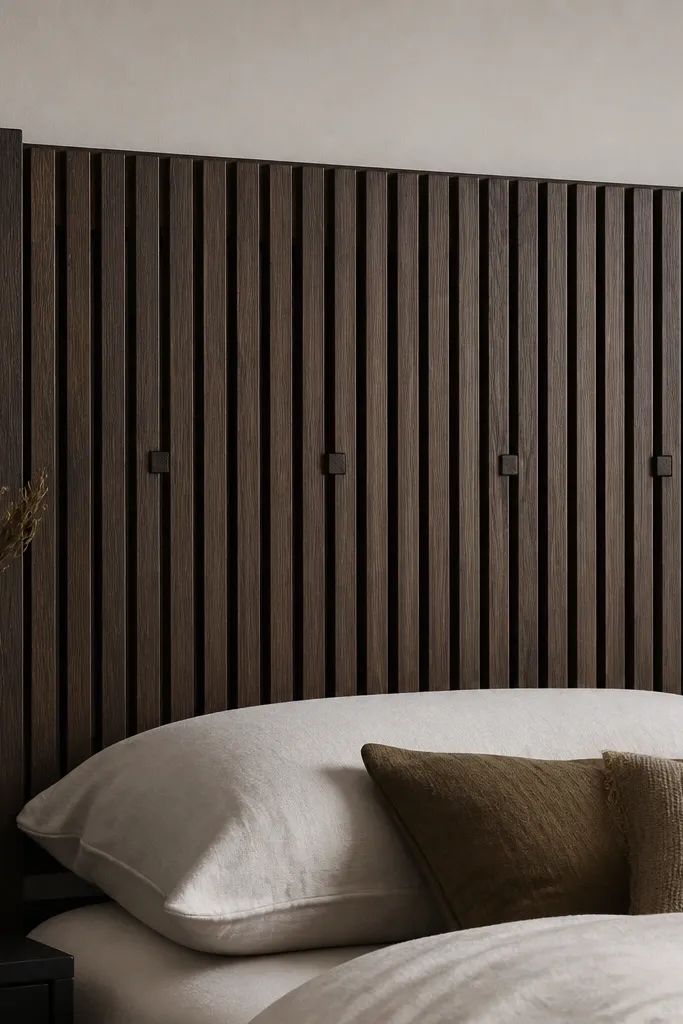
Dense vertical slats create a strong rustic texture, and the square pegs break up the pattern so it doesn’t look like plain fencing. The dark espresso stain makes the texture look deeper and helps the headboard act like an anchor behind neutral bedding. It also photographs well because the light catches the peg edges.
Quick tipPre-stain the pegs and slats separately if your wood absorbs unevenly — it prevents darker blotches.
Build a frame from 1x4 boards and fill with 1x2 vertical slats. Keep spacing consistent at 1/4 inch between slats for a tight look. Add square pegs by cutting 1 inch squares from scrap and gluing them at every third slat, then sand the pegs flush before staining.
One warningAvoid leaving end grain unsealed; it drinks stain and makes some slats look patchy.
7. Corner-To-Corner Board Lattice Behind a Solid Top Rail
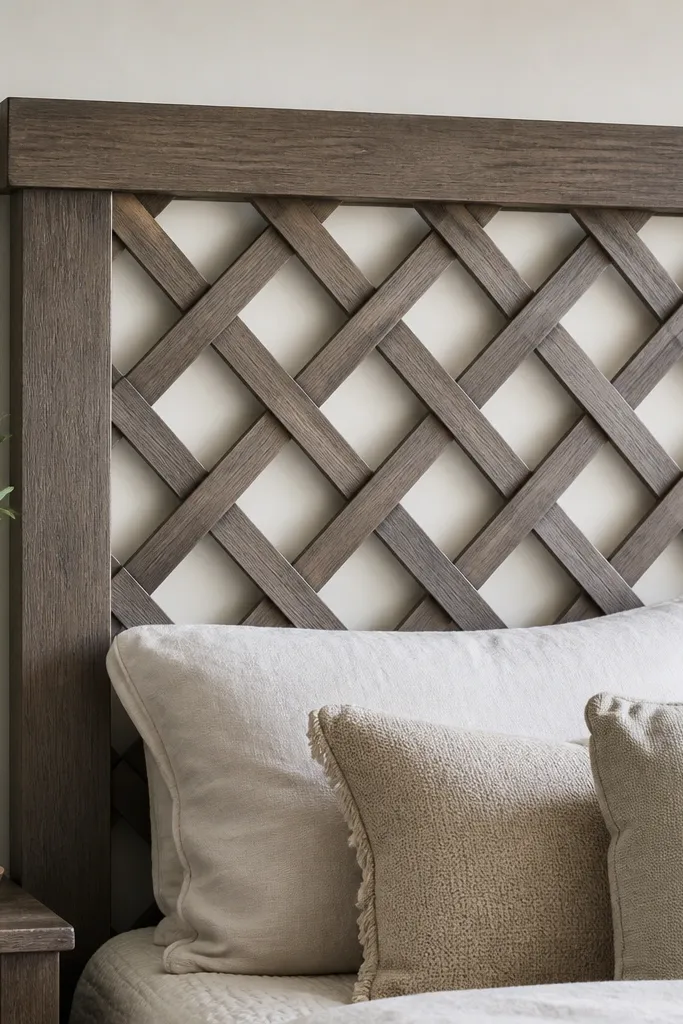
Diagonal lattice adds movement and a “cabin window” vibe without needing heavy carvings. Keeping a solid top rail makes the whole thing feel sturdy and visually grounded. The gray-brown stain makes it seasonal and evergreen because it pairs well with green, red, and natural beige bedding.
Frame the outside with 1x4 rails. Install diagonal lattice boards at 45 degrees using 1x2 strips, leaving 2 inches between intersection points. Add a solid top rail from a 1x6 for the visual weight. Sand to 150 grit, stain with a gray-brown mix, then seal with matte poly.
Mark diagonal positions using a chalk line on the frame so the lattice stays symmetrical across the center seam.
Avoid over-tight lattice spacing; it can look like a screen door instead of a rustic design.
8. Rustic Tool Rack Headboard With Small Wood Shelves
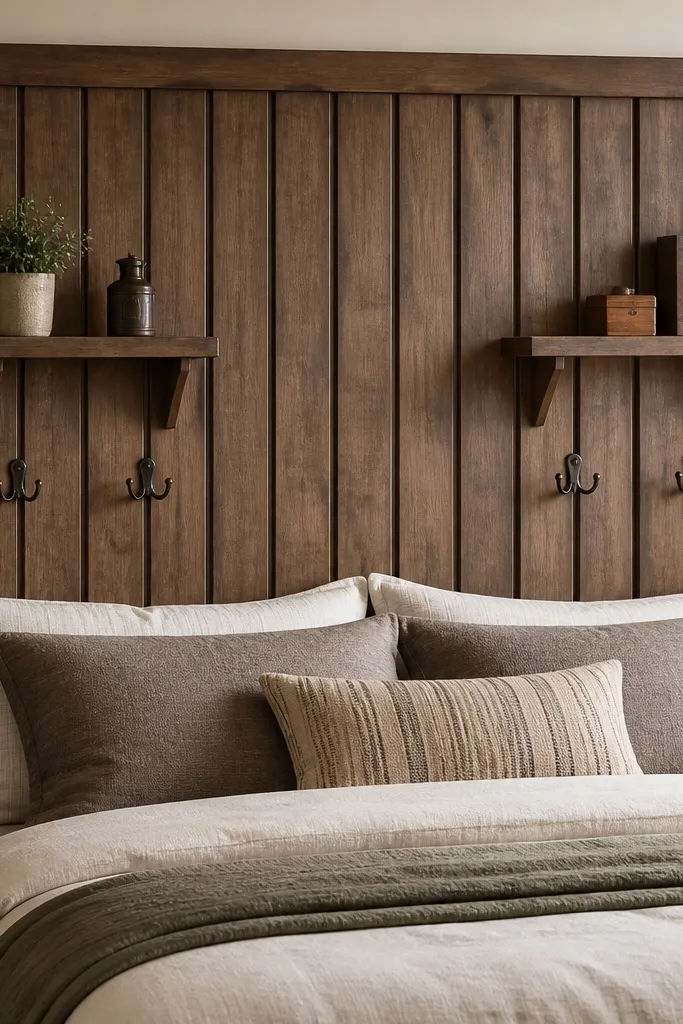
This is a functional rustic headboard. You can hang a small wreath, a lantern hook, or even keep throw blankets folded on the shelves. The metal hooks add that “farmhouse workshop” look and bring contrast against lighter wood tones. I’ve used this in guest rooms where people want a place for hats or scarves.
Quick tipAdd felt pads under the shelf ends so the wood doesn’t squeak against the bed frame.
Build a back panel from 1x3 vertical boards on a 1x4 frame. Add two shelves using 1x6 boards, mounted about 18 inches and 36 inches above the floor line behind the bed. Use black metal cup hooks or screw-in hooks spaced every 6 inches. Finish wood with a worn stain (apply, wipe back, repeat) and seal with satin poly.
One warningAvoid thin shelves; 3/4 inch thickness looks flimsy and causes sag over time.
9. Weathered Oak Board Headboard With Burned Edges
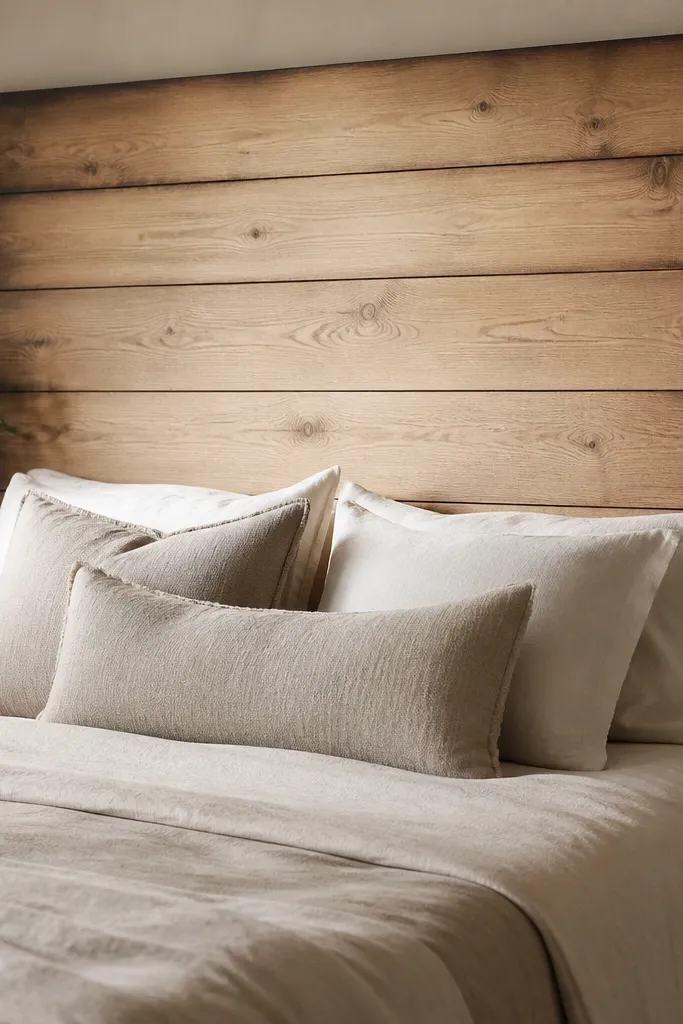
Burned edges make the seams pop and give you that “picked up at an old mill” look. The boards stay wide and calm, and the edge burning adds detail without carving. It also hides minor unevenness between boards because the dark outline tricks your eye into reading crisp lines.
Use wide 1x6 or 1x8 boards for the main surface, backed by 1x3 rails. Sand lightly, then use a wood burner to lightly trace the seams and edges — keep it subtle. Wipe away soot, then stain the center tone (light oak) and seal matte. Test your burn intensity on scrap because it darkens more after sealing.
Do the burning after you sand but before stain so you don’t seal in dirty soot.
Avoid heavy burning — thick char turns the whole headboard into a campfire prop.
10. Reeded Wood Headboard Using Half-Lap Strips
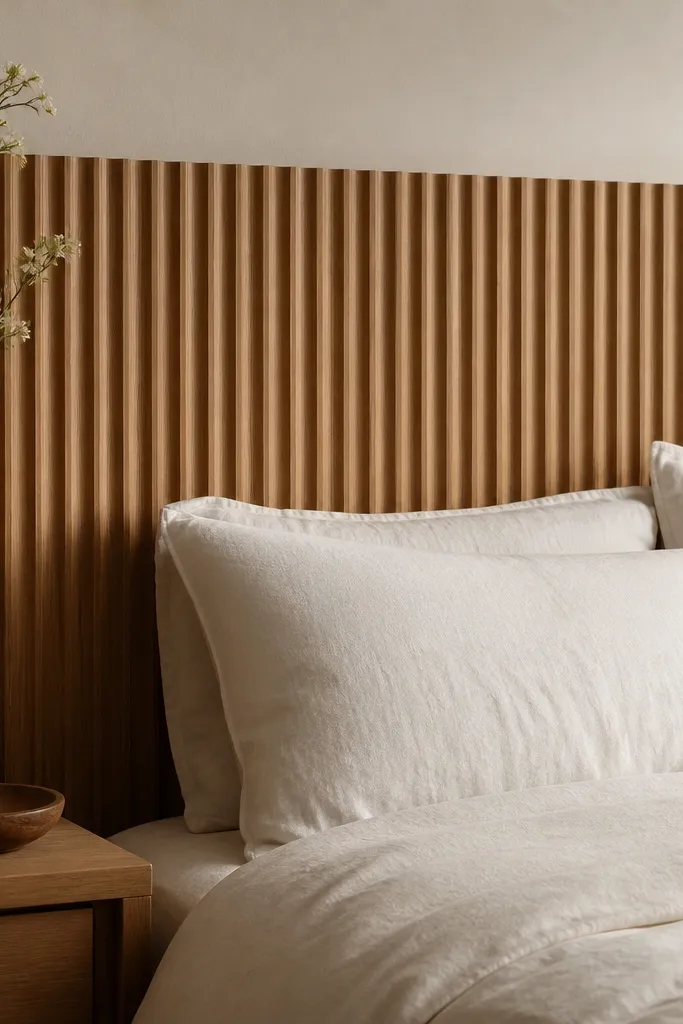
Reeded grooves give you a high-end rustic texture without needing expensive tools. Half-lap strip construction creates consistent channels that catch light like carved wood. This style looks clean enough for modern rustic rooms, but still feels handmade because you see the hand-sand lines and grain.
Quick tipLightly sand the grooves with a folded sandpaper strip so they don’t feel sharp under fingers.
Rip or buy 1x2 strips and cut a half-lap edge so each strip overlaps its neighbor by about 1/4 inch. Mount strips vertically over a frame and keep the gaps even at roughly 1/8 inch. Finish with a clear matte sealer so the grooves stay crisp. Use a water-based finish that dries fast so you can check alignment between coats.
One warningAvoid rushing the strip spacing; crooked grooves look like a DIY error instead of design.
11. Cedar Slat Headboard With Green-Tinted Clear Finish
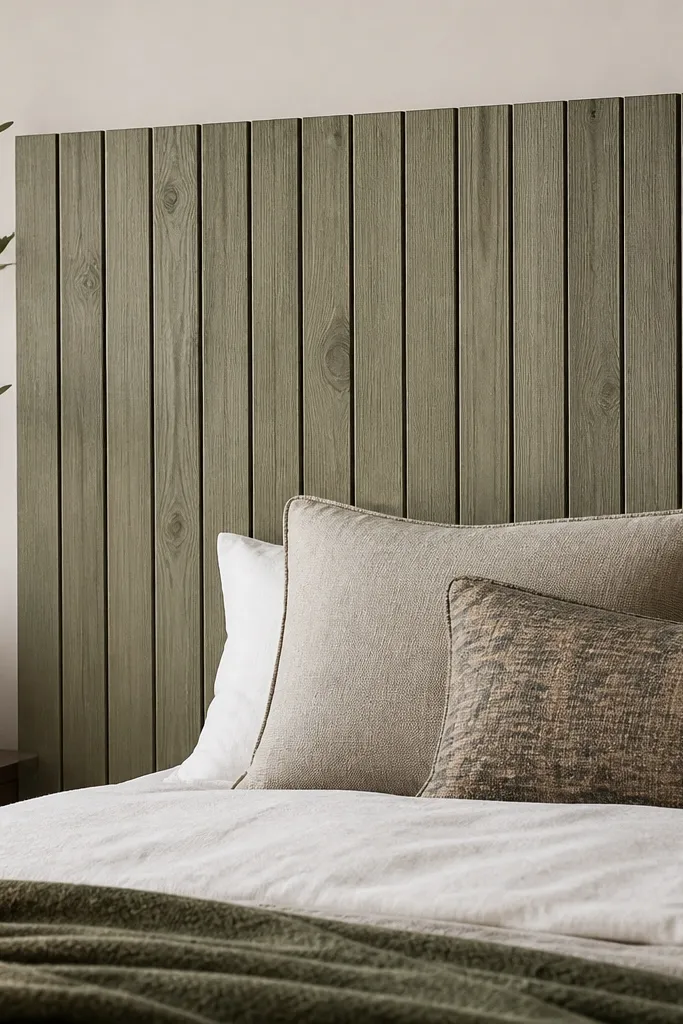
Cedar already smells good, and the slight green tint keeps the headboard “seasonal evergreen” even when you change pillows. The vertical slats add texture, while the green tint ties into bedding without forcing you into one theme. It also looks great with cream, oatmeal, and black accents.
Quick tipVentilate well and wear a respirator — cedar finishes can be strong-smelling.
Use 1x3 or 1x4 cedar boards cut to headboard height, mounted to a 1x4 frame. Space slats 1/4 inch apart. Apply a clear sealer, then add a small amount of green tint to the final coat (test on scrap first). Finish with matte so the green stays soft and not glossy.
One warningAvoid heavy green tint; too much makes it look like a painted craft board.
12. Shaped Top Arch Headboard With Rustic Stain and Wrought Iron Pins
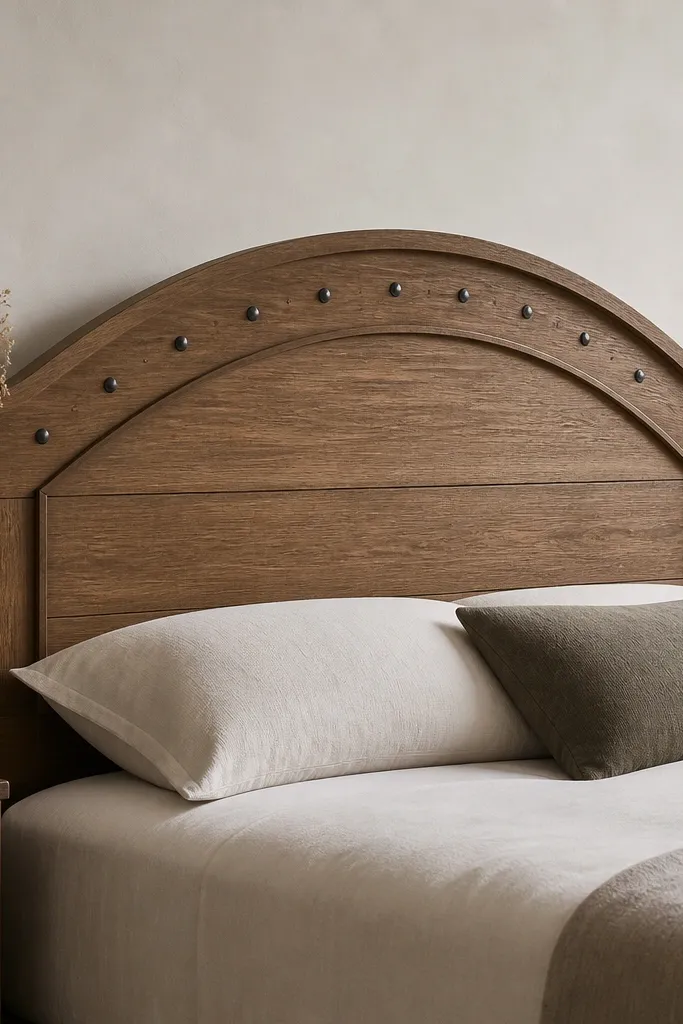
An arched top instantly reads classic rustic. The layered wood around the arch gives thickness and shadow, while the metal pins add a “hand-forged” accent. This one looks best in bedrooms with curved furniture or a farmhouse-style mirror on the opposite wall.
Build a rectangle frame first, then add arch templates cut from 1/2 inch plywood or thin boards. Cover the face with 1x3 vertical slats. Stain medium brown and drive small black wrought iron nails or decorative pins along the arch line, spacing about 3 to 4 inches apart.
Trace the arch onto cardboard first and tape it to the wall behind your bed to confirm the height before you cut wood.
Avoid too-thin arch layers; thin edges look flimsy and peel later.
13. Wood Slice Mosaic Headboard With Mixed Walnut and Pine
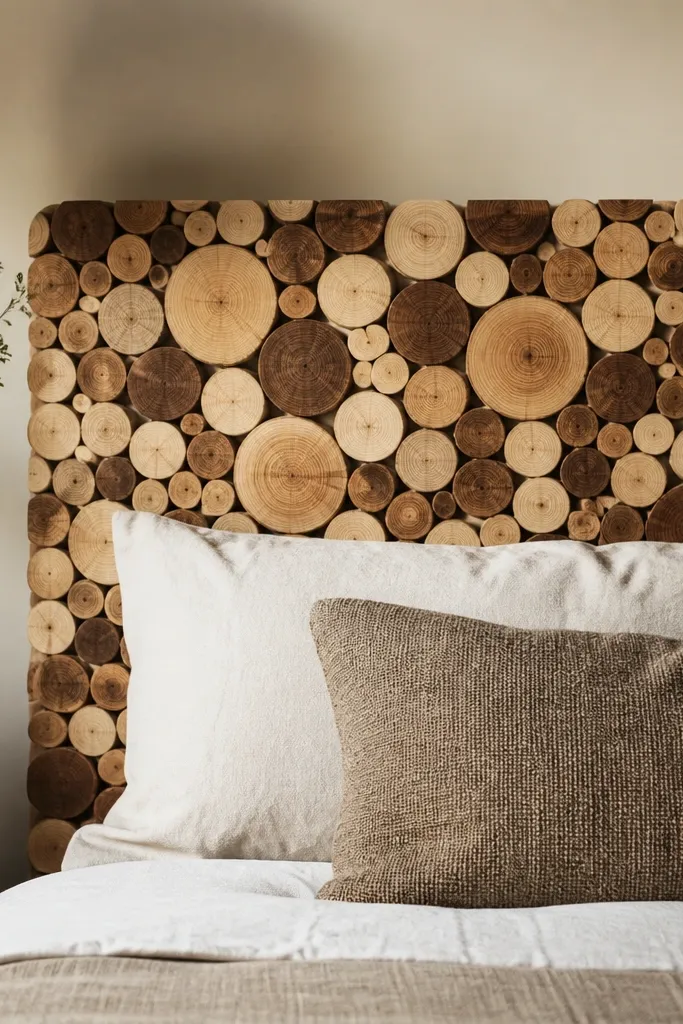
Wood slices add instant texture and a natural look that changes with the light. Mixing walnut and pine gives you contrast without needing paint. It feels rustic and seasonal because the natural tones pair with greenery garlands and winter whites.
Quick tipLay slices dry first and take a photo — you’ll spot spacing issues faster than your eyes can.
Cut or buy 2 to 3 inch wood slices, then lay them on a plywood base in a grid pattern with 1/4 inch gaps. Glue slices down tightly, then sand the tops flush. Seal with epoxy or thick clear poly for a smooth surface that won’t snag fabric. Frame the edges with 1x3 trim to hide plywood.
One warningAvoid skipping sanding flush; raised edges make bedding catch.
14. Rustic Pallet Board Headboard With Vertical Nail Stripe Pattern
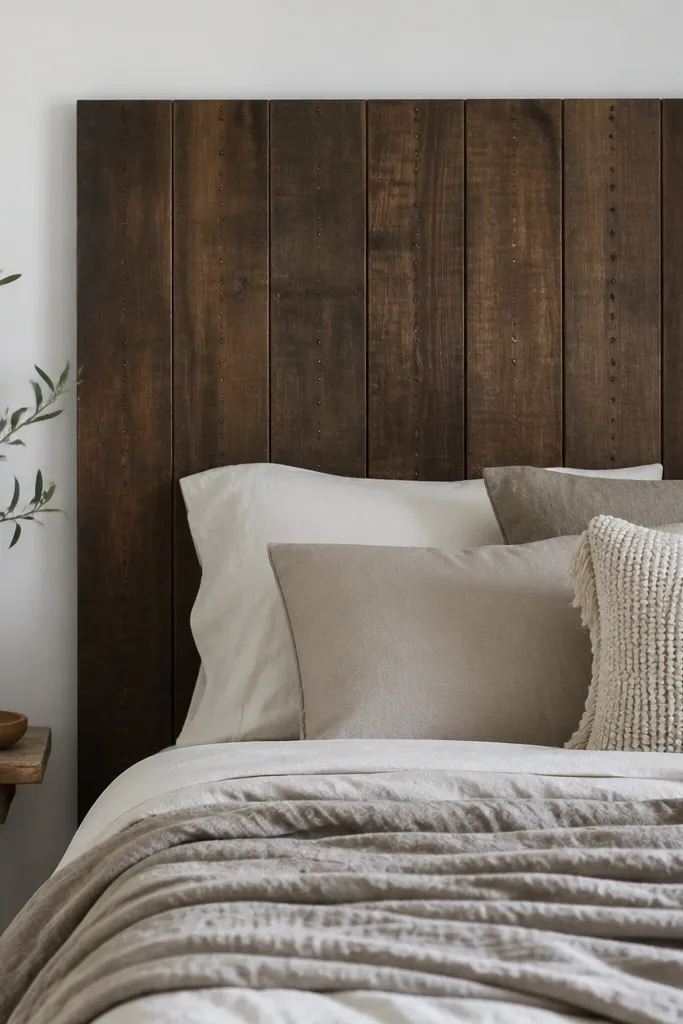
This style keeps the surface simple and adds a graphic rustic detail using nail lines. The pattern draws attention to the center, and it looks good even when your bedding is plain. Nail stripes also hide small gaps between boards because your eye reads the line.
Quick tipUse a metal ruler as a guide and do one test stripe at the top before you commit to the full headboard.
Select pallet boards with similar width so your stripes feel consistent, then attach to a back frame. Hammer small black nails or brads in straight columns with 2 to 3 nails per 6 inches of height. Stain dark walnut, wipe back, then seal matte. Keep nail depth shallow so the heads sit flat.
One warningAvoid random nail placement; uneven spacing reads messy, not rustic.
15. Two-Tone Ladder Slat Headboard With Whitewashed Center
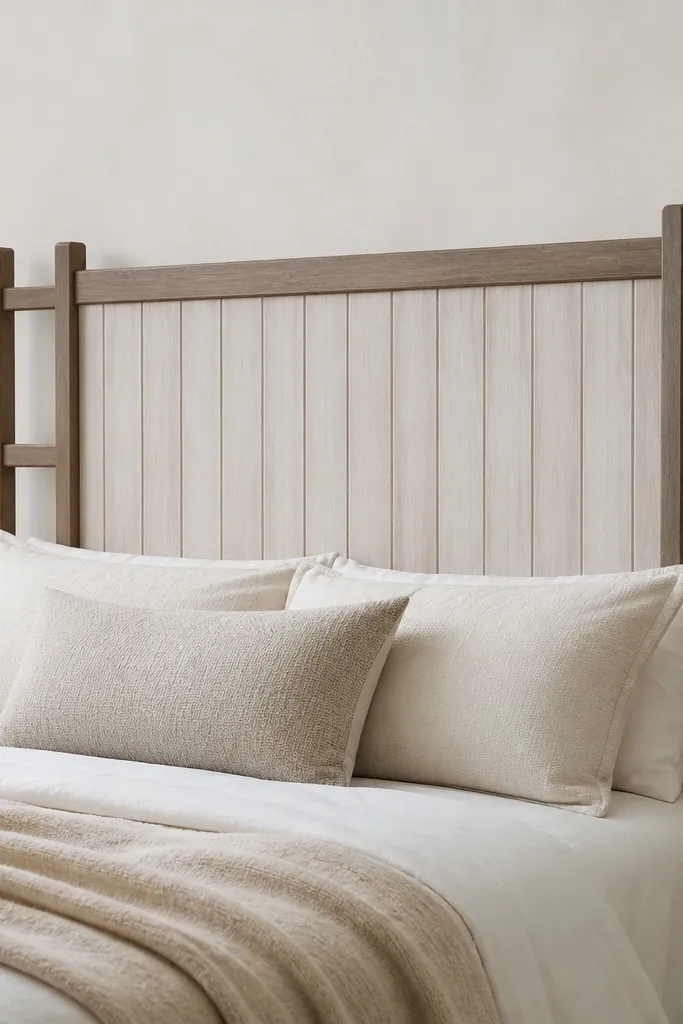
Two-tone wood makes the bed look styled even when you don’t add decor. The whitewashed center stays bright for summer, and the darker rails keep it grounded for fall. I like this when your room has light floors and you want the headboard to feel airy.
Build the ladder frame with 2x2 side rails stained dark walnut. Attach vertical slats from 1x2 boards and apply a whitewash mixture (white paint thinned with water) only to the slats. Seal everything with matte poly so the whitewash doesn’t flake. Use spacer blocks to keep slats evenly spaced at about 1/4 inch.
Seal after the whitewash dries fully, then do one extra thin coat on the whitewashed area to prevent rubbing off.
Avoid thick white paint — it covers knots unevenly and looks chalky.
16. Rustic Corner Bracket Headboard With Exposed Joinery Look
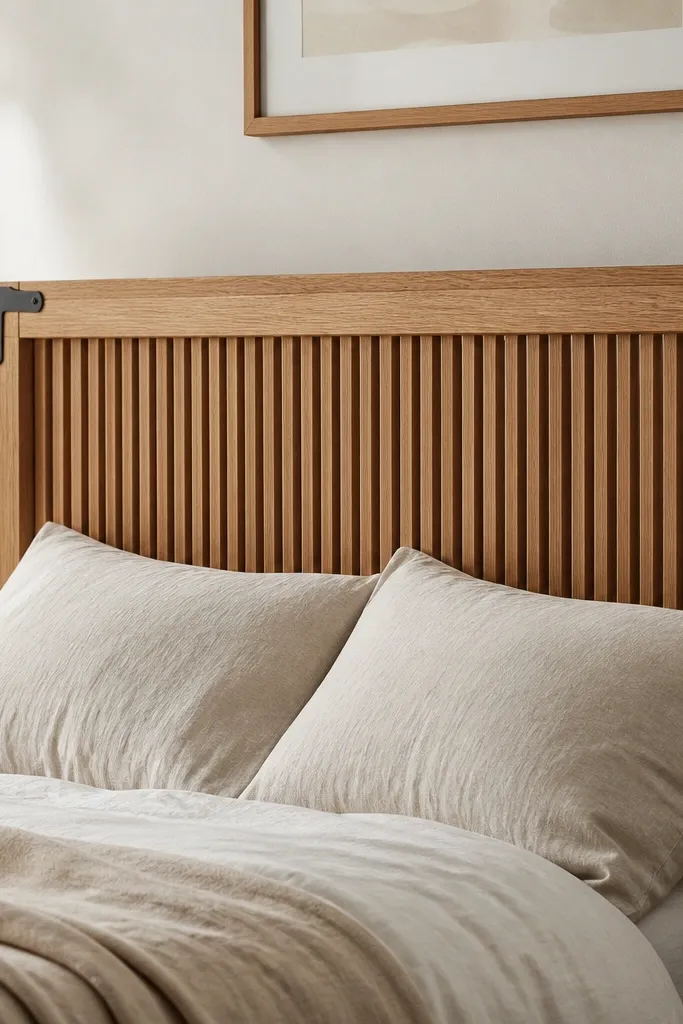
Exposed joinery cues make a simple headboard look like it came from a workshop. Black corner brackets add strength and a visual “industrial rustic” edge. The natural oak keeps the tone warm, and the matte finish prevents the brackets from looking shiny and cheap.
Quick tipPre-drill bracket holes so you don’t split oak boards at the corners.
Make a back frame from 1x4 boards, then add a center grid of vertical 1x2 slats. Install black corner brackets at each corner — two brackets per corner for a sturdy feel. Clear seal with matte, then lightly distress edges with 220 grit sandpaper for wear. Leave the center slats slightly lower than the top rail by about 1 inch so the frame reads clean.
One warningAvoid skipping pre-drilling; split corners ruin the whole look.
17. Wide Plank "Wall" Headboard With Center Bead Detail
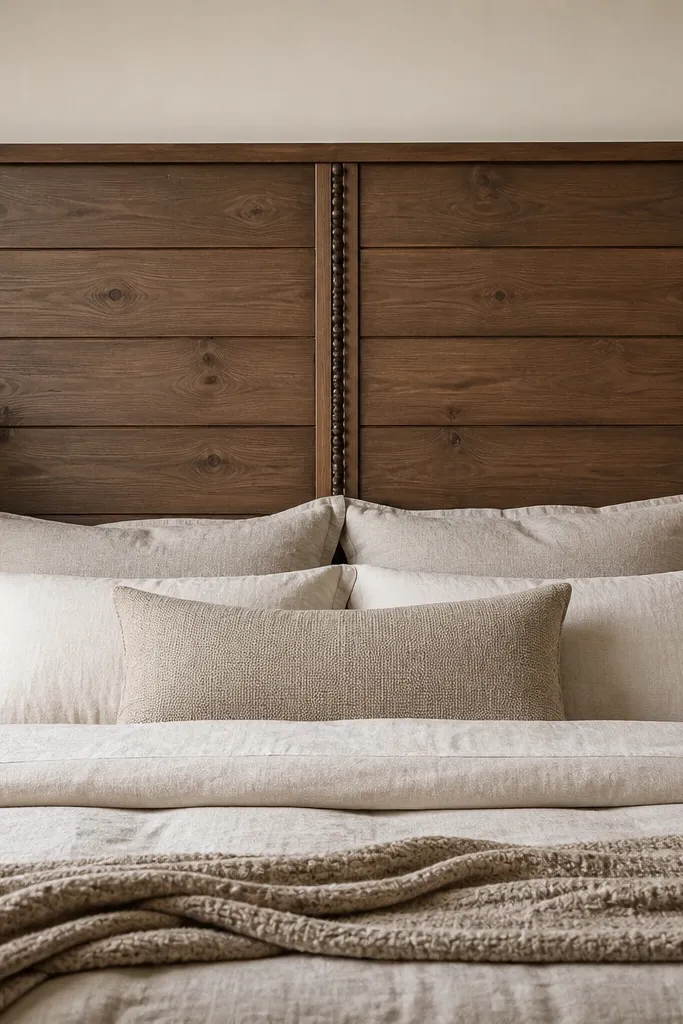
Wide planks read rustic “wall panel,” and the center bead strip adds a subtle decorative line you can build without carving. This style is great if you want a calm background for seasonal bedding — you can swap pillow covers and throws and the headboard stays consistent. The bead detail also gives you a focal point for wreaths and garlands.
Quick tipUse a straightedge to align plank seams perfectly — the bead detail makes any seam misalignment obvious.
Use two or three wide planks for the main face, mounted to a frame. Add a center bead strip using a 1x2 board with a rounded edge or a pre-made beadboard trim. Keep the bead strip width around 3 inches so it looks intentional. Sand, stain medium brown, and seal matte.
One warningAvoid too many plank seams; it turns into a patchwork quilt look.
18. Wood and Jute Rope Wrapped Headboard Edges
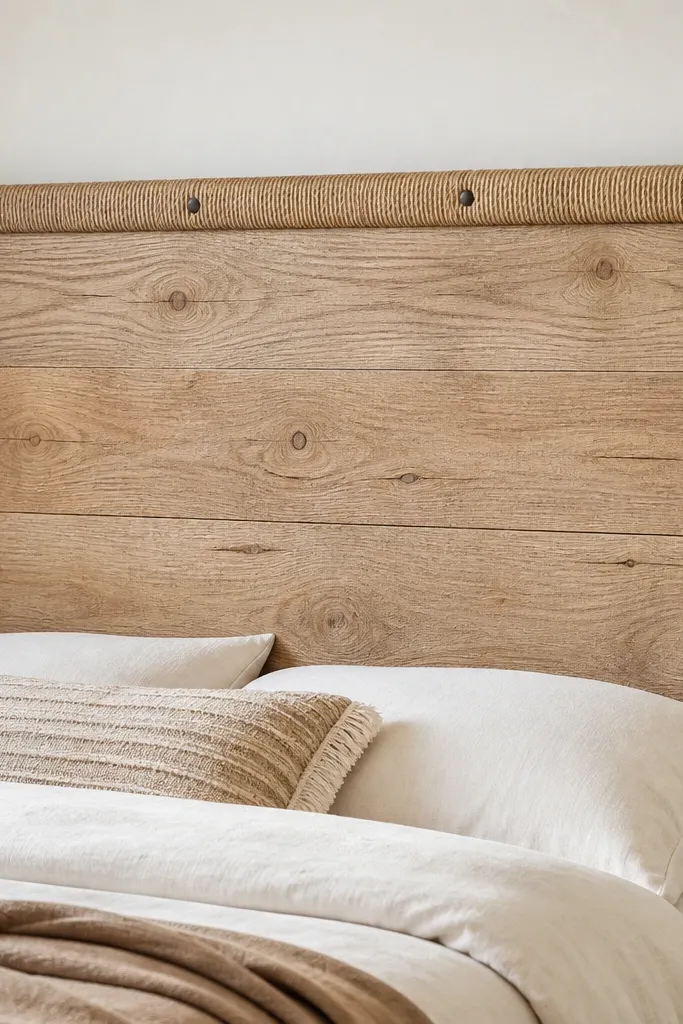
Rope wrap adds texture you can feel, and it makes the corners look finished without buying fancy trim. Jute reads earthy and works with greenery and winter whites. The key is to keep the rope tight and the wood tone light so it doesn’t look heavy.
Quick tipUse painter’s tape to hold rope tension while glue sets — it keeps the wrap even.
Build a simple rectangular plywood or 1x frame and cover with slats or one flat panel. Wrap jute rope around the outer edges using wood glue in small sections, then pin with small brads. Stain the face light oak and keep rope natural or lightly stained to match. Topcoat the wood face only; keep rope matte and sealed lightly with a clear matte spray to prevent fraying.
One warningAvoid glossy clear coat on rope; it looks plastic and catches light harshly.
19. Rustic Box Frame With Crosshatch Stakes
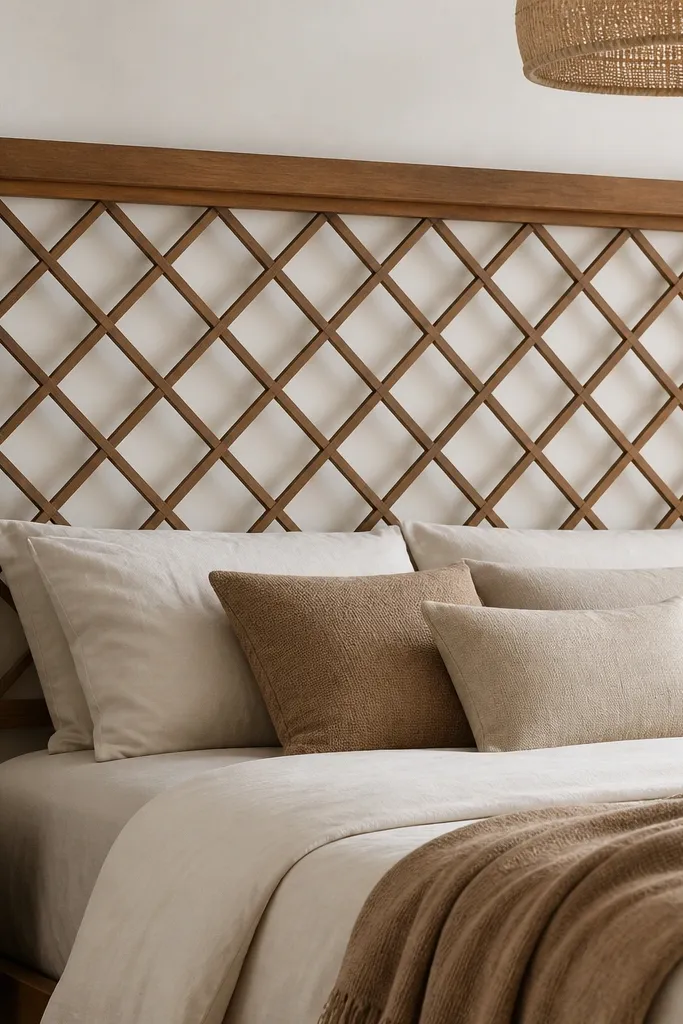
Crosshatch stakes add that old fence look, but in a controlled rectangle. The box frame keeps it from looking like yard scrap, and the repeated X pattern adds visual interest even with plain bedding. It’s also a good choice if you want airflow behind the headboard because the center isn’t solid wood.
Quick tipDraw your crosshatch on paper first and count the number of X repeats across the width — it helps you keep symmetry.
Make a box frame from 1x4 boards. Fill the center with thin 1x1 or 1x2 stakes cut diagonally and layered to form X shapes. Use a jig or spacing blocks so intersection points align. Stain warm brown and matte seal. Keep stake thickness around 3/8 to 1/2 inch so the lattice doesn’t look too chunky.
One warningAvoid random stake lengths; uneven grid spacing turns into a crooked fence.
20. Cedar Pickett Headboard With Small Top Banner Board
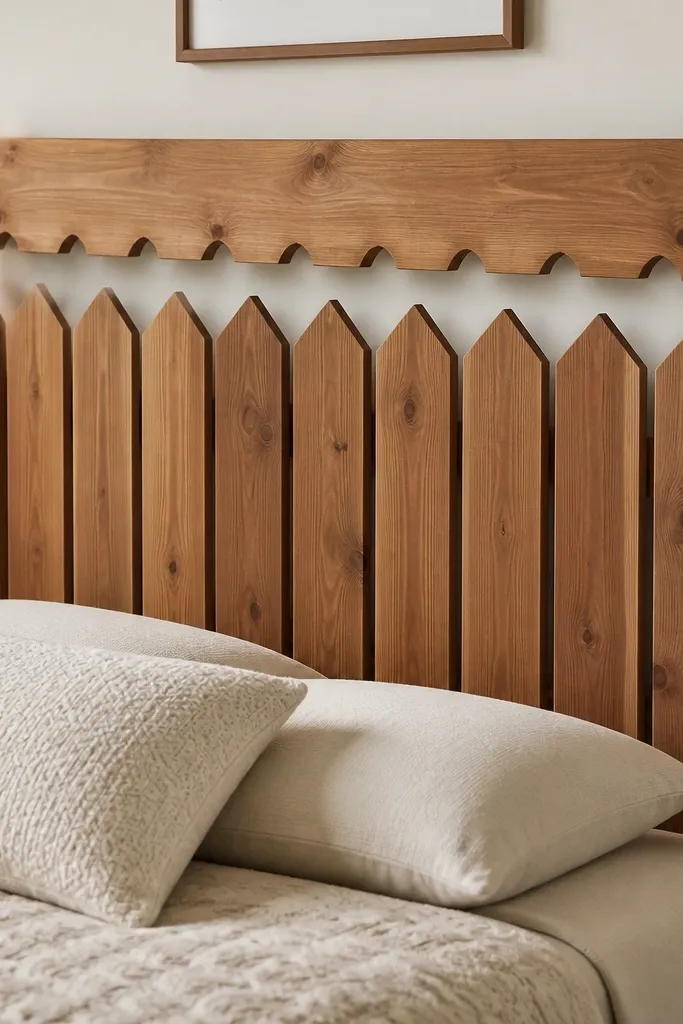
Picket tops give you a classic rustic silhouette, and cedar keeps the tone fresh for all seasons. The banner board adds a “finished trim” feel and gives you a place to hang small lights or a mini evergreen wreath. This style looks best when your bed sits slightly away from the wall so you can see the picket points clearly.
Cut cedar pickets with a simple pointed top template using a jigsaw. Build a back frame from 1x4 rails and attach pickets with small screws from the back. Add a top banner board from 1x6 with a subtle notch cut every 8 inches. Clear matte seal so cedar color stays natural.
Sand the point tips to a soft radius so they don’t snag fabric or scratch skin when you make the bed.
Avoid too-sharp points; sharp tips make it feel unsafe and cheap.
21. Rustic Plank Headboard With Vertical Dowel Columns
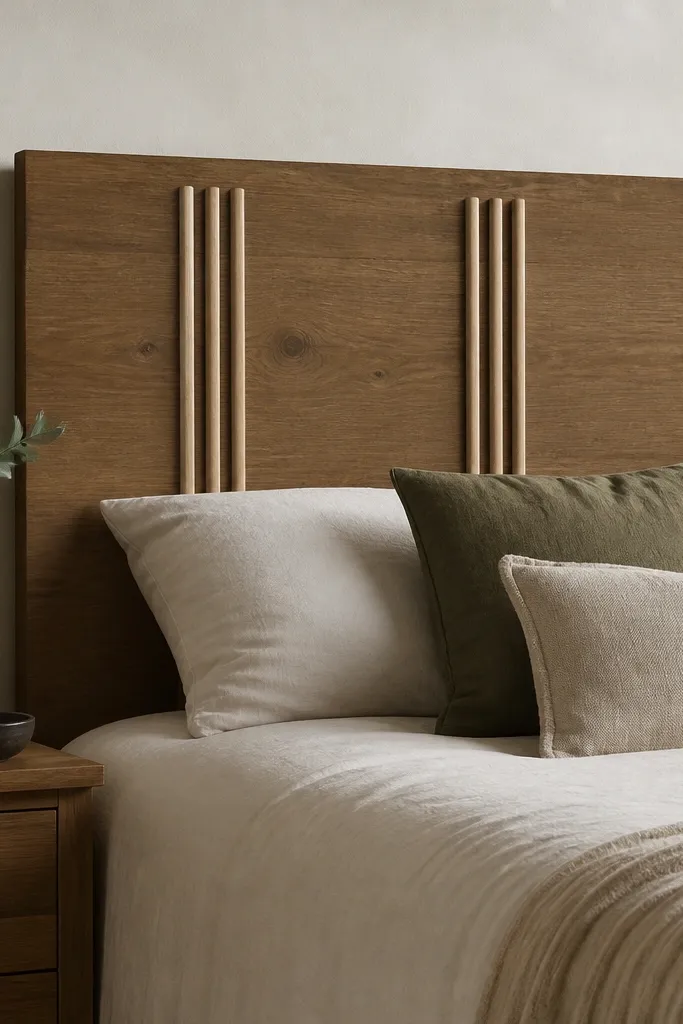
Dowels are an easy way to add dimension without carving. The shadows between dowels and the stained base create a hand-built look that feels more expensive. I like this when you want rustic but your room already has a lot of visual calm — the dowel columns give structure without busy pattern.
Use a plywood or 1x plank base stained medium brown. Add dowels cut to headboard height minus 2 inches, gluing them in three columns with 2 inches between columns. Use 3/4 inch dowels for chunky shadow lines. Seal with matte poly, then lightly sand dowel edges so they blend smoothly into the finish.
Dry-fit dowels with painter’s tape first — it’s faster to adjust spacing than to scrape glue off the finish.
Avoid gluing dowels directly over rough stain — it can cause uneven adhesion and peeling.
22. Wood Turned Spindle Accent Headboard With Center Window
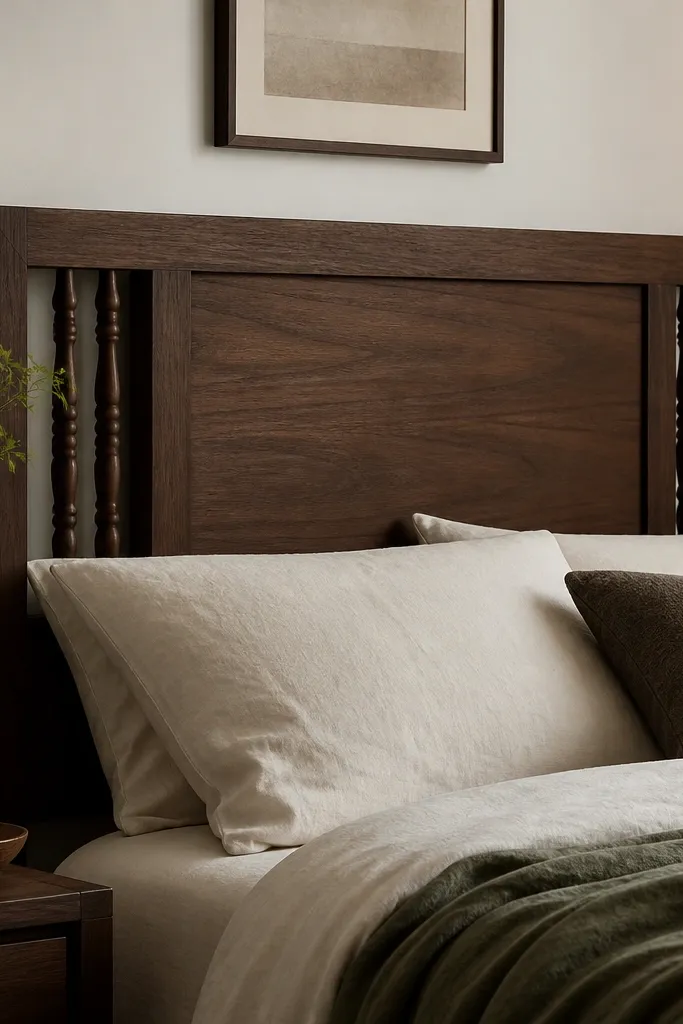
A center inset panel keeps the design calm, and turned spindles add that “antique” rustic texture. Dark walnut makes the turned details stand out without adding carvings. This one looks great with seasonal evergreen decor because the inset can hold a small framed sign, wreath, or greenery bundle.
Quick tipUse a spacer block when mounting spindles so each spindle sits at the same inset depth.
Build a frame from 1x4 and add a plywood inset panel inside. Mount turned spindles (or spindle-style trim pieces) on each side of the inset, spaced 3 inches apart vertically. Keep the inset height around 26 to 30 inches so it fits pillows visually. Stain dark walnut and matte seal, then lightly distress only the frame edges.
One warningAvoid placing spindles too close to the inset edges; it makes the center look cramped.
23. Flat Panel Wood Headboard With Routed Channel Lines
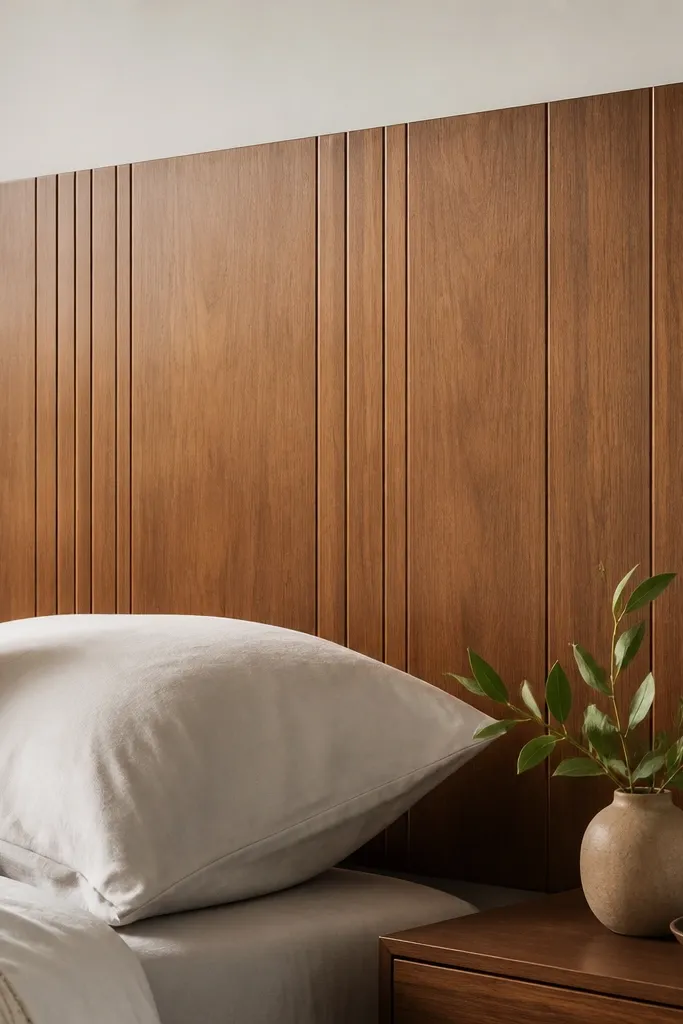
Routed channels give you the look of carved wood without building a full lattice. On a flat panel, the grooves stay crisp and clean, which makes the rustic style feel intentional. It’s also a good option if you want a headboard that stays tidy with minimal decor changes.
Use a 3/4 inch plywood panel cut to headboard size and mount it to a simple frame. Rout vertical channels using a 1/4 inch straight bit with shallow depth around 1/8 inch. Space channels 1 inch apart for a balanced pattern. Sand, stain medium oak, and seal with matte poly.
Practice routing on scrap and test stain — routed channels hold stain differently than flat areas.
Avoid deep routing; deep grooves show tool marks and can collect dust.
24. Rustic Corner Post Headboard With Two Vertical Beams
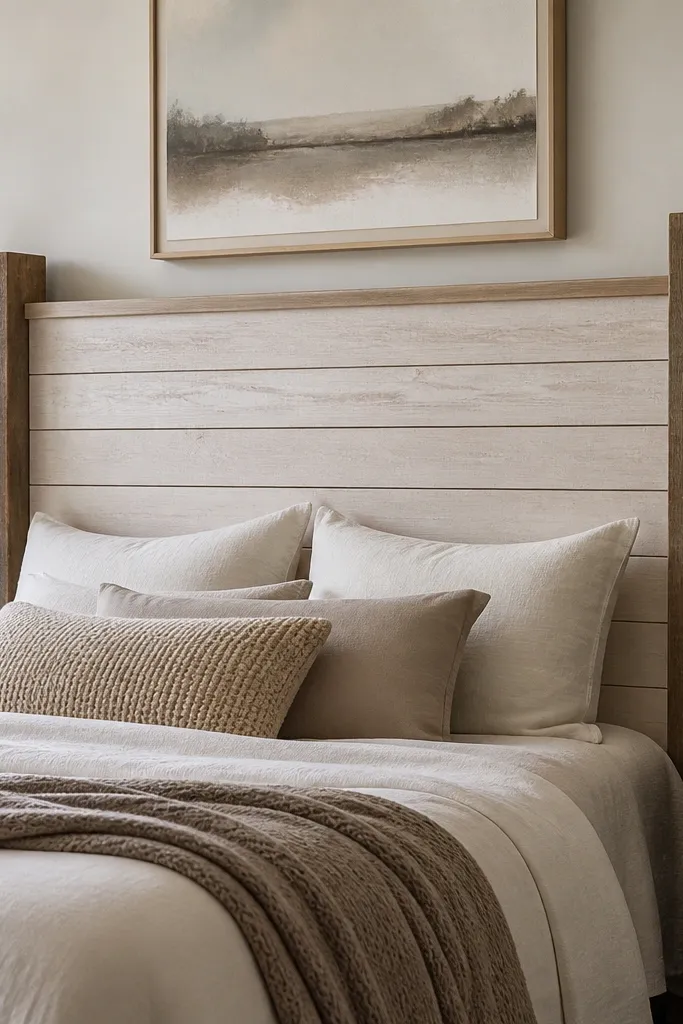
This design frames the bed like a photo — the corner beams create structure, and the lighter center slats add texture. It looks good in rooms where you don’t want a full wall of wood because the pattern stays concentrated. The contrast is also forgiving when you switch seasonal bedding colors.
Quick tipUse the same wood for posts and slats, then vary only the finish — it keeps the tones from looking mismatched.
Make corner posts from 2x2 boards mounted to a back frame. Fill the center with horizontal slats using 1x3 or 1x2 boards in a lighter stain (or clear coat over natural). Keep the center slats about 1/4 inch apart. Seal both tones separately so the lighter center doesn’t darken too much.
One warningAvoid using two totally different woods with no color match; it reads like a craft experiment.
25. Rustic Sawtooth Edge Headboard With Barn Plank Face
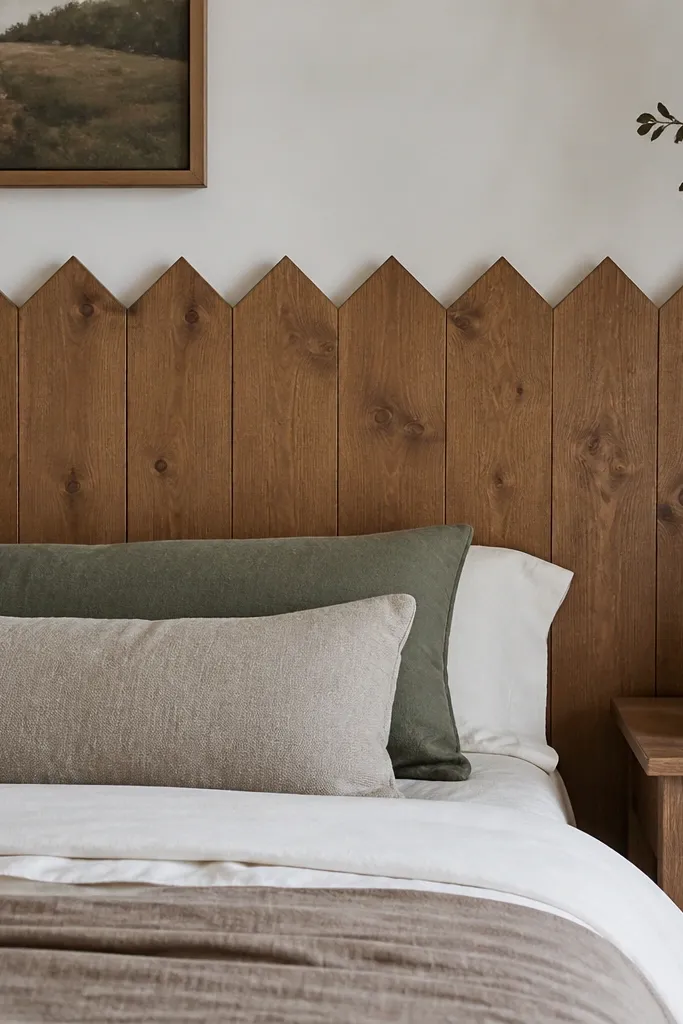
A sawtooth top edge makes the headboard feel decorative without needing carving. It also gives you a built-in place for garland clips or a string of small lights. The rustic plank face keeps the look authentic, and the crisp edge makes it feel deliberate.
Quick tipCut one triangle sample, stain it, and confirm the edge sharpness before cutting the full template.
Use a plank face built on a back frame. Create the sawtooth top by cutting a template that repeats every 4 inches across the width, then attach the top edge pieces underneath the face panel so the triangles are supported. Sand the triangles smooth and stain evenly. Add matte clear coat so the edges don’t raise or fuzz.
One warningAvoid rough sawtooth sanding; jagged edges look cheap and can snag fabric.



