
1. Thrift Frame Gallery Wall With Painted Mat Borders
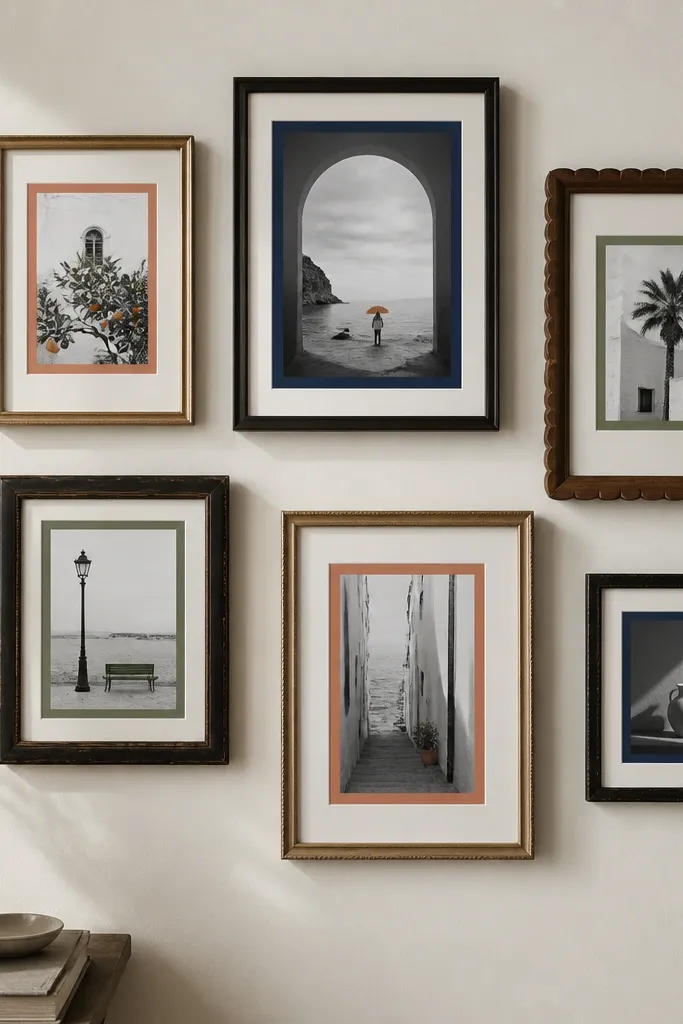
I love this because the frames look curated even when they’re all different sizes. The secret is painting the mat border, not the whole frame — it gives you a consistent design language across mismatched thrift finds. Use matte craft paint so the colors don’t glare under overhead lights. Black-and-white prints make the border colors pop without turning the wall into a busy collage.
Lay out your frames on the floor first. Pick one border thickness, like 1 inch, and cut the inner opening paper to fit the frame glass or backing. Spray the frames with one color if they’re wildly different (I usually use satin black), then paint the border with painter’s tape for crisp edges. Hang with picture hooks rated for your frame weight.
Quick tipUse one “anchor” color for the largest frame border, then repeat it in tiny amounts on the smaller frames so it feels designed.
One warningDon’t use glossy paint on the borders — it looks cheap and catches light unevenly.
2. No-Sew Fabric Banner Using Scrap Cotton and Skirt Hems
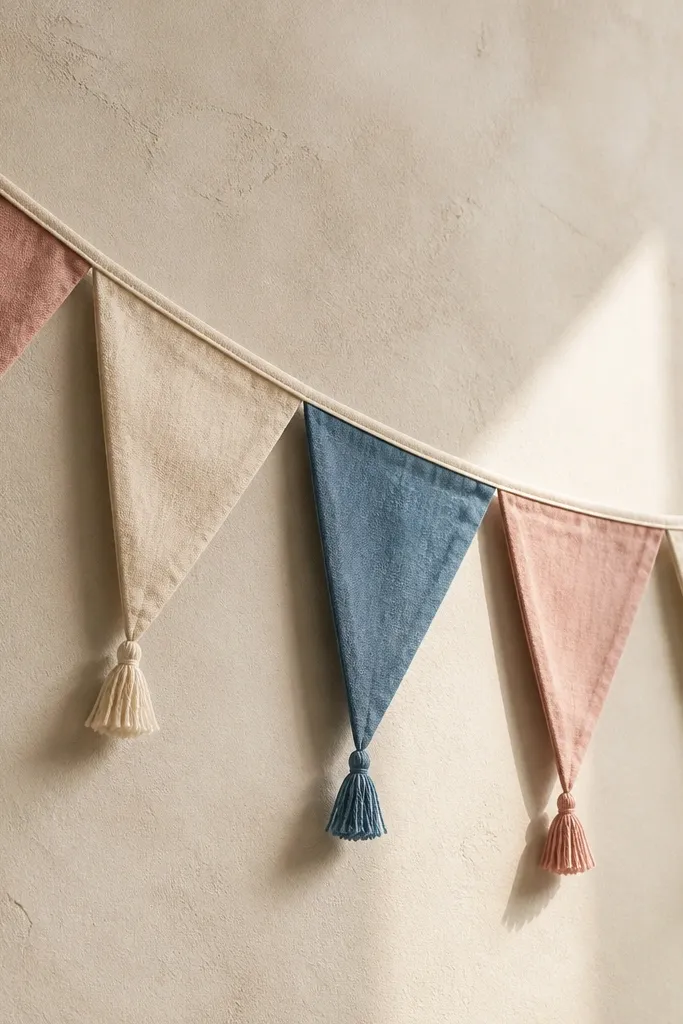
Fabric bunting is one of the fastest ways to make a room feel warmer without spending much. I’ve used scrap cotton from old shirts and skirt hems because the edges already look finished. The folded hem creates structure so the triangles hang flat instead of flopping. Keep the palette to 2-3 colors so it reads as decor, not leftover fabric.
Cut rectangles, then fold into triangles and press. Use fabric glue or iron-on hem tape inside the fold — no sewing required. Make each triangle roughly 6 inches wide at the base and 8 inches long from base to point. String them with thin jute or cotton twine and tie knots between each triangle.
Quick tipTrim the points with pinking shears if you have them — the edge stays tidy after glue dries.
One warningAvoid mixing too many tiny prints — it makes the banner look like craft leftovers.
3. Wood Slat Floating Shelf With Painted Back Strip
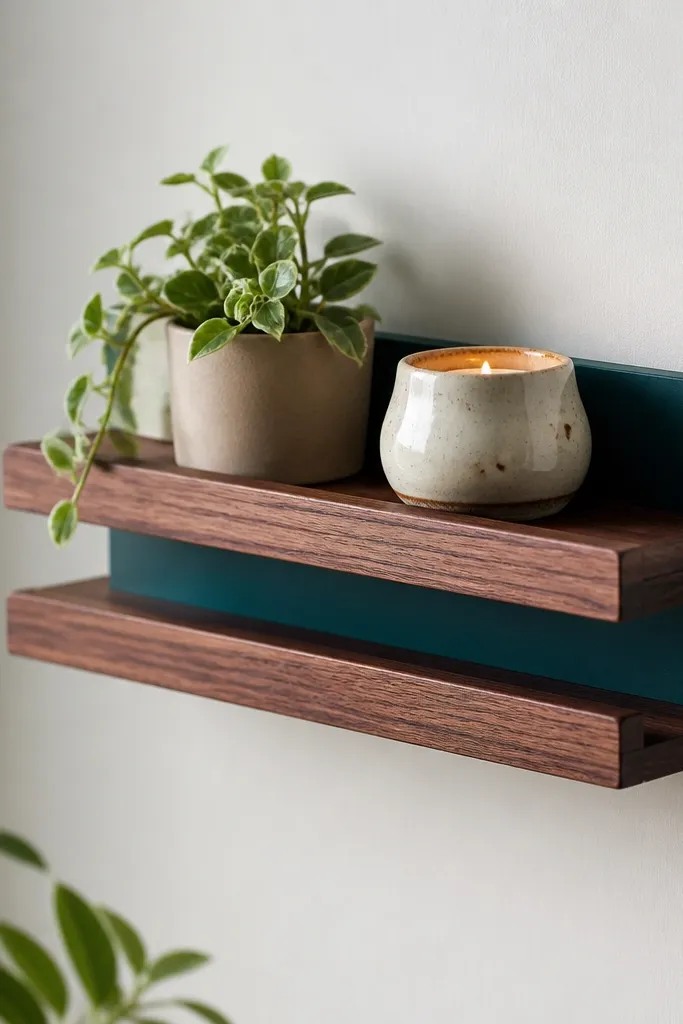
A floating shelf looks expensive when the back is painted a single bold color. The stained slats add warmth, and the painted back makes everything on the shelf look intentional. I like deep teal or soft black for the back because it frames small decor items without needing lots of pieces. This is a great way to add vertical storage and hide clutter in plain sight.
Use 1x2 pine slats cut to 18-24 inches long. Stain with one coat of warm walnut, then seal with matte clear. Cut a thin backing board to the same width and paint it with matte acrylic. Mount shelf supports to studs, then screw the slats to the supports and attach the painted back behind.
Place one tall item (like a small plant) plus one flat item (like a book) so the shelf has height variation.
Don’t mount it using only drywall anchors — heavy items will sag and it looks sloppy fast.
4. Contact Paper Faux Marble Coasters for a Side Table
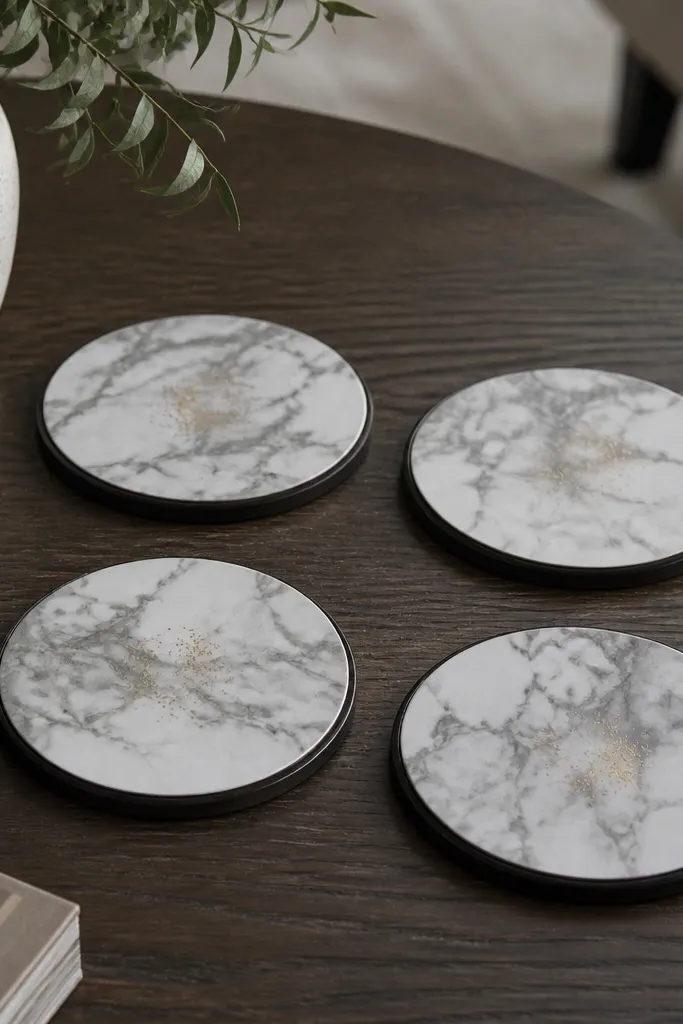
This is one of my go-to cheap upgrades because it makes the whole table surface look cleaner. Faux marble contact paper reflects light softly and hides scratches. I pair the marble look with black tape edges so the coasters look finished, not like a craft sheet. Place them under a lamp or near a drink station and they read as intentional decor.
Start with 4 round cork rounds or thin wood circles, about 4 inches wide. Cut contact paper slightly larger, press down with a credit card, then wrap the edges with thin black painter’s tape or heat-resistant tape. Seal the top with a clear matte Mod Podge layer if you want better durability. Let dry 24 hours before heavy use.
Quick tipBlend the pattern by rotating the paper before cutting each coaster so the gray veining lines up across the set.
One warningSkip glossy top coats — they look like cheap laminate and glare under lights.
5. Painted Mason Jar Desk Organizer With Fabric Wrapped Rim
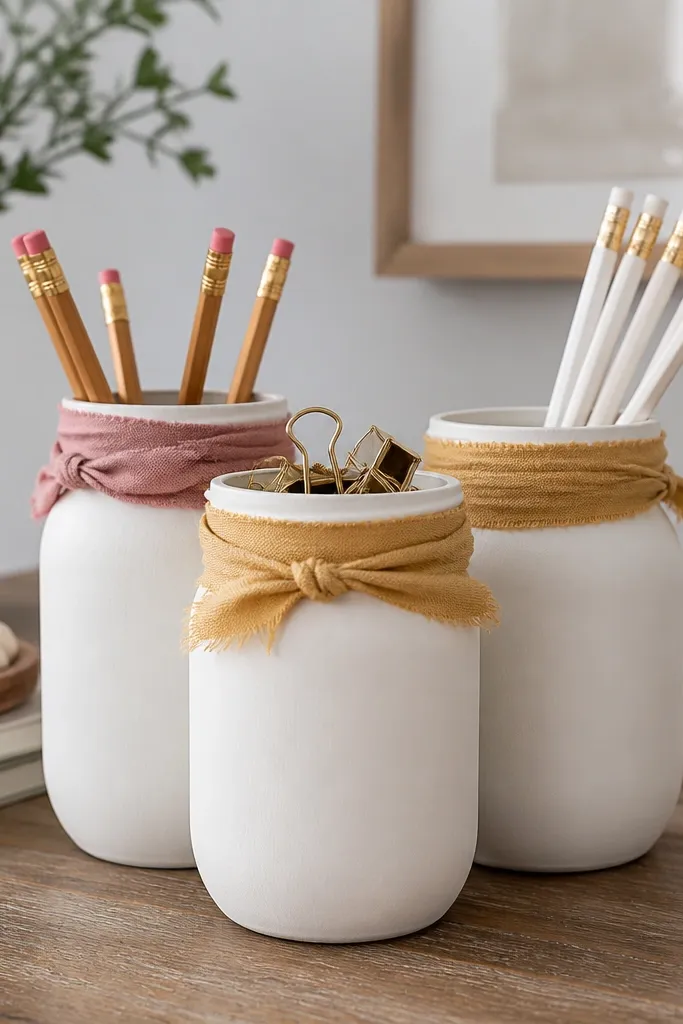
A desk organizer is decor you use every day, so it never looks like clutter. Matte paint gives the jars a uniform look even if the glass is different shades. The fabric-wrapped rim makes it feel handmade and warm, especially in a bedroom or craft corner. Keep the fabric to solid cotton — dots and stripes look chaotic when you have multiple jars.
Clean jars with rubbing alcohol and let dry. Paint with matte acrylic in 2 thin coats. Cut fabric strips wide enough to wrap the top rim; glue the fabric inside using fabric glue or hot glue, then fold neatly. Add a small label tag with twine if you want, but keep it simple.
Quick tipUse a hair dryer on low to speed drying between coats so you don’t end up with tacky spots.
One warningDon’t use thick paint — it drips and the rims look uneven.
6. Paper Rope Bowl for Keys Using Thick Twine and Glue
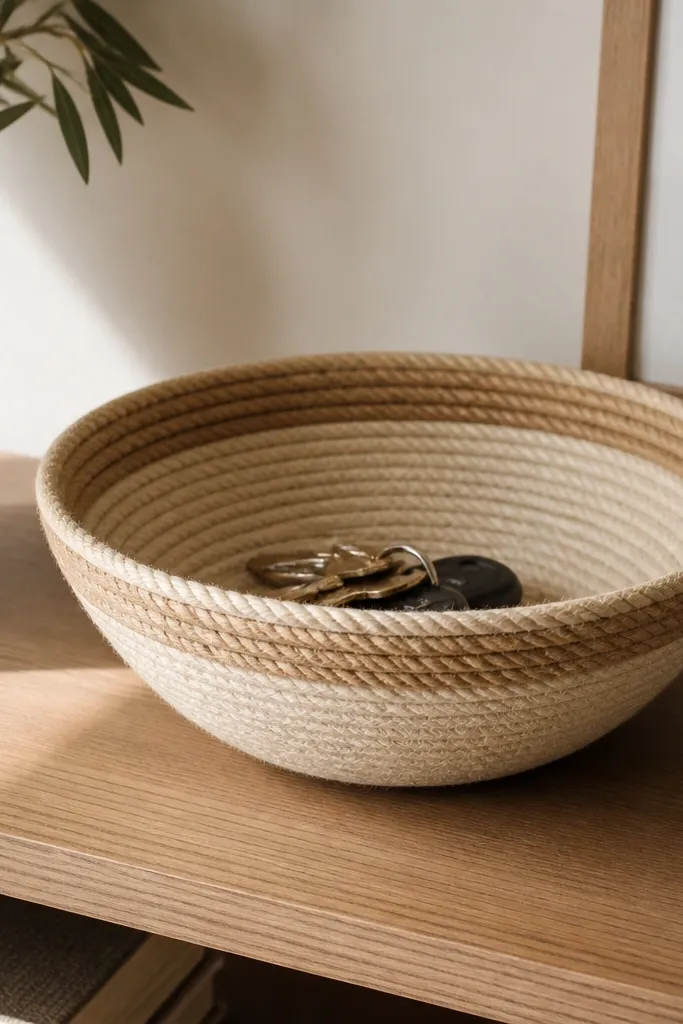
A rope bowl fixes the “where do keys go” problem and looks good doing it. The coil pattern reads as texture, which is what makes cheap decor look intentional. Natural twine also plays nicely with wood and neutral walls. Use it as a catchall on an entry table or a nightstand tray.
Start with a cardboard circle base or a thick coaster as the bottom. Coil twine tightly and glue each loop with hot glue, working in small sections. Make the sides about 1.5-2 inches tall for keys. Finish the rim with a double coil and a final glue line so it holds shape.
If the bowl starts to wobble, press it flat under a heavy book while the glue cools.
Don’t leave big gaps between coils — the bowl looks flimsy and cheap.
7. Hanging Fabric Wall Pockets From a Single Table Runner
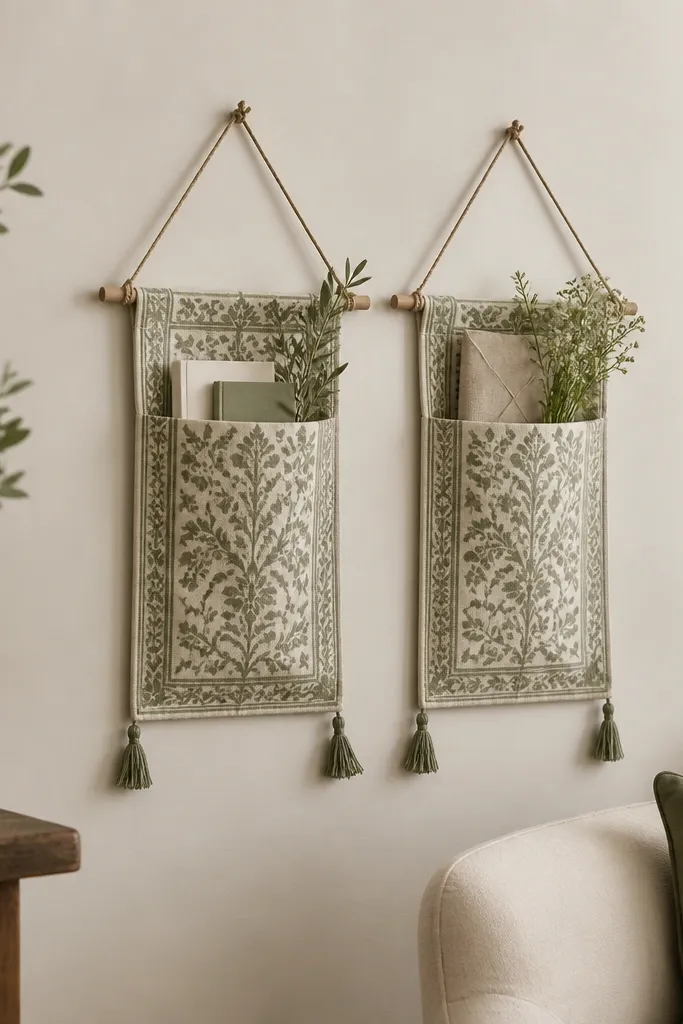
Wall pockets are a smart decor fix because they hide small clutter while adding color. I like using one table runner because the pattern already looks coordinated. The pockets give you vertical organization, and the fabric adds softness to a room with lots of hard surfaces. It’s also easy to switch out what’s inside — book stack, remote, or small plants in cups.
Cut the runner into two or three pocket panels. Fold the top edge and glue or hem tape it to create a channel for a small dowel or stick-on rod. Make each pocket about 10 inches wide and 12 inches tall. Use a removable hook rail system if you rent, or screw into studs if you own.
Add a light interfacing layer behind thin fabric so the pocket edges don’t sag.
Avoid skinny pockets — remotes and chargers slip out and it looks messy.
8. Sticker + Paint Stencil Accent Wall Panel (One Shape Only)
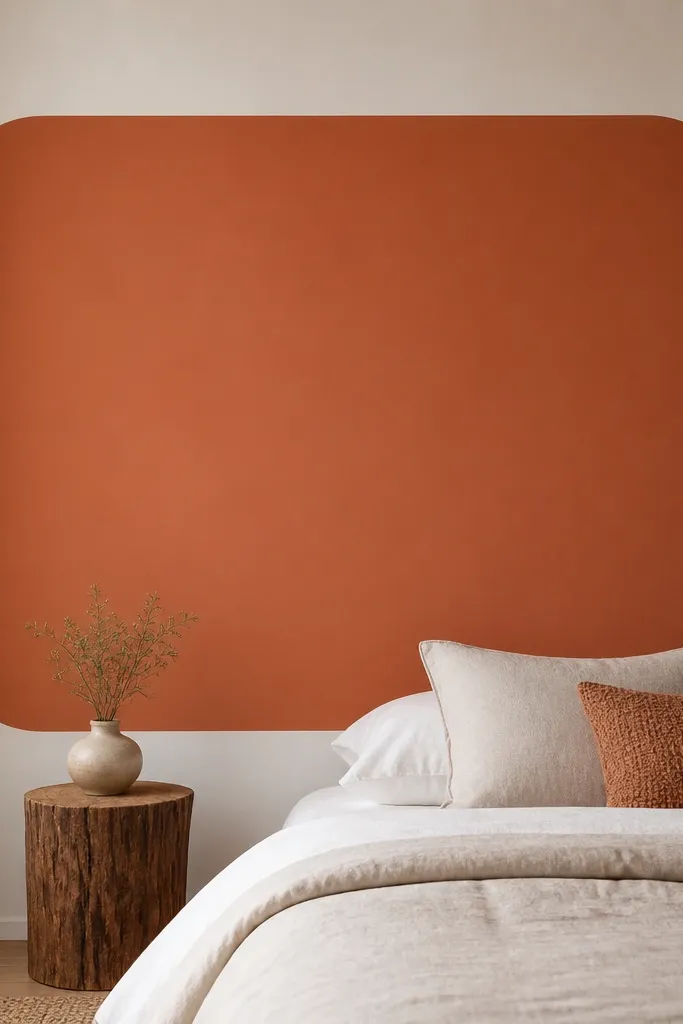
One clean shape beats a whole wall of random decals. I use a stencil or painter’s tape mask to create a single focal panel that frames the room’s eye. Matte paint keeps it modern and avoids the shiny “sticker” look. This works great behind a bed, sofa, or reading chair because it gives you a visual anchor.
Pick a shape that matches your furniture lines, like a rounded rectangle for modern rooms or a simple arch for cozy spaces. Tape off the shape using painter’s tape, pressing the edges firmly with a plastic card. Paint with matte acrylic in 2 thin coats. Peel tape while the paint is still slightly tacky for the cleanest edges.
Quick tipUse a small foam roller — brushes leave streaks on tape edges.
One warningDon’t paint over textured walls without primer — the edges will look fuzzy.
9. Thrift Lamp Shade Refresh With Washi Tape Edge Trim
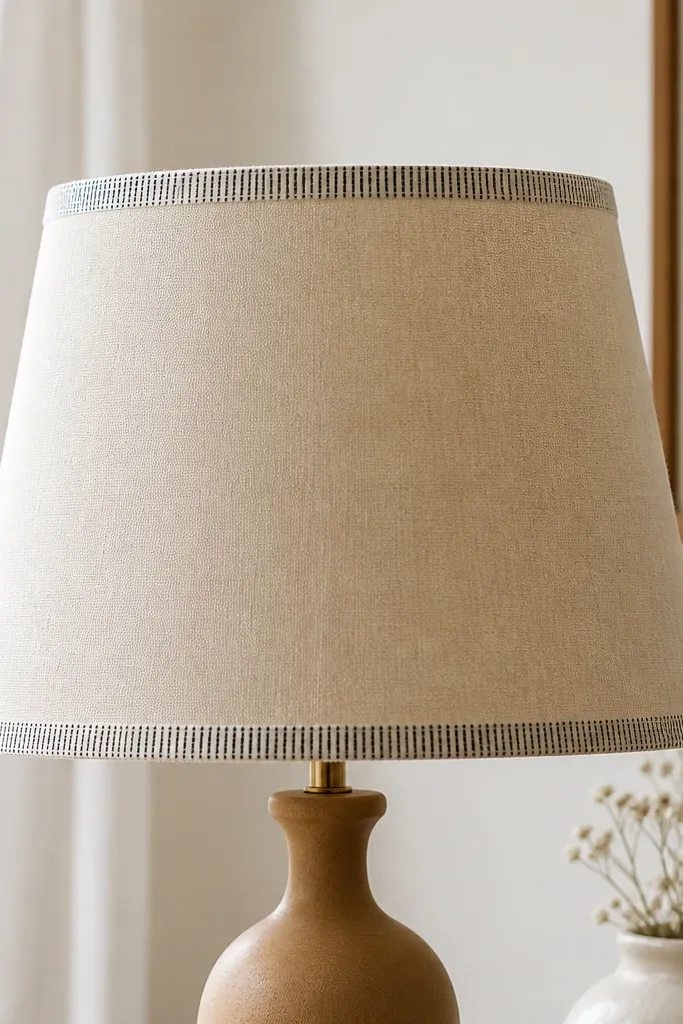
Lamp shades are where cheap decor can quietly look expensive, because they sit in your sightline every day. Washi tape is perfect for a clean border because it’s easy to apply and remove if you change your mind. A thin trim makes the shade look intentionally finished even if the shade is slightly worn underneath. Choose a simple pattern — tiny stripes or dots — and stick to one tape.
Clean the shade with a lint roller and wipe with rubbing alcohol. Measure the top and bottom circumference and cut tape strips to match. Press down firmly and seal the edges with a light brush of clear glue on top of the tape if you want extra hold. For best results, keep tape width around 1/2 inch.
Turn the lamp on during trimming — the light shows uneven tape edges instantly.
Avoid thick glitter tape — it sheds and looks messy near heat.
10. Dollar Store Faux Wreath Using Paper Leaves and a Wire Ring
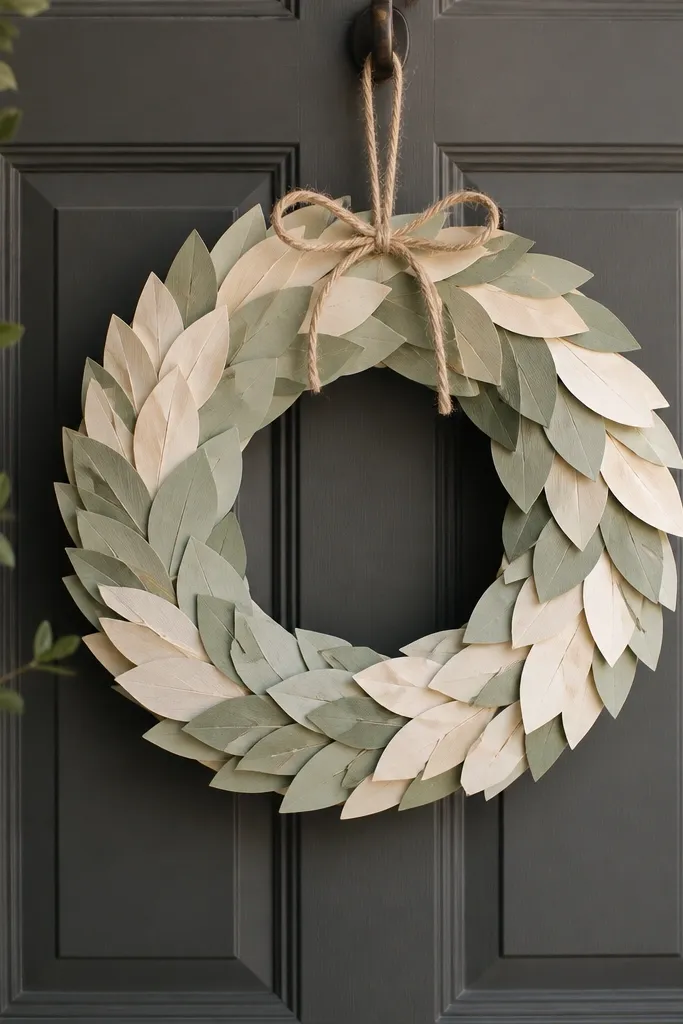
Paper leaf wreaths look surprisingly full when you layer them with different shades of the same color family. I made one with craft paper and it held shape better than I expected. A wreath also works in rentals because you can hang it with an over-the-door hook. The overlapping leaf design hides imperfections in the paper cutting.
Wrap a wire ring with twine first so gaps don’t show. Cut leaf shapes about 2 inches long and layer 3-4 shades. Hot glue the leaf base to the ring, then angle each leaf slightly outward. Add a small bow using twine or ribbon at the top.
Quick tipUse one color for the outer leaves and a lighter shade for the inner leaves so it looks dimensional.
One warningDon’t glue leaves flat — the wreath will look like a sticker sheet.
11. Gallery Rail With Removable Clips for Art and Photos
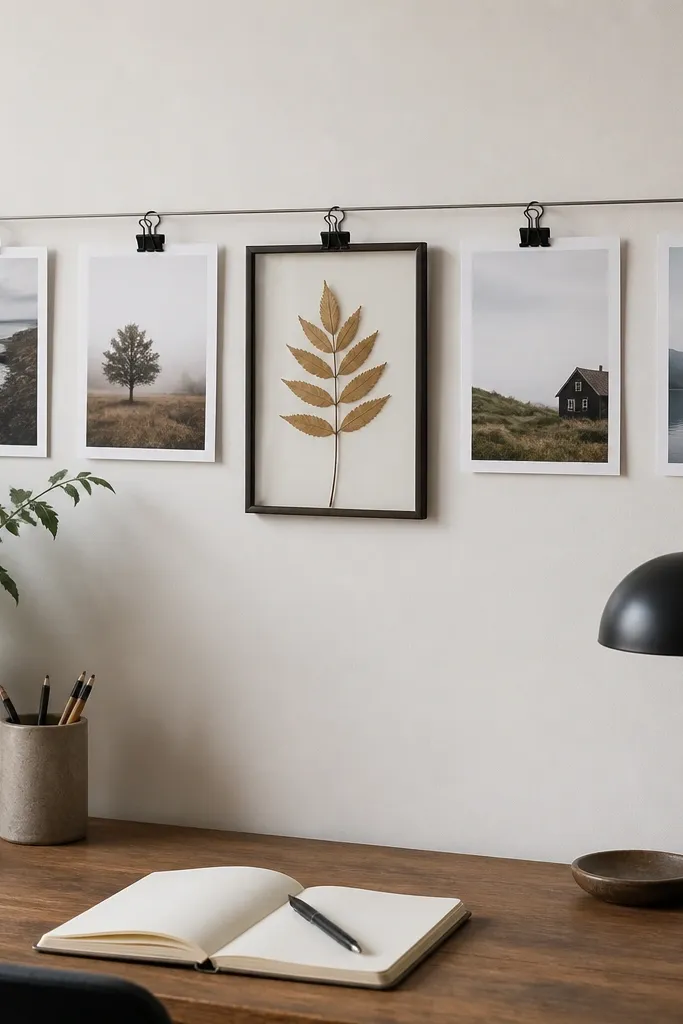
This is how you keep your wall from going stale. Instead of committing to one print, you can rotate art and photos with clip changes in minutes. The rail makes the wall look like a real gallery, but the cost stays low. It also helps you correct spacing errors because you can slide clips until it looks right.
Use a small picture rail kit or a budget rail and install into studs if possible. Space clips about 3-4 inches apart for small photos and 4-5 inches for larger ones. Use photo paper with a consistent white border so the set looks cohesive. Keep clips the same color across the rail for a cleaner look.
Make a paper template of your photo sizes and tape it to the wall first so you don’t drill twice.
Don’t use random clip colors — it makes the rail feel like a craft project.
12. DIY Fabric Covered Photo Blocks for a Shelf
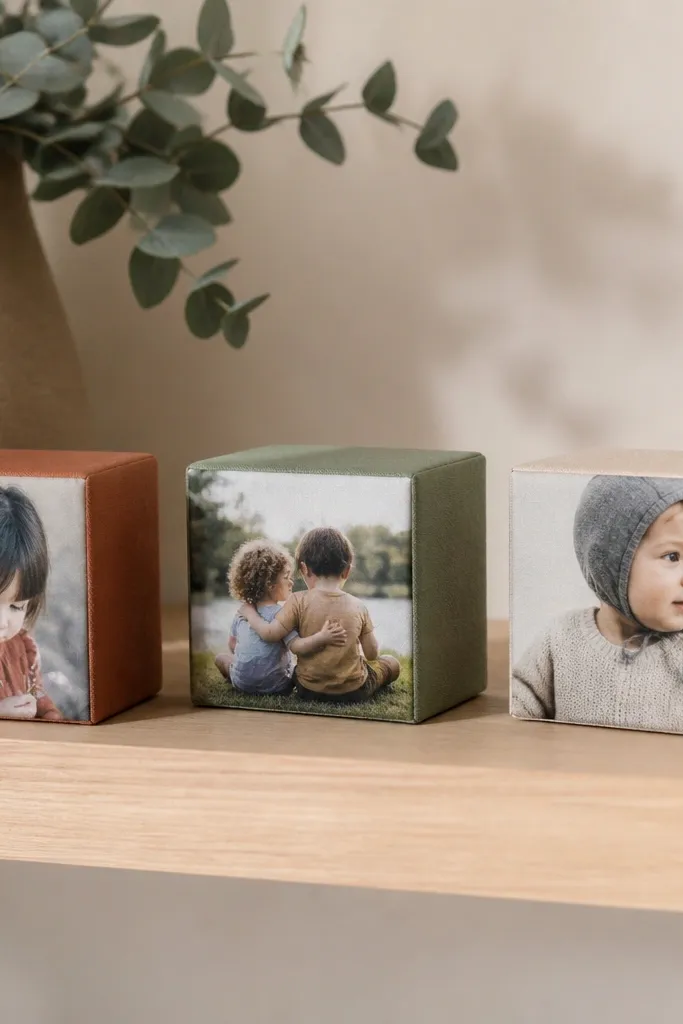
Photo blocks give you a personal decor moment without looking cluttered. Covering the sides with fabric makes the blocks feel like part of the room palette. I like solid fabric so the photos stay the focus. Use black-and-white photos with one small color detail if your room has a strong accent color.
Use foam blocks or lightweight wood cubes. Cut fabric squares with extra seam allowance, glue fabric to the sides, and wrap tightly around corners. For the front, glue a printed photo under a clear craft film or seal with a thin Mod Podge layer. Let everything dry flat under a book so the corners don’t lift.
Press fabric with a warm iron on low through a thin cloth to remove wrinkles before gluing.
Avoid stretchy knit fabric — it pulls and makes corners look wavy.
13. Rope Coaster Garland Under a Floating Shelf
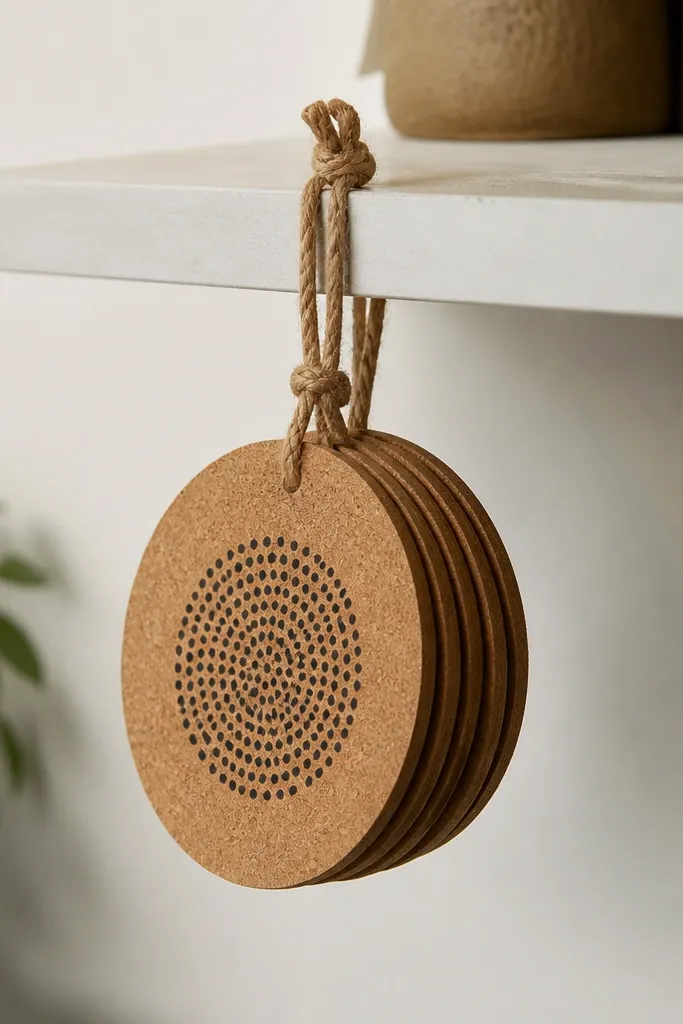
This is a weirdly effective trick: you add a little “movement” under a shelf so the space doesn’t look dead. The cork looks warm, and the simple ink dots make it cohesive. It also hides the sight of cords or clutter behind a shelf edge. It’s the kind of decor that makes the room feel styled even when you didn’t add more furniture.
Use cork coasters or thick felt circles. Punch holes near the edge and tie them onto jute rope spaced 1.5-2 inches apart. If you want the dot look, use a paint pen and make one dot about 1 inch wide on each coaster. Hang from small hooks attached to the underside of the shelf.
Quick tipKeep the ink dots all the same size and centered — that symmetry is why it looks intentional.
One warningDon’t vary the spacing wildly — it reads messy instead of decorative.
14. Painted Bottle Vases With One-Color Label Tape
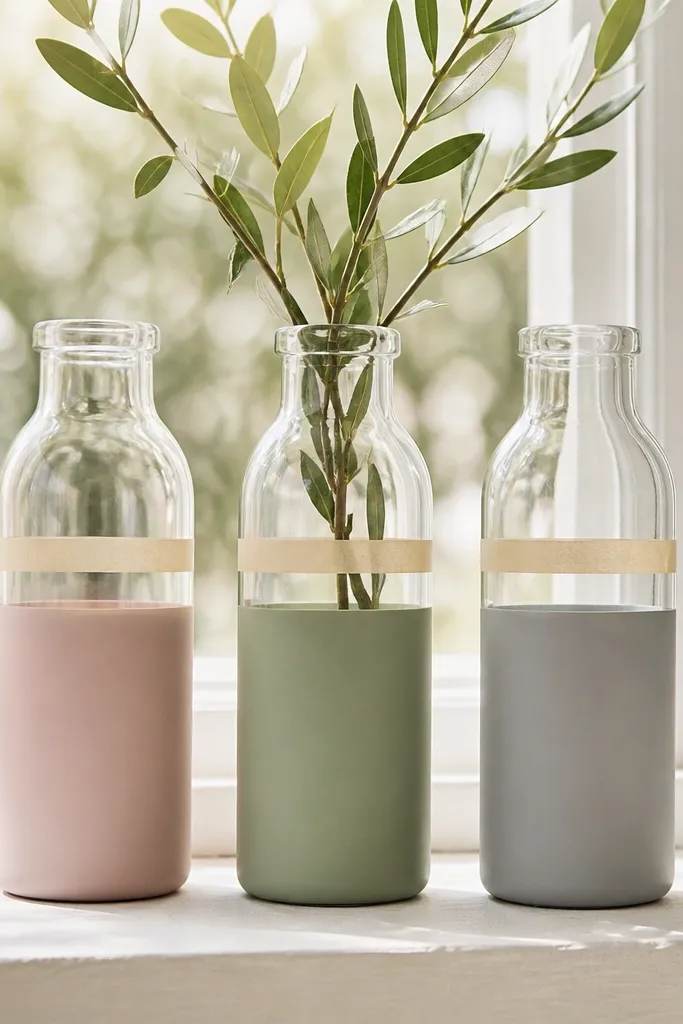
Bottle vases look expensive when the paint stops at a clean line. I only paint the bottom half because it creates a horizon effect and makes the bottles look designed, not “covered.” The label tape adds a graphic element that matches modern decor. This works with grocery store glass bottles and thrift finds.
Clean bottles and let dry. Use painter’s tape to mask a straight paint line, then paint the lower half with matte acrylic in 2 coats. Apply label tape near the top as a band, leaving it unpainted for contrast. Fill with water and trim stems short so the greenery doesn’t hide the painted area.
Cut stems so the tallest one is about 1.5 times the bottle height — you’ll see the paint line clearly.
Don’t paint the whole bottle — it dulls the glass and makes it look like a craft fail.
15. No-Pinch Fabric Curtain Tiebacks From Old Belts
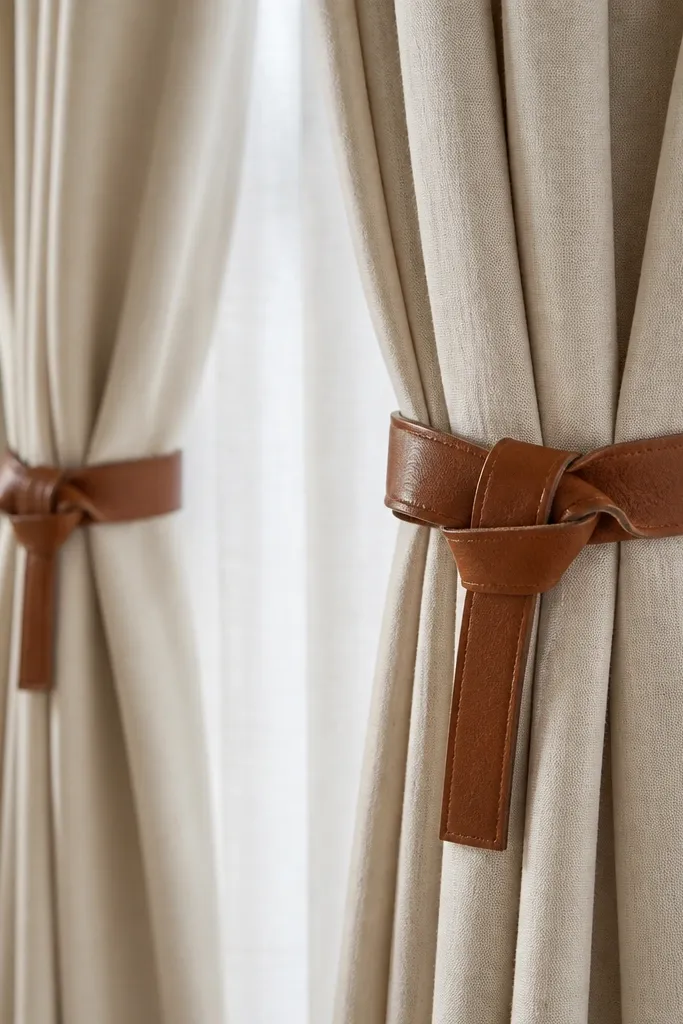
Tiebacks are a cheap decor win because they change how the whole window looks. Old belts give you structure, and the leather edge looks finished without extra materials. If you add a small fabric loop inside, the tieback grips the curtain without slipping. Keep both tiebacks the same so the window looks balanced.
Cut belt lengths so each tieback wraps once around the curtain with extra overlap. Make a small fabric loop from a scrap strip and glue it inside the belt so it creates friction. Tie or sew a small keeper loop so the belt end stays tidy. Mount with a simple hook if you want them always ready, or just tie them as needed.
Quick tipUse one knot style for both sides, like a simple wrap-and-tuck, so the folds match.
One warningAvoid tiebacks that slip — if it slides down, it looks unfinished fast.