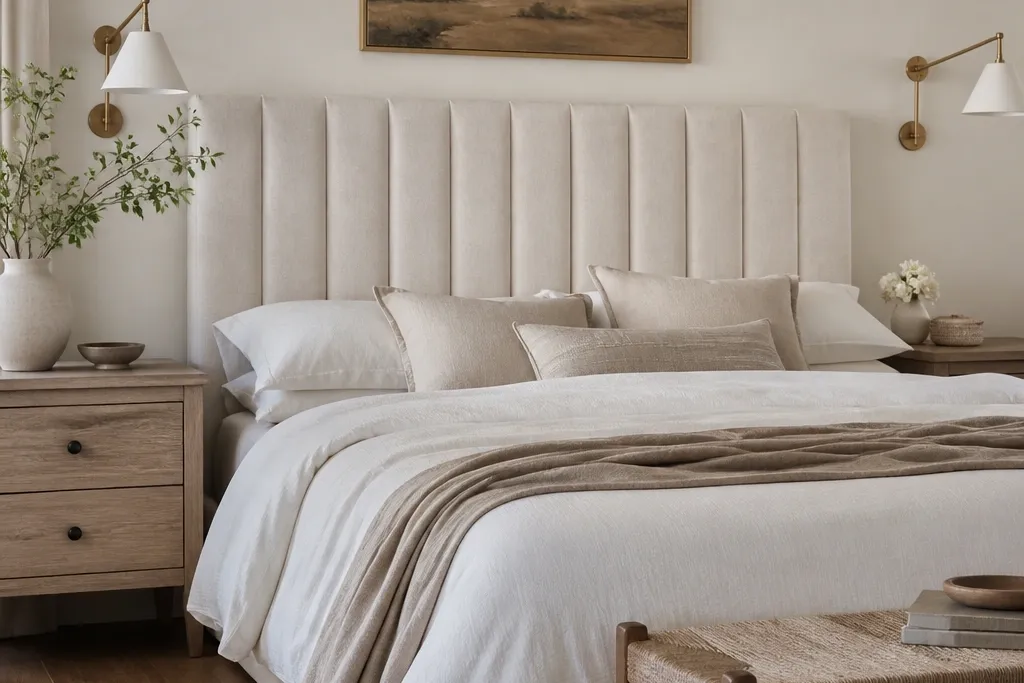

1. Matte-Linen Upholstered Board with Double Welt
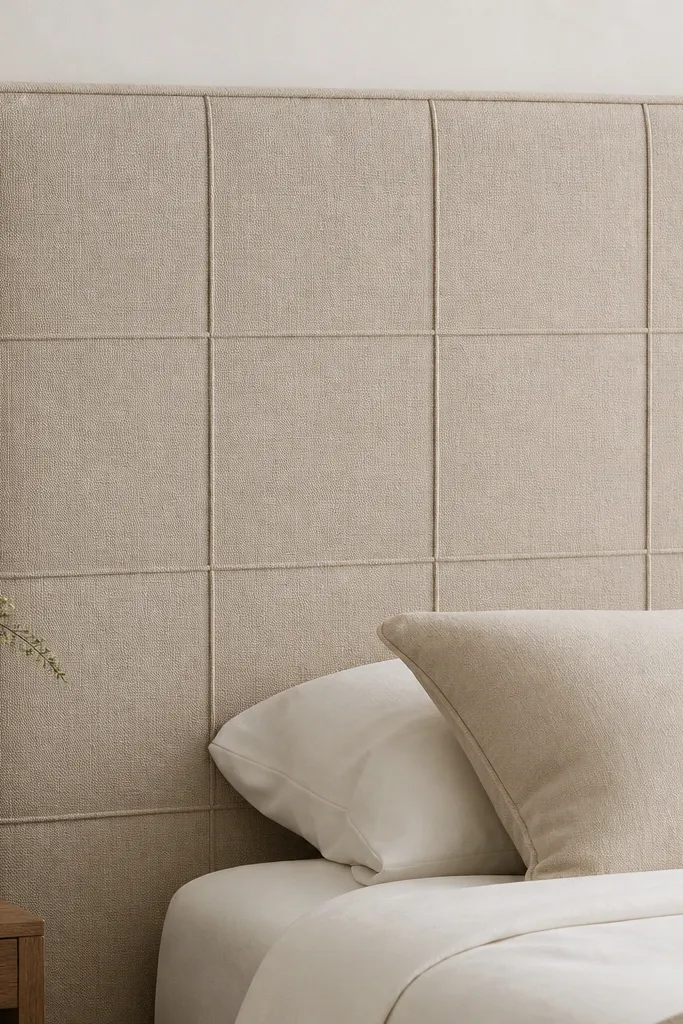
Cut a 3/4-inch plywood board to your target width. Glue 1-inch foam batting (high density) to the front, then staple-wrap the linen on the back, pulling tight every 2 to 3 inches. Add welt cord along your chosen grid lines using a hot glue gun first to position, then tack through the fabric at the back for stability.
This one looks expensive because the fabric reads like furniture upholstery, not craft fabric. I use a dense foam layer for a smooth front and then wrap with linen that has a tight weave, so it doesn’t look shiny or wrinkly. The double welt cord creates crisp lines that catch light and make the panel look tailored.
One warningDon’t use shiny satin-look fabric — it shows every ripple and makes the whole piece look like a costume.
Quick tipPress the fabric seam lines with a warm iron on low (through a pressing cloth) before final stapling so the grid stays flat.
2. Wood Slat Headboard with Chamfered Edges
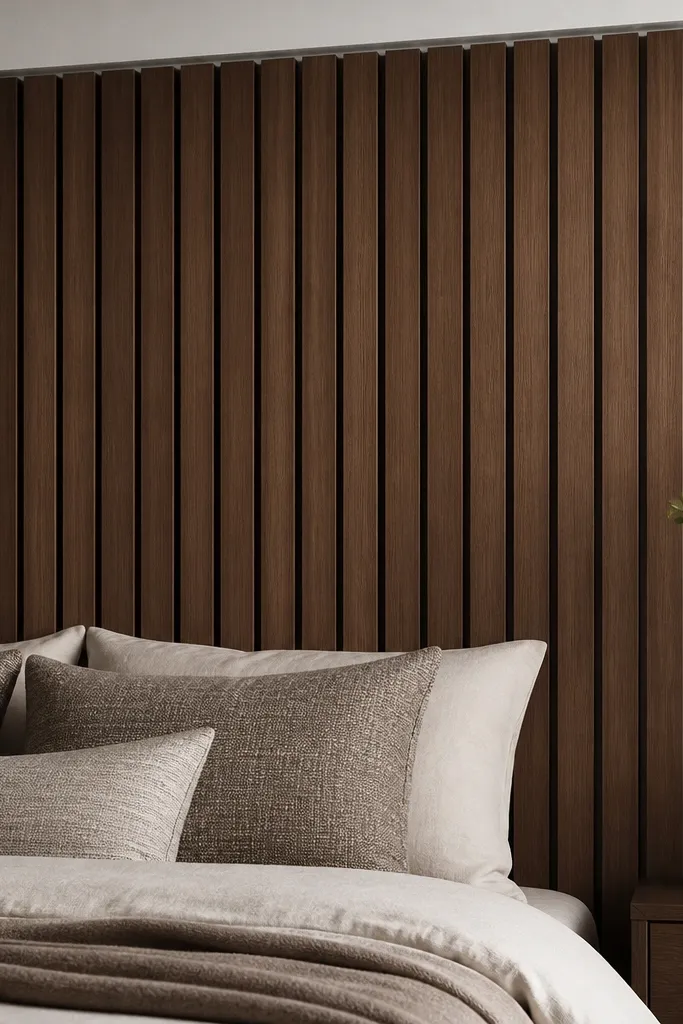
Vertical slats create built-in texture, and chamfered edges deepen the shadow line between slats. The trick is spacing: if you keep gaps consistent, it looks like a store-bought design. I finish with a matte clear coat so the stain looks warm, not wet.
Use a plywood rectangle as the backer. Attach slats (about 1-inch wide, 3/4-inch thick) with 1/4-inch spacing using wood glue and 1-inch brad nails. Paint the back frame in a warm off-white before staining slats, then clear coat the slats with matte polyurethane.
Sand only the slat faces, not the edges where you want the shadow — it keeps the chamfer crisp.
Don’t eyeball the spacing; uneven gaps scream DIY.
3. Beadboard Overlay with Painted Rail Frame
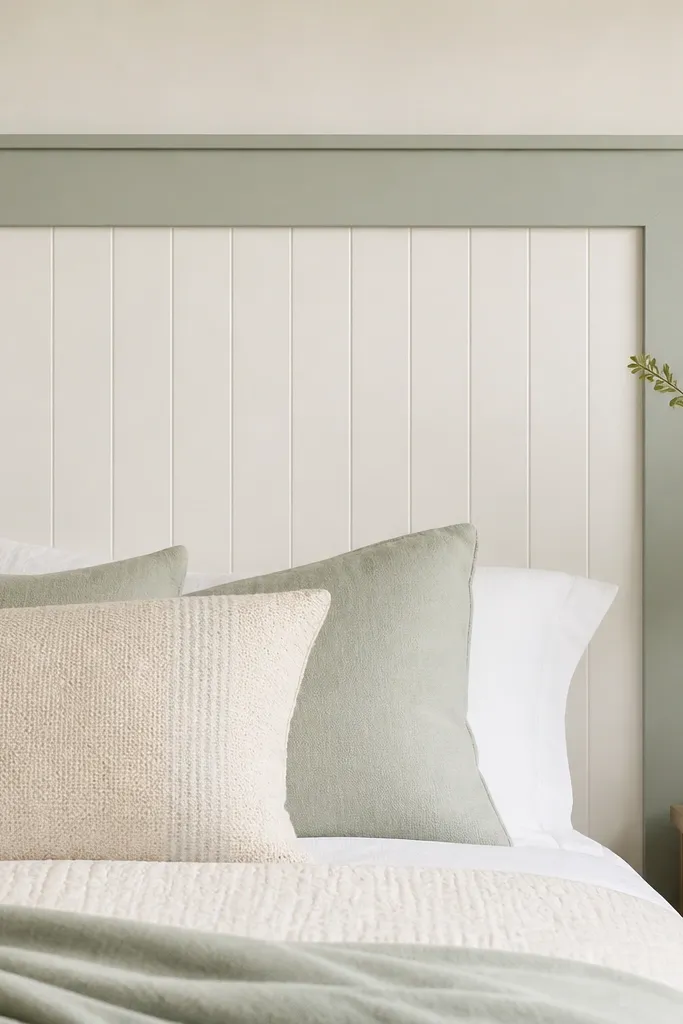
Cut beadboard panel to size (use 1/4-inch thick for easy handling). Build a simple picture-frame border from 1x2 boards, then attach the beadboard to the center with wood glue and brad nails. Paint the border and beadboard separately so the bead details stay sharp; finish with satin topcoat.
Beadboard looks expensive when it’s framed like furniture. The raised bead pattern gives dimension without needing fabric, and painting the frame a muted color makes it feel custom. I like soft sage or dusty blue because it warms the room without going trendy.
One warningDon’t seal beadboard with heavy gloss — it highlights dents and makes cheap caulk lines visible.
Quick tipUse painter’s tape to protect the bead edges, then remove tape while paint is still slightly tacky for cleaner lines.
4. No-Sew Faux Leather Panel with Stud Trim
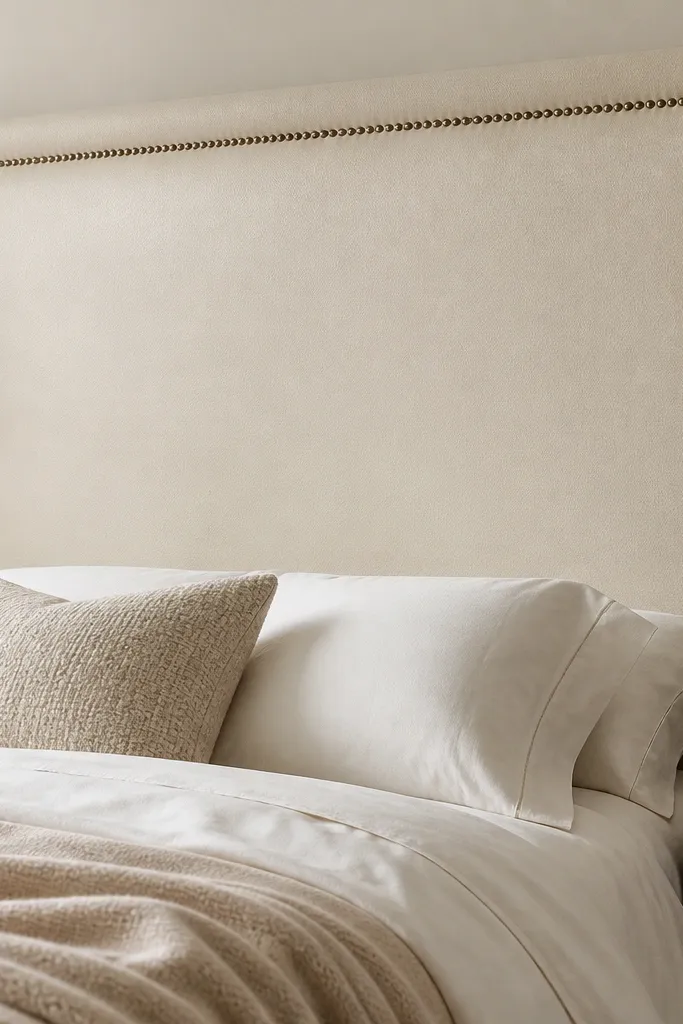
Faux leather looks high-end when it’s stretched over a rigid board and finished with metal nailhead trim. I use a slightly structured backing so it doesn’t sag. The perimeter studs make the whole thing read like a boutique bed headboard.
Cut plywood to your size and wrap with a thin layer of foam for softness. Instead of sewing, use heavy-duty upholstery glue on the back side, then press and hold along the edges. Install nailhead trim around the border — align it with a ruler so the studs form a straight line.
Use a fine-tip marker to mark stud positions first, then tap studs into place one by one to keep spacing equal.
Don’t glue faux leather directly to bare plywood without foam — it will look flat and show every bump.
5. Reclaimed Look Pallet Headboard with Wire-Brushed Finish
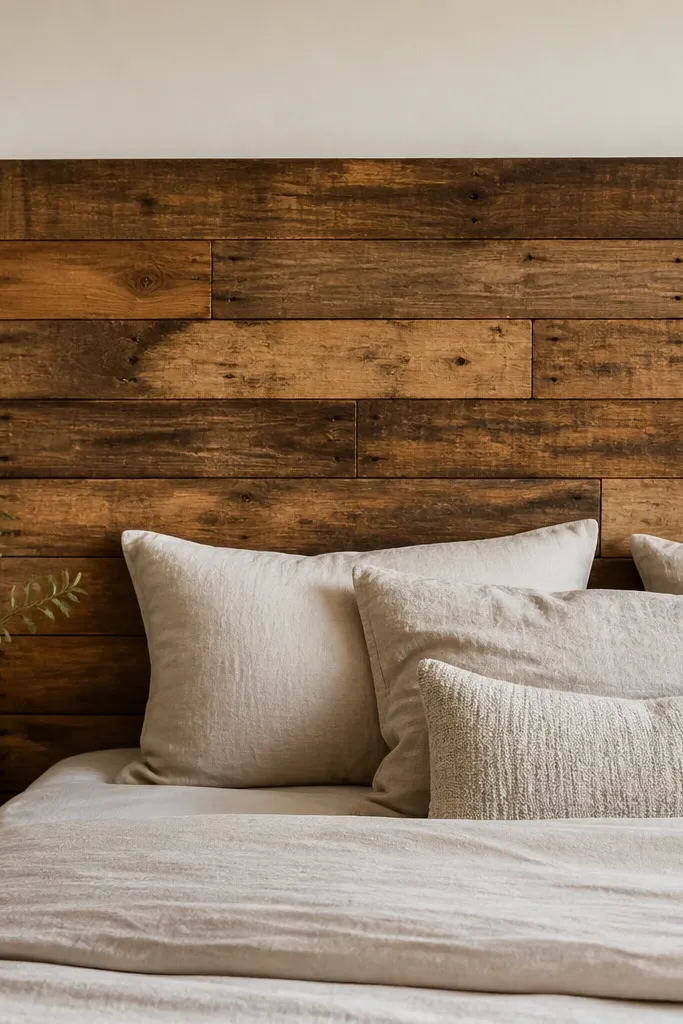
This style looks expensive because the surface texture is real. Wire-brushing or scuffing the grain gives that reclaimed look without needing actual old wood. Keep the color warm and low-sheen so it doesn’t look like a stain sample.
Disassemble pallets and sort boards by width so you don’t end up with one skinny section in the middle. Screw boards to a backer frame (2x2 or 1x3 rails) so the face stays straight. Wire-brush lightly with a steel brush, then stain with a medium walnut and finish with matte clear coat.
Mix two stain batches (light + medium) and wipe on with a rag in small sections for a more natural variation.
Don’t skip sealing — untreated pallet wood can look uneven and get patchy fast.
6. Oversized Framed Foam Panels with Geometric Lines
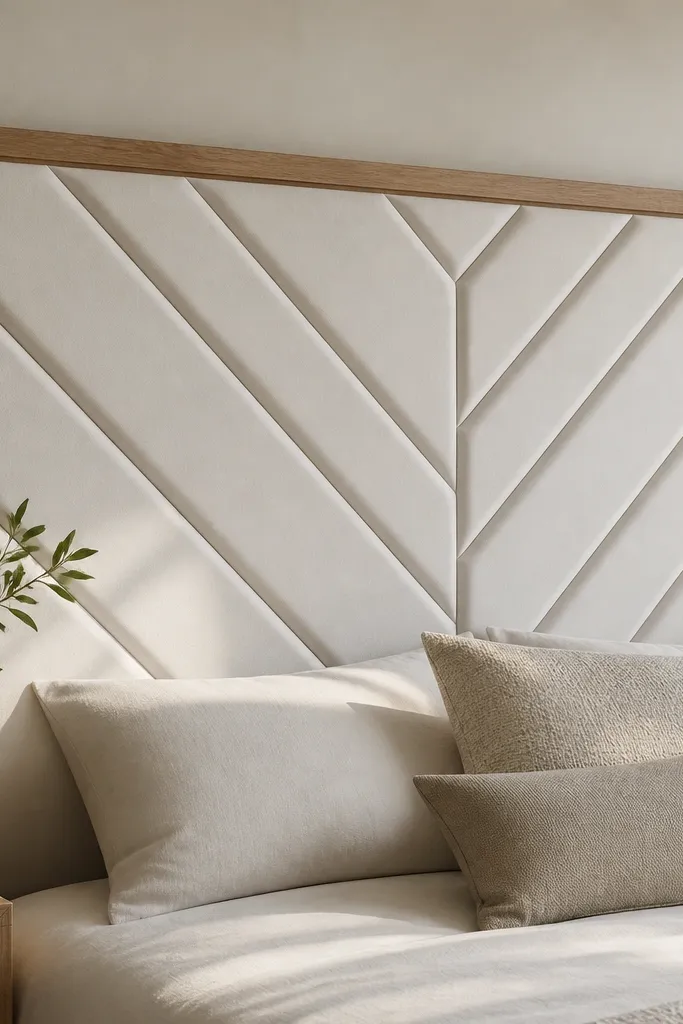
Use rigid foam sheets (like insulation board) as the base, then carve shallow grooves or attach pre-cut foam strips for the pattern. Build a border frame from 1x2s, then glue the foam to the frame. Prime with bonding primer, paint matte, and add corner blocks to hide seams.
Foam paneling is the fastest way to get a sculptural look without heavy carpentry. Raised geometry creates depth even with a simple paint color. I keep the center matte white and the frame in warm gray so the lines read crisp instead of messy.
One warningDon’t use glossy paint — it highlights foam seams and uneven texture.
Quick tipUse painter’s tape as a temporary straightedge while the glue sets so your lines stay aligned.
7. Rattan-Style Woven Headboard with Wood Backer
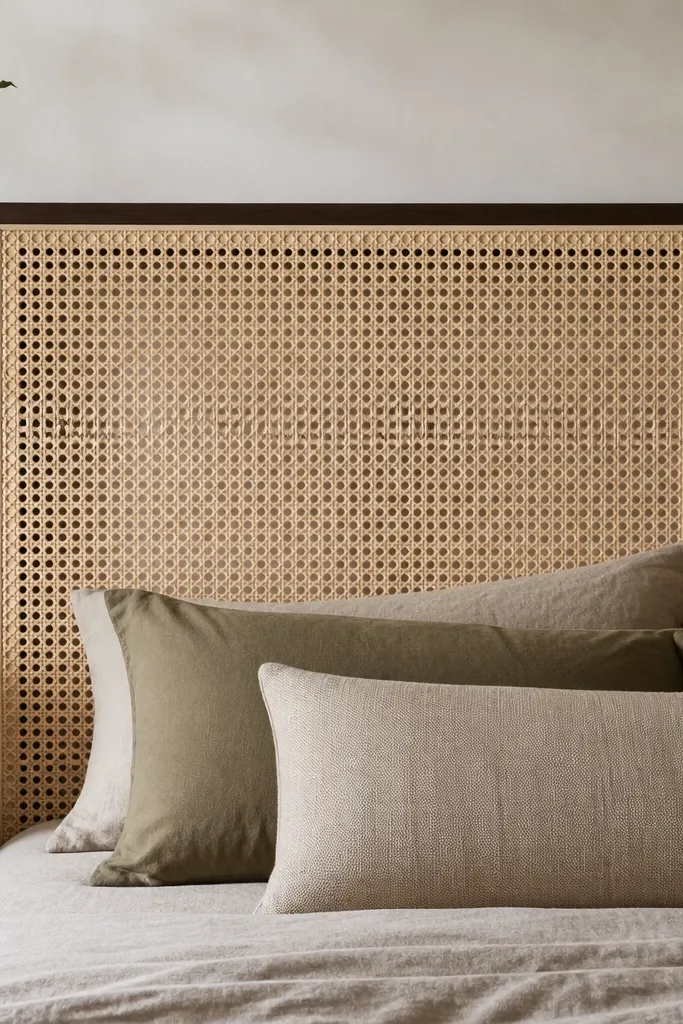
Build a rectangular wood frame from 1x2s. Stretch woven material (rattan-look roll, cane webbing, or flat weave fabric designed for furniture) across the frame and staple on the back. Stain or paint the frame in a dark oak tone, then add a thin top trim strip to cover staples.
Woven textures look high-end when the weave is stretched tight and the frame is clean. This design gives that resort look without needing real rattan. The key is tension: if it sags, it reads handmade in a bad way.
One warningDon’t skip a top trim strip — staples show and make it look unfinished.
Quick tipSoak the weave material lightly (per product instructions) if it’s stiff, then let it dry under tension for a cleaner, flatter look.
8. Herringbone Wood Veneer Look from Peel-and-Stick
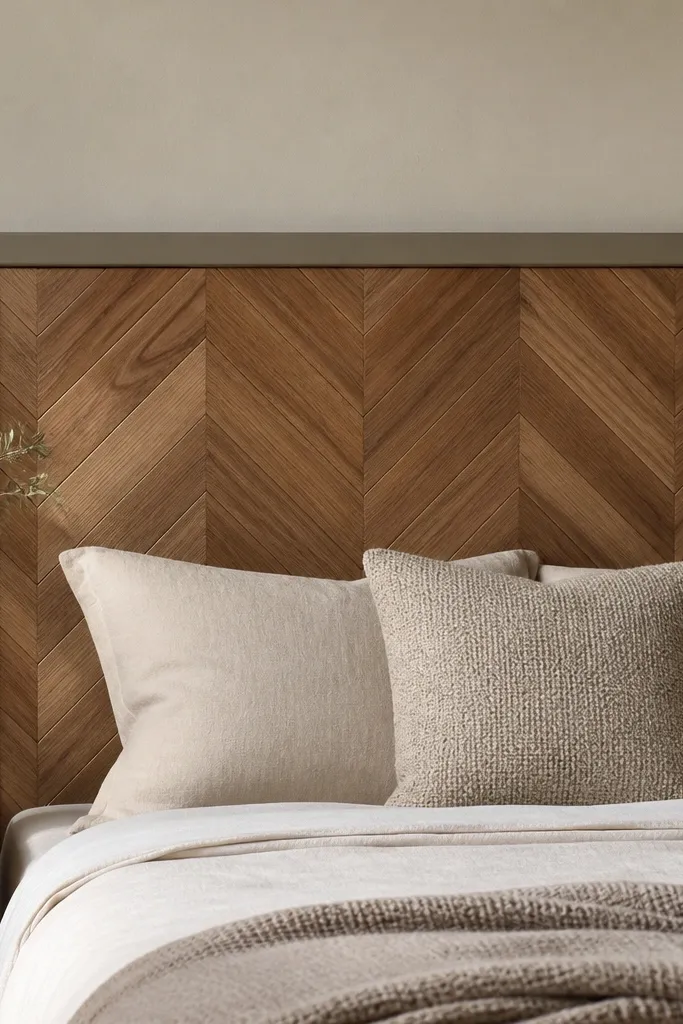
Start with a flat plywood board and paint it a matching neutral (so seams don’t flash through). Lay peel-and-stick herringbone in a dry run first, then apply from the center outward to avoid shifting. Frame it with wood trim so the edges look intentional and the pattern doesn’t end abruptly.
Peel-and-stick herringbone can look shockingly expensive if you treat it like tiling — alignment and straight edges matter more than the brand. I like this look because it adds pattern without bulky construction. Use matte clear varnish over it if the material allows it so it resists scuffs from leaning.
One warningDon’t apply from one side only — the pattern will drift and you’ll see it every time you sit up.
Quick tipUse a metal ruler and a fresh craft blade — dull blades tug and create uneven edges.
9. Cedar Batten Headboard with Vertical Center Panel
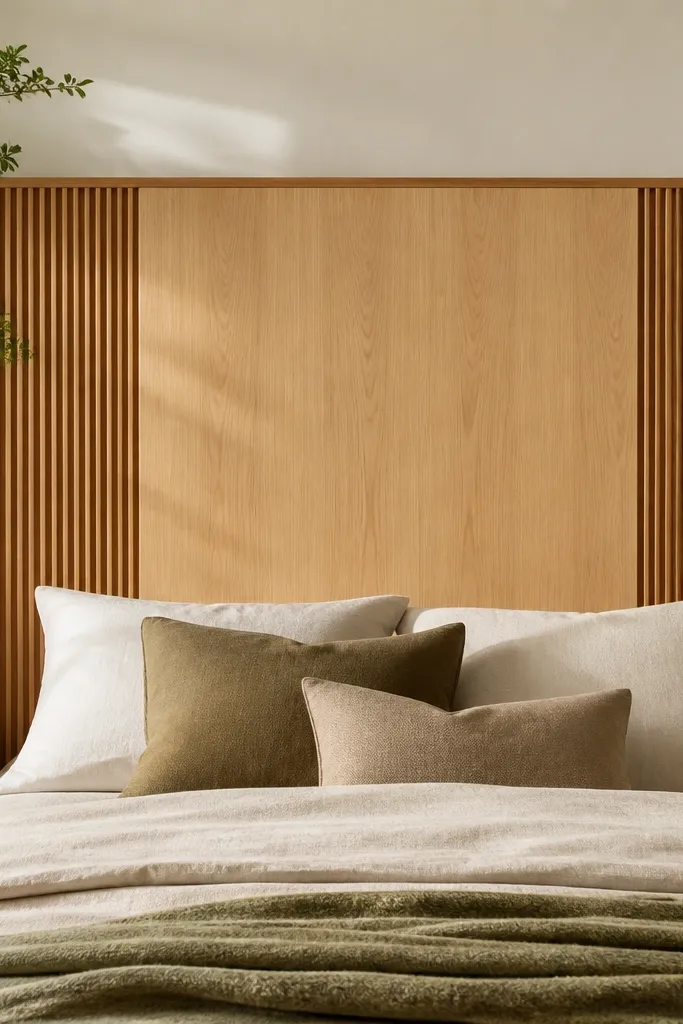
Use two side sections of thin battens (about 1/2-inch wide) and a center panel of plywood covered with veneer or painted in a light warm tone. Build a back frame so everything stays straight, then attach battens with glue and small brads. Finish with a matte cedar oil or clear matte poly.
This design looks expensive because it uses negative space. The smooth center panel calms the texture while the battens add depth. Cedar smells great too, and it ages nicely when you keep it matte.
One warningDon’t over-stain the center — too-dark center panels look heavy and cheap.
Quick tipSand the center panel to a slightly higher smoothness than the battens so it catches light differently.
10. Layered Molding Headboard in Soft Gray
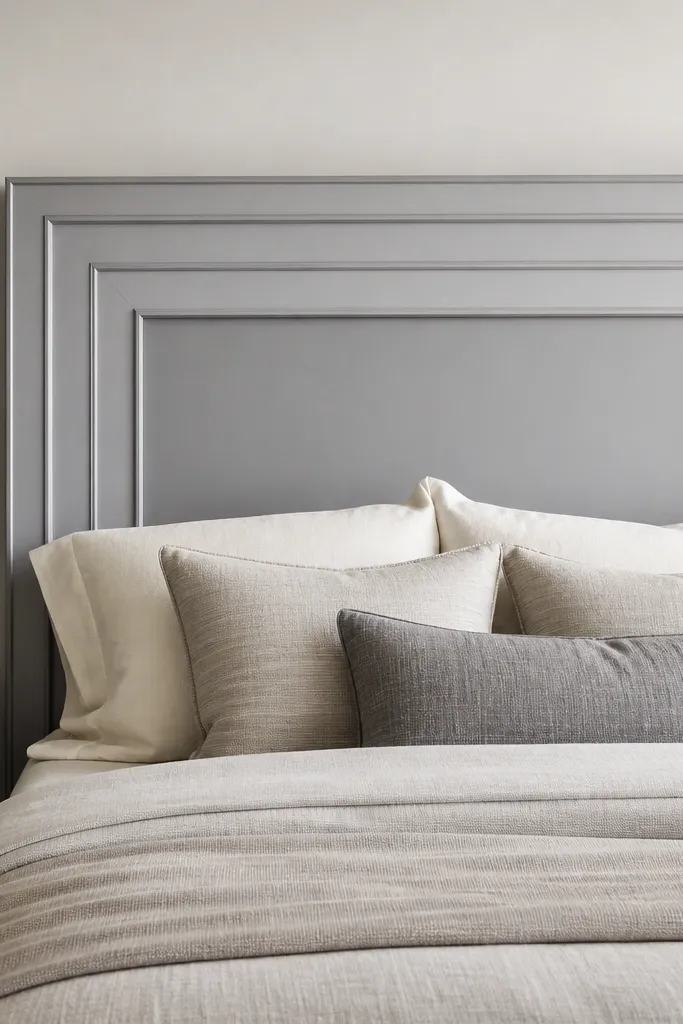
Cut a plywood base and attach foam or wood molding strips in a rectangular stepped pattern (think 3 levels). Prime everything, then paint with a smooth roller and a high-quality angled brush for corners. Seal with a satin finish so it’s tough enough for daily leaning.
Layered molding gives you the “architectural” look without building cabinets. The stepped frames create shadows that read like custom millwork. I paint the main field a warm soft gray and the insets a shade darker for depth.
One warningDon’t skip primer on foam molding — paint will look patchy and uneven after it dries.
Quick tipUse a laser level or a long straightedge to mark each molding line — misalignment is the only thing that makes it look DIY.
11. Curtain Fabric Headboard with Piped Corners
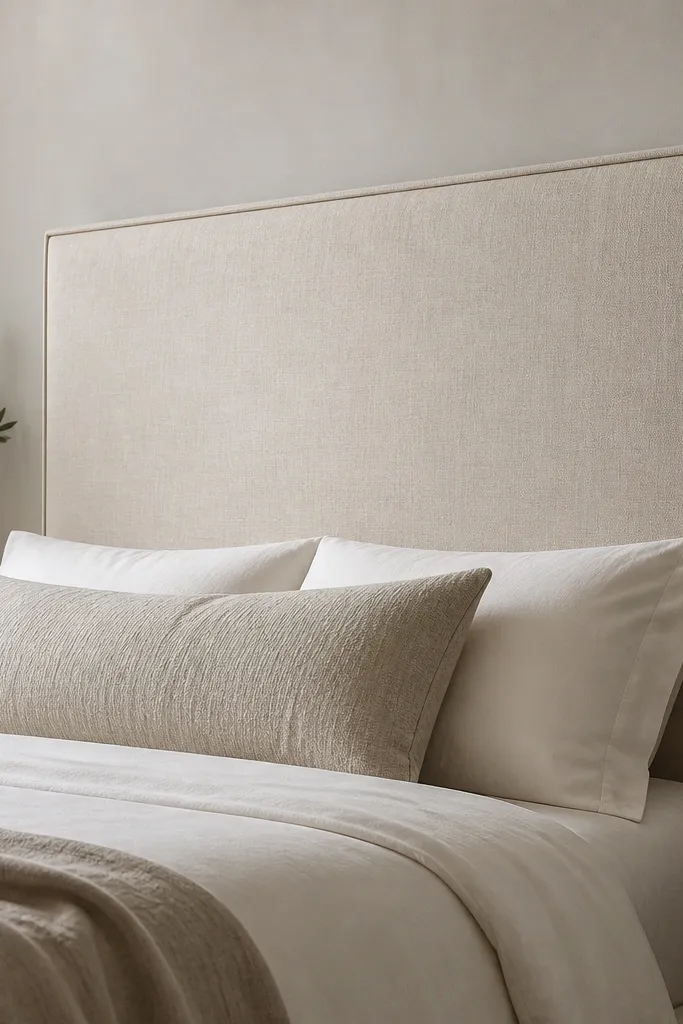
Choose a medium-weight fabric (linen blend or cotton twill) and back it with 1/2-inch foam. Staple the fabric on the back like upholstery, then add piping along the outer perimeter. For mounting, attach a French cleat to the back and a matching cleat on the wall or bed frame.
You get softness without sewing a full upholstery job. Curtain fabric with a medium weight drapes nicely, but when it’s pulled taut over a board, it looks like a tailored headboard. Piped corners make the edges look finished and expensive.
One warningDon’t use a stretchy knit — it will warp and the piping won’t sit straight.
Quick tipIron the fabric before wrapping and handle it with clean gloves so you don’t leave shine or smudges.
12. Oversized Pegboard Headboard with Paint and Brass Hooks
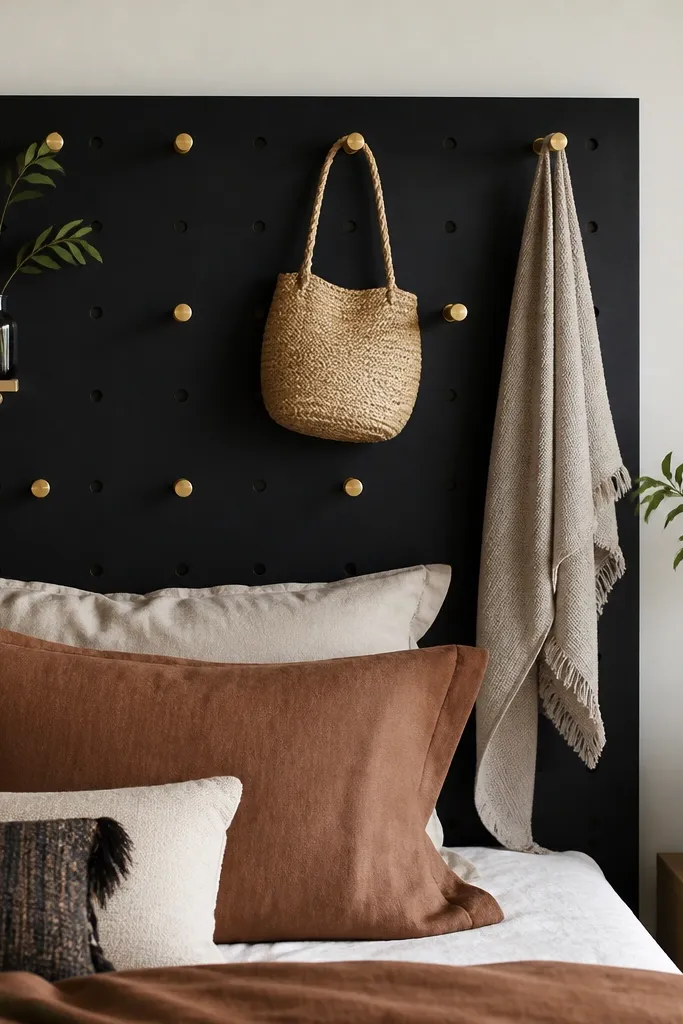
Pegboard looks modern and expensive when it’s scaled large and painted with a smooth finish. The hooks add a practical detail that makes the headboard feel intentional, not decorative clutter. I keep the pegboard matte and add a few brass pieces, not a whole tool display.
Use a pre-cut pegboard sheet and mount it to a rigid frame so it doesn’t flex. Paint with matte spray or a smooth roller system, then install brass hooks using the included screws. Add a simple wood border to hide the pegboard edges and screws.
Group hooks in rows with the same spacing so it reads like design, not random storage.
Don’t leave raw pegboard edges — the paper backing shows and cheapens the look.
13. Charcoal Ticking Stripe with Tufted Center Button
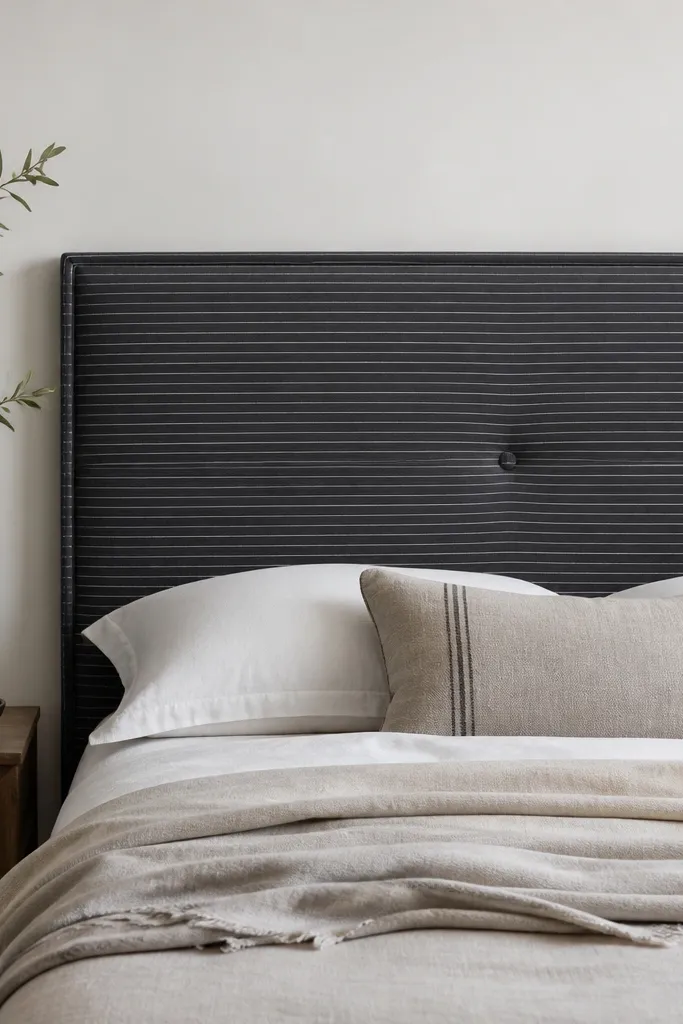
Cut a plywood panel and add foam batting so the fabric sits smooth. Align the stripe pattern before stapling by measuring the stripe center on the board. Sew one button tuft through the front with a long needle and anchor it to the backing, then wrap and staple.
Stripes look luxe when they’re aligned and not stretched crooked. The single tufted button gives a classic focal point without turning it into a complicated tufting project. I use charcoal ticking because it hides stains and looks crisp in daylight.
One warningDon’t overstuff with thick foam — it makes stripes curve and look sloppy.
Quick tipCheck stripe alignment after every few staples — tug the fabric back to center before it sets.
14. Shiplap-Style Panel with Two-Stage Stain
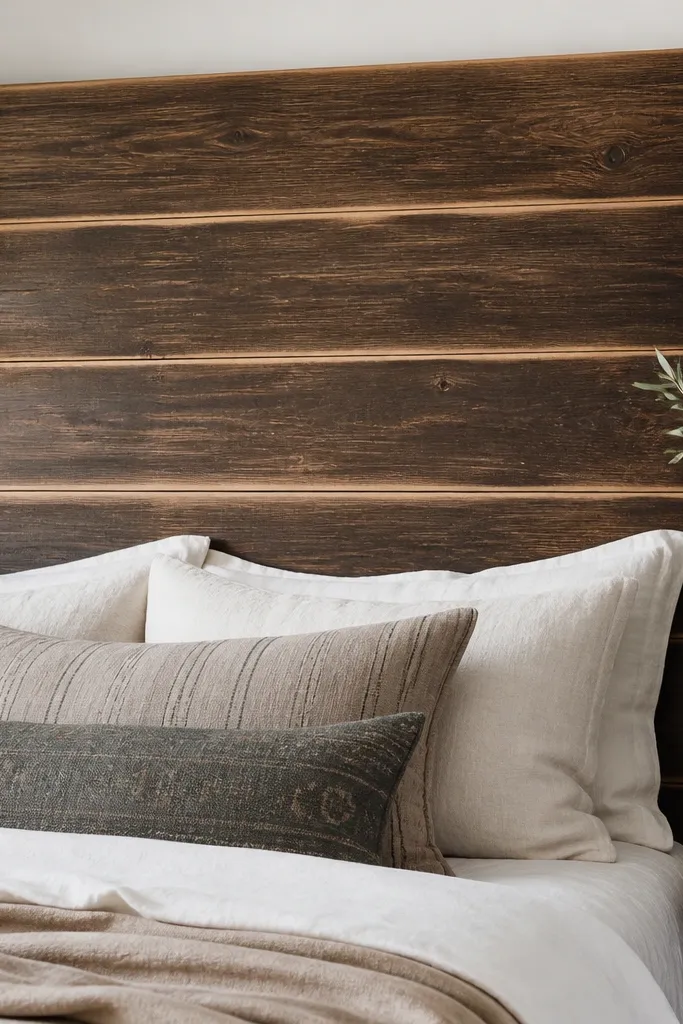
Two-stage staining makes new boards look older. The lighter edge trick creates depth at each board seam so the grain reads more dimensional. I finish with matte clear so it stays soft and not shiny.
Use thin shiplap boards or faux shiplap paneling attached to a backing frame. Apply a dark stain first, wipe it back quickly, then dry. After it dries, lightly sand edges and corners, then apply a lighter stain wash to those areas only.
Use a rag to wipe in the direction of the grain — it keeps the tone natural, not streaky.
Don’t stain and seal in one step — the lighter edge effect disappears if you don’t control the wipe-back.
15. Macrame-Inspired Rope Panel with Wooden Top Rail
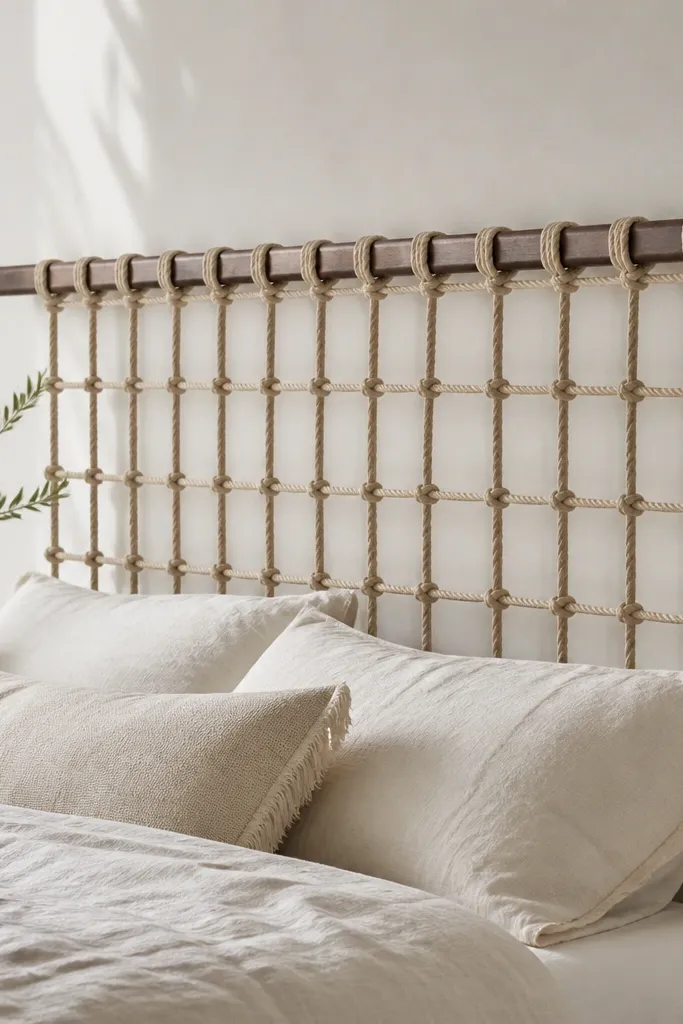
Create a back frame from thin plywood strips and attach rope in a grid using knotting or tension cords. Keep spacing consistent — measure every row. Add a top rail (1x2) stained dark and hide knots on the back with a thin fabric cover or trim strip.
Rope lattices look expensive when they’re even and not tangled. This design adds texture without blocking light, which is perfect for smaller rooms. I like it most in bedrooms with warm lighting because the rope casts soft shadows.
One warningDon’t leave rope ends raw on the front — frayed tips make it look unfinished.
Quick tipSpray the knots lightly with clear matte fabric sealant after it sets so it stays neat and doesn’t snag.
16. Vintage Window Frame Headboard with Linen Insert
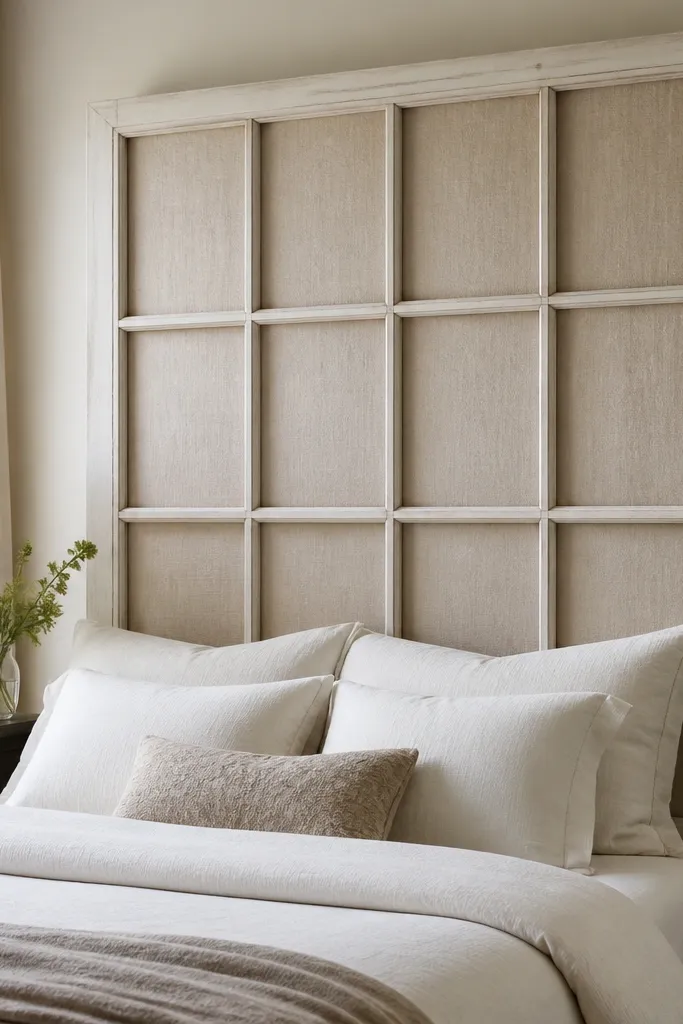
Find a window frame with sturdy trim and clean corners. Remove loose glass, then cut linen to fit the openings backed by batting or thin foam. Stretch fabric behind the frame and secure with small finishing nails or staples, then mount the whole piece using heavy-duty D-rings and wall anchors.
A window frame headboard looks expensive because it already has built-in architecture. The linen insert keeps it soft and prevents the frame from looking like a random salvage piece. I paint the frame in a matte warm white so the linen becomes the only texture focus.
One warningDon’t paint over flaky layers — peeling paint looks cheap instantly.
Quick tipUse a fabric in a tight weave and pre-wash it so it doesn’t shrink after you hang it.
17. Marble-Look Contact Paper Panel on MDF Frame
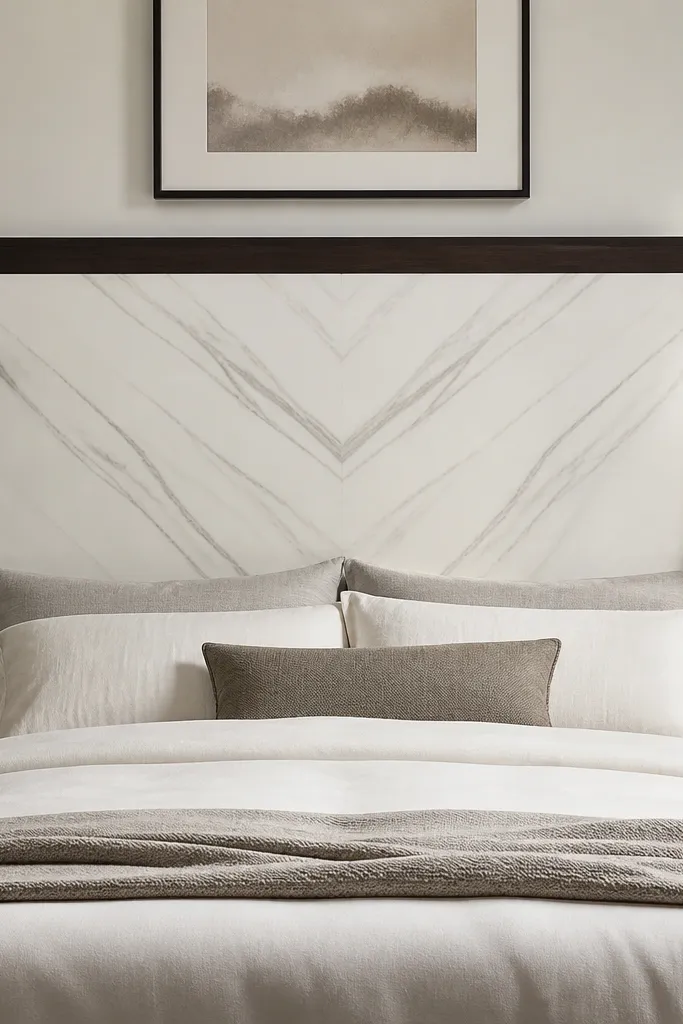
Marble-look contact paper reads luxe when the pattern is centered and the border is real wood. The smooth surface also feels clean in a bedroom, especially if you have kids or pets. Keep it matte or satin-looking so it doesn’t look like craft vinyl.
Cover MDF with marble-look contact paper, smoothing as you go with a plastic scraper. Frame it with 1x2 trim and miter the corners for a crisp finish. Seal the edges with clear matte sealant if the product allows it, then attach mounting hardware to the back.
Cut the contact paper slightly oversized, apply to the center, then trim the edges with a fresh blade after it’s fully adhered.
Don’t install it on a wobbly panel — any flex shows bubbles and seams.
18. Woven Fabric Panels in a Grid with Wood Spacer Frame
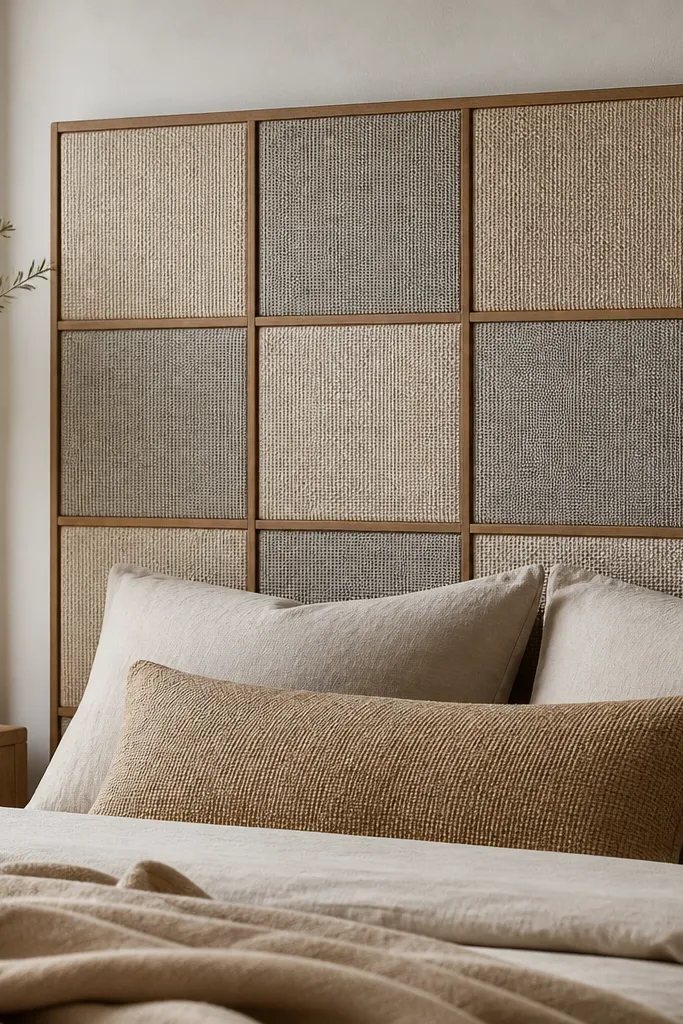
This looks high-end because it mixes pattern and structure. The wood spacer grid keeps everything aligned and makes the fabrics feel intentional, like a custom textile wall. I stick to three tones so the headboard looks cohesive rather than like a patchwork sale.
Build a frame from 1x2 lumber and divide it into equal squares. Cut woven fabric panels to fit each square with a small margin, then staple each panel to a thin backing board or directly to the frame. Finish the wood with a matte stain and clear coat for durability.
Label your fabric pieces by row before you staple — it saves you from swapping tones mid-build.
Don’t mix too many colors; more than three tones makes it look busy.
19. Velvet Panel with Oversized Nailhead Border
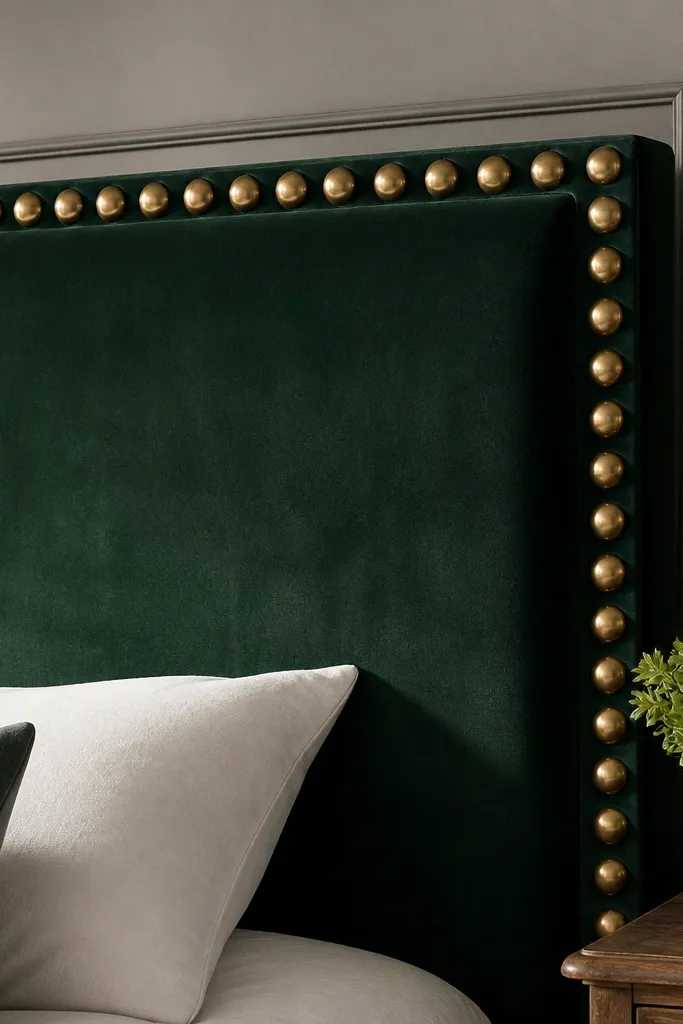
Use a rigid plywood core with 1-inch foam batting. Cut velvet slightly oversized and wrap tightly on the back, then add a border trim strip at the perimeter. Install nailhead trim along the outer edge, spacing evenly with a marked guide line.
Velvet reads expensive because it has depth, and nailheads make it look like a designer bed. I like deep green or navy because they photograph well and hide lint. The border does the heavy lifting, so the center can stay simple and smooth.
One warningDon’t press velvet with a hot iron — it flattens the pile and makes the color look uneven.
Quick tipBrush velvet with a soft dry cloth in one direction before final install so the pile looks even.
20. Color-Blocked Headboard with MDF Panels and Trim
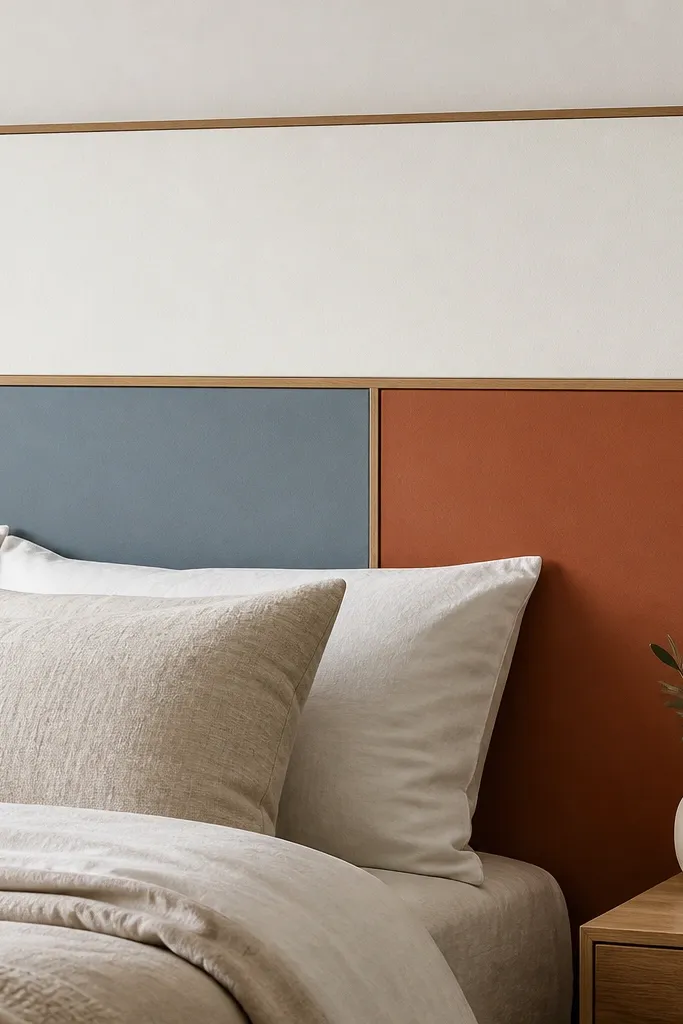
Cut MDF panels for each color area and assemble them on a backer board. Add thin wood strips (like 1/4-inch) between blocks as separators, then prime and paint each area separately. Finish with matte topcoat and mount with a cleat so it stays aligned behind the pillow line.
Color blocking looks expensive when the divisions are straight and the finish is matte. MDF gives you crisp edges, and trim lines create that gallery-like separation. I keep the palette to three colors max so it reads modern, not chaotic.
One warningDon’t paint all blocks in one go without masking — bleed at the edges makes it look rushed.
Quick tipUse a laser level or chalk line for every trim line before you paint — it’s the difference between “intentional” and “off.”
21. Ladder Shelf Backdrop Headboard with Open Cubes
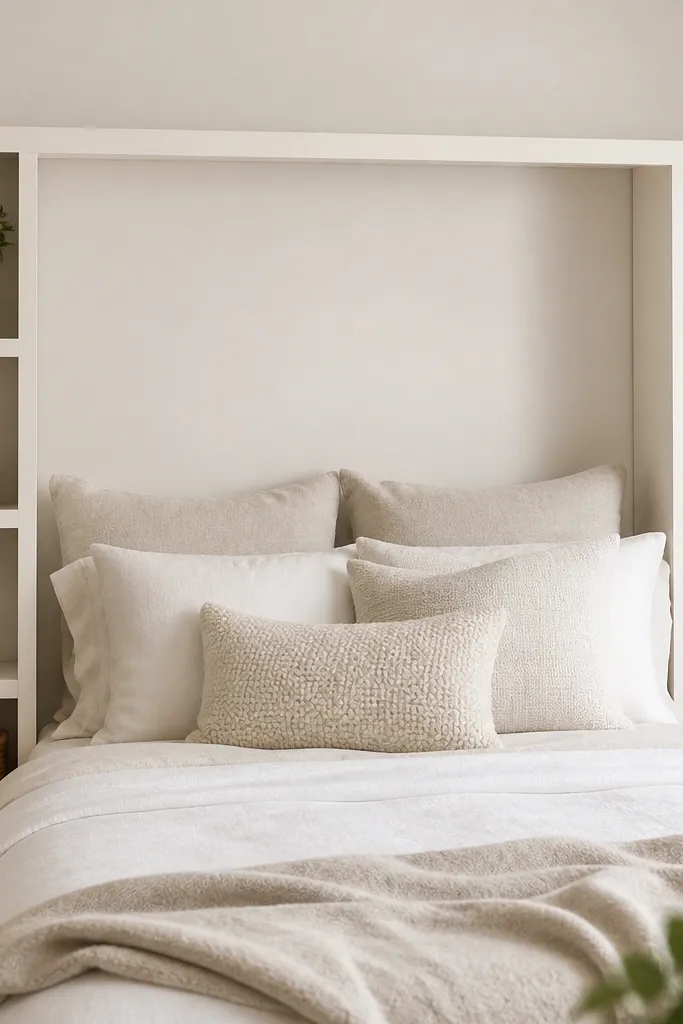
This one looks expensive because it adds storage lines and depth, not just a flat backdrop. The open cubes keep it light visually, and the ladder rails give a built-in look. I’ve used it in guest rooms where people need a spot for books and a lamp.
Build a back frame from two vertical rails and cross shelves. Leave the center open so the pillows sit against a flat surface or add a thin backing panel behind the ladder. Paint with a satin enamel, then secure shelves with screws and wood glue.
Pre-drill every screw hole; MDF splits fast if you rush and the split edges look bad under paint.
Don’t overload the shelf spacing — if cubes are uneven depth, the whole frame looks crooked.
22. Gilded Faux Plaster Panel with Limewash Finish
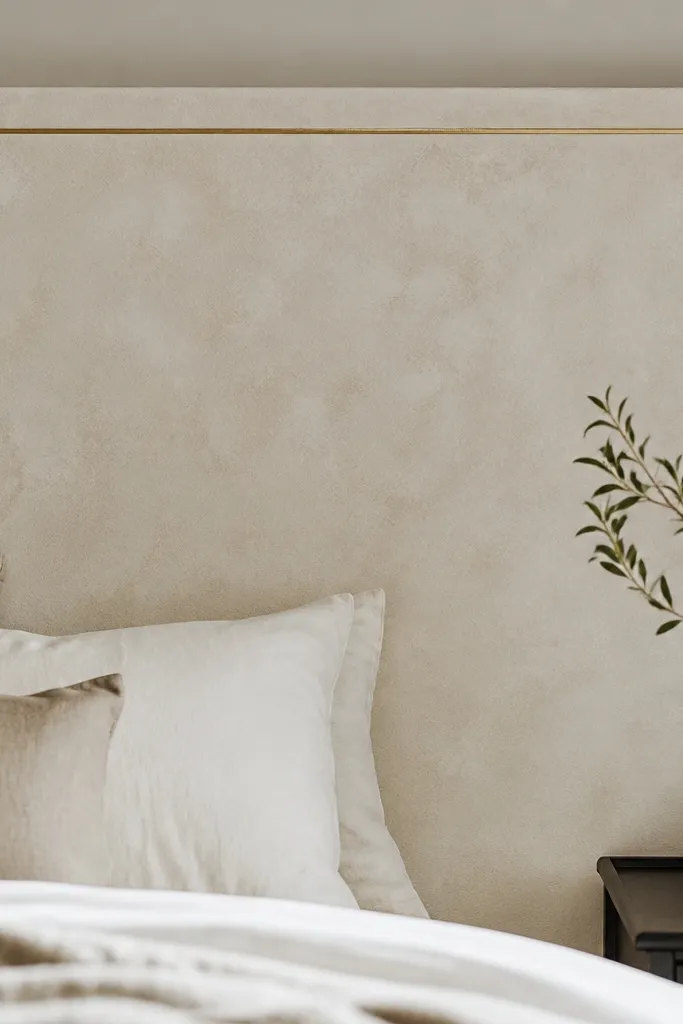
Use a rigid panel base and apply a plaster texture product with a trowel, then let it set. Once dry, limewash over it with a watered-down off-white, dragging lightly with a brush for variation. Add a thin gold line at the border with painter’s tape and a small angled brush.
Faux plaster and limewash give that old-world texture that reads high-end in natural light. The gold border adds contrast without heavy ornament. I like this for rooms with warm wood floors because the finish blends instead of fighting the space.
One warningDon’t over-brush — too much smoothing kills the texture and makes it look like a painted wall.
Quick tipShake limewash well and test on scrap board so you know how translucent it stays after it dries.
23. Matte Black Metal Grid with Fabric Inserts
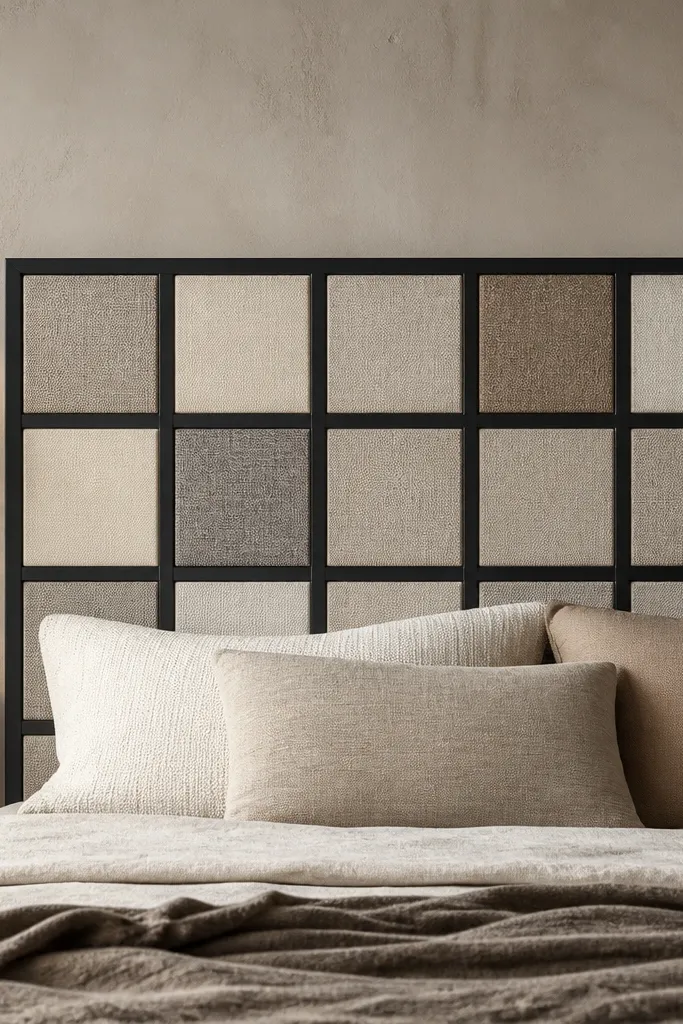
A metal grid looks modern and expensive when the grid is straight and the color is consistent. Fabric inserts soften the metal so it doesn’t feel industrial in a bedroom. I keep the fabrics all in the same family — oatmeal, sand, and warm gray — so the mix feels curated.
Use a pre-made metal grid panel (or build with metal strips) and mount it to a backer board. Cut fabric squares with a small margin and stretch them behind each opening, then add a thin trim ring or clip system to hold them. Paint or finish the metal in matte black so it doesn’t glare.
Lay the grid on a flat surface and measure each opening before cutting fabric — one off-square cut throws off the whole look.
Don’t use glossy metal finish — it reflects light and makes the seams stand out.
24. Oversized Fabric Ribbon Border Headboard
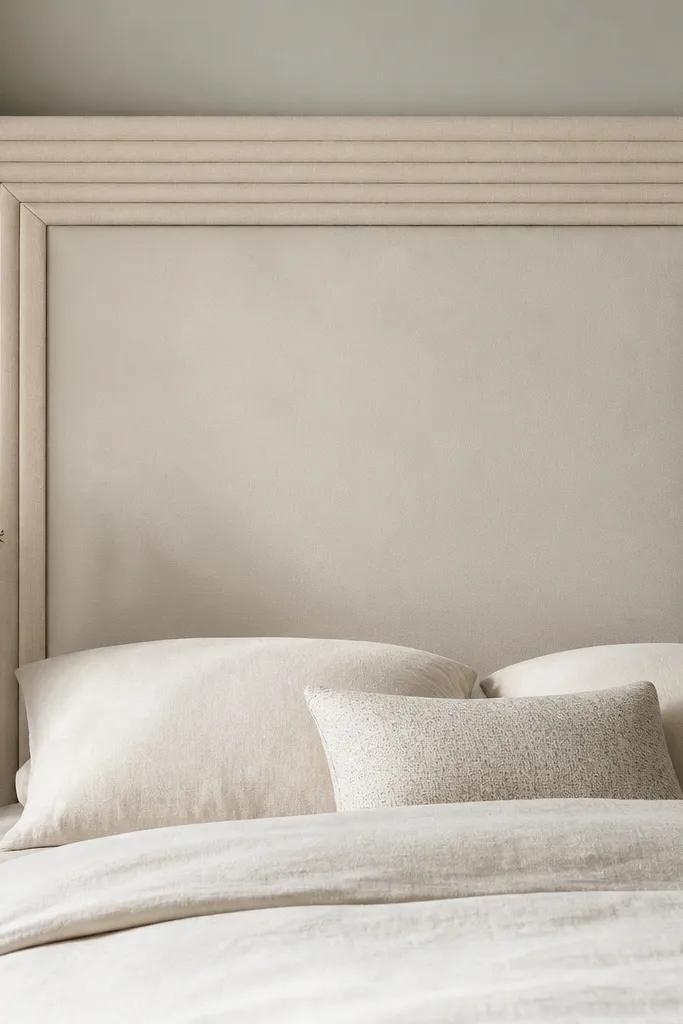
Start with a plywood or MDF base covered in a neutral fabric or matte paint. Glue ribbon around the perimeter in two layers, staggering the seams so it looks dimensional. For extra durability, stitch ribbon to a thin backing strip first if you have a sewing machine, then glue the strip to the panel.
This is one of my favorite tricks for making a plain panel look designer. The center stays simple, and the ribbon border creates a thick “frame” that looks custom. Choose a ribbon with a woven texture (not shiny satin) so it reads like upholstery trim.
One warningDon’t use thin ribbon — it collapses and looks like decoration instead of trim.
Quick tipUse a fabric glue made for upholstery and clamp at corners for 10 minutes so the ribbon doesn’t lift.