
1. Thrifted Door Panel Headboard with Chalk Paint + Linen Bands
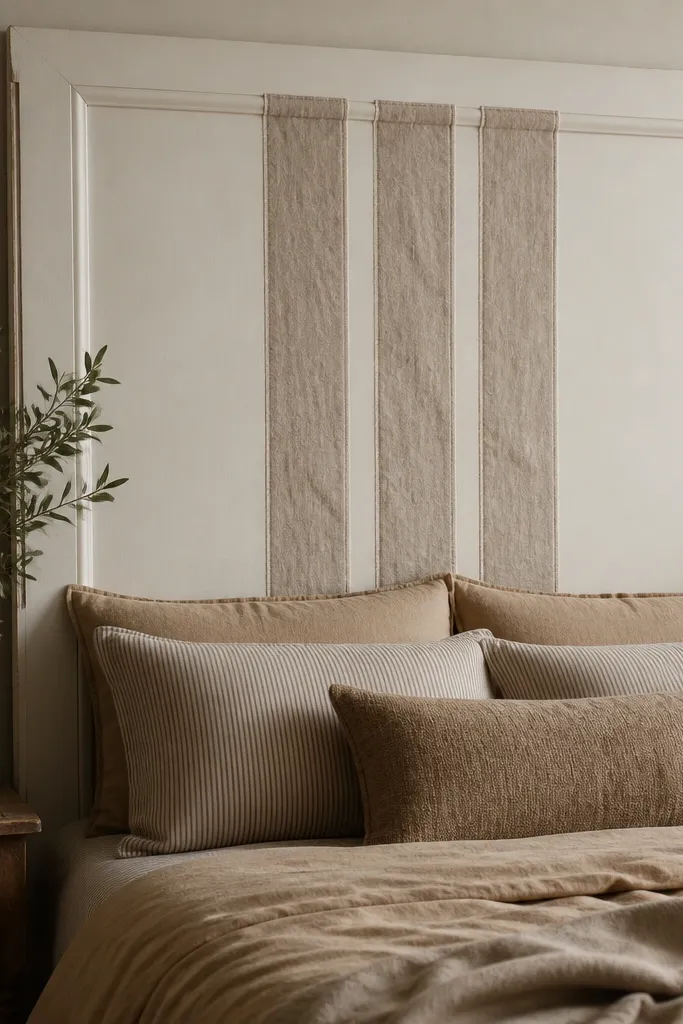
I love this build because a door already has the “architectural” look — raised panels, sturdy thickness, and built-in proportions. I paint the door with off-white chalk paint and then add linen bands only in the panel lines so it looks designed, not decorated. Linen reads warm and forgiving, which hides minor paint imperfections from thrift finds. This headboard looks best with neutral bedding and warm wood floors, but it also pops against cool gray walls because the linen has texture. If you have a small bedroom, the door proportions make the wall feel taller without adding visual clutter.
Start by sanding the door lightly (120 grit) and wiping dust with a damp microfiber cloth. Prime any bare spots with a bonding primer, then roll on two thin coats of off-white chalk paint using a foam roller so the finish stays even. Measure the center panel width and cut three linen strips, each about 4-5 inches wide, with the middle strip slightly wider if you want a focal point. Glue or staple the linen strips to the door using spray adhesive, then add a simple straight stitch or narrow trim along the strip edges for crisp lines. Mount the headboard with two heavy-duty picture hooks or a French cleat behind the top rail so it hangs flat.
Quick tipPress the linen strips with a warm iron on low heat through a pressing cloth before gluing so they don’t ripple.
One warningDon’t skip primer on stained door wood — chalk paint can peel in patches where the surface is oily.
2. Window Shutter Headboard with Spray-Gilded Edges
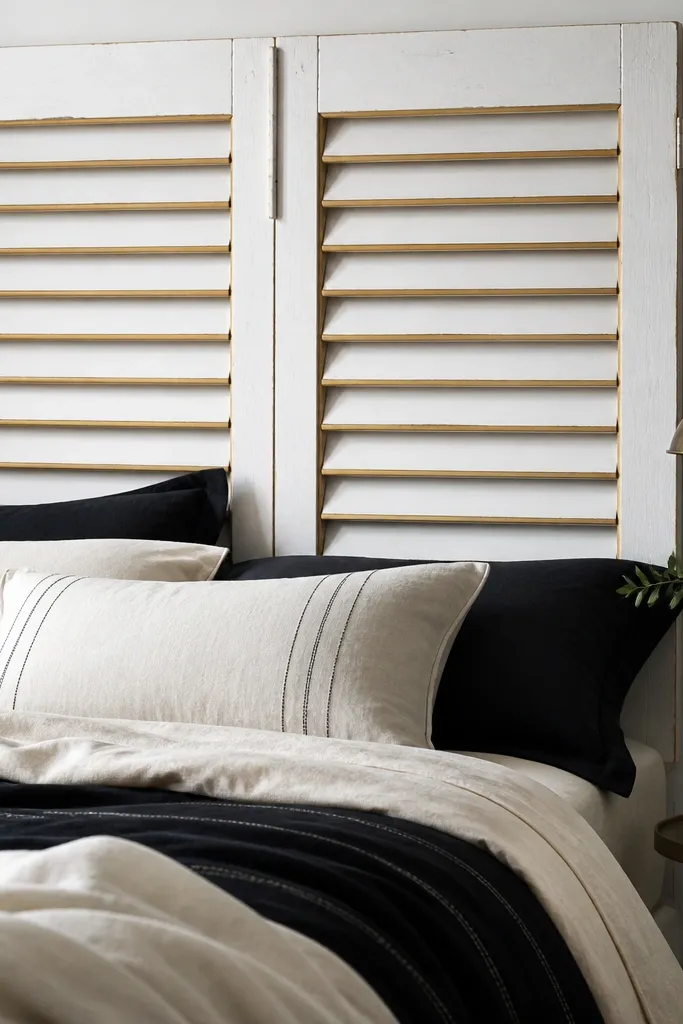
Shutters give you built-in spacing, so the headboard looks styled even when you keep the design simple. I paint the center faces white, then spray-gild only the raised edges so you get shine without covering the whole surface. That partial metallic line makes the bed look more expensive, especially with crisp white sheets and black accents. This works great for people who like clean lines but don’t want a flat slab headboard. It also photographs well because the gold catches light from the side.
Start by removing old hardware and sanding down chips (150 grit). Paint the shutters with a bonding primer first, then apply two coats of white satin cabinet paint so it wipes clean. Mask off the slat faces with painter’s tape and paper, then spray a thin layer of metallic gold spray paint on the raised edges only. Let it cure overnight, then attach the shutters to a backer board sized to your mattress width (I use 1/2-inch plywood cut to about 60 inches for a queen). Mount with wall brackets or a cleat so the shutters don’t drift outward.
Quick tipUse satin paint instead of flat — flat shows fingerprints and dust fast on a headboard.
One warningDon’t spray gold over open slats without masking; it ends up looking speckled and messy.
3. Pallet Wood Headboard with Rope-Wrapped Center Knot
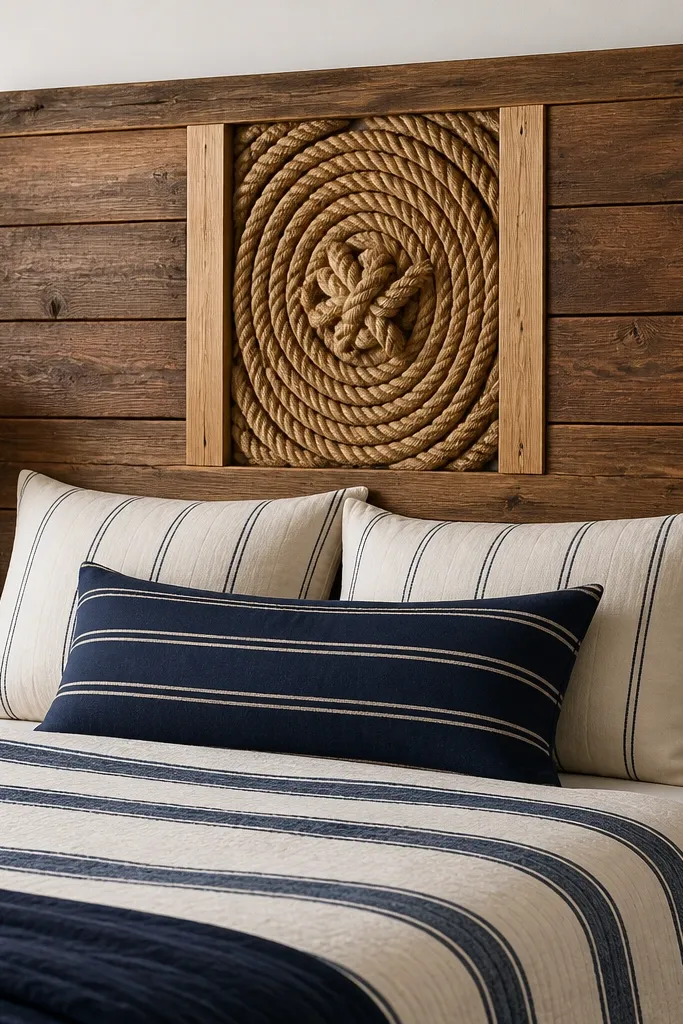
Pallet wood is uneven in the best way, so it gives character without extra decoration. I stain it a medium walnut and keep the grain visible, then I add one rope feature in the middle to bring a clear theme. The rope looks cozy and adds softness against the rough wood texture. This design suits casual bedrooms, coastal-inspired rooms, and anyone who wants something that looks handmade but not messy. The rope knot becomes the focal point when you style with stripes or textured throws.
Start by disassembling pallet boards if needed so you can straighten the face. Sand the front face only (80-100 grit to remove splinters, then 120 grit for smooth), then wipe clean. Stain with a medium walnut stain and seal with a water-based polyurethane in matte so it doesn’t yellow. Build a rectangle frame on the back using scrap 1x2 lumber so the headboard stays flat. Wrap jute rope around a cardboard core for the center coil, then secure with hot glue and twine. Finally, attach the headboard to the wall using two sturdy brackets near the top corners.
Pre-wrap jute rope around a bucket for a day to relax it, then it lays tighter when you coil it.
Don’t leave pallet nails exposed — they snag fabric and hands, and they rust through the finish.
4. Reclaimed Fence Picket Headboard with Horizontal Stain Ombre
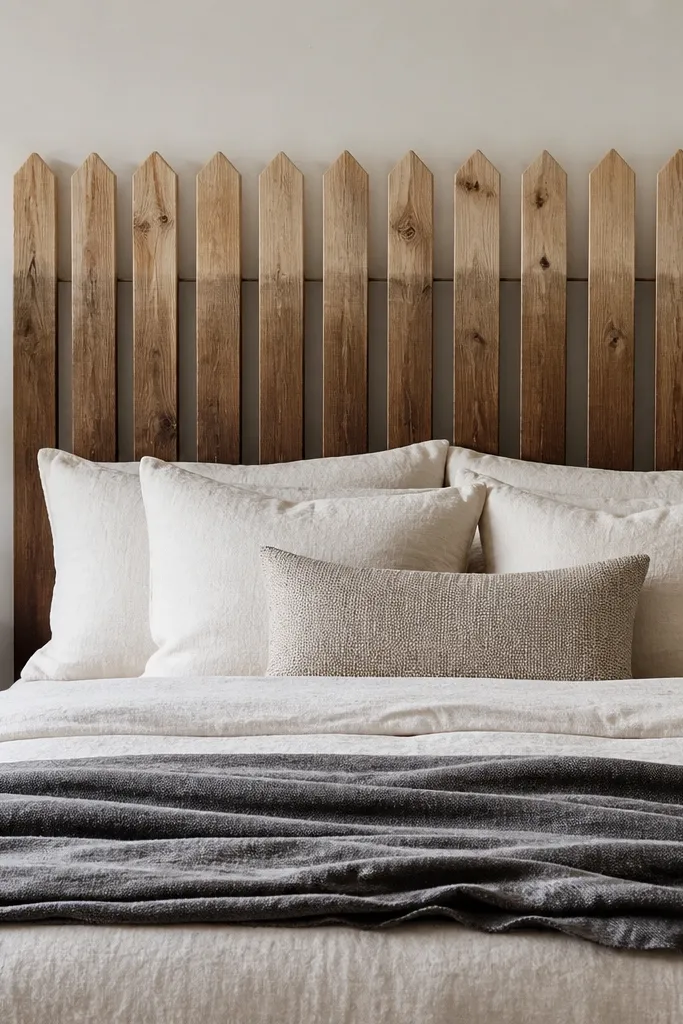
This is one of my favorite “budget fancy” looks because the ombre stain does the heavy lifting. Fence pickets already have texture and narrow widths, so the headboard looks airy and not bulky. I stain the bottom third darker and blend upward with a lighter wash so the wall feels layered. It’s flattering in rooms that get bright light because you see the grain shift as the day changes. If you have a slim bed frame or smaller room, the spacing keeps it from feeling heavy.
Start by sorting pickets by thickness so the face stays even. Lay them out on the floor and space them about 1 inch apart, then mark alignment points. Build a backing rectangle from 1x3 boards cut to the width of your bed, then screw pickets into the backing using countersunk screws. Sand all faces to 120 grit and wipe dust. Apply stain starting with the darkest color on the bottom third, then blend up with a lighter stain wash using a rag, working in horizontal strokes. Seal with matte clear coat and let it cure for 24 hours before mounting.
Quick tipUse a foam brush for blending — it spreads stain evenly without leaving hard lines.
One warningDon’t stain all pickets at once; you’ll get blotchy edges where the rag dries too fast.
5. Scrap Wood Picture Frame Headboard with Fabric Pin Tacks
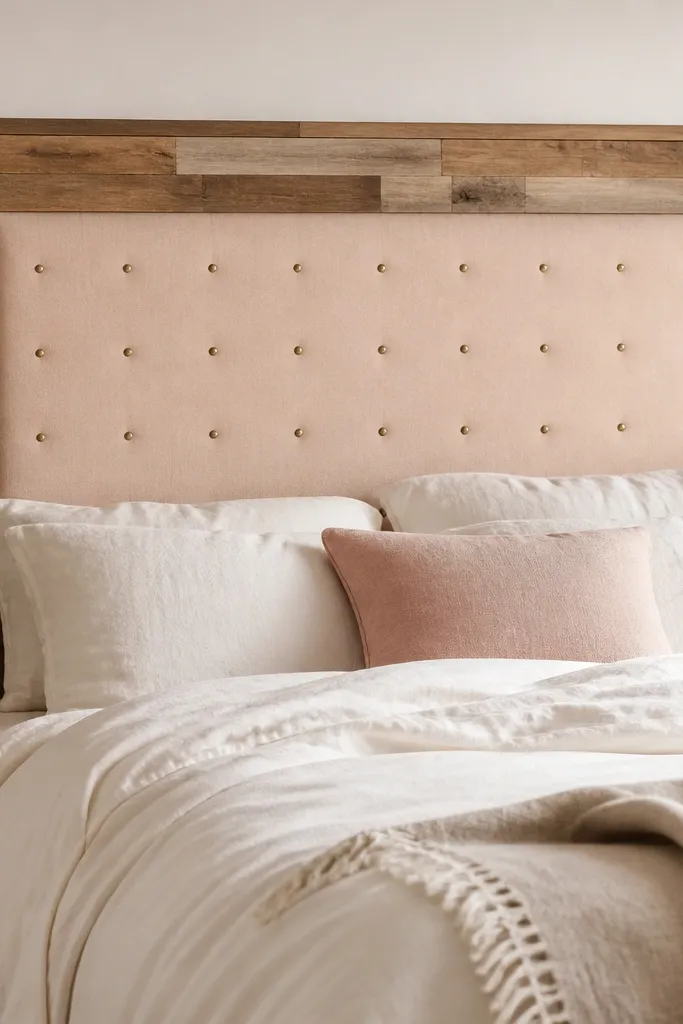
If you like clean geometry but hate the look of plain fabric, this one nails it. The mismatched wood frame adds that handmade vibe, while the pin-tack grid gives structure. I use blush or dusty rose fabric because it softens the whole thing and flatters both cool and warm skin tones in photos. This works beautifully with a simple bed frame and minimal wall decor because the headboard becomes the art piece. You can keep the panel smooth or add light wrinkles, but the grid makes it look intentional either way.
Start by building a rectangle frame from scrap boards, keeping the outer dimensions about mattress width plus 2-4 inches. Sand edges and join corners with wood glue and 1-inch brad nails or screws. Stretch upholstery fabric over a thin foam or batting sheet cut to fit the inner opening, then staple on the back. Add a second layer of batting if you want a plush look — I use 1/2-inch. Mark a grid with chalk lines (example: 4 columns and 5 rows), then hammer small brass tacks at intersections. Mount using D-ring hangers on the back so it hangs straight.
Use upholstery fabric with a tight weave; it holds tack holes cleaner than jersey knits.
Don’t pull fabric too tight over foam — it can make tack points look stretched and puckered.
6. Metal Bed Frame Headboard with Hanging Suncatcher Panel
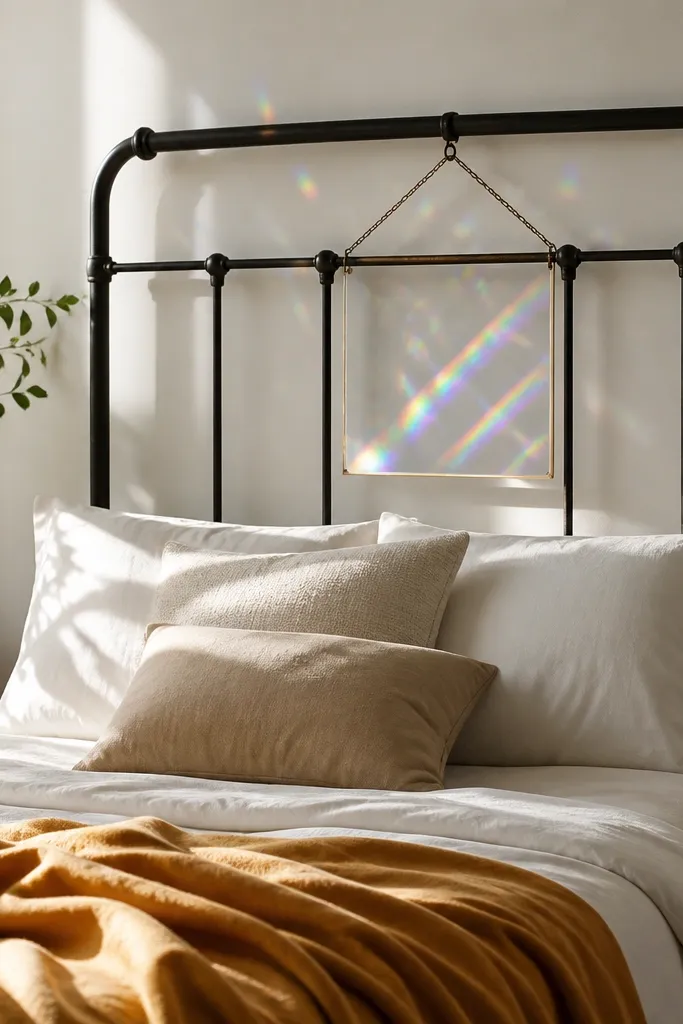
Metal frames look sharp, and adding one suspended “light catcher” turns the headboard into something you notice even with plain bedding. I paint the frame matte black or deep charcoal, then hang a single acrylic suncatcher panel in the center so it doesn’t clutter the whole space. The reflections look especially good in rooms with a window across from the bed. This is a great option if you have a smaller bedroom because the frame has open space and doesn’t feel heavy. Pair it with warm textiles like mustard or rust to keep the black from feeling cold.
Start by cleaning the metal frame with degreaser and sanding lightly so paint sticks. Spray prime with rust-inhibiting primer, then apply two thin coats of matte black spray paint. Choose a suncatcher panel or clear acrylic art piece that’s about 12-18 inches wide, and drill two small holes at the top corners. Attach two short chain lengths to the panel, then connect the chains to eye screws on the metal frame center. Hang the panel so it sits about 6-8 inches above the bed pillow line. Mount the headboard to the wall with wall anchors and L-brackets for stability.
Use clear silicone around any drilled edges on acrylic to prevent cracking from vibration.
Don’t use glossy paint on the frame — reflections fight the suncatcher’s sparkle.
7. Upholstered Scrap Quilt Headboard with Corner Buttons
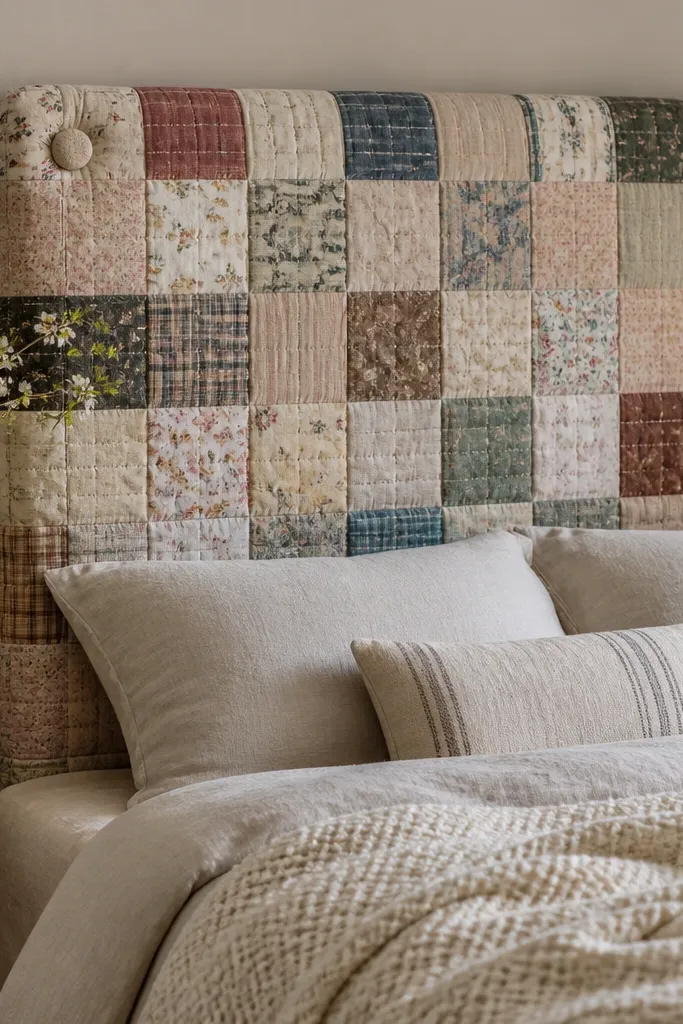
This is for when you have fabric scraps and you’re tired of the “patchwork pillow only” look. I build the headboard as a padded panel so the quilt squares feel cohesive and soft against your shoulders. Fabric-covered corner buttons pull the whole thing together and hide the seam lines at the back. The quilt look flatters people who like cozy textures and warm color stories. It also looks great in bedrooms where you want pattern without adding wallpaper.
Start by cutting quilt squares into a consistent size, like 9x9 inches, and sew them into rows. Back the finished quilt top with batting and a backing fabric, then sandwich it into a simple wood frame made from 1x2s cut to your bed width. Pull the quilt over the frame and staple the back. Add corner buttons by anchoring button shanks through the quilt and into the frame with a needle and thread. Finish the top edge with a narrow fabric trim strip, then mount with brackets or a cleat.
Quick tipPre-wash fabric so shrinkage doesn’t distort your seams after you upholster.
One warningDon’t use slippery satin scraps for the top — they shift under batting and look uneven.
8. Bookcase Door Headboard with Open Shelf for Nightstands
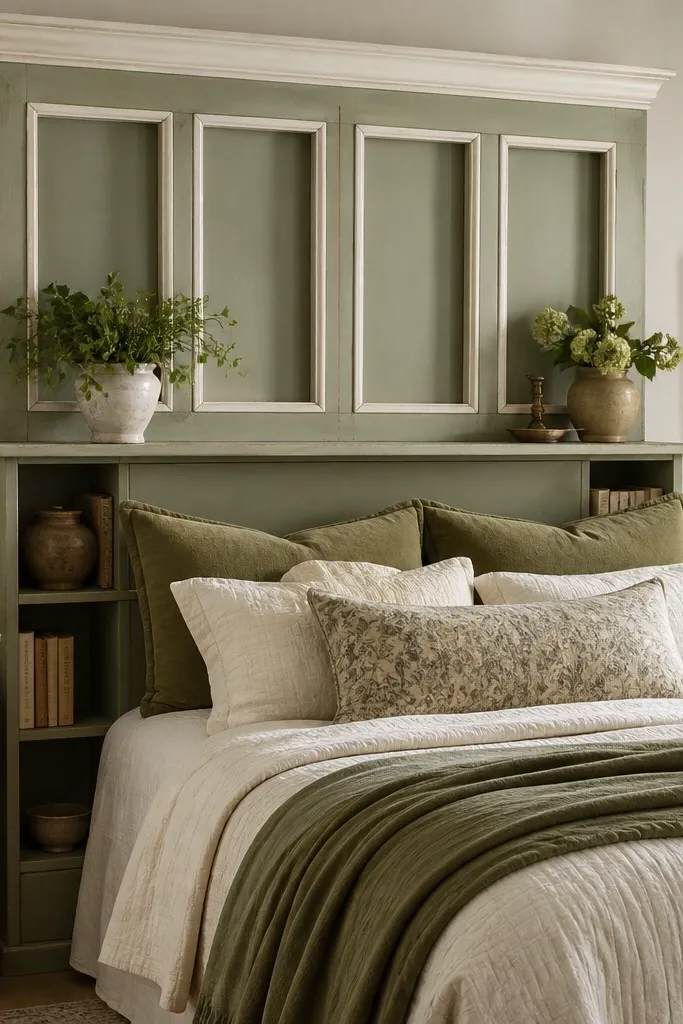
This one gives you storage behind the bed without buying a separate nightstand set. I use an old door with shelving so you get vertical lines and practical space for books, a lamp, or a phone charger. Sage green looks calm and hides scuffs from real life. It flatters bedrooms with plants or wood textures because it ties greenery and natural finishes together. If your room is tight, the shelf makes the bed area feel organized instead of crowded.
Start by removing hinges and hardware and sanding the door frame thoroughly. Prime, then paint the door sage green satin using a roller for even coverage. If the door has shelves, clean them and leave them open; if it’s flat, add two shelf boards cut to fit the desired heights. Screw shelf boards into the door frame using pocket-hole screws or brackets from the back. Seal the inside edges with clear coat so it wipes clean. Mount the headboard like a heavy door using two wall brackets aligned to studs if possible, or use rated anchors if you can’t.
Quick tipAdd a thin cork sheet or felt pad to the shelf bottom so books don’t scratch paint.
One warningDon’t paint over glossy old varnish — shelves chip fast when you slide items.
9. Macramé Rope Headboard on a Salvaged Wood Rail
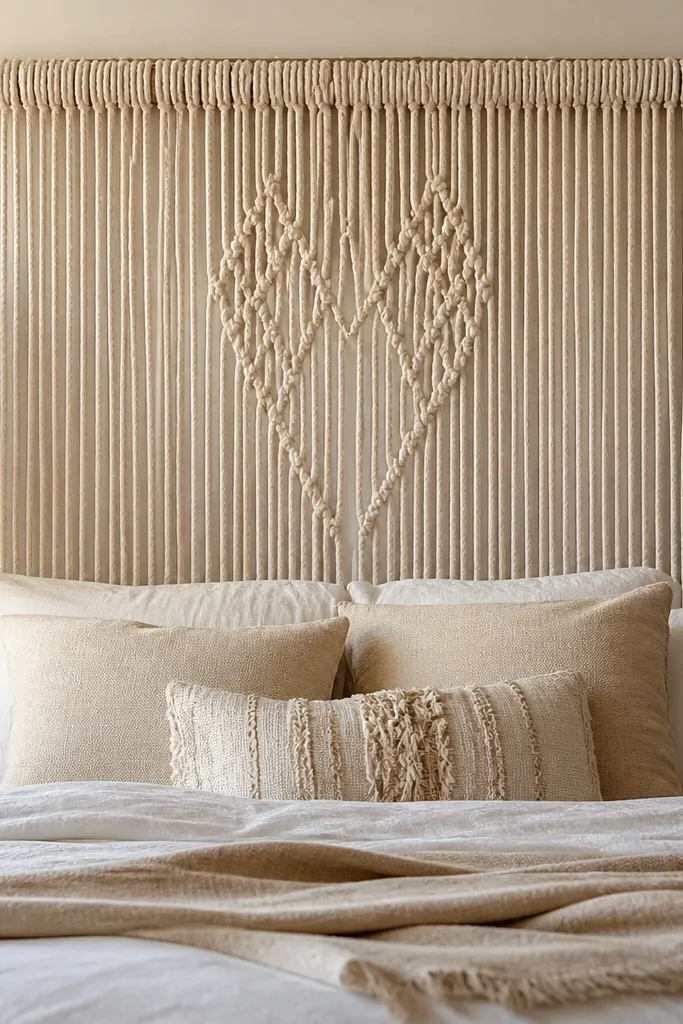
Macramé looks expensive when it’s done with clean repetition and a simple top bar. I keep the design minimal: mostly vertical cords with one knotted focal section in the middle so it doesn’t turn into a wall of tangles. Natural jute with a few cream cotton strands makes it warmer and more flattering than all-brown rope. This suits casual boho bedrooms, and it also softens a room with hard surfaces like tile or metal furniture. If you have light-colored curtains, this headboard adds texture without adding heavy color.
Start with a straight wood rail about mattress width, sanded and sealed with matte clear coat. Tie macramé cords in evenly spaced bundles, about 2.5-3 inches apart. Use a simple square knot for the center section and then keep the rest as straight hanging strands. Secure knot ends with fabric glue and trim to even lengths after it dries. Add a backing strip behind the knots so the rope doesn’t snag on bedding. Mount the rail with two heavy-duty picture brackets so it stays level.
Mist the knots lightly with water and let them dry flat so the pattern tightens and looks uniform.
Don’t cut all the strands at once before they dry — lengths drift while rope relaxes.
10. Leather Belt and Brass Stud Headboard Frame
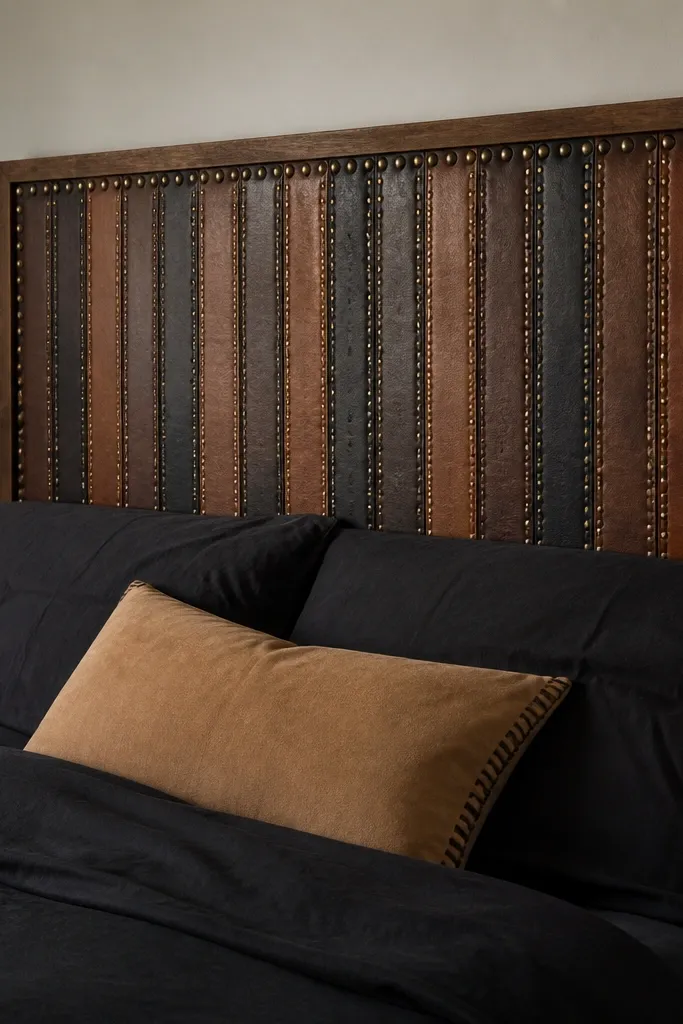
This is a strong look if you want “industrial but clean.” Leather belts create natural texture and a sense of structure, while brass studs add a controlled shine. I use a dark brown or black belt set and keep the frame color either raw wood or matte black so it doesn’t get too busy. It looks best with black, cream, or charcoal bedding, and it flatters people who want bold contrast. The belts also hide small wall imperfections because they’re dimensional.
Start with a plywood rectangle cut to your bed width minus 2 inches, then seal it with primer. Build a thin frame around it with 1x2 wood so you have a finished border. Lay leather belts vertically, spacing them about 1.5-2 inches apart, and mark placement. Attach belts with industrial adhesive and add a few small screws through the belt holes into the plywood for extra hold. Add a brass stud border using pre-punched holes or by punching and adding snap studs around the perimeter. Seal the top surface with a clear matte leather finish so it wipes clean. Mount with cleats or wall brackets.
Use the belt holes as anchor points so your studs line up and the surface stays flat.
Don’t use stretchy belts — they sag and look sloppy after a few weeks.
11. Fabric Wall Pocket Headboard from Old Curtains
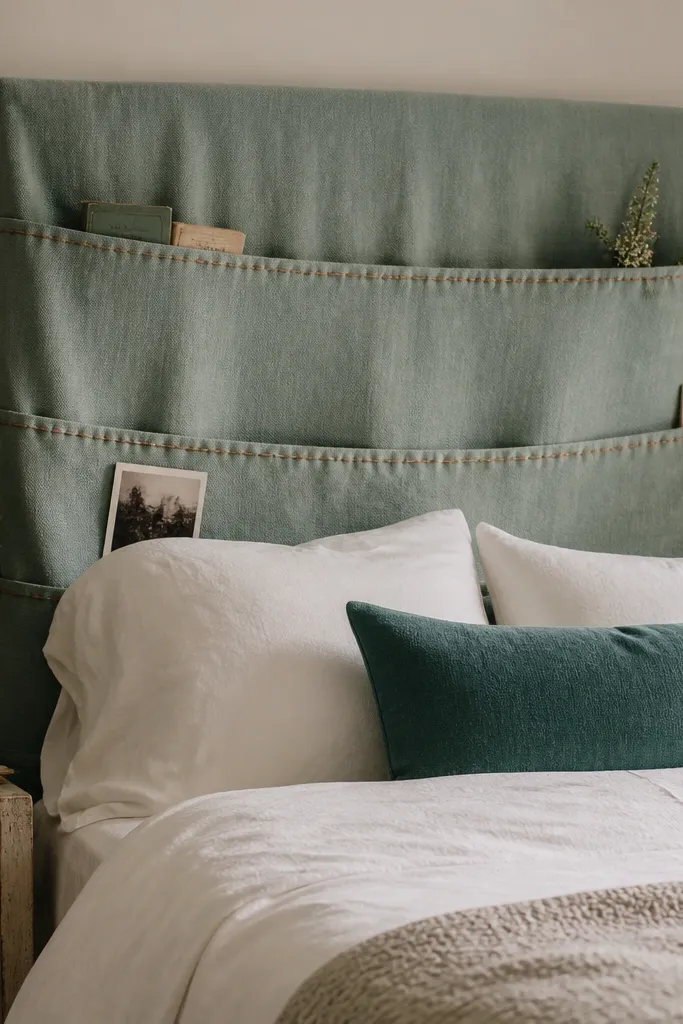
This one is practical and pretty: you get storage for remotes, books, and a water bottle right on the headboard. I use curtain fabric because it already has a nice weight and drape, plus it doesn’t fray as easily as cheap craft cotton. The pockets create horizontal lines, which look great if your bed is tall and you want to balance it. It flatters small bedrooms because it replaces a nightstand. Use jewel tones like teal or deep navy to make it feel intentional.
Start by cutting your curtain panel to headboard size, aiming for about 60 inches wide for a queen. Fold and stitch a backing channel along the top for hanging hardware, like a 1x2 strip. Mark pocket heights: for example, 10 inches for the top pocket, 12 for the middle, and 10 for the bottom. Sew pocket side seams and bottom edges, then attach pocket openings with a narrow hem for a clean lip. Add a simple velcro strip or button closure if you want items to stay put. Mount using a French cleat or a top rail mounted into studs.
Press all hems with steam before stitching so pocket edges stay crisp and straight.
Don’t use thin sheers — they stretch and the pockets sag after you load them.
12. Reclaimed Wood Slat Headboard with White Wash and Black Numbers
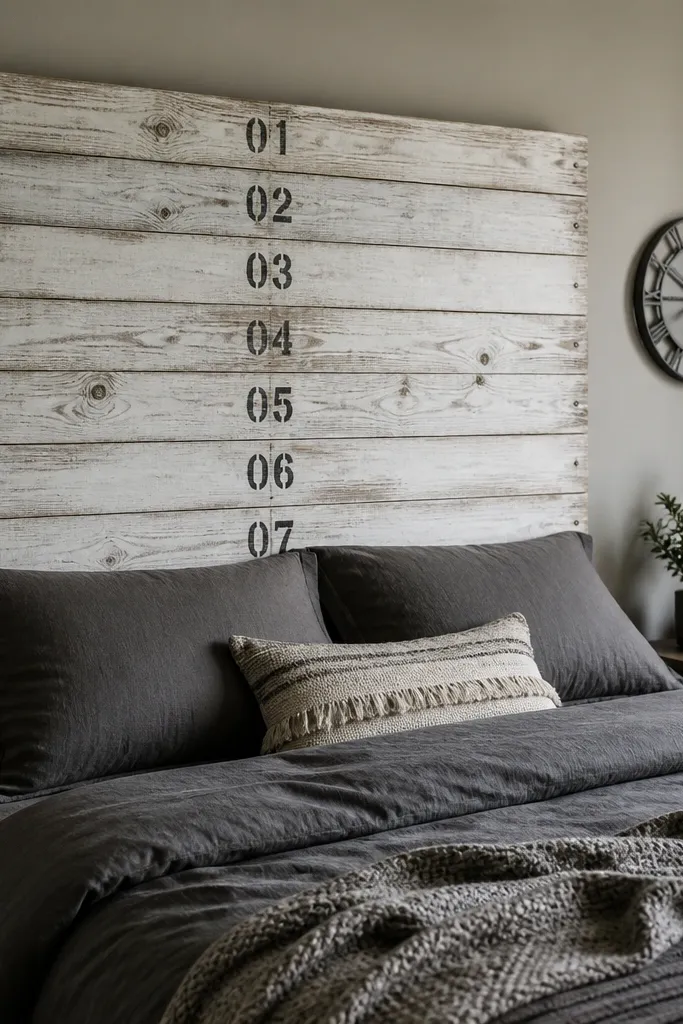
This is a fun “decorate the wall behind the bed” trick without buying wall art. White wash gives you brightness, then black numbers add a graphic element that looks modern. I keep the numbers small and straight so it feels designed, not random. This headboard flatters rooms with black metal accents and works well for renters because the stenciling is on top of a sealed surface. It also pairs with patterned bedding because the numbers are controlled and don’t compete with the textiles.
Start by sanding slats to 120 grit and sealing with a clear shellac or primer if the wood is very uneven. Build a rectangular backing frame with 1x3 boards and screw slats on top, leaving about 1/2 inch gaps for a lighter look. Apply white wash using a 1:1 mix of white paint and water, then wipe off excess until the grain shows. Let it dry, then stencil black numbers using a stencil brush and craft paint. Seal again with matte clear coat to protect the stencil edges. Mount using two L-brackets at the top corners for a straight hang.
Tape down the stencil with painter’s tape and dab paint using a sponge — brush marks show on white wash.
Don’t skip sealing after stenciling; friction from pillows will rub off the numbers.
13. Cardboard Core Headboard with Faux Leather Wrap and Stud Corners
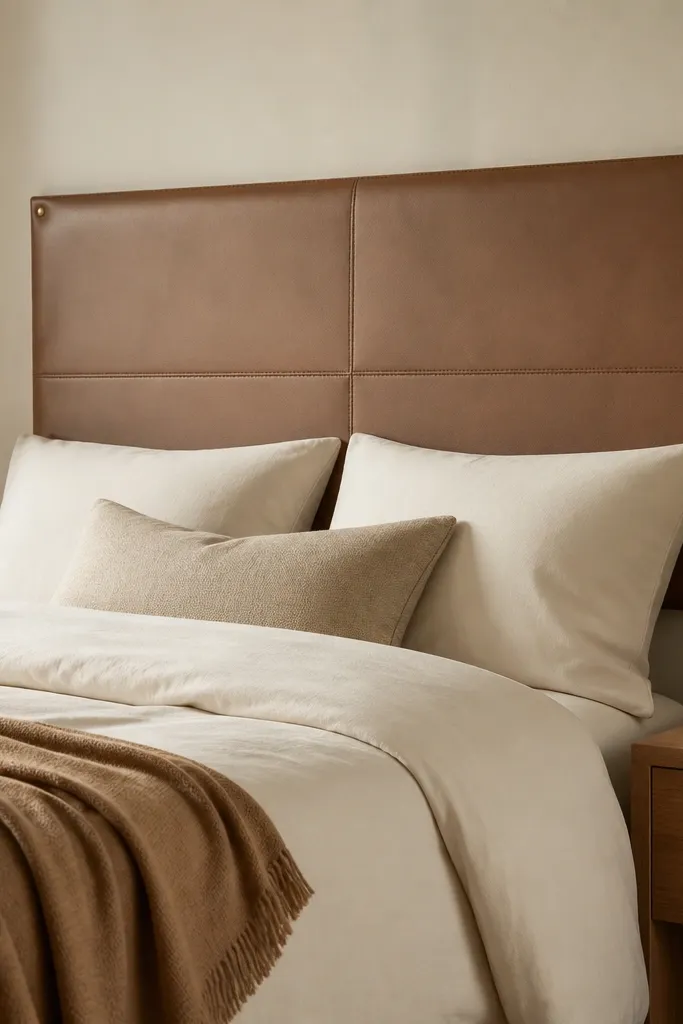
This is the budget move when you don’t want heavy wood. I build a lightweight structure using stacked cardboard core or foam board panels, then wrap faux leather so it looks real from a distance. The smooth surface and stud corners look sharp and upscale, especially with warm neutrals. This works best if you have a bedroom with less humidity because faux leather can take scuffs; you’ll still get the look for a fraction of the cost. It’s also easier to mount since it’s not brick-heavy.
Start by building a rectangle core with stacked cardboard sheets or foam board, then reinforce the back with wood strips for mounting. Wrap the front with faux leather using contact adhesive, smoothing as you go so you don’t trap wrinkles. Trim edges clean with a sharp utility knife. Add seam lines by using masking tape as guides, then press lightly to create fold lines or stitch faux leather with upholstery thread if you’re comfortable. Install corner studs by making small punctures and securing with the stud backs. Mount with a cleat and two anchors, making sure the cleat sits level.
Use a hair dryer on low to warm faux leather while smoothing — it helps the material conform without bubbles.
Don’t over-stretch the wrap; it pulls the surface tight and makes corners look distorted.
14. Burlap and Twine Headboard with Stitched X Pattern
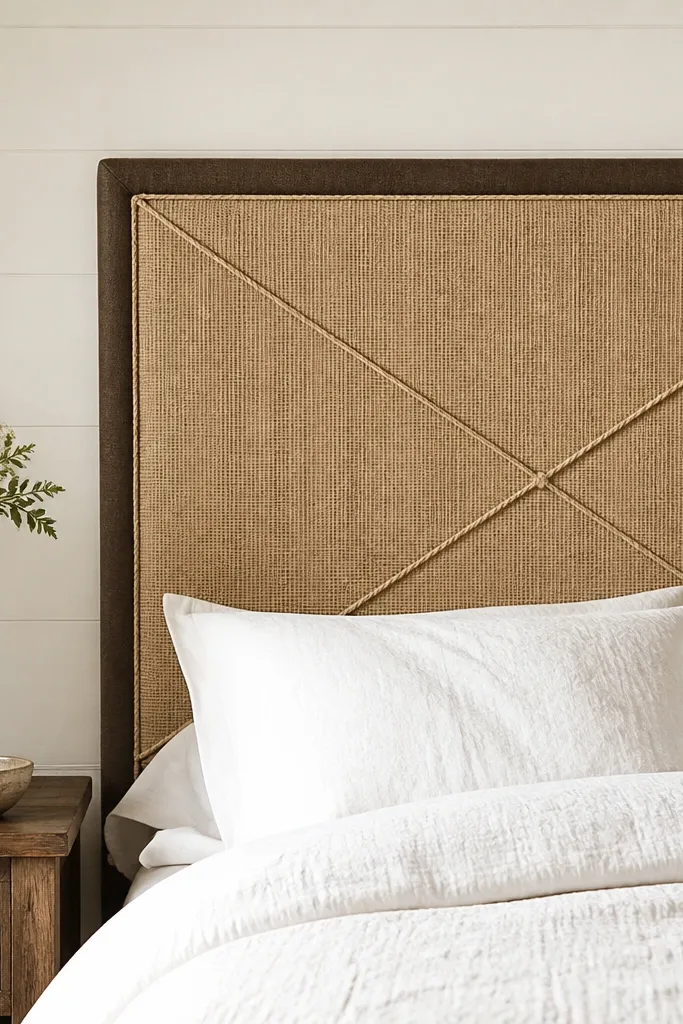
Burlap is coarse, but it looks great when you pair it with a clean stitch pattern. I cover a foam-backed panel with burlap, then add an X pattern using twine so the texture stays the star. Dark brown trim around the edges makes it look finished instead of like a craft project. This headboard flatters farmhouse bedrooms and also neutral color palettes because burlap is an earthy mid-tone. If your wall is bare, the twine lines add structure at eye level.
Start with a backing panel of plywood or MDF, sized about mattress width. Cover it with batting or thin foam, then wrap burlap tightly and staple on the back. Trim the edges and add a narrow border strip by gluing it around the frame. Mark an X grid by drawing two diagonal lines that meet at the center, then mark where you want intersections. Stitch twine along the marked lines using a hand needle and thick upholstery thread, tying knots on the back. Seal the burlap lightly with matte fabric sealant if you want it more wipeable. Mount with brackets at the top corners.
Use a thimble when stitching twine through burlap — it saves your fingertips.
Don’t skip tensioning the burlap; loose burlap looks saggy and cheap.
15. Old Skis Headboard with Rope Ladder Detail
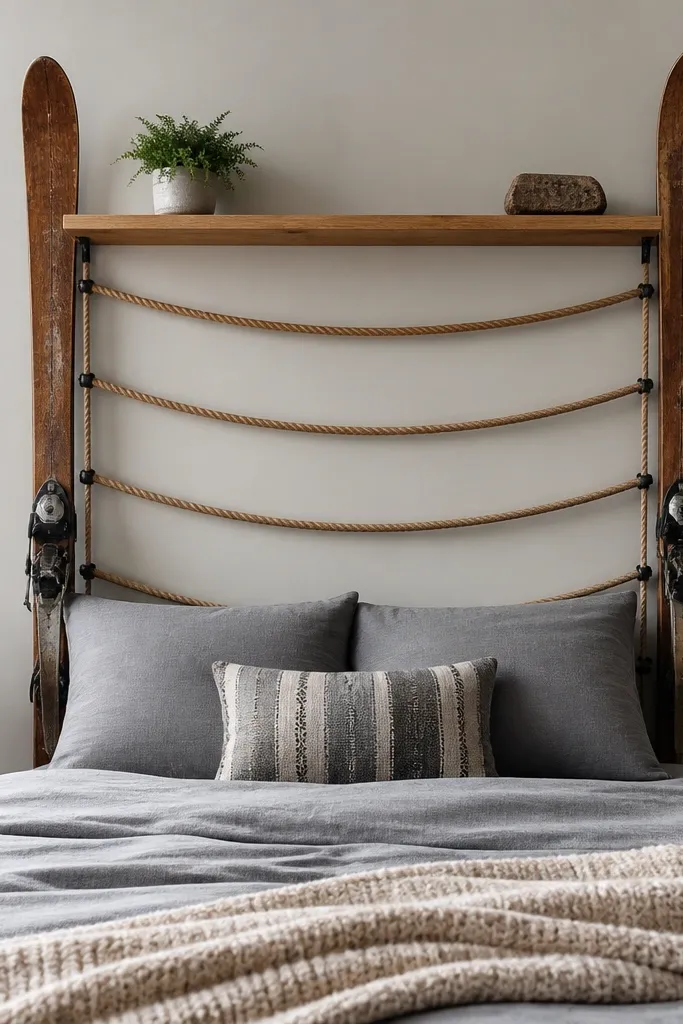
Skis are weird in the best way. They already have curves and metal edges, so the headboard has motion even with plain styling. I mount them vertically, then add a rope ladder between them for a cozy cabin vibe. The rope softens the cold metal look and makes it feel lived-in. This works best for bedrooms with wood accents, knit textures, and neutral bedding. It also looks great if your room has a rustic rug or exposed beams.
Start by cleaning skis and sanding off rust spots lightly, then prime with metal primer. Spray paint the skis in matte charcoal or deep green, then seal with clear matte. Mount each ski vertically using two brackets or a rail behind them so they don’t twist. Cut rope rungs from thick rope and tie them evenly between the ski bindings, spacing about 6 inches apart. Add a small wood shelf on top using L-brackets if you want a place for a lamp. Finally, hang the whole unit level using wall anchors at the top support rail.
Quick tipIf the skis have sharp edges, file them down and cover with a thin rubber strip so pillows don’t snag.
One warningDon’t mount skis too far apart; the rope ladder looks stretched and uneven.
16. Mason Jar Sconce Headboard Line with Reclaimed Boards
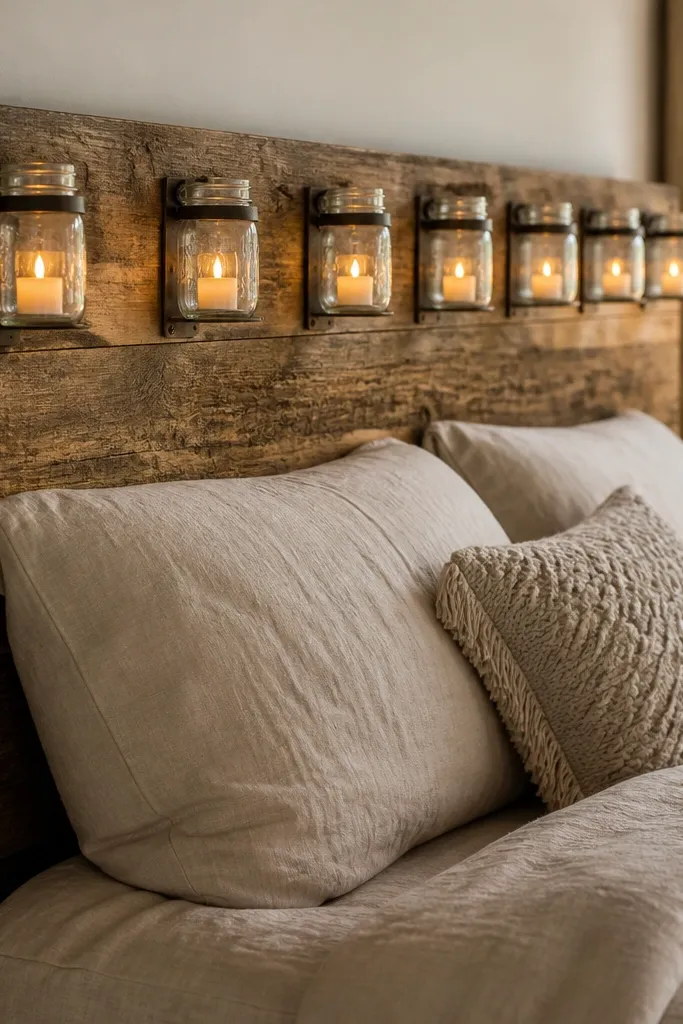
A row of mason jars turns a plain headboard into a nighttime feature. I build it on reclaimed boards so it has texture, then I mount jars evenly along the top like a sconce line. Warm LED candles make it cozy without wiring a complicated light system. This headboard flatters bedrooms that already use warm light — it makes the whole bed area feel softer. It’s also useful: you get a gentle reading light glow for late-night scrolling without a table lamp.
Start with a backing board rectangle and attach slats or a single reclaimed plank face for texture. Sand and seal the wood, then cut a top rail strip where the jar brackets will sit. Mark jar positions with a tape measure — keep equal spacing, about 6 inches apart. Screw metal jar brackets into the rail, then place mason jars into the brackets. Add LED candles inside and test the glow before final mounting. Mount the headboard using a cleat and two anchors so it holds steady when you sit up and lean.
Quick tipUse battery LED candles with a timer so you’re not swapping batteries every week.
One warningDon’t use real flame candles on a headboard — jar heat can damage wood finish and is a safety risk.
17. Wallpapered Accent Headboard with Book-End Trim
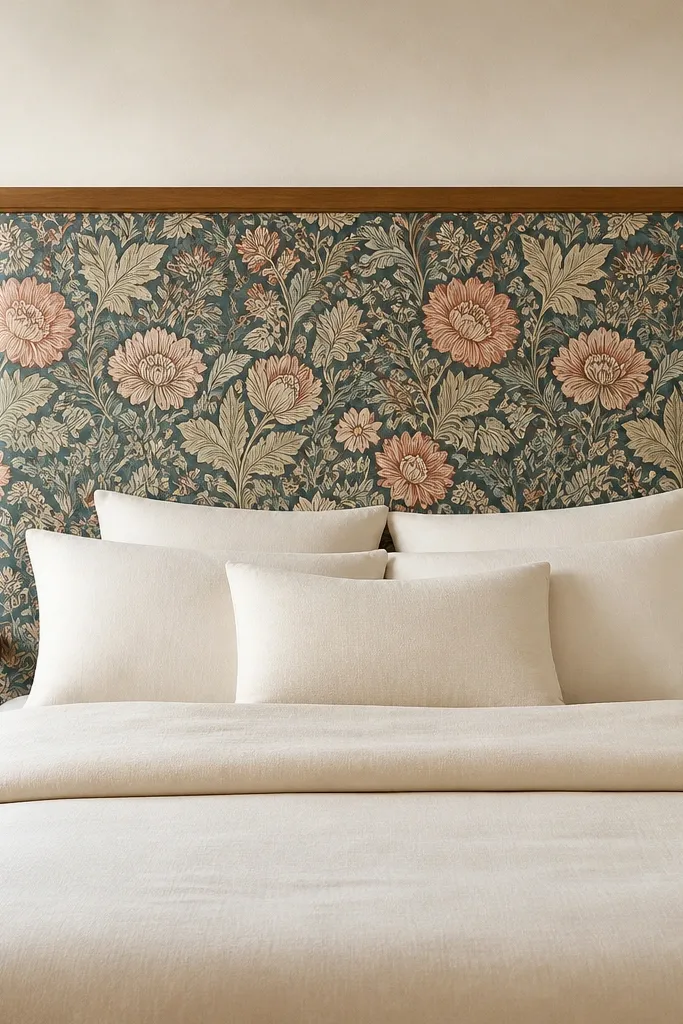
Wallpaper on a headboard looks like custom design when you frame it properly. I use wallpaper with a strong motif and keep the trim narrow so it doesn’t compete with the pattern. The book-end finials at the bottom corners add a built-in “furniture” feel instead of a flat wall panel. This headboard flatters people who want a statement without filling the room with more art. It also works well in bedrooms with plain bedding because the wallpaper becomes your focal point.
Start with a flat plywood panel cut to your desired width and height, then sand smooth and prime with wall primer. Apply wallpaper to the panel using wallpaper paste or a peel-and-stick method, smoothing from the center outward. Trim the edges with a sharp knife and a straight metal ruler. Build a thin frame around the edges using 1x2 wood and glue/screw it to the panel. Add two small decorative finials or book-end style knobs at the bottom corners by screwing them into pre-drilled holes. Seal the wallpaper with a matte clear coat if it’s a washable pattern. Mount with a French cleat so the frame sits flush to the wall.
Use a foam roller to press wallpaper into the panel corners so the pattern doesn’t lift later.
Don’t apply wallpaper directly to raw MDF without priming — it soaks paste unevenly.
18. Rattan Wicker Panel Headboard with Paint-Blocked Sides
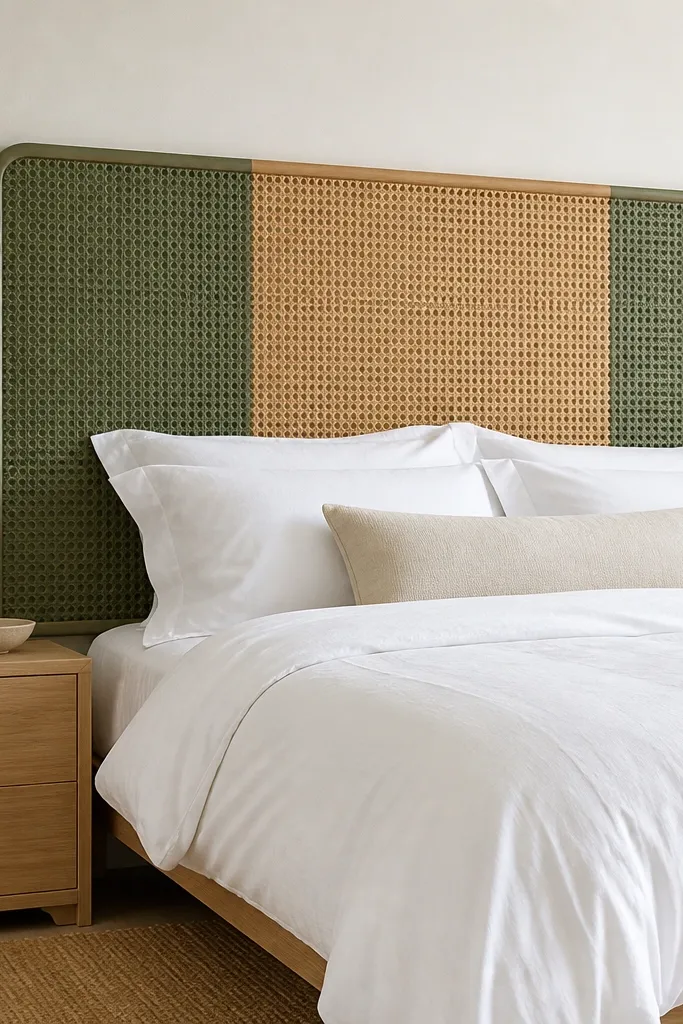
Wicker is already decorative, so the budget win is leaving the center natural and only painting the sides. I use a paint color that matches your room hardware — black, sage, or warm terracotta — and keep the rattan untouched so it stays airy. This headboard looks great for people who want texture without heavy weight. It flatters small rooms because the pattern has gaps that let light through. Pair it with white bedding and a simple throw for the cleanest look.
Start by finding a wicker panel or rattan screen sized slightly wider than your bed, then remove any loose sections. Sand the painted side strips area and prime with adhesion primer. Mask the center rattan and paint only the edges using satin paint on a small roller for smooth coverage. Add a thin backing board behind the panel to keep it rigid, then attach with screws at the frame edges. Seal the rattan lightly with a clear matte spray so it’s less dusty. Mount with two wall brackets or a cleat behind the backing board.
Quick tipSpray paint the edges in thin coats — thick coats can gum up rattan fibers.
One warningDon’t seal the whole rattan with glossy varnish; it turns the texture shiny and less natural.
19. Old Upholstered Chair Back Headboard with Matching Throw Placement
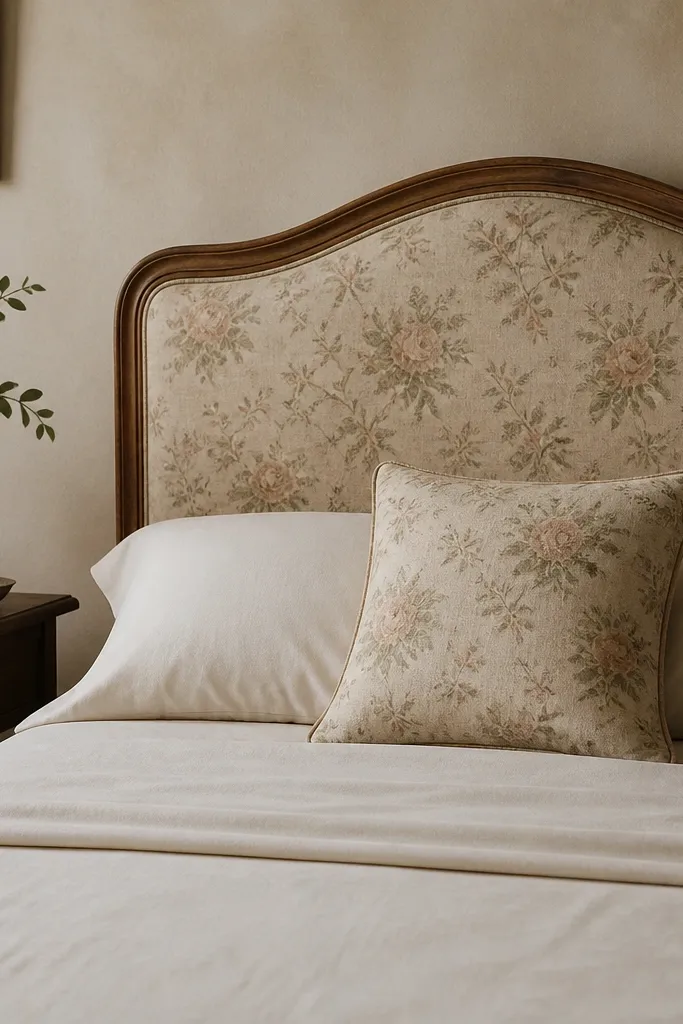
This is my favorite “one piece” repurpose because it already has shape and padding. A chair back has curves that frame your head naturally, and the upholstery gives a finished look fast. I look for chair backs with sturdy springs or firm stuffing so it doesn’t collapse when you lean. This headboard flatters bedrooms where you want softness and a bit of charm, especially with warm neutrals. Style it with one throw pillow that repeats a color from the chair fabric, and the whole bed looks pulled together.
Start by removing any broken legs and checking the chair back frame for wobble. Sand any loose wood edges and prime if you plan to paint the frame. If the chair is already upholstered, clean the fabric with a gentle upholstery cleaner and let it fully dry. Mount the chair back using two strong brackets at the bottom corners and a top hanging method if the chair has a solid rail. Keep the chair centered behind your mattress and adjust so the curved top sits about 10-14 inches above the pillow line. If the upholstery is worn, add a thin new foam layer and re-cover the top panel only, then staple the back neatly.
Take a quick photo of your bed from the side before mounting — you’ll see if the curve sits too high or too low.
Don’t use a chair back with sagging padding — it looks tired and makes the bed area feel unfinished.



