
1. No-Sew upholstered panel on a plywood backing
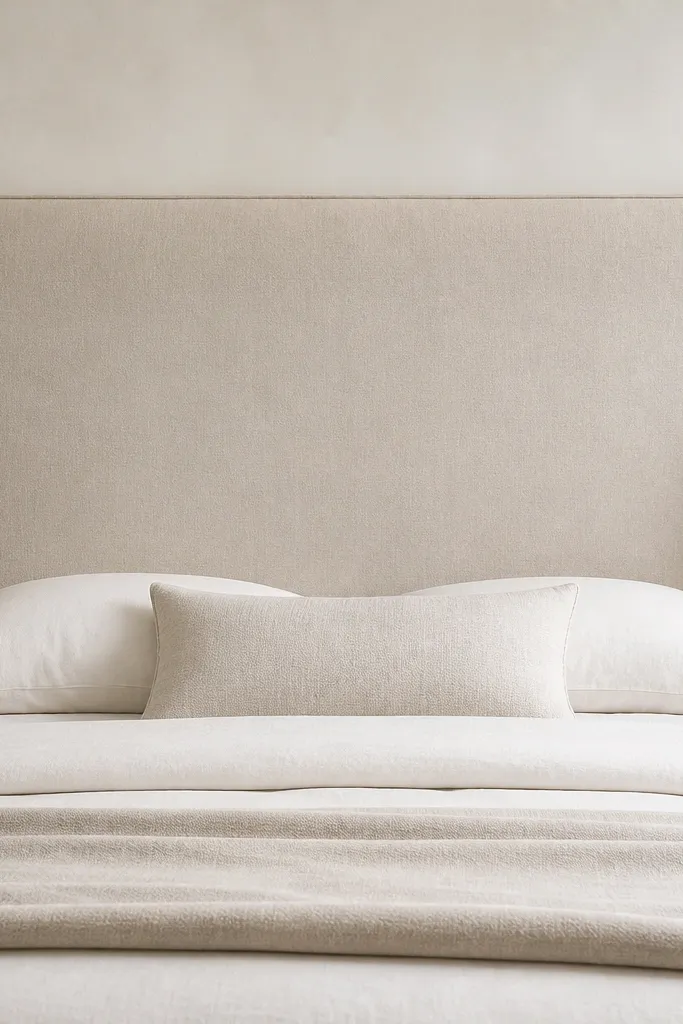
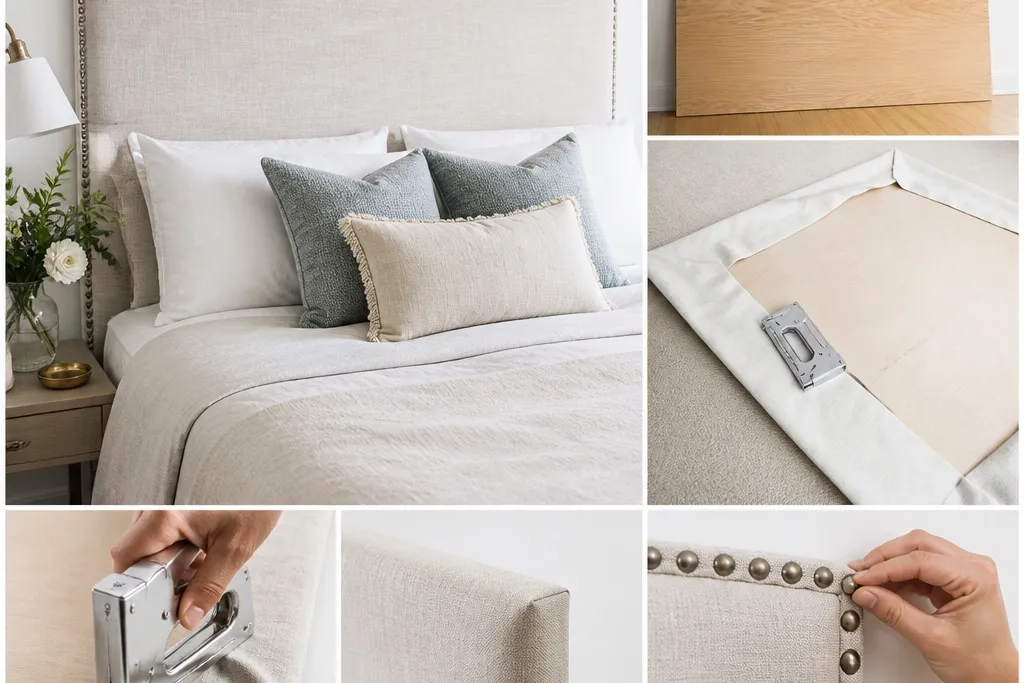
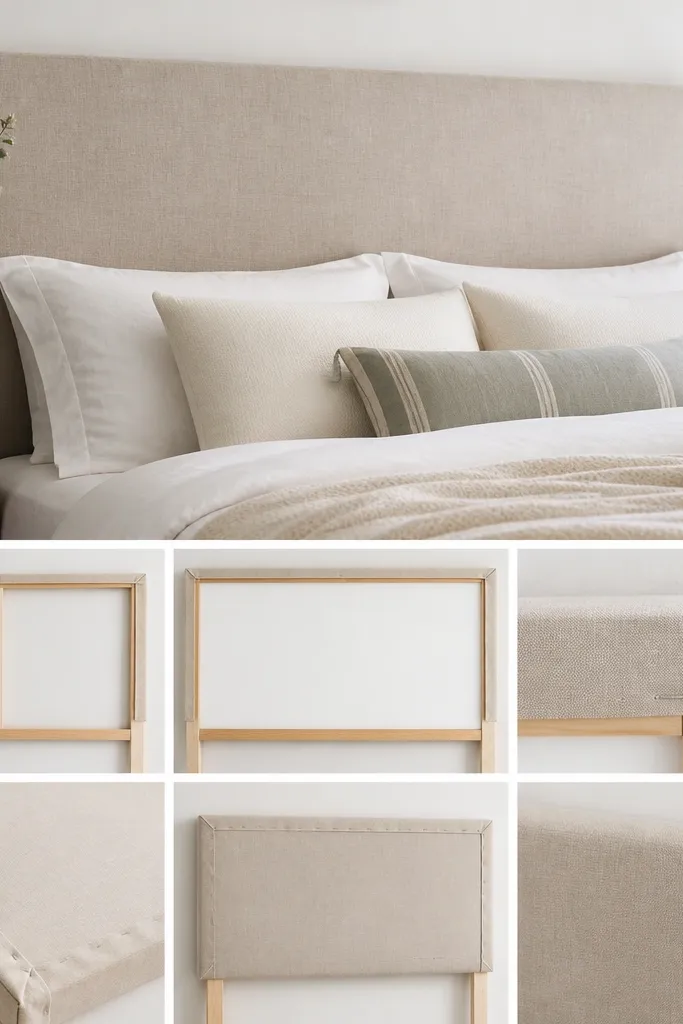
This build gives you the cleanest “store-bought” look because you’re covering a rigid plywood rectangle and keeping the front perfectly flat. I use upholstery cotton or linen blend in oatmeal, cream, or soft greige so the fabric doesn’t cling to every little wave. It looks best in bedrooms with warm wood tones, because the neutral fabric makes the room feel calmer without adding loud color. If your bed is low and you want the headboard to feel taller, go for a slightly oversized panel — it visually stretches the bed up. The styling trick is a thin contrast trim, like black piping or navy bias tape, which makes the shape read crisp even when the room is dim.
Quick tipPress the fabric with steam before cutting so you don’t lock wrinkles into the front.
Start by cutting 3/4-inch plywood to your target size, then sand the edges and wipe off dust. Cut your fabric with a generous overhang — I aim for at least 4 inches on each side so you can pull tight without running out. Lay the fabric face-down, center the plywood, and staple the middle first on the left and right, then do the top and bottom. Pull fabric taut as you staple, smoothing from the center outward so the corners fold neatly like wrapping a gift. Finish by adding a thin trim strip around the perimeter with fabric glue or a small line of hot glue before you cover the back staples.
One warningDon’t skip sanding plywood edges — sharp corners telegraph through fabric and make the surface look cheap.
2. Box-stitched headboard with foam for a tailored look
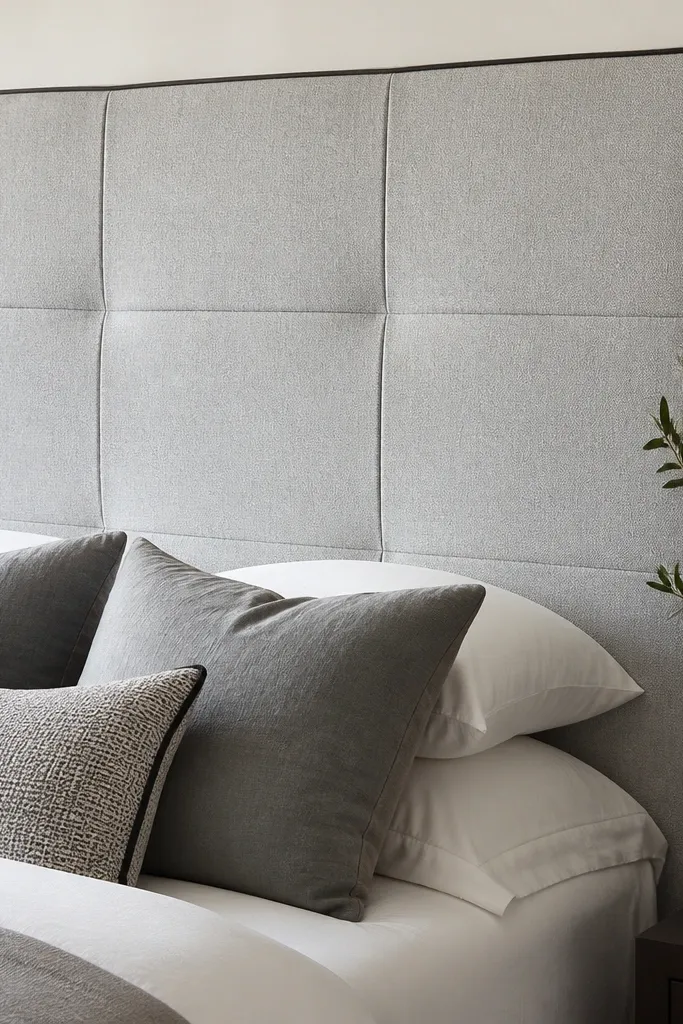
A foam-backed, box-stitched headboard looks structured without needing deep tufting. I’ve used 1-inch foam on top of a flat backing so you get soft cushioning, but the fabric still stretches tight enough to keep the lines straight. This style flatters medium and tall beds because the stitched boxes create vertical rhythm. For skin tones and styling, light gray or warm ivory fabric makes your bedding look cleaner and helps colored pillows pop. Choose a fabric with a visible texture — it hides slight stitch imperfections and makes the whole thing look intentional.
Start with a backing board the same size as your final headboard, then glue a layer of 1-inch foam to the front with spray adhesive. Wrap the foam with a thin batting layer (like cotton or polyester quilt batting) so the fabric pulls smoothly over the foam. Mark your box grid with chalk — for a queen headboard, I like 6 to 8 inch box widths so it doesn’t feel childish. Sew or pin the fabric sections, then stitch lines through the fabric and batting into the backing so the boxes stay defined. Wrap and staple the fabric on the back, then add piping along the edge so the borders look finished.
Use chalk and a ruler to mark straight lines — freehand box lines show up from across the room.
Don’t use thin upholstery fabric — it stretches unevenly over foam and the boxes look wavy.
3. Button-tufted headboard using a simple backing frame
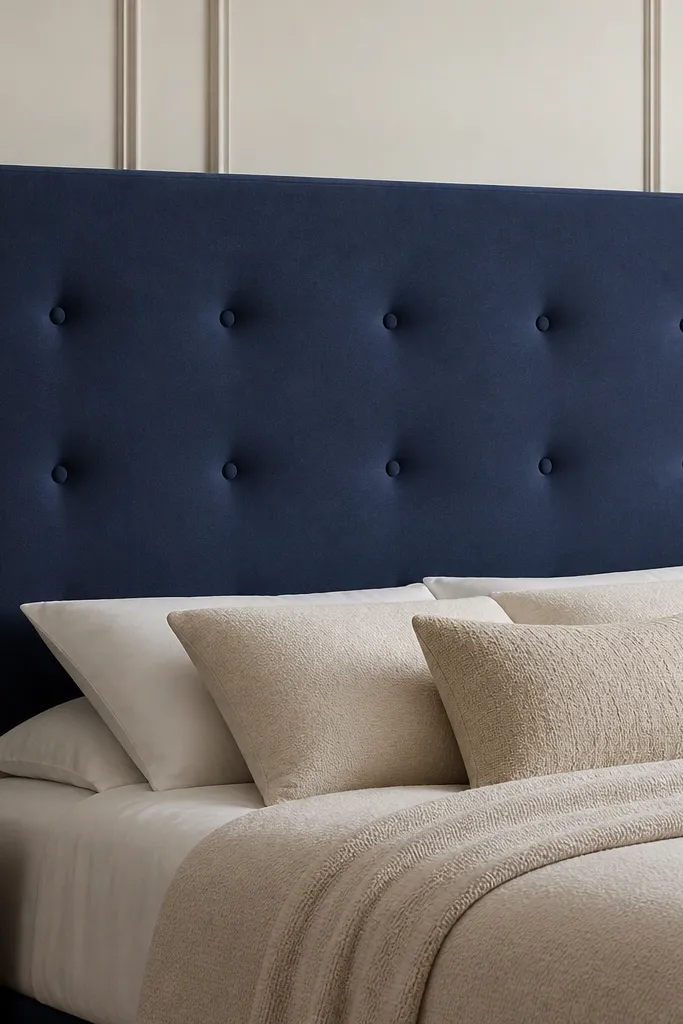
Button tufting reads fancy fast, but you don’t need a complicated wooden frame to get the effect. I build a simple rectangular frame, then attach batting and fabric so the buttons pull evenly. Navy, olive, or charcoal fabric looks best because the dimples catch light and hide minor stitch spacing. This style works great if your bed is against a plain wall and you want the headboard to be the focal point. It also flatters warm lighting — the dimples look richer at night when the bedside lamps are on.
Quick tipTest button spacing on scrap fabric first so your dimples line up where your pillows will land.
Start by building a rectangular frame from 1x2 lumber sized to your headboard, then staple a thin mesh or burlap to the front to hold the batting. Glue batting in layers — I use about 1 to 1.5 inches total — then wrap your fabric loosely over the front. Mark button locations with a template — for a queen, I like spacing around 9 to 10 inches center to center. Use a tufting needle or sturdy upholstery needle with a strong thread, push through to the back, then pull tight and knot around a button anchor or a staple. Cover the back with a fabric panel, then add a clean edge wrap so the front buttons look centered.
One warningDon’t pull buttons too tight — if the fabric puckers hard, it looks strained and cheap.
4. Draped fabric headboard with weighted hem
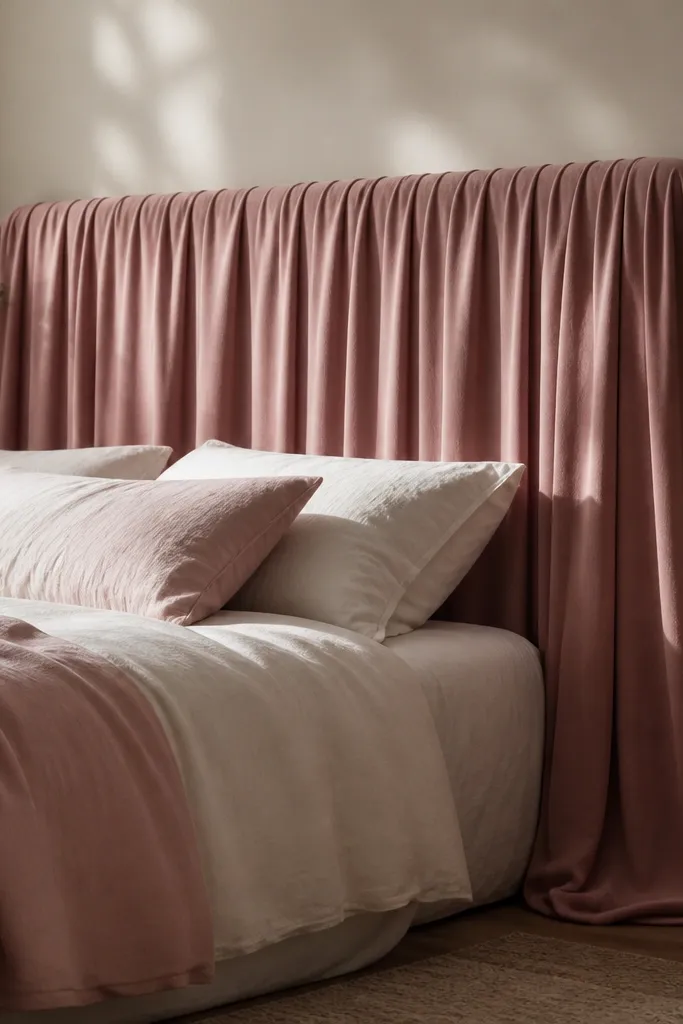
If you hate stiff, boxy headboards, draped fabric gives you softness without foam or tufting. I use medium-weight linen or linen-cotton blend and add a weighted hem so it falls in controlled folds instead of curling upward. This style looks great in bedrooms with lots of textiles — think quilts, knit throws, and layered pillow covers. For people with small rooms, draped fabric adds height without looking bulky because it creates movement. Choose a color that matches your bedding undertone so the folds don’t fight your patterns.
Quick tipSteam the fabric after hanging; drape looks best once it relaxes for a full hour.
Start by mounting a straight fabric rod or a series of wall hooks at your desired headboard height. Cut fabric wide enough for movement — for a queen bed, I use fabric that’s about 1.75 to 2 times the bed width. Sew or glue a weighted hem at the bottom edge using lead-free curtain weights or a fabric weight strip inside a narrow channel. Pin the top edge to a flat backing strip or hem it onto a rod pocket so it hangs evenly. Adjust fold spacing by pulling fabric gently at the top until the drape looks balanced from both sides, then secure the edges.
One warningDon’t hang lightweight fabric without weights — it twists and turns into messy loops.
5. French seam fabric headboard with clean edges
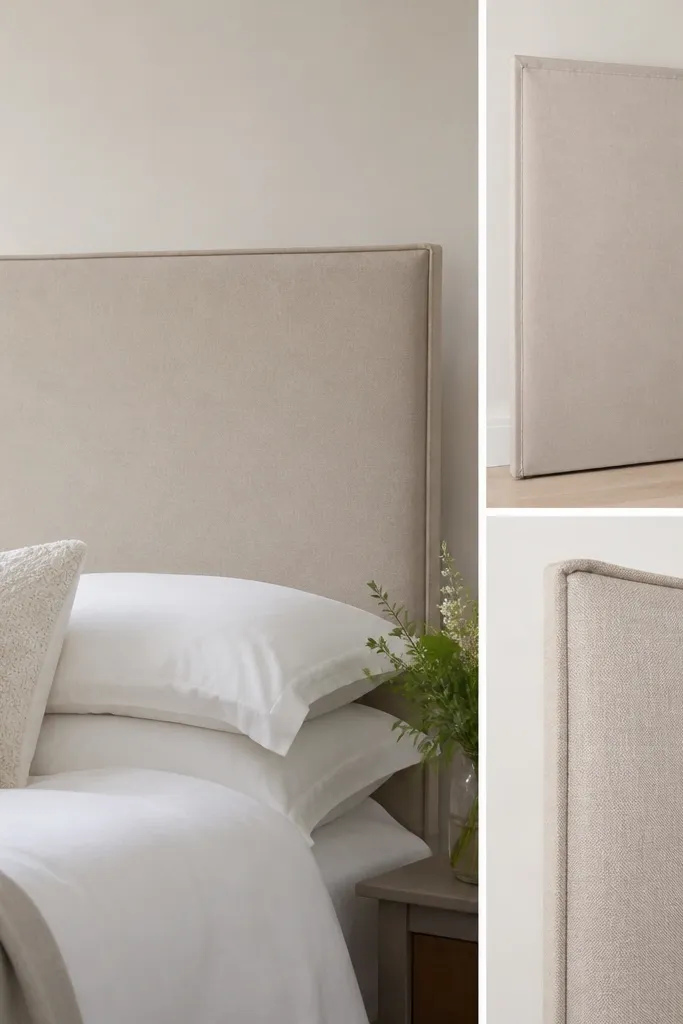
This is the “I sewed this carefully” look, and it hides messy edges behind a neat seam finish. French seams work best on medium-weight cottons or linen blends that hold shape when pressed. It flatters modern bedrooms because the front reads crisp and the edges don’t look thick. I recommend this when you want the cover to be removable for cleaning, because you can swap the fabric without rebuilding the whole headboard. Choose a fabric with a subtle pattern or solid color — patterns hide seam line differences but solids show tension issues, so press hard.
Quick tipPress every seam with a hot iron before you assemble — French seams look best when the crease is sharp.
Start with a backing board cut to size, then wrap it with batting and a simple fabric layer that won’t be seen. Measure the front cover panels and sew them with French seams — sew wrong sides together first, trim the seam, press, then sew right sides together for the final seam. Create a top and bottom hem so the cover sits flat and doesn’t sag. Fit the cover over the backing and secure it with a hidden zipper or hook-and-loop at the back edge. Add a strip of trim along the perimeter to cover the boundary where the cover meets the backing.
One warningDon’t stretch fabric while sewing French seams — it warps the edge and the headboard looks crooked.
6. Rope-tied upholstered headboard for a rustic modern vibe
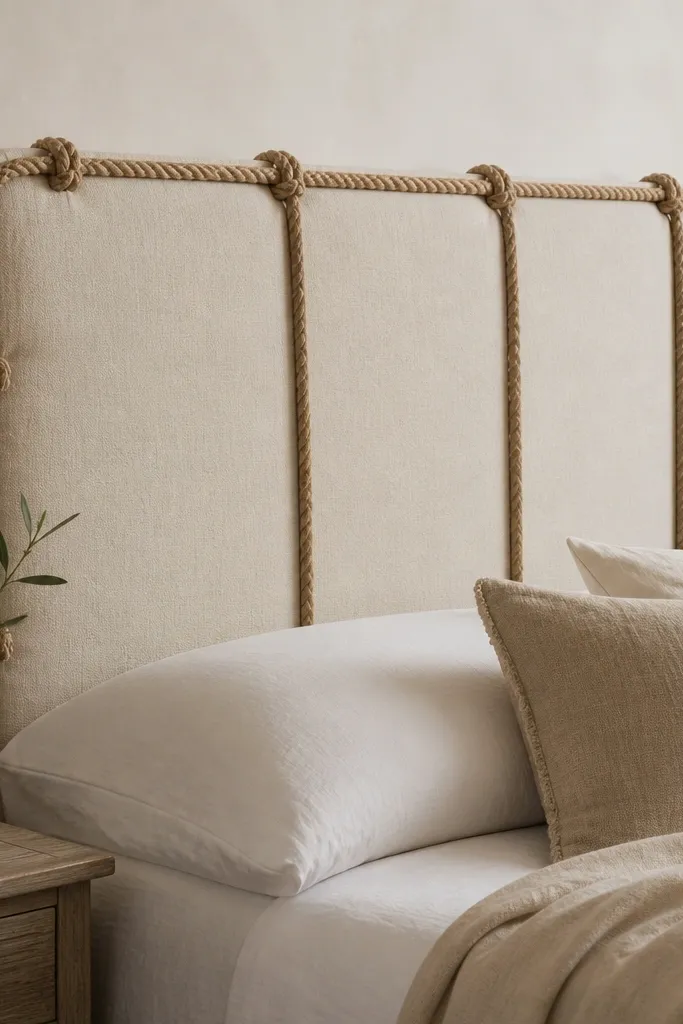
Rope-tied headboards look intentionally handmade, not “I ran out of supplies.” I use jute or cotton rope and staple it in tension points so it creates gentle lines across the fabric. Canvas fabric in beige, tan, or off-white keeps the texture consistent and prevents the rope from looking too harsh. This style flatters farmhouse rooms and also works in modern spaces if you keep the rope color natural and the fabric solid. The visual effect comes from contrast: the rough rope against a smoother woven canvas.
Start with a plywood backing and cover it with batting so the fabric doesn’t sit flat and scratchy. Pull upholstery fabric tight and staple it on the back, then trim the excess. Mark vertical rope tie points — I like two to four lines depending on headboard width. Wrap rope around the back and tie it off with a firm knot, then bring it to the front and secure with small staples or upholstery tacks where the rope touches. Add a perimeter rope border by looping it around the edges and tying at the back so the front looks continuous.
Use a rope thickness around 1/4 inch so it shows texture without swallowing the fabric lines.
Don’t use a silky rope — it slides and the tie points look sloppy after a week.
7. Slipcover-style headboard with elastic corners
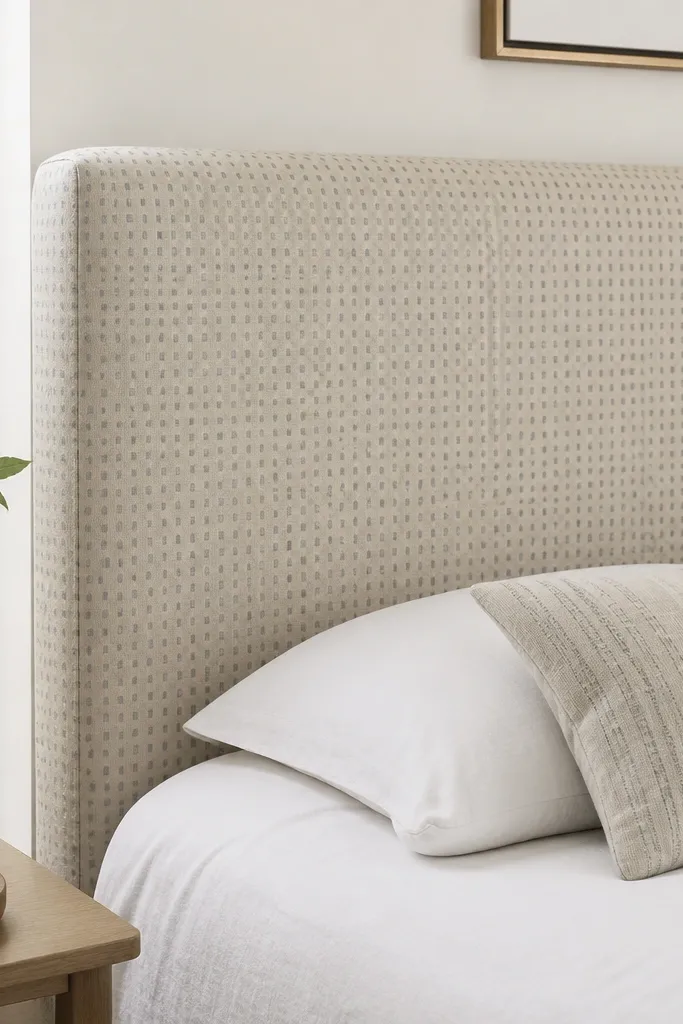
Slipcover-style headboards are a lifesaver when you change bedding seasonally or have kids who smear things on the front. I use a cover pattern that wraps around the backing with elastic at the corners so it stays taut without constant tugging. It’s especially flattering when you use a playful small-scale print because the cover stays neat and the pattern looks deliberate. For bedrooms with frequent laundry, this method saves you from reupholstering. Choose a fabric that can handle washing — cotton poplin, cotton sateen, or a washable canvas.
Quick tipUse a zipper foot on your sewing machine — tight seam work around corners looks cleaner.
Build or buy your backing panel, then add batting if you want softness on the face. Sew a cover from two side panels and one front panel, leaving an opening on the back for elastic insertion. Install elastic in channels at the corners — cut elastic strips about the width of your corners and stitch them into the channel so the fabric pulls tight. Fit the cover onto the backing and test the tension by pressing down at the corners; adjust before final stitching. Finish the back edge with a simple closure like hook-and-loop so you can remove it quickly.
One warningDon’t skip elastic — a cover without corner tension turns into baggy folds in the first week.
8. Folded fabric rosette headboard using stacked pleats
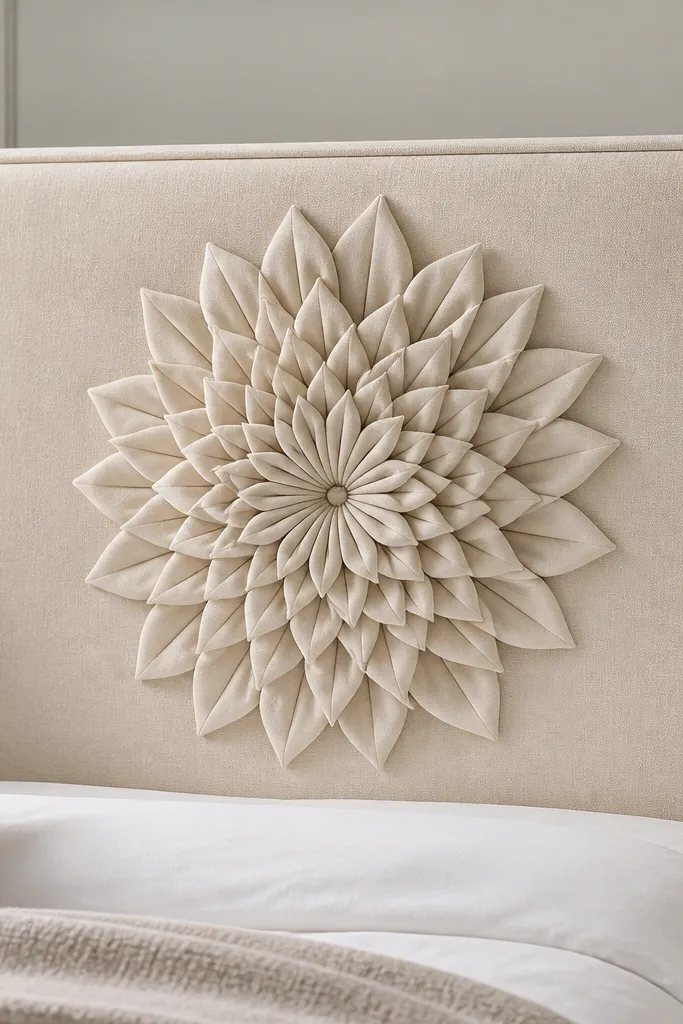
This one looks like decor you’d pay a lot for, but it’s mostly careful folding. I use a solid fabric like ivory cotton or soft blush for the rosette so the folds read clearly, then pair it with a simple neutral backing fabric. It flatters bedrooms that need a focal point but don’t want full tufting or button work. If you sit up in bed and want something decorative behind your pillows, the center rosette draws the eye upward. Keep the rest of the headboard plain so the rosette doesn’t compete with your bedding patterns.
Start with a simple upholstered backing panel, then cut a circle or oval base for the rosette. Make fabric strips and fold them into petals by pressing a narrow fold, then pinning and stitching the base edge to hold the shape. Build petals outward in a spiral, stacking slightly so each fold overlaps the one below. Glue the rosette onto the headboard front with fabric glue, then stitch a few hidden tacks through the backing to lock it in. Trim the edges of the rosette base so you don’t see raw fabric, and finish the headboard border with a narrow trim strip.
Use a fabric that holds creases — cotton and linen blends make cleaner petal folds than slippery synthetics.
Don’t make petals too thick — bulky rosettes look heavy and lose the delicate flower effect.
9. Quilted fabric headboard with stitched channels
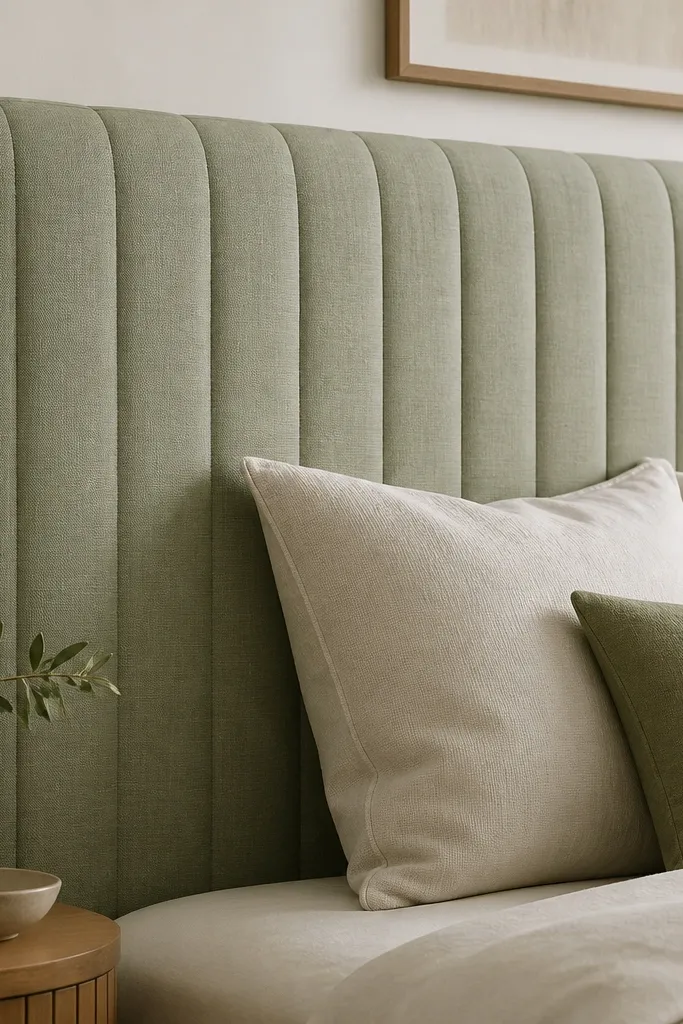
Quilted channels give you plush texture without the bulk of deep foam tufting. I like this for bedrooms where you want comfort but still want clean geometry. Sage, dusty green, or warm taupe looks great because quilt stitching adds dimension even in low light. This style flatters people who use simple bedding — the quilting becomes the pattern. It also hides minor fabric wrinkles because the quilting lines break up surface movement.
Quick tipUse a walking foot if your sewing machine has one; it keeps the layers from shifting during quilting.
Start with a backing board and add a layer of batting — I use 1/2 inch for a soft quilted face. Wrap your top fabric over the batting and staple it to the back, then pull tight and trim. Mark channel lines with chalk — for a queen, I use straight lines spaced about 6 inches apart. Stitch through the fabric and batting along each channel line, then tie off at the back or bury threads between layers. Finish the perimeter with piping or a folded fabric border to cover the stapled edge.
One warningDon’t stitch only the face fabric — if you don’t catch the batting, the quilting looks flat and hollow.
10. Herringbone bias-wrapped headboard edge
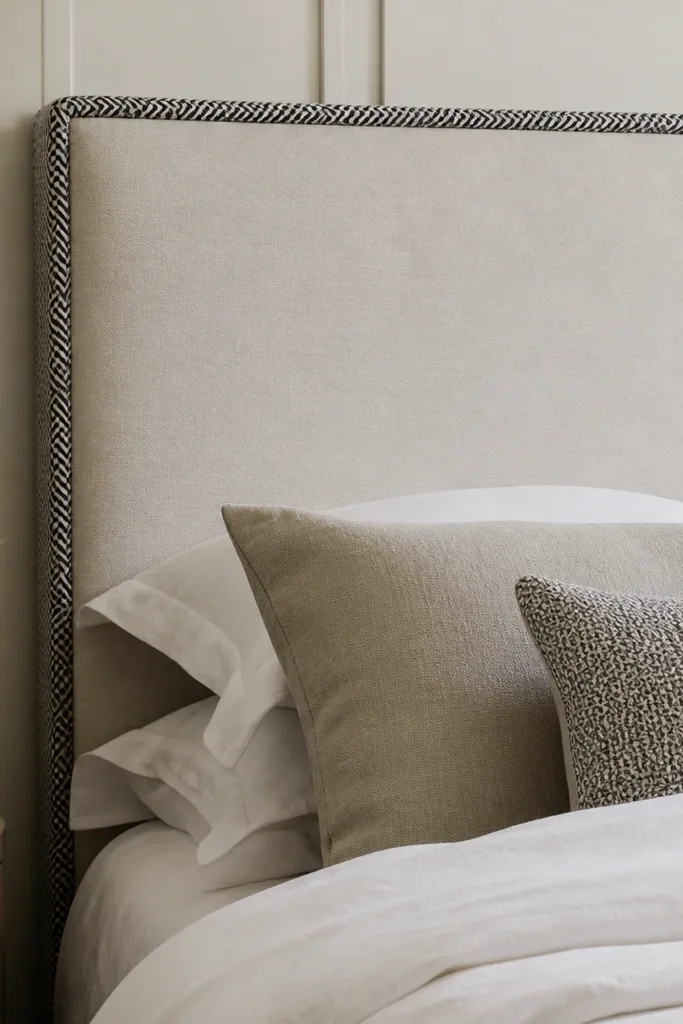
This is my favorite “cheap fix that looks planned” approach. The front stays minimal, but the herringbone bias trim around the perimeter makes the whole piece look tailored. I pair a solid neutral fabric like ivory or light gray with black-and-white bias trim so the edge reads crisp from across the room. This works especially well for small bedrooms because the headboard doesn’t take up visual attention — the trim does. If your bedding has black accents, this trim ties everything together without adding extra pattern.
Build a basic upholstered panel headboard with batting and a tight front — focus on getting the face smooth. Cut bias trim or buy pre-made herringbone trim long enough for the full perimeter plus extra for corners. Apply fabric glue or small hot glue dots along the edge seam where the fabric meets the backing, then press the trim into place. For corners, cut 45-degree miter folds so the pattern lines meet cleanly; pin them while the glue sets. Finally, cover the back edge with a thin fabric strip so the trim attachment points don’t peel.
Press the bias trim lightly before attaching so it lays flat at corners.
Don’t skip mitering corners — straight-cut corners make the trim look like it was taped on.
11. Velvet banded headboard with horizontal stripes
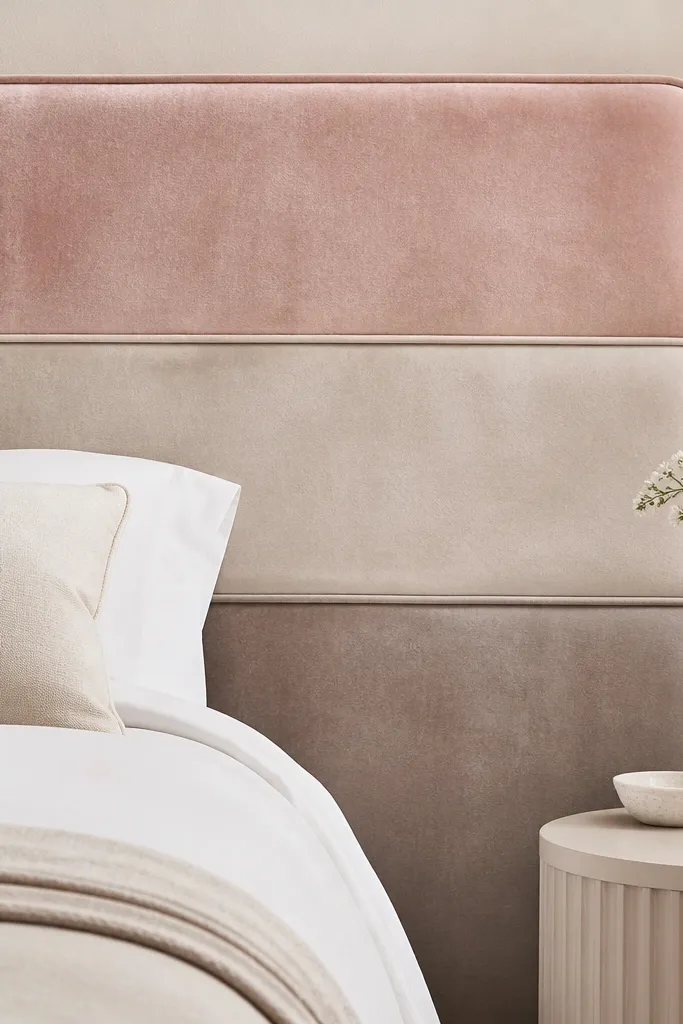
Velvet headboards look expensive because the fabric changes color as you move past it. I keep the design simple: horizontal bands in two or three tones, separated by thin piping or narrow trim. This flatters bedrooms with warm lighting because velvet glows at the edges and softens hard lines. Choose blush and sand, or charcoal and smoke gray, depending on your bedding. It’s also forgiving — if your stripes are slightly off, velvet hides it better than matte fabrics.
Quick tipUse a soft brush to lift velvet pile after cutting so the face looks even.
Cut your backing panel and add batting so the velvet has body. Cut velvet bands to the same height, then align them on the front with chalk marks — I like 4 to 6 inch bands for a queen headboard. Sew or glue the band edges together, then press seams carefully on low heat using a pressing cloth. Add piping along each seam line with fabric glue so the bands look separated and intentional. Wrap and staple the whole assembly on the back, then trim any excess velvet pile so it doesn’t get caught in staples.
One warningDon’t use low-quality velvet with loose pile — it sheds and makes the headboard look worn fast.
12. Macrame-backed fabric headboard insert
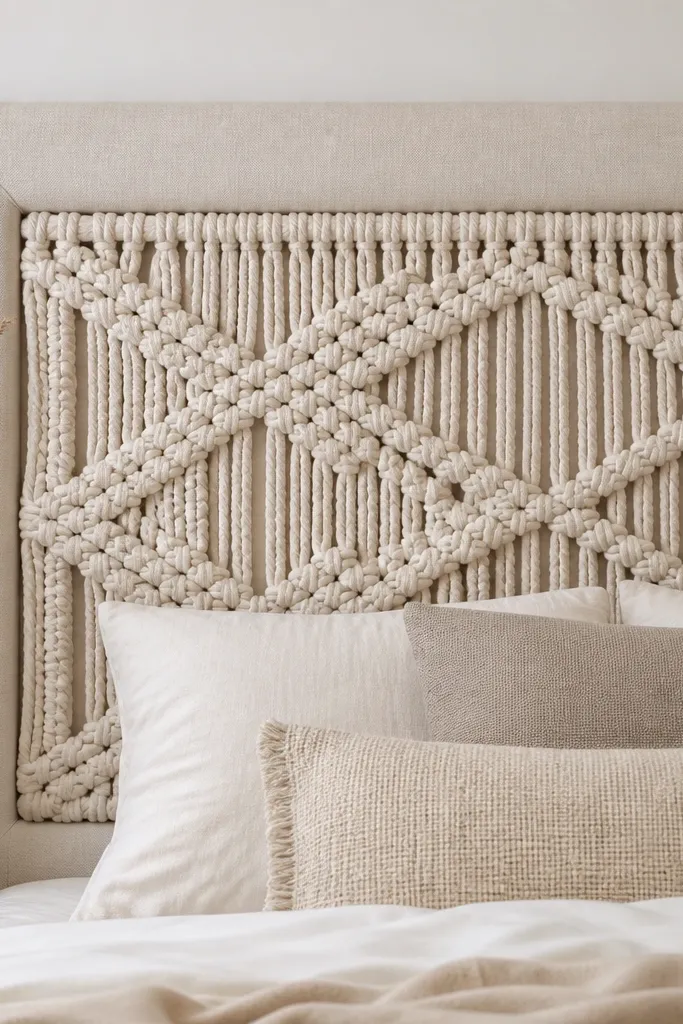
Macrame inserts make a headboard feel handmade without needing a full wall of knots. I mount a macrame panel onto a backing board and then frame it with fabric so it looks finished from every angle. This style flatters boho bedrooms, but it also works with modern bedding if you keep the frame neutral. Natural cotton macrame looks best with light linen or cream upholstery fabric so the texture reads clean. The key is balance: macrame has visual weight, so you need a simple frame and tidy edges.
Quick tipHang the macrame panel and let it settle for a day before final attachment so the knots relax.
Start with a plywood backing sized to your bed width, then cover it with batting and a plain fabric layer. Center the macrame panel on the front and pin it in place so it hangs straight. Secure the macrame to the backing using small upholstery tacks or strong thread through the knots — avoid pulling knots tight so the panel stays airy. Frame the edges with a strip of fabric trim — I use folded cotton twill or linen tape — and glue it around the perimeter. Finish by covering the back with a thin fabric sheet so the knots and tacks don’t show.
One warningDon’t attach macrame directly to raw wood without fabric — it scratches and looks unfinished.
13. Reversible headboard cover with two fabrics
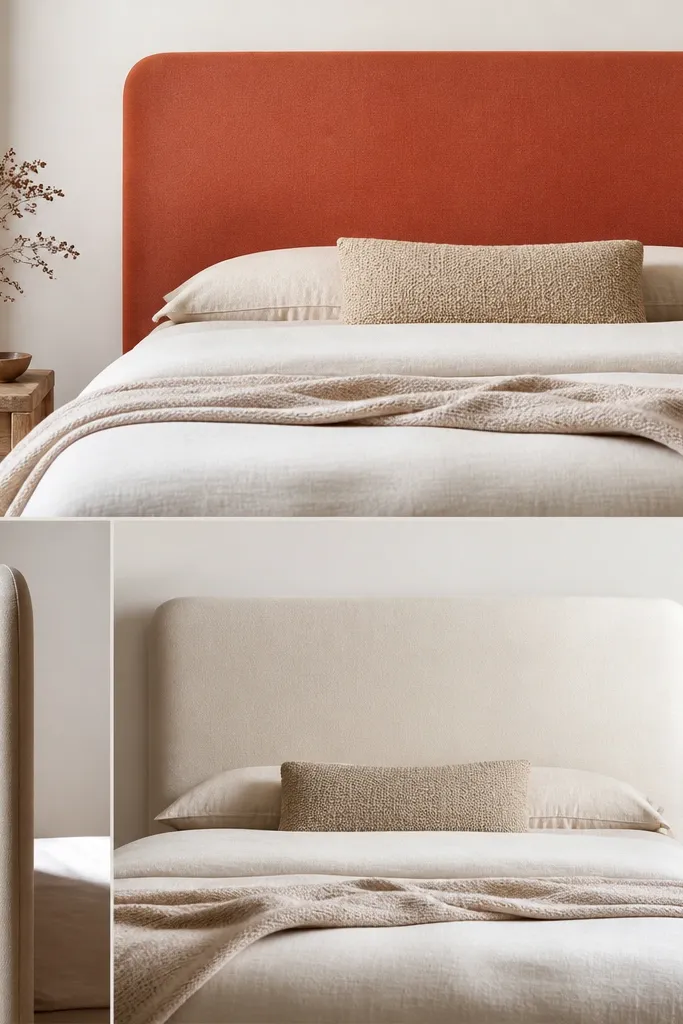
A reversible headboard is the quickest way to change the mood of your bedroom without buying new decor. I build it by making a cover that has two fabric faces and a centered closure on the back, so you can flip it like a pillow sham. This flatters people who switch bedding colors — terracotta on one side and cream on the other gives you two seasons in one. Choose fabrics with similar weights so the drape stays consistent. The look becomes more polished when the edges are the same size on both sides and the closure is hidden.
Start with a sturdy backing panel and batting, then measure the front face area. Cut two fabric rectangles — one for each side — add seam allowance, and sew them together with a hidden zipper or hook-and-loop closure placed on the back edge. Turn the cover right-side out and press the seam so the edges look crisp. Fit the cover over the backing and secure the closure behind the headboard so it doesn’t show from the front. If you want extra durability, stitch the cover to the backing with a few hidden tacks at the corners only.
Use hook-and-loop instead of a zipper if you want faster flips and fewer zipper failures.
Don’t pick two fabrics with very different stretch — one side will pull tighter and the headboard will look uneven.
14. Stitch-and-roll headboard with continuous fabric roll border
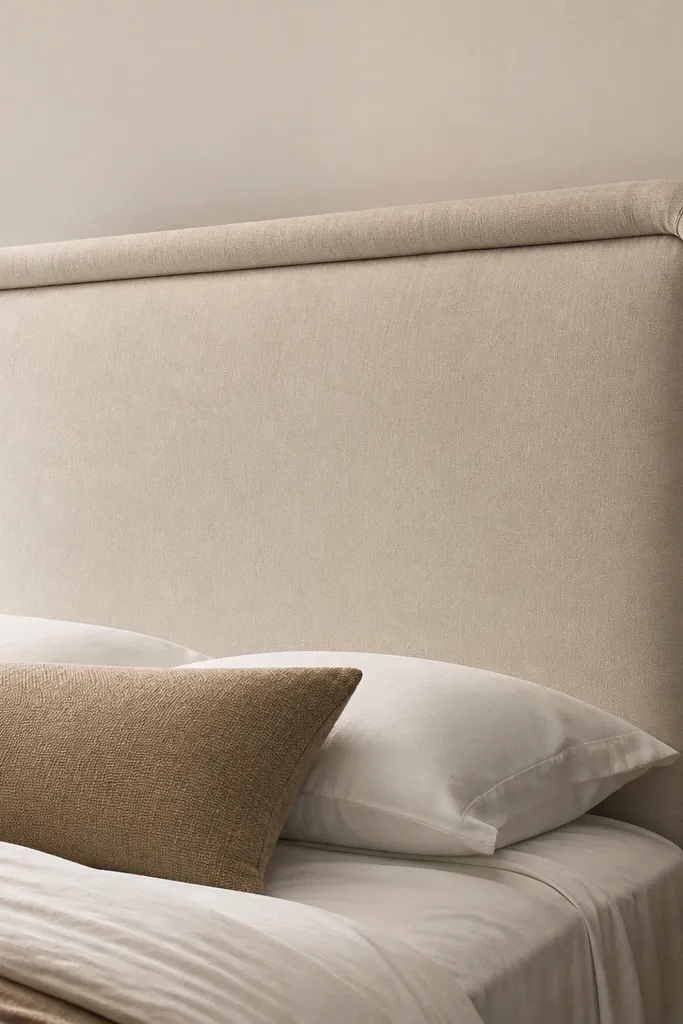
A rolled fabric border makes a simple headboard look custom because it creates a soft shadow line. I’ve used it on matte cotton and canvas because the round edge gives the piece a premium finish. This style flatters modern rooms where you want clean shapes but don’t want hard, sharp edges. It also looks good with patterned bedding because the border acts like a frame. Stick to one fabric for the border or match it closely to your front panel so it reads intentional.
Build your upholstered panel headboard with batting, then keep the front face smooth and tight. Cut a strip of fabric for the roll border — about 1.5 to 2 inches wide — and wrap it around a thin cording or foam strip. Stitch along the edge of the cording so the roll stays round and doesn’t flatten when you install it. Apply fabric glue along the perimeter seam and press the roll into place, then pin until set. Cover the back staples with a backing fabric strip so the roll border looks neat from every angle.
Use thin cording around 1/4 inch so the roll looks rounded instead of bulky.
Don’t use thick foam for the roll — it makes the border look like a gasket and the headboard feels clunky.
15. Taut fabric tuftless headboard with vertical channel tucks
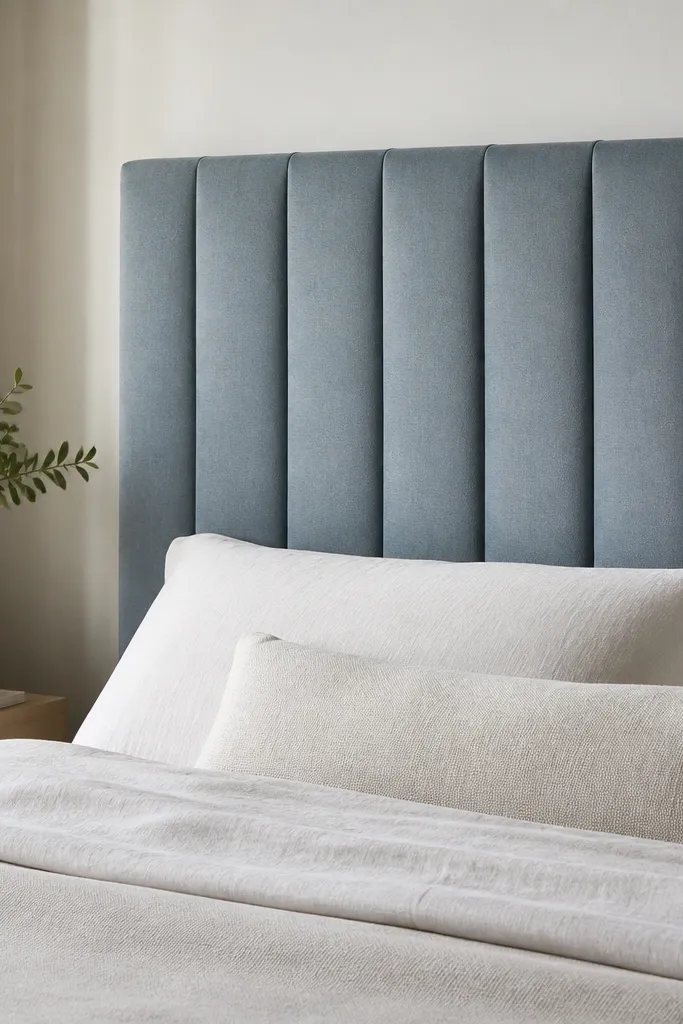
If you want structure without buttons, vertical channel tucks are my go-to. They create a tailored texture that looks great with solid bedding and simple pillow shapes. I use medium-weight fabric like cotton twill or upholstery linen blend so the channels stay crisp and don’t collapse. This style flatters narrow spaces because the vertical lines visually lengthen the wall behind the bed. It also hides small unevenness in wall alignment because the front texture draws focus forward.
Quick tipUse a fabric chalk that wipes clean, then test it on scrap so it doesn’t stain.
Start with a backing board and batting, then wrap your fabric tightly on the front. Mark vertical tuck lines — for a queen, I like 3 to 5 channels spaced evenly, depending on how wide you want the texture. Fold fabric along each line so the tuck creates a small ridge, then pin and stitch through to the backing. Keep the stitches tight and consistent so channels look parallel instead of random. Finish by stapling the back edges cleanly and adding a simple trim strip around the perimeter.
One warningDon’t overstuff batting — too much padding makes channels blur and look sloppy.



