
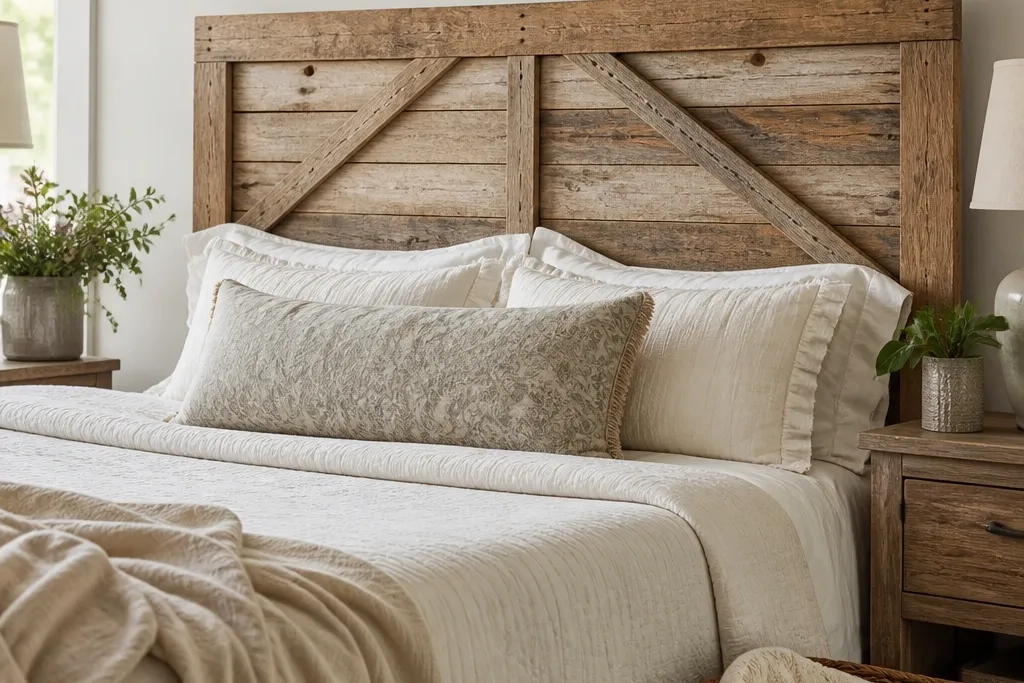
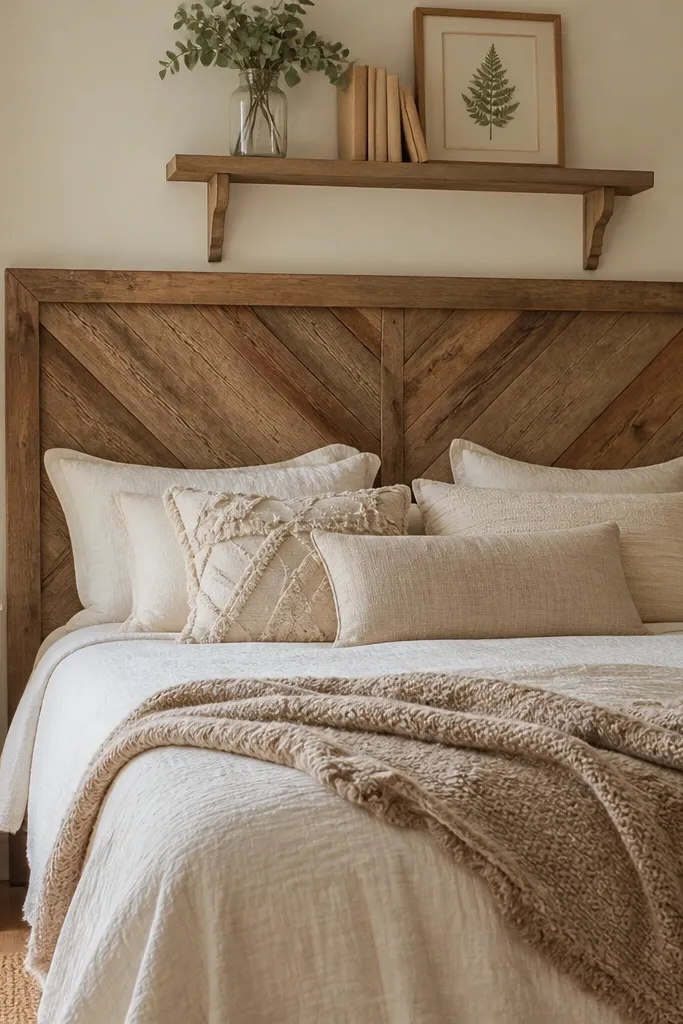
1. Reclaimed-style board headboard with half-lap frame
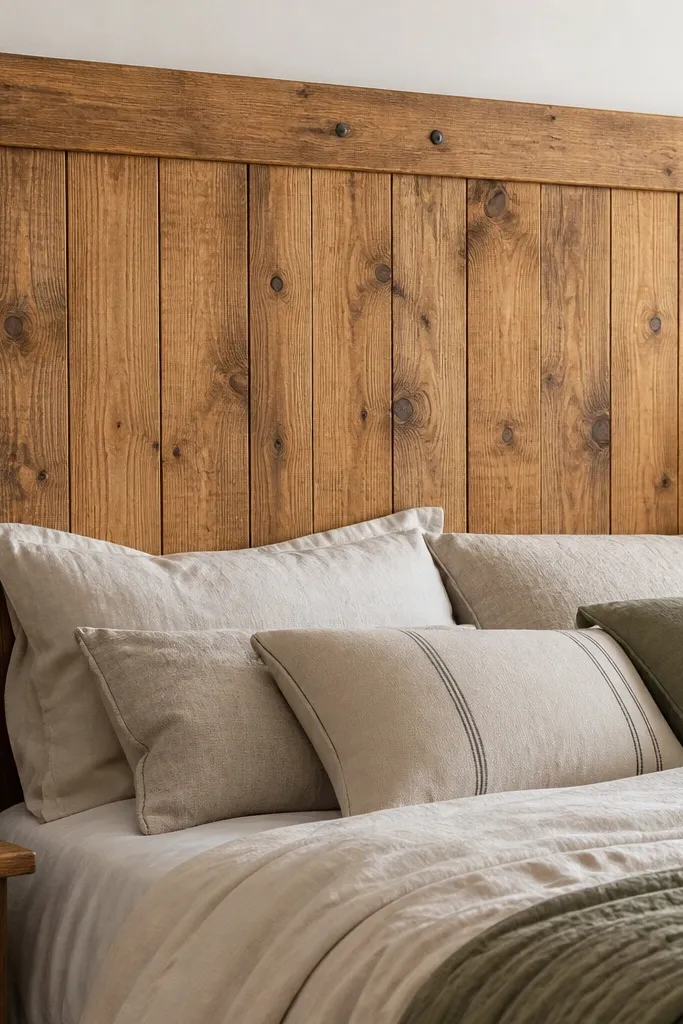
This is the farmhouse look that reads cozy because it has weight and shadow. Use 1x8 or 1x10 pine boards for the front and build a 2x2 frame behind them so the slats don’t warp. I like a half-lap style frame where the frame pieces overlap the panel edges — it hides gaps and makes the whole thing feel sturdier than a basic flat board. It flatters beds with a simple frame and works especially well in rooms with warm beige walls and dark trim, because the honey wood softens the contrast.
Quick tipIf you want it to look older, sand only the edges and corners to “wear” the contact points, not the whole face.
Start by cutting your frame rails to match your bed width minus 1 inch so it doesn’t overhang the nightstands. Lay your vertical boards on a flat surface and mark spacing — I use 3/4 inch gaps for a chunky, farmhouse rhythm. Build the half-lap joints on the frame so the panel boards sit flush and the front stays smooth. Stain with a honey or weathered oak tone, then seal with a matte water-based clear coat so the grain stays warm under light.
One warningDon’t rely on pocket screws alone — without a back frame, the boards will pull apart after you lean against them.
2. Shaker panel headboard in warm white with black pulls
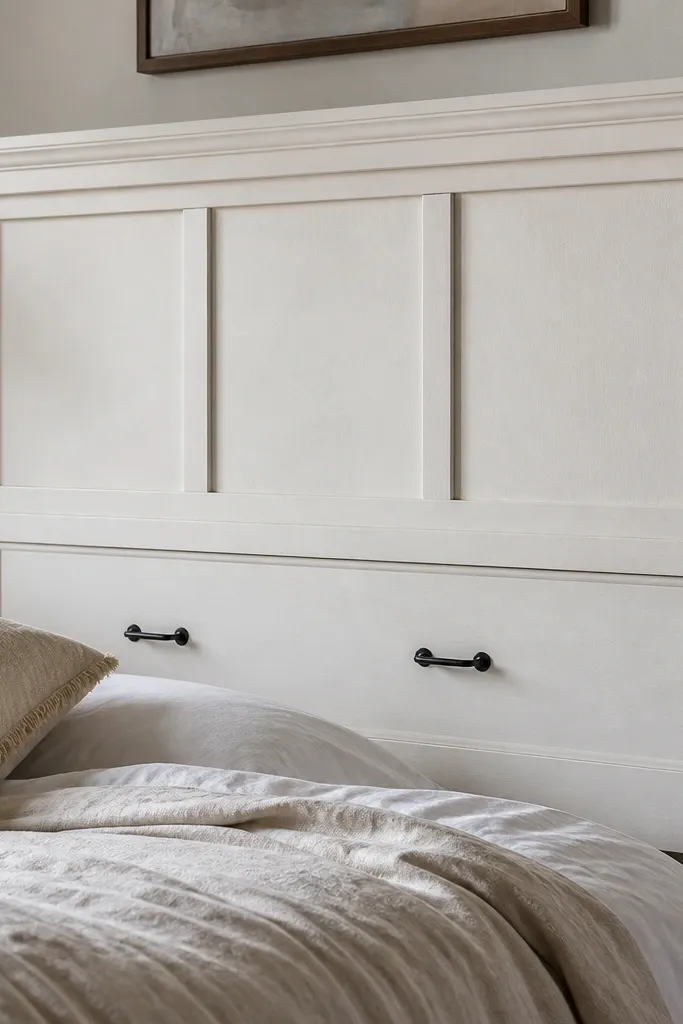
This one makes a room feel tidy and cozy at the same time. The shaker pattern gives you structure, while the warm white paint keeps it soft instead of stark. I’ve done this for guest rooms because it looks clean even when the sheets are just okay — the headboard handles the “finished” feeling. It flatters people who like neutral bedding and black accents, and it looks great with light wood floors because the white doesn’t fight the space.
Start with a plywood base cut to your headboard size, then glue and nail on 1x2 trim strips to create the shaker grid. Sand the trim edges so the corners feel smooth when you touch them, not sharp. Paint with a warm white cabinet paint and a foam roller to keep brush marks controlled. Install two matte black pulls on the lower panel after the paint fully cures, then add corner brackets to mount into wall studs or into a bed frame ledger.
Use painter’s tape to mask trim lines and pull it off while the paint is still slightly tacky for crisp edges.
Avoid glossy paint — it turns the trim highlights into glare and kills the cozy vibe.
3. Pallet slat headboard with diagonal brace
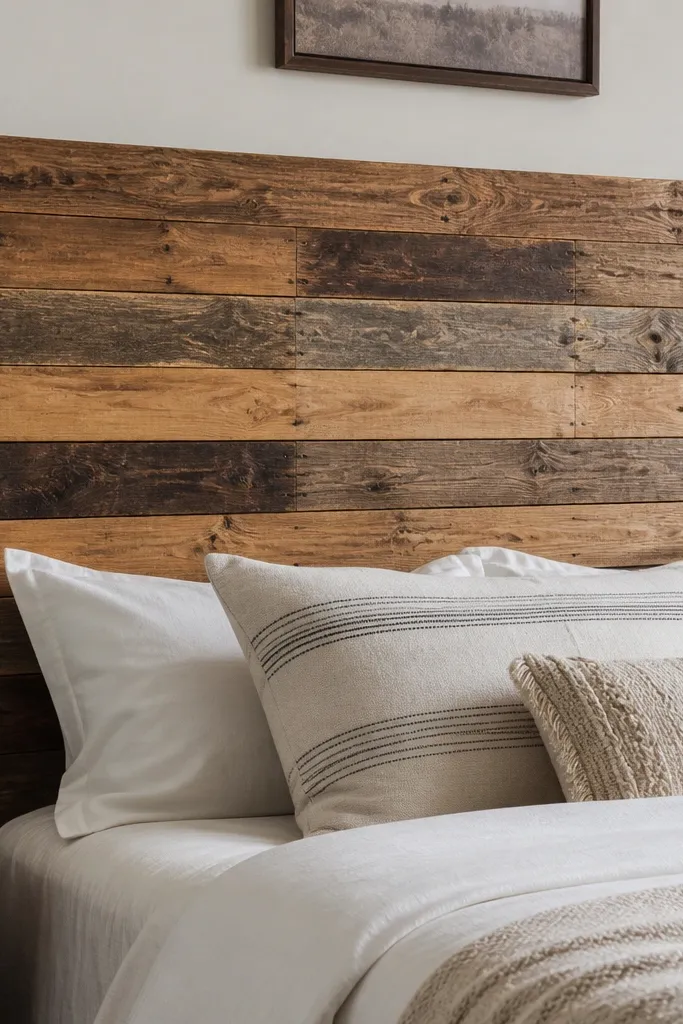
Pallet wood looks farmhouse because it has history, but the diagonal brace is what makes it feel solid. Horizontal slats create a grounded look and hide minor variations in wood thickness. I’ve built this for people who like a lived-in style but still need something that survives real leaning — the brace keeps it from flexing. It works best with warm gray walls, cream bedding, and chunky knit throws because the texture reads cozy instead of messy.
Quick tipSand down only the slat faces — keep the edges slightly more worn so it reads authentically pallet, not “new wood aged.”
Start by disassembling pallet boards and sorting them by thickness, then plane or sand the worst ones so your slats sit level. Cut a back frame from 1x3 lumber and add a diagonal brace from top corner to opposite bottom corner. Attach slats horizontally with 1.5-2 inch spacing so it looks rustic but not sparse, then stain with a dark walnut wash to unify tones. Seal with matte clear and mount using two heavy-duty L-brackets into studs or into a ledger on the bed frame.
One warningDon’t skip sorting thicknesses; uneven slats make the headboard look crooked even when the frame is straight.
4. Linen-tufted foam panel headboard with nailhead trim
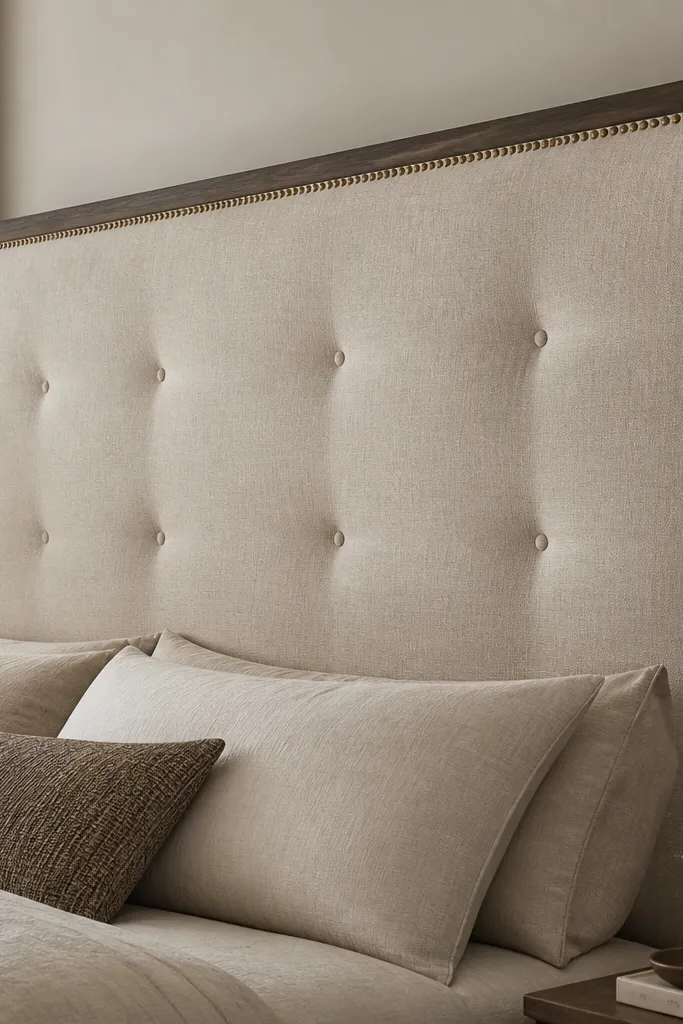
This is the cozy headboard when you want comfort for sitting up in bed. Foam-backed tufting makes the wall feel cushioned, and linen adds that farmhouse softness without turning into a giant quilt. I’ve used this look in rooms with white walls and dark floors because the linen warms the space instantly. It’s also great for people who lean their head back while reading — the tufted surface gives a little give instead of feeling like hard plywood.
Start with a plywood core cut to size, then screw a 1x2 frame around it so fabric edges have something to wrap. Add 2-inch high-density foam, trim it flush, then wrap with linen using a staple gun — pull fabric taut but don’t stretch so tight it puckers. For tufting, mark button locations, push upholstery buttons through, and secure from the back with string or upholstery clips. Add nailhead trim along the perimeter and mount with French cleats for a clean, wall-hugging look.
Use upholstery thread and practice on scrap fabric first so your button pulls sit evenly.
Don’t use thin foam — it collapses and the tufting looks flat after a few weeks.
5. Board-and-batten headboard with X brace back
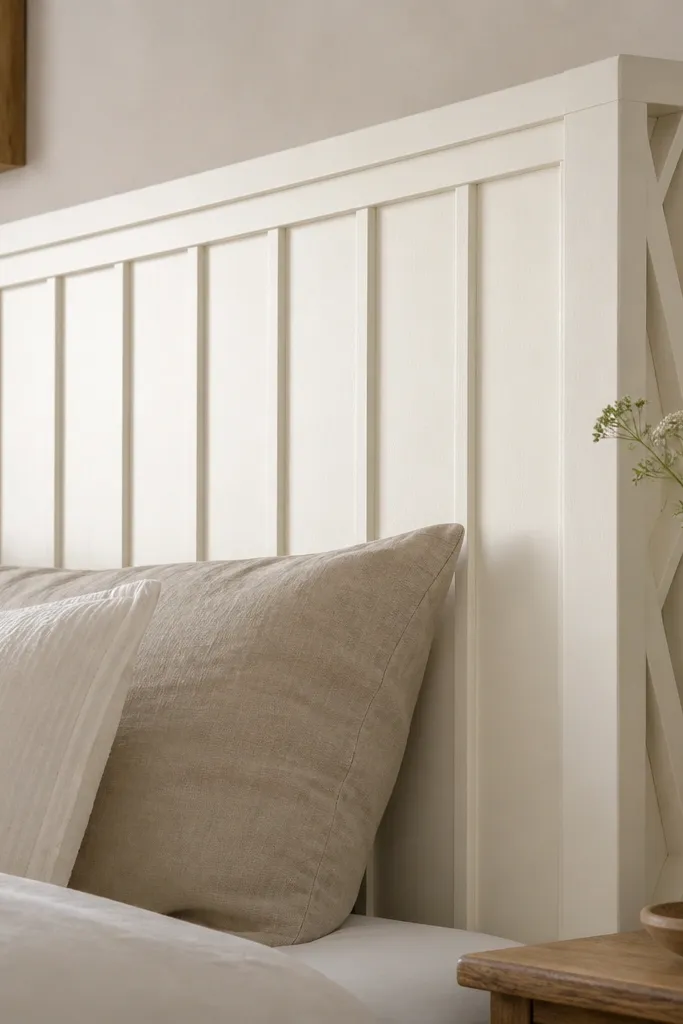
Board-and-batten reads farmhouse because it’s all about rhythm, and the X brace means it stays straight. The off-white paint makes it cozy, while the vertical lines make the wall feel taller. I built one of these for a narrow bedroom and it made the bed area look bigger without adding visual clutter. It suits slim beds and low nightstands because the vertical pattern pulls the eye up.
Quick tipMark your batten lines with a speed square and pencil before you apply glue so spacing stays perfect.
Start with a plywood panel, then glue and nail 1x2 battens onto it at consistent spacing — I like 3 inches between battens for a bold farmhouse look. Build a simple outer frame from 1x3 boards and add an X brace on the back with 1x2 diagonal strips. Paint with a creamy off-white and lightly sand the edges after curing for a subtle worn look. Mount with two or three wall cleats depending on width so it doesn’t tilt when you sit up.
One warningAvoid eyeballing spacing; uneven battens make the whole headboard feel amateur.
6. Barn door slat headboard with sliding hardware look
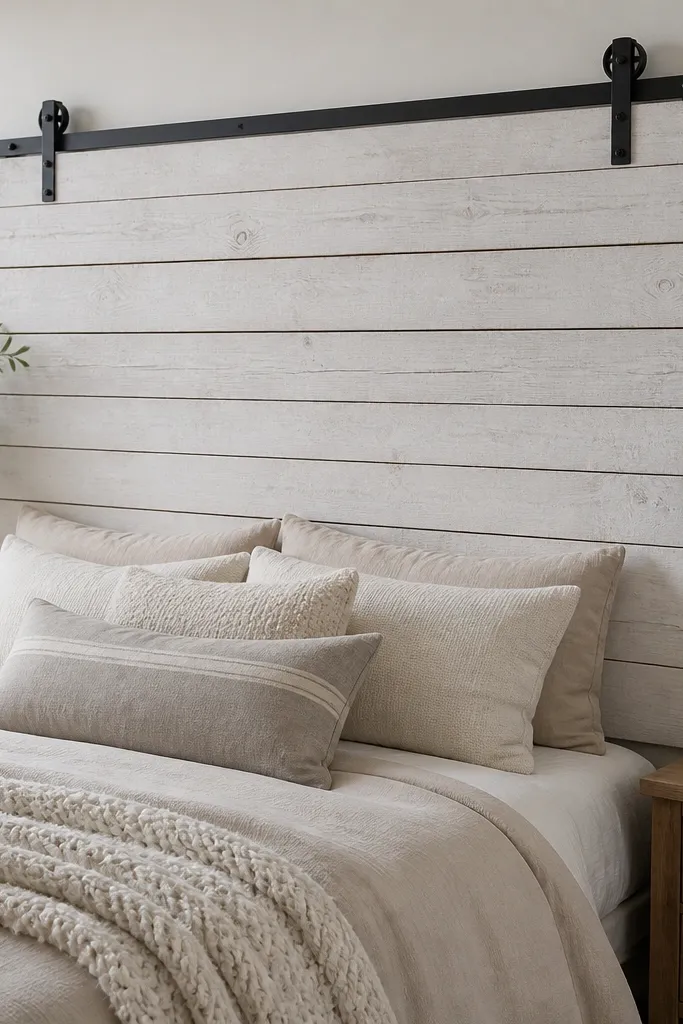
This is farmhouse with a little attitude, and it still reads cozy because the slats are light and the finish is soft. The black metal hardware gives you contrast, but the whitewashed wood keeps it from feeling harsh. I used this style in a room with a plain bed frame and it instantly made the bed area look like a feature wall. It’s great if you like industrial touches paired with warm textiles.
Start by building a slat panel on a back frame using 1x3 or 1x4 slats with 1/2 to 3/4 inch gaps. Whitewash with a thinned paint and a rag so the grain shows through, then seal matte. Mount the headboard to the bed frame or wall ledger, then attach a decorative black track on top so it looks like a barn door. Add a faux handle made from a black pipe elbow or a cabinet pull mounted to the right side.
Pick one metal finish and stick to it — matte black looks best with whitewash wood.
Don’t use glossy clear coat; it makes the whitewash look plastic.
7. Woven cane and wood frame headboard
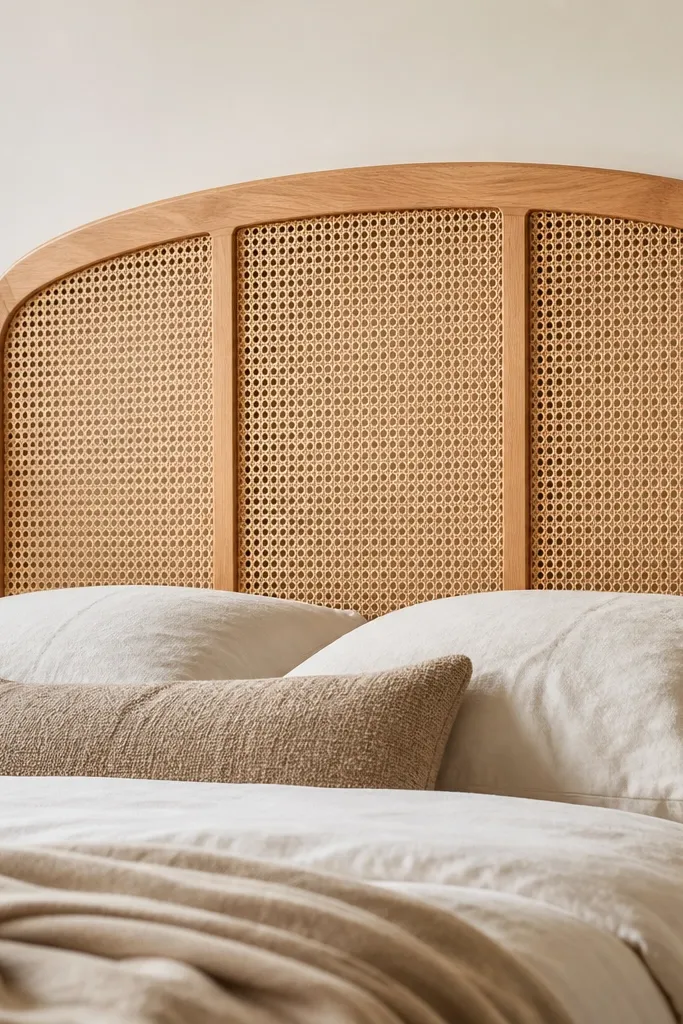
Cane adds farmhouse coziness because it’s breathable-looking and softens hard lines. When you pair it with a warm wood frame, it reads like a natural material piece, not like a craft project. I’ve done this for bedrooms that feel too heavy with dark furniture — the cane opens the visual space. It flatters airy, neutral bedding and works well for people who want texture without big fabric bulk.
Build a rectangular frame from 1x3 lumber, then cut cane sheets or cane panel strips to fit the openings. Leave a small gap around the cane so it can sit without buckling — I aim for 1/8 inch clearance. Staple cane to a thin backing panel, then attach the backing inside the frame with small screws. Finish the wood with honey stain and matte topcoat, then mount with a cleat system so the cane stays flat against the wall.
Wear gloves when handling cane; the edges can be sharp and you’ll avoid splinters.
Don’t pull cane too tight — it will sag or split after humidity changes.
8. Quilted drop-cloth headboard with rope trim
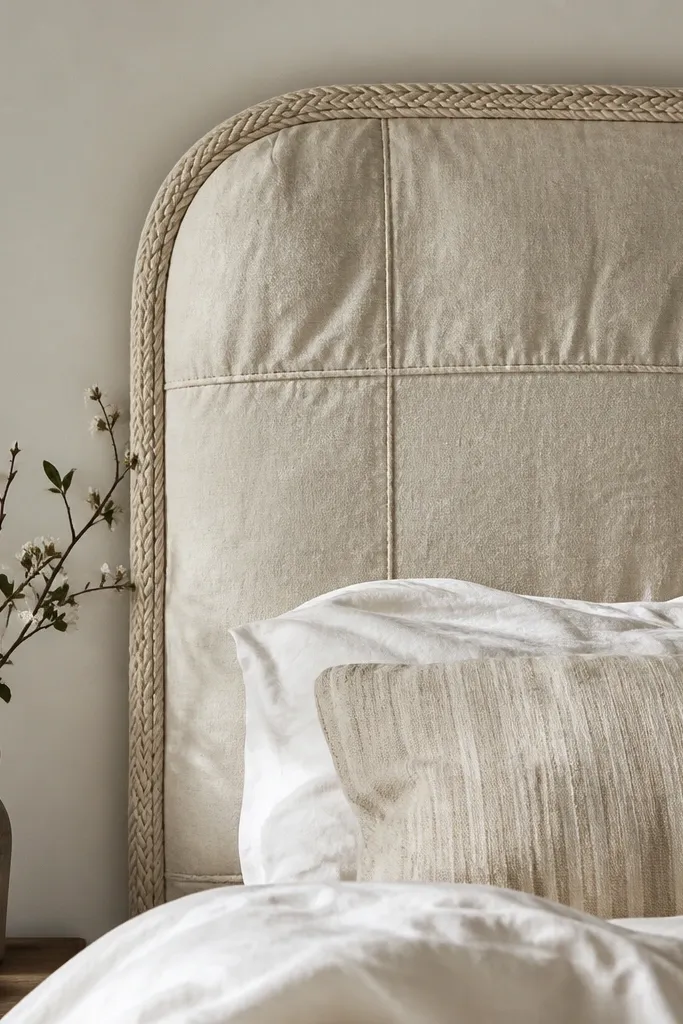
This is my go-to when someone wants farmhouse cozy without buying expensive upholstery fabric. Drop cloth has a rough, natural texture that looks right in daylight, and quilting turns it into a headboard you can lean on. The rope trim adds a finished edge that looks nautical but reads farmhouse when paired with warm wood and cream bedding. It’s especially good for kids' rooms or guest rooms because the fabric hides small scuffs.
Start with a plywood core and screw a 1x2 frame around it. Cut batting and a layer of drop cloth, then quilt in a grid using a chalk line and a long quilting stitch on a sewing machine. Wrap the fabric around the back and staple, pulling evenly so corners don’t bubble. Add rope trim by gluing it along the perimeter and securing with small brads if needed, then mount with corner brackets.
Pre-wash drop cloth so it shrinks before you quilt — your stitch lines will stay straight.
Avoid thin batting — it makes the headboard feel flat and you lose the cozy cushion effect.
9. Faux shiplap headboard using MDF panels and scoring
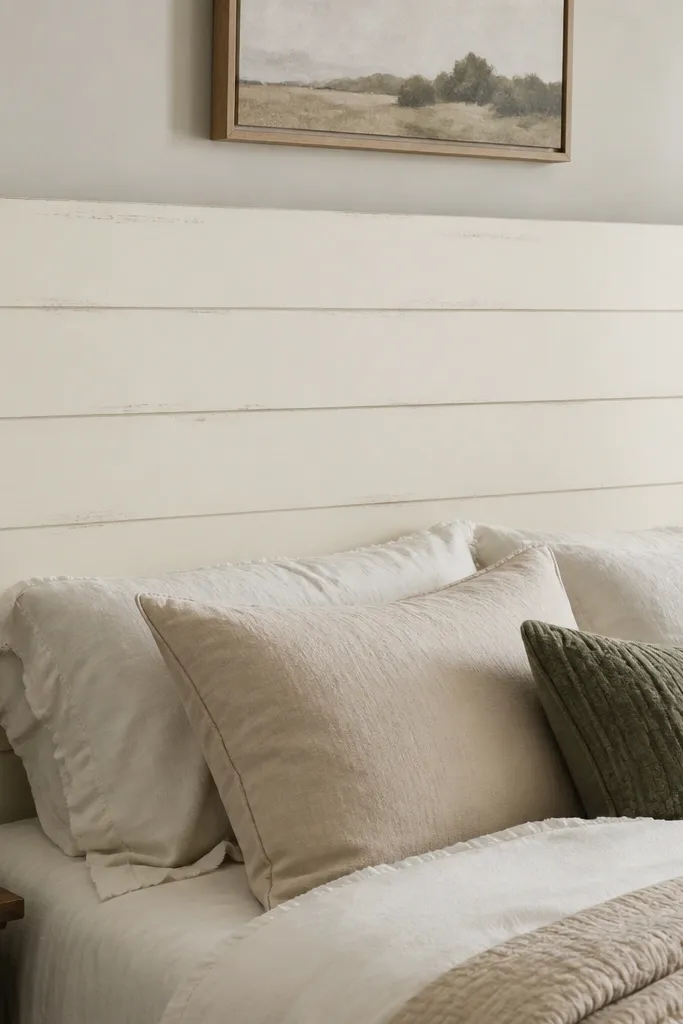
If you want farmhouse texture without the weight, faux shiplap is the way I’d choose. The grooved lines catch shadows like real boards, and painting it warm white keeps it cozy. I like this for renters because it’s easy to mount and you don’t need to hunt reclaimed wood. It also works well with bedding that’s more modern — the texture gives you farmhouse warmth without turning the whole room into a cabin.
Start with MDF cut to headboard size and mark board widths — I use 4 inches with 1/8 inch gaps. Use a utility knife and a straightedge to score shallow grooves, then sand lightly so edges look smooth. Paint with warm white and add side rails from stained 1x2 boards for warmth. Install a wall ledger and hang with screws through the back support blocks so it stays straight.
Do a test board: score one section, paint, and check the shadow effect under your room lighting.
Don’t make grooves too deep; they look like scratches instead of shiplap.
10. Rattan panel headboard with farmhouse arch top
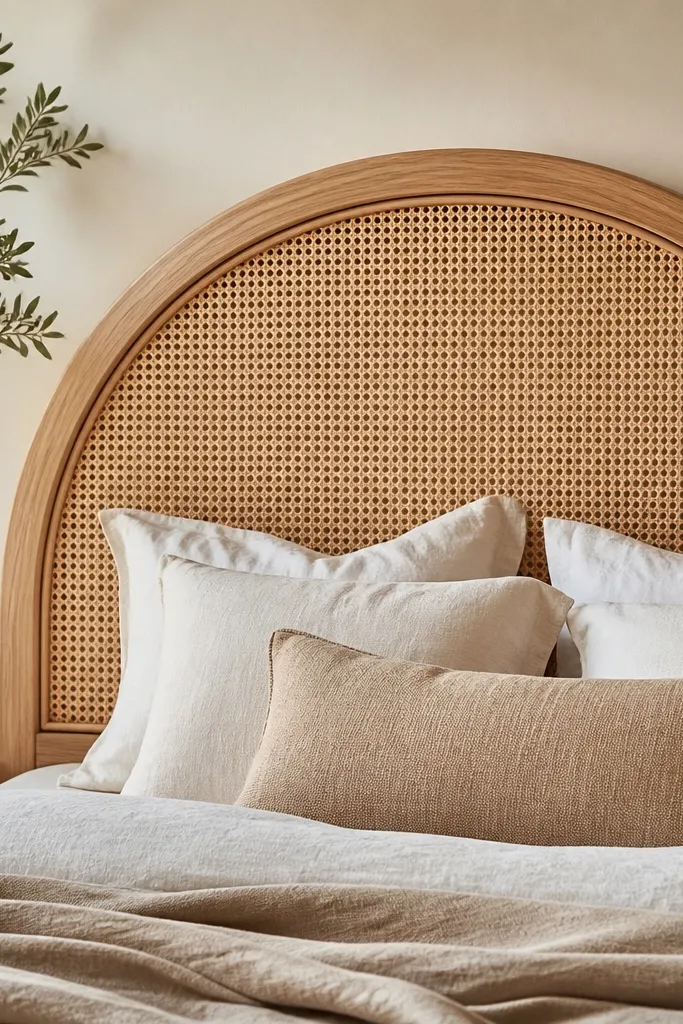
An arch top plus rattan is the farmhouse cozy combo that feels both soft and elevated. The arch gives you a gentle silhouette that looks good with floral bedding and neutral curtains, and rattan brings that woven warmth. I built one for a room with low ceilings and it made the space feel taller because the arch pulls the eye upward. It’s also forgiving if your wall isn’t perfectly flat because the frame can sit slightly proud with spacers.
Draw an arch template using a scrap piece of plywood and trace it onto your frame stock, then cut with a jigsaw. Build the frame with 1x2 or 1x3 lumber, and install rattan inside with a thin backing panel. Finish the wood with light honey stain and matte sealer, then secure the headboard to a wall ledger using at least two mounting points per side. For extra stability, add a center support block behind the rattan panel so it doesn’t flex.
Keep the rattan sheet flat while cutting — curling edges look sloppy unless you weight them overnight.
Avoid painting the rattan — it loses texture and turns plastic-looking fast.
11. Rustic wood and burlap curtain panel headboard
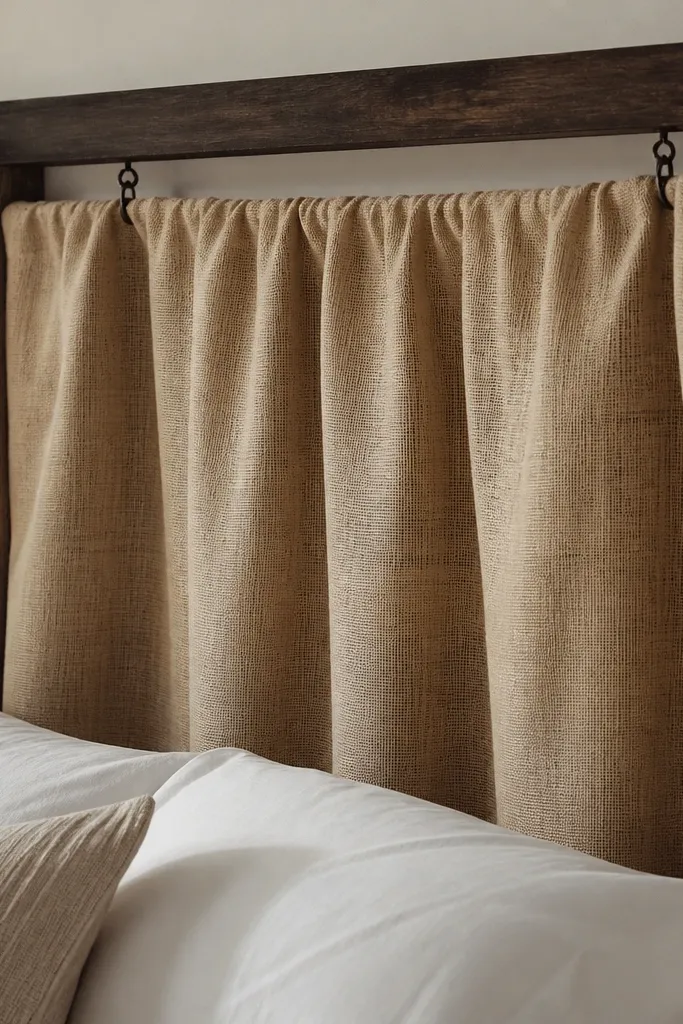
Burlap sounds itchy, but when it’s sewn with a lining and mounted on a firm backing, it reads cozy and looks intentional. This headboard has movement because the fabric drapes in folds, so it doesn’t look like a flat wall panel. I used this style in a farmhouse bedroom where the bed had a plain metal frame — the fabric hides that metal and softens everything. It also flatters rooms with lots of wood and neutral bedding because the burlap blends without clashing.
Quick tipUse a medium-weight burlap and steam it after mounting so the folds look soft, not stiff.
Start by building a simple wood frame from 1x4s and attach a rigid backing board inside. Sew or staple burlap to a lining fabric so it doesn’t scratch your hands when you adjust pillows. Gather the top edge with a few stitches or by using a curtain track strip, then attach to a top rail with two small hooks. Mount the finished headboard to a ledger and keep the burlap panel centered so folds look symmetrical from the bed.
One warningDon’t skip a lining — bare burlap feels rough and makes the whole project feel cheap to touch.
12. Oversized farmhouse wall mirror frame headboard
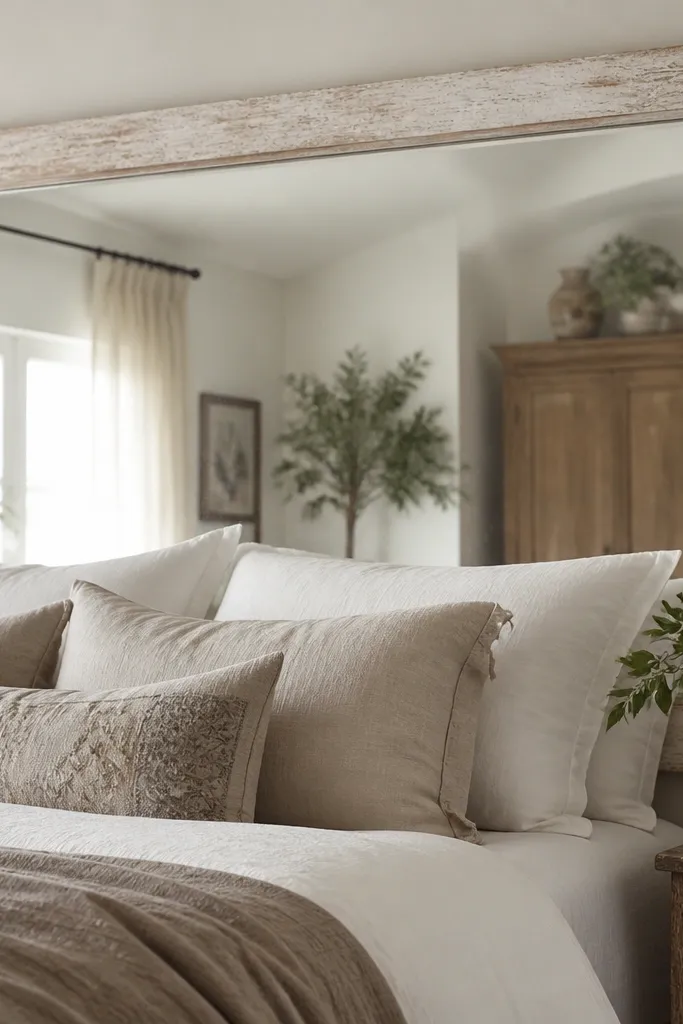
A mirror headboard sounds odd until you try it. The mirror reflects soft light from lamps, which makes a cozy room feel brighter without adding new decor clutter. I’ve done this in small bedrooms where the bed wall felt dark — the mirror makes the whole area feel airier. It flatters neutral bedding because the reflection adds texture from the room itself.
Quick tipCover the back of the mirror with a thin felt sheet so it doesn’t rattle against the frame.
Start with a mirror cut to your headboard size, then build a wood frame around it using 1x3 lumber. Distress the frame edges with sandpaper and a dark stain wash so it looks farmhouse-aged. Add corner blocks behind the mirror for support and safety clips so it doesn’t shift. Mount with two or three wall brackets into studs, then style with a pair of warm lamps to take advantage of the reflection.
One warningDon’t place it too high — if the mirror edge hits pillow height, it looks awkward and reflective at bedtime.
13. Reversible faux leather and ticking stripe panel
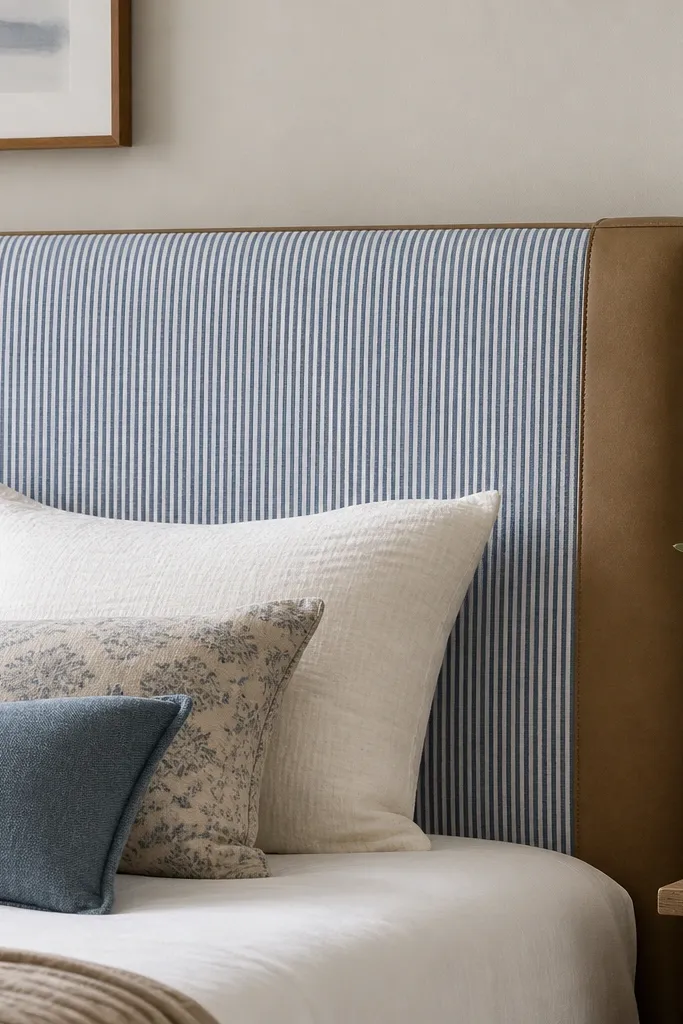
This is for when you want farmhouse cozy but you also like crisp lines. Ticking stripe reads farmhouse instantly, and the faux leather-look sides add a stronger structure so it doesn’t feel like a quilt you’re leaning on. I built one for a couple who changes bedding seasonally — the headboard stays stylish even when the sheets change color. It flatters people who like blue accents and works especially well with white walls and dark wood floors.
Start with a plywood core and build a rectangular frame. Staple a layer of batting, then apply ticking stripe fabric to the center panel and sew or staple it with neat tension. Add faux leather-look panels on the sides, mitering corners so seams line up. Finish by adding a strip of trim around the perimeter and mount with a cleat system so the edges look straight behind pillows.
Press the ticking fabric with a steam iron before cutting so stripes don’t shift.
Don’t stretch ticking unevenly; the stripes will curve and it looks sloppy fast.
14. Oversized macramé wall hanging headboard
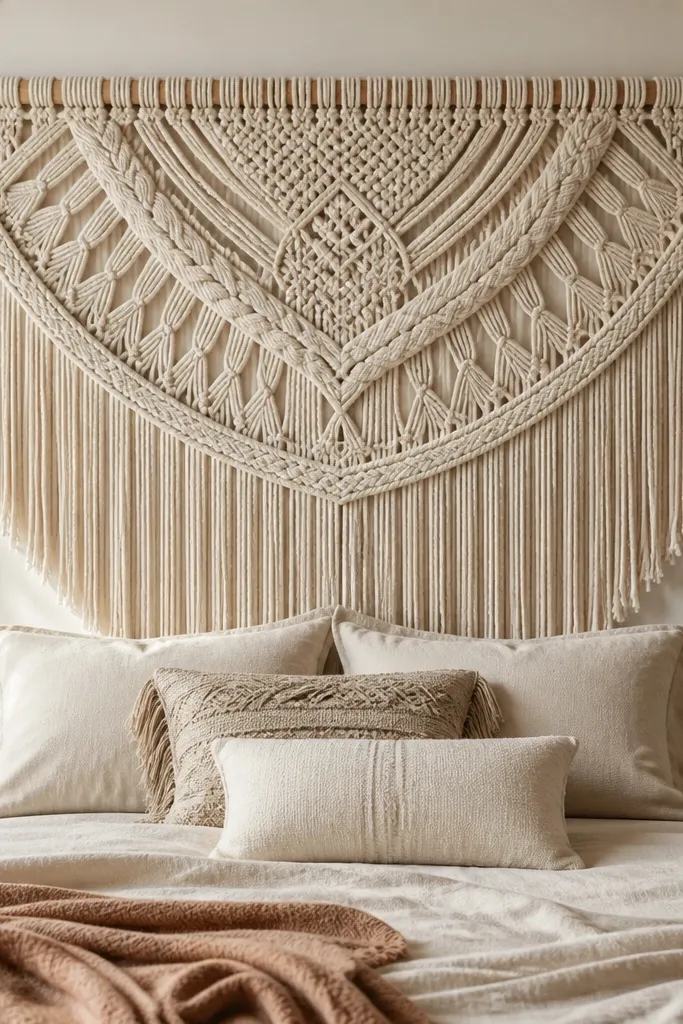
Macramé gives farmhouse coziness because it’s soft, tactile, and it creates shadow texture without paint. When it’s sized right, it looks like a headboard even though it’s technically wall decor. I’ve used this for renters because installation is simpler than carpentry — you anchor a top dowel and you’re done. It flatters neutral bedding and works best when your room has warm light bulbs, because the shadows make it look dimensional.
Quick tipUse a level on the dowel, not on the cords; cords settle and your eyes will catch the tilt.
Choose a macramé piece meant for wall hanging, then add a sturdy wooden dowel across the top if the piece doesn’t already have one. Mount two French cleats or two heavy picture hooks into studs so the top stays level. Hang the macramé so the fringe ends about 4-6 inches above the mattress top. Style with a chunky throw and pillow covers in cream and oatmeal so the cords blend into the bedding palette.
One warningDon’t hang it too low — fringe that hits pillows makes the whole setup look accidental.
15. Rustic ladder headboard with wood rungs and fabric backing
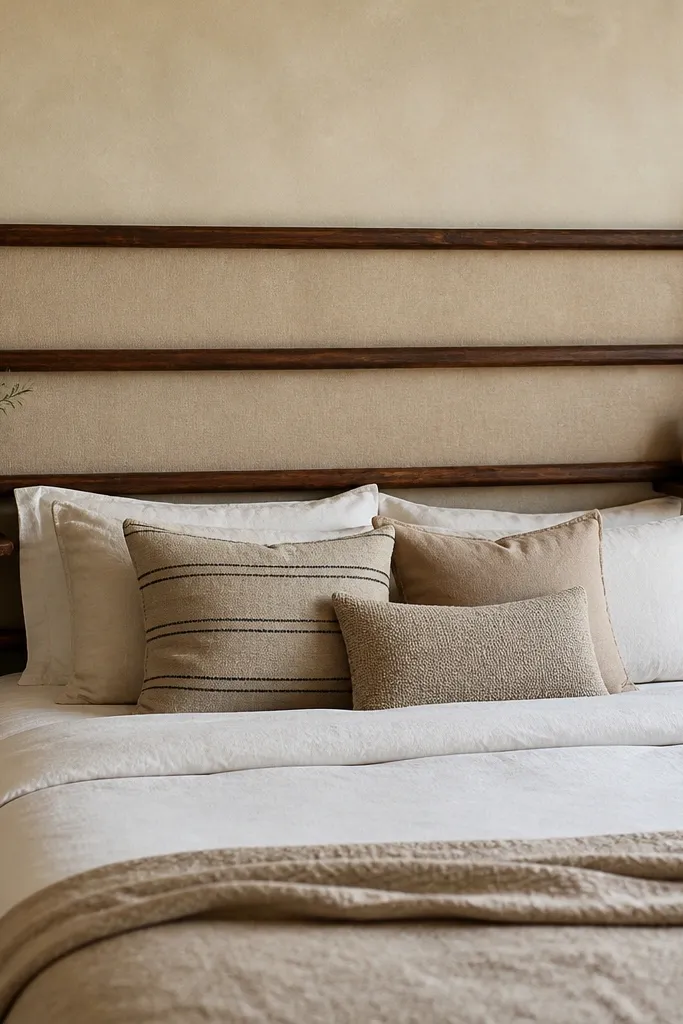
A ladder-style headboard gives vertical farmhouse character without needing tons of trim. The key is the fabric backing — it keeps the space cozy and prevents the wall from looking bare behind pillows. I built this for a bed with a lot of patterned bedding, and the neutral backing made the patterns feel intentional. It flatters taller people because the ladder lines draw the eye upward, and it looks great in rooms with rustic wood shelves.
Quick tipUse a neutral fabric like oatmeal linen so the rungs stay the star.
Start by building or buying a ladder frame, then add a fabric-backed panel behind the rungs using a plywood or foam core. Cut fabric to size, staple it to the backing, and wrap edges so they don’t show. Mount the ladder frame to a wall ledger or to bed frame posts using lag screws into studs. Add two small shelves or hooks on the sides only if your nightstands are simple — too much storage on the headboard makes it busy.
One warningAvoid leaving the backing uncovered; it looks thin and cheap once you put pillows in front.
16. Dark stained slat headboard with linen flange
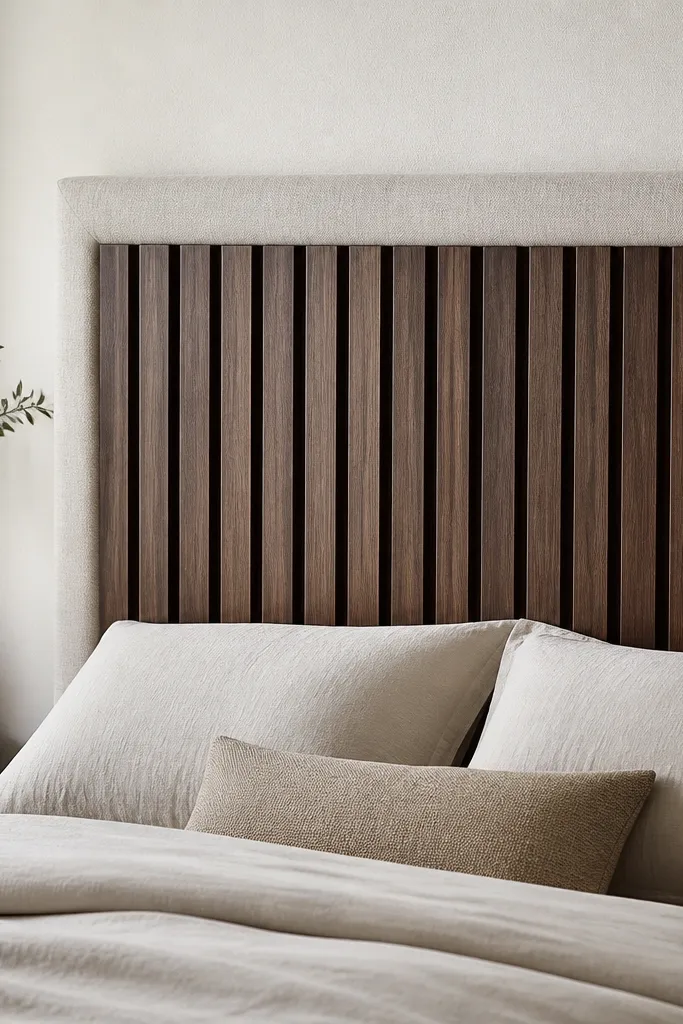
Dark wood can still feel cozy if you add a soft fabric edge. The linen flange makes the headboard feel warmer to the touch, and it also hides minor wood gaps where you might see raw edges. I like this for rooms with cream walls and light gray bedding because the contrast looks intentional. It flatters people who want farmhouse style but don’t want the headboard to look too light or rustic.
Build a slat panel on a back frame with 1x3 or 1x4 slats, keeping spacing consistent — I use 2.5 inches between slats for a clean look. Stain with a walnut tone and seal matte so it doesn’t glare. Add a linen border by wrapping fabric around thin foam or batting strips and stapling to the back so it forms a soft edge. Mount with a hidden ledger and keep the linen flange aligned so it looks even from the bed.
Use painter’s tape as a guide line for the linen flange so it doesn’t drift while you staple.
Don’t skip sealing the dark stain; it can rub off on hands and makes bedding look dusty.
17. Oversized farmhouse picture frame headboard with fabric inserts
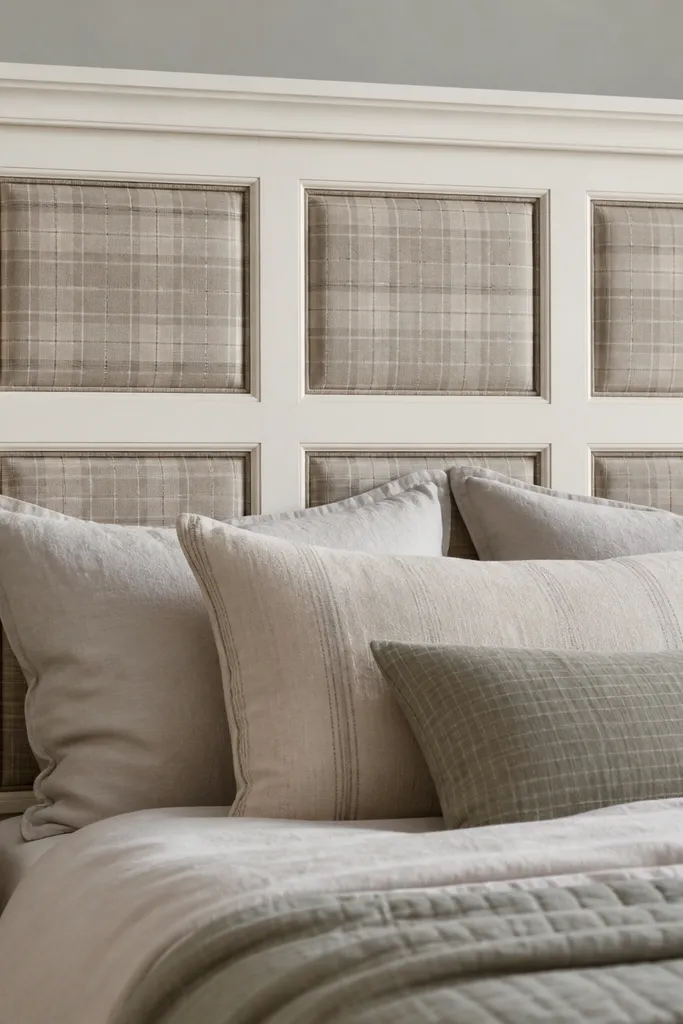
This style looks like a wall of framed art, so it makes the bed wall feel decorated even with plain sheets. Fabric inserts add softness, and the off-white frame keeps it farmhouse instead of craft-room. I built one for a couple who didn’t want tufting or bulky cushions, and they loved the “gallery wall” effect. It works best when you use one fabric pattern and repeat it across panels so it looks cohesive.
Start with a plywood backing, then build an outer frame and internal grid dividers using 1x2 trim. Cut fabric inserts to fit each opening, add batting on the back for puff, and staple fabric into each compartment. Paint the frame off-white and lightly distress the edges for that lived-in farmhouse vibe. Mount using a cleat system and set the headboard so the top rail sits about a hand’s width above pillow height.
If you’re using plaid, align the pattern at the top rail so the grid looks straight instead of random.
Avoid mixing too many patterns; two fabrics max looks intentional, three starts looking messy.
18. Cedar plank headboard with shiplap-style grooves
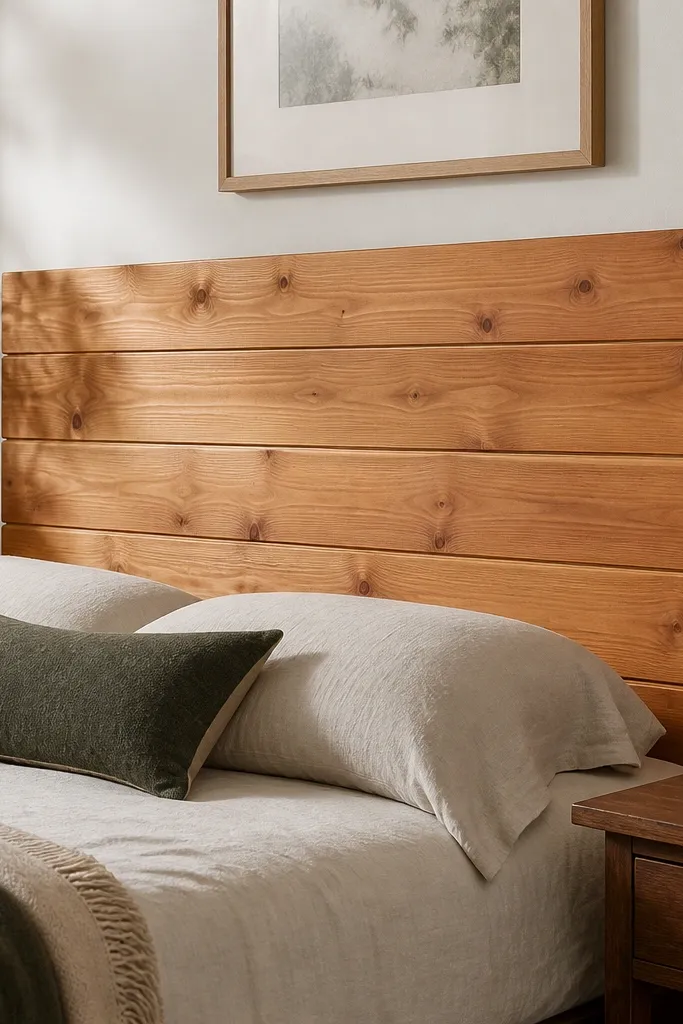
Cedar feels cozy because it smells good and looks warm even when you keep it natural. Horizontal planks plus shiplap-style grooves create a farmhouse texture that stays calm. I like this for rooms with white walls and a lot of natural light — the cedar tone warms the whole bed area. It also works well with neutral bedding and minimal decor because the wood texture carries the look.
Cut cedar boards to your width and decide your plank spacing — I use 3/8 to 1/2 inch gaps. If your boards don’t have grooves, create a shallow rabbet or use a router to form a consistent line so shadows look real. Build a back frame from 1x3 lumber and screw planks to it so they don’t shift. Finish with a light clear sealer and mount with brackets into studs for a straight, heavy feel.
Test your clear coat on a scrap plank — cedar can go from honey to orange if the finish is too warm.
Don’t use thick glossy polyurethane; it makes cedar look like a kitchen cabinet instead of a cozy headboard.
19. Vintage door panel headboard with iron strap hardware
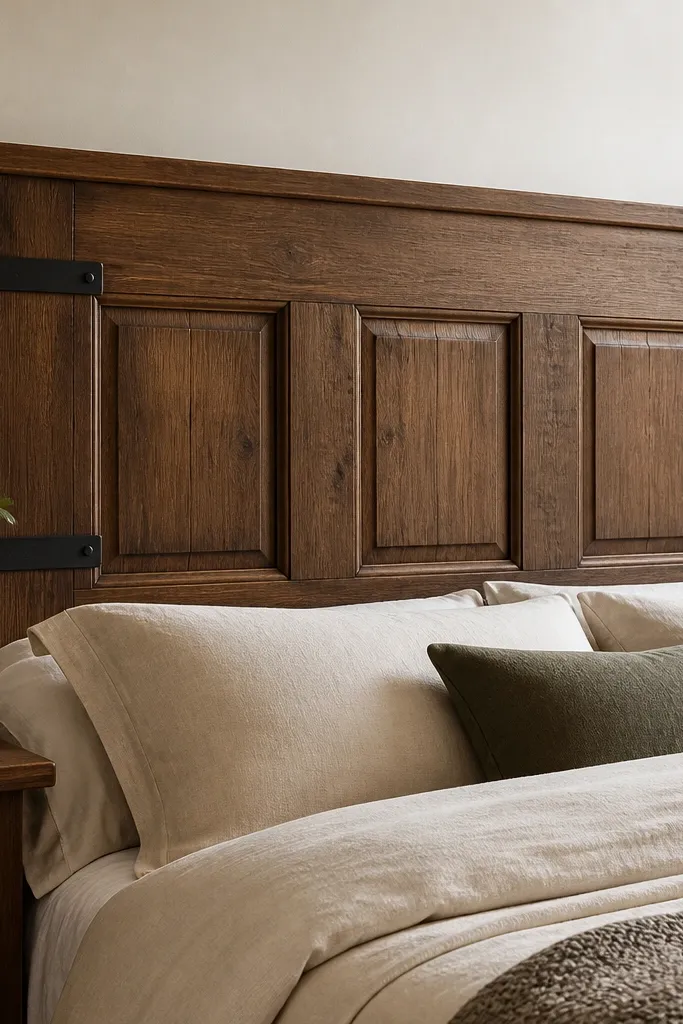
A door panel headboard looks cozy because it has depth and raised molding. The farmhouse feel comes from the paneling and the aged wood, but it also works practically because doors are already stiff. I’ve used this in rooms where the bed looks too “floating” — the panel gives it weight and anchors the wall. It flatters warm neutrals and dark accents, and it’s especially good if you like a more traditional farmhouse style.
Trim a reclaimed door panel to your headboard width, then add a back frame so it mounts straight. Sand the face lightly, then stain and seal matte. Add iron strap hardware to the sides or back edge for visual interest, but keep them functional with brackets behind. Mount using at least two anchors into studs and use shims so the panel sits flush and doesn’t rock when you lean.
If the door panel is uneven, sand the back edge first so the face stays flat when mounted.
Avoid skipping a back frame; a single door skin can crack or twist over time.
20. Macramé + wood dowel headboard with layered fringe
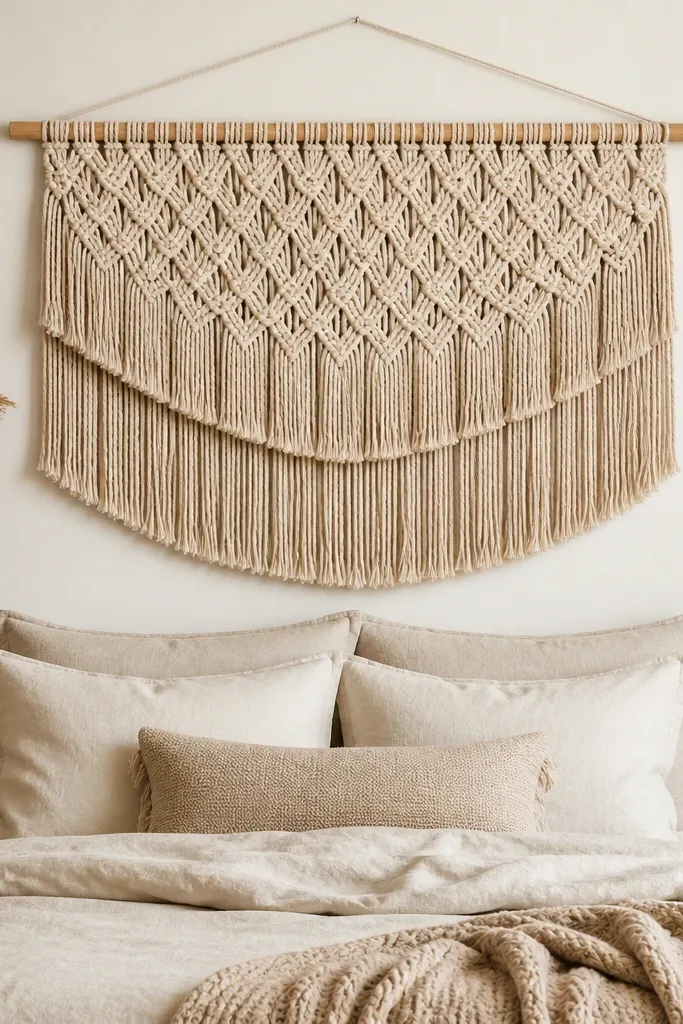
Layered fringe makes macramé feel cozy because it looks plush from a distance and detailed up close. The wood dowel gives you a farmhouse anchor line, so the hanging piece doesn’t look like random wall decor. I like this in rooms with simple bedding because the texture becomes the focal point. It also flatters people who want soft style without painting or upholstery.
Hang the dowel first using two stud-mounted screws and heavy picture wire, then attach the macramé so it sits centered. Adjust the fringe lengths so the bottom layer ends around 4 inches above the mattress top — that keeps it out of pillow chaos. If your piece is too narrow, add a second macramé strip on each side and knot it to the existing cord so it widens. Style with neutral pillows and a knit throw to keep the whole look warm instead of boho-random.
Use a hair dryer on low to gently smooth cord twists before you hang it so the pattern looks clean.
Don’t hang it using only one hook; the top will tilt and the fringe will look uneven fast.
21. Farmhouse panel headboard with reclaimed window trim
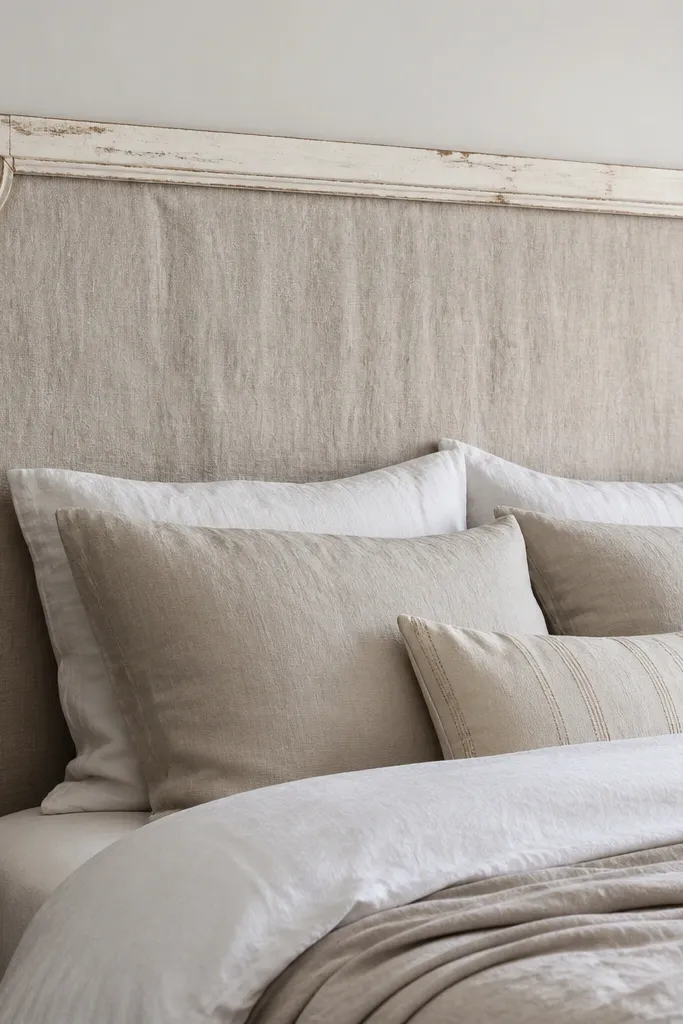
Reclaimed window trim gives you farmhouse detail without building complex woodwork from scratch. The thin molding adds shadow lines, and the linen center makes it cozy to lean on. I did this for a room with a vintage dresser and it matched the style instantly — the bed wall looked like it belonged. It’s a good fit if you like soft neutrals and want a headboard that looks “collected,” not mass-produced.
Quick tipUse a small foam roller to press the linen into corners so you don’t get puckers along the molding.
Start with a firm backing panel and wrap the center with linen plus a layer of batting so it has cushion. Build the window trim frame around it using the reclaimed pieces, then glue and pin the trim to the backing. Paint the trim with off-white and distress only the edges so the center stays crisp. Mount using a back cleat and add two support blocks behind the trim corners so the molding doesn’t crack under stress.
One warningDon’t use slippery satin fabric in the middle; it slides behind pillows and looks cheap fast.
22. Chunky rope tie-back headboard using canvas and dowels
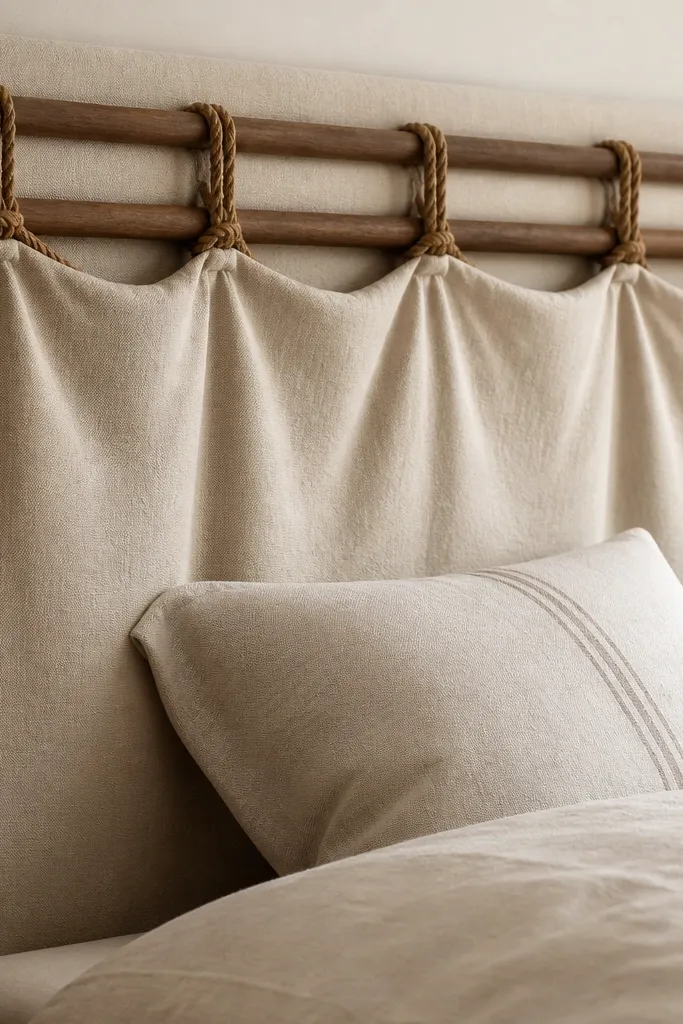
Rope-tied canvas looks farmhouse because it mimics how curtains are tied back, but it’s built like a headboard so it stays tidy. The canvas texture reads cozy, and the rope adds that rustic detail that feels handcrafted. I use this when someone wants a softer look than wood slats but doesn’t want full upholstery. It flatters rooms with neutral curtains and woven baskets because the rope ties match that natural material language.
Quick tipUse thick rope and rough canvas — thin materials look stringy and won’t hold the draped shape.
Build a simple plywood core and wrap it with canvas, stapling at the back. Sew or attach two horizontal channels on the front where the dowels sit, then insert the dowels to create the tie-back shape. Tie chunky rope around the dowels and anchor the rope ends to the back so the drape holds its form. Mount with a cleat system so the canvas doesn’t sag over time, and keep the drape centered so pillows won’t tangle the rope.
One warningAvoid mounting it without a solid backing; canvas alone will sag and look unfinished.
23. Farmhouse tufted bench-style headboard with diamond stitch
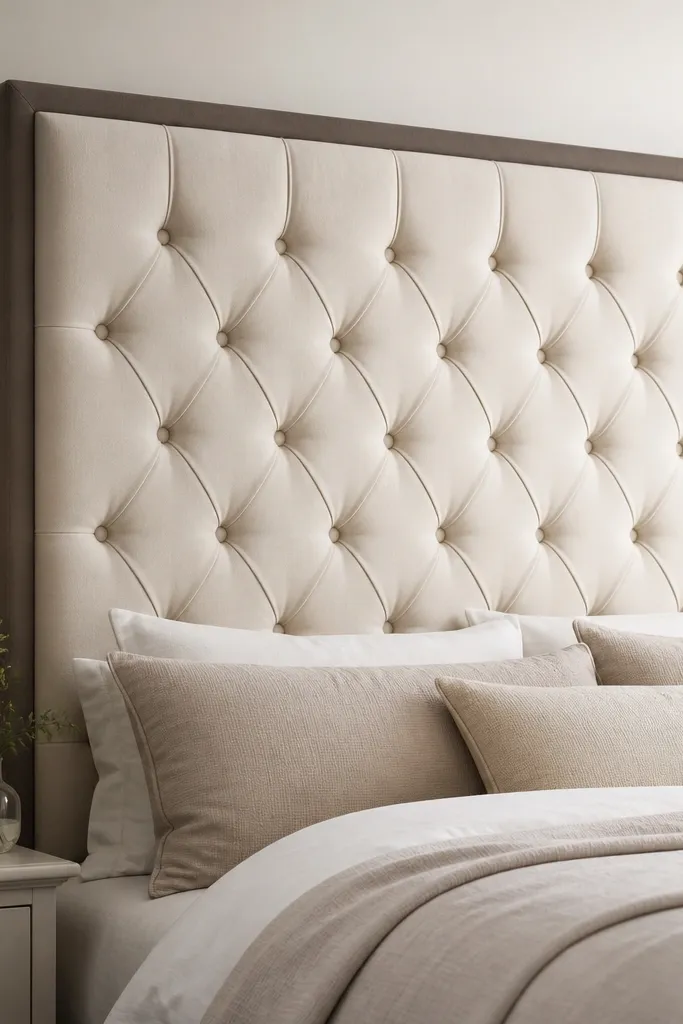
Diamond stitch gives you that cozy, tailored look without going full traditional nailhead. The padded feel is what makes it comfortable for leaning, and the darker border keeps it farmhouse instead of plain. I’ve done this for people who want a headboard that looks store-bought but still feels soft when you sit up. It flatters warm-toned rooms and neutral bedding because the cream fabric absorbs light instead of reflecting glare.
Quick tipTest your diamond spacing on a scrap panel first; once you stitch foam, it’s hard to undo cleanly.
Start with a plywood core and add 2-3 inches of foam padding, then cover with a smooth base layer fabric. Mark a diamond grid with chalk — I use 4-5 inch diamonds for a bold look — and stitch the fabric through foam using a tufting needle. Add buttons at key intersections so the diamonds pull evenly. Finish the perimeter with a darker fabric border strip and mount with wall cleats so the headboard stays level behind pillows.
One warningDon’t skip marking; freehand tufting looks uneven and the pattern becomes the mistake.
24. Thick frame farmhouse headboard with fabric-covered center panel
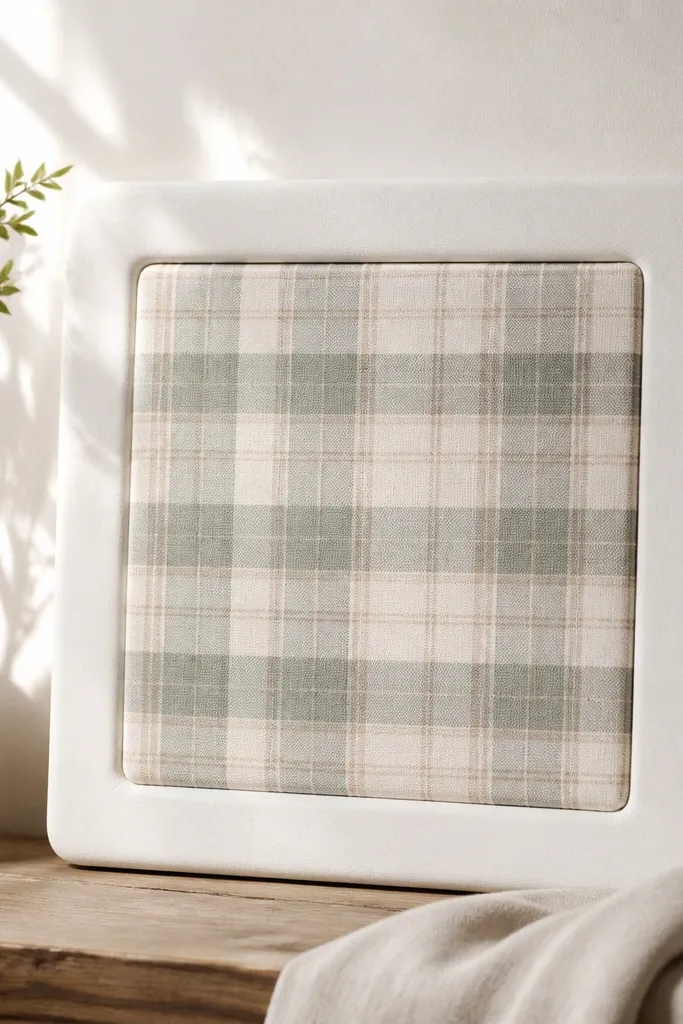
This is the “cozy but structured” headboard when you want farmhouse style without lots of slats. The thick frame makes it feel substantial, and the upholstered center gives you comfort. I like it in rooms where the rest of the furniture is simple because the headboard brings texture and pattern without overwhelming the space. It flatters people who like mixing neutrals and soft checks — the plaid stays cozy against the matte paint.
Quick tipChoose a fabric with a tight weave; it hides staple marks and looks clean from close up.
Build a thick outer frame from 2x2 or 1x4 lumber and sand edges smooth. Cut a foam core panel to fit the inside opening, then wrap with fabric and staple on the back so corners are tight. Paint the wood frame off-white and seal matte, then attach the upholstered panel from the back using screws. Mount with a ledger and make sure the frame sits 8-12 inches above the mattress for the best proportion.
One warningAvoid thin foam; it makes the center panel feel like a flat board instead of padded.
25. Vintage window shutters headboard with hinged look
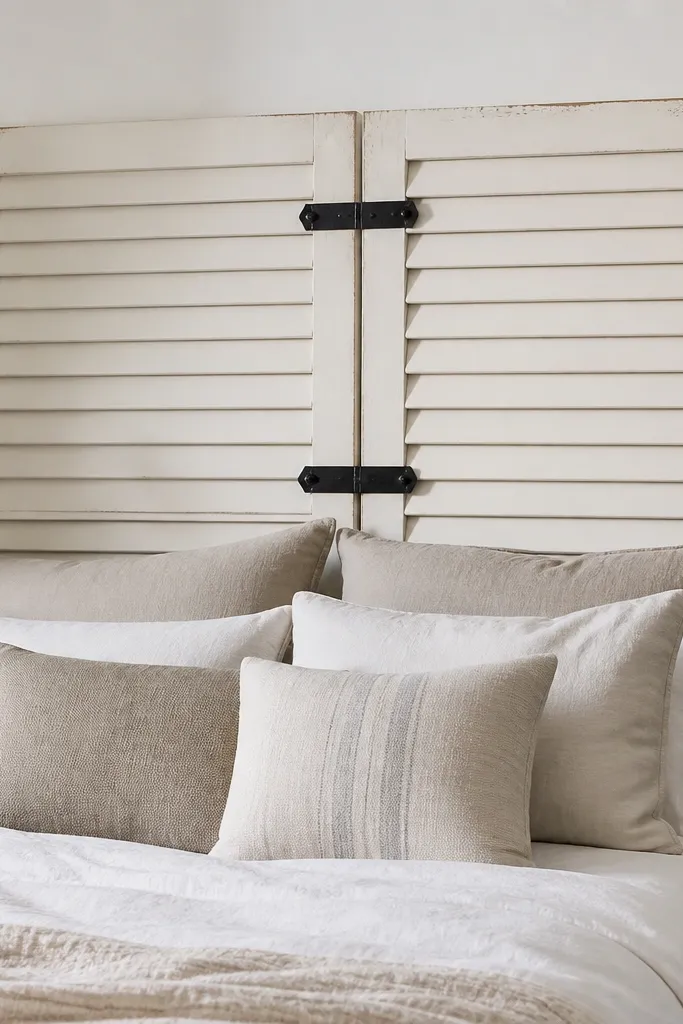
Shutters give you farmhouse texture instantly because the slats create natural shadow lines. The hinged look adds character even when you keep bedding simple. I’ve used this when the room needs height and the wall needs visual interest, but you don’t want a bulky upholstered headboard. It flatters rooms with black metal lighting and warm wood floors, because the shutters match that traditional hardware vibe.
Quick tipIf your shutters bow, clamp them flat overnight before drilling and mounting.
Find two matching shutters and mount them on a back board so the slats line up. Paint off-white and distress edges lightly with sandpaper so it looks lived-in without looking scratched-up. Add black strap hinges at the center seam as decoration, then bolt the shutters to a ledger so they can’t swing. Mount into studs and check level across both shutters — slats hide small gaps but not big tilts.
One warningDon’t mount shutters too far apart; big gaps make it look like wall decor instead of a headboard.



