
1. Classic flat-panel headboard with tailored welt edge
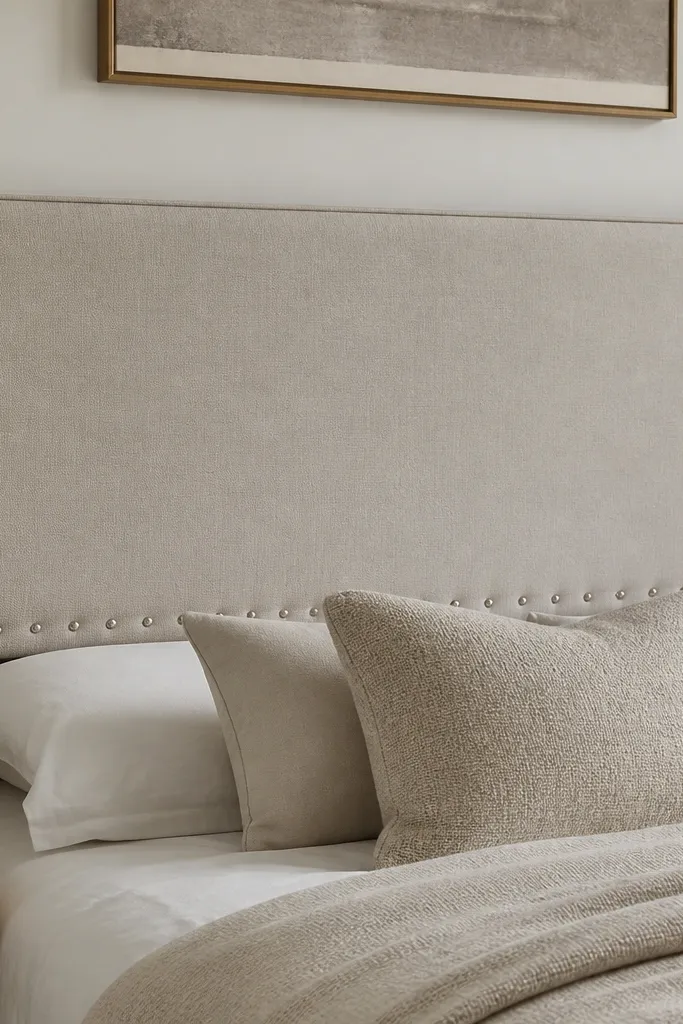
This is the cleanest look for a first build because it hides a lot of imperfections. The flat foam face gives you a uniform surface, while the welt cord makes the border look professionally finished. I use a medium-weight fabric like charcoal cotton canvas or a linen-look weave, then match welt cord in black or the same fabric color for a tight line.
Cut MDF to your final size and add 1-inch foam on top. Stretch your upholstery fabric over the foam, staple every 1 to 1.5 inches across the perimeter, and trim the excess close to the staples. Add welt cord with a zipper-foot sewing machine or by hand using upholstery glue, then anchor the bottom edge with a strip of nailheads.
Quick tipTest welt placement by pinning it first — if the cord line is even by 1/8 inch, the whole headboard looks intentional.
One warningDon’t skip trimming the foam edges; if the foam sticks out, the welt line will look wavy.
2. Button-tufted headboard in a soft grid
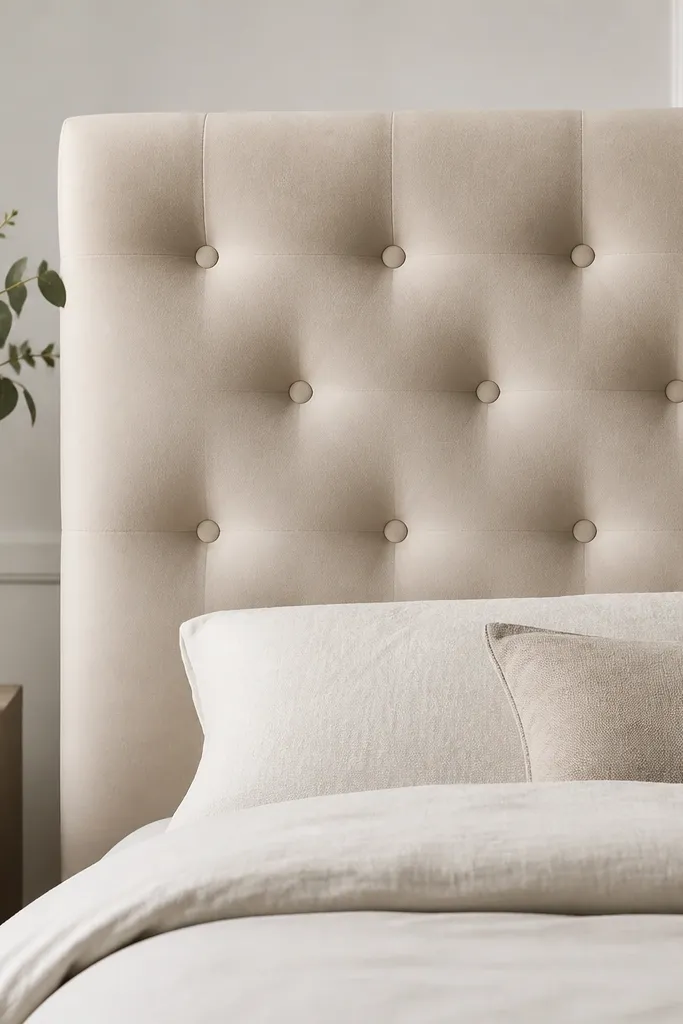
Tufting makes a headboard look custom even when your upholstery fabric is budget-friendly. The trick is keeping the tuft pattern tight and symmetrical so it reads as intentional, not homemade. I like a soft grid with fewer buttons rather than a dense one, because it keeps the face smooth and prevents a “pillow lumpy” look.
Use 3/4-inch foam over 1-inch foam or add a single 1-inch foam layer plus batting, then mark button points with a chalk line grid. Pre-drill holes through the panel for each button post, then sew fabric to buttons and pull tight from the back using a tufting needle and strong upholstery thread. Cover with fabric and staple the perimeter after tufting is done.
Pull each button until the fabric just dimples — stop before it puckers, or you’ll see ripples in daylight.
Don’t try to tuft through thin foam; the buttons won’t hold their shape and the face will sag.
3. Channel-sewn headboard with faux leather panels
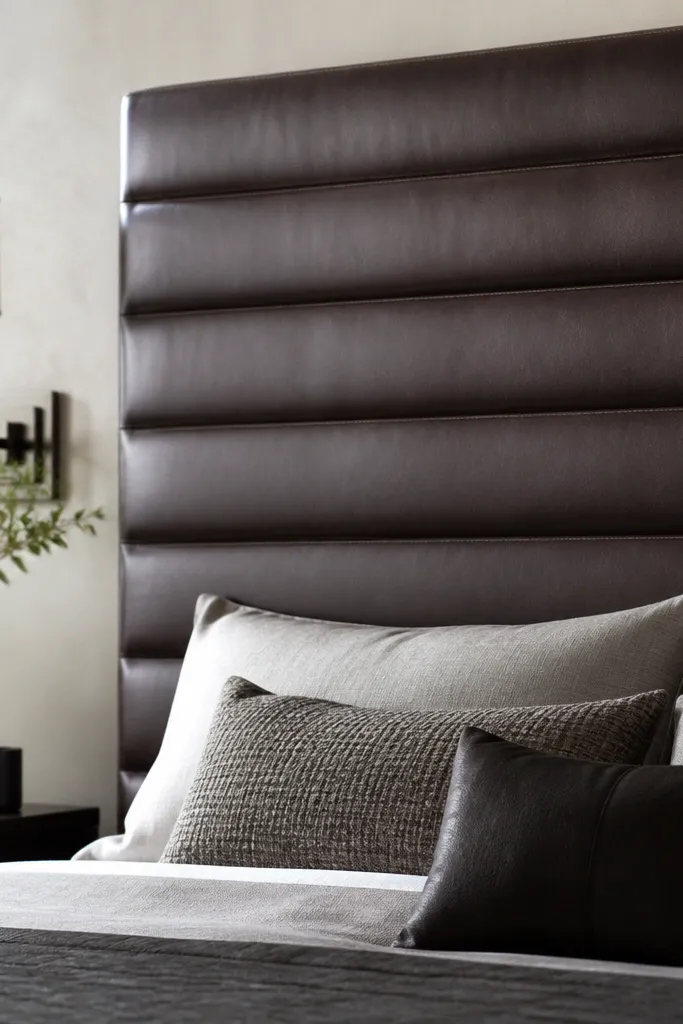
Channel seams look crisp and architectural, and faux leather gives you a clean shine that makes the channels pop. This style is great if you want texture without the complexity of deep tufting. The channels also hide slight unevenness in foam because the seams visually organize the surface.
Build a 1-inch foam face on a plywood panel. Mark channel lines with a chalk pen and sew straight channels using heavy-duty thread and a zipper-foot edge guide. Wrap and staple the fabric first, then sew channels from the front carefully, keeping seam spacing consistent (for example, 3 inches apart).
Quick tipPress seams with a tailor’s ham and a low iron setting; faux leather looks cleaner when creases are controlled.
One warningDon’t sew channels while the fabric is loose; pull tight before attaching so seams don’t curve.
4. Vertical stripe upholstered headboard with piping
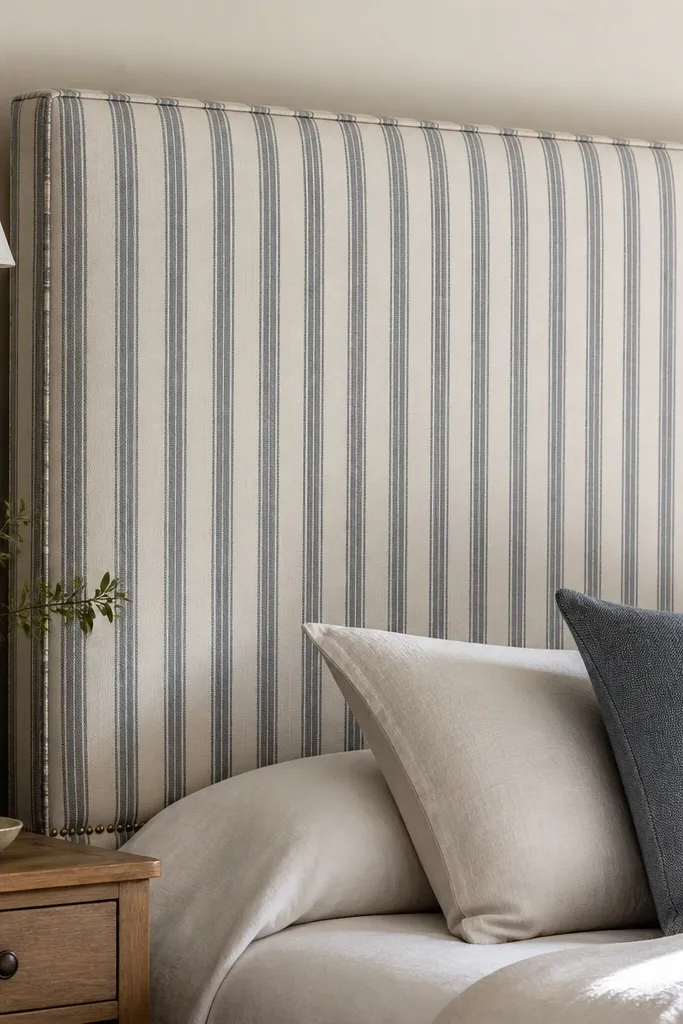
Aligned stripes make your headboard look designer because your eye reads order. Piping defines the perimeter and keeps the striped fabric from looking like it’s just draped over foam. I like navy and cream stripes or olive and ivory, because they show alignment clearly and match real bedding colors.
Buy upholstery fabric with a stripe repeat and plan your layout before cutting. Center the stripe pattern on the panel so the main stripe hits the middle. Use 1-inch foam, wrap and staple tightly, then add piping with welt cord sewn to bias tape for a clean edge.
Quick tipMark the stripe centerline on the foam before fabric goes on — it saves you from a crooked final look.
One warningDon’t cut fabric without checking the stripe repeat; misalignment makes the whole piece look off even if stitching is neat.
5. Rattan-wrapped headboard frame with upholstered center panel
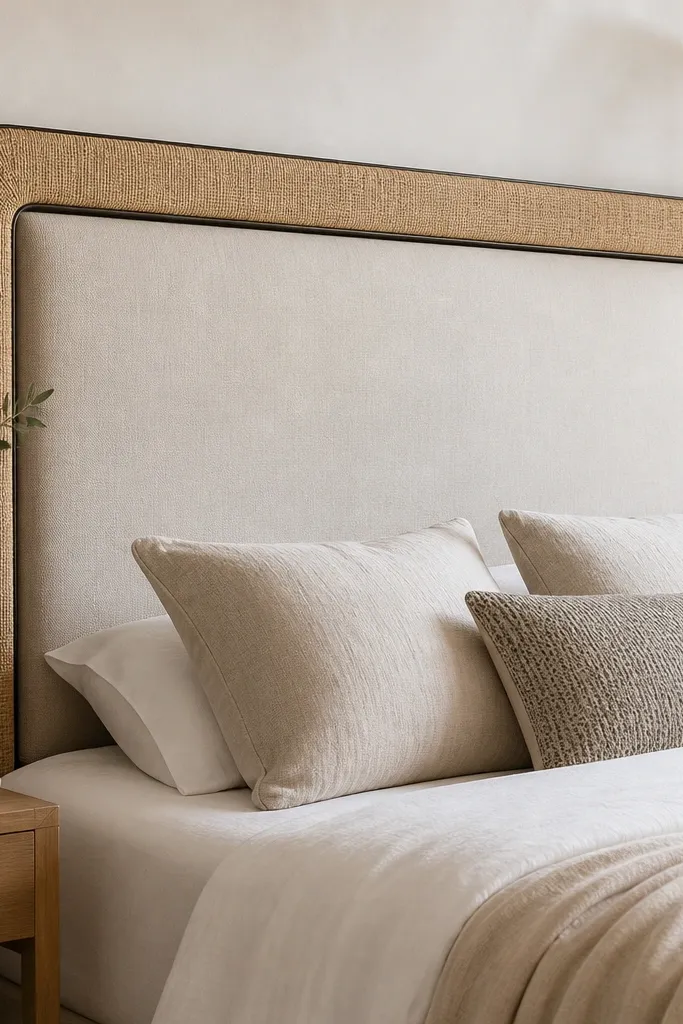
This is for people who want texture without heavy tufting. The rattan frame adds warmth and depth, while the upholstered center keeps the look comfortable when you lean back. I’ve done this with a 2-layer approach: upholstered center panel first, then attach rattan strips to the sides for a finished border.
Build a plywood rectangle for the center and upholster it with 1-inch foam and fabric. For the rattan, use pre-wrapped cane strips or rattan lath and glue/screw them to the outer frame. Finish the outer edge with thin trim so the fabric doesn’t peek out at the seam.
Quick tipSeal rattan with a clear matte spray after assembly so it doesn’t snag bedding or look fuzzy over time.
One warningDon’t rely on hot glue alone for rattan; it loosens when humidity changes.
6. Shiplap-inspired upholstered headboard with boxed battens
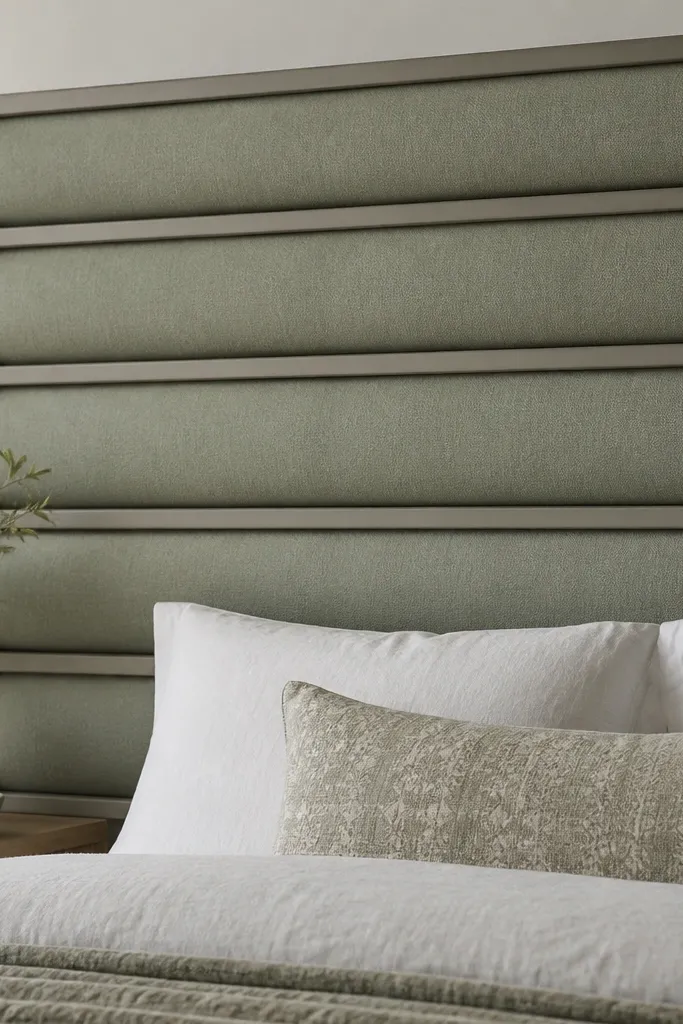
This one looks like built-in wall paneling, but it’s way easier than real shiplap. The boxed battens create structure and hide minor foam unevenness between bays. I’ve used sage-green linen look fabric and painted battens in the same tone for a monochrome, calm feel.
Upholster a flat foam face, then glue and screw thin wood strips to create the bay lines. Wrap each bay with fabric or cover the whole face and then add battens that press into the fabric. Keep bay heights consistent (for example, 5 inches each) so the pattern reads clean.
Use a carpenter’s square to align battens before you glue; the headboard will look straight even from the side.
Don’t skip a tight fabric pull around the batten edges; loose fabric makes the bays look stuffed.
7. Linen-look tufted chevron with two-tone buttons
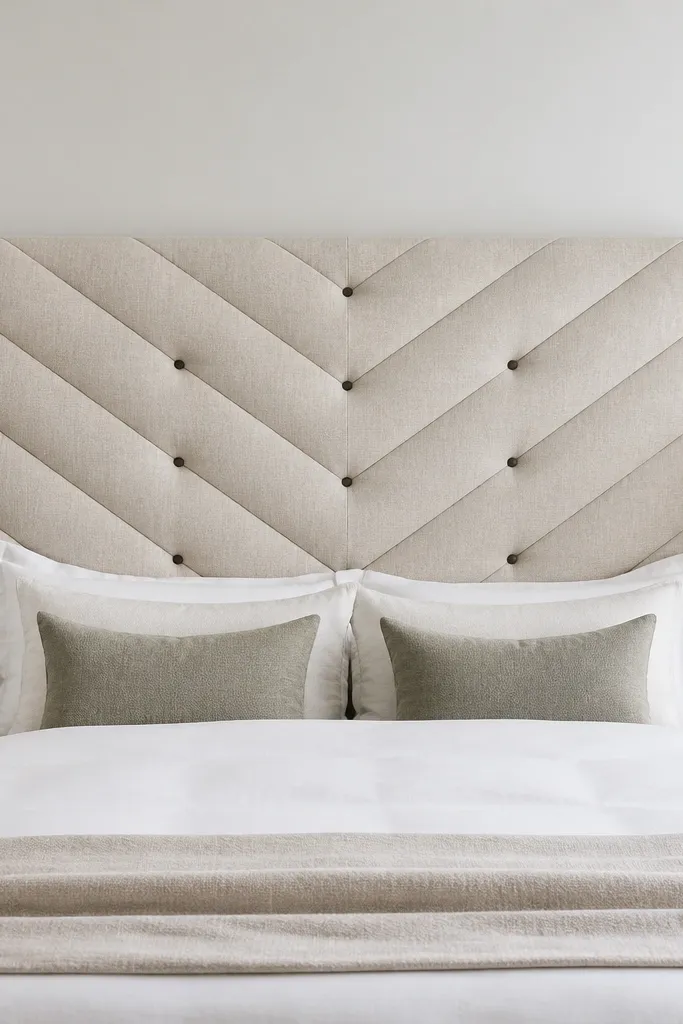
Chevron tufting gives you movement without complicated woodworking. Two-tone buttons make the pattern read instantly, especially in photos. I like pairing an off-white linen-look fabric with charcoal button covers or deep olive buttons to keep it grounded.
Mark chevron lines with chalk and plan button spacing so the V shape centers on the bed. Use 1-inch foam plus a thin batting layer for a smooth surface, then tuft through pre-drilled holes at button points. Cover buttons in your chosen fabric and attach them with upholstery thread to secure pulls.
Quick tipDo a dry fit with one button before committing; if the fabric pulls too tight, it warps the chevron edges.
One warningDon’t tuft on a panel with sharp corners; the fabric will tear or pucker where the chevron meets the edge.
8. Oversized upholstered headboard with "floating" edge trim
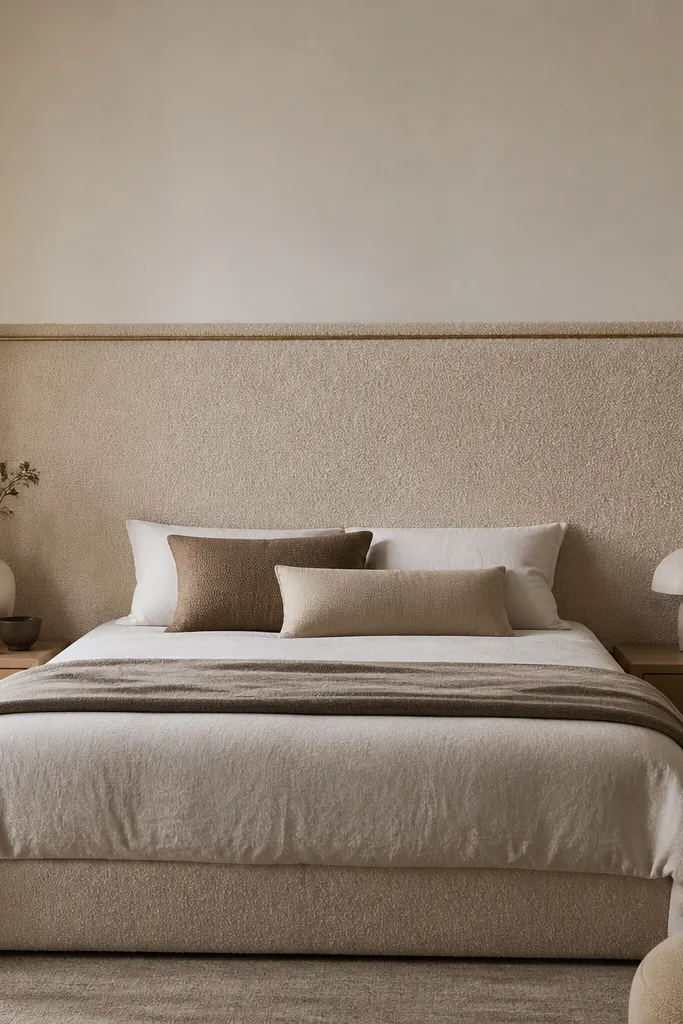
Boucle or textured knits look amazing on a headboard, but they can look messy at the edges. This style solves that by adding a contrasting trim strip that frames the face like a picture mat. I’ve used cream boucle with a charcoal trim for a strong look that still feels soft.
Cut your base panel to the exact face size. Upholster with 1-inch foam and a layer of batting for a plush look, then trim the edge flat. Add a second thin board or trim piece around the back edge so the contrast strip sits slightly “floating” from the front face.
Keep the floating gap consistent by using spacers when you screw the trim on the back.
Don’t glue trim directly to stretched fabric; it will ripple as the fabric relaxes.
9. Wingback-style headboard with curved side arms
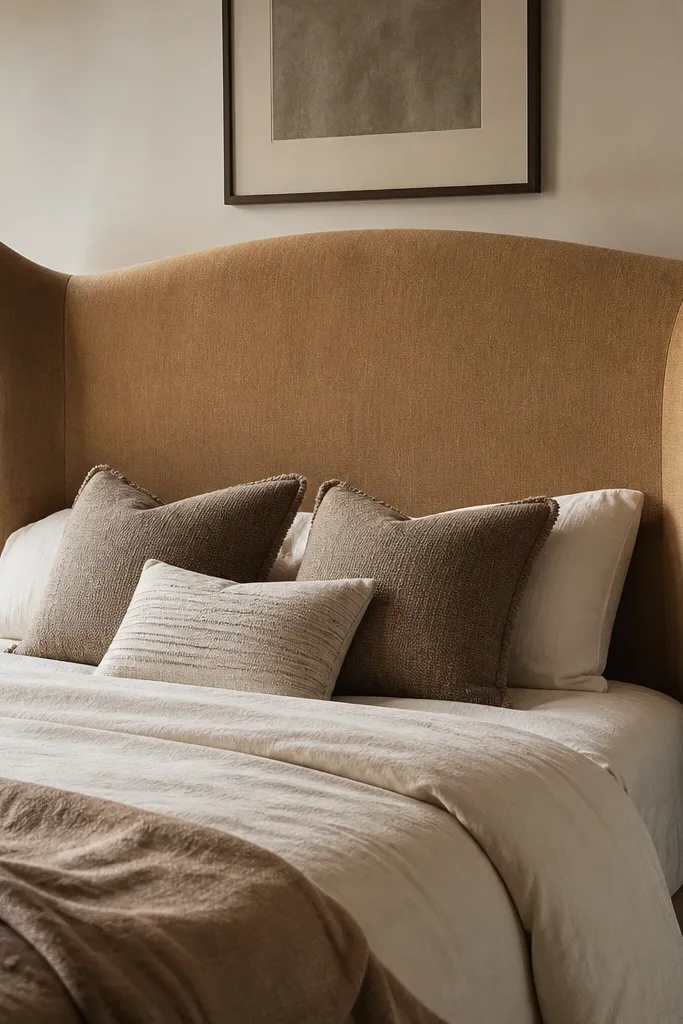
If you want a headboard that looks like a store-bought armchair, this is the move. The curved wings make the room feel cozy and give you a place for your shoulders when you read. I’ve done this in camel or muted rust upholstery fabric with a slightly darker piping for definition.
Use plywood for the main panel and build wing shapes with additional plywood ribs or foam blocks glued to the sides. Upholster the entire form with 1-inch foam, then add batting for softness. Sew or staple piping along the outer curve where needed — straight piping won’t sit on a curve without careful shaping.
Use steam to gently shape the fabric over the curve before stapling so you don’t get puckers.
Don’t cut wing fabric without leaving extra at the curve; you’ll run out and end up with an uneven seam line.
10. Reversible fabric headboard with removable covers
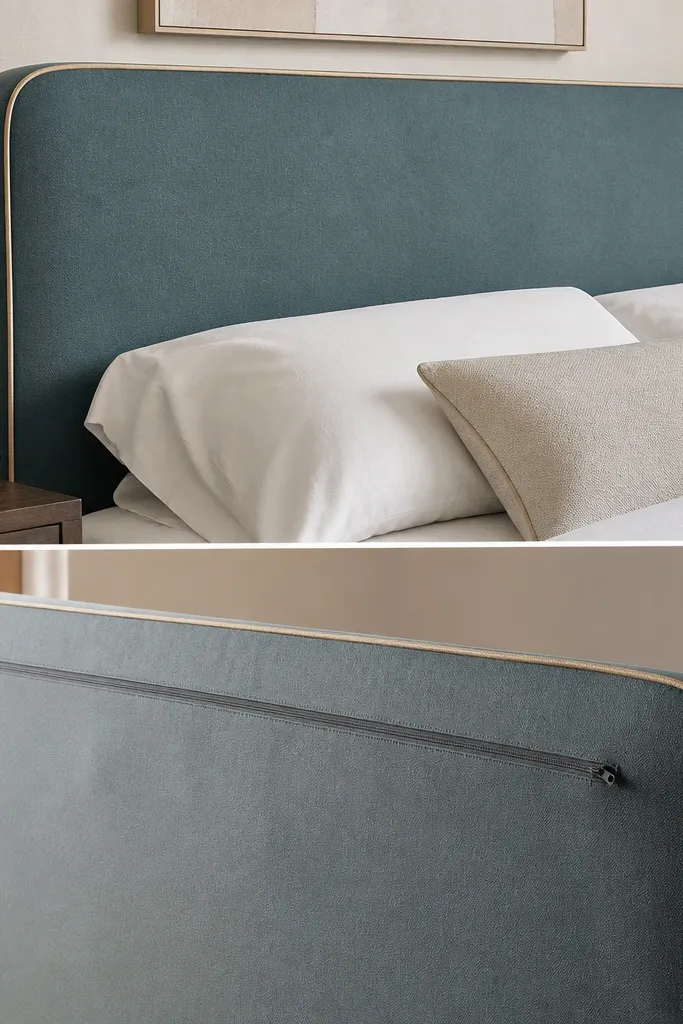
This is my favorite practical upgrade because you can swap the look when your bedding changes. The front stays neat because the cover has a fitted shape, not a loose slipcover. I used a medium-weight cotton upholstery fabric on one side and a performance velvet on the other so it feels different season to season.
Build a base headboard with foam and fabric that will stay hidden. Sew a fitted cover with a heavy-duty zipper along the backside or a removable Velcro edge for access. Keep the cover pattern tight at corners, and use a 1/2-inch seam allowance so the cover doesn’t bunch.
Choose zipper placement where you can hide it behind the mounting hardware so it never shows from the bed.
Don’t use lightweight curtain fabric for the cover; it stretches and the zipper line will sag.
11. Quilted headboard with faux leather border and square quilting
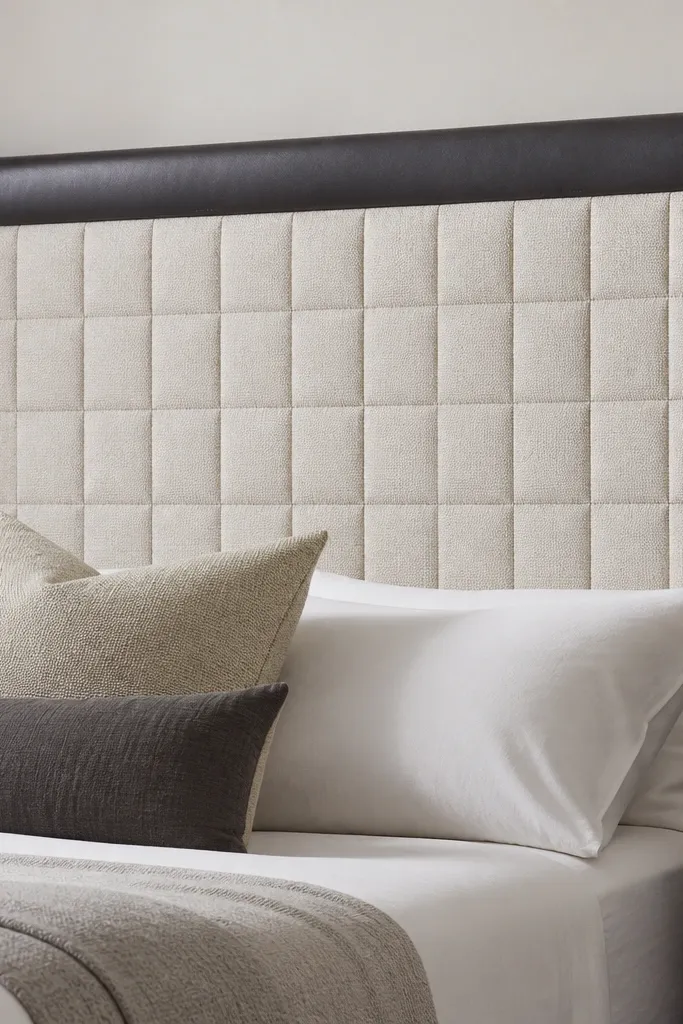
Square quilting gives you a tailored, structured look, and faux leather trim frames it cleanly. This style looks great in a monochrome palette because the quilting lines show even in low light. I’ve built it with gray upholstery fabric and a black faux leather border to make the grid feel intentional.
Use 1-inch foam plus a thin batting layer so the quilting holds shape. Mark a grid (for example 4-inch squares) and stitch through the face fabric and batting at each grid intersection. Add faux leather binding around the perimeter with a boxed seam so the border looks crisp.
Quick tipUse a walking foot for quilting so the layers don’t creep while you stitch.
One warningDon’t skip batting thickness; without enough loft, the quilting lines look flat and cheap.
12. Farmhouse plaid headboard with fabric-wrapped battens
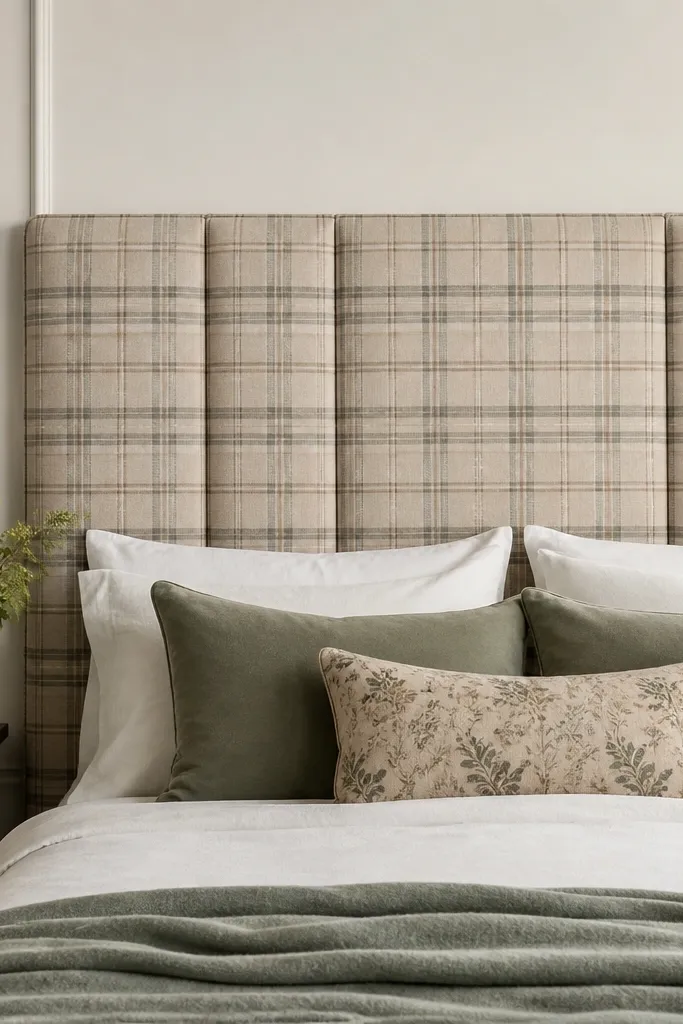
Plaid looks best when it’s centered and framed by simple lines, and battens create those lines. Wrapping battens in fabric keeps the pattern consistent and hides rough edges. I like a red-and-cream plaid with a muted black border fabric for a farmhouse vibe that still reads clean.
Cut your panel and upholster the face with plaid centered on the midpoint. Add thin wood battens, then wrap each batten with matching plaid or solid border fabric. Nail or staple battens into place over the upholstered face, keeping consistent spacing between them.
Quick tipAlign the plaid centerline first, then measure batten spacing from that center so nothing drifts.
One warningDon’t let the plaid run wild under battens; if the pattern jumps, it will look sloppy.
13. Matte velvet ombre headboard with gradient piping
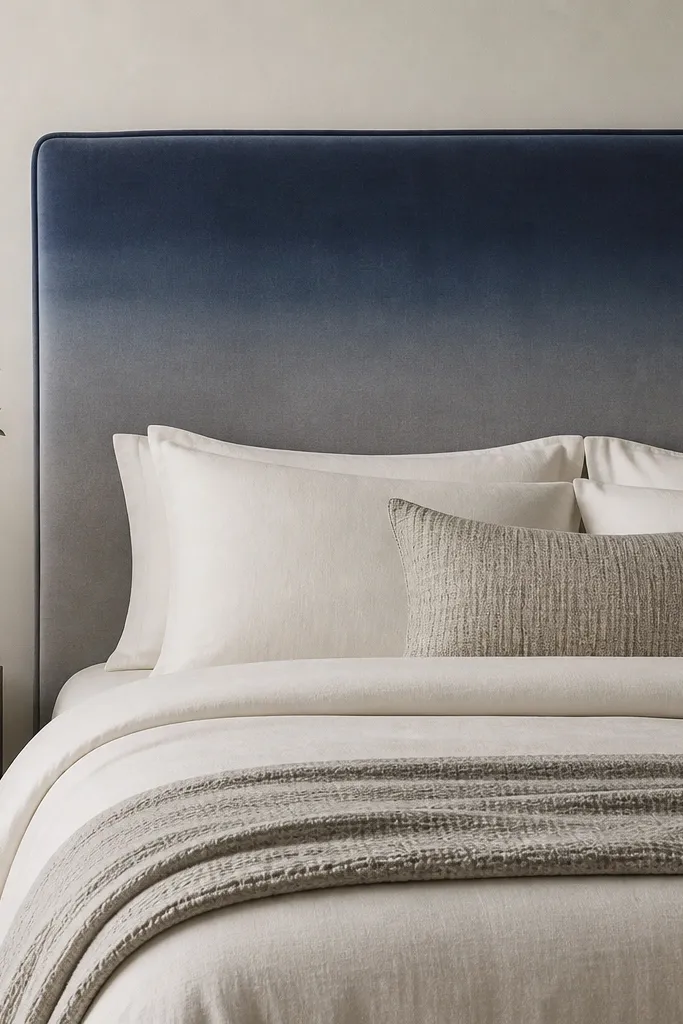
Ombre looks stunning in velvet because it catches light differently as you move. The key is controlling the gradient so it looks smooth, not streaky. I’ve done ombre by using two matching velvet lengths and blending the seam under a narrow welt so the transition stays invisible.
Use a rigid panel with 1-inch foam. Cut two fabric sections, for example navy for the top half and gray for the bottom half, then blend with a hidden seam in the middle. Add welt cord in a neutral gray to unify the look and prevent the edge from looking raw.
Iron velvet gently through a pressing cloth and always test direction on a scrap — wrong nap direction shows as stripes.
Don’t sew velvet pieces together without a plan; seam lines show more than you think.
14. Modern geometric headboard using foam blocks and fabric panels
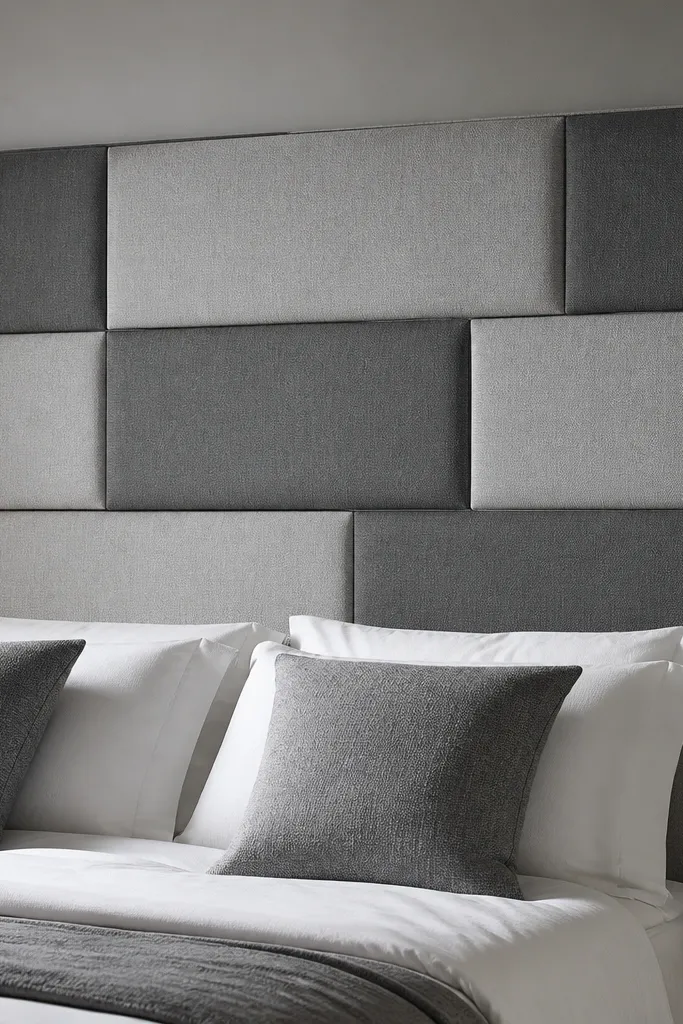
If you like modern style, this gives you dimension without tufting. Foam blocks create the raised shapes, and fabric panels make each section look clean and intentional. I like pairing two grays with different textures — one smooth upholstery fabric and one soft woven — so the geometry reads clearly.
Start with a flat base panel and cover it in a thin layer of batting. Glue foam blocks onto the face in your pattern, then cover each block section by wrapping fabric tightly around edges and stapling to the back. Use a consistent seam allowance at transitions so the lines stay straight.
Mark your geometry with painter’s tape on the foam before cutting blocks — it’s faster than re-measuring after glue dries.
Don’t overstuff batting between blocks; it blurs the edges and kills the sharp geometry.
15. Soft boucle scalloped headboard edge
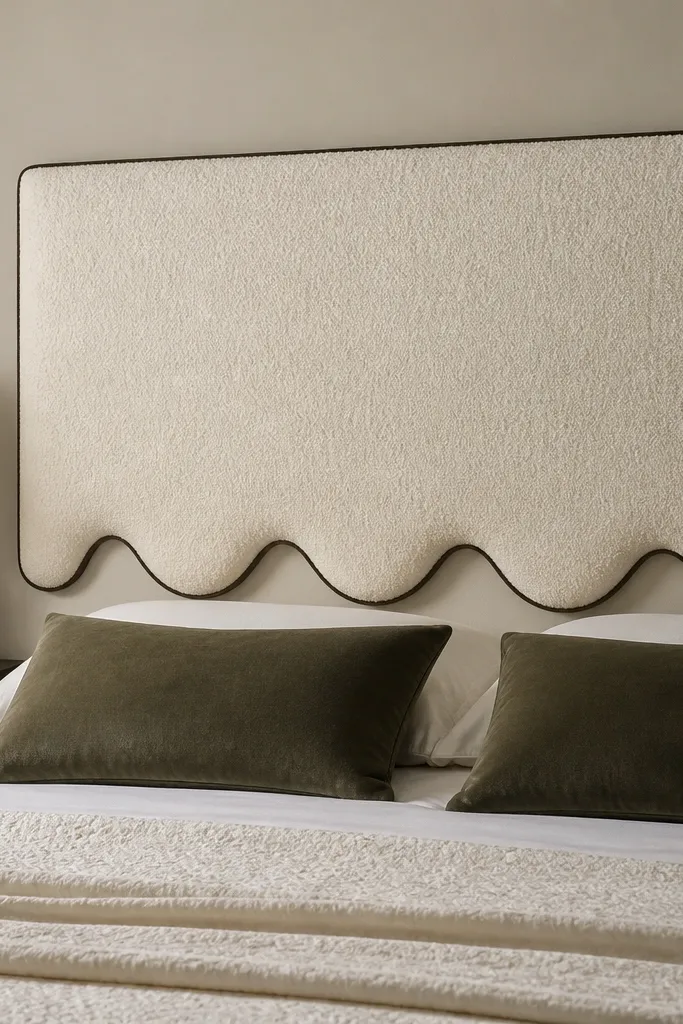
Scalloped edges make a headboard feel playful without being childish. Boucle hides small texture imperfections, so this style forgives beginner upholstery mistakes. The outline trim keeps the scallops crisp so it doesn’t look like fabric was just cut and glued.
Cut your base panel with a scalloped profile using a template you trace onto cardboard first. Upholster with 1-inch foam and add batting so the boucle drapes smoothly over the curves. Stitch or hand-attach narrow trim along the scallop edges, then staple the back perimeter.
Make a cardboard template for the scallop curve and reuse it for any future headboard — it keeps your waves consistent.
Don’t skip a trim outline; without it, the scallops blend into the fabric pile.
16. Ribbed upholstery headboard with vertical cord lines
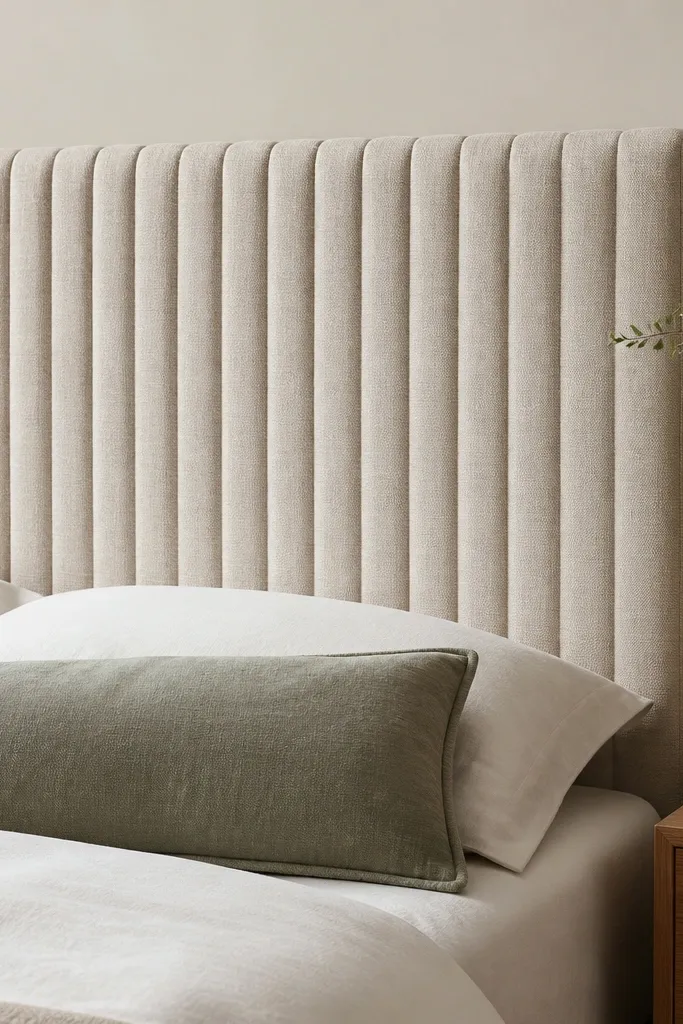
Vertical cord lines add structure and draw the eye upward, which makes the headboard look taller. You can get the ribbed effect without button tufting by sewing narrow channels and running cord through them. I’ve used a neutral greige fabric and thin black cords for a modern contrast that still feels warm.
Mark vertical lines on your foam-covered panel at your chosen spacing (for example, 2.5 inches apart). Sew channels along the lines or attach channel tape, then insert thin cord and secure it to the back with small stitches. Cover the perimeter with fabric and add a clean border with bias tape.
Keep cord tension even; uneven tension makes ribs look wavy instead of straight.
Don’t use thick cord on a thin foam layer; it bulges and creates lumps.
17. Dark-stained wood and linen upholstered mixed-material headboard
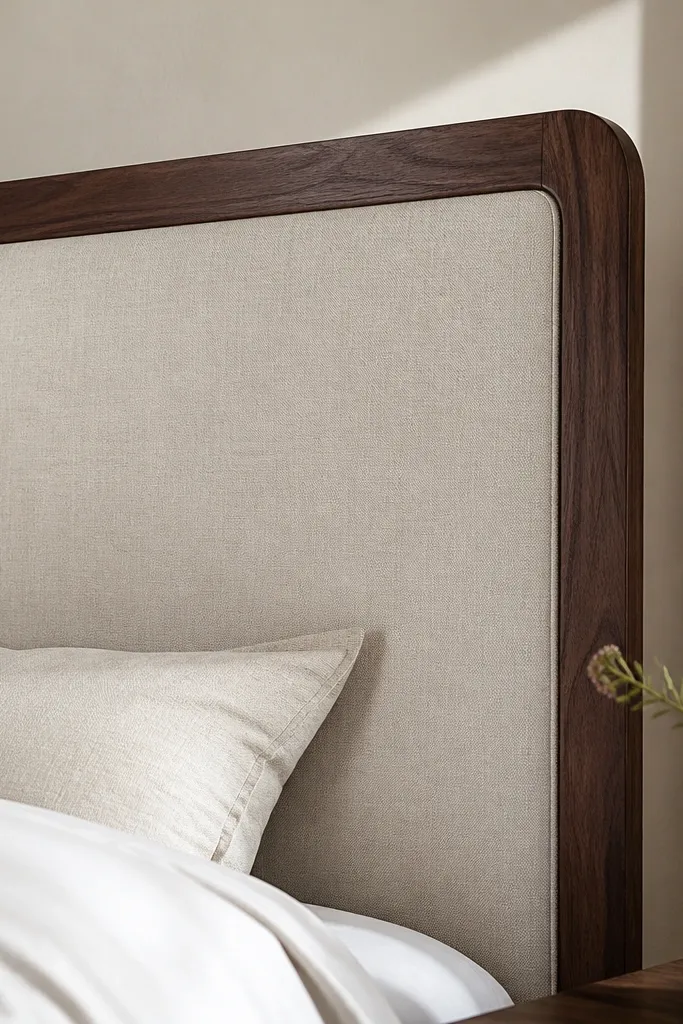
Mixed materials look expensive because your eye reads both craftsmanship and comfort. The wood frame keeps the shape rigid, and the linen center gives you that soft, breathable feel. I’ve done this with a simple rectangular wood frame stained dark and a cream upholstery fabric that matches linen bedding tones.
Build a wood frame from 1x2 or 1x3 boards and attach it to a backing panel. Upholster the center with foam and fabric, then mount it into the frame opening. Add a thin trim strip where fabric meets wood so you get a straight edge and no raw fabric showing.
Quick tipSand and stain the wood before upholstery; once fabric is on, you do not want dust settling into the foam.
One warningDon’t skip a trim strip; raw fabric edges against wood look DIY even if the upholstery is perfect.
18. Tucked upholstery headboard with diagonal folds
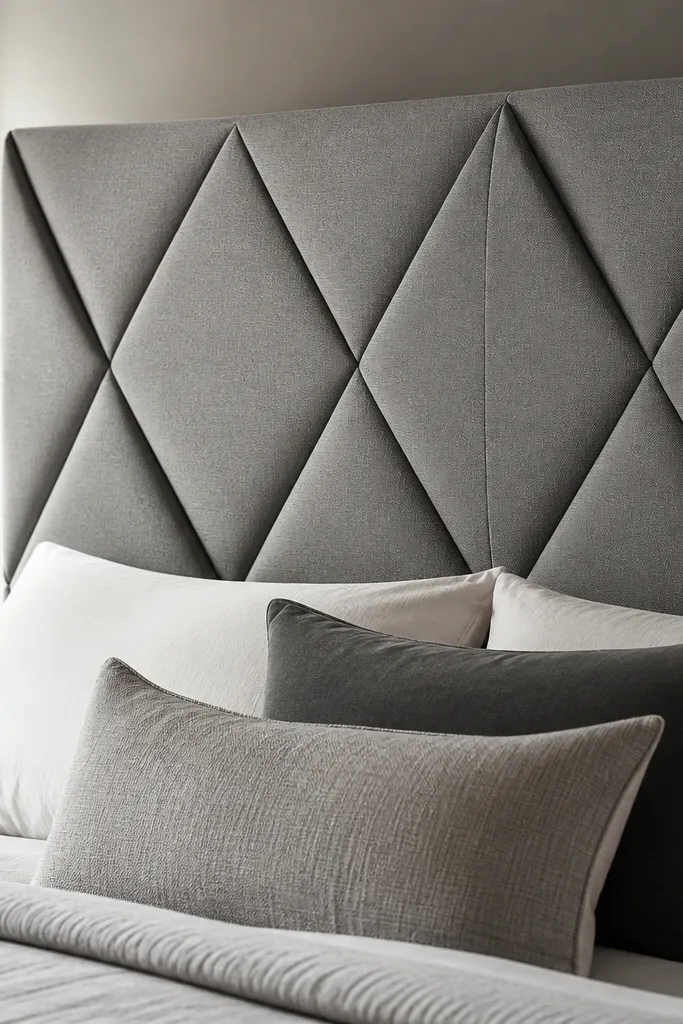
Diagonal tucks look like custom tailoring and they hide minor imperfections in the base foam. You get a dimensional surface without buttons or channel sewing. This style works great in textured fabrics like structured cotton because the folds hold shape when you staple them correctly.
Start with 1-inch foam and wrap the base fabric smoothly. Mark diagonal lines with chalk, then create tucks by folding along the lines and securing each tuck to the back using staples. Keep tuck depth consistent, around 1/2 to 3/4 inch, and finish the perimeter with bias tape or a welt cord.
Pin the first tuck before you staple the rest; use it as your measuring reference for depth and angle.
Don’t make random tuck depths; uneven folds read as mistakes in every photo.
19. Upholstered headboard with hidden storage shelf behind the face
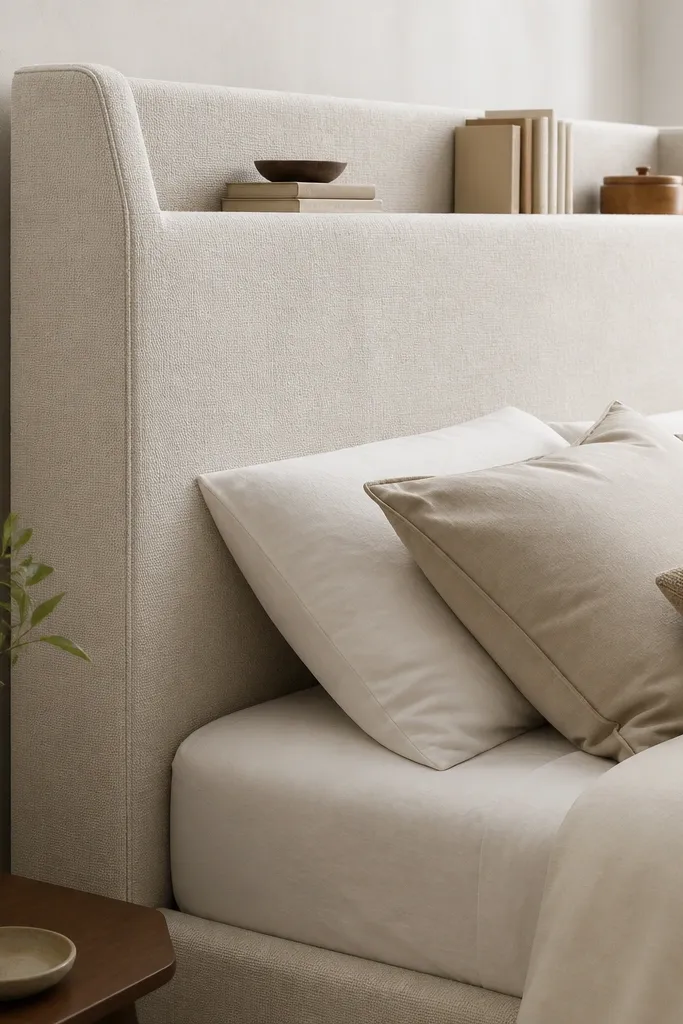
This one solves the problem of cluttered nightstands. You keep the upholstered look on the main face, then add a shallow shelf inside the frame so books and chargers sit where you reach. I’ve built it with a 3-inch-deep shelf that holds a paperback stack and a charging cable without looking like a built-in cabinet.
Build your panel on a plywood frame with side rails that create a cavity behind the upholstery. Upholster the face like any flat-panel headboard, then install the internal shelf board before you close the back. Add a backing panel with screws so you can access the shelf later.
Quick tipLine the inside shelf with scrap fabric or thin felt so it doesn’t scuff items and it looks finished when you peek.
One warningDon’t make the cavity too shallow; chargers and book corners catch if the depth is under 2.5 inches.
20. Double-row nailhead headboard with soft gray upholstery
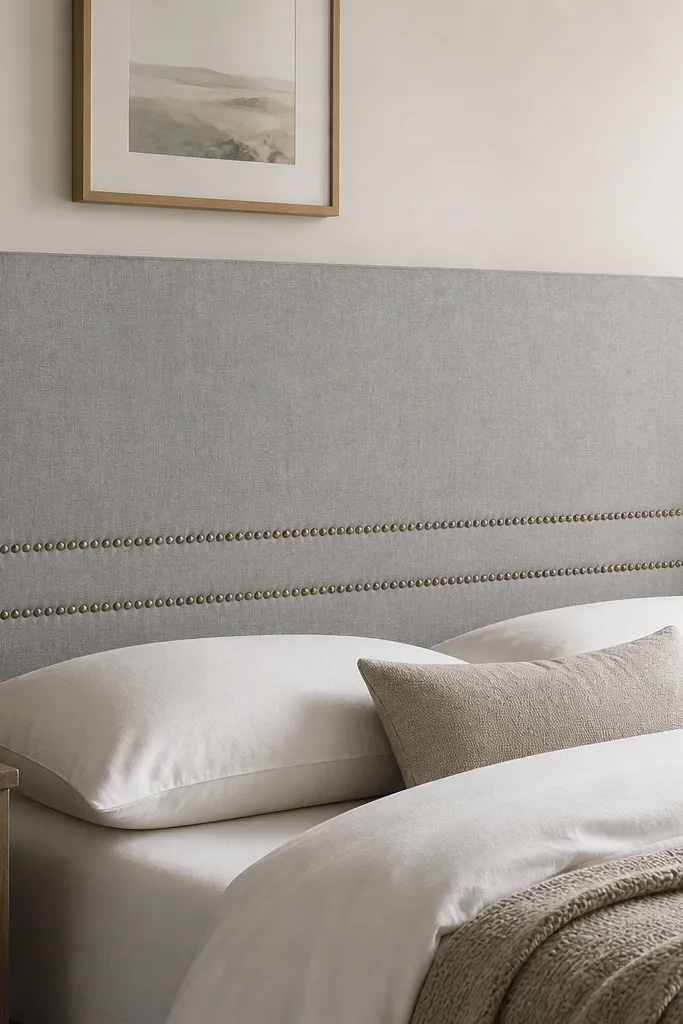
Nailheads are the fastest way to make a simple upholstered panel look tailored. Two rows look more intentional than one, especially when the fabric is matte and plain. I like soft gray upholstery fabric with brass nailheads because it warms up the room without going flashy.
Use a flat-panel build with 1-inch foam and a smooth fabric so nailheads sit cleanly. Mark the nailhead line with painter’s tape and a ruler so both rows stay level. Install nailheads by tapping gently with a small hammer, then finish the perimeter with bias tape to hide staple edges.
Measure from the bottom edge for both rows, not from the center — it’s easier to keep them straight.
Don’t pound nailheads into foam; you’ll crush the padding and create dents around each one.



