
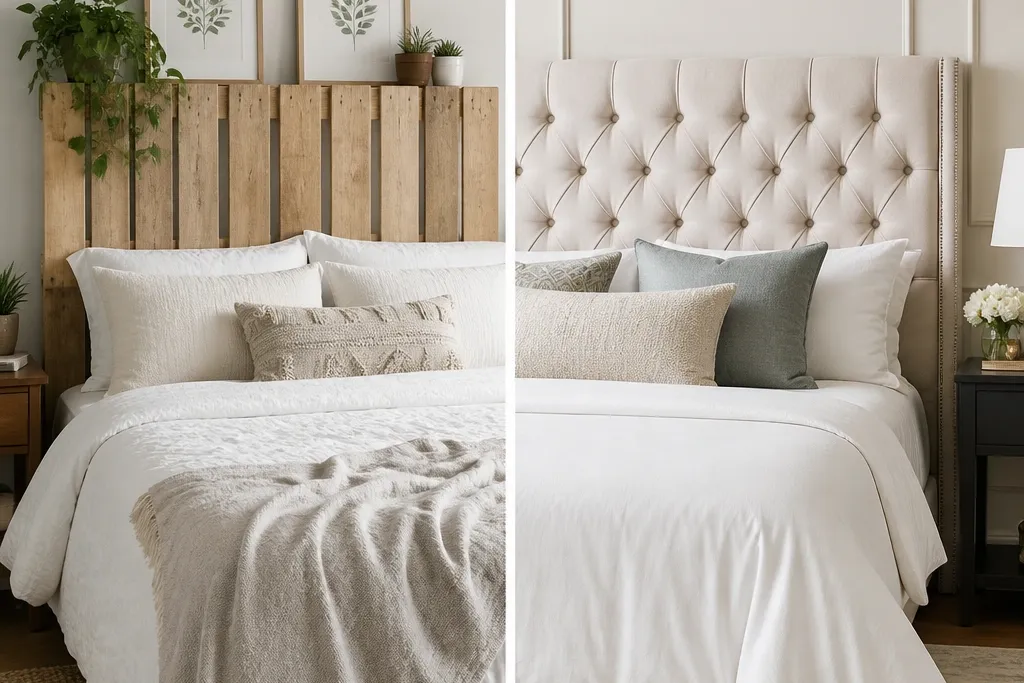
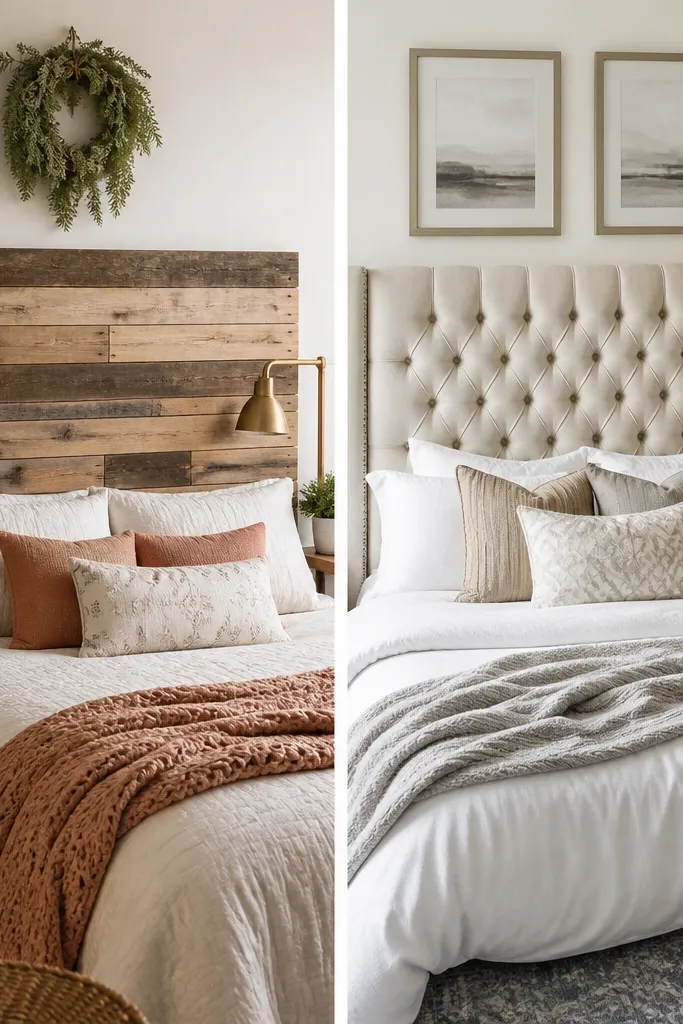
1. Plywood + 1-inch foam upholstered headboard in warm oatmeal
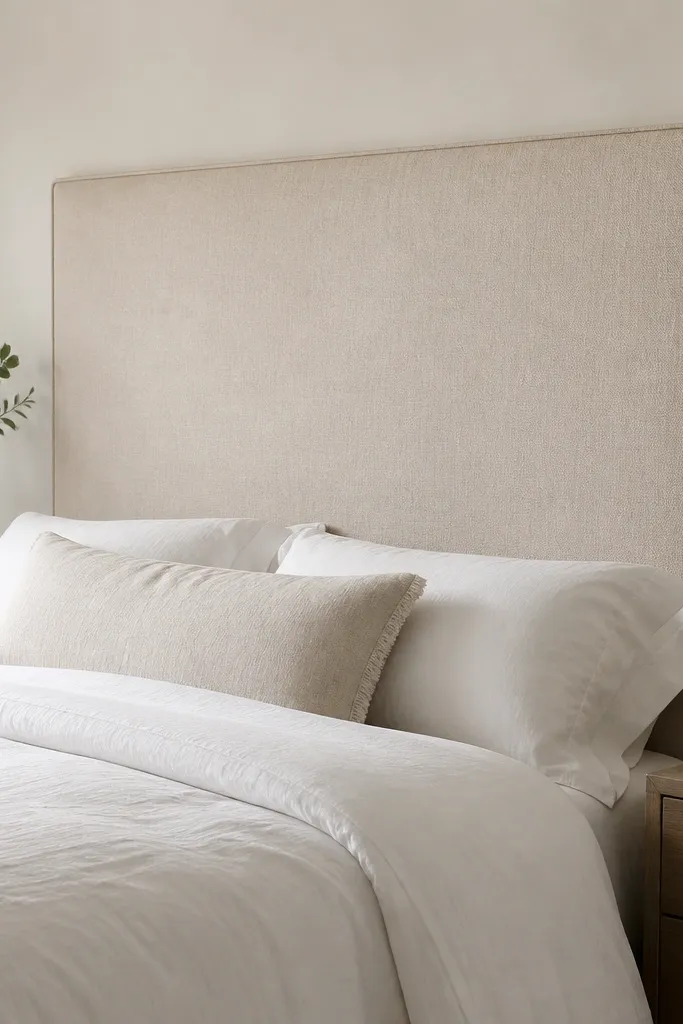
This is the one I reach for when someone says their bedroom feels “unfinished” even with new sheets. The warm oatmeal fabric hides minor wall scuffs and looks softer than gray upholstery under indoor light. I use 1-inch foam on top of plywood so it has body when you lean back, but it still looks crisp at the edges. It flatters most skin tones because it sits in the beige family — it doesn’t pull blue like cool gray-beige can. If your room has dark furniture, this headboard balances the weight with a lighter, matte texture.
Quick tipUse a slightly heavier upholstery fabric (home decor weight) so it doesn’t show staple marks through the weave.
Start by cutting 3/4-inch plywood to your target width (queen is usually about 60 inches wide) and height (I like 52 inches from the top of the mattress area). Add a layer of batting, then glue 1-inch foam on top with spray adhesive; trim foam flush with the plywood edges. Stretch your oatmeal fabric over the back, pull tight, and staple about every 1 inch along the perimeter. Mount it using the same bracket spacing as your bed frame or add two heavy-duty French cleats into the back so it hangs straight.
One warningDon’t use thin craft foam — it collapses in a month and makes the front look wavy.
2. No-sew canvas headboard with pinned box corners
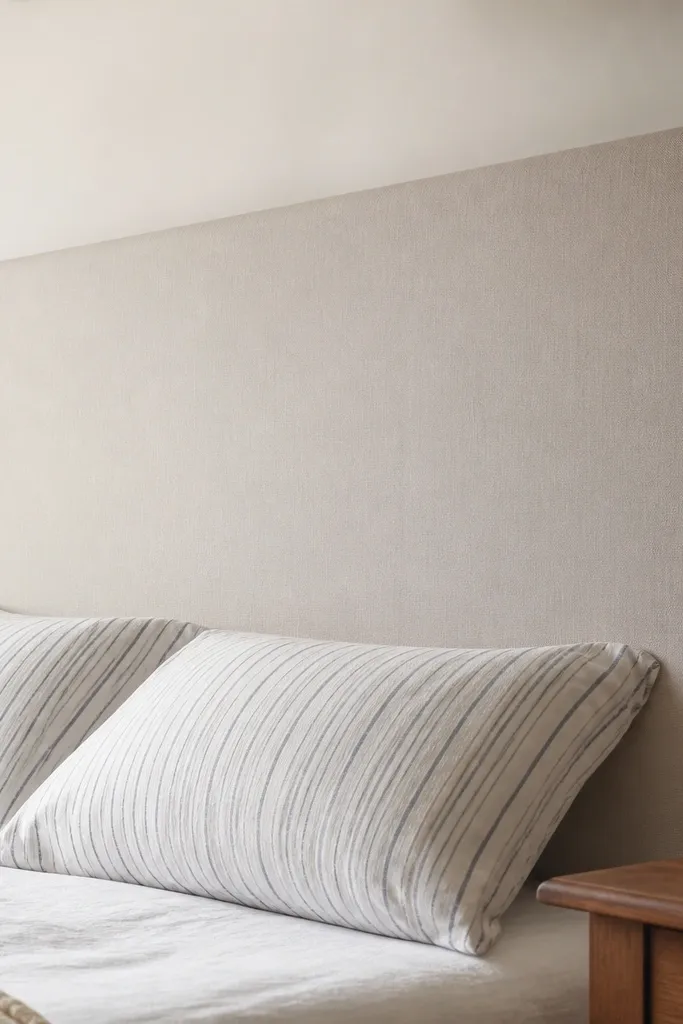
If you want the tailored look of upholstery without committing to full stapling, this works because the corners do the heavy lifting. Canvas holds shape better than thin cotton, so your folds stay crisp when you sit against it. I like this with natural canvas in sand or stone because it reads warm and grounded, not farmhouse-rusty. It flatters rooms with neutral floors and wood tones because it matches the color family without blending into the wall. This also feels practical for kids or pets — canvas scrubs down better than delicate upholstery.
Start with an MDF panel cut to your queen width and desired height, then sand edges lightly so fabric doesn’t snag. Lay canvas face-down, center the board on it, and fold and pin the fabric at the back — I use straight pins through a temporary scrap backing first. Create box corners by folding each side fabric into a small triangle, then pin the fold so it forms a clean, squared edge. Once the corners look right, remove pins one section at a time and secure with a hot glue gun along the back perimeter, pressing for 10 seconds each spot.
Spray the canvas with a fabric stiffener before you install if you want extra structure at the corners.
Don’t stretch the canvas like you’re wrapping a gift — it puckers and makes the corners look uneven.
3. Vertical slat headboard with 2x2 poplar and matte white paint
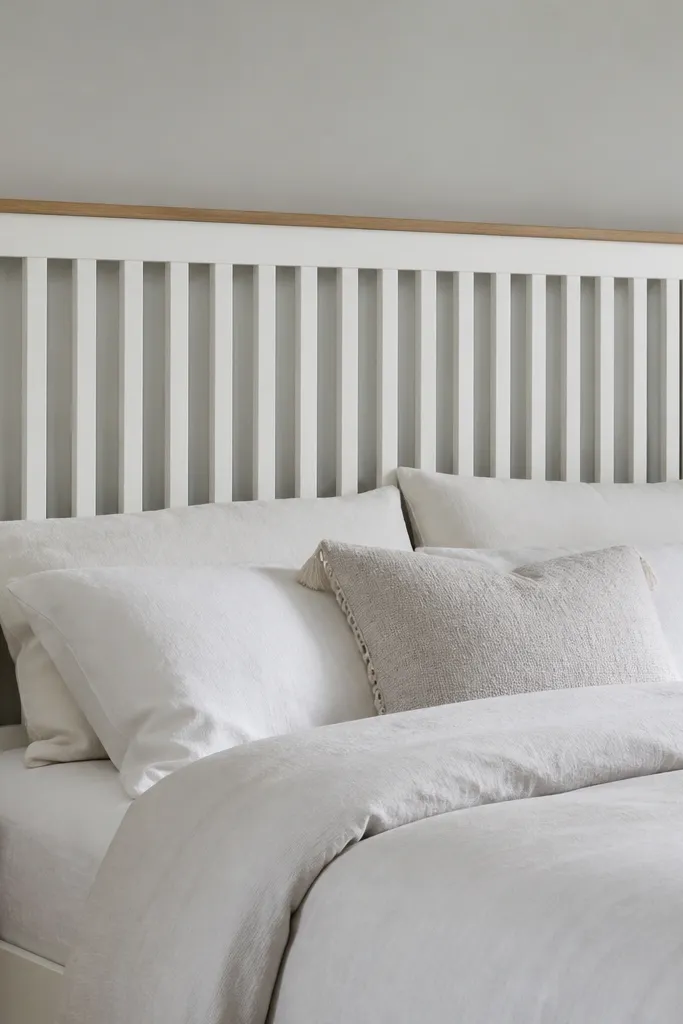
This is the headboard I build when I want a crisp, modern look that doesn’t feel heavy. Vertical slats create height, and matte white keeps it from reflecting light like glossy paint. I use 2x2 poplar or similar straight stock so the slats don’t warp, then sand to 220 grit for a smooth finish. It flatters smaller rooms because the lines pull the eye up without adding visual bulk. If you have a lot of pattern in your bedding, slats calm the space and give your pillows a place to “rest.”
Quick tipUse a small foam roller for paint — it keeps the slats looking smooth instead of brush-streaky.
Build a rectangular frame first using 1x4 boards for the top and sides, cut to your queen width and the headboard height you want. Add vertical slats spaced 1.25 inches apart (use spacers and mark rows with a pencil line). Pre-sand, then prime with a bonding primer, and paint with two coats of matte white wall paint or furniture paint. Seal with a matte clear coat only if you expect frequent wall contact — otherwise the matte finish stays soft.
One warningDon’t skip priming on raw wood — you’ll get blotches that show through the white.
4. Reclaimed door headboard with a live edge and black hardware
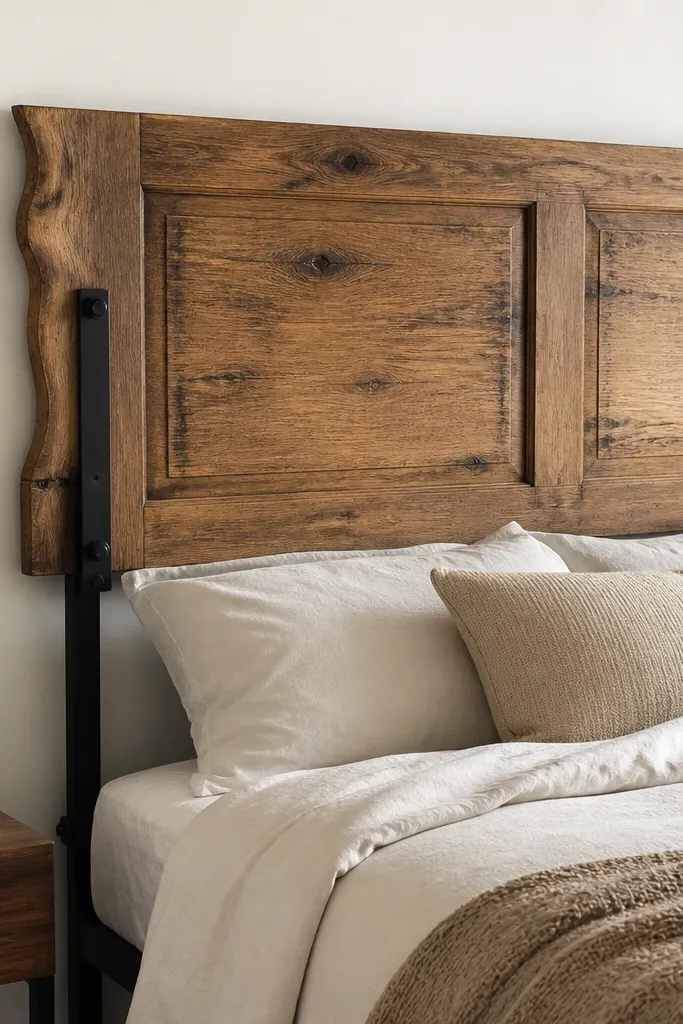
This one is pure character without turning your bedroom into a Pinterest prop. A reclaimed door gives you built-in panels and depth, so you don’t need to add trim or carving. I like leaving the door mostly intact — the grain and knots read warm, especially against off-white walls. It’s flattering if your room already has wood — even a small dresser or floating shelf — because it ties the materials together. If you lean on your headboard daily, the thicker door panel feels solid and forgiving compared to thin MDF.
Start by finding a door slab that fits your queen width visually; trim only if it’s dramatically wider than your bed. Sand the high spots, then stain with a warm brown stain and wipe off after 3-5 minutes for a consistent tone. Seal with a satin polyurethane so it doesn’t look plasticky. Mount it using two heavy metal brackets: attach brackets to the bed frame, then screw the door slab to the brackets through the existing hinge-side area or drilled pilot holes.
Drill pilot holes before screwing into reclaimed wood — old boards split when you rush.
Don’t paint over a door’s texture — it hides what makes it look expensive.
5. Batting and faux tufted headboard using channel tape lines
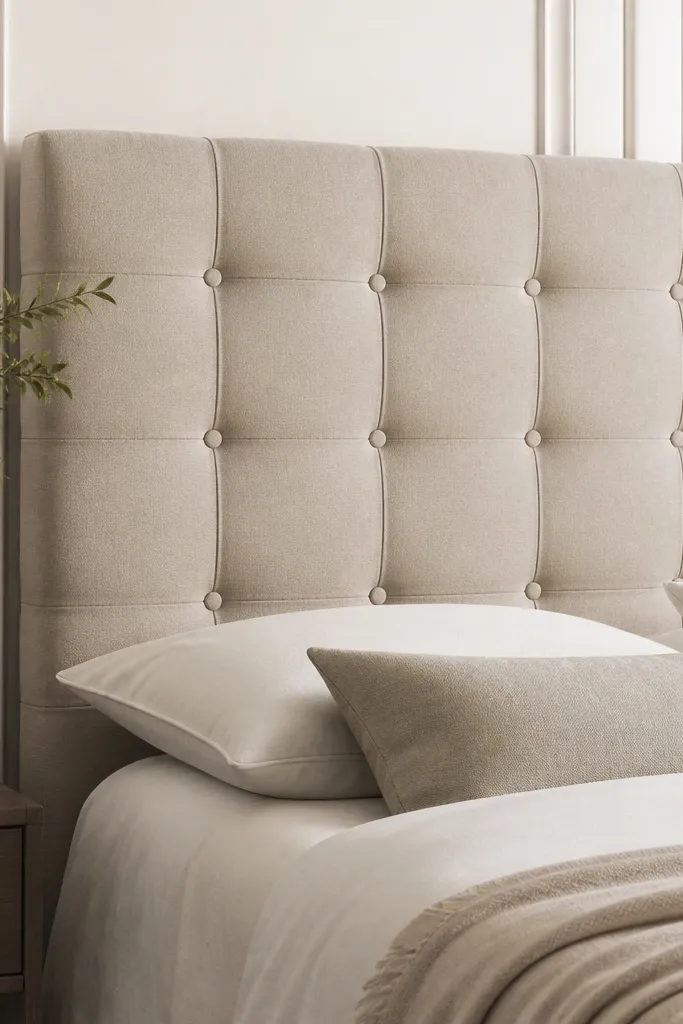
Tufted headboards look expensive because the surface is pulled into a pattern, not because it’s hard to make. This faux tufting method gives you that quilted depth without deep button holes. I use medium-weight upholstery fabric in a muted teal or deep olive because the dimples catch light in a way plain beige can’t. It flatters darker rooms by adding depth without turning the whole bed into a block of color. If you want a soft, tailored vibe, this reads more “designed” than a plain upholstered panel.
Quick tipUse upholstery thread, not regular sewing thread — it holds tension when you lean on the headboard.
Build your base panel from plywood and 1 inch foam, then add a layer of batting so the fabric has something to grip. Lay painter’s tape in a grid where you want tufts (for example, 8-inch spacing horizontally and vertically). Press tape lines down to guide your tension, then cut small slits on the back where each tuft point will be pulled through. Pull fabric tight at each slit point using a strong upholstery thread, tie off on the back, and remove tape after tension is set.
One warningDon’t skip the batting layer — without it, the tufts look flat and the fabric wrinkles.
6. Wall-hinged headboard with fabric panels that fold for storage
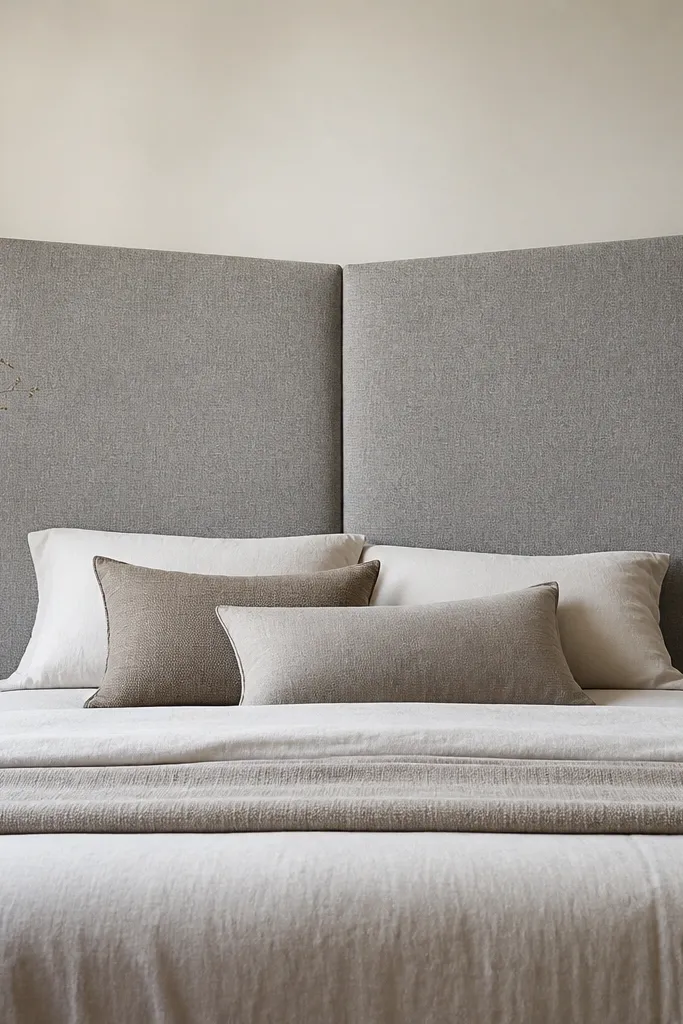
This is the headboard solution when you need storage or you hate cleaning behind the bed. The fold line makes it functional, but the fabric keeps it looking like a normal upholstered headboard. I use textured linen blend in gray because the weave hides minor wrinkles from folding. It’s flattering in small rooms because the bed looks lighter than heavy wood boards. If your bedroom layout makes it hard to reach corners, this design solves that problem daily.
Quick tipUse a magnetic latch — it closes quietly and doesn’t drift like cheap hook-and-eye hardware.
Cut two plywood panels, each half the queen width, and upholster them like you would a normal panel headboard. Add hinges along the top edge and mount the hinge side to the wall or to a back rail attached to your bed frame. Install a simple support strap or latch on the bottom so the panels sit flat when open. Finish by trimming the fabric edges so the center seam stays straight — use a seam tape or thin bias tape on the visible gap.
One warningDon’t mount hinges directly to thin plywood — add a 1x2 backing strip so screws bite.
7. Woven rattan roll headboard with dowel frame
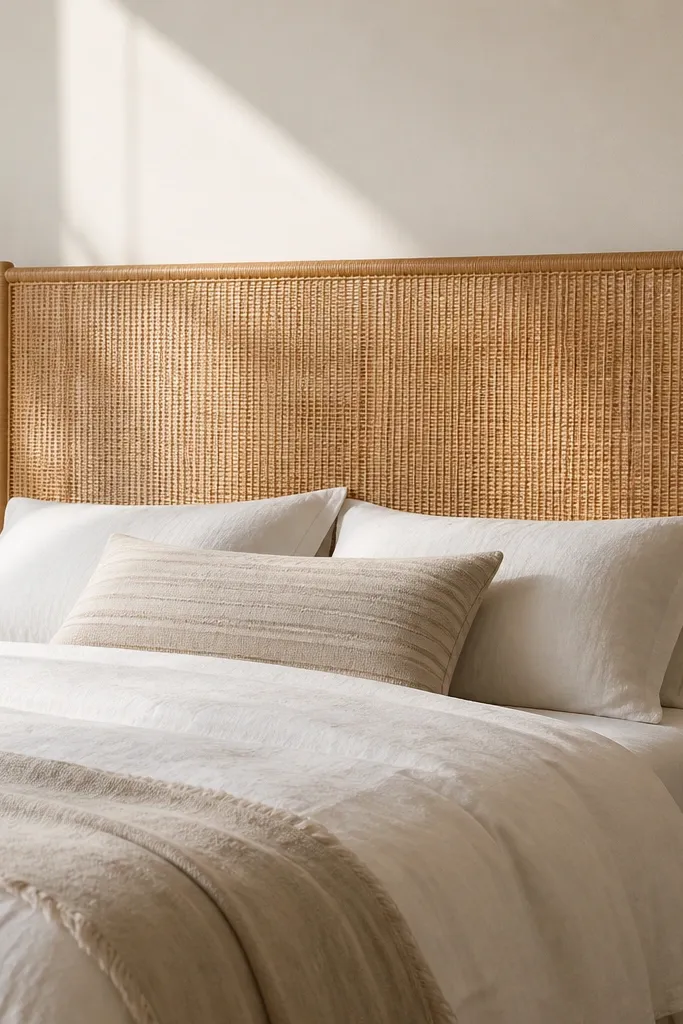
This gives you that airy, spa-like look without upholstery that traps heat. Rattan and similar woven materials breathe, and the pattern adds texture even with plain sheets. I use honey or light caramel rattan because it flatters warm undertones and looks good with white, cream, and sage bedding. It also works if your room has lots of metal — the warm weave softens it. The best part is that it doesn’t show minor scuffs as much as painted wood.
Build a top and bottom dowel frame using 1-inch dowels with end caps, sized to your queen width. Wrap rattan strips vertically and tie them tightly around the frame dowels using jute or upholstery wire at intervals of about 6 inches. Secure the ends with small wood blocks screwed into the dowel ends, then cover any raw tie points with thin fabric tape. Finish by mounting the frame to the bed using two sturdy L-brackets on the back corners so the headboard stays level.
Mist the rattan lightly with water before tying — it relaxes and you get tighter tension.
Don’t use super-thin rattan matting — it sags in the middle once you lean on it.
8. Cork panel headboard with grid pushpins and a linen backing
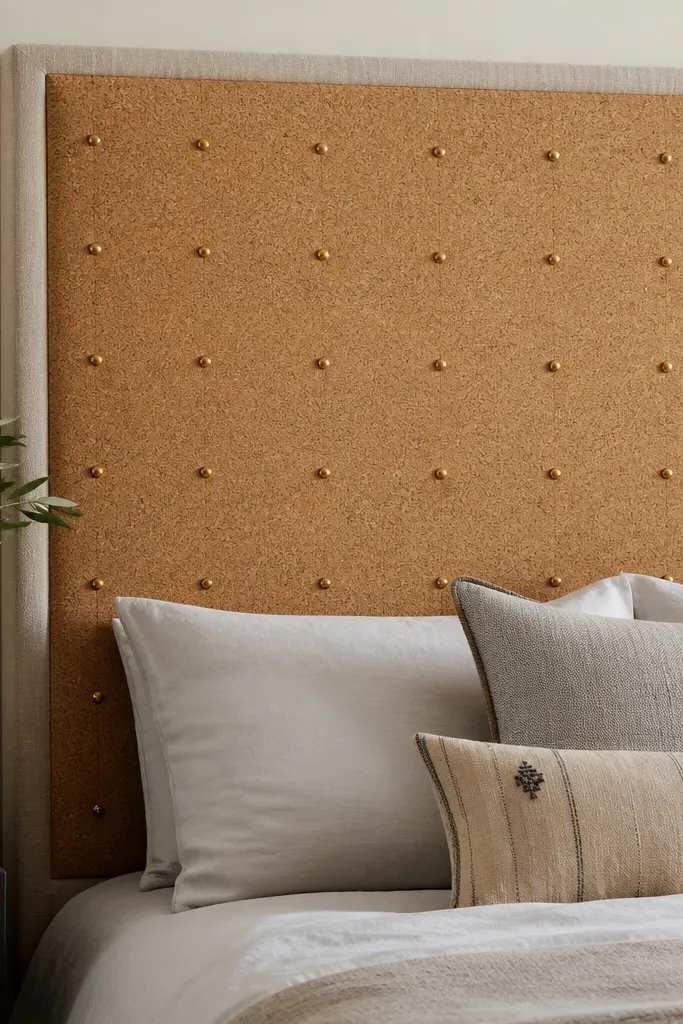
Cork headboards look artsy, but they’re also practical. The cork adds a soft, slightly springy feel and can handle light scuffs without showing scratches like paint. I use a warm tan cork sheet backed with linen so the edges look finished. This design flatters people who like neutral decor but want a little function — you can pin photos, notes, or fabric swatches for styling. It also works in rental homes because you can mount it with brackets and still remove it cleanly.
Quick tipUse brass pushpins if you want a warm, cohesive look — black pins look harsh against tan cork.
Cut a cork sheet to your headboard size, then wrap the edges with linen so the cork doesn’t shed. Place cork on top of a thin backing board like 1/4-inch MDF, then secure with a thin layer of spray adhesive. For the grid, mark a pencil grid on the face (example: 3 inches between pin points), then press pushpins straight in. Mount the finished panel using a French cleat or two wall brackets so it doesn’t tilt.
One warningDon’t overpin — if pins are too close, the cork face gets patchy and loses the clean grid.
9. Fabric-covered foam blocks with a staggered 3D pattern
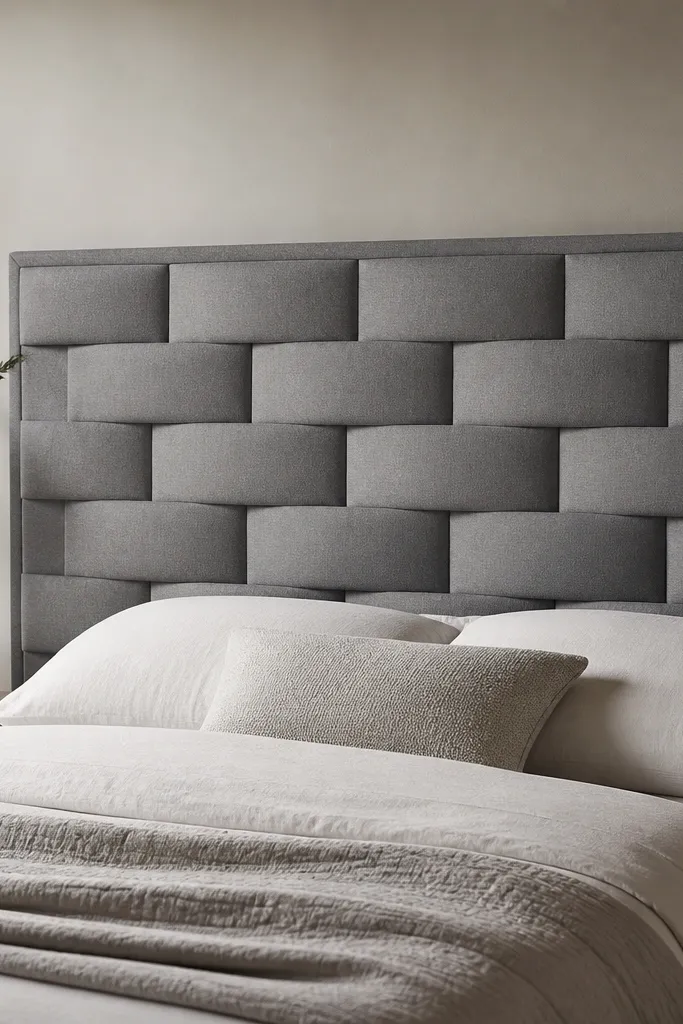
This is what I build when a plain upholstered panel feels too flat. The staggered foam blocks create shadow lines, so the headboard looks dimensional even in low light. I like matte gray or muted olive for the fabric because the shadows show up without turning the room into a circus. It flatters people with strong wall patterns because the block grid gives structure without competing with wallpaper. If you’re rough with headboards, foam blocks are forgiving — they don’t crack like rigid wood panels.
Quick tipUse a ruler and painter’s tape to map the stagger before gluing any blocks — once foam sets, alignment is hard to fix.
Cut your base plywood panel, then decide block size — I like 6x6-inch blocks with 1-inch gaps. Glue foam blocks onto the base in a staggered pattern (like brick layout) and cover the whole surface with batting so the fabric has a smooth top layer. Stretch fabric over the entire headboard, staple the back, and trim carefully around the block edges so the pattern stays visible. Add a thin border strip on the perimeter so it looks intentional, not like fabric wrapped around foam.
One warningDon’t skip batting between blocks and fabric — it makes the fabric crease at every edge.
10. Shiplap headboard with beadboard top rail
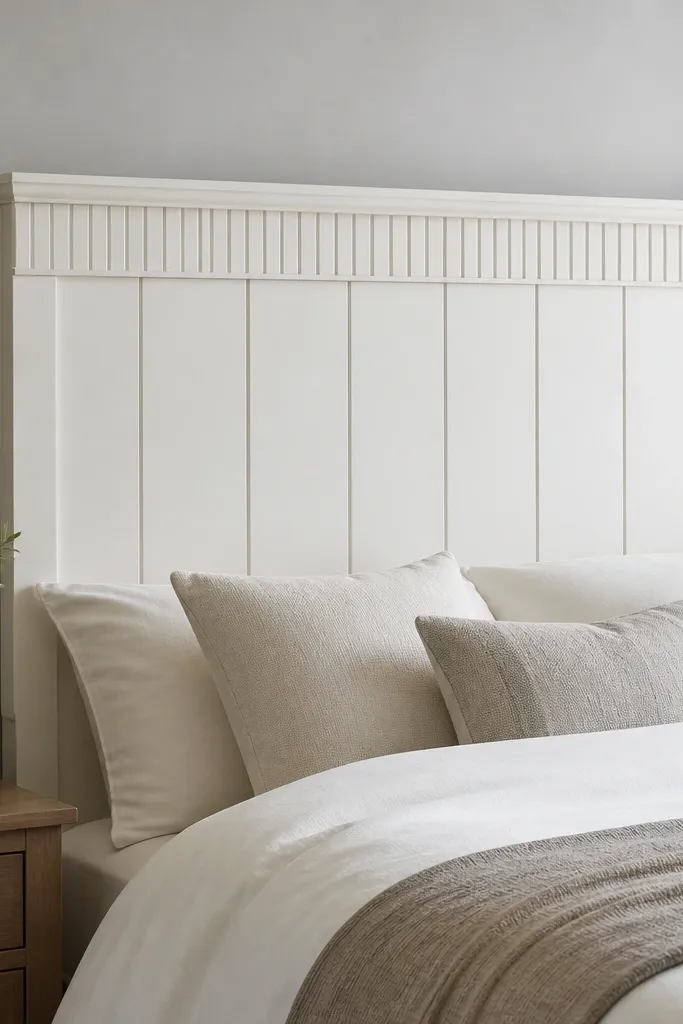
This mix gives you the cozy look of shiplap without making the whole room feel cottage. The beadboard top rail adds a little detail where your eyes naturally land, especially if you sit up in bed. I paint it soft white (not bright) because bright white can look cold against warm bedding. This style flatters rooms with mid-tone wood floors and neutral walls because it blends without disappearing. If you want texture but hate the “rustic” vibe, this is a safer direction than rough reclaimed wood.
Quick tipUse a pin nailer if you have one — it leaves tiny holes that disappear under paint.
Build a frame with 1x3 boards to your queen width and chosen height. Install shiplap boards vertically or horizontally depending on your room — I usually do vertical for a taller look. Leave a consistent 1/8-inch gap between boards for a tidy shadow line, then fill nail holes and sand smooth. Add a beadboard strip along the top edge, then paint with two coats and caulk the perimeter for crisp lines.
One warningDon’t use thick caulk everywhere — it smears and makes the texture look flat.
11. Leather-look vinyl headboard with piping and hidden zippers
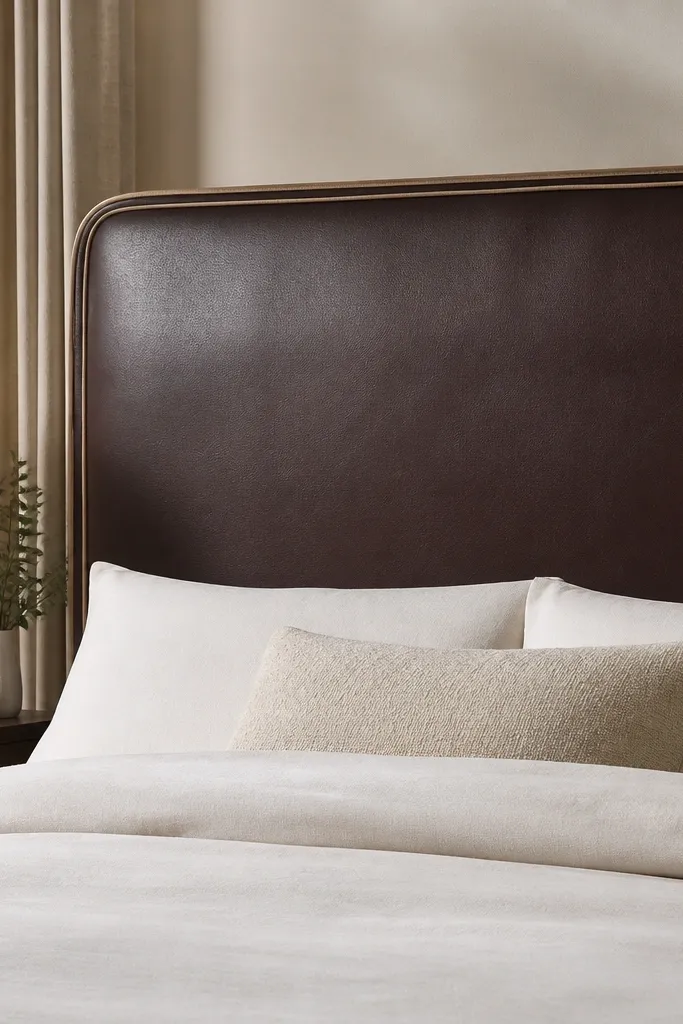
Vinyl headboards look sharp when the edges are finished properly. This one gives you that tailored, furniture-store vibe with minimal bulk. I use espresso brown vinyl because it reads warm, not black, and it matches both brass and matte black hardware. It’s flattering in rooms with darker bedding because it ties everything together without needing a pattern. Plus, vinyl wipes clean — I’ve used this setup in guest rooms where people put backpacks and bags on the bed.
Cut a plywood panel and add 1/2-inch foam if you want a little give, then cover with a thin batting layer. Sew a fabric cover from leather-look vinyl with a front panel and a back panel, then add piping around the perimeter — keep piping width about 1/4 inch. Install a hidden zipper on the back seam so you can remove the cover later. Staple or screw the finished cover to the back using small upholstery tacks around the edges so the front stays smooth.
Before sewing vinyl, test your needle and thread on scrap — a sharp needle prevents puckering.
Don’t skip test fitting — vinyl stretches differently than fabric and shows wrinkles fast.
12. Wood panel headboard with geometric triangles and walnut stain
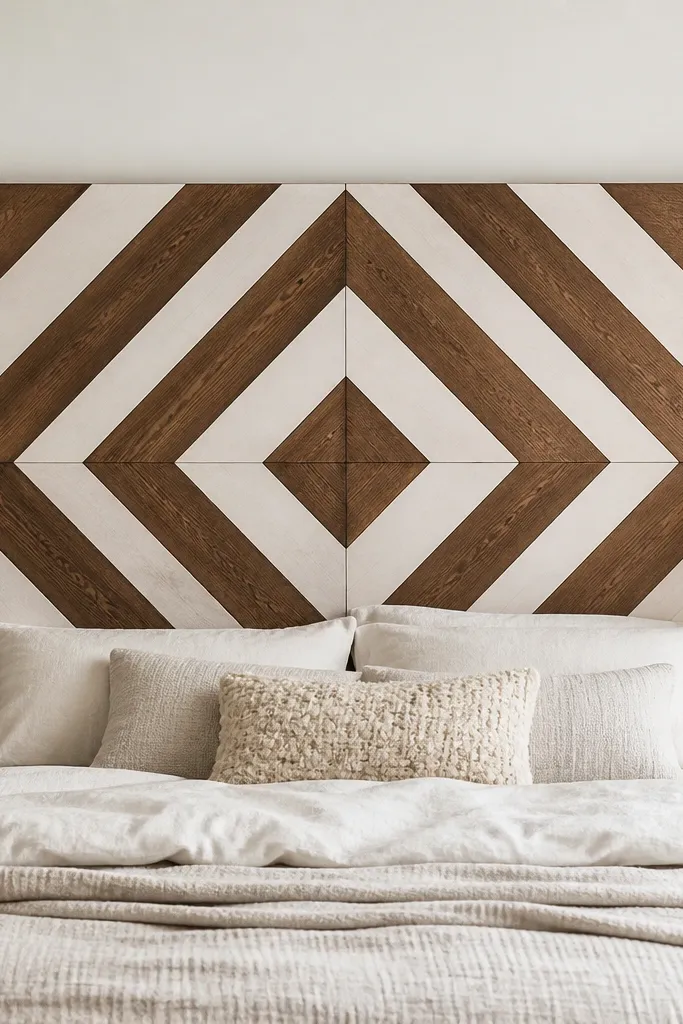
This gives you a gallery-style look without buying art. The triangle geometry creates movement and catches light on the edges, especially when you have lamps at night. I like walnut stain paired with a matte off-white because it looks clean and modern, not busy. It flatters rooms with simple bedding because the headboard becomes the focal point. If your walls are plain, this is one of the best ways to add structure while still keeping the bed area neat.
Quick tipUse painter’s tape as temporary spacers while the glue sets — it keeps triangles from drifting.
Start with a flat plywood base and sand it smooth. Cut small triangles from 1/4-inch plywood or thin hardwood sheets, then sand all edges so they don’t chip. Stain the darker pieces walnut and paint the lighter pieces off-white; seal both before assembly. Glue triangles onto the base in a centered grid, then apply a satin clear coat across the whole piece so the sheen matches.
One warningDon’t glue stained pieces before they fully cure — you’ll smear stain on the glue line and it looks dirty.
13. Macrame-style rope headboard on a simple wooden frame
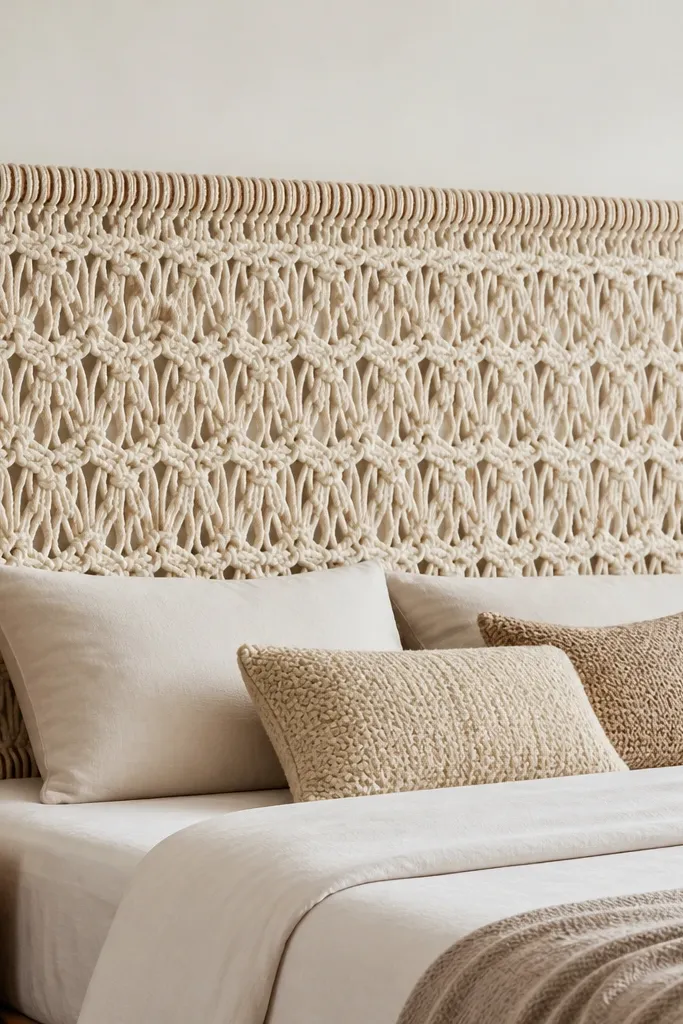
Rope headboards bring texture without the “fabric sag” problem. The open weave makes the bed feel lighter, and the knot pattern adds visual interest from across the room. I use off-white rope so it reads soft under warm lighting and doesn’t glare like pure white. This style flatters boho rooms, but it also works in modern spaces if you keep the frame clean and the rope consistent. If you live somewhere humid, rope still holds up better than delicate upholstery.
Quick tipUse a rope thickness you can tie without fighting it — for most households, 6mm to 10mm rope is manageable.
Build a simple wooden frame from 1x2 boards and sand it smooth. Drill evenly spaced holes along the back top rail and tie rope strands through the holes so the knots hang evenly. Tie repeating knots in rows — I do 3 to 4 knot rows per vertical section — then trim and fray lightly if you like that look. Secure the rope ends to the back rail with wood glue and wrap the back with a thin fabric strip so nothing scratches.
One warningDon’t make knots too tight right away — tighten gradually so the pattern stays even across the width.
14. Upholstered headboard with reversible fabric and snap-on covers
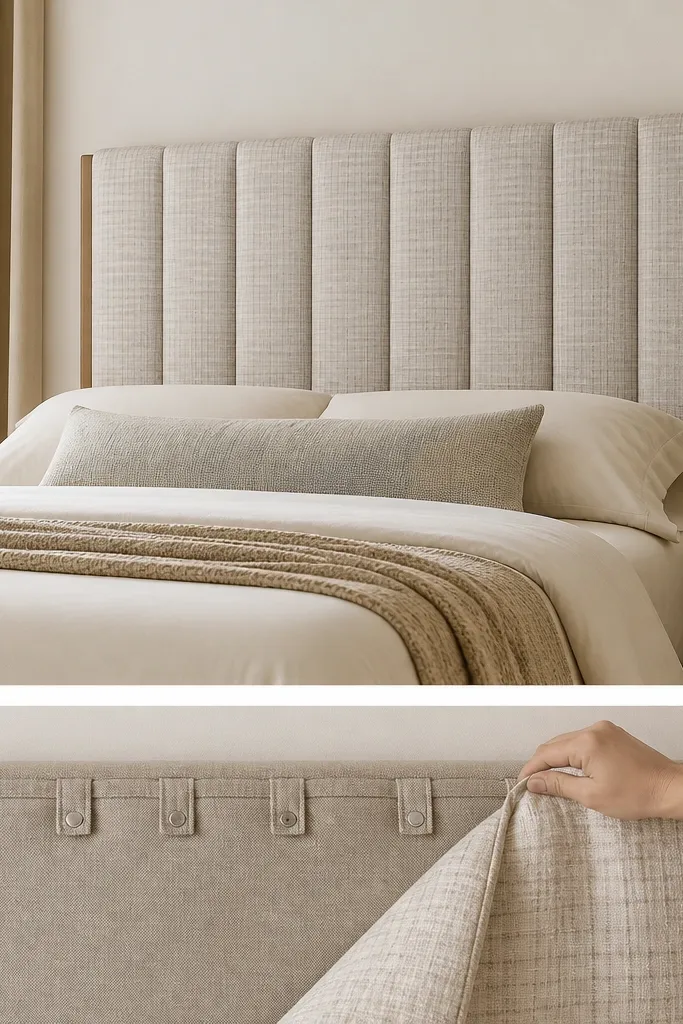
This is the best trick I’ve used when I don’t want a permanent look. Reversible or swap covers let you change seasonally or match new bedding without rebuilding the foam. I use two fabrics with different undertones — like warm oatmeal on one side and a taupe grid on the other — so you can shift the vibe without changing the bed. It flatters people who redecorate often because the headboard stays consistent while the “style” changes. It also helps if you have sun exposure that fades one fabric faster than another.
Build the base panel with plywood and foam, then cover it with a plain backing layer of muslin or cheap cotton. Sew two separate cover panels that fit tightly over the front, and attach snap tape along the back perimeter of the base. Align snaps so the cover seats flat — add 1 extra snap on each side so corners don’t lift. When you swap, remove the cover by unsnapping, then re-snap starting at the center points so alignment stays straight.
Use snap tape with a strong backing and test one snap line on scrap fabric first.
Don’t rely on Velcro — it peels with fabric tension and the cover starts to sag.
15. Buying new upholstered headboard with a DIY mounting adapter kit
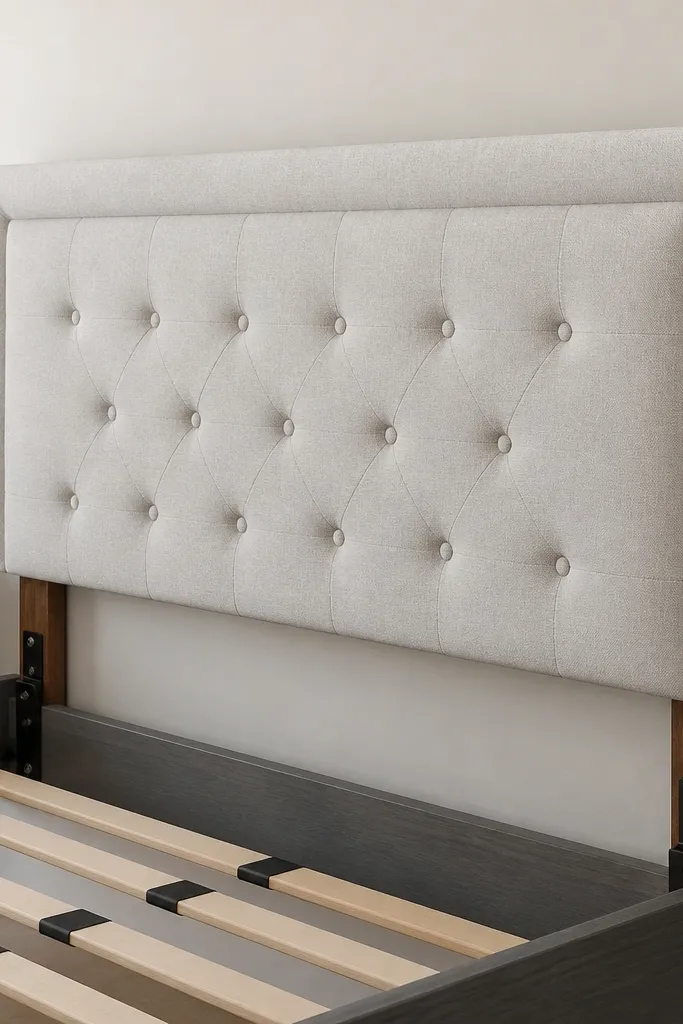
This is the hybrid approach I recommend when you want the comfort of a factory upholstered headboard but your bed frame doesn’t match the included brackets. You still get the padded look, but you fix the fit problem instead of forcing the headboard to sit crooked. I like this when the headboard is already the right height and width, but the mounting points are off by even an inch. It flatters you if you want buttoning or a specific fabric finish you can’t easily source in upholstery weight. You end up with a store-quality front and a DIY-correct back.
Quick tipUse a level on the wall side — even a small slope shows up instantly above a queen bed.
Start by removing the bed frame cover plates and measuring the distance between mounting holes on your bed. Take the headboard and measure its bracket holes — write the numbers down so you don’t guess. Buy a metal mounting adapter kit or make your own from steel angle brackets; drill new holes in the adapter so it aligns with both the bed and headboard. Attach the adapters to the bed first, then hang the headboard and tighten screws evenly so the top edge stays level.
One warningDon’t mount using only one side bracket — the headboard twists and you’ll feel wobble every time you sit up.



