
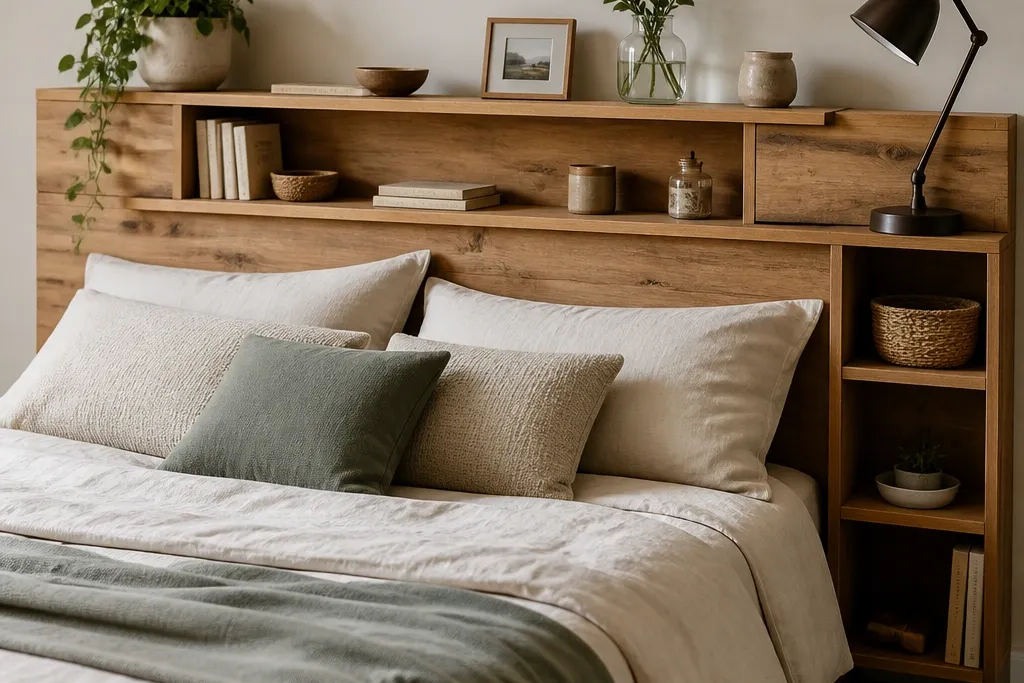
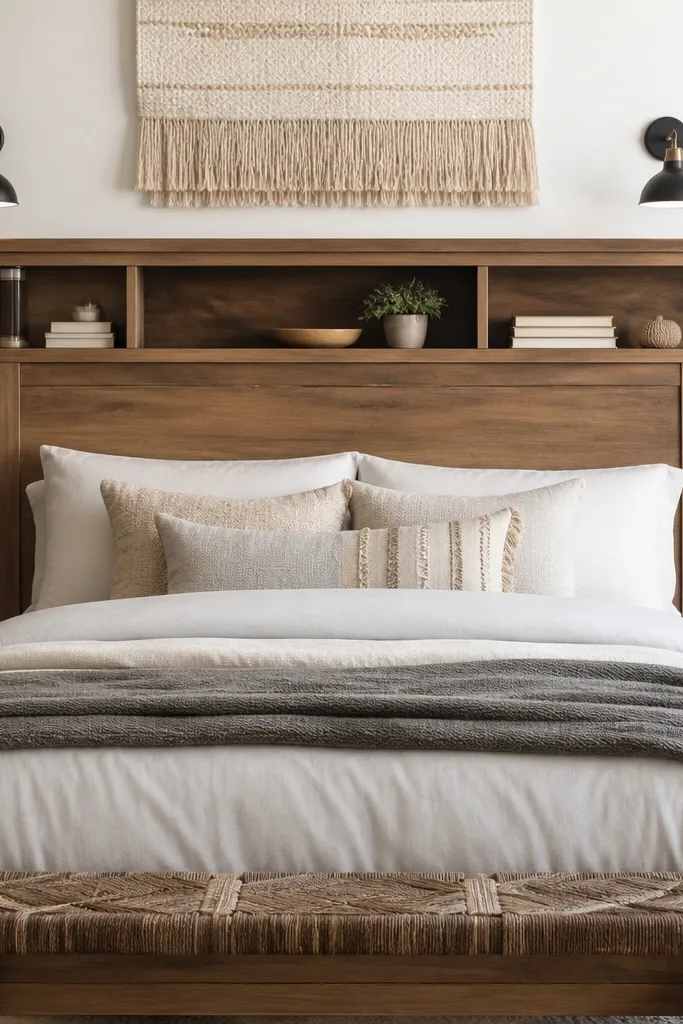
1. Queen headboard with two deep book shelves and a centered charging cubby
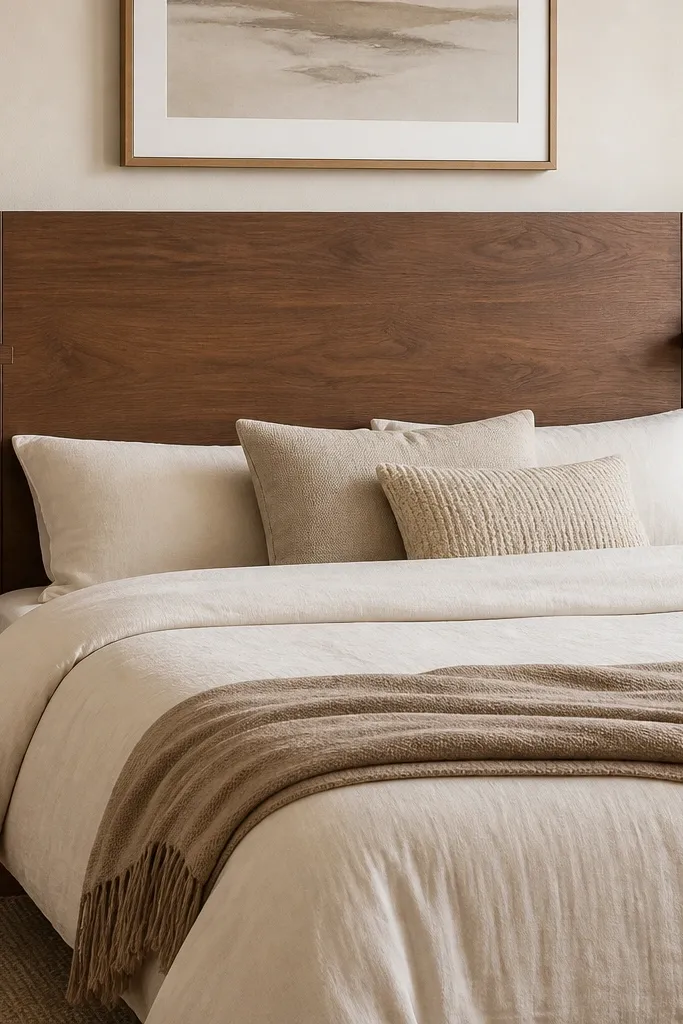
I built this one for a queen bed where the nightstands kept turning into charging stations and book piles. The headboard is a single plywood rectangle stained walnut, with two framed shelves at the same height so the lines read calm from across the room. The charging cubby is narrower and sits lower so cords drop straight down instead of looping behind furniture. This layout flatters rooms with standard-height ceilings because the shelves create a horizontal rhythm without making the wall feel crowded. If your skin tone runs warm or you wear a lot of cream and camel bedding, the walnut stain keeps everything cozy instead of gray-cold.
Start by cutting a 3/4-inch plywood backer to your queen width (about 60 inches) and your chosen height (around 58 inches). Build two shelf boxes from 1/2-inch plywood with 3/4-inch front rails, then attach them to the backer using pocket-hole screws and wood glue. Cut a 6-inch-wide charging cubby opening in the middle and add a rear cord channel by routing a shallow groove in the back panel. Sand everything to 180 grit, stain, then seal with two coats of satin polyurethane. Finally, install using a French cleat along the top back edge so the weight sits evenly and the shelves don’t sag.
Quick tipRoute a cord slot that is 1 inch wide and 3/4 inch tall so you can tuck a multi-outlet strip without it bulking the panel.
One warningSkipping a front lip makes books creep forward fast and the shelf edge looks messy.
2. Twin headboard with staggered floating shelves for a teen room wall
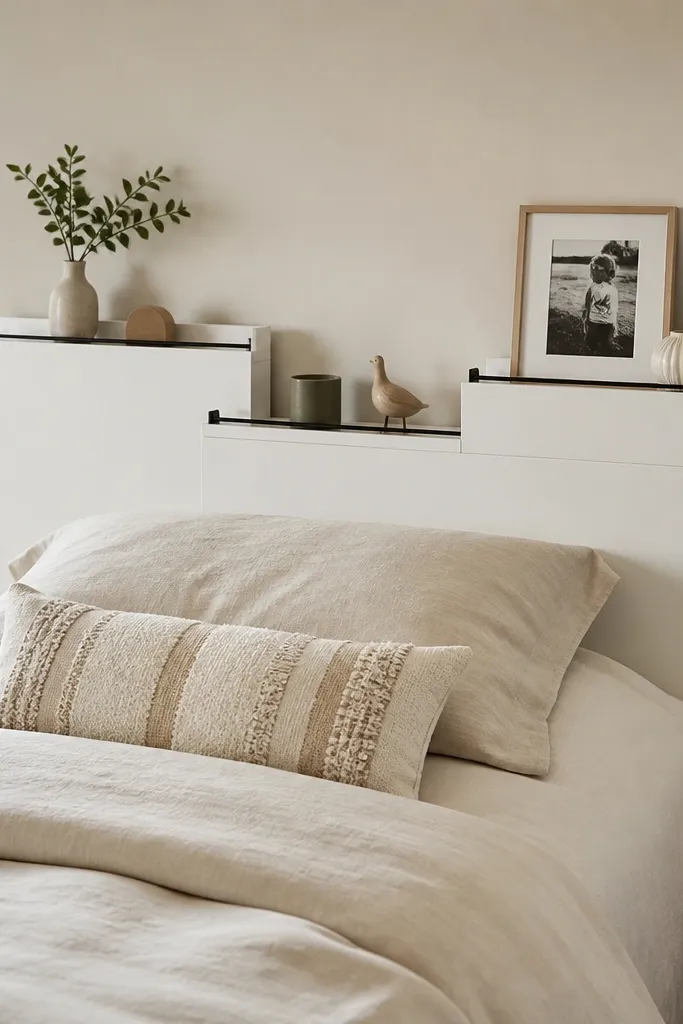
For a teen room, I like staggered shelves because they feel playful but still organized. The headboard is matte white, which makes the black shelf lips pop and keeps the whole wall from looking heavy. I use shallow, framed shelves so the items stay visible — think small plants, a book stack, and a photo frame. This works well when you have a narrower wall width like a twin bed because the staggered layout fills space without needing extra height. If you wear cooler tones in your bedding (gray, navy, crisp white), the matte white base keeps the wall looking clean and bright.
Cut a plywood headboard panel for a twin bed at about 42 to 44 inches wide and 50 to 56 inches tall. Build three shelf frames from 1x2 lumber or 1/2-inch plywood strips, keeping each shelf about 8 inches deep. Attach the shelves to the back panel at different heights, then add a 1/2-inch black metal front lip using small screws or brackets. Sand edges sharp, paint the entire unit white, and seal with a clear coat to resist scuffs. Mount with two cleats — one near each end — so the staggered shelves don’t pull the unit slightly off level.
Quick tipUse a level and mark shelf heights with painter’s tape before you drill anything so the stagger looks intentional, not accidental.
One warningUsing unframed “floating” boards makes the shelf ends look thin and the structure feels flimsy.
3. Fabric-backed headboard with hidden storage ledges and a soft top rail
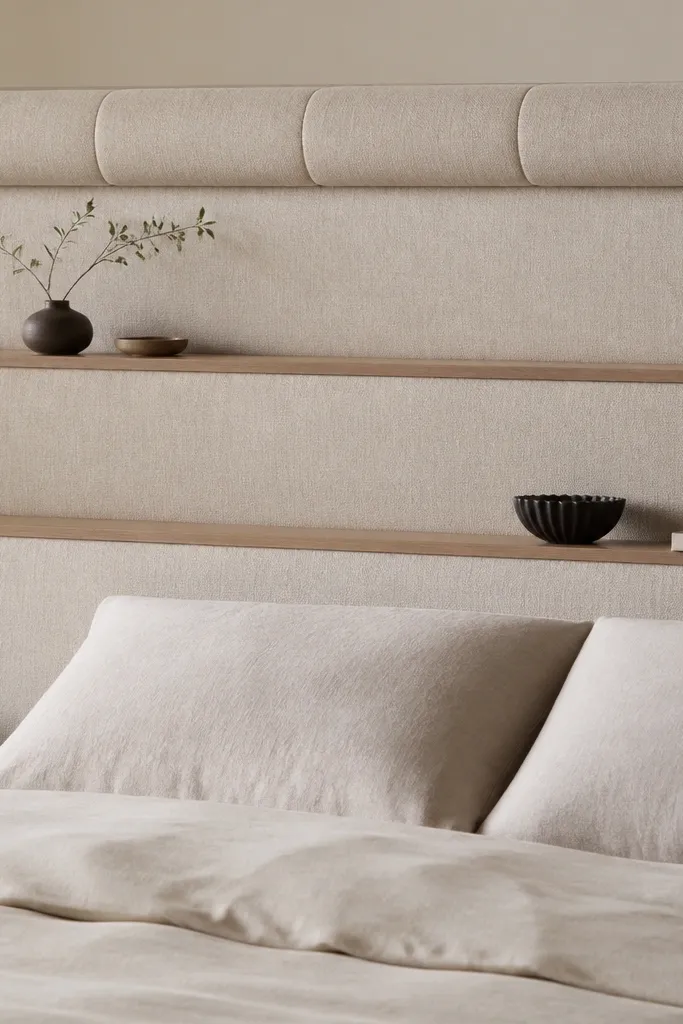
This one is for people who want a softer bedroom look but still need storage. The trick is that the shelves are wood boxes, but the visible surfaces are upholstered or hidden behind fabric panels so the wall doesn’t look like a workshop. I use a foam-backed board wrapped in medium-weight linen, then attach shelf rails in front so the shelf edges look intentional. The palette — beige fabric plus natural oak trim — flatters warm lighting and makes the room feel calm. If you have a lot of textured bedding like chunky knits or flannel sheets, the fabric headboard keeps it looking cohesive instead of too hard-edged.
Start with a plywood base and wrap it in foam and linen using a staple gun. Build two shelf ledges from 3/4-inch plywood with a 1-inch oak front edge and a 7-inch depth, then mount them to the plywood base before you fully close the fabric sides. Add fabric panels between the wood and the wall so you don’t see raw plywood edges. Use a zipper or removable fabric cover on the back if you want access to mounting screws. Finish by trimming the shelf top edge with a thin wood strip and sealing any exposed wood with matte clear coat.
Quick tipTest your fabric tension by pulling the cloth tight over a scrap panel; you want smooth, no wrinkles, without stretching the seam line.
One warningLetting fabric cover the shelf lip directly makes it sag and stains show where hands touch.
4. Arched-top headboard with ladder shelves and a front book stop
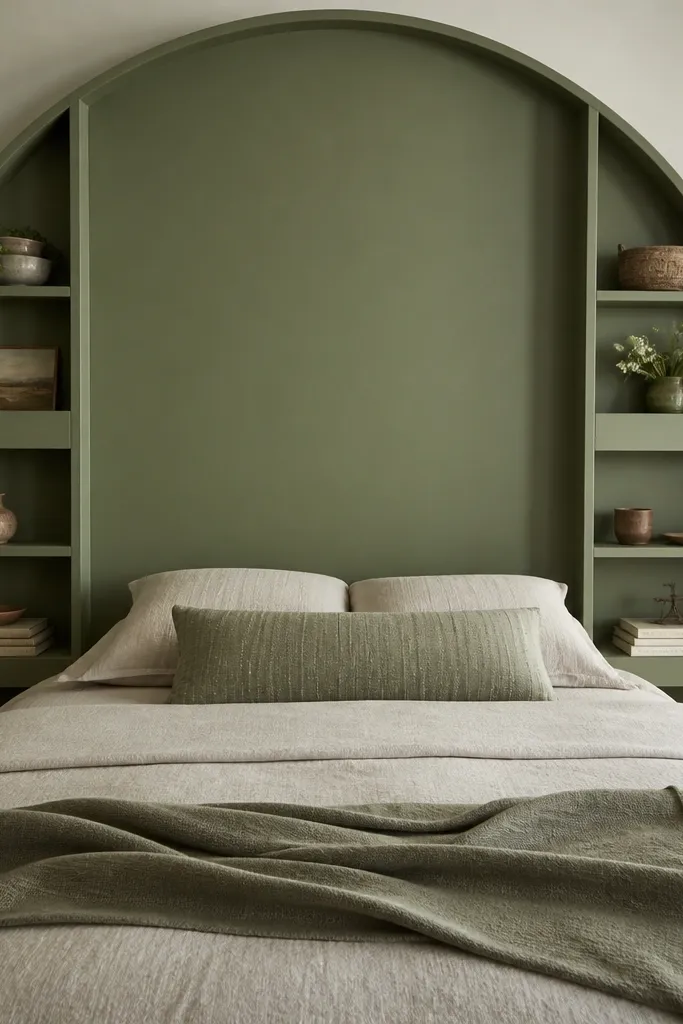
An arched top turns a storage headboard into a statement without adding clutter. I built this using ladder frames on the sides, then attached shelves between them so the structure reads sturdy and architectural. The sage paint makes the shelves feel softer than black or dark walnut, and the curved arch keeps the top portion from looking like a flat board. This works especially well in bedrooms with curved elements like rounded lampshades or arched mirrors. If your bedding has warm whites and soft greens, the color match looks natural and not forced.
Cut a plywood headboard outline with an arch top using a flexible strip to trace the curve. Build two ladder side frames from 1x3 lumber, spacing rungs to match your shelf heights (I use 9 to 10 inches between shelves). Install shelves from 3/4-inch plywood cut to fit between the ladder rails, and add a 1-inch front stop strip so books sit neatly. Prime and paint with a satin enamel, then seal with a clear topcoat for durability. Mount using two wall brackets hidden behind the ladder rails so the arch stays centered and the shelves don’t twist.
Sand the arch edge by hand with a sanding block so the curve stays smooth and doesn’t show tool marks.
Skipping a front stop makes the front edge look unfinished and books slide off during everyday use.
5. Reclaimed wood headboard with boxed shelves and a distressed clear coat
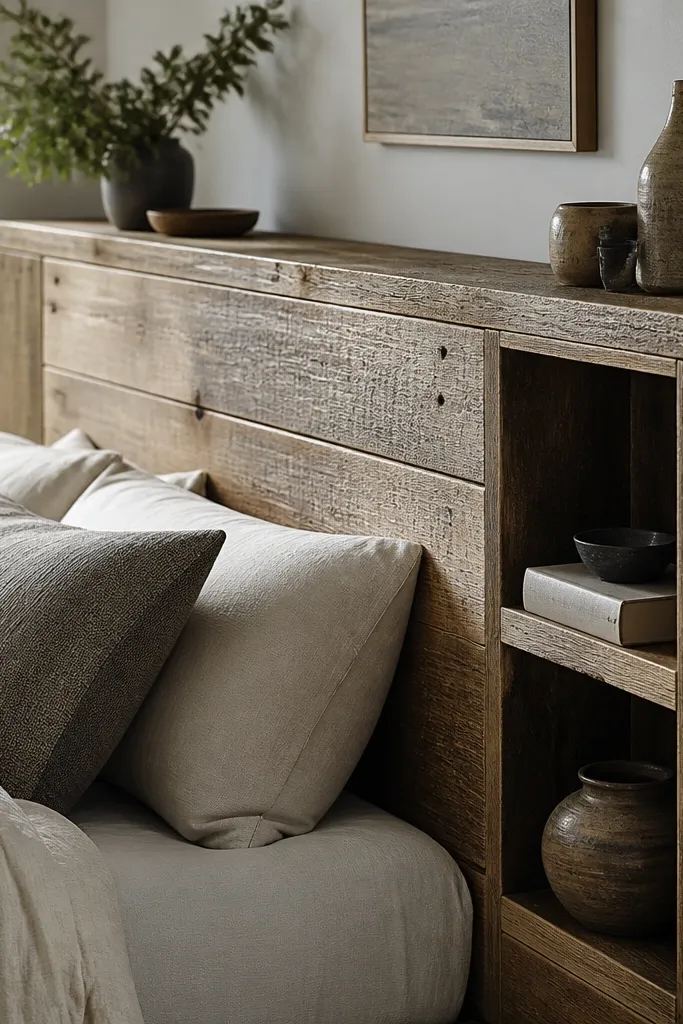
I love reclaimed wood looks, but only when the shelves are framed like furniture. This design uses boxed shelves so the interior wood tone shows when you place items, giving you depth without making the unit look chaotic. The headboard face shows varied board grain, but the shelf frames are consistent so the storage stays tidy. It looks best with bedding that has earthy colors — oatmeal, rust, olive — because the warm wood tones blend into the room. If your walls are cool gray, I’d still go for this but keep the clear coat warm and not too smoky so the wood doesn’t look muddy.
Pick boards with similar thickness so your shelf frames sit flush; I use 3/4-inch material for the headboard face. Build the shelving boxes with 1/2-inch plywood interior and reclaimed wood trim on the front and sides. Stain the interior slightly darker than the exterior to create contrast, then apply a distressed clear coat using steel wool on the outer trim only. Glue and nail the trim with wood glue and 18-gauge brads, then fill nail holes with matching wood filler. Seal the whole unit with a satin poly so the distressed texture stays tactile but wipeable.
Quick tipDo a test piece on scrap reclaimed boards to dial the distress level; too much steel wool makes shelving look tired fast.
One warningUsing reclaimed boards as the actual shelf deck without sealing invites splinters and rough edges.
6. Modern slat headboard with narrow shelves for minimalist decor
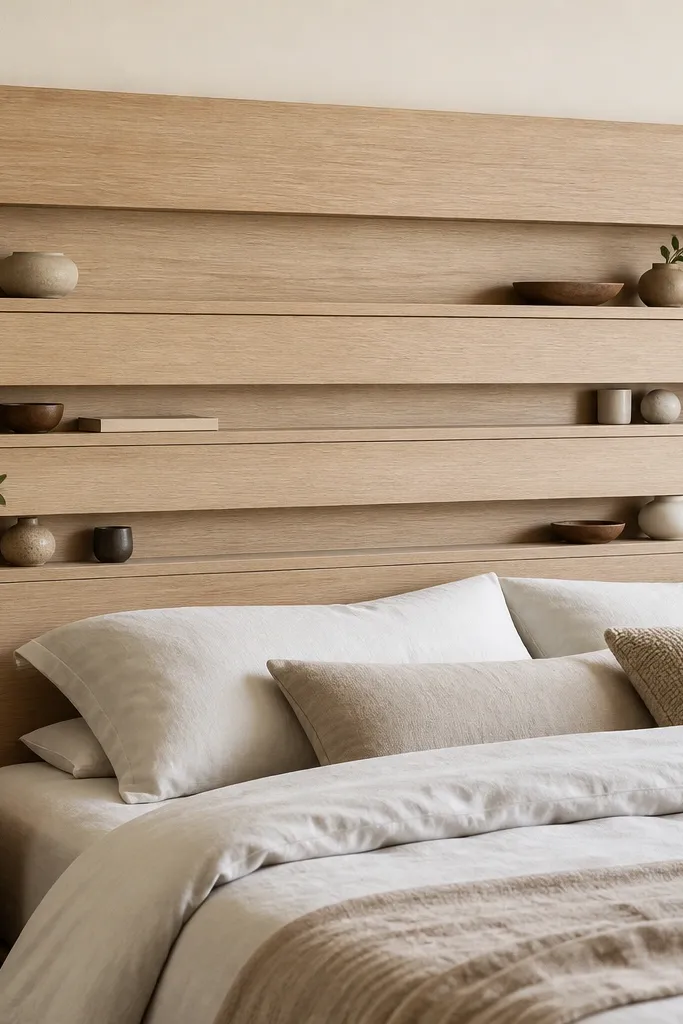
This is the cleanest option if you hate clutter. The slat headboard gives you texture, and the shelves are narrow enough that you only display a few objects — a candle, a small tray, one or two books. I keep shelf depth around 6 to 7 inches here so the line stays sleek and doesn’t turn into a bulky ledge. It looks best in bedrooms with simple bedding and fewer patterns because the slats already bring visual interest. If you like cooler palettes like white, beige, and light gray, light oak slats keep it warm without getting orange.
Build a slat frame first using 1x2 oak strips spaced 2 inches apart on a 3/4-inch plywood backer. Add two or three shelf platforms made from 1/2-inch plywood strips across the width, then install small vertical dividers at both ends so items don’t slide off. Cut dividers from 1x2 and paint or stain to match. Sand lightly, finish with matte clear coat, and install with a cleat system so the slat face stays level. Place the shelves so their centers land around 18 inches and 36 inches from the floor for balanced sightlines.
Use a small bead of clear caulk where slats meet the backer so the slat line stays tight after expansion.
Making shelves too deep in minimalist designs turns the look into a pantry shelf.
7. Built-in look headboard with full-width shelves and hidden side cabinets
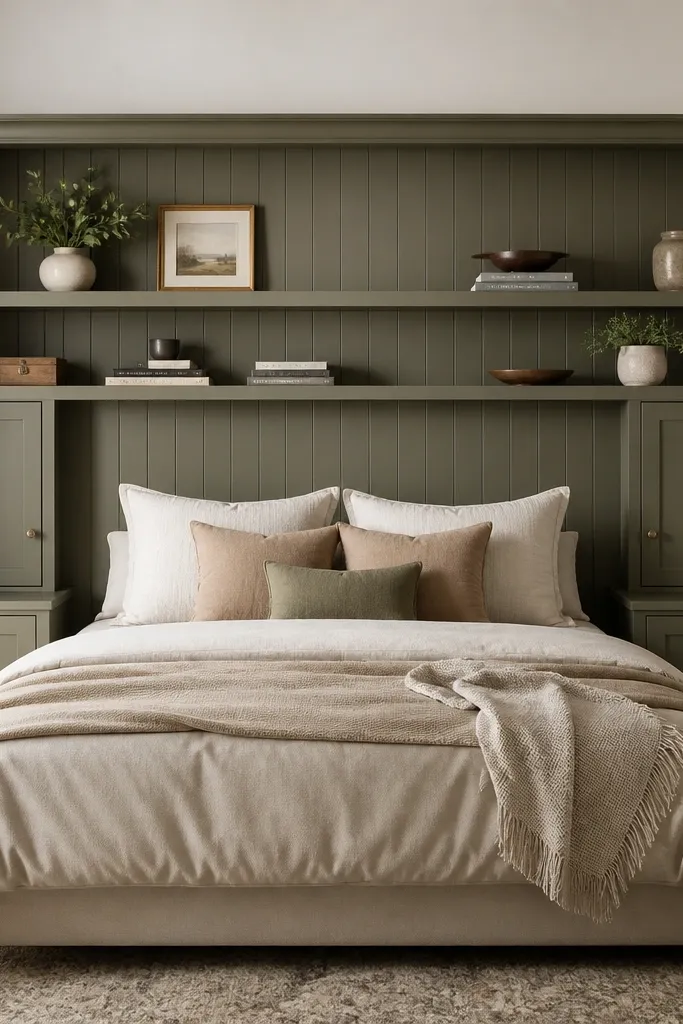
If you want storage that disappears, this layout is the one I keep recommending after doing installs. The full-width shelves give you open display space, but the side cabinets swallow the mess — charging bricks, extra pillowcases, random cables. I built the headboard so the shelves line up with the cabinet top edges, which makes everything look built in even when it’s a DIY. It flatters larger rooms because it uses wall width fully, and it looks great with beds that sit centered on the wall. If you have a warmer undertone in your room lighting, the painted finish looks richer and hides scuffs better than stain.
Start with a 3/4-inch plywood backer the full width of your bed, then frame two side cabinets from 1/2-inch plywood with 1/4-inch back panels. Build a full-width shelf box across the center, then add a second shelf band above it with matching frame depth. Install cabinet doors using concealed hinges so the doors sit flush with the shelf frame. Paint everything with a durable cabinet paint (semi-gloss or satin), then add shelf liners if you want a wipe-clean surface. Mount the whole unit by screwing through the back frame into studs, using a level to keep the shelf bands perfectly horizontal.
Quick tipAdd a magnetic catch to cabinet doors so they close softly and don’t swing open when you grab items.
One warningSkipping concealed hinges makes the door gap look uneven and the built-in illusion breaks.
8. Corner-friendly headboard with L-shaped shelves and a reading nook
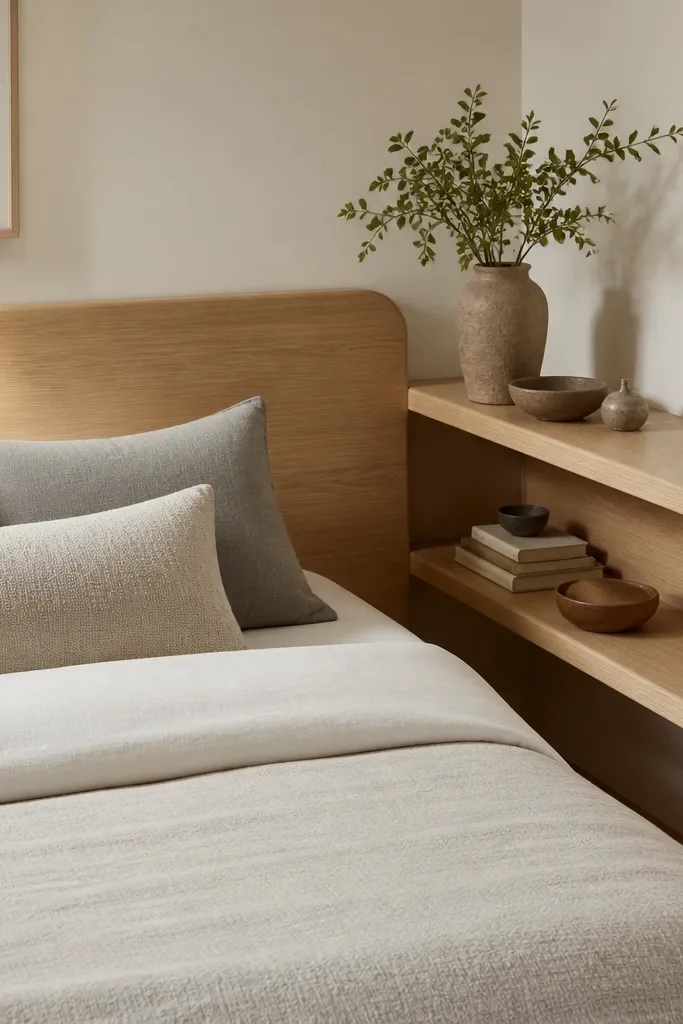
Corner beds need storage that doesn’t waste the side wall. This DIY Headboard with shelves ideas layout extends shelves around the corner so you get more access without adding nightstands. The L shape makes the reading area feel intentional because books and a lamp can live at the corner junction. I used a light stain so the corner doesn’t look dark and cramped. This is great for small rooms where you need to keep the floor open and still have a place for water, glasses, and a phone charger. If your room has warm wood floors, the light stain makes the headboard blend instead of contrast harshly.
Measure the distance from the bed edge to the corner so the shelf depth doesn’t bump your walkway; keep the run depth around 8 inches. Build a main headboard backer against the primary wall, then extend a second plywood panel around the corner with a matching shelf box frame. Add shelves as framed boxes with a back rail on both runs so items don’t fall into the corner gap. Round the shelf edges with a 1/4-inch round-over bit and sand to 220 grit. Finish with stain and a satin topcoat, then mount using a cleat on the main backer and a second cleat on the corner extension into studs.
Test shelf reach by placing a paperback and a water bottle on the shelf before final mounting — adjust by 1 inch if bottles feel too close to the edge.
Building the corner shelf too deep makes the bed feel pushed forward and blocks the line of sight.
9. Plywood grid headboard with cube shelves and pegboard-style organization
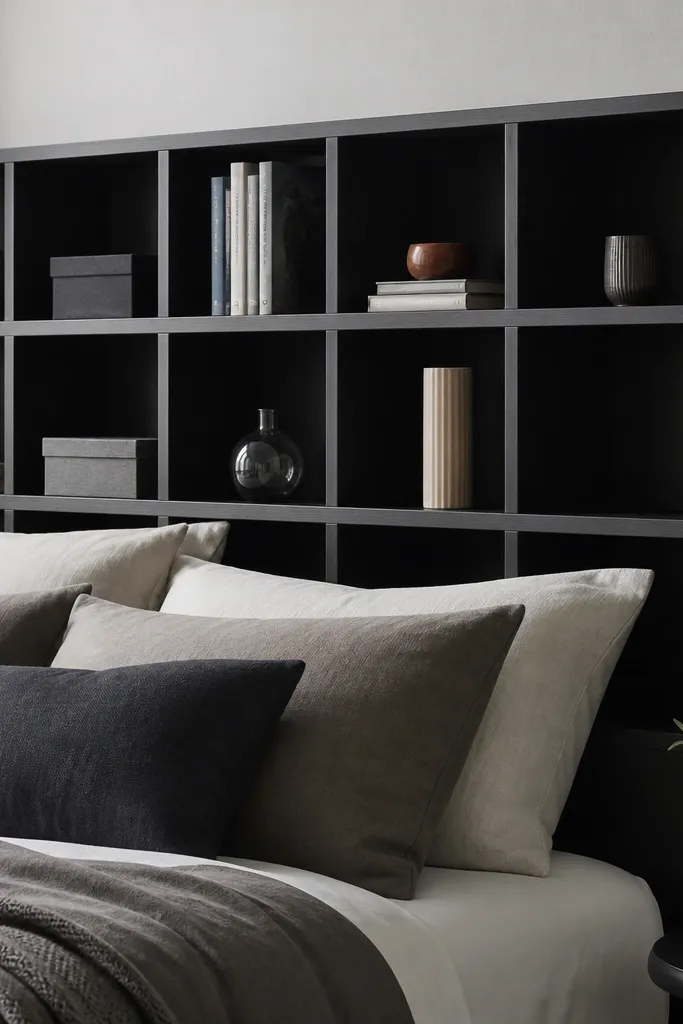
This is for people who love organization systems. The cube shelves let you assign categories — books in one row, small baskets in another, and decor in the top cubes. I made it with a plywood grid so the whole unit stays rigid and the lines stay straight, even when you move it during assembly. Because the shelves are open cubes, you get visual order, which helps if your room tends to look chaotic. Black paint makes the cubes look crisp and modern, and it flatters jewel-tone bedding like teal or burgundy.
Cut a plywood backer, then mark a grid with pencil and a square. Build cube frames from 1/2-inch plywood and screw them into the backer so each cube is a separate box. Keep cube openings around 8x8 inches for common book sizes and small baskets. Sand, prime, then spray or roll matte black paint, finishing with a clear matte topcoat. Add small hooks on a vertical strip for headphones or a charging cable loop and mount using a French cleat at the top.
Use the same spacer block for every cube so your grid stays perfectly even from shelf to shelf.
Using glossy paint on cube interiors shows every fingerprint and looks messy fast.
10. Farmhouse beadboard headboard with two towel-and-book shelves
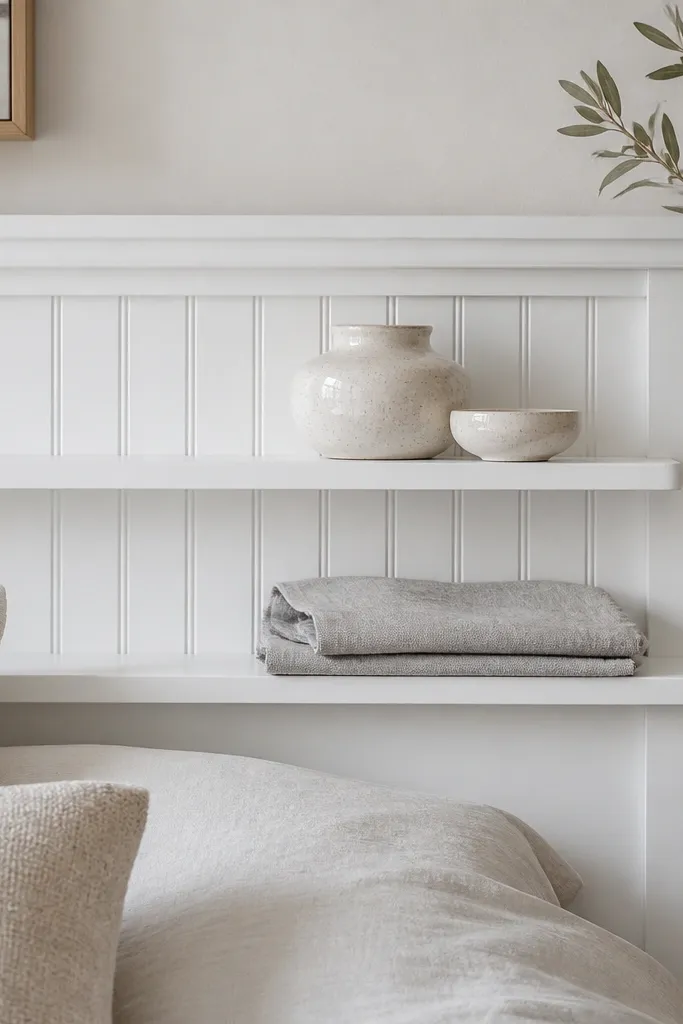
Farmhouse beadboard is cozy, and the shelf placement makes it functional. I put the shelves at different heights so you can set a folded towel or throw on the lower shelf and books on the upper shelf without mixing everything. The beadboard texture hides minor wall imperfections and makes the whole unit look like it belongs in an old house. It flatters neutral bedding and works with warm skin tones because the white base reads gentle, not sterile. If your room has lots of light fabrics, the shelves keep your bedside items from landing on the floor.
Cut a plywood headboard frame and attach beadboard paneling to the front using small finish nails. Build two shelf platforms from 3/4-inch plywood with a 1-inch front trim, keeping depth around 9 inches. Paint the beadboard and shelf frames the same white, then seal the shelf tops with a satin clear coat so they wipe clean. Install shelves to the beadboard backer with pocket-hole screws and wood glue. Mount with stud screws through the top frame — I like two screws per side — so the shelves feel anchored.
Add a 1/4-inch lip under the shelf front trim so beadboard edges don’t chip from daily contact.
Leaving raw beadboard edges exposed makes the project look unfinished and can fray over time.
11. Walnut and metal pipe shelves headboard with industrial vibe
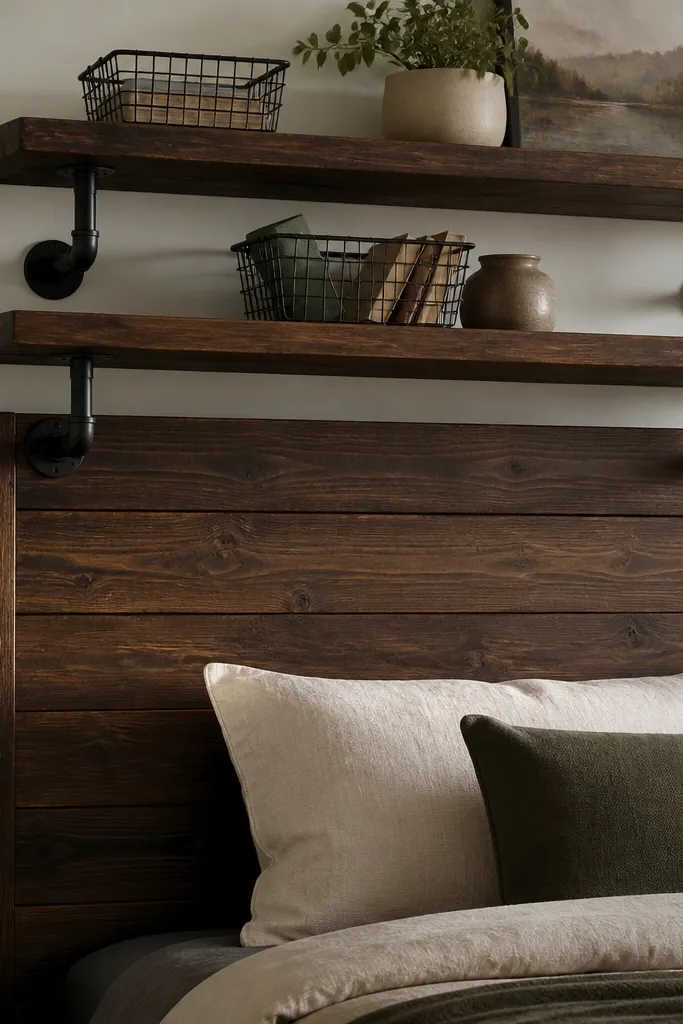
Industrial doesn’t have to look messy. This layout uses metal pipe brackets that give you a real, mechanical look — the shelves feel like they’re holding up the headboard, not attached randomly. The walnut wood keeps it warm so it doesn’t feel like a garage. I like this for people who have black furniture accents, because the black brackets blend naturally. It flatters contrast-heavy rooms — dark frames, gray walls, black lamps — and it looks sharp with crisp white sheets. If your bedding leans neutral, the wood grain adds enough texture without extra decor.
Build a 3/4-inch plywood headboard panel and stain it walnut. Cut two shelf decks from 3/4-inch plywood, then add a 1-inch thick front edge trim for a solid look. Install black pipe brackets on the inside of the headboard frame so the wood shelves sit level at your chosen heights. Use a back rail or a small metal stop strip at the front to keep items from sliding. Seal the wood decks with satin poly and mount the whole unit to studs using a top cleat plus two side screws for security.
Quick tipDrill pilot holes for the bracket screws — pipe brackets crack cheap wood if you force them.
One warningSkipping a front stop lets small items slide off, and the shelf looks chaotic immediately.
12. Small-space headboard with three slim shelves and a pull-out bin
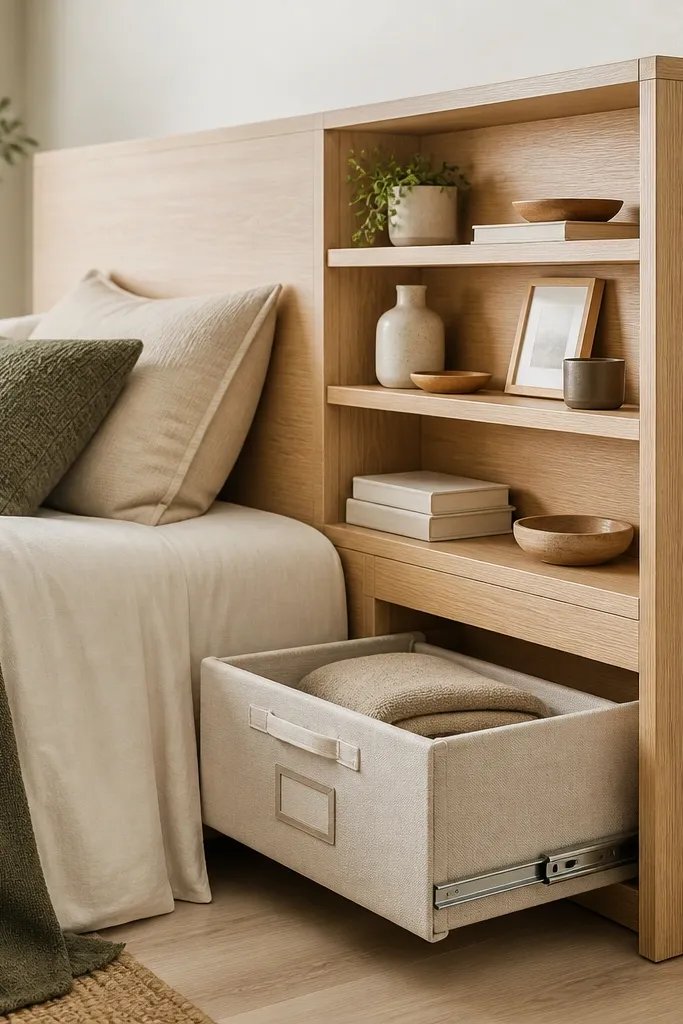
This is the one I built for a tight guest room where nightstands were a bad idea. The shelves are slim and vertical, so you still get storage for a book, a small lamp, and a skincare tray without taking up floor space. The pull-out bin is where you hide the ugly stuff — extra charging cables, spare chargers, or travel-size products. The oak finish keeps it warm and makes the storage feel lighter than painted wood. This layout flatters small bedrooms because it uses height instead of width. If your room lighting is warm, the oak shelves look inviting instead of yellow.
Cut a headboard backer to the bed width and a height around 54 inches. Build three shelf boxes with 6-inch depth and framed sides so they stay rigid; attach them to the backer at equal intervals. For the bin, install two side runner pieces inside a lower framed compartment, then slide a fabric bin with a rigid plastic back or a thin plywood base. Add a small handle lip or pull tab on the bin front. Sand, finish with stain and satin topcoat, then mount using a cleat and two stud screws.
Choose a bin with a stiff back so it doesn’t sag when you pull it out with one hand.
Making shelves too deep forces items to sit in a pile and the neat look disappears.
13. Whiteboard-style headboard with marker ledge and narrow shelves for notes
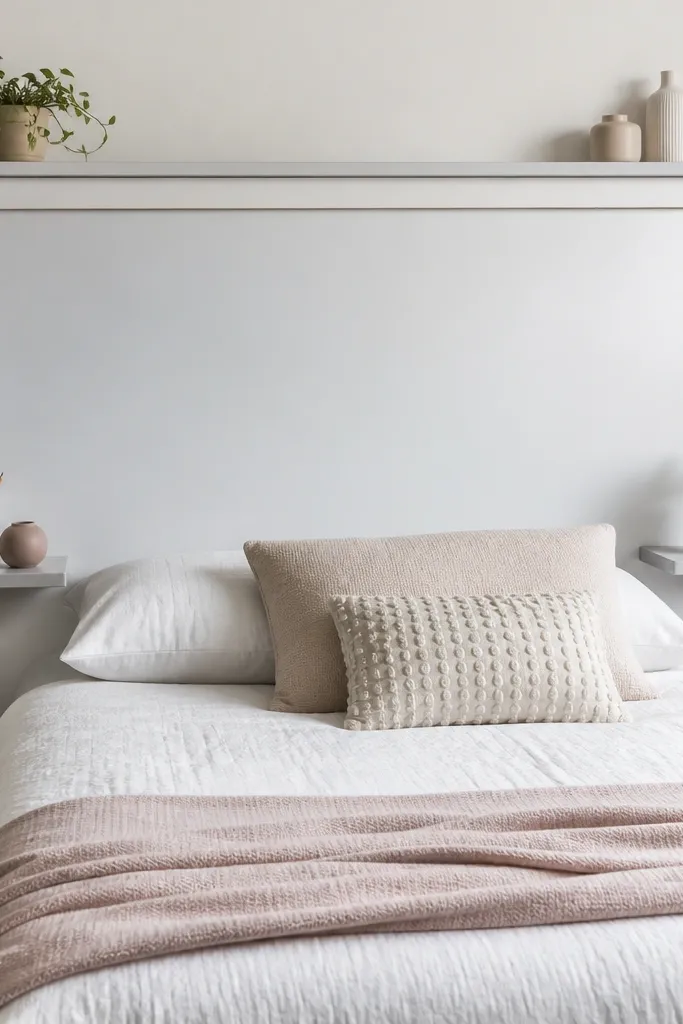
If you’re the type who writes reminders on sticky notes, this layout is a game for keeping it in one place. The center panel is a writing surface, and the storage shelves are narrow so you store pens, a small notebook, and a couple of books, not random clutter. I used a magnetic writing surface layer so you can pin a photo or a grocery list. The white finish makes the room feel brighter, and the thin gray trim keeps it from looking flat. This works best when your bedding is patterned — the writing panel adds another texture that still looks organized. If you want a clean look without heavy wood tones, this is the direction.
Build a plywood frame for the headboard and attach a magnetic write-on panel to the center section. Add a top ledge from 3/4-inch plywood at 1.5 to 2 inches deep so markers and a notebook don’t slide. Install two narrow shelves below, each about 7 inches deep, with a 3/4-inch front lip. Seal the wood ledges with clear coat, then paint the frame with durable white enamel. Mount the writing headboard to studs using a cleat and verify level before the final screws.
Use a shelf liner or thin felt on the top ledge so marker caps don’t scratch the writing surface.
Skipping a front lip on narrow shelves — even tiny items slide and the whole unit looks sloppy.
14. Two-tone headboard with dark shelves and a light panel for contrast
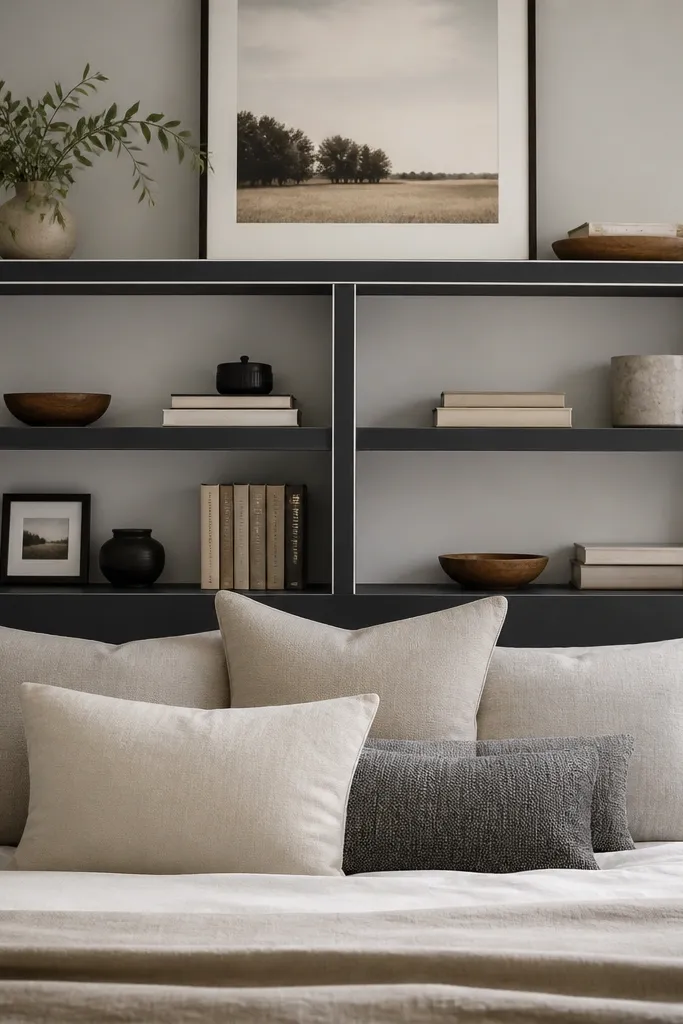
Two-tone is how you make a storage headboard look like furniture instead of a school project. Keep the back panel lighter so the wall doesn’t feel heavy, then paint the shelves dark so they read as structured compartments. I built this with crisp edges and a thin trim line between colors, which makes the shelves stand out even when they’re empty. This layout flatters almost every bedding color because it creates a neutral base with a strong accent. If your room has a lot of light wood furniture, the charcoal shelves look intentional instead of harsh.
Cut your headboard backer and shelf frame from plywood, then sand and prime everything. Paint the back panel off-white, then mask the shelf frames with painter’s tape and paint them charcoal satin. Use 9-inch deep shelves with a 1-inch front lip so the dark shelf color doesn’t look like a flimsy ledge. Assemble shelves to the backer with pocket-hole screws and glue, then add a thin trim strip between the painted surfaces to sharpen the color boundary. Seal with a clear satin topcoat on the shelves only, then mount with studs and a cleat.
Let the first coat dry fully and re-sand lightly before the second color so the tape line stays sharp.
Mixing finishes (matte shelves with glossy back) — it looks patchy and cheap up close.
15. Corner shelf headboard with a built-in plant shelf and watering tray
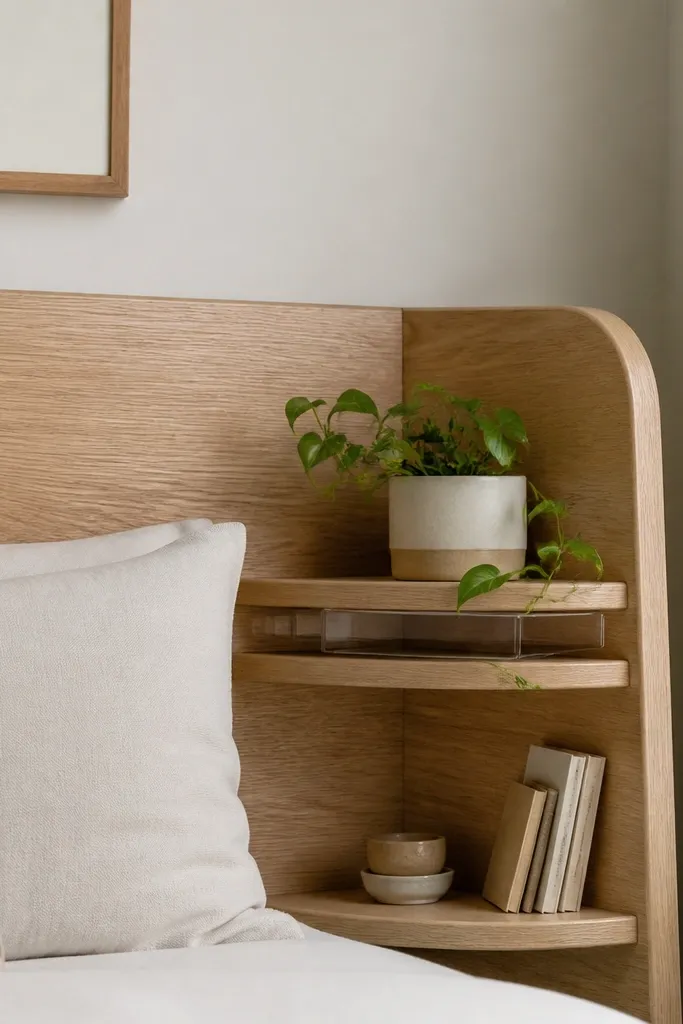
Plants by the bed look good, but water damage ruins cheap shelf builds. This design puts a dedicated plant shelf at an angle with a tray inside so excess water stays contained. The headboard is light oak for a clean, natural look, and the shelf frame has a slightly raised lip so the pot sits stable. I like this with soft neutrals and linen curtains because the plant shelf adds calm texture without making the wall busy. If you’re fair-skinned and your room lighting is warm, the oak tone looks gentle and flattering. It also works well for people who like low-maintenance decor — one plant shelf is easier than multiple small displays.
Build the headboard backer from 3/4-inch plywood and install a plant shelf box at about eye level. Make the shelf 8 to 9 inches deep and add a 1-inch front lip, then line the bottom with a shallow tray insert made from clear acrylic or thin poly sheet cut to fit. Add a small rear guard strip so pots don’t slide backward when you water. Seal the wood with water-resistant finish — two coats of satin polyurethane. Mount with a cleat at the top and support brackets near the shelf corners so the plant shelf doesn’t flex.
Quick tipUse a tray with a removable lip edge so you can lift it out for cleaning without dismantling the shelf.
One warningPlacing a plant directly on unsealed plywood — water soaks in and leaves dark rings.
16. Headboard with vertical magazine racks and side shelves
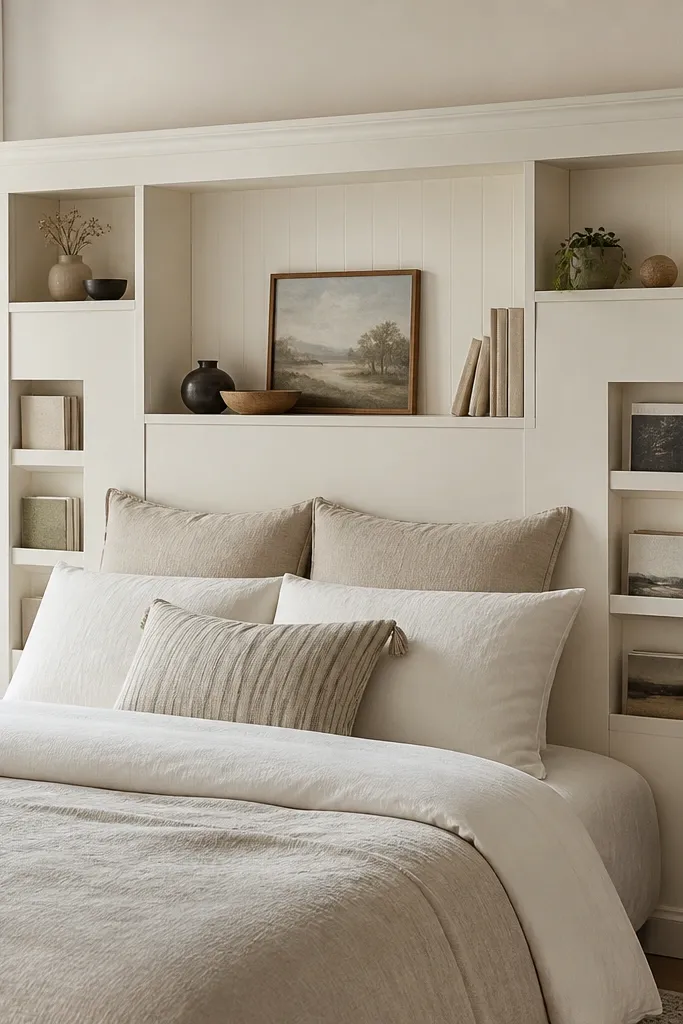
If you read magazines and like to keep them sorted, vertical racks beat pile stacks. This headboard has magazine slots that hold papers upright, plus side shelves for small items like a candle or a reading lamp base. I designed the racks with a back stop so magazines don’t fall forward when you pull one out. The cream paint keeps it light and makes the vertical lines feel tidy. This layout is great for full and queen beds where you have enough width for the side storage. If your bedding has soft grays and creams, the cream headboard keeps the room cohesive instead of contrasting too hard.
Build a 3/4-inch plywood backer and frame the outer headboard edges. Cut two vertical magazine rack frames from 1/2-inch plywood with slot widths around 3.5 inches, then screw them into the sides of the backer. Add a central shelf box made from 3/4-inch plywood with 8 to 9 inches depth and a front lip. Install upper side shelves about 10 inches from the top for small decor, keeping them shallow so the unit stays balanced. Sand, prime, paint cream, and seal the shelf tops with satin clear coat. Mount using two cleats spaced across the top and verify alignment before final tightening.
Quick tipSand the slot edges round with 120 grit so magazines slide in smoothly without catching corners.
One warningMaking magazine slots too tight — you’ll fight every page and the rack stops being useful.
17. Shaker-style headboard with inset shelves and decorative trim
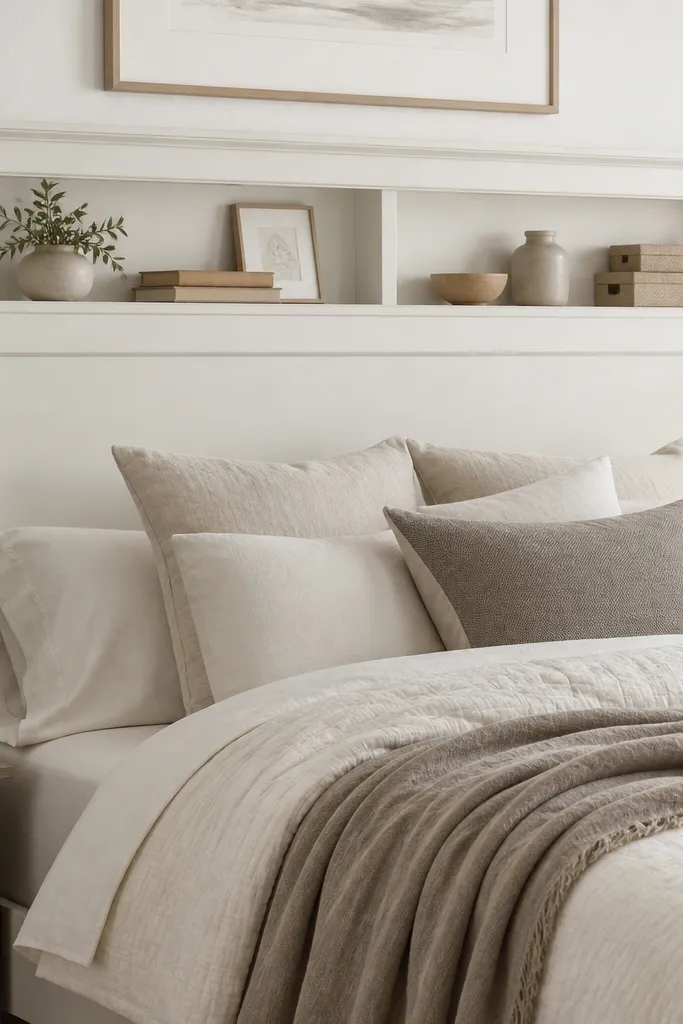
Shaker trim makes storage look intentional because the shelves sit inside a framed structure instead of sitting on top of a flat board. I built this with inset shelves so the edges create shadow lines, which makes the design look higher-end. The warm white finish keeps it classic, and the gray shadow line adds depth even when shelves are mostly empty. This flatters traditional bedrooms, but it also works in modern spaces if you keep the rest of the room simple. If your walls are a soft gray, the warm white prevents the headboard from blending in. It also looks great with brass bedside lamps because the trim lines catch light nicely.
Build a shaker frame from 1x2 and 1x3 lumber around a 3/4-inch plywood backer. Cut inset shelf recesses using a router or careful table-saw cuts so shelf decks sit flush with the frame face. Make shelves from 1/2-inch plywood with a 3/4-inch front rail so the inset still holds items securely. Add decorative trim around the shelf recess openings and keep shelf depth at 8 to 9 inches. Prime, paint warm white, and add a clear satin topcoat on shelf decks. Mount through the back frame into studs with a cleat for safety.
Use a thin foam tape strip behind the shelf deck edges so you avoid squeaks when wood expands and contracts.
Rushing the inset fit — gaps around shelf openings scream DIY.
18. Round-corner headboard with built-in nightstand-style drawers and shelves
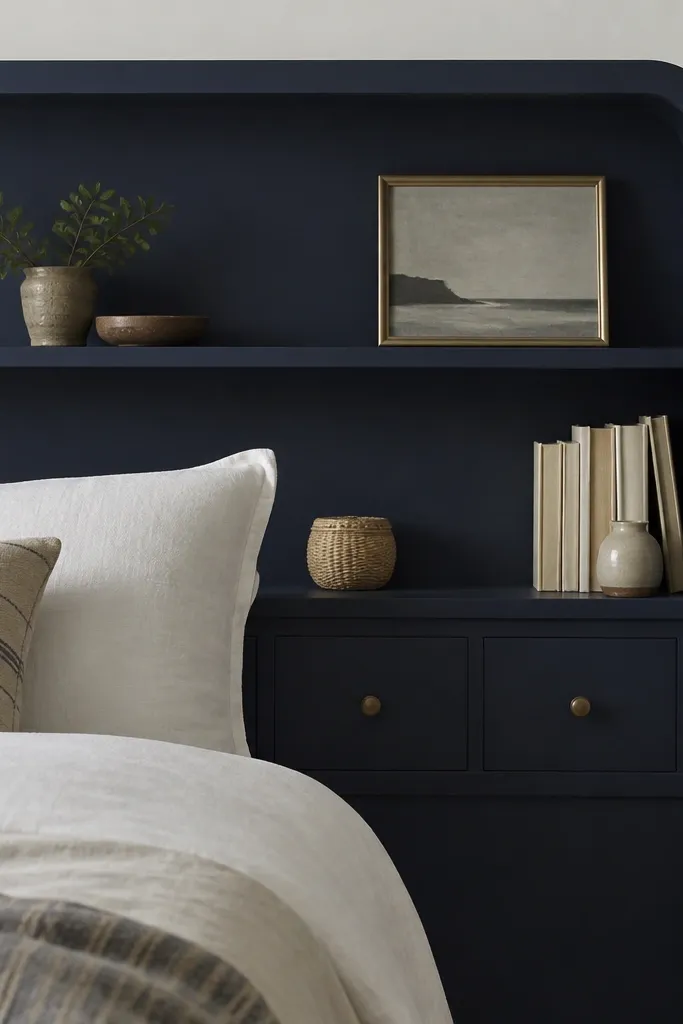
You get the best of both worlds here: hidden storage from drawers and open storage from shelves. The rounded corners keep the navy finish from looking harsh, and the drawers keep small items out of sight — cables, lip balm, remotes. I designed the shelves above the drawers so you can place a lamp and a book stack without blocking drawer access. This layout looks great in rooms with darker walls or bold bedding colors because navy anchors the palette. If you have lighter skin and you wear warm-toned clothing, the navy makes whites and creams look crisp next to it.
Start with a plywood headboard frame cut with rounded corners using a large template or a cut-off circle. Build two lower drawer boxes from 1/2-inch plywood, install drawer slides, then build shelf platforms above using 3/4-inch plywood decks at 8 to 9 inches depth. Add a front lip on the shelves so books don’t slide. Paint the entire unit navy, then add a satin clear coat to protect the shelf surfaces. Install using a French cleat and additional stud screws through the back frame. Pull drawers out during installation to avoid hitting the wall and damaging the slides.
Line drawer bottoms with thin felt so items don’t rattle and the drawers feel smooth.
Using cheap drawer slides that aren’t rated for weight — they sag and drawers won’t close cleanly.
19. Floating shelf ladder headboard with fabric bins for kids and clutter
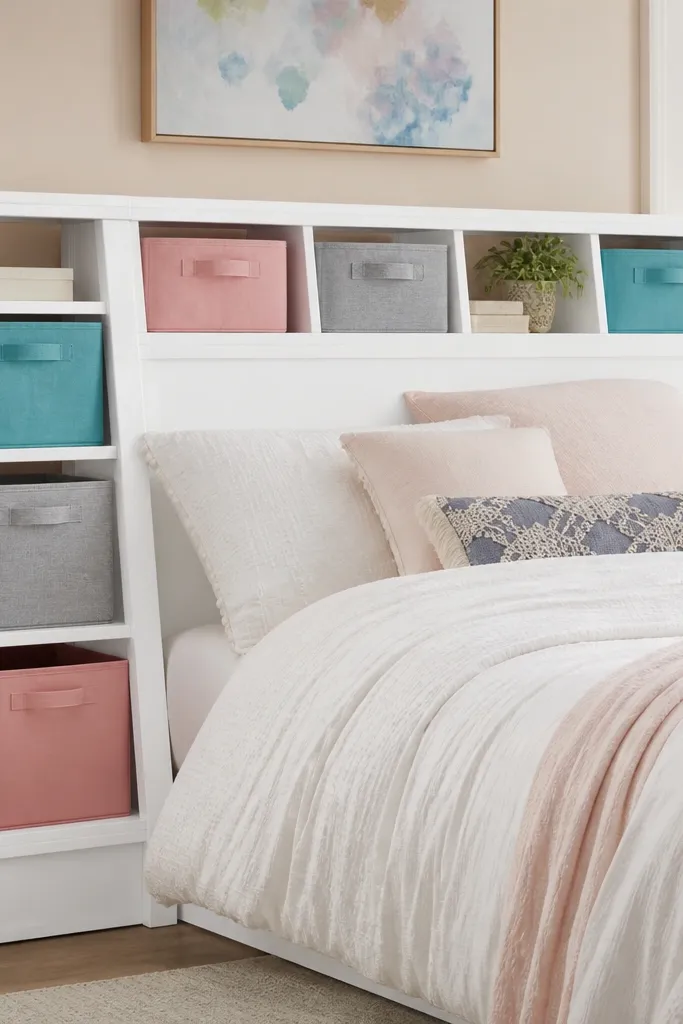
For kids rooms, open shelves that hold fabric bins beat hard open storage. The ladder structure is easy to build and strong, and the bins keep toys from turning into a mess pile. I used bright white paint so the bins pop, and the wood stays clean-looking even with daily use. This layout works best for twin beds, but it scales to full if you widen the ladder frames. If your child’s bedding has colorful patterns, the white headboard keeps the wall from becoming too loud. It also helps because kids can find what they need without digging through drawers.
Build a backer panel from plywood, then create two ladder side frames from 1x3 lumber spaced about 14 to 16 inches apart. Add horizontal rungs at heights that match common storage bin sizes, typically 10 to 12 inches between rungs. Install rungs as shelf decks with a 7 to 8 inch depth so bins fit without sagging. Place fabric bins inside and secure the top edge with Velcro to prevent bins from sliding forward. Paint the ladder and backer white, seal the wood, then mount to studs with a cleat and corner brackets.
Pick bins with a stiff rim so they hold shape inside the ladder compartments.
Leaving bins unanchored — they slide out and the shelf looks messy even when everything is “stored.”
20. Tall slim headboard with vertical peg rails and two shelf ledges
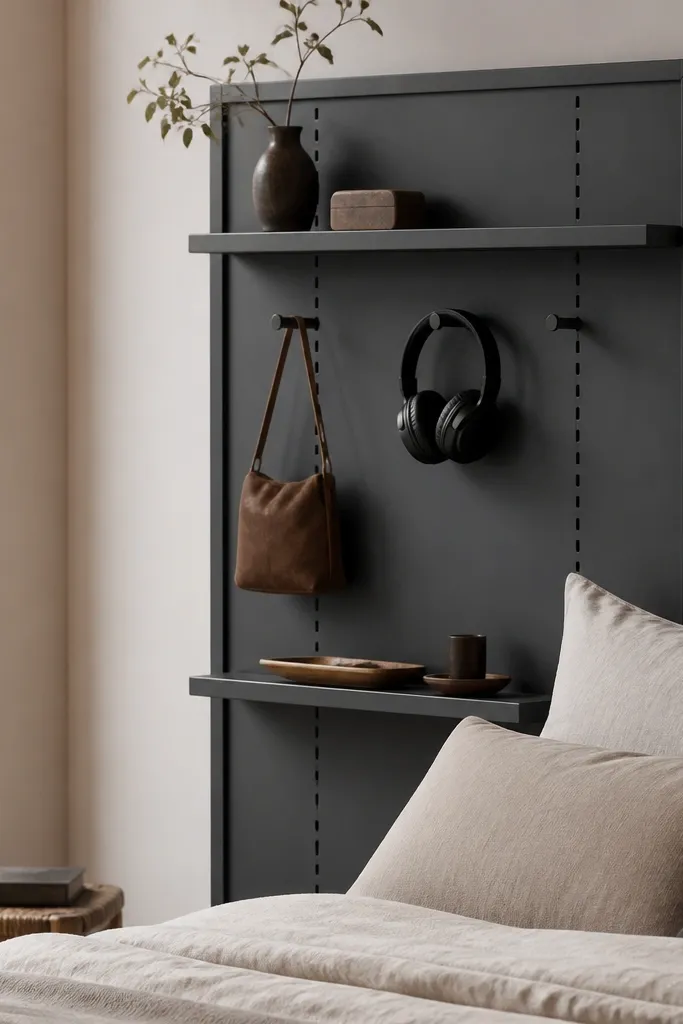
This is for people who want storage that changes daily. Vertical peg rails let you hang headphones, a small bag, or a charging cable organizer, while the two ledges handle books and a tray for keys. I like charcoal paint here because it hides small scuffs from daily touches, and it makes the hooks look intentional. The headboard is tall and slim, so it works in narrow rooms where wide units feel bulky. It flatters modern bedrooms with metal accents and clean lines. If your bedding is light and airy, the dark headboard creates a nice contrast without adding extra furniture clutter.
Cut a slim plywood headboard frame — about 16 to 20 inches wide — and a height around 62 inches. Install vertical peg rails made from perforated metal strips or wood slats with evenly spaced pegs, then mount two shelf ledges made from 3/4-inch plywood at different heights. Keep ledge depth at 7 inches and add a front lip strip so items don’t fall. Sand, prime, paint charcoal satin, and seal. Mount with studs using a top cleat and two side screws, then add hook accessories that match your daily routine.
Use one tray with a lip on the upper ledge for small items so nothing rolls off during the morning rush.
Overloading the peg rails — too many items make it look cluttered instead of organized.



